
Latest Edition - Better Scrapbooking
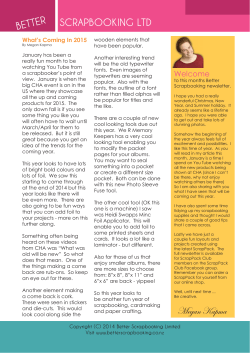
R
BETTE
SCRAPBOOKING LTD
Playing with Penwork
By Megan Kapma
Often we look for fancy
embellishments such as diecuts, punches, stickers, brads
and such, but sometimes all
you need is the humble pen.
could even draw a couple of
wonky lines round the edge
and add some dashes in the
some places.
Welcome
to this months Better
Scrapbooking newsletter.
With your pens you can
create fancy titles, stunning
borders, simple stitching and
so much more.
Winter has certainly arrived,
so now is a great time
to get out your photos
from summer and get
scrapbooking.
Just the other weekend my
16 year old daughter joined
our workshop and this is one
of her layouts where she
used a white pen to create a
snowy/frozen border.
Not only did she draw the
lines but often she purposely
smudged them.
Another fun looks is to simply
draw round the edge of a
card or layout - it doesn’t
need to be perfect, in fact
the less perfect is best. You
This month I have been
playing with some of
my journaling pens and
enjoying them for the
creativity that they bring
other than writing my
journaling. So be sure
to check out the article
‘Playing with Penwork’.
Instead of printing or diecutting your title why not
either write your own or use a
template, then add some fun
swirls or flourishes.
Now if
your prefer
a more
perfect
look to
your pen
work,
many
of the
electronic
die-cut
machines
also have pen and drawing
capabilities. So why not
utilize them Often you can
I also have some really
fun layouts created using
this months ScrapPack.
You may notice that
the ScrapPack for May
is actually different that
what was mentioned in
last months newsletter. We
had a delay in that product
arriving so had to put a
different one together.
We will however be able
to bring that particular
ScrapPack next month all
going to plan.
Also this month we have
some fun tips and some
beautiful new product to
share so be sure to keep
reading ...
Well, until next time ...
Be creative.
Megan Kapma
Continues on next page
Copyright (C) 2014 Better Scrapbooking Limited
Visit www.betterscrapbooking.co.nz
R
BETTE
SCRAPBOOKING LTD
just add the pen and away
you go.
So what about faux stitching.
Getting out a needle and
thread can take quite a bit of
time so why not just grab your
pen. You can do a simple
running stitch by just drawing
Tutorial 2
https://youtu.
be/56n7_1FGgiw
Classes, Workshops and
Events
Also be sure to check out
Pinterest as they also have
heaps of ideas for drawing.
Here is one I found on one
of my daughters drawing
boards. It even shows you
step by step how to create
the doodle pattern - easy, I
love it.
Crop ‘Til You Drop Workshop
Saturday May 30th
6pm - midnight
Cost $15 includes pizza and
supper
dashes all the way round your
page or mat. You could even
do little “x”s to give the look of
cross-stitch. There are some
templates out there to help
you draw more complicated
stitching, but the running stitch
and cross-stitch are probably
the most popular as they are
quick and easy to draw.
There are also some really
fun You Tube videos showing
some great doodle ideas and
techniques. Here are just a
couple you can check out.
• Doodling how to get
started:
https://youtu.be/
HRz5ZFDO0hk
• Super Quick Doodle
patterns
https://youtu.be/
IAab1w2LXO4
• How to draw four cool
patterns
https://youtu.be/
wpGNXwh8F8E
• Zendoodle Sampler
Zentangle Pattern Styles
So grab some pens and start
getting creative. All it takes if
for you to give it a go.
Are you on facebook?
Have you liked the Better
Scrapbooking Ltd facebook
page?
If not be sure to come and like
us on Facebook and we will
keep you up to date with new
products, new blog posts,
ideas and other scrapbooking
related things. See you there.
After School Children’s Classes
Monday afternoons
3:45pm - 4:45pm
$15 includes materials
Pinterest Workshop
Saturday June 13th
7pm - midnight
$15.00 bring something for supper
Here is your time to give some
of those Pinterest ideas a go.
Bring your own projects to work
on.
Crop ‘Til You Drop Workshop
Saturday June 27th
6pm - midnight
$15 includes pizza and supper
To Book phone Megan
09 818-2045
Deposits required to secure your
place for all classes and workshops
www.betterscrapbooking.co.nz
www.facebook.com/
betterscrapbooking
Copyright (C) 2014 Better Scrapbooking Limited
Visit www.betterscrapbooking.co.nz
R
BETTE
SCRAPBOOKING LTD
Tips And Tricks
project. Try adding a touch
of clear nail polish to the
ends of the ric-rac.
By Megan Kapma
Do you like stamping but
sometime want a mirror
image of your stamp?
Use a piece of acetate,
stamp on the acetate then
apply they image from the
acetate onto your paper
- be careful to not move
the acetate as you rub it to
transfer the image.
Here is a fun way to know
what ink sponges are used
for which of your ink pads.
Using your tab punch,
punch out some tabs from
white cardstock. Ink each
of the tabs using the ink
pad and once dry write
the name of the ink on one
end of the tab. Attach
each tab to a sponge, this
can be done with a simple
staple. Now you have all
your sponges matched to
ink pads.
Coming Soon ...
We are very excited to be
able to let you know that we
will be soon offering product
from Dutch Doobadoo.
They have a really great
range of products ideal for
card making and paper
crafting. I am falling in love
with some of their Dutch
Mask Art stencils that have
some amazing designs great
for card, tag and other
backgrounds. Most of their
product is of A5 size but I am
sure there are ways to use
them to cover more area.
They also have lots of other
stunning products so keep an
eye out.
In the Next
ScrapPack:
2 sheets Bazzill Raven
cardstock
2 sheets Bazzill Pinecone
cardstock
2 sheets Bazzill Clay Swiss
Dot cardstock
2 sheets Kaiser Craft Scrap
Yard - Copper pattern
paper
2 sheets Kaiser Craft Scrap
Yard - Blue Print pattern
paper
2 sheets Kaiser Craft Scrap
Yard - Warehouse pattern
paper
2 sheets Kaiser Craft Scrap
Yard - Brick Wall pattern
paper
1 sheet Kaiser Craft Scrap
Yard - Loft pattern paper
1 sheet Kaiser Craft Scrap
Yard - stickers
10 Kaiser Craft Scrap Yard
collectable die-cuts
2 strips Kaiser Craft Scrap
Yard Acrylic Stamps
1 packet pearl borders
1 roll washi tape
Shipping Date:
25th June 2015
Note: Some packs may vary. The
above products are subject to
availability and may change without
notice.
To order your ScrapPack email:
megan@betterscrapbooking.
co.nz
$45 per month
or $50 for a one off
plus shipping and handling
When working with ric-rac,
do you ever worry about
the ends fraying on your
Copyright (C) 2014 Better Scrapbooking Limited
Visit www.betterscrapbooking.co.nz
R
BETTE
SCRAPBOOKING LTD
Zumba in the Park Layout
Bazzill Typhoon cardstock
3 1/2”x 12” Bazzill Whirlpool cardstock
3 1/2”x 8” We Are Family Dotted
Chevron pattern paper
3 1/2”x 8” We Are Family Star Slides pattern
paper
3 1/2”x 8” We Are Family, Family Floral pattern
paper
3x Cloud die-cuts
1x We Are Family Journaling card
We Are Family Alpha stickers
We Are Family stickers
2x landscape photos
Charcoal Ink
Adhesive tape
The base of this layout is the Bazzill Typhoon
cardstock.
Designed By Megan Kapma
Take the 3 1/2”x 12” Bazzill Whirlpool
cardstock and attach it to the top of the Bazzill Typhoon cardstock.
Trim one of your photos down to about 5”x 3”
Take the three pattern papers 31/2”x 8” and cut a fish tail shape from the bottom of each. Then
cut them to measure different lengths. Ink the edges of each piece with Charcoal Ink (this is
optional). Adhere them so that they butt up against the bottom edge of the Bazzill Whirlpool
cardstock piece. Add the red scalloped sticker border to cover the join between the pattern
papers and the Bazzill Whirlpool cardstock.
Arrange your photos as shown then adhere them in place so that the bottom photo overlaps
slightly to the top photos bottom right corner.
Add the arrow sticker border just under the top photo from the bottom left corner to the edge of
the bottom photo.
Add three cloud die-cuts of your choice to the top right corner of the layout and add your title
using the We Are Family Alpha stickers.
Use the ‘Notes’ journaling card, crop the sides if necessary and add your journaling. Adhere the
journaling card just below the top photo and add a fun sticker word.
Lastly add a banner phrase beside the bottom right corner of the bottom photo - I used Love
Today
Copyright (C) 2014 Better Scrapbooking Limited
Visit www.betterscrapbooking.co.nz
R
BETTE
SCRAPBOOKING LTD
Family - Layout
We Are Family, Family Floral
pattern paper (reverse side)
Bazzill Red Devil cardstock
We Are Family Dotted Chevron
We Are Family Journaling card
We Are Family Decorative Stickers
We Are Family Alpha stickers
Chipboard descriptive arrow
Black journaling pen
Five photos (size mentioned below)
Foam Tape
Adhesive tape
For this layout us the reverse side of the
We Are Family, Family Floral for your
background.
You will want to crop your photos to
Designed By Megan Kapma
measure as follows: three at 2” square,
one landscape photo being 6”x 2 1/2”
and the third photo a portrait photo measuring 3”x 4”
Cut a piece of Dotted Chevron paper to measure 8 1/2”x 9” and mat on a piece of Bazzill
Red Devil measuring 8 3/4”x 9 1/4”.
Add foam tape adhesive to the back of the three 2” square photos. Adhere your photos
in place as shown. Start of by placing them down first and one you are happy with the
placement adhere them down.
Cut out a journaling card from the We Are Family journaling cards, here I used the one
with the flower edge, but I trimmed some of the flowers off and them matted it on some
of the off cuts of the Bazzill Red Devil cardstock. Adhere your journaling card in the space
to the bottom left of the photos.
Add the sticker banner to the top right corner of your layout and add the “Family” sticker
title to sit on the Dotten Chevron paper but overlap the banner slightly.
Add the place name of your photos using the small alpha stickers just above your
journaling (this could also be a sub-title if you don’t have a place name to use)
Lastly add one of the Descriptive chipboard arrows just below the bottom left corner of
your top photo.
Copyright (C) 2014 Better Scrapbooking Limited
Visit www.betterscrapbooking.co.nz
R
BETTE
SCRAPBOOKING LTD
We R Memory Keepers Envelope Notcher
This is a great little tool that you can use with the
envelopes that you create using your Envelope Punch
board. You can also use it on tri-fold cards. It creates
notches which
enable you to close
envelopes or tri-fold
cards without using
adhesives. Available to order online or instore.
Envelope Notcher $35.50 (plus shipping and handling)
Teresa Collins Project Dies
Six designs available from Teresa Collins. These are great quality
metal dies great to use in your eBosser machines, Big Shot and
Cuttlebug machines. Now you can create amazing layouts and
projects with these stunning dies.
$39.95 per set
Elizabeth Craft Designs
We now offer some really stunning new dies from Elizabeth
Craft Designs. They range from card dies, pop it ups dies
to fun shapes and designs from cards and scrapbooking
layouts. These are available from our online shop or to
order in-store.
Copyright (C) 2014 Better Scrapbooking Limited
Visit www.betterscrapbooking.co.nz


© Copyright 2026