
Needlesongs Basic Foundation Paper Piecing
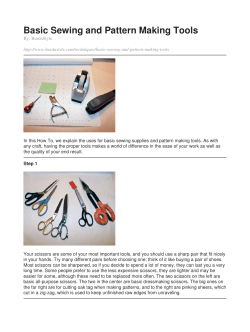
Basic Foundation Paper Piecing
By Carol Bruce at Needlesongs
Overview
A variety of foundation piecing and paper piecing techniques go back several centuries,
although not all quilters use them. However, now with the advances in computers and
copy machines, foundation paper piecing has become popular for it’s ease and accuracy.
The technique covered here makes use of paper patterns with printed sewing lines. The
fabric is placed on the blank side of the paper and sewn on the printed side. Accurate
template cutting isn’t necessary (although fabric is roughly cut to shape) because the
accuracy is in the sewing.
Where designs cannot be completely sewn in one piece because of odd angles, blocks are
sometimes broken into easy sections that are then joined together.
One point to remember is that the actual finished block is a mirror image of the printed
pattern, since it’s sewn from the reverse side. This isn’t important when sewing
symmetrical blocks, but should be kept in mind when patterns involve numbers, letters or
directional designs.
Supplies:
100% cotton fabrics (refer to individual patterns for yardage)
Copies of foundation paper patterns, enough to complete project plus extras
Sewing machine and sharp # 14 sewing machine needles.
Sewing thread to match fabrics
Iron and ironing board
Rotary cutter, mat and ruler
Scissors, pins and basic sewing supplies
Fabric glue stick
Tweezers
Optional supplies:
Small wood, bone or plastic pressing stick
Fun-dation [by HTC, Inc., 103 Eisenhower Parkway, Roseland, NJ 07068] a
transparent, easy-tear, computer friendly paper for copying quilt patterns.
Preparations:
1. Pre-wash and iron fabrics
Always pre-wash fabrics to deal with any possible shrinkage, dye bleeding,
and to wash out any sizing or chemicals that may cause fabric not to bond if
the scraps are later used for fusible appliqué.
2. Copy patterns
1
Use a copy machine or computer to run off one copy of the foundation
pattern. Then lay it over the original and hold up to a light to be sure the lines
overlap exactly and are not distorted. With some patterns this isn’t critical,
but others have seam lines that must match up and won’t if the pattern is
distorted. If the copy is acceptable, make enough for the project plus extras
for practice and in case one gets torn.
Patterns may also be traced and copied using a fine-line marker, but it’s more
time consuming if there are a large number of blocks. Be sure to transfer all
numbers and important markings.
Special papers such as Fun-dations ™ are easy to tear away or are light
enough to be left in some projects. However, regular computer paper can be
used.
Designs may be enlarged or made smaller, but for any size change be sure to
redraw all seam allowances to ¼”.
3. Sewing preparation:
Set the sewing machine stitch length at 15 to 20 stitches per inch and use a
sharp # 14 sewing machine needle. This makes the paper easier to tear out.
When doing a lot of blocks the needle will become dull, so keep a supply on
hand. If the machine is adjustable, try tightening the needle and bobbin
tensions slightly.
4. Make a test block or section:
Assemble one of the extra block or section patterns (according to the
directions which follow) as a practice piece to fine tune your technique and
also test the sewing machine settings. Then tear out the paper and check the
seam stitching to see if further adjustments are needed to stitch length or
tensions. It may take a couple of tries to get the technique down, but once it
“clicks,” the sewing can be fast, easy and accurate.
5. Fabric cutting:
Most of the time it’s easiest to strip-cut pieces if a number of blocks are being
made up. Cut the number of strips required and slice to length or roughly cut
around a template (for triangles or odd shapes) placed on the strip. If the
pieces are odd shapes, it may be wise to cut generously, with a 3/8” seam
allowance rather than the usual ¼”. Excess fabric will be trimmed as needed.
If cutting pieces one at a time as the foundation block is sewn, simply be sure
the piece covers the outlined area on the paper plus ¼” to 3/8” for the seam
allowance.
2
When cutting fabric pieces, keep in mind the grain or design of the fabric. If
there is a distinct pattern that should be kept aligned, try marking grain lines
on the foundation paper.
6. Sewing steps:
Choose one of the patterns, make a copy of it and cut it out slightly outside of
the seam allowance cutting line. (Some people prefer to cut it out on the
printed cutting line now, at the beginning).
If the design requires piecing in sections (usually labeled Section A, etc.) there
may be several of these. Each pattern or section should have numbered
divisions starting with “1.” The numbers indicate sewing order.
Here is an 8” Four-leaf Clover pattern that can be used as a practice block. It
doesn’t have different sections to be assembled, but it is a quarter-block and
four copies need to be sewn together to make the whole design. It can also be
done in pastel colors as a flower block.
3
Since the fabric is placed on the blank side of the paper, it helps to have a
placement guide. Creases in the paper work fine for this. Remembering that
the printed lines are sewing lines, look at the lines that go around # 1.
Carefully crease the paper ¼” or a smidgen more outside of the sewing line in
the areas marked 2, 3 and 5. (Dashed lines have been drawn on this pattern to
indicate where the creases should be made). Then, turn the paper blank side
up. Next, cut a piece of fabric that will cover the whole area (wrong side
against the paper) between the creases on the blank side, to cover area 1. Use
a dot of the fabric glue or a pin to hold it in place if desired.
Next, cut a piece of fabric to cover area 2 plus a seam allowance all the way
around. Think of this piece as a door, hinged on the line between patches 1
and 2. Flip it over face down on patch 1, lining up the fabric edges that
extend into the patch 2 space. Hold or pin in place. Turn paper and fabric
over so that the printed side of the paper is up. Sew on the line between 1 and
2. Try to sew as straight a line as possible and be sure to extend the stitching
through the seam allowance. Some people prefer to back stitch (1 or 2
stitches only) at the beginning and end of the seam line while others do not.
Try both ways and when peeling the paper off later, it will become obvious
whether your sewing technique requires the back-stitching or not.
When the first seam is done, bend the paper out of the way and trim any
excess fabric to leave a ¼” seam allowance. On the right side of the fabric
press the seam flat with a pressing stick, your fingers or the iron. Patch #2
Should now cover and extend at least ¼” past area “2 into #4.
For positioning patch #3 there should already be a crease just outside of area
#1 running across area #3. Cut a patch of fabric to cover area #3 plus the
seam allowance. (It may help to lay the fabric on the lined side of the pattern
to visualize it). On the blank side of the paper, lay this fabric face down on
piece #1, with the edges of the fabrics together. Pin or hold the fabric in
place, turn the paper lined side up and stitch on the line between areas 1 and 3.
Flip the fabric over right side up to be sure it covers the area and seam
allowances. Then, bend the paper away and trim the seam allowance to ¼. “
If a patch has a long section containing the outside seam allowance (for
example, pieces 3, 4, and 5 in the Four-leaf Clover pattern) they can be
stitched to the paper in the seam allowances as you go. (Although some
quilters prefer to sew completely around a block and anchor all the edges at
the same time after it’s completed).
Finish the quarter-block by adding patches # 4 and 5 in the same way as # 2
and #3.
Finally, press the completed block or section and use a rotary cutter or scissors
to trim the piece exactly to its outer seam allowance.
4
If assembling a design with more than one section, place the sewn sections
with fabric sides together, matching any seams. Take straight pins and
carefully pin straight through the fabrics and papers at the beginning and
ending of the sewing lines, as well as any other matching points. Keep the
pins at right angles to the paper and parallel to the other pins. With these in
place, stick other pins flat through the paper and fabric, parallel to them. Sew,
slowly sliding pins out as you get to them.
When the last piece is assembled and edges are trimmed to the cutting lines,
the paper may be removed. Sometimes pulling the fabric on the bias will pop
it loose easily. It can also help to fold the pieces back and forth on the sewing
lines before removing them. The last little stubborn bits can usually be
removed with the tweezers or a pin.
Chain sewing: To streamline the foundation process, chain sewing is
recommended. Begin by making neat stacks of all pre-cut fabric pieces and
paper sections by the sewing machine. Start sewing patches #1 and 2 on the
first section. Don’t cut the machine thread but pick up and sew the same
patches to the next section until all of the first 2 patches are sewn down. Then
trim and press all of them before continuing. Proceed on to sewing all of the
#3 patches before going on to #4, etc. until all have been sewn.
© Copyright 2001, by Carol Bruce, Needlesongs. All rights reserved.
5


© Copyright 2026