
SEWING 4-H Apparel and Textiles Junior Level
COOPERATIVE EXTENSION SERVICE • UNIVERSITY OF KENTUCKY COLLEGE OF AGRICULTURE, LEXINGTON, KY, 40546 4JD-01PB 18 U. S. C. 707 4-H Apparel and Textiles SEWING 4-H Member Project Guide and Practice Projects Junior Level State Contact: Marjorie M. Baker, M.S., Extension Associate for Textiles and Clothing Agriculture and Natural Resources • Family and Consumer Sciences • 4-H Youth Development • Community and Economic Development EXTENSION 4-H Apparel and Textiles—Sewing 18 U. S. C. 707 Purpose The primary goal of the Kentucky 4-H Sewing program is to teach youngsters about the art and skills of using needle and thread to create useful items. This includes not only the use of a hand needle and thread but the sewing machine and the serger. Youngsters can learn to create clothing and wardrobe essentials as well as useful items for daily living. Contents Junior Unit I—Project Guide: Let’s Learn to Sew (Age: 9 to 13).................................................................................. 3 Travel Kit......................................................................................................................................................................... 5 Tissue Holder.................................................................................................................................................................. 8 Laundry Bag..................................................................................................................................................................10 Drawstring Shoulder Bag............................................................................................................................................ 12 Go Green Tote Bag....................................................................................................................................................... 15 Junior Unit II—Project Guide: Let’s Get to the Bottom (Age: 9 to 13)................................................... 21 Fabric Book Cover........................................................................................................................................................ 20 Zippered Travel Bag..................................................................................................................................................... 22 Duffel Bag...................................................................................................................................................................... 24 Zippered Quilted Tote Bag (Quilted Purse)............................................................................................................. 27 Garment Bag................................................................................................................................................................. 30 Junior Unit III—Project Guid: Top It Off (Age: 9 to 13).......................................................................... 39 Hanger Cover—Serger................................................................................................................................................. 35 Pillowcase with Button Closure................................................................................................................................. 37 Backpack........................................................................................................................................................................ 39 Gift Bag.......................................................................................................................................................................... 44 Junior Unit IV—Project Guide: Stretch Your Knit Skills (Age: 9 to 13)................................................ 53 Bath Mitt........................................................................................................................................................................ 47 Junior Unit V—Project Guide: Put It All Together (Age: 9 to 13).......................................................... 49 Wild Things Tote Bag..................................................................................................................................................... 51 Shoe Bag........................................................................................................................................................................... 54 4-H Sewing Record.............................................................................................................................. 55 4-H Apparel and Textiles—Sewing 4JD-01PB 18 U. S. C. 707 Project Guide—Junior Unit I Let’s Learn to Sew Ages 9 to 13 Sewing can be a fun and exciting activity. It begins with learning some of the basics. DO What you will do: Learn the tools of the trade and how to use them. You will learn to: • Identify sewing machine parts • Use the sewing machine • Use an iron and ironing board • Follow simple pattern directions • Use measuring tools • Identify and prepare a woven fabric for sewing • Sew on a woven fabric • Sew straight seams, finish seams, and a casing • Sew a turned-and-stitched machine hem APPLY Using the skills listed above, practice what you have learned, complete a project, and keep a record of what you have sewn. Practice the skills We learn to sew by sewing! You will begin learning to sew by constructing an item made from woven fabric. The more you sew and practice the skills you have learned, the better you will become. Make one or more Practice/Service Projects. See your leader/teacher or county agent for copies of the patterns. Consider giving some of these projects as gifts to friends or family. Practice/ Service Projects cannot be exhibited in 4-H Sewing at the Kentucky State Fair. Sew and exhibit an item from one of the options listed • Clothing Option—Shorts, pants, or skirt with a casing waistline • Non-Clothing Option—Tote bag, laundry bag, or drawstring shoulder bag University of Kentucky - Cooperative Extension Service - College of Agriculture 3 4-H Apparel and Textiles—Sewing 4JD-01PB 18 U. S. C. 707 Notions and Materials Keep a record of what you have sewn • Pattern* Ask your parent or leader to help you fill out the “4-H Sewing Record” for this project. Store it in a notebook to review before you begin next year’s sewing unit. • Woven fabric (see pattern for exact amount; your leader/teacher has some fabric suggestions) • Thread to match fabric • Non-roll elastic or drawstring (see pattern for exact amount) Check off the skills you have learned Make note of the skills you have learned this year and check them off on the “Suggested Skills and Techniques to Learn” sheet. What you will need: Equipment • Sewing machine • Serger (optional) • Tape measure • Sewing gauge • Marking pen • Large safety pin • Seam ripper • Dressmaker’s shears • Thread snips • Dressmaker’s pins • Pin cushion (magnet preferred) • Iron and ironing board 4 *Patterns for the Non-Clothing option are included in the 4-H Member Project Guide. Practice projects may not be entered as 4-H sewing exhibits at the Kentucky State Fair. A commercial pattern, meeting the project guidelines, may be used for the Clothing and NonClothing options. A list of suggested patterns will be available from your county Extension office each project year. SHARE Show others what you have learned. What you can do: • Participate in your county Fashion Revue • Participate in your county Demonstration Contest • Exhibit at your county Fair or Rally Day (Project Card required) • Participate in your club or county Knowing Sewing Skillathon • Exhibit at State Fair University of Kentucky - Cooperative Extension Service - College of Agriculture 4-H Apparel and Textiles—Sewing 4JD-01PB 18 U. S. C. 707 Practice Project—Junior Unit I Let’s Learn to Sew Travel Kit Going somewhere? Then make a travel kit to take along. With this project, you will learn pinning, color coordination, measuring, straight stitching, and hand basting. Materials Required: • One terrycloth finger or hand towel Figure A • One striped washcloth • One shoestring, 27 inches long Fold and cut edge • Matching thread • Seam sealant • Washable basting tape (optional) Equipment Required: • Dressmaker’s shears • Pins • Hand sewing needle • Sewing machine 2. Use shears to cut the washcloth in half at the fold. Your leader will show you how to handle the shears so that you can take long, even strokes. 3. Remove the pins and separate the pieces. Fold one of the washcloth halves again to find the center. Mark the center with a pin at the raw edge and the top edge (Figure B). Sewing Instructions: Pin to mark center Before you get started, think about what your travel kit will look like. 1. Fold the washcloth in half with the stripes running up and down. Then pin the open edges together with three or four pins (Figure A). Fold Cut edge Figure B University of Kentucky - Cooperative Extension Service - College of Agriculture 5 4-H Apparel and Textiles—Sewing 4JD-01PB 18 U. S. C. 707 Center 4. Find the center of the towel by folding it in half crosswise with right side out. Mark the center of the towel with pins, using at least three pins on the fold line. Also, insert a row of pins on the right side of the towel, 1/2 inch from the lower hem (Figure C). 7. Take out the pins if used and stitch the washcloth to the towel. You will be stitching 1/4 inch from the hem of the towel. Be sure to secure your seam by either stitching backward or tying the thread ends together with knots. 8. Fold the washcloth up onto the towel, hiding the raw edge that you just stitched and keeping edges of the towel and washcloth even. Pin the washcloth in place on the sides (Figure E). Figure C Center 5. Place the washcloth on the towel matching the center of the washcloth with the center of the towel (Figure D). Cut edge of wash cloth should overlap edge of towel 1/2 inch. Figure D 6. Use pins to hold the washcloth in place as pictured in Figure D. Hand baste to hold the washcloth in place for machine stitching. Because many of you have never sewn by hand, you may need to practice making stitches on scrap material. Try to keep the basting stitches about 1/4 inch long. Option: Use washable basting tape in place of pins and hand basting. 6 Figure E 9. Machine stitch sides of pockets removing pins as you come to them. Guide the edge of the presser foot along the edge of the washcloth. 10. To make pockets for the travel kit: Decide which articles you would like to take and place them on the washcloth. Choose the stripes nearest to the size of the pocket needed for each article. Pin the washcloth to the towel along these stripes to make the pockets (Figure F). Figure F University of Kentucky - Cooperative Extension Service - College of Agriculture 4-H Apparel and Textiles—Sewing 4JD-01PB 18 U. S. C. 707 11. Slip the items into the pockets to be sure you have left enough room for them. If everything slips into position easily, you are ready to sew. If not, the pockets can be made bigger by moving the pins to another stripe. 12. When you have decided which stripe you will use for each pocket, begin by backstitching at the lower seam, and stitch up to the top of the washcloth. Backstitch again. One, two, three, four rows of stitching—your pockets are finished! 13. Fold the shoestring in half. Pin the mid-point of the string to the towel at the point marked in the drawing (Figure G). 14. Fasten the string with very small machine stitches. Do this by sewing back and forth across the width. Clip the threads close to the stitching line. Use a dot of seam sealant to secure. Now that you have finished your travel kit, put your toilet articles and brushes in the pockets. Fold the upper edge down to cover them. Roll the towel up from the right to the left. Wrap the shoestring around the towel and tie it into a bow. You are all set to tuck it in your suitcase or under your arm and take off! Revised 4-2009 from Stitching Fun for Girls and Boys (4-H 1307) University of Kentucky Back side of towel Midpoint of shoestring Figure G University of Kentucky - Cooperative Extension Service - College of Agriculture 7 4-H Apparel and Textiles—Sewing 4JD-01PB 18 U. S. C. 707 Practice Project—Junior Unit I Let’s Learn to Sew Tissue Holder This is a simple project to learn sewing with a serger. It includes a serged edge finish and serged seams. Materials Required: • 1/4 yard fabric – may use quilted fabric, upholstery, or synthetic suede Sewing Instructions: 1. Serge the two 51/2-inch sides of the fabric, allowing the cutting blade to trim off “a hair’s width” of the fabric (Figure A). • Thread to coordinate or match (decorative thread may be used in upper looper of serger) • Seam sealant (optional) Equipment Required: • Dressmaker’s shears • Pins and pin cushion • Ruler or sewing gauge for measuring • Marking pencil • Serger Pattern Layout/Cutting 1. On single fabric thickness using a ruler and marking pen, measure and mark a 51/2-inch by 7-inch rectangle. 2. Cut along marked edges using dressmaker’s shears and long cutting strokes. 8 Figure A 2. With ruler/sewing gauge and a marking pencil, measure and mark the midpoint of the fabric along each of the 7-inch sides. 3. With wrong sides together, fold the serged edges toward the mark in the center of the fabric. Make sure the serged edges meet at the marked points on either end. University of Kentucky - Cooperative Extension Service - College of Agriculture 4-H Apparel and Textiles—Sewing 4JD-01PB 18 U. S. C. 707 4. Serge the two ends (Figure B). 5. Secure the serger thread chains by threading them back into the serged seam or cutting the thread chains off and applying seam sealant. 6. Insert package of tissues. Figure B Adapted from Tissue Holder, Nadine Hackler, Retired Professor Clothing and Textiles, University of Florida, Florida Cooperative Extension Service. University of Kentucky - Cooperative Extension Service - College of Agriculture 9 4-H Apparel and Textiles—Sewing 4JD-01PB 18 U. S. C. 707 Non-Clothing Option—Junior Unit I Let’s Learn to Sew Laundry Bag Ages 9 to 13 This simple drawstring bag includes straight machine stitching, seam finish, and a casing with cording drawstring. It requires machine sewing, fabric preparation, and measuring skills. Materials Required: • 1 yard of 44/45 inches wide mediumweight denim or sports cloth 3. Stitch across finished end and up the side (making a 5/8-inch seam), stopping 2 inches from the top (Figure A). • 13/4 yards of 1/4-inch cording 2“ Equipment Required: • Pins and pin cushion • Sewing gauge Fold • Dressmaker’s shears Wrong side • Large safety pin • Sewing machine • Serger (optional for finishing seam edges) Bag Construction: 1. Finish sides and bottom of bag pieces by zigzag stitching, machine overcast, or serging the edges. 2. With right sides together, fold fabric in half lengthwise. 10 Figure A 4. Secure thread ends at the beginning and end of each line of stitching (backstitch on sewing machine). 5. Press seams open. Press the 2-inch openings above the seam back 5/8 inch. University of Kentucky - Cooperative Extension Service - College of Agriculture 4-H Apparel and Textiles—Sewing 4JD-01PB 18 U. S. C. 707 6. Reinforce and secure drawstring opening. Beginning on the left seam allowance, stitch approximately 3/8 inch from opening edge down 2 inches, across, and back up the other seam allowance (Figure B). Wrong side Figure C 10. Turn laundry bag right side out and press. Figure B 7. Turn top edge under 1/4 inch and press. 8. Fold top edge down 1 inch to form casing. 9. Stitch close to the lower folded edge, leaving ends open to insert the drawstring (Figure C). 11. Using a large safety pin attached to drawstring, pull cording through the casing. 12. Tie cording ends together with an overhand knot. Adapted from Laundry Bag, Nadine Hackler, Retired Professor, Clothing and Textiles, University of Florida, Florida Cooperative Extension Service. University of Kentucky - Cooperative Extension Service - College of Agriculture 11 4-H Apparel and Textiles—Sewing 4JD-01PB 18 U. S. C. 707 Non-Clothing Option—Junior Unit I Let’s Learn to Sew Drawstring Shoulder Bag Ages 9 to 13 This simple drawstring bag includes straight machine stitching, topstitching, self-fabric straps, and a casing. It requires beginning machine sewing and measuring skills. Materials Required: • 1 yard medium- to heavyweight fabric (denim, sports cloth, etc.) • Thread to match Equipment Required: • Dressmaker’s shears • Pins and pin cushion • Sewing gauge • Measuring tape Cutting instructions: (Figure A) Draw pattern pieces on paper. Cut out using paper scissors. Pin pattern to fabric according to layout. Keep the grain lines () parallel to the fabric selvages. Cut fabric with dressmaker’s shears. Straps: Cut (2) 33” x 23/4” Bag: Cut (2*) 15” x 16” with 15/8” square notch cut from each corner of the bottom of bag only. *If using lighter weight fabric, cut four bag pieces. Use two pieces for the bag and two pieces for the bag lining. • Large safety pin • Sewing machine • Serger (optional) Pattern Layout: Selvage Strap Bottom of bag Bag Figure A 12 Fold University of Kentucky - Cooperative Extension Service - College of Agriculture 4-H Apparel and Textiles—Sewing 4JD-01PB 18 U. S. C. 707 Bag Construction: 1. Finish seam allowances on sides and bottom of bag pieces. 2. Press top edge of each bag piece under 1/2 inch. Fold pressed edge down 1 inch to the inside of the bag and press again. (Pressing these lines first makes the bag construction easier.) 3. Unfold all pressed edges. With right sides together, pin bag pieces together along the bottom edge. Sew a 5/8-inch seam. Press seam open. 4. With right sides of the bag together, pin side edges together. Sew side seams, 5/8-inch seam allowance, leaving a 1-inch opening for the drawstring (Figure B). Press side seams open. Note: The corners of the bag should not be sewn yet. 5. Casing: Fold top edge of bag along the 1-inch established crease lines to form the casing. Pin in place. Using regulation machine stitching (12 to 14 stitches per inch), stitch close to lower edge of casing. Overlap stitching to secure. 6. Straps: Measure and press the long edges of each strap under (toward the wrong side of the fabric) 5/8 inch. Fold each strap in half, long ways, matching the pressed edges. Pin together. Press. Each strap should measure 3/4 inch wide. 7. Topstitch around each strap close to the edge. 8. Attach straps to the bottom corners: To form corners, fold bag bottom so that side seams and bottom seam match. Insert one end of the strap between the layers of the bottom of the bag (Figure C). Top Bottom Strap inserted inside bag 1/2” fold line 1“ fold line Side seam Leave open Corner Corner Top Strap Bottom Figure B University of Kentucky - Cooperative Extension Service - College of Agriculture 13 4-H Apparel and Textiles—Sewing 18 U. S. C. 707 9. Turn bag right side out. Using a large safety pin attached to the strap end, insert the other end of the strap through the casing, threading it through to the opposite side seam. Repeat with second strap on other side of bag. 10. Remove safety pin and pin strap end under casing. Sew through casing and strap to secure. Be careful to leave remaining casing open so that other strap may be inserted. 11. Insert other strap and sew in place. Pattern: Jennifer Klee, Woodford FCS Agent, revised by Marjorie M. Baker, M.S., Extension Associate for Clothing and Textiles 14 University of Kentucky - Cooperative Extension Service - College of Agriculture 4JD-01PB 4-H Apparel and Textiles—Sewing 4JD-01PB 18 U. S. C. 707 Non-clothing Option – Junior Unit I Let’s Learn to Sew Go Green Tote Bag Ages 9 to 13 This simple tote bag includes straight machine stitching, top stitching, seam finish, self fabric straps, pocket, and turned and stitched hem. Use it for shopping, books, or toting your favorite project. Finished size 18” x 14”. Materials Required: • 1 yard of firmly woven medium weight fabric • All purpose sewing thread Equipment Required: • Dressmaker’ shears • Tape measure or sewing gauge • Pins and pin cushion • Pencil Cutting instructions: (Figure A) Draw pattern pieces on paper. Cut out using paper scissors. Pin pattern to fabric according to layout. Keep the grain lines ( ) parallel to the fabric selvages. Cut fabric with dressmaker’s shears. Straps: Cut (2) 22 ½” x 4” Bag: Cut (1) 32” x 19” Pocket: Cut (1) 9” x 20” • Ruler/yard stick • Newsprint or similar paper for pattern • Paper scissors POCKET • Iron and ironing surface STRAP • Sewing machine STRAP BAG Figure A University of Kentucky - Cooperative Extension Service - College of Agriculture 15 4-H Apparel and Textiles—Sewing 4JD-01PB 18 U. S. C. 707 Sewing instructions: All seam allowances are ½” 1. With wrong side of strap fabric facing up, press ½” over along each long edge. Fold in half lengthwise matching folded edges. Stitch close to both long edges of each strap (Figure B). 3. Fold bag in half wrong sides together and matching short ends to each other. Measure up 2” from bottom fold and pin the edges together at each side seam (Figure D). 4” STRAP 2” Figure B 2. With right sides together, fold pocket in half matching short ends together. Sew ½” seam around the three sides, leaving a 4” opening in one side to turn (Figure C). When turning the corners, stop and put the needle in the fabric, lift the presser foot, turn the fabric, and lower the presser foot before continuing to sew. Turn right side out and press seams flat. Center pocket on bag right side and 4” down from one top edge. Stitch close to pocket edge around three sides, backstitching at each end to reinforce. Figure D Bring short ends down over each pin forming a pleat at the bottom of the bag (Figure E). Fold Figure E POCKET Figure C 16 University of Kentucky - Cooperative Extension Service - College of Agriculture 4-H Apparel and Textiles—Sewing 4JD-01PB 18 U. S. C. 707 4. Pin side seams together, maintaining the pleat. Sew side seams. Zigzag or overcast the seam allowances together. Press seams flat to one side (Figure F). 5. Turn bag right side out and pin straps to top edge 3 inches each side of the center. Stitch ¼” and 1” away from top edge of bag. Press top edge to inside along the one-inch stitching line and again one more inch creating a double folded hem. Stitch close to lower hem edge (Figure G). Bring straps to outside of bag, pin to top edge of bag and stitch close to the top edge all the way around (Figure H). Figure G Figure F Figure H Marjorie M. Baker, M.S., Extension Associate for Clothing and Textiles University of Kentucky - Cooperative Extension Service - College of Agriculture 17 4-H Apparel and Textiles—Sewing 4JD-01PB 18 U. S. C. 707 Project Guide—Junior Unit II Let’s Get to the Bottom Ages 9 to 13 You will continue to use and build on the sewing skills learned in Unit I. DO What you will do: Learn new skills. You can learn to: • Use interfacing • Use the serger to finish your seams • Finish a waistline with a waistband or facing • Make darts • Ease a seamline • Handle bulk in an enclosed seam • Put in a zipper (may include centered, lapped, or fly) • Put on a hook and eye or snap • Hem using a hand sewing needle and thimble Practice the skills We learn to sew by sewing! You will continue learning to sew by constructing an item made from woven fabric. The more you sew and practice the skills you have learned, the better you will become. Make one or more Practice/Service Projects. See your leader/teacher or county agent for copies of the patterns. Consider giving some of these as gifts to friends or family. Practice/Service Projects cannot be exhibited in 4-H Sewing at the Kentucky State Fair. Sew and exhibit an item from one of the options listed APPLY • Clothing Option—Shorts, pants, or skirt with a zipper and a waistline facing or waistband Using some of the new skills listed above, along with ones you learned in Unit 1, complete a project and keep a record of what you have sewn. • Non-Clothing Option—Tote bag, garment bag, purse, or gym bag with zipper and self-fabric straps or handles 18 University of Kentucky - Cooperative Extension Service - College of Agriculture 4-H Apparel and Textiles—Sewing 4JD-01PB 18 U. S. C. 707 Keep a record of what you have sewn Notions and Materials • Pattern* Ask your parent or leader to help you fill out the “4-H Sewing Record” for this project. Store it in a notebook to review before you begin next year’s sewing unit. • Woven fabric (see pattern for exact amount; your leader/teacher will have some fabric suggestions) • Thread to match fabric Check off skills you have learned • Zipper (match/coordinate color to fabric) Make note of the skills you have learned this year and check them off on the “Suggested Skills and Techniques to Learn” sheet. • Hook and eye • Snap What you will need: Equipment • Sewing machine • Serger (if available) • Basic sewing kit to include: thread snips, tape measure, sewing gauge, thimble, seam ripper, dressmaker’s shears, dressmaker’s pins, pin cushion/magnet • Iron and ironing board • Zipper foot attachment for sewing machine • Hand sewing needles (sharps) Interfacing (see pattern for exact amount) *Patterns for the Non-Clothing option are included in the 4-H Member Project Guide. Practice projects may not be entered as 4-H sewing exhibits at the Kentucky State Fair. A commercial pattern, meeting the project guidelines, may be used for the Clothing and NonClothing options. A list of suggested patterns will be available from your county Extension office each project year. SHARE Show others what you have learned. What you can do: • Participate in your county Fashion Revue • Participate in your county Demonstration Contest • Exhibit at your county Fair or Rally Day (Project Card required) • Participate in your club or county Knowing Sewing Skillathon • Exhibit at State Fair University of Kentucky - Cooperative Extension Service - College of Agriculture 19 4-H Apparel and Textiles—Sewing 4JD-01PB 18 U. S. C. 707 Practice Project—Junior Unit II Let’s Get to the Bottom Fabric Book Cover Ages 9 to 13 This is a simple project to practice pinning, measuring, cutting, pressing, sewing straight, applying interfacing, and following pattern direction. Materials Required: • Your favorite paperback book • 1/4 yard (approx.) firmly woven, medium-weight fabric—amount depends on size of book • 1/4 yard fusible interfacing • Thread to match fabric Equipment Required: • Sewing machine • Measuring tape • Dressmaker’s shears • Dressmaker’s pins and pin cushion 2. Cut one piece of fabric for the book jacket (inside width [A] by length [B]). 3. Cut one piece of fabric for jacket outside (the width [A] by the length [C]). 4. Cut one piece of interfacing the same size as the jacket outside. Sewing Instructions: 1. Fuse interfacing to the wrong side of the jacket outside piece. 2. On short sides of jacket outside, turn under 1/2 inch to the wrong side of the fabric. Press. Sew 1/4 inch from the folded edge (Figure A). • Pencil and paper to make pattern • Iron and pressing surface Cutting Instructions: 1. Measure your book to determine size. Top to bottom ___ + 11/4 inches = ___ [A] Side to side ___ x 2 + spine ___ = ___ [B] [B] ___ + 6 inches = ___ [C] 20 Figure A University of Kentucky - Cooperative Extension Service - College of Agriculture 4-H Apparel and Textiles—Sewing 4JD-01PB 18 U. S. C. 707 3. With right side of jacket outside facing up, fold hemmed edges back 21/4 inches. Pin in place (Figure B). 5. Sew a 5/8-inch seam along both long edges. Backstitch at both ends (Figure D). 2 1/2” 2 1/2” Fold Fold Figure D Figure B 4. Place right side of jacket inside piece face down on jacket outside. Folded flaps are in between the two layers of fabric. Match sides and corners, pin together along long edges (Figure C). 6. Turn the cover right side out through one of the end openings. Unpin and flip the flap ends over so that they are against jacket inside. Press seams and folded edges so they lay flat. 7. Insert book and enjoy reading!! Marjorie Baker, M.S., Extension Associate for Clothing and Textiles Figure C University of Kentucky - Cooperative Extension Service - College of Agriculture 21 4-H Apparel and Textiles—Sewing 4JD-01PB 18 U. S. C. 707 Practice Project—Junior Unit II Let’s Get to the Bottom Zippered Travel Bag Ages 9 to 13 This handy travel bag can also be used as a purse! You will learn to apply decorative trim, apply a zipper, and how to topstitch. Materials Required: • 10-inch by 16-inch double-faced quilted fabric • 2 strips coordinating fabric for borders, 31/2 by 10 inches • 9-inch zipper • 6-inch piece of 1/4-inch ribbon for zipper pull • Thread to match Equipment Needed • Pins • Chalk/marking pen Sewing Instructions: 1. Prepare fabric for bag. • Along lower edge of each border strip, press under 1/4 inch. • Place border strips on right side of quilted fabric, aligning top edges. Pin in place. • Topstitch close to the fold on lower edges of border (Figure A). • Baste remaining sides of border to quilted fabric (Figure A). • Zigzag or serge all four sides to prevent raveling (Figure A). • Dressmaker’s shears • Sewing machine with an all-purpose and zipper foot Border Border • Serger or zigzag sewing machine • Tape measure or ruler Zigzag/serge Figure A 22 University of Kentucky - Cooperative Extension Service - College of Agriculture 4-H Apparel and Textiles—Sewing 4JD-01PB 18 U. S. C. 707 2. Prepare zipper. • Remove zipper from package. Press if necessary. 3. Apply zipper. • With zipper face down to the right side of the bag, align the edge of the zipper tape to the edge of the fabric. Pin. • Stitch close to the zipper coil using a zipper foot attachment. • Flip zipper over to its right side. • Press seam away from the zipper. • Using the edge of the all-purpose machine pressure foot as a guide against the zipper coil, topstitch through all thicknesses (Figure B). • Be sure to secure stitching at the top edge. 5. Sew corner seams. • To give the bag a squared bottom, unzip completely. Poke your finger in the bottom corners of the bag, smoothing out the fabric. • Fold one end of the bag with the side pushed out and end squared (see Figure D). Pin. • Using chalk or marking pen, mark 11/2 inches up from the point at the seam. Draw a straight line across to both sides of the bag. Sew over the line. Secure threads. • Repeat for the other side. • Repeat for other side of zipper. HINT: It will help to open zipper when topstitching second side. Zipper Figure B 4. Sew side seams • Unzip zipper halfway. Working from the inside, pin the edges of the bag, right sides together (Figure C). • Sew side seams 1/2 inch from the edge. Figure D 6. Add finishing touches. • Turn bag right side out. • Insert ribbon in zipper pull and secure. Fill it with personals and you’re ready to go! Figure C Marjorie Baker, M.S., Extension Associate for Clothing and Textiles University of Kentucky - Cooperative Extension Service - College of Agriculture 23 4-H Apparel and Textiles—Sewing 4JD-01PB 18 U. S. C. 707 Non-Clothing Option—Junior Unit II Let’s Get to the Bottom Duffel Bag Ages 9 to 13 Skills demonstrated with this project include sewing a centered zipper, topstitching, measuring, sewing, and finishing seams. Materials Required: • 1 yard sturdy fabric (denim, sport cloth, quilted) • 18-inch heavy-duty zipper • Thread to match fabric Equipment Required: • Sewing machine • Serger (if available) • Dressmaker’s shears Approximate size is 18 inches by 9½ inches. 2. Cut pattern according to layout (not drawn to scale) (Figure A). You will need: • Two rectangles, each 16 inches by 19 inches for bag body • Two circles, each 10 1/2 inches in diameter for ends • Two rectangles, each 3 inches by 44 inches* for straps • Four tabs, 2 inches by 21/2 inches • Dressmaker’s pins and pin cushion Fold • Pencil and paper for making pattern Tabs • Tape measure • Chalk/marking pen Body 19" Cutting Instructions: 1. Fold fabric in half lengthwise, matching the selvage edge to the opposite selvage edge. 16" Ends 10 1/2” Selvages Figure A *Note: Straps may be made longer if desired. 24 University of Kentucky - Cooperative Extension Service - College of Agriculture Straps 4-H Apparel and Textiles—Sewing 4JD-01PB 18 U. S. C. 707 Sewing Instructions: 1. To prevent raveling, finish both 19-inch edges of body pieces by zigzag stitching or serging. 10. Pin strap to the body. Be sure straps are not twisted. 11. Topstitch strap to body as shown, stopping 2 inches below zipper (Figure C). 2. With zipper facing down against right side of body, pin zipper tape edge even with finished edge of one body piece. 3. With zipper foot, stitch close to the zipper coil. 4. Flip zipper over to its right side and press seam allowance away from the zipper. 5. Topstitch 1/4 inch away from zipper coil, through all layers (Figure B). 2“ 3½-inches 6. Repeat for other side of zipper and remaining body piece. 3½-inches Figure C 12. Repeat for second strap. 13. With right sides together, pin bottom edges of bag together. 14. Sew a 1/2-inch seam across the bottom edge. 15. Press seam open. 16. Make tabs by placing two tab pieces right sides together. Stitch 1/2-inch seams, leaving straight end open for turning. Figure B 7. Along the long sides of the straps, press edge under 3/8 inch. 8. Fold each strap in half, matching pressed-under edges. Pin edges together. 9. Topstitch close to both long edges of each strap. 17. Trim seam to 1/4 inch and clip corners diagonally. Turn right sides out and press. 18. Topstitch 1/4 inch from edge on both tabs. 19. Align raw edges of tabs with each end of zipper, pin, and baste to bag. Be careful to keep tape ends of zipper together when stitching (Figure C). 20. Open zipper. University of Kentucky - Cooperative Extension Service - College of Agriculture 25 4-H Apparel and Textiles—Sewing 4JD-01PB 18 U. S. C. 707 21. With bag inside out, find the halfway points by folding the bag, matching the bottom seam and the zipper. Mark halfway points with a pencil. 26. Repeat for second end. Be sure zipper is at least halfway open before sewing second end or you will have a difficult time turning your bag right side out. 22. Find the quarter points on each end piece by folding circle end in half along lengthwise grain line. Fold again along crosswise grain line. Mark with chalk or marking pen at each fold. 23. With right sides together, pin the end to the body side, matching halfway marks, zipper, and bottom seam to the quarter points on end piece. Ease end piece to fit (Figure D). 24. Machine stitch end to body using 1/2 inch seam allowance. Try not to stitch any tucks or folds into seam. 25. Finish raw edges with zigzag stitching or serging. 26 Figure D 27. Turn bag right side out. Prepared by Marjorie Baker, M.S., Extension Associate for Clothing and Textiles University of Kentucky - Cooperative Extension Service - College of Agriculture 4-H Apparel and Textiles—Sewing 4JD-01PB 18 U. S. C. 707 Non-Clothing Option—Junior Unit II Let’s Get to the Bottom Zippered Quilted Tote Bag (Quilted Purse) Ages 9 to 13 This clever pattern helps you create a useful item while polishing your sewing skills, including reading and following a pattern, applying trim, and putting in a zipper. Materials Needed: • 3/4 yard double-sided quilted fabric • 3/8 yard coordinating stripe or 1/8 yard coordinating fabric • 3 yards of 3/4-inch- to 1-inch-wide belt interfacing • 1 heavy-duty 14-inch zipper • 1 package double-fold bias tape Equipment Required: • Measuring tape Layout/Cutting: 1. From double-sided quilted fabric, cut pattern according to layout (Figure A). • Two rectangles—3 inches by 45 inches (straps) • One rectangle—14 inches by 20 inches (purse) • Two rectangles—14 inches by 41/2 inches (inside pockets) • One rectangle—5 inches by 6 inches (outside pocket) • Ruler 3“ x 45” 3“ x 45” • Sewing machine • Dressmaker’s shears 20” x 14” 4 1/2” x 14” 4 1/2” x 14” • Serger (optional) 5“ x 6” lengthwise • Pins and pin cushion Figure A University of Kentucky - Cooperative Extension Service - College of Agriculture 27 4-H Apparel and Textiles—Sewing 4JD-01PB 18 U. S. C. 707 2. From coordinating fabric, cut: 8“ Purse top • Two rectangles—31/2 inches by 14 inches • Two rectangles—11/2 inches by 2 inches on the bias Sewing Instructions: 1. Along one long edge of the coordinating fabric strips, press edge under 1/2 inch. With raw edges even with purse top, pin in place. 2. Baste raw edge together and then topstitch close to the folded edge. 3. Shorten zipper: With the zipper closed, measure from the bottom of the zipper teeth up 111/2 inches. Mark with a pin or marking pencil. Unzip the zipper, making sure the zipper pull is in between the bottom of the zipper and your markings. 4. Make a thread bar tack across the zipper teeth on both sides. Trim zipper ends 1/2 inch from bar tack. 5. Bind ends of zipper with bias strips cut from coordinating fabric, with ends of bias strip extending off both sides on zipper tape. Bound zipper should now be 12 inches long. Figure B 8. Straps: Sew short ends of straps (1/2-inch seams) together forming one large circle. Position belt interfacing 1/2 inch in from the raw edge and sew in place along the center of the interfacing. Fold 1/2 inch in on raw edges, and fold strap in half lengthwise. Topstitch close to both long edges. 9. With purse lying flat, mark the strap locations. Outside edge of straps are 31/2 inches from the sides of purse, and 31/2 inches down from the top of the purse. Make sure the straps cover the edges of the pocket. Center the strap seams at the center bottom of the purse. Pin. Sew in place, close to the edge of the straps (Figure C). 28 Pocket 6. Finish top edge (6-inch side) of the outside pocket by turning under 3/8 inch twice and stitching. 7. Measure and mark the pocket location. The pocket seamline should be 8 inches down from the top of the purse’s raw edge (Figure B). Center the pocket and sew, with right sides together and pocket top toward the bottom of the purse. Flip pocket up toward the purse top and pin in place. Purse bottom Figure C University of Kentucky - Cooperative Extension Service - College of Agriculture 4-H Apparel and Textiles—Sewing 4JD-01PB 18 U. S. C. 707 10. Inside pockets: Finish the long edges with bias tape. On the inside of the purse, mark seam lines 8 inches down from the top of the purse edges. Pin pockets with lower edge extending 3/8 inch below the seam line. Stitch in place. NOTE: The pocket separations/partitions are made by stitching through all fabric thicknesses where straps are attached. (Stitch on top of the strap stitching.) Baste side edges to purse sides. 11. Zipper: Place zipper, face down, 1 inch from purse sides with the zipper tape edges even with the purse top. Move machine needle to the far left position, or use a zipper foot to sew zipper in place. Fold zipper out and topstitch, making sure to catch zipper tape. Repeat for other side of zipper. Be careful to keep straps out of the way. B. With wrong sides of the purse together, pin and stitch a 1-inch seam. Trim seam to 3/8 inch. Using strips of 1-inch double-fold bias tape, encase the seam allowance; pin and stitch in place through all layers. 14. Using a water-soluble marking pen, draw a line 11/2 inches in from the point. Sew over line, being careful not to catch inside pocket edge in the seam. Repeat for the other side. Purse top 11/2” 12. Side seams: There are several ways the side seams can be handled. Select the method below that you prefer: A.With right sides of the tote (purse) together, sew 1/2-inch seams on each side. Trim close to the stitching. Turn purse wrong side out. Sew side seams 1/2 inch from the edge a second time, enclosing the trimmed edge. (You have just made a French seam!) 13. Bottom shaping: Turn purse right side out. Poke your fingers in the bottom corners of the purse, smoothing out the fabric. Fold the purse with the side seam matching the center of the purse bottom, making a point as shown; pin (Figure D). Figure D 15. Trim close to stitching (seam will be on the outside of the purse). Turn purse wrong side out and stitch corner seam 1/2 inch from the folded edge, enclosing trimmed edge and stitching over the lower pocket edge. Marjorie Baker, M.S., Extension Associate for Clothing and Textiles University of Kentucky - Cooperative Extension Service - College of Agriculture 29 4-H Apparel and Textiles—Sewing 4JD-01PB 18 U. S. C. 707 Non-clothing Option – Junior Unit II Let’s Get to the Bottom Garment Bag Ages 9 to 13 This simple garment bag includes straight and curved machine stitching, top stitching, seam finish, pocket with turned and stitched hem, and zipper with tab closure. Finished size 22” x 38” Materials Required: Pattern Cutting instructions: • 2¼ yards of 45” firmly woven medium weight fabric (denim, sport cloth, quilted) • 36” heavy-duty zipper • 1” Velcro® closure or gripper snap • All purpose sewing thread to match fabric Equipment Required: Figure A 30 3. Cut with paper scissors. 3" 10" 2" 10" 4 ½" 10" 23" 12" 39" Back Cut1 23" Pocket/Cover Cut 1 2. Round corners as illustrated. 4 ½" • Dressmaker’s shears • Tape measure or sewing gauge • Pins and pin cushion • Pencil • Ruler/yard stick • Newsprint or similar paper for pattern • Paper scissors • Iron and ironing surface • Sewing machine • Serger (if available) 1. Using ruler/yardstick, measure and draw the following pattern pieces: pocket, back, and side fronts. (Figure A). 12" University of Kentucky - Cooperative Extension Service - College of Agriculture 39" Side Fronts Cut 2 4-H Apparel and Textiles—Sewing 4JD-01PB 18 U. S. C. 707 Fabric layout for 45" fabric Side Fronts Cut 1 Side Fronts Cut 1 Cut 1 Back Cut1 Pocket/Cover Selvage Selvage Figure B Important: Be sure to reverse the second side front so you will have a right and a left side Sewing instructions: All seam allowances are ½” 1. To prevent raveling, apply a seam finish to all outside edges of each piece. 2. Suggested finishes: zigzag or serge. 3. With zipper facing down, pin zipper tape edge even with finished edge of one side front piece. 4. Using a zipper foot, stitch close to the zipper coil. 5. Flip zipper over to its right side and press seam allowance away from the zipper 6. Topstitch ¼ inch away from zipper coil, through all layers (Figure C). 7. Repeat for other side of zipper and remaining front side piece. Figure C University of Kentucky - Cooperative Extension Service - College of Agriculture 31 4-H Apparel and Textiles—Sewing 4JD-01PB 18 U. S. C. 707 8. Lay completed front out on a flat surface. Lay back piece on top. Trim front piece to match back if necessary. Amount will depend on the size of zipper that was used. 9. Prepare pocket/cover: Turn under and stitch a 1-inch hem along top edge of pocket. On lower edge, measure 1½ inches from each side of the center. Sew a line of reinforcement 1 inch beyond each of these points (Figure D). Clip seam allowance a each point to seam line, being careful not to cut the previous line of stitching. Fold seam allowance between clip to underside of pocket. Top stitch ¼ inch away from fold. This will create an opening to insert the hanger when garment bag is folded in half for carrying. 12.Unzip the zipper half way. Place garment front and back pieces right sides together. Pin and sew seam starting at the top, sew around the sides and bottom and back to the top. Be careful not to catch the opening in the pocket bottom as you sew. 13.Turn garment right sides out. 14.From fabric scraps, cut a 2 ¼ inch by 6 inch rectangle for a tab closure at the top of the zipper. 15.Fold tab piece in half matching end to end, right sides together. Sew sides. Trim seam allowances. Turn tab right side out. Top stitch ¼ inch from edge. 16.Apply the soft side of the Velcro® closure OR the socket side of gripper snap to the finished end of the tab. 17. Fold under raw edge of tab and position at the top of the garment bag left side going across the zipper. Sew folded end to garment bag. 18.Position remaining half of closure (ball side of snap or rough side of Velcro®) on garment bag right front in line with tab. Sew or secure in place. Figure D 10.With wrong side of pocket against garment bag back, position pocket at lower edge. Baste pocket to back along sides and bottom within the seam line. 11. At top of garment back and front pieces, fold seam allowance to underside and press. Top stitch ¼ inch away from fold. This area will be the opening for the garment hanger(s). 32 19. Garment bag carrying instructions: Fold garment bag in half inserting the hangers inside pocket and through opening in the bottom. Marjorie M. Baker, M.S., Extension Associate for Clothing and Textiles University of Kentucky - Cooperative Extension Service - College of Agriculture 4-H Apparel and Textiles—Sewing 4JD-01PB 18 U. S. C. 707 Project Guide—Junior Unit III Top It Off Ages 9 to 13 This unit builds on the fundamental skills learned in Units I and II. DO What you will do: Learn new skills. You can learn to: • Make a top with sleeves (raglan, shirt, or kimono style) • Make a collar • Make a simple lining • Topstitch • Make machine buttonholes • Sew on buttons • Apply decorative trim APPLY Using new skills listed above, practice what you have learned, complete a project, and keep a record of what you have sewn. R Practice the skills We learn to sew by sewing! You will continue learning to sew by constructing an item made from woven fabric. The more you sew and practice the skills you have learned, the better you will become. Make one or more Practice/Service Projects. See your leader/teacher or county agent for copies of the patterns. Consider giving some of these as gifts to friends or family. Practice/Service Projects cannot be exhibited in 4-H Sewing at the Kentucky State Fair. R Sew and exhibit an item from one of the options listed • Clothing Option—Shirt, simple jacket, one-piece dress with no waistline, cape with a hood or collar, bathrobe, or vest with lining or facings; project must include buttons and buttonholes • Non-Clothing Option—Backpack with lining, applied trims, and button/buttonhole closure. University of Kentucky - Cooperative Extension Service - College of Agriculture 33 4-H Apparel and Textiles—Sewing 4JD-01PB 18 U. S. C. 707 R Keep a record of what you have sewn R Notions and Materials • Pattern* Ask your parent or leader to help you fill out the “4-H Sewing Record” for this project. Store it in a notebook to review before you begin next year’s sewing unit. • Woven fabric (see pattern for exact amount; your leader/teacher will have some fabric suggestions) • Thread to match fabric • Interfacing (see pattern for exact amount) R Check off skills you have learned • Buttons (match/coordinate with your fabric) Make note of the skills you have learned this year and check them off on the “Suggested Skills and Techniques to Learn” sheet. What you will need: REquipment • Sewing machine • Serger (optional) • Basic sewing tool kit to include: thread snips, tape measure, sewing gauge, thimble, seam ripper, dressmaker’s shears, dressmaker’s pins, pin cushion/magnet, thimble, hand sewing needles (sharps) • Iron and ironing board • Zipper/cording foot • Buttonhole foot/attachment *Patterns for the Non-Clothing option are included in the 4-H Member Project Guide. Practice projects may not be entered as 4-H sewing exhibits at the Kentucky State Fair. A commercial pattern, meeting the project guidelines, may be used for the Clothing and NonClothing options. A list of suggested patterns will be available from your county Extension office each project year. SHARE Show others what you have learned. What you can do: • Participate in your county Fashion Revue • Participate in your county Demonstration Contest • Exhibit at your county Fair or Rally Day (Project Card required) • Participate in your club or county Knowing Sewing Skillathon • Exhibit at State Fair 34 University of Kentucky - Cooperative Extension Service - College of Agriculture 4-H Apparel and Textiles—Sewing 4JD-01PB 18 U. S. C. 707 Practice Project—Junior Unit III Top It Off Hanger Cover— Serger This simple project teaches serger skills and includes straight edge finishing and curved seams. Materials Required: Cutting Instructions: • 1/4 yard firmly woven fabric, such as polished cotton, chintz, or quilted 1. Make a paper pattern by tracing around a metal or plastic hanger. • Paper pattern 2. Add 1 inch all the way around pattern. • Metal or plastic hanger 3. Grainline should be parallel to the lower edge of the hanger (and cover). • Regular or decorative thread, such as pearl (cotton, rayon, acrylic), texturized, or ribbon thread. (Decorative thread can be used in both the upper and lower loopers.) Equipment Required: • Serger 4. Fold fabric on grain. Pin pattern through both fabric layers, and cut out. Sewing Instructions: 1. On each piece, serge upper and lower straight edges, trimming off a hair as you serge (Figure A). • Dressmaker’s shears • Dressmaker’s pins and pin cushion • Pencil and paper to make pattern • Seam sealant (optional) Figure A University of Kentucky - Cooperative Extension Service - College of Agriculture 35 4-H Apparel and Textiles—Sewing 4JD-01PB 18 U. S. C. 707 2. With right sides together, pin layers together 2 inches back from the seamlines. 3. Serge the two curved edges, trimming 1/2 inch off as you serge (Figure B). 4. Secure thread ends by knotting and threading back through serged seam or applying seam sealant to the thread chain, trimming after it is dry. 5. Turn to right side. Press. Place over hanger, and use! Adapted from Hanger Cover, Nadine Hackler, Retired Professor, Clothing & Textiles, University of Florida, Florida Extension Service Figure B 36 University of Kentucky - Cooperative Extension Service - College of Agriculture 4-H Apparel and Textiles—Sewing 4JD-01PB 18 U. S. C. 707 Practice Project—Junior Unit III Top It Off Pillowcase with Button Closure This project demonstrates color and fabric selection, measuring, straight stitching, applying interfacing, applying buttons, and creating buttonholes. Materials Required: • 3/4 yard 44/45-inch lightweight to mediumweight woven fabric for main color Preparation and Cutting Instructions: • 1/8 yard 44/45-inch lightweight to mediumweight woven fabric for accent (optional) Wash/launder fabric. All seams are 5/8 inch. Fabric pieces are cut along the crosswise grain of the fabric. • 3/8 yard 44/45-inch lightweight to medium-weight woven fabric for border With adult supervision, a rotary cutter and mat may be used for cutting fabric strips and trimming. • 11/4 yard lightweight fusible interfacing 1. Cut one 27-inch by 44/45-inch (width of the fabric) piece for body of pillowcase. • Four 3/4 -inch buttons • Thread to match Equipment Required: • Measuring tape • Ruler • Sewing Machine • Buttonhole attachment/foot • Pins and pin cushion • Dressmaker’s shears • Thread snips • Hand needle • Thimble • Serger (optional) 2. Cut one 11/2-inch by 44/45-inch strip for pillowcase accent. 3. Cut one 12-inch by 44/45-inch strip for pillowcase border. 4. Cut interfacing 6 inches by 44/45 inches for pillowcase border. Sewing Instructions: 1. Apply interfacing strip to the wrong side of the border piece according to interfacing manufacturer’s instructions. Interfacing should be matched to one of the long edges of the border piece, covering approximately one-half of the border piece. • Chalk or marking pen University of Kentucky - Cooperative Extension Service - College of Agriculture 37 4-H Apparel and Textiles—Sewing 4JD-01PB 18 U. S. C. 707 2. Fold the accent piece and the border piece of the pillowcase in half lengthwise, with the right sides to the outside. The accent will be 3/4 inch by 44/45 inches, and the border will be 6 inches by 44/45 inches after folding. Press. 3. Place the folded accent on top of the folded border, matching the raw edges. Pin and sew. The ends of these pieces may not line up. They will be trimmed later (Figure A). Raw edge Figure A Accent Border fold 4. With the accent side down, place the border/accent strip on top of the right side of a 44-inch side of the body fabric. Match the raw edges, and sew. To prevent fraying, finish this seam edge. Serge or machine zigzag the raw edges together. Press the seams toward the body of the pillowcase. 5. Trim off the selvage edges and any excess fabric that may result from differences in fabric width. Width should be 42 inches after trimming. Fold Start sewing here Figure B 8. Plan and mark the placement of the vertical buttonholes along the border. Mark so buttonholes will be equal distance apart. They will be approximately 4 inches apart and 4 inches from the sides of the pillowcase. Make buttonholes vertical to the border edge, beginning 5/8 inch from the folded edge. (If not using 3/4-inch buttons, adjust distance from the edge according to button size). Refer to CT-LMH.189 Buttons and Buttonholes. 9. Mark and sew buttons to match buttonholes. Button placement line will be 3/4 inch from folded edge of border (if not using 3/4 -inch buttons, adjust distance according to button size). Marjorie M. Baker, M.S., Extension Associate for Clothing and Textiles 6. Fold pillowcase in half, right sides of the fabric together, matching edge of border and seam between the pillowcase body and border/accent. Pin. 7. Sew the side seam starting at the folded edge of the border and across the end of the pillowcase (Figure B). Be sure to backstitch these two seams and finish them by serging or machine zigzagging. Turn right sides out and press. 38 University of Kentucky - Cooperative Extension Service - College of Agriculture 4-H Apparel and Textiles—Sewing 4JD-01PB 18 U. S. C. 707 Non-Clothing Option—Junior Unit III Top It Off Backpack Ages 9 to 13 Who can’t use a new backpack? Project provides a chance to apply trim, put in a zipper, and apply fasteners. Materials Required: Equipment Required: • 1 yard double-faced quilted fabric • Measuring tape • 1 yard coordinating fabric for lining and trim • Ruler • 1 package coordinating piping • Pins and pin cushion • 11/4 yards drawstring or 45-inch shoestring • 7-inch zipper (will shorten to 5 inches) • 12 eyelets • 1 drawstring slide • 1 large button (¾ inch to 1 inch suggested) • 1 yard medium- to heavy-weight interfacing • Sewing Machine • Dressmaker’s shears • Thread snips • Hand needle • Thimble • Serger (optional) • Chalk or marking pen University of Kentucky - Cooperative Extension Service - College of Agriculture 39 4-H Apparel and Textiles—Sewing 4JD-01PB 18 U. S. C. 707 Figure A Figure B Figure C Outer fabric Lining/trim Interfacing fabric a. a. b. d. c. e. f. g. f. k. k. l. m. m. n. h. i. i. j. 1 sq yard 1 sq yard a. b. c. d. straps (2 pcs) .................................. 33” x 3½” bag (1 pc) ..........................................29” x 14” flap (1 pc) ...........................................9¼” x 7” handle (1 pc) .................................. 12” x 3½” e. f. g. h. i. j. bag (1 pc) ..........................................29” x 14” bottom trim (2 pcs)...................... 14” x 3½” pocket lining (1 pc)...................... 15½” x 7” flap lining (1 pc)...............................9¼” x 7” flap trim (2 pcs) ................................9¼” x 2” flap trim (1 pc) ......................................7” x 2” 1 sq yard k. l. m. n. straps (2 pcs) .................................. 3½” x 33” flap (1 pc) ...........................................9¼” x 7” top edges (2 pcs).......................... 2½” x 14” handle (1 pc) .................................. 3½” x 12” Cutting Instructions: Sewing Instructions: From outside fabric: (Figure A) Interfacing a. Straps (2) 33-inch x 3½-inch b. Bag (1) 29 inches x 14 inches Apply interfacing to wrong sides of each end of bag, flap, straps, and handle pieces. c. Flap (1) 9¼ inches x 7-inches Apply Trim to Outer Fabric d.Handle (1) 12-inch x 3 ½ -inch From lining/trim: (Figure B) e. Bag lining (1) 29-inch x 14-inch f. Bottom trim (2) 3½-inch x 14-inch g. Pocket lining (1) 7-inch x 15½-inch h.Flap lining (1) 9¼-inch x 7-inch i. Flap trim (2) 2-inch x 9¼-inch, j. Flap trim (1) 2-inch x 7-inch From interfacing: (Figure C) k. Straps (2) 33” x 3 ½” l. Flap (1) 9 ¼” x 7 m.Top edges (2) 2 ½” x 14” n.Handle (1) 12” x 3 ½” 40 1. Along one long side of the flap trim pieces (I & J), turn edge under ¼ inch; press. 2. Lay the two long pieces (I) with raw edges even with sides of the flap front, right sides facing up. Topstitch close to the pressed-under edge. 3. Repeat with trim piece J, matching raw edge to lower edge of flap and top stitch in place. (Figure D). i. h. i. raw edge finished edge j. 4. On bottom trim Figure D. pieces (F), turn under ¼ inch along both long edges; press. University of Kentucky - Cooperative Extension Service - College of Agriculture 4-H Apparel and Textiles—Sewing 4JD-01PB 18 U. S. C. 707 5. On bag front and back, measure down 12½ inches from the top and draw a line across. Pin lower edge of trim along this line and top stitch both long edges (Figure E). raw edge f. b. Apply Zipper and Pocket to Outer Fabric 1. From the top edge of bag back, center and draw a line 3 inches down and 5 inches long. 2. On wrong side of pocket lining, center and draw a 5-inch line 1 inch down from top edge. 3. Match these two lines up with right sides together. Pin together. f. finished edge Figure E Prepare Flap 1. With right side together, pin flap and flap lining together along lower and side edges. Sew using a ½-inch seam allowance. Leave the top edge open for turning. 2. Clip corners and grade seam allowances. 3. Turn flap right side out. Press. 4. Baste across top opening. 5. Topstitch ¼ inch from outer seamed edge. Prepare Straps and Handles 1. With right sides together, fold handle and straps in half lengthwise. Pin. 2. Sew long edges together using a ½-inch seam allowance. Trim seam allowances to ¼ inch. 3. Turn straps and handle right sides out. Press. 4. Stitch ¼ inch away from line, going around both sides of the line forming a rectangle and overlapping ends of stitching (Figure F). (Rectangle measures approximately 5 1. stitch 2. cut through inches x ½ inch). both layers of fabric 5. Cut through both g. layers of fabric along line and diagonally Figure F to corners, being careful not to cut through stitching at corners. (Figure F). 6. Push pocket lining through the slot to the inside of the bag. Press, forming a narrow “window” for the zipper. 7. Bar tack top edges of the zipper tape together using a wide zigzag stitch. 8. Pin window over zipper with pull tab at the left end of the window. Baste. Topstitch close to the window edge, using a zipper foot if necessary. (Figure G). Figure G 9. Fold the pocket lining up matching sides and ends. Pin. 4. Topstitch long edges ¼ inch from edge. University of Kentucky - Cooperative Extension Service - College of Agriculture 41 4-H Apparel and Textiles—Sewing 4JD-01PB 18 U. S. C. 707 10. Stitch edges together, being careful to keep bag free (Figure H). g. Construct the Bag 1. Side piping: Cut two pieces of piping 13¼ inches long. Position and pin piping seam line ½ inch away from the side edges of the front starting at the top of the front. Baste along seam line. 2. Pin and baste handle to front flap, right sides together (Figure I). 3. At center of back, pin and baste straps with edges touching each other (Figure J). 4. With right sides together, center flap on the bag back. Pin and baste together. 5. With right sides together, fold bag, matching sides of front and back together. Sew together, using ½-inch seam allowance. Turn right side out. 42 Figure H flap Figure I back f. b. 6. Lay bag flat with seams at sides. From bottom corners, cut out a 1-inch square (Figure K). This will create a place to insert strap ends and make a square bottom for Figure K the bag. f. 7. From the back, bring strap ends down to the bottom corners. Line edge of strap up with side seam and match ends to cut edge of side corner. Pin in place. 8. Turn wrong side out. Fold corners to create square bottom by matching side seam to center bottom (Figure L). Pin and sew in place using a ½-inch seam, being sure Figure L to catch straps securely in the seam. Corner may need to be clipped to allow the strap to lay flat within the corner. Bag Lining f. straps Figure J 1. Sew side seams the same as bag, leaving a 4-inch opening in the middle of one side. 2. Cut bottom corners out, and sew corners the same as bag omitting strap insertion. University of Kentucky - Cooperative Extension Service - College of Agriculture 4-H Apparel and Textiles—Sewing 4JD-01PB 18 U. S. C. 707 3. With right sides of bag and lining together, pin and sew around top edge using a ½-inch seam. 4. Turn through opening in lining side seam. 5. Press top edge and topstitch ¼ inch from edge. 6. Sew opening in lining closed. Eyelets 1. Eyelets are placed 1 inch down from the top edge in groups of three—front and back. 2. Place first eyelet 1¾ inches in from the side seam; the next eyelet will be 3 inches from the side seam, and the third one is 4¼ inches in from side seam (be sure front and back match). Button and Buttonhole Closure 1. Measure button to determine buttonhole length. 2. Center and mark buttonhole placement on flap (Figure M). 3. Sew buttonhole. Figure M 4. Attach button to bag front corresponding to buttonhole. Be sure to allow enough of a thread shack for thickness of flap (Figure N). 3. Follow the directions on the eyelet package on how to put eyelets on. 4. Insert drawstring beginning and ending at bag front. 5. Put drawstring slide onto drawstring ends. Knot ends together. Figure N Marjorie Baker, M.S., Extension Associate for Clothing and Textiles University of Kentucky - Cooperative Extension Service - College of Agriculture 43 4-H Apparel and Textiles—Sewing 4JD-01PB 18 U. S. C. 707 Practice Project—Junior Unit III Top It Off Sewing machine constructed bags Gift Bag This simple project reinforces skills using the sewing machine and/or serger, including straight stitching and narrow seams. Serger constructed bags Materials Required: • Fabric scraps or remnants of any kind, size to be determined by gift • Thread • Cording or ribbon for ties 3. Fold in half with right sides together. 4. Stitch a 1/4-inch seam (Figure C) or serge (Figure D) down the side and across bottom. Equipment Required: • Sewing machine • Serger (if available) • Dressmaker’s shears • Dressmaker’s pins and pin cushion • Measuring tape Instructions: 1. Cut fabric according to the desired size. Example: For a 6-inch by 12-inch bag, cut a 12inch by 12-inch piece of fabric. 2. Serge (Figure A) or Figure A construct a narrow hem along top edge. To construct narrow hem, turn edge under 1/4 inch and press, then turn under 1/4 inch again and stitch close to the edge (Figure B). Figure B 44 Fold Figure C Fold Figure D 5. Secure thread ends, and hide them in the seam. 6. Turn right side out and press. 7. A serged tie may be made by serging each side of a 1-inch fabric strip or tying with a cord or ribbon. Adapted from Gift Bag, Nadine Hackler, Retired Professor, Clothing & Textiles, University of Florida, Florida Cooperative Extension Service University of Kentucky - Cooperative Extension Service - College of Agriculture 4-H Apparel and Textiles—Sewing 4JD-01PB 18 U. S. C. 707 Project Guide—Junior Unit IV Stretch Your Knit Skills Ages 9 to 13 Sewing with knit fabric is easy. This is the introductory project focusing on the fundamental techniques you will need. DO What you will do: Learn new skills. You can learn to: • Select a stable knit fabric • Select a pattern for sewing with knit fabric • Use basic sewing techniques for sewing on knit fabric • Apply knit ribbing around sleeve, neckline, or hem edges • Use a serger for sewing seams APPLY Using the new skills listed above, along with those previously learned, practice what you are learning, complete a project, and keep a record of what you have sewn. Practice the skills We learn to sew by sewing! You will continue learning to sew and expand your knowledge and skills by making an outfit from knit fabric. The more you sew and practice the skills you have learned, the better you will become. Make one or more Practice/Service Projects. See your leader/teacher or county agent for copies of the patterns. Consider giving some of these as gifts to friends or family. Practice/Service Projects cannot be exhibited in 4-H Sewing at the Kentucky State Fair. Sew and exhibit a complete outfit • Clothing Option—One- or twopiece complete outfit, such as top and bottom, pajamas, night shirt, or dress • Non-Clothing Option—Not available for this unit University of Kentucky - Cooperative Extension Service - College of Agriculture 45 4-H Apparel and Textiles—Sewing 4JD-01PB 18 U. S. C. 707 Keep a record of what you have sewn Notions and Materials • Pattern* Ask your parent or leader to help you fill out the “4-H Sewing Record” for this project. Store it in a notebook to review before you begin next year’s sewing unit. • Knit fabric (stable knit—see pattern for exact amount; your leader/ teacher will have some fabric suggestions) • Knit ribbing (see pattern for amount needed) Check off skills you have learned • Thread to match fabric • Interfacing suited to knit fabric (see pattern for exact amount) Make note of the skills you have learned this year and check them off on the “Suggested Skills and Techniques to Learn” sheet. • Buttons if required (match/coordinate with your fabric) What you will need: Equipment • Sewing machine • Serger (optional) • Universal or ballpoint sewing machine needles • Ballpoint hand sewing needles • Ballpoint pins • Basic sewing tool kit to include: thread snips, tape measure, sewing gauge, thimble, seam ripper, dressmaker’s shears, pin cushion/ magnet, thimble • Iron and ironing board 46 *A commercial pattern designed for knit fabric is necessary. A list of suggested patterns will be available from your county Extension office each project year. SHARE Show others what you have learned. What you can do: • Participate in your county Fashion Revue • Participate in your county Demonstration Contest • Exhibit at your county Fair or Rally Day (Project Card required) • Participate in your club or county Knowing Sewing Skillathon • Exhibit at State Fair University of Kentucky - Cooperative Extension Service - College of Agriculture 4-H Apparel and Textiles—Sewing 4JD-01PB 18 U. S. C. 707 Practice Project—Junior Unit IV Stretch Your Knit Skills Bath Mitt This simple project will teach the application of knit ribbing trim. It includes instructions for using the serger as well as the sewing machine. Techinque may be used for t-shirt arm holes, necklines, and arm and leg bands. Materials Required: • 12-inch by 12-inch terry washcloth • 6 inches knit ribbing • Thread to match Equipment Required: • Sewing machine Stretch • Serger (if available) Figure A • Dressmaker’s shears • Dressmaker’s pins and pin cushion • Measuring tape Sewing Instructions: 5. Stitch/serge seam a 1/2-inch seam, stretching ribbing as you sew (Figure B). Zigzag stitch raw edge if using the sewing machine (Figure C). 1. Determine the exact amount of ribbing needed by taking a snug measurement of your wrist and subtracting 1/2 inch. Cut. 2. Fold ribbing in half, crosswise of the ribs. 3. Divide ribbing and washcloth into fourths. Mark with pins. 4. Match right side of ribbing to right side of the washcloth at markings, reposition pins (Figure A). Figure B Note: Pins will need to be placed parallel to the stitching line and out of the way of the presser foot if using the serger. University of Kentucky - Cooperative Extension Service - College of Agriculture Figure C 47 4-H Apparel and Textiles—Sewing 4JD-01PB 18 U. S. C. 707 6. Fold in half with right sides together. Pin. Figure D 48 9. Turn to right side. Adapted from Bath Mitt, Nadine Hackler, Retired Professor, Clothing and Textiles, University of Florida, Florida Cooperative Extension Service. Fold Fold 7. Stitch/serge 1/2-inch seam down the side and across the end. If using a sewing machine, stitch again at 1/4 inch, or zigzag edges together (Figure D or E). 8. Secure thread ends and hide in the seam. Figure E University of Kentucky - Cooperative Extension Service - College of Agriculture 4-H Apparel and Textiles—Sewing 4JD-01PB 18 U. S. C. 707 Project Guide—Junior Unit V Put It All Together Ages 9 to 13 This is the last of the Junior units. The skills you will learn in this unit build on the sewing techniques you have learned in previous units. You may choose to sew with knit and/or woven fabric. DO What you will do: Learn new skills. You can learn to: • Sew on a specialty knit, such as two-way stretch, fleece, sweater, or nylon tricot • Sew on a stretch woven • Apply an invisible or separating zipper • Make pockets • Make plackets (sleeve or neckline) • Make elasticized leg openings, elasticized arm openings, or elasticized waistline (not a casing) • Construct regulation set-in sleeves • Construct a collar or hood • Learn to use Wild Things! computer software to design patterns APPLY Using some of the new skills listed above, along with those previously learned, practice what you are learning, complete a project, and keep a record of what you have sewn. Practice the skills You have used many important sewing techniques for both knit and woven fabrics. Continue building your knowledge and skills by sewing and practicing what you have learned. Make one or more Practice/Service Projects. See your leader/teacher or county agent for a copy of the patterns. Practice/Service Projects cannot be exhibited in 4-H Sewing at the Kentucky State Fair. Sew and exhibit a complete outfit • Clothing Option—Two- or threepiece complete coordinating outfit, such as swimwear with cover-up, a warm-up suit, a dress with jacket or coat, or a jacket or shirt with slacks/ skirt. At least one piece must include sleeves and a collar or hood. Fabric choice may be woven, knit or a combination of the two. If elastic is used, it must be applied and sewn to the fabric. University of Kentucky - Cooperative Extension Service - College of Agriculture 49 4-H Apparel and Textiles—Sewing 4JD-01PB 18 U. S. C. 707 • Non-Clothing Option—Using Wild Ginger Software, Inc. Wild Things! software program, select the tote bag option and design a bag that includes at least two pockets. Minimum size requirement for the tote bag is 12 inches in height and 12 inches in width. Be creative with your design. See project sheet, page 59 for more specific requirements. • Cording foot • Computer with Wild Things! software • Printer with paper Notions and Materials • Pattern* • Fabric (see pattern for exact amount; your leader/teacher will have some fabric suggestions) • Thread to match fabric • Interfacing suited to fabric (see pattern for exact amount) • Zipper to match fabric • Buttons (match/coordinate with fabric) • Transparent tape for putting computer printed pattern together Keep a record of what you have sewn Ask your parent or leader to help you fill out the “4-H Sewing Record” for this project. Store it in a notebook to review before you begin next year’s sewing unit. Check off skills you have learned Make note of the skills you have learned this year and check them off on the “Suggested Skills and Techniques to Learn” sheet. What you will need: Equipment • Sewing machine • Serger (if available) • Universal or ballpoint sewing machine needles and/or regular machine needles • Basic sewing tool kit to include:thread snips, tape measure, sewing gauge, thimble, seam ripper, dressmaker’s shears, dressmaker’s pins and/or ballpoint pins, pin cushion/magnet, thimble, hand sewing needles (sharps and/or ballpoint) • Iron and ironing board • Invisible zipper foot • Buttonhole foot attachments for sewing machine 50 * A commercial pattern may be used for the clothing option only. If using a knit fabric, be sure to select a pattern designed for knit using the stretch gauge. A list of suggested patterns will be available from your local county Extension office each project year. Wild Things! software may be downloaded free from www. wildginger.com. SHARE Show others what you have learned. What you can do: • Participate in your county Fashion Revue • Participate in your county Demonstration Contest • Exhibit at your county Fair or Rally Day (Project Card is required) • Participate in your club or county Knowing Sewing Skillathon • Exhibit at State Fair University of Kentucky - Cooperative Extension Service - College of Agriculture 4-H Apparel and Textiles—Sewing 4JD-01PB 18 U. S. C. 707 Non-Clothing Option—Junior Unit V Put It All Together Wild Things! Tote Bag ABC Ages 9 to 13 Did you know you can use the computer to design and print your own patterns? This project challenges you to design a Tote Bag using Wild Ginger Software, Inc.’s Wild Things! software. Add to your list of sewing related skills, design, and analyze construction procedures required to “Put it all Together.” Written documentation including style sheets and pattern layout must accompany finished project. Project requirements: • Design and print a Tote Bag pattern using the Wild Things! program. • Bag must at least 12 inches in height, 12 inches in width, and 3 inches in depth. • Include at least two pockets. • Include at least one functional zipper. • Include some sort of decorative stitching or applied trim to personalize the bag. • Bag must be lined OR use a bound seam finish on any inside or exposed seams. • Include written documentation – style sheet(s), pattern layout sheet, answers to project questions listed on this project sheet. Optional closure(s) as design dictates: • Button(s) • Hook and loop tape • Snap(s) Fabric Selection Tips • Use sturdy medium to heavy weight fabric. • Quilted fabric can be used. • Lighter weight fabric should be interfaced to add stability – consider using a fusible on all pattern pieces. • Use a size 100 sewing machine needle when sewing heavy weight or quilted fabric. Design Tips • Look at bags you may already have or ones in the stores for ideas. • Measure items you think you will be carrying in your finished bag. • Be creative. University of Kentucky - Cooperative Extension Service - College of Agriculture 51 4-H Apparel and Textiles—Sewing 4JD-01PB 18 U. S. C. 707 Procedure for designing Wild Things! Tote Bag 1. Download the Wild Things! program from www.wildginger.com OR use the program already downloaded at your county Extension office. 2. Open the program – select “Create Patterns.” 3. On the design page – select “Tote Bag” from the Bags menu. 4. Select the size dimensions for your bag, remember the minimum size is 12” x 12” x 3”. 5. Select a pocket from the pocket menu – notice that the pattern piece will appear separate from the tote bag design picture. 6. Select the dimensions for the pocket. Print your pattern 1. Click the print button on the left side of the screen. 2. With “Piece select” selected, move the pattern pieces to use the least amount of paper. Use your left mouse button to select each pattern piece. When the pieces turn red, you can move them. 3. If there are blank pages, select “Page select” at the top of the page and click on the pages you wish to print. 4. Print full size patterns. Tape or glue the pages together matching the registration marks in each corner. The marks will form a circle when matched correctly. 5. Print the pocket pattern. If you want a different pocket style or size for your second pocket, you must go through the design process again for each different pocket. 52 6. Print the Style Sheet. The style sheet tells you what seam allowance to use and the dimensions of your bag and pocket. A separate style sheet should be printed for each different pocket. Save all style sheets for project documentation. Determine how much fabric you need 1. Return to the design page. Be sure that your design hasn’t changed. If it has changed, reselect your design choices as printed on your style sheet. 2. Click the “Layout” button on the left side of the design page. 3. Enter the width of your fabric at the top of the page – example: 45 inches. 4. Decide if your layout will be for flat or folded fabric. If you choose flat layout, remember to copy a second bag front and a second handle and any multiple pocket pieces. 5. Click the “Set Up” button on the left side of the Yardage Calculator page. 6. Select and rotate the bag strap(s), pocket, and tote bag side/bottom and move all of the pattern pieces on to the “fabric block,” positioning them for cutting and following the lengthwise grain on the “fabric.” 7. If any of the patterns pieces are longer than the fabric, they will extend past the red line on the right side of the “fabric.” 8. Click the “Calculate” button on the left side of the screen. 9. The exact amount of fabric will appear at the top in inches, yards, centimeters, and meters. University of Kentucky - Cooperative Extension Service - College of Agriculture 4-H Apparel and Textiles—Sewing 4JD-01PB 18 U. S. C. 707 10.From the drop down menu in the top left corner, select “Fit to Paper,” change the paper orientation to landscape on the Print Setup screen. 11. Print the layout. Take your layout with you to shop for fabric. 12.Save your layout to follow when cutting your pattern out and include it with your project documentation. Putting It All Together – decide how to before starting to sew • The Wild Things! program includes a “Help” document that has general sewing instructions however; it does not include instructions for sewing specific pockets and adding zippers. • For a zippered pocket, refer to instructions given for the Unit III Back Pack. • Ask an adult leader to show you how to apply zippers in other places and how to sew the pockets. • Refer to a sewing reference book such as Reader’s Digest Complete Guide to Sewing. 2. Did you have any trouble using the software or printing your patterns? Explain. ___________________________________ ___________________________________ ___________________________________ ___________________________________ ___________________________________ ___________________________________ 3. Did you download the Wild Things! Program to your home computer or use the program at your county Extension office? ___________________________________ ___________________________________ 4. Did you make any changes to your pattern after it was printed? If so, tell what you did. ___________________________________ ___________________________________ ___________________________________ ___________________________________ Complete your Project Documentation by answering the following questions. Attach completed page to style and layout sheets. Turn in with your completed project for judging. ___________________________________ 1. How did you choose the size of your tote bag, or did you use the default setting in the program? ___________________________________ ___________________________________ ___________________________________ ___________________________________ ___________________________________ ___________________________________ ___________________________________ ___________________________________ ___________________________________ ___________________________________ ___________________________________ ___________________________________ ___________________________________ ___________________________________ ___________________________________ University of Kentucky - Cooperative Extension Service - College of Agriculture 53 4-H Apparel and Textiles—Sewing 4JD-01PB 18 U. S. C. 707 Practice Project—Junior Unit V Put It All Together Shoe Bag This simple bag includes straight stitching, zigzag stitching or serging, and an elasticized opening. (Technique can be used for elasticized waistlines, sleeve and pant hemlines) Materials Required: • 1/2 yard cotton flannel, stable knit, or polar fleece • 1/2 yard of 1/2-inch-wide elastic • Thread to match Equipment Required: • Sewing machine • Serger (optional) • Dressmaker’s shears • Pins and pin cushion • Sewing gauge • Measuring tape Cutting Fabric: 1. Measure length of shoe plus 2 inches. 2. With the two shoes held together, measure around the shoes. If using a woven fabric, add 2 inches to this measurement to get bag width. For knit and stretch fabric, use actual measurement for bag width. 3. Cut elastic 2 inches shorter than the width of the bag. Sewing Instructions: 1. If using a sewing machine to apply elastic: Across the width of the bag, press one end under 1/4 inch. 2. Pin elastic to one edge and stitch across the width of the bag, matching halfway points and ends. Serge or zigzag elastic to the fabric, stretching the elastic and removing pins as you sew. 3. Fold the bag in half lengthwise with right sides together. 4. Stitch a 5/8-inch seam down long edge, turn corner and continue across bottom of bag, securing thread ends at both ends. 5. Clip one side seam allowance to stitching just below elastic to allow seamline with elastic to be pressed open. 6. Finish raw edges by zigzag stitching or serging seam allowances together, leaving elastic part free. 7. Turn elastic to underside and pin in place. Stitch close to lower edge of elastic, stretching as you sew and using a straight or zigzag stitch. Turn bag right side out and press. Adapted from Shoe Bag, Nadine Hackler, Retired Professor, Clothing and Textiles, University of Florida, Florida Cooperative Extension Service. 54 University of Kentucky - Cooperative Extension Service - College of Agriculture 4-H Apparel and Textiles—Sewing 4JD-01PA 18 U. S. C. 707 4-H Sewing Record Complete this record and turn it in when you exhibit your garment. Name of Unit:______________________________Junior Senior Name___________________________________________ Birth Date__________________________ Address_________________________________________County_____________________________ ________________________________________________ Number of Years in 4-H Sewing_______ Name of Club_ ___________________________________ Date Project Completed:______________ Name(s) of My Leader(s)_ _______________________________________________________________ Attach All Fabric Samples Here: (Staple or glue fabric to record.) List Fabric Care Instructions: What I Made: Item/Garment Pattern Brand & Number Fiber Content Cost Date List the skills/techniques you learned in order to complete this project/unit. Mastered Need to improve _____________________________________________________________ _______ ____________ _____________________________________________________________ _______ ____________ _____________________________________________________________ _______ ____________ _____________________________________________________________ _______ ____________ _____________________________________________________________ _______ ____________ _____________________________________________________________ _______ ____________ _____________________________________________________________ _______ ____________ University of Kentucky - Cooperative Extension Service - College of Agriculture 55 Did you share your information with a friend or group? ________ YES ________ NO What You Demonstrated How Many You Showed It To Where Shared Did you enter the garment in an exhibit? ________ YES ________ NO Exhibit Where Shown Date PROJECT STORY: Use this space to write about your project. What did you enjoy doing most? Least? What are some of the things you learned? _______________________________________________________________________________________________________ _______________________________________________________________________________________________________ _______________________________________________________________________________________________________ _______________________________________________________________________________________________________ _______________________________________________________________________________________________________ _______________________________________________________________________________________________________ _______________________________________________________________________________________________________ _______________________________________________________________________________________________________ _______________________________________________________________________________________________________ _______________________________________________________________________________________________________ _______________________________________________________________________________________________________ ________________________________________ 4-Her’s Signature ___________________________________________ County Agent’s Signature Parent’s/Guardian’s Signature _______________________________________ Leader’s Signature Educational programs of Kentucky Cooperative Extension serve all people regardless of race, color, age, sex, religion, disability, or national origin. Issued in furtherance of Cooperative Extension work, Acts of May 8 and June 30, 1914, in cooperation with the U.S. Department of Agriculture, M. Scott Smith, Director, Land Grant Programs, University of Kentucky College of Agriculture, Lexington, and Kentucky State University, Frankfort. Copyright © 2009 for materials developed by University of Kentucky Cooperative Extension. This publication may be reproduced in portions or its entirety for educational or nonprofit purposes only. Permitted users shall give credit to the author(s) and include this copyright notice. Publications are also available on the World Wide Web at www.ca.uky.edu. Revised 9 -2009 Some images © 2003-2004 www.clipart.com


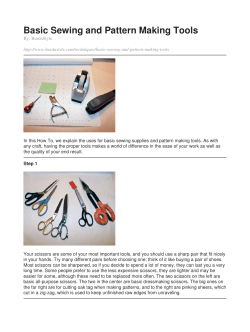


© Copyright 2026