
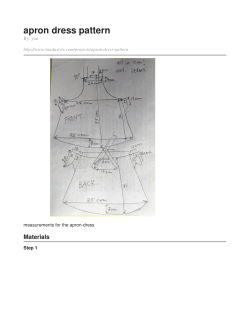
Simple Elegance Sizes Newborn -16 Ellie Inspired
Ellie Inspired
Simple
Elegance
Sizes Newborn -16
Finished Garment Measurements
Size
NB
3
mos
6
mos
9
mos
12
mos
18
mos
2
3
4
5
6
7
8
9
10
12
14
16
Length
13”
14”
15”
16”
17”
18”
19”
20 ½”
22”
23 ½”
25”
26 ½”
28”
29 ½”
31”
32 ½”
34”
35 ½”
Simple Elegance is a very simple dress that can be elegant with dressier
fabrics or casual for spring/summer in cottons. The skirt is gathered to a
narrow band and shoulder straps are added. Buttons up the back.
Size
NB
3
mo
6
mo
9
mo
12
mo
18
mo
2
3
4
5
6
7
8
9
10
12
14
Dress
1/2
1/2
1 1/8
1 1/4
1 1/2
Contrast
(straps,
bindings,
bodice, and
ruffle)
5/8
3/4
1
1
1 1/2
*Fabric requirements based on 45” wide fabric.
Suggested fabrics: Any medium to light-weight fabrics such as cotton, pique, seersucker, charmeuse,
taffeta, silk, voile, batiste, organdy
Notions: Two ½” buttons (snaps can also be used for infant sizes)
16
Cutting out your Fabric
Cut out the bodice, straps, skirt, and ruffle according to the chart below:
Size
Yoke
Straps
Dress
Ruffle
Arm Bindings
Newborn
1 ½”W x 4 ½”L (cut 2)
3 ½”W x 4”L (cut 2)
14”W x 9”L (cut 2)
22” W x 4”L (cut 2)
2 ½” W x 12” L (cut 2)
3 mos
1 ½”W x 5”L (cut 2)
3 ½”W x 4”L (cut 2)
14”W x 10”L (cut 2)
22” W x 6”L (cut 2)
2 ½” W x 12” L (cut 2)
6 mos
1 ½”W x 5½”L (cut 2)
3 ½”W x 4 ½”L (cut 2)
16”W x 11”L (cut 2)
30”W x 6 ½”L (cut 2)
2 ½” W x 12” L (cut 2)
9 mos
1 ¾”W x 6 ”L (cut 2)
3 ½”W x 4 ½”L (cut 2)
16”W x 12”L (cut 2)
30”W x 6”L (cut 2)
2 ½” W x 12” L (cut 2)
12 mos
1 ¾”W x 6 ½”L (cut 2)
3 ½”W x 5”L (cut 2)
18”W x 13”L (cut 2)
36”W x 7”L (cut 2)
2 ½” W x 12” L (cut 2)
18 mos
2”W x 7”L (cut 2)
3 ½”W x 5” L (cut 2)
18”W x 14”L (cut 2)
36”W x 7 ½”L (cut 2)
2 ½” W x 12” L (cut 2)
Cutting out your Fabric
Cut out the bodice, straps, skirt, and ruffle according to the chart below:
Size
Yoke
Straps
Dress
Ruffle
Arm Bindings
2
2”W x 7 ½”L (cut 2)
3 ½”W x 5 ½”L (cut 2)
18”W x 15”L (cut 2)
44”W x 8”L (cut 2)
2 ½” W x 12” L (cut 2)
3
2 ¼””W x 8”L (cut 2)
3 ½”W x 6”L (cut 2)
20”W x 16”L (cut 2)
44”W x 8”L (cut 2)
2 ½” W x 12” L (cut 2)
4
2 ½”W x 8½”L (cut 2)
3 ½”W x 6 ½”L (cut 2)
22”W x 17”L (cut 2)
44”W x 8”L (cut 2)
2 ½” W x 12” L (cut 2)
5
2 ¾”W x 9 ”L (cut 2)
3 ½”W x 7”L (cut 2)
22”W x 18”L (cut 2)
44”W x 8”L (cut 2)
2 ½” W x 12” L (cut 2)
6
3”W x 9 ½”L (cut 2)
3 ½”W x 7 ½”L (cut 2)
22”W x 19”L (cut 2)
44”W x 8”L (cut 2)
2 ½” W x 12” L (cut 2)
7
3 ¼”W x 10”L (cut 2)
3 ½”W x 8”L (cut 2)
24”W x 20”L (cut 2)
48”W x 8 ½”L (cut 2)
2 ½” W x 12” L (cut 2)
8
3 ½”W x 10 ½”L (cut 2)
3 ½”W x 8 ½”L (cut 2)
26”W x 21”L (cut 2)
52”W x 9”L (cut 2)
2 ½” W x 12” L (cut 2)
9
3 ¾”W x 11”L (cut 2)
3 ½”W x 9”L (cut 2)
28”W x 22”L (cut 2)
56”W x 9 ½”L (cut 2)
2 ½” W x 12” L (cut 2)
10
4”W x 11 ½”L (cut 2)
3 ½”W x 9 ½”L (cut 2)
30”W x 23”L (cut 2)
60”W x 10”L (cut 2)
2 ½” W x 12” L (cut 2)
12
4 ¼”W x 12”L (cut 2)
3 ½”W x 10”L (cut 2)
32”W x 24”L (cut 2)
64”W x 10 ½””L (cut
2)
2 ½” W x 12” L (cut 2)
14
4 ½”W x 12 ½”L (cut 2)
3 ½”W x 10 ½”L
(cut 2)
34”W x 25”L (cut 2)
68”W x 11”L (cut 2)
2 ½” W x 12” L (cut 2)
16
4 ¾”W x 13”L (cut 2)
3 ½”W x 11”L (cut 2)
36”W x 26”L (cut 2)
72”W x 11 ½”L (cut 2)
2 ½” W x 12” L (cut 2)
Sewing the Dress
Binding the Armscyes
Binding the Armscyes:
1. Cut out the armcyes at the top of each of the skirt
rectangles. Place the curve so that the top and
sides line up and cut on the curve.
How to cut bias bindings for the armscyes:
Cut on the bias grain of fabric to
stretch around curves easier. Fold
the fabric at a 45o angle to the
selvedges. Measure the length
needed and cut at a 45o angle.
1. Press the arm bindings in half, lengthwise, wrong sides
2. Place the front and the back skirts, right sides
together and stitch each side seam with a finished
seam edge.
together.
2. Pin raw edges of binding strip to wrong side of dress
at the armscye curve.
3. Stitch ¼” from raw
edges.
Binding the Armscyes, cont’d Attaching the Yok
1. Stitch two rows of gathering stitches across both the
front and back skirts.
4. Press seam allowance toward the binding. Turn
binding to right side of dress, enclosing the raw
edge. Pin so that the finished edge of the binding
overlaps the first stitching line just ¼”. Stitch in place.
2. Fold the yoke pieces in half, lengthwise with wrong
sides together. Fold in each end ¼” (diag. A) and
stitch the short ends (diag. B).
fold
Diagram A
5. Trim ends even with the neckline edge.
Diagram B
3. Pin one yoke to a skirt
piece, with raw edges
together, adjusting
gathers to fit.
4. Repeat with back
yoke and dress piece.
5. Top-stitch in place.
Attaching the Shoulder Straps
Attaching the Shoulder Straps:
1. Press the shoulder straps in half, lengthwise, right
sides together.
2. Stitch the long, open edge together. Turn right side
out and press well.
3. Repeat with other strap.
5. Attach to the front and back bodice by placing
each strap on each side of the bodice and
stitching in place.
Adding the Optional Ruffle
1. Place the ruffle right sides together and stitch the
short ends.
3. Stitch two rows of gathering stitches around
the raw edges and pull gathers.
2. Fold the ruffle in half, lengthwise with wrong sides
together and raw edges matching.
4. Place over the bottom of the dress, adjusting
gathers to fit. Stitch in place with a finished
seam edge.
Fold
Adding the Placket
Placket Construction:
1. Find the middle of the back of the dress and cut a 4”
slit from the top of the bodice down into the skirt.
3. From the wrong side (placket on the bottom), stitch,
using a ¼” seam, catching only a few threads of the
skirt at the bottom of the “V”. Pivot the fabric and
continue sewing on the other side of the “V”.
2. Cut a placket 2 ½” wide x 9” long. Press in half with
wrong sides together and raw edges matching.
3. Place the right side of the placket piece to the right
side of the opening, matching raw edges and
beginning at one top edge.
Pin around the “V” opening
4. Press from the wrong side with the tip of the iron right at
the seam. Press the seam towards the placket.
up to the other top edge.
(The placket is over-sized
to allow for any extra
length needed. The
extra length may be
trimmed off at this
point.)
5. Press the raw edge of the placket 3/8” to the wrong
side.
Adding the Placket, cont’d
6. Pin this folded edge to the wrong side of the garment,
just over the stitching line, encasing the raw edges.
Press fold well.
Finishing the Dress:
1. Stitch ribbon at waist in a bow
or covering waist seam, if
desired. A bow or flower
can also be formed with
spaghetti bias tubing.
Stitch by hand to front
7. Whip by hand to inside.
bodice.
2. Mark three buttonholes
evenly spaced on the
right back placket.
Stitch by machine or hand.
8. The placket should measure ½” wide. Fold the raw
edges to the inside and stitch closed. Turn under the
3. Sew buttons on the left
right side and stitch in place at the top. Leave left
back placket to correspond
side extended. Press.
with the buttonholes on
the right.
Simple Elegance
By Laura Johnson. For personal use only. All rights reserved. Copyright © December 2011. No part of this pattern may be
reproduced or copied without permission in writing from the author. To see more patterns by Laura Johnson go to
www.ellieinspired.com.
Fair use of this pattern are subject to the following conditions:
There can be NO resale or reproduction of this pattern in part or whole
without written consent from the designer Laura Johnson. This includes
sharing, tracing, or forwarding the pattern to anyone except the
original purchaser.
If you sell garments made using this pattern, in consideration of the
many hours spent on the design, please always give credit to Ellie
Inspired as the designer (i.e. “Simple Elegance” dress pattern by Ellie
Inspired, www.ellieinspired.com). No mass production is permitted
using this pattern.
For questions on sewing patterns by Ellie Inspired, visit the
discussion forums on our website: www.ellieinspired.com
16
14
12
10
9
8
7
6
5
4
3
2
“Simple Elegance”
ELLIE INSPIRED
Armcye Curve
18 mos
12 mos
9 mos
6 mos
3 mos
NB
“Simple Elegance”
ELLIE INSPIRED
Armcye Curve


© Copyright 2026