Getting Started with Microsoft Publisher What is Microsoft Publisher?
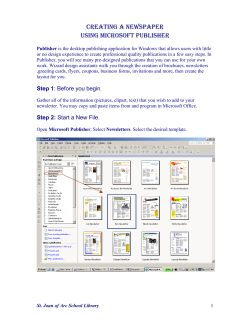
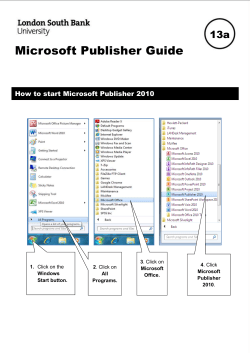
Instructor: OIT Training Email: [email protected] http://www.oit.duke.edu/training Getting Started with Microsoft Publisher What is Microsoft Publisher? Publisher is a page layout software program. The program's capabilities allow you to create various types of professional publications, such as brochures, newsletters, cards, fliers, and invitations. The program is more flexible than a word processing program such as Microsoft Word. You can manipulate graphics, text, and create layouts to suit your needs. You can also create brochures, letterhead, reports, flyers, etc. with a professional look and "feel." Publication Checklist Below are some things you should consider before creating your publication: What is the purpose of your publication? Why is it needed? Who is the intended audience? What kind of information will you include? What kind of image do you want to project? Does the publication need to fit into an established design program or conform to a corporate style? What is the overall format? What kinds of art or photography—and how much—will you include? What are the printing specifications? What will you use for camera-ready pages? How will the publication be reproduced? How will it be distributed? When is your deadline? What is the budget? OIT Training – Publisher Page 1 of 10 Creating Publications You have several options for creating a new publication: Create a blank publication Make a copy of an existing publication and then edit it Create a new publication based on a specific Template Creating a Blank Publication Click on the File tab and choose New Select Blank 8.5×11” or Blank 11×8.5” If you need a different page size, choose More Blank Page Sizes o This will bring up a variety of different page sizes as well as allowing you to create your own custom pages Creating a Publication from Template Creating a publication from a template can save time with preset text boxes and a professionally-designed layout To insert a template, click on the File tab and choose New Microsoft Publisher 2010 ships with dozens of premade templates, so you can look through all of the prebuilt templates until you find one that is useful OIT Training – Publisher Page 2 of 10 If the template you want isn’t available, you can download additional templates online Download a Template You can find many different templates on the Microsoft Office’s Web Site ranging from post cards, recipe books, manuals to marketing materials. Go to http://office.microsoft.com/en-us/templates/templatesFX101741961.aspx?CTT=97 o You can also access this site by going to http://office.microsoft.com and clicking on the Templates tab Find the template that you want to use o Click on Download and Continue o The publication that you selected will open in Microsoft Publisher o Save the publication and modify it to suit your needs OIT Training – Publisher Page 3 of 10 Publisher Features The Publisher Window The Publisher window contains vertical and horizontal rulers, layout guides, a scratch area, page navigation icons, and a task pane. Rulers appear along the top and left sides of the publication windows and make it possible for you to place text and graphics exactly where you want them. Layout guides contain text and graphical elements. The task pane provides convenient access to frequently used commands and features. Component Title bar (0) Layout guides (1) Scratch area (2) Horizontal ruler (3) OIT Training – Publisher Description Displays the name of the application and the name of the current document Blue and red dotted lines that help you align the various elements on each page. These lines will not appear in the printed publication The extra space around the page area that’s used for storing text and graphics until you place them in the publication. Items in the scratch area will not appear in the printed publication. They will; however, add to the size of the file. Adjusts or removes tab stops or indents on a page. You can refer to the ruler to adjust the position of the objects on the Page 4 of 10 Zoom controls (4) Status bar (5) Page navigation icon (6) Size box (7) Vertical ruler (8) Command Tabs (9) page. Changes the magnification level at which the publication is displayed. You can view the publication at 50%, 100%, 200%, etc. Displays the current location of the pointer, as well as the size and position of any selected object. Represents the various ways to view pages in the publication. To display a page or two-page spread, click the appropriate numbered icon. Adjusts the size of the window. Helps align objects vertically on the page. Provides a convenient interface through which you can perform common tasks— for example, creating a new publication. Clicking any of the tabs (Home, Insert, etc) changes the commands displayed on the command bar. Navigating Publications Publications can be opened by clicking on the File tab and choosing Open The Page Navigation bar on the left-hand side of the screen allows you to move between pages o To change the order of pages, click and drag a page to its new position (indicated by a black line) Clicking on the View tab will provide a variety of options to change the layout of your presentation o Two view two facing pages simultaneously, click on Two-Page Spread o To zoom in and out, either click and drag on the Zoom Slider on the lower right-hand side of the screen, or change the percentage zoom manually in the Zoom section of the View tab OIT Training – Publisher Page 5 of 10 Working with Text Boxes Text boxes allow you to add text to your pages. Quick publications have text boxes already in them o To insert a text box, click on the Insert tab and choose Draw Text Box o Click and drag anywhere on your publication to insert the text box o Right click on the text frame and Choose Format Text box to change the color, size, internal margins and position any text box (including rotating it) Formatting Text Selecting text will bring up a Text Box Format tab where you can change font size, color, etc You can also click on the arrow in the bottom-right part of the Font section of the Format tab for more powerful formatting tools in a popup dialog box Design Issues There are two classes of typefaces: Serif: those having small extensions at the end of characters, such as the “foot” at the bottom of an “r”. Serif typefaces are easily readable and not tedious, and are therefore ideal for body copy. When used in larger sizes, they can also be good for headings. Times New Roman is a typical serif typeface. Sans-serif: those without extensions at the end of characters and tend to have the same thickness within a character. Sans-serif typefaces are excellent for headings and display type, as used in advertising copy and flyers. Sans-serif fonts tend to be harder to read and usually not appropriate for large amounts of text. Adding Additional Pages Go to the Insert tab and choose Page to add additional pages. You will need to determine the number of pages, the placement of the pages as well as other options. Importing Text If you have the text already typed out, you do not need to retype into Publisher. You can copy and paste or import text into the box. To import the text, you will need to: Create a text frame. (change the size for positioning as needed) OIT Training – Publisher Page 6 of 10 Choose Insert, File. Select Import Text Click OK. NOTE: If the text does not fit in the text frame it will ask you if you want to automatically link the current text frame to another frame. Click NO, if you would prefer to create a new text box and then create a manual link. Columns You can divide the text frame into columns as it is typically done in magazines and newsletters. Place the insert point in the text frame. Right-click on the text box and choose Format Text Box… In the dialog box that appears, click on the Text Box tab and choose Columns… Enter the number of columns and the amount of space in the appropriate fields. NOTE: You can move text boxes onto other pages easily by temporarily moving it into the scratch area and then moving it to another page. Working with Pictures Pictures add eye-catching appeal to your publication while providing important visual information. In addition to the large collection of clip art images you can use in Publisher, you can insert photos, drawings, and other graphics in a variety of file formats: Encapsulated PostScript (.eps) Graphics Interchange Format (.gif) Joint Photographics Expert Group (.jpg or .jpeg) Portable Network Graphics (.png) Tagged Image File Format (.tif) Microsoft PhotoDraw or PictureIt! (.mix) Windows Metafile (.wmf) Windows Enhanced Metafile (.emf) NOTE: The image being used should add to the message by supplementing the text in your publication. (In other words, images should have a purpose.) Inserting a Clip Art Image Click on the Insert tab and choose Clip Art The Insert Clip Art Task Pane appears. OIT Training – Publisher Page 7 of 10 Search the Clip Art library until you find a useful picture Click once on the image to select it or Click modify to do another search. Inserting a Picture from File Click on the Insert tab and choose Picture A dialog box will appear that allows you to search your files for the appropriate pictures Find and select the image that you want to use. Select Insert to insert the image into your document NOTE: You can move an image anywhere you want on a page by clicking and dragging it to the location of your choice. Working with Objects You can add objects, such as boxes, lines and circles to break up the space within your publication To insert an object, click on the Insert tab and choose Shapes In the drop-down menu that appears, select the shape you wish to insert Click and drag on the publication to add the shape (Hold down the shift key while clicking and dragging to create a regular shape or horizontal/vertical line) To change the fill of the object, line, tint, etc., select the object, right click and select Format AutoShape Page Design The Page Design tab allows you to modify the way a page is laid out in an already-existing document o In the Template section, you can click on Change Template to switch your publication to another premade template style o In the Page Setup section, you can change the Margins of your pages, Page Orientation (portrait or landscape) and Size. Connecting Text Frames If there is not enough room for the text in a frame, a Text Overflow indicator appears. If OIT Training – Publisher Page 8 of 10 this occurs, you can either resize the frame or create another text frame and then create a link between them. To create a new text frame, simply click on the Text Overflow indicator Then, click anywhere else on the page to insert a new text box to handle your overflow A pitcher will appear that will allow you to dump the additional text into the new text frame Finalizing your Publication and Preparing for Print Editing It is critical to spell check any publication before you send it to be printed. o Click on the Review tab and choose Spelling or press F7 CAUTION: Make sure you check all web addresses (URLs), dates/times/locations, proper names and phone #s for accuracy! OIT Training – Publisher Page 9 of 10 Additional Resources lyndaCampus lynda.com is an online software training library. All Duke students, faculty, and staff can access this resource with their Duke NetID. http://training.oit.duke.edu/lynda OIT Multimedia Project Studio (MPS) Need a specialized computer lab with hardware and software to edit graphics, develop a website, edit a video or integrate audio/video into a project? The MPS Labs on East and West campus have all that plus knowledgeable staff to help get you started and keep you going on your project. For location & staffing information for the MPS, visit http://www.oit.duke.edu/mps or email [email protected] Microsoft’s Publisher Web Site: This site includes downloadable templates, tips and tricks for using Publisher as well as many documents for user support. http://microsoft.com/office/publisher/default.asp About Desktop Publishing: In addition to having downloadable templates, this site includes tutorials and frequency asked question (FAQ) pages. http://desktoppub.about.com/cs/publisher/ OIT Training – Publisher Page 10 of 10
© Copyright 2026
