
Publisher - Basics Course Description
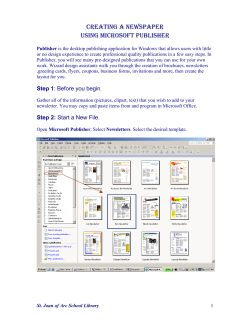
Publisher - Basics
Course Description
Microsoft Publisher is a desktop publishing software that is designed for people who are not
design professionals but who need to produce professional looking publications. The typical
user is routinely called upon to create publications quickly without the support of art designers
or a production studio who are experienced in page layout and technique. To make it easier
for the user, Publisher has several automated tools, templates and wizards.
Why use Publisher over Word? Both Publisher and Word have templates offering similar types
of publications. However, Publisher gives a wider variety of templates and more control over
the page design. Plus Publisher contains hundreds of sample layouts that you can easily
modify.
Objectives
• Main features of the Publisher Window
• Working with Text
• Connecting Text Boxes
• Spacing of Characters, Lines and Paragraphs
• Add a Drop Cap
• Add Guides
• Insert Items
• Group and change the Orientation of Objects
• Text Wrapping
• Use the Spell Checker
• Save a File
• Set up Auto Recovery
• Closing and Opening files
• Print a Publication
Microsoft Publisher 2007
Page 1
Publisher Windows
Publisher starts in the Getting Started with Microsoft Office Publisher 2007 window. You can
select a template from this gallery or start with a blank “canvas”. There is also an option to
create types of Word Documents.
As soon as a publication type is chosen, the window displays more specific choices for that
publication type.
Page 2
•
At the top of the middle section will be links
(“breadcrumbs”) to different publications within the
publication type chosen.
•
The middle section also displays thumbnails of
different publications within the category.
•
An orange frame engulfs the chosen publication.
•
The right task pane shows a larger thumbnail of the selected design
and any available settings which can be changed.
•
Make changes to the color scheme, font scheme, business
information, page size, layout, etc.
•
Some publication types do not allow for editing of some of the
options. In these cases, they will be grayed out.
•
When all settings are chosen, click the Create button to create the
publication.
•
If the default settings fit the needs for a publication, just double click
on the type of publication.
Microsoft Publisher 2007
Once the Publication is created, the main Publisher window will be displayed. The menu bar
and other toolbars have several of the same choices that use to be in the Office 2003
applications. This is a desktop publisher, so an Objects toolbar has been added to the left side
of the Publisher window.
Menu bar
Standard toolbar
Formatting toolbar
Connect Frames toolbar
Objects toolbar
Page Sorter
Microsoft Publisher 2007
Page 3
Working with Text
Text is considered an object in Publisher and must be placed in a text box. You can copy and
paste text from another software program, insert a file of information, or just type the text. After
placing the text, changes can be made to its position and format.
Creating a new
text box
1. Click the Text Box tool from the Objects Toolbar.
2. Position the crosshair mouse pointer where the text box will start.
3. Press and hold the left mouse button.
4. Drag the crosshair to the ending point and release the mouse
button.
5. Type the text.
•
Pieces of a text box include the Frame, Handles, and Rotating Handle.
•
Zoom can be used to bring the page closer to see it up close.
•
Multiple columns can be set in a text box.
•
Any part of text can be formatted.
•
The Format Publication task pane contains choices for Font scheme, Color scheme, etc.
Replacing text
1. Select the text you want to replace.
2. Type in the new text.
Importing Text
1. Place the cursor in the text box.
2. Click Insert.
3. Choose Text File.
4. Find and select the file you want to insert.
5. Click OK.
Page 4
•
When you have entered more text than your text box can hold,
Publisher displays a message asking if you want to flow the text
automatically or if you want to connect text boxes yourself.
•
If you allow Publisher to flow text automatically it will offer to create
text boxes as needed and then flow the extra text into them.
•
If you decide to connect the text boxes yourself, the Text in Overflow
indicator appears in the lower-right corner of the text box.
Microsoft Publisher 2007
Connecting Text Boxes
You can connect text boxes in a series which creates what Publisher refers to as a story.
Being able to connect text boxes is a great tool. When the text placed into a text box is too
large to be displayed in just one text box, this feature is applicable.
Create a chain of
connected text
boxes
1. Create as many new text boxes as you want.
2. Select the text box you want to be the first in the “story”.
3. On the Connect Frames toolbar, click the Create Text Box Link.
4. Place the mouse pointer over an empty text box for the next part of
the story.
•
The mouse pointer becomes an upright “pitcher”
when you move it over the page.
5. Continue until all the text boxes are filled and the story is completely
displayed.
•
To unlink 2 text boxes, click the first box and then on the Connect Text Boxes toolbar, click
the Break Forward Link button.
•
A text box can be set up to allow text to auto fit into the box. As more information is typed
into a box the text auto fits to the box.
Set up Auto Fit
Text
1. Click in the text box.
2. Click Format.
3. Hover over Auto Fit Text.
4. Choose Shrink Text on Overflow.
To help your reader navigate through your story and publication, you can add “continued
notices” at the bottom or the top of the text boxes. This is especially helpful when you are
creating larger newsletters.
Add a continued
notice
1. Right click the text box where you want to place a continued notice.
2. Choose Format Text Box.
3. Click the Text box tab from the Format Text Box dialog box.
4. Under Text autofitting, click the Include “Continued on page…”
check box, or Include “Continued from page…” check box.
5. Click OK.
•
Microsoft Publisher 2007
The text boxes must be on different pages to display the continued
notices.
Page 5
Spacing of Characters, Lines and Paragraphs
Have you ever noticed the spacing of text, lines and paragraphs in a newspaper? The
newspaper industry has some helpful tools which allow them to make the paper easier for
everyone to read. Publisher has some of these tools at its disposal too.
Tracking -
The spacing between all selected text characters.
Kerning -
The space between any two specific characters.
Leading -
(pronounced ledding) – The amount of white space
between lines of text.
To adjust tracking
or kerning
1. Select the text you want to reformat.
2. Choose Format.
3. Select Character Spacing.
4. Under Tracking, choose the space to apply to the text.
5. Under Kerning, select the options to define the space between any
two characters.
To adjust the
Leading or Line
Spacing
1. Select the text to reformat.
2. Choose Format.
3. Select Paragraph.
4. Click the Indents and Spacing tab.
5. Set the paragraph and line spacing.
Drop Cap
Large or decorative letters placed at the beginning of a heading or paragraph in a brochure can
quickly draw a reader into your publication. These types of letters are known as a Drop Cap.
Inserting a Drop
Cap
1. Position the insertion point in the text where the first letter will change.
2. Select Format.
3. Choose Drop Cap.
4. Select a tab.
•
Click the Drop Cap tab to insert a preformatted drop or initial cap.
•
Click the Custom Drop Cap tab to design your own style.
5. Choose the style you want to use.
6. Click OK to apply.
Page 6
Microsoft Publisher 2007
Inserting Items
To enhance the look of a Publication, many types of items and graphics can be inserted.
Inserting and 1. Select an existing page.
Deleted
2. Choose Insert.
Pages
3. Click Page.
4. Select how many pages needed and if they will be inserted before or after
the current page.
5. Click OK.
Inserting
Pictures
1. Select Insert.
2. Hover over Picture.
3. Select From File.
4. Find and select the Picture.
5. Click Insert.
6. Reposition the picture object.
Inserting
Clip Art
1. Select Insert.
2. Hover over Picture.
3. Select Clip Art.
4. Find and select the Clip Art item.
5. Reposition the Clip Art object.
Shapes
1. Click the AutoShapes icon from the Objects toolbar.
2. Hover over the type of shape.
3. Choose a shape from the palette.
4. Position the crosshair mouse pointer where the object will start.
5. Press and hold the left mouse button.
6. Drag the crosshair to the ending point and release the mouse button.
Word Art
1. Click the Insert WordArt icon from the Objects toolbar.
2. Choose the WordArt style.
3. Click OK.
4. Type your word(s).
5. Click OK.
Microsoft Publisher 2007
Page 7
Guides
You can apply Guides to the publication to view how well the items are lining up.
View Guides
1. Click View.
2. Choose the type of guide to be displayed.
Grouping and Orientation of Objects
Once objects are positioned just right on your slide, you will want to keep them together. Using
the grouping feature will accomplish this for you and will make the objects easier to move.
Group or
Ungroup
objects
1. Select each object using the ctrl key.
2. Click Arrange.
3. Choose Group or Ungroup.
•
Other functions can also be applied from the Arrange menu.
Change the
Orientation
of Objects
Order – Bring to Front, Send to Back, Bring Forward, Send Backward
Snap – To Grid
Nudge – Up, Down, Right, Left
Align or Distribute – Align Left, Center, Right, Top, Middle, Bottom,
Distribute Horizontally, Vertically, Relative to Slide
Rotate or Flip – Free Rotate, Rotate Left, Rotate Right, Flip Horizontal, Flip
Vertical
Working with Text Wrapping
When pictures are placed into long columns of text, you often need to change how the picture
interacts or wraps with surrounding text.
To create visual interest and maintain order on a page, it is a good design practice to keep
pictures at the end of a text frame, between columns of type or at the bottom of a page when
wrapping text around a graphic.
To edit text
wrapping around
a picture
1. Select the object.
2. Click Format.
3. Choose Picture or object type.
4. Click the Layout tab.
5. Under Wrapping Style, select the style you wish to apply.
6. Under Wrap text, click the option you prefer.
7. Click OK.
Page 8
Microsoft Publisher 2007
Spell Check
Publisher spell checks the publication as you are typing. If Publisher detects a spelling error, a
red wavy line will appear under the incorrect word. You may correct the error as soon as it
appears or wait until the publication is finished.
To correct an incorrect word, place your mouse pointer on the incorrect word and right click, a
shortcut menu will display choices. You may correct the spelling of the word, ignore the
spelling or add the word to the dictionary.
If your publication is lengthy, you may wish to use Spell Checker to check spelling of the entire
publication rather than one word at a time.
Spell Checking
a Document
1. Position the insertion point at the beginning of the publication.
2. Click Tools.
3. Hover over Spelling.
4. Choose Spelling.
5. Walk through each word it finds.
With either method of spell checking, it still does not eliminate the need for proofreading! Spell
check only finds misspelled words not words used incorrectly.
•
A story can also be edited in Word.
•
Hyphenation settings are available.
•
As with Word, the AutoCorrect feature is useable within Publisher.
Microsoft Publisher 2007
Page 9
Saving Files
It is a good rule of thumb to save a publication every 10 to 15 minutes, after the publication is
completed, before it is printed or when a major change is made. Therefore, if the computer
loses power, the information has been retained.
Saving a File
Save as is used to save a file for the first time or to save it with a different
name or to a different location.
1. Click File.
2. Chose Save As.
3. In the File Name text box, type in the desired filename.
4. Press Enter or click Save.
Save is used to save a file using its current name and replace the existing
file. This command is used to update a file.
1. Click File.
2. Select Save.
- or 1. Click on the Save icon on the Standard toolbar.
Auto Recovery
You can set the system up to save your publication every so many minutes so that if your
system crashes or goes down for some reason, you will be able to pull the publication up later.
Make sure to save the file initially so that this feature will work for you. This is not a guarantee
because the most recent changes may not be retrieved so it is still important to save often.
Set up Auto
Recovery
1. Click Tools.
2. Select Options.
3. Choose the Save tab.
4. Make sure the box next to Save Auto Recovery info every: is
checked.
5. Set the number of minutes.
6. Click OK.
Page 10
Microsoft Publisher 2007
Closing and Opening
Even though you can open several publications at the same time, this practice takes up
valuable memory on the PC. It is a good practice to close publications when you are finished
working with them.
Closing a File
1. Click File.
2. Select Close.
3. If the file has been changed since the last time it was saved, a
dialog box appears.
•
•
•
Opening
Existing Files
To save the file click Yes.
To close the file without saving click No.
To return to the file without closing it click Cancel.
1. Click File.
2. Select Open.
3. Find and select the file.
4. Click Open.
Printing
Publications can either be sent directly to the printer or previewed before they are printed. It is
a good idea to preview your publication before printing it. This allows you to "eye-ball" the
publication before it is printed which will save you time, ink and paper.
Print Preview
1. Click File.
2. Select Print Preview.
3. Click Close to return to the publication.
Print
1. Click File.
2. Select Print.
3. Choose your options.
4. Click Print.
Microsoft Publisher 2007
Page 11
Notes:
Page 12
Microsoft Publisher 2007


© Copyright 2026