
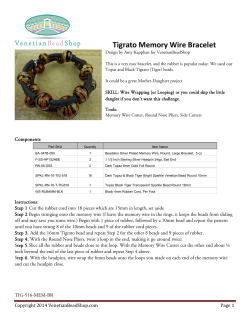
Wire Wrapped Sunburst Earrings Jewelry Making Tutorial
Wire Wrapped Sunburst Earrings Jewelry Making Tutorial
Created by Emily Tan
Reviewed by XQ Designs
www.Handmade-Jewelry-Club.com
www.DIYLessons.org
www.DiyBeadingClub.com
Please do not distribute, lend or copy. Do not mass produce.
Copyrights 2012 XQ Designs
WIRE WRAPPED
SUNBURST EARRINGS
Created by Emily Tan of www.emilysecretpassions.blogspot.com
Level: Beginner to Intermediate
In this lesson, you will learn to create this pair of earrings by learning to
construct the frame, wrapping/coiling the loops, attaching the beads
and making a pair of ear wires.
The techniques you will learn creating this piece can also be used to
create pendants. You can create variations by adding beads and
embellishing the looped wires to make it more sparkly! You can make it
more colorful by using color coated wires. Surely, this earring will make
your day sparkly and sunny!
Page 1
www.diylessons.org
www.diybeadingclub.com
www.handmade-jewelry-club.com
Materials:
18g wire (work from spool) – construction of frame
20g wire (work from spool) – making loops & ear wires
26gwire (120cm long) – for wrapping/coiling
2 pcs of 15cm coin shape or round flat/puffy beads (drilled from top to
bottom).
2 pcs of ear wires (you may use ready-made ear findings or make a pair
yourself, as shown in this tutorial)
Measurements indicated here are for the type of bead I’ve used. If you
use a smaller/larger bead, please adjust the measurements accordingly.
Please read thoroughly the whole tutorial before you start cutting the
wires.
Tools:
Chain nose pliers/flat nose pliers
Wire cutter
Nylon jaw pliers
Hammer
Steel block (optional)
Mandrel with 15cm in diameter (I’ve used a marker pen)
Wigjig
Ruler
PART 1: CONSTRUCTING THE WIRE FRAME WITH LAYER WRAPS.
Place the 18g wire (working from spool) on a mandrel. In this lesson,
I’ve used a marker pen as the mandrel.
Coil the wire around the marker pen to form a round frame. Let the wire
overlap each other by about 0.5cm to 1.0cm.
If you plan to use a larger bead, a thicker mandrel can be used to form the
frame, and if a much smaller bead is used a thinner mandrel is required.
Page 2
www.diylessons.org
www.diybeadingclub.com
www.handmade-jewelry-club.com
Slip the wire off the mandrel carefully.
Place the bead into the round frame to see whether it fits. Make the
necessary adjustments if the bead does not fit by slipping the frame back
onto the mandrel.
Remove the bead and trim both ends of the wire and leave the
overlaying part 1cm as shown.
Re-check the fitting of the frame to the bead again until you are satisfied
with the fit. You may cut the ends if you find it too long.
Page 3
www.diylessons.org
www.diybeadingclub.com
www.handmade-jewelry-club.com
This is how it looks like after adjustment. File both ends of the wire and
leave aside to be used later.
Place the round frame on the steel block.
The overlaying part must not be over each other when hammering (refer
to picture)
Hammer the frame lightly on the steel block to slightly flatten it.
The hammered frame will expand by about 0.2cm.
Adjust the overlaying part with flat/chain nose pliers until you get a
perfect round frame.
Repeat the whole process of Part 1 to make another round frame.
Page 4
www.diylessons.org
www.diybeadingclub.com
www.handmade-jewelry-club.com
PART 2: MAKING THE LOOPS WITH WIGJIG
Insert the pegs as shown to acquire the figure “8” loops. If you have
enough pegs, you may insert them until you get about 13 – 14 loops.
Take the 20g wire (work from spool) and make a round loop with your
round nose pliers.
Ensure that the round loop fit into the 1st peg.
Place the loop into the 1st peg, continue to bring the wire down to the 1st
bottom peg (as shown) and bring the wire around the peg, up to the
next 2nd peg on top, bring it around again and down to the 2nd peg at the
bottom.
See next picture for a clearer view.
This is how the figure “8” loops are formed. Follow the directions of the
wire as shown in the pictures below. Continue until you have about 14
loops on either side
If you don’t have sufficient pegs, you can start from where you left by
taking the loops you’ve made, off from the last peg and re-insert the
wire at the 1st peg and continue making the loops until you get 13 – 14
loops (depending on the bead you use)
Page 5
www.diylessons.org
www.diybeadingclub.com
www.handmade-jewelry-club.com
Continue making the loops until you have sufficient loops to go round
the bead.
Take the loops off slowly from the pegs.
You can stretch the loops with your fingers to get the desired length and
space between the loops.
Don’t worry if you have extra loops. This can be trimmed off later.
Flatten the loops (optional) with nylon jar pliers.
Adjust and re-adjust the length of the loops by stretching the wire with
your fingers to get the desired fit around the outer round frame.
Follow the process of Part 2. Once you have the loops ready, set it aside.
Page 6
www.diylessons.org
www.diybeadingclub.com
www.handmade-jewelry-club.com
Let’s get on with the next step ……..
PART 3: WRAPPING FIGURE “8” LOOPS TO THE ROUND FRAME
Cut apiece of 26g wire, measuring about 3 feet (90cm) to begin
wrapping the loops. Don’t worry …. You have more than enough wire to
do the wrapping.
Mark the middle point of the frame at the overlaying part (as shown).
Begin wrapping the frame at the marked point, leaving about 1” of wire
(you can trim it off later). Use the longer wire to wrap about 4 – 5
rounds towards the frame before attaching the figure”8” loops.
Note: For a right-handed person, you’ll work in clockwise direction and
for left-handed, vice versa.
Place the 1st loop against the frame right after the initial wraps and start
wrapping 4 – 5 times tightly into each loop and the space between the
loops.
The number of wraps between the spaces will depend on how far apart
you stretch the loops around the frame.
Page 7
www.diylessons.org
www.diybeadingclub.com
www.handmade-jewelry-club.com
Neatly wrapped/coiled.
Half way done ….. Let’s continue to wrap to the end.
Wrap the remaining last loop towards the 1st loop wrapped. At this
time, make sure that the last loop aligns with the 1st wrapped loop on
the frame.
If you have extra loops here, you may trim it off.
See how the last loop aligns with the first wrapped loop.
Secure the overlapping loops with the remaining wire by wrapping both
loops 5 – 6 times. Trim the excess wire with a cutter and press it down
neatly with chain nose pliers.
Page 8
www.diylessons.org
www.diybeadingclub.com
www.handmade-jewelry-club.com
Front view of the frame.
Back view…… as neat as the front.
PART 4: ATTACHING THE BEAD
Cut a piece of 26g wire, measuring 3 – 4 inches long (for each
attachment).
Slip the bead into the 26g wire at about half way (as shown) and start
wrapping the bead at the top (make sure that the wire is aligned to one
of the loops at the top & bottom.
Wrap a few times to secure the bead. Trim off any excess wire and press
down neatly with chain nose pliers.
Use the remaining 26g wire to attach the bead bottom, wrap a few
times as you have done with the top.
Page 9
www.diylessons.org
www.diybeadingclub.com
www.handmade-jewelry-club.com
Turn the frame around. Now use the remaining 26g wire, start
wrapping the back side to secure the bead from swiveling.
Bring the wire from behind the round frame up against the bead and
wrap it a few times around the frame and the 26g wire itself. Trim off
excess wire and press down neatly with chain nose pliers.
The bead should rest snugly in the frame.
Front view
Back view …. Neat and tidy as the front (I am a neat freak!!)
Repeat the whole process of Part 4 for the other side.
PART 5: MAKING THE EAR WIRES
Measure and cut 2 pieces of 20g wire, each measuring 2 inches (5cm) in
length.
Form a loop of about 4mm diameter at one end of the wire with your
round nose pliers.
Page 10
www.diylessons.org
www.diybeadingclub.com
www.handmade-jewelry-club.com
I’ve used a jump ring maker as a mandrel to form the U shape for the
ear wire.
Bend the wire about 1cm from the top of the loop around the jump ring
maker. Mark and cut 3cm from the top of the bend.
Repeat with the other ear wire.
File the wire ends to smoothen.
The completed ear wires, ready to be attached to the bead
components.
Open slightly the loop with the chain nose pliers.
Page 11
www.diylessons.org
www.diybeadingclub.com
www.handmade-jewelry-club.com
Attach the bead component to the ear wire and close it.
Repeat with the other bead component.
Congratulations! You’ve made a pair of earrings all by yourself.
You can use some creativity and imagination on how to create some
other variations of designs by attaching beads to make it sparkly or
leave it simple by attaching a jump ring and a chain to convert it into a
pendant.
Another variation, using a larger oval bead. You can attach some
smaller beads to embellish the outer loops to make it sparkly.
If you have any query or feedback for the tutorial, please
contact me at [email protected].
Please do not distribute, lend or copy.
Do not mass produce.
Copyrights 2012 XQDesigns
Page 12
www.diylessons.org
www.diybeadingclub.com
www.handmade-jewelry-club.com
Visit DIY Beading Club HERE and explore our
tutorials and membership packages!
Page 13
www.diylessons.org
www.diybeadingclub.com
www.handmade-jewelry-club.com


© Copyright 2026