
A l e g
2012
Allegro
Owner’s Manual
Tiffin Motorhomes, Inc.
105 2nd Street NW
Red Bay, AL 35582 U.S.A.
Phone: (256) 356-8661
E-Mail: [email protected]
[20110831]
A L L E G R O
O W N E R ’ S
M A N U A L
3
Volume
TIFFIN MOTORHOMES, INC.
105 2nd Street NW Ø Red Bay, Alabama 35582 U.S.A.
Allegro
Owner’s Manual
A L L E G R O
O W N E R ’ S
M A N U A L
TIFFIN MOTORHOMES, INC.
Allegro Owner’s Manual
© Tiffin Motorhomes, Inc.
105 2nd Street NW, Red Bay, AL 35582 U.S.A.
Telephone 256.356.8661 • Facsimile 256.356.8219
E-Mail: [email protected]
DISCLAIMER
Many of the features and appliances described in this manual may or may not be reflected in the
actual motor home purchased, depending on the options and models selected by the motor-home
owner. All items, materials, instructions, and guidance described in this manual are as accurate
as possible at the time of printing. However, because of Tiffin Motorhomes’ ongoing and
dedicated commitment to excellence, improvement of Tiffin’s motor homes is a continuing
process.
Consequently, Tiffin Motorhomes reserves the right to make substitutions and
improvements in its makes and models of motor homes without prior notification. Substitutions
of comparable or better materials, finishes, appliances, instrumentation, and instruction may be
made at any time it is deemed prudent to provide the customer with the best possible motor
home meeting the customer’s requirements.
Copyright © 2011 by Tiffin Motorhomes, Inc. -- all rights reserved
Printed in the United States of America: First U.S. Printing: August, 2011
[20110831]
A L L E G R O
O W N E R ’ S
M A N U A L
Table of Contents
Chapter 1
General Information
Delivery
1-2
Dealer Responsibilities
1-2
Customer Responsibilities
1-2
Tiffin Motorhomes Limited Warranty
1-3
Major Equipment Manufacturers
1-3
Warranty Service
1-4
Owner’s Information Package
1-5
Customer Relations
1-5
Specification Labels
1-5
Weighing Procedures for the Allegro
1-7
Weight Distribution of the Motor Home
1-7
Fire Safety
2-8
Fire Extinguisher
2-8
Smoke Detector
2-9
Emergency Exit Window
2-9
Parking Procedures
2-10
Towing Hitch
2-10
Chapter 3
Heating & Air Conditioning
Chapter 2
Driving & Safety Instructions
Furnace
3-2
Air-Conditioning System
3-3
Thermostatic Controls
3-4
Liquid Propane (LP) Tank
3-4
LP Tank Filling Practices
3-5
LP Gas Regulator
3-6
Carbon Monoxide/LP Gas Detector
3-6
Safety Considerations
2-2
General Warning
2-2
Prior to Departure
2-3
Driving
2-4
Major Appliances & Accessories
Fuels for the Motor Home
2-5
Refrigerator
4-2
Liquid Propane (LP) Gas System
2-6
Microwave/Convection Oven
4-3
LP Gas Regulator
2-7
Air Filtration Fan
4-4
LP Distribution System
2-7
Oven and (Optional) Cook-Top
4-4
TELEVISION SYSTEM OPERATION
4-5
Chapter 4
Recommended Precautionary Practices 2-8
ii
A L L E G R O
O W N E R ’ S
M A N U A L
Television Antenna
4-5
Battery Inspection and Care
7-3
Tri-Pod Hookup
4-6
Battery Disconnect Panel
7-5
Television Sat. Dish Control (Optional)
4-6
120-Volt AC (VAC) Receptacles
7-5
Television Sets
4-7
12-Volt DC (VDC) Receptacles
7-6
DVD Player (Optional)
4-7
Ground-Fault-Circuit Interrupt (GFCI)
7-6
AM/FM Stereo System
4-7
Converter
7-7
Cable & Telephone Jack
4-8
Electrical Generator
7-7
Water Heater
4-8
Automatic Transfer Switch
7-8
Water Heater Storage
4-10
Resettable Circuit Breakers
7-8
Pressure-Relief Valve
4-10
Fuse Blocks
7-8
Seven-Pin Towing Connector
7-9
CB Radio System Antenna Connection 4-10
Triple Vision Camera Monitor System
4-11
Carbon Monoxide Detector
4-13
Chapter 8
Slide-Out Features
Chapter 5
Cabinets & Furniture
SLIDE-OUT OVERVIEW
8-2
General Considerations
8-2
Cabinets
5-2
Operating Precautions
8-3
Furniture
5-3
Extending the Slide-Out Room
8-3
Bedroom Area
5-4
Retracting the Slide-Out Room
8-3
Manual Operation: Slide-Out Room
8-4
Chapter 6
Chapter 9
Structural Features
Chassis Features
6-2
Alignment
6-2
Exterior Features
Chapter 7
Electrical Features
General Information
7-2
Circuit-Breaker Boxes
7-2
Auxiliary Start Switch
7-3
iii
Towing Hitch
9-2
Exterior Sides
9-2
Security Lights
9-2
Roof & Ladder
9-2
Leveling System (Hydraulic)
9-3
Electric Steps
9-5
Mirrors
9-6
A L L E G R O
O W N E R ’ S
M A N U A L
Chapter 10
Chapter 12
Interior Features
Windows, Awnings, Vents &
Doors
Bedspread
10-2
Flooring
10-2
Windows
12-2
Ceiling
10-2
Awnings (Optional)
12-2
Window Treatments (Optional)
10-3
Vents
12-5
Doors
12-5
Chapter 11
Chapter 13
Plumbing & Bath Features
Routine Maintenance
FRESH WATER SYSTEM
11-2
Monitor Panel
11-2
EXTERIOR CARE
13-2
Kitchen Sink
11-2
Washing
13-2
Bath, Sink, Shower & Accessories
11-2
Seals
13-3
Water Pump
11-3
Proper Sealants for Application
13-4
City Water Connection
11-3
Striping and Decals
13-4
Filling the Fresh-Water Tank
11-4
Roof Care and Maintenance
13-5
Sanitizing
11-5
Moisture Management
13-5
Water Heater Bypass System
11-6
Tire and Tire Safety Information
13-10
Freshwater Lines
11-6
Tire Pressure
13-23
WASTE WATER SYSTEMS
11-7
INTERIOR CARE
13-27
General Information
11-7
Carpet
13-27
Toilet
11-7
Fabrics
13-28
P-Traps
11-7
Walls and Ceiling
13-28
Black-Water Holding Tank
11-8
Dashboard
13-29
Gray-Water Holding Tank
11-8
Woodwork and Floors
13-29
Wastewater Disposal
11-8
Countertops
13-29
Sewer Connection and Camping
11-9
Accessories
13-30
No-Fuss Flush
11-10
Detectors
13-30
Exterior Shower
11-10
Condensation
13-31
ROUTINE MAINTENANCE SCHEDULES 13-31
iv
Monthly
13-32
Every Three Months
13-32
Every Six Months
13-32
A L L E G R O
O W N E R ’ S
Annually
13-33
Winterizing
13-33
De-Winterizing
13-36
Chapter 14
Maintenance & Data Charts
Motor Home Owner’s Data Sheet
14-2
Motor Home Maintenance Record
14-3
Motor Home Maintenance Record
14-4
Motor Home Maintenance Record
14-5
Motor Home Maintenance Record
14-6
Motor Home Maintenance Record
14-7
Motor Home Maintenance Record
14-8
v
M A N U A L
G E N E R A L
I N F O R M A T I O N
Chapter
1
GENERAL INFORMATION
1-1
G E N E R A L
I N F O R M A T I O N
Tiffin Motorhomes: “Wherever you go…we go”
Delivery
Throughout the entire manufacturing process your Tiffin motor home has been regularly inspected by our
qualified personnel to assure you of the finest product of the highest quality, without exception. However,
the final inspection at our factory is not to be the last one. The pre-delivery inspection and system check that
your dealer performs are the final inspections done to your particular motor home prior to your actually
receiving your new Allegro motor home. Your dealer is also available to assist you in understanding the
warranties and completing the necessary forms to activate the warranties for the various appliances and
accessories installed in your motor home.
Dealer Responsibilities
1. A pre-delivery inspection and systems check is performed to assure a thorough inspection of the
motor home and to assure the proper operation of all factory-installed components.
2. A customer walk-through is performed to familiarize the new customer with the motor home, its
systems and components, and their proper and safe operation.
3. Delivery of the Owner’s Information Package which contains warranty cards and registrations for
the vehicle and all factory-installed components from other vendors and suppliers to Tiffin
Motorhomes. The detailed operation instructions and maintenance instructions on these components
are also included in this package.
4. Assisting the customer in completing the registration forms to avoid loss of warranty coverage. The
dealer should review the limited-warranty provisions with the customer to stress the importance of
completing the warranty cards and registration forms for the components in the motor home to enable
the manufacturers to receive them within the prescribed time limits.
5. Providing the customer with information regarding warranty and non-warranty work on the
vehicle and its separately warranted components.
Customer Responsibilities
The customer is responsible for regular and proper maintenance of the motor home. Properly maintaining
your motor home will prevent conditions arising from neglect that are not covered by your Tiffin Motorhomes
limited warranty. The maintenance guidelines in this manual and any other, applicable manual(s) should be
followed. It is your responsibility and obligation to return the vehicle to an authorized dealer for repairs and
service.
To assist you in avoiding problems with your motor home, it is recommended that you do the following:
1-2
G E N E R A L
I N F O R M A T I O N
1.
Read the warranty. Go over it thoroughly with your dealer to make sure you understand all
the terms and conditions of the warranty.
2.
Inspect the motor home; do not accept delivery until after you have gone through the motor
home with the authorized Tiffin Motorhomes dealer. Ask questions about anything unfamiliar
to you.
3.
Please ask questions about anything you don’t fully understand about your Allegro; Tiffin
Motorhomes is here to serve you and assure that you have all the information necessary for
your safe and enjoyable use of your new motor home.
4.
When you are taking delivery, set an appointment for adjustments. This appointment
should be within two weeks after you accept delivery.
5.
You are responsible for and expected to use your Allegro in a responsible, safe manner.
Please take the time to familiarize yourself with the proper operation of the motor home and all
its features before you attempt to use your motor home.
Tiffin Motorhomes Limited Warranty
The Tiffin Motorhomes limited warranty was provided to you by your authorized Tiffin Motorhomes
dealer during the pre-delivery inspection. When you inquire about your Tiffin Motorhomes warranty,
please refer to this document.
Should you need or desire an additional copy or other information, please contact:
Tiffin Motorhomes, Incorporated
105 2nd Street NW
Red Bay, AL 35582 U.S.A.
Telephone: (256) 356-8661; Facsimile: (256) 356-8219
E-Mail: [email protected]
Tiffin Motorhomes will be pleased to send you an additional copy or any other information requested, as may
be warranted.
Major Equipment Manufacturers
The following list is a compilation of the vendors and suppliers of the major subsystems and components of
your Allegro. This list is provided for your convenience and is not meant as a complete substitution of the
literature and accompanying “how to contact us” information supplied by those vendors and suppliers in your
Owner’s Information Package [see below for particulars]. Where appropriate, web-site information is provided
for computer users.
1-3
G E N E R A L
•
Atwood Mobile Products
I N F O R M A T I O N
(800) 646-8557
www.atwoodmobile.com
o LP Gas Water Heater (815) 877-5700
www.atwoodmobile.com
•
Denso Corporation
(248) 350-7500
www.globaldenso.com
•
The Dometic Corporation
(574) 294-2511
www.dometic.com
•
Flexsteel Industries
(319) 556-7730
www.flexsteel.com
•
Kwikee
(541) 942-3888
www.kwikee.com
•
Norcold, Inc.
(800) 543-1219
www.norcold.com
•
Onan Corporation
(612) 574-5944
www.onanindiana.com
•
Panasonic Corporation
(800) 211-7262
www.panasonic.com
•
Power Gear
(800) 334-4712
www.powergear.com
•
RV Products (Coleman A/C)
(316) 832-3400
www.airxcel.com
•
Saf-T-Alert (CO/LP Alarm)
(800) 383-0269
www.safetalert.com
•
Sharp Corporation
(800) 237-4277
www.sharp-usa.com
•
Suburban Manufacturing Co.
(423) 775-2131
www.suburbanmanufacturing.com
For those wishing more information (e.g., locations of authorized subsidiaries), the following web site,
www.rvamerica.com/data/s_alist.htm, should be helpful. This site provides complete, alphabetic listings of
all suppliers and vendors for all contemporary recreational vehicles and motor homes.
Warranty Service
If any warranty service may be required, that service needs to be completed during the warranty period (basic
warranty: 12 months or 12,000 miles). Tiffin Motorhomes provides a limited warranty on its unitized
construction for 10 years and its laminations for 5 years. Any service work performed after the expiration of
the Tiffin Motorhomes warranties WILL NOT be covered by those warranties. Exceptions may be made, on
an individual basis, to this deadline on account of the unavailability of parts and/or service appointment time
where work is to be performed. However, don’t rely on the possibility of an exception; please schedule any
desired in-warranty work before your warranty expires.
1-4
G E N E R A L
I N F O R M A T I O N
Owner’s Information Package
The Owner’s Information Package (Figure 1-2) includes valuable documents about your Allegro and its
components and systems. By consulting the booklets and instruction
manuals included in the Owner’s Information Package, you will learn how
to operate, maintain, and troubleshoot these items safely and effectively.
The Tiffin Motorhomes Allegro Owner’s Guide does not cover every
possible detail of equipment—standard and/or optional—installed on or in
your vehicle.
As with all valuable docuentation, please keep them in a safe, secure place
for your later use and consultation. Please complete the warranty
registration form and return to Tiffin Motorhomes, Inc. within five
Figure 1-2. Owner’s Information Package
working days. A stamped copy will be returned to your for your
records. Again, please keep this document in a safe, secure place for your later use and consultation.
Customer Relations
If you wish to schedule maintenance or service or wish to order parts, you should notify your local authorized
Tiffin Motorhomes Dealership to set up an appointment. If you are unsure of the location of your nearest,
authorized Tiffin Motorhomes Dealership; please access the Tiffin Motorhomes website at
www.tiffinmotorhomes.com and then click on the “Dealer Locater” button, then enter in the appropriate
search criteria such as zip code and search radius or dealer name and state, then click on “Find Locations”—the
dealer’s name, address, and telephone number will then be displayed for your use.
Specification Labels
There are two main numbers used to identify your Allegro. The Vehicle Identification Number (VIN) is the
legal identification of the completed vehicle. The VIN is the
number used by the state for vehicle identification and registration.
Additionally, there is a Tiffin serial number (Figure 1-3). The
Tiffin number is needed when you plan to make an appointment
for service or order parts through your Tiffin Motorhomes
Dealership or Service Center. This number can be found on the
side of the dashboard. A typical sample of this identification label
Figure 1-3. Tiffin Serial Number
is shown on the right.
Another label affixed to your Allegro is the Recreational Vehicle Industrial Association (RVIA) Weight Label
(Figure 1-4) which is a required label for your vehicle. Tiffin Motorhomes, a manufacturer-member of RVIA,
has the obligation to disclose the following information, at minimum, to the purchaser of the motor home:
1-5
G E N E R A L
I N F O R M A T I O N
•
An indication of the contents of the RVIA affixed to the
motor home.
•
A concise explanation of the following items:
o Vehicle Weight (VW) distribution
o Proper weighing techniques to be used to weigh the
vehicle.
o Specific definitions for the following terminology:
Gross Vehicle-Weight Rating (GVWR) – This is
the maximum permissible weight of the motor home
when it is fully loaded.
Unloaded Vehicle Weight (UVW) – This is the
weight of the motor home, as built at the factory, with
Figure 1-4.
full fuel, engine oil, and coolants. The UVW does not
include cargo, fresh water, LP gas, or any dealer-installed accessories.
RVIA Weight Label
Cargo-Carrying Capacity (CCC) – This is the maximum weight of all occupants
including the driver, personal belongings, food, fresh water, waste water, LP gas, tools, tongue
weight of towed vehicle [if any], dealer-installed accessories, and the like. The CCC is equal to
or less than the GVWR minus the UVW.
Gross Combination-Weight Rating (GCWR) – This is the value specified by the chassis
manufacturer as the maximum allowable loaded weight of the motor home with a towed trailer
and/or vehicle [if any].
Sleeping-Capacity Weight Rating (SCWR) – This is the maximum weight capacity of
the combined number of persons (i.e., number of people multiplied by 154 pounds per person)
permitted to sleep within the vehicle.
Gross Axle-Weight Rating (GAWR) – This is the maximum allowable weight for an axle;
the GAWR considers the weakest link in the tire, wheel, brakes, hubs, axle, springs, and
attaching parts. To illustrate, if the axle is rated at 15,000 pounds and the tires are rated at 3,200
pounds each as a dual installation; then the maximum GAWR would be 12,800 pounds for a
four-tire vehicle
•
Towing Guidelines – Specific weighing instructions and guidelines are furnished in the Owner’s
Manual (see below and also in Chapter 2).
1-6
G E N E R A L
I N F O R M A T I O N
Weighing Procedures for the Allegro
To weigh the motor home properly, the motor home should be level when the weighing process is performed.
Your Allegro motor home has been designed and built in compliance with the recommended limits of the
major-component/system suppliers to provide a realistic CCC. It is up to the final user to provide even
distribution of the loads brought into the motor home to prevent uneven loading. Once the vehicle is loaded, it
can be taken to any drive-on scales or individual-wheel scales to determine that the final weight is within
specified limits for the motor home. The procedure which can be used is as follows:
First, drive the motor home onto the scales so that all wheels are on the scales; this provides the gross vehicle
weight (GVW) of the vehicle and can be recorded as such. The GVW should not exceed the GVWR specified
for the vehicle. Second, drive the motor home so that the front wheels are off the scales and only the rear
wheels remain on the scales; this provides the total weight of the vehicle, save for the front axle. This weight
should not exceed the total rating of the axles remaining on the scales. The front axle weight is determined by
subtracting the weight from the GVW that was obtained in the first step which was performed earlier. The
result should not exceed the listed front-axle weight rating. Chapter 14 contains more specific axle-weight
determinations.
Weight Distribution Throughout the Motor Home
To assure the maximum stability of the motor home under static (i.e., parked) and dynamic (i.e., moving)
conditions, the distribution of the items to be carried and stored within the motor home and in the storage bays
underneath the motor home should be performed in such a manner to strive for reasonably even side-to-side
and front-to-rear dispersion of the weight of the stored items. This process will assure that the motor home is
not “lop-sided” in weight distribution (i.e., all the stored weight on one side and/or mainly towards the front or
the rear)—keeping a center of mass of the motor home essentially centered on a front-to-rear and side-to-side
basis will also provide better control of the motor home when it is in motion.
1-7
D R I V I N G
&
S A F E T Y
I N S T R U C T I O N S
Chapter
2
Driving & Safety Instructions
2-1
D R I V I N G
&
S A F E T Y
I N S T R U C T I O N S
Safety Considerations
Prior to using your motor home, especially for the first time or after a long period of non-use, please read
thoroughly all the instructions in the Owner’s Manual and the chassis-manufacturer’s manual before attempting
to operate your motor home. There are several safety considerations which you should realize and follow while
your Allegro is in motion. These safety considerations, as well as others meant to preclude any damage to the
motor home, are listed in this chapter. Besides the driver, it would be helpful for the passengers to be familiar
with these safety considerations and precautions, too.
Warning
Before your motor home is to be towed, be sure that you have read the entire Owner’s
Manual and that you fully understand the equipment on your motor home and how to
use that equipment safely.
General Warning
Warning
Any portable, fuel-burning equipment (e.g., charcoal, propane, butane, wood) must not
be used inside the motor home. Any use of such equipment inside the motor home
may readily cause fires and/or asphyxiation by carbon-monoxide poisoning. Further,
such unauthorized use would probably invalidate your motor-home insurance policy.
In general, there are several “common-sense” safety precautions that should be taken every time the
motor home is to be used on the road. These precautions include:
•
Only seats with seat belts should be used while the motor home is in motion; those seat belts
should be worn by all people (driver, passengers) in the motor home at that time.
•
While the motor home is moving, lock all seats in the forward-facing position to provide
maximum safety for the users.
•
While the motor home is moving, no one inside should ever stand or kneel on seats (e.g., young
children).
2-2
D R I V I N G
&
S A F E T Y
I N S T R U C T I O N S
•
In the majority of states, it is the law that seat belts must be used (fastened snugly about the chest
and hip areas), anytime the motor home is in motion, to provide desired protection in the event
of a crash.
•
Any fire extinguisher(s) should be inspected on a monthly basis to assure that each extinguisher is
properly charged and ready for operation.
•
Any smoke and/or carbon-monoxide (CO)/liquid propane (LP) alarm(s) should be regularly
inspected and tested. If being used for the first time, the smoke and/or CO/LP gas alarm should
be properly activated and fresh batteries installed before the motor home is placed into service.
Prior to any trip, the smoke and/or CO/LP gas alarm(s) should be manually tested to assure their
correct operation. Immediately replace any defective components (e.g., weak batteries). Never
sleep in a motor home not having functional smoke and/or CO/LP gas alarm(s).
•
While the motor home is moving, the sleeping facilities are not to be used.
•
In the event of an emergency, be sure to be familiar with all escape exits (doors, escape window).
Do not use the emergency window as a routine exit; this is strictly to be used for emergency
purposes only.
Prior to Departure
For your continued safety and convenience, the following is a representative “check list” designed to
assure your safety while driving:
•
Clean all windows, mirrors, and light lenses (front, back, side) to assure that you can “see” and
“be seen.” Reposition any mirrors or other fixtures to provide an unobstructed view (front, sides,
and back) from the driver’s seat.
•
Remove or secure all loose fixtures (e.g., awnings, flags, antennas, portable lights) to keep them
from falling from the motor home when the motor home is in motion.
•
Make a “walk-around” visual inspection of the motor home to note any irregularities (e.g., loose
trim) or problems (e.g., low tires); correct noted problems accordingly.
•
Check all exterior storage-compartment and generator-compartment doors to make sure that they
are properly latched. If need be, check inside all exterior compartments to make sure that all
cargo and equipment are properly secured so that they won’t work loose and become hazards
during sudden starts and stops.
•
Check tires for proper inflation (i.e., cold inflation pressure: 100 psig); if the motor home has not
been used, make sure that the “cold inflation” pressure is maintained. If the motor home has
very recently been used, make sure that the “hot inflation” pressure (see the tire-manufacturer’s
literature to determine appropriate “hot inflation” pressure) is maintained. All tire pressures
should be within 1-2 pounds (psig) of each other.
2-3
D R I V I N G
&
S A F E T Y
I N S T R U C T I O N S
•
Examine wheel lug nuts to assure their proper tightness. If any lug nuts were found to be loose,
first check the fit of the wheel to the hub to make sure that the wheel is not mis-mounted which
would produce a “wobbly” wheel when the motor home is in motion, then tighten the lug nuts.
•
Check all fluid levels (e.g., engine oil, transmission fluid, coolant, power-steering fluid, brake fluid,
battery fluid [if applicable], windshield-washer solvent) to assure correct levels are maintained.
Fill any low reservoirs, as needed.
•
DO NOT SUBSTITUTE any other fluids for specified oils, transmission fluid, brake fluid, or
other hydraulic fluids—in most instances, substitutions are not acceptable and may void
warranties.
•
Prior to starting the motor-home engine, make sure that all lines (e.g., water, sewer) and electricalpower cords are disconnected and properly stowed.
•
Assure that the leveling jacks are in the “travel” position.
•
After entering the motor home, make sure that the electrically-actuated, retractable step has
properly operated to retract the step fully before starting the engine of the motor home.
Driving
Various adjustments need to be made to assure the driver’s comfort and the safety of the motor home before
starting and moving the motor home; these include:
•
The driver should adjust the driver’s seat, the tilt
steering, the exterior rear-view mirrors, and the
instrumentation panel lighting (if nighttime) for the
driver’s comfort and safety.
This is especially
important for first-time use so that the driver may
become accustomed to the “feel” of the motor home
and know where the various adjustments are located
“before the fact”; not after some need arises while the
motor home is in service.
Figure 2-1. Driver’s Instrumentation Panel
•
The driver should be familiar with all gauges,
instruments, switches, and indicators on the instrument panel (Figure 2-1) prior to driving. Should the
driver encounter any “unknowns” on the panel, they should be investigated (via the Owner’s Manual)
prior to departure so that the driver fully understands these items and their functions.
•
One should never adopt a “learn as you go” philosophy, as there are too many controls and switches to
be understood before the motor home is actually used. Please take the time to become thoroughly
familiar with the entire instrument panel prior to using the motor home.
2-4
D R I V I N G
&
S A F E T Y
I N S T R U C T I O N S
•
Do not operate the cruise-control function during any extreme weather situations (e.g., snow, ice, sleet,
heavy rain) or when road conditions are hazardous (icy, snowy, winding roads, city traffic) or when a
constant speed of the motor home is not possible or if traffic conditions don’t warrant such.
•
Avoid driving the motor home through any standing water. If deep enough, such water can wet the
brake pads and cause fading of the brakes (i.e., loss of braking power) and lead to excessive sliding or
pulling to one side or another. If one has driven through standing water, at the first opportunity safely
to do so, check the braking action. If braking has degraded, lightly apply the brakes to allow the brake
pads to dry—don’t use the motor home when the braking function is significantly reduced.
•
Know the limits of operation of the motor home. Don’t try to achieve excessive speeds, climb overly
steep hills, traverse overly long grades, attempt to use the motor home as an “off-the-road” (OTR)
motor home, rapidly switch lanes, or rapidly accelerate or decelerate the motor home. When in doubt
about the handling characteristics of the motor home, consult your chassis manual for information.
•
The solar or blackout shade is operated by a switch located on the driver’s console. Depress the switch
to lower or raise the shade. The switch will be labeled “VISOR.” The time delay switch must be held a
few seconds before it is activated. CAUTION: DO NOT over extend either shade as this may block
the view of the road.
Fuels for the Motor home
Warning
Liquid Propane (LP) gas containers (Figure 2-2),
gasoline, or other flammable liquids are not to
be placed or stored inside the motor home
because a fire or explosion may occur. LP gas
containers are equipped with safety valves that
may relieve excess pressure by discharging gas
into the atmosphere—any containment of that
Figure 2-2. Liquid Propane Tank
vented LP gas constitutes an explosive hazard.
Your motor home is designed to have several types of petroleum-derived fuels used in
the routine operation of the motor home—these require prudent and safe handling to
assure safety of the motor home and its occupants; namely:
•
Anytime the motor fuel (i.e., gasoline, see Figure 2-3) or the LP tank is to be
filled, the motor home engine is to be turned off, all pilot lights must be
extinguished, and appliances turned off. Further, during any filling operation or
Figure 2-3. Fuel Tank
Fill Door
2-5
D R I V I N G
&
S A F E T Y
I N S T R U C T I O N S
connecting/disconnecting of any LP tanks, a NO SMOKING policy should always be observed. In a
similar manner, any other comparable devices of the motor home users (e.g., butane camp-lights,
propane lights and grills) should be treated in a similar manner to assure the safety of all concerned.
•
NEVER use an open flame to test for LP gas leaks or to examine the fluid levels in the fuel tanks.
•
After filling any LP system, immediately replace and secure all protective covers and caps.
•
After closing the LP valve, close and securely latch the LP door to prevent unintentional access or
damage.
•
NEVER connect natural gas to the LP gas system—LP gas and natural gas are not interchangeable.
•
NEVER use any other “burning” equipment (e.g., charcoal grills, wood stoves, butane lights, propane
lights inside the motor home—doing so may cause fires and/or asphyxiation.
Liquid Propane (LP) Gas System
A warning label is conspicuously located near the LP gas container (Figure 2-4); that label reads:
Warning
DO NOT FILL the LP Container(s) to more than 80% of capacity.
Any overfilling of the LP gas container(s) can result in uncontrolled gas flow—a prime condition for a fire or
explosion. The LP container should only be filled to 80% of its capacity; the remainder of the cylinder space is
an air space to contain expansion of that liquid when subjected to varying ambient-temperature conditions.
Filling in excess of 80% of the liquid volume of the container reduces that air space and, thus, creates a
condition for possible over-pressurization of the container.
All LP appliances in your motor home have been approved for use in motor homes by a nationally recognized
testing laboratory (i.e., UL and CSA certified). When properly used, LP gas is a clean-burning fuel which can be
dependably used. In actuality, the LP container contains liquid propane under high pressure. The liquid, when
it passes through the tank valve to a lower pressure,
vaporizes into a gas, and then passes through a regulator
used to maintain a constant pressure. This gas, then, is the
actual fuel distributed through the LP-gas manifold system
to the LP-based appliances used in your motor home.
LP-appliance lighting problems are typically caused by an
improperly adjusted gas regulator. NEVER attempt to
adjust or reset the gas regulator yourself, as an authorized
service technician is needed to make these adjustments. As
a good preventive-maintenance activity, the regulator should
2-6
Figure 2-4. Liquid Propane Tank
D R I V I N G
&
S A F E T Y
I N S T R U C T I O N S
be checked annually by a service technician and also before every extended trip.
Even though the LP-gas system is leak-checked and verified at the factory at the time of manufacture, normal
usage (travel vibrations, etc.) could loosen the fittings. Consequently, it is wise to check the gas fittings
periodically for leak tightness. One can daub some leak-detector solution (e.g., a “liquid-soap”-like solution) on
all the fittings, connections, and junctures when the system is under pressure. Should there be any leaks, small
bubbles will appear at any leak sites.
Generally, loose fittings can be tightened to stop the leaks. If this process doesn’t work, then one must shut off
the main gas valve at the LP cylinder(s) and immediately consult an authorized service technician to determine
what repairs are necessary. Leaks may also be detected by noting a sulfurous odor (i.e., rotten eggs). DO NOT
search for a leak by using a match or open flame.
Warning
When the motor home is not in use, be sure to close the main LP gas valve at the tank.
When the LP gas tank is to be refilled, close the main valve to preclude the chance of
pilot lights possibly igniting fumes from the LP fuel. As some LP-gas appliances (e.g.,
refrigerator, furnace, water heater) have Direct Spark Ignition (DSI) systems, it is very
important that these appliances be turned off when the LP gas is off. The DSI boards
will continue to work (i.e., emit an ignition spark) even when there is no LP gas
available.
LP Gas Regulator
The LP gas regulator is the most critical element of the LP-gas distribution system. The regulator converts the
high-pressure LP gas from the tank into a reduced-pressure LP-gas supply suitable for use in the various
appliances in the motor home. One should regularly inspect visually the regulator system. If any damage or
corrosion is noted, contact an authorized service technician to inspect and repair or replace the regulator. Do
not attempt to adjust the regulator yourself; the regulator has been pre-set at the factory. Only a qualified LP
service technician using specialized equipment should adjust the regulator.
LP Distribution System
The primary LP distribution system in the motor home is a pipe manifold running the length of the motor
home. The secondary distribution lines running from this main distribution system are usually copper tubing
with flare fittings. If any of the gas lines break, do not attempt to splice them—always run new lines to
maintain the safety of the motor home. It is strongly recommended that only qualified service technicians
perform this work. Remember, the main valve at the LP gas tank must be closed whenever any gas appliance is
to be installed, removed, or serviced—this process prevents LP gas leakage which could result in a possible
2-7
D R I V I N G
&
S A F E T Y
I N S T R U C T I O N S
harmful explosion. If the odor of LP gas is ever detected, immediately discontinue use of any gas appliances
and seek the services of a qualified service technician.
Recommended Precautionary Practices
The following practices are recommended to assure continued safety and reliability of the LP gas system; these
are, of course, representative; not necessarily exhaustive. In all cases, use common sense in the use of the LP
system.
•
Visually inspect the LP fill valve before any refueling operation to look for foreign materials or debris;
remove, as necessary, to assure a leak-tight connection.
•
Prior to any re-fueling operation of the LP gas system, shut off all the pilot lights.
•
NEVER, under any circumstances, check for LP gas leaks with any type of open flame; doing so would
probably cause an explosion and subsequent fire.
•
Periodically inspect visually the entire LP gas distribution system; do so at least annually and before any
major trips. Should problems be noted, seek the services of a qualified service technician to make
necessary repairs and perform any maintenance.
Warning
The LP gas distribution system in your motor home is designed for liquefied petroleum
(LP) gas ONLY. DO NOT attempt to connect and use any natural-gas or butane-gas
systems with this LP gas system.
Fire Safety
As with any enclosed system containing the three required conditions for fire (i.e., combustible materials,
oxygen, ignition sources), there will exist the possibility of fire. Tiffin Motorhomes has taken every precaution
and design practice to minimize or negate this possibility, but the final determination rests with the owner and
user of the motor home. Accordingly, it is in the best interests of the owners, users, and their guests to be
aware of basic fire-safety practices and procedures and those particular features that Tiffin Motorhomes has
provided for fire safety.
Fire Extinguisher
The Allegro is equipped with a fire extinguisher (located on the wall next to the entrance door) rated for both
Class B (i.e., grease, gasoline, diesel fuel, flammable liquids) and Class C (i.e., electrical) services—these are
typically the most likely types of fires to be expected in motor homes. Read and understand the accompanying
2-8
D R I V I N G
&
S A F E T Y
I N S T R U C T I O N S
owner’s manual on that extinguisher (found in your Owner’s Information Package) and remember the location
of the extinguisher. In an emergency, you won’t have the time or presence of mind to do so then.
These types of fire extinguishers (Figure 2-5) are pressurized, mechanical devices and require that appropriate
care be used in their safe storage and use. The owner’s manual will provide necessary
guidance for the proper storage, handling, and use of the extinguishers. Prudent preventive
maintenance suggests monthly inspection of any fire extinguisher to assure that it is
sufficiently pressurized (i.e., the needle on the gauge is in the “normal” zone) and that the
mechanical components are not blocked in any way.
Figure 2-5. Fire
Extinguisher
Do not test a fire extinguisher by partially discharging the unit—this will cause a loss of
pressure and may lodge some fire-retardant materials in the valve mechanism and cause the
extinguisher to continue to vent slowly down to zero pressure. Rather, if an extinguisher is
ever partially used; continue its use until the unit is completely discharged then have the fire
extinguisher fully recharged at an appropriate service center (one can call any fire
department for information on having an extinguisher recharged in that particular locality).
DO NOT wait a long time to recharge an empty fire extinguisher; you’ll never know when
it may be needed.
Should a fire occur inside or around the motor home, evacuate the motor home quickly and calmly—do not
panic. In the event of heavy smoke or extensive flames, keep low (crawl if you must) and make your way to the
nearest exit (door, emergency window) and leave. If the fire involves a fuel source (e.g., diesel fuel, LP gas);
consider the probability of an explosion and move sufficiently far away to minimize personal harm. If such is
available, immediately place a call to the local fire department (or ask someone nearby to do so) to report the
fire. Consider the cause and the consequences of the fire and the risks associated with possibly fighting the fire
yourself before trying to extinguish it—DO NOT expose yourself or others to unnecessary danger.
Smoke Detector
The Allegro motor home is equipped with a battery-operated smoke detector (Figure 2-6) located on the ceiling
in the living area of the motor home (left-hand side of picture). Read and become familiar
with the operation and periodic testing of this detector. The smoke detector should be
tested on a weekly basis, before each trip, and after any period of storage of the motor
home. If a low-battery condition is noted or the alarm “chirps” to indicate a low-battery
condition, immediately replace the battery. It would be prudent to keep replacement
batteries in the motor home for any in-transit replacements so that the smoke-alarm
capability is never compromised. DO NOT disable the smoke detector for any transient,
2-6. Smoke
false alarm (e.g., cooking smoke, dusty furnace, tobacco smoke); rather, ventilate the FigureDetector
motor home with fresh air and the alarm will reset.
Emergency Exit Window
In the rear of the motor home, there is an emergency exit window (Figure 2-7)
in the bedroom—this window is designed for an emergency exit when it is not
practical to exit by the door [also an emergency exit] in the front of the motor
Figure 2-7. Emergency Exit
Window
2-9
D R I V I N G
&
S A F E T Y
I N S T R U C T I O N S
home. This window is readily noticeable by its red handle and the red “EXIT” label on that window. To use
this window as an emergency exit, lift the handle and push outward on the window. As required, the window
can be closed by pulling the window inwards and then lowering the handle to latch the window back in place.
When the motor home is to be parked, it would be wise to note where this window will be so that this exit
won’t be blocked (e.g., against a tree, pole, or wall).
Parking Procedures
To park the motor home in any unfamiliar terrain, examine the prospective site for surface irregularities, slopes
or inclines, and other discontinuities (i.e., stumps, rocks, external connections for power/water/sewage) and
also examine the area immediately above the proposed parking site for obstructions (e.g., tree branches and
limbs, signs, overhead wiring). If the motor home is to be backed into the proposed parking site, strive to have
that site be on the driver’s left-hand side, as this will allow the driver to watch the rear of the motor home.
Back up slowly and use the side mirrors and, if installed, the optional back-up camera as a guide or, better yet,
have another person outside provide supplemental guidance to help park the motor home.
When the motor home is finally situated, shift the transmission into “park,” then set the emergency brake, and
then turn “off” the engine. If installed, activate the optional, leveling-jack system (see Chapter 9 for more
detail) to level and stabilize the motor home.
If the motor home is to be powered externally, connect the 120 VAC power to the motor home. Turn “on”
the LP gas valve at the LP tank. Connect the fresh-water supply and sanitize the water systems (see Chapter
11), as needed. Connect the waste drain hose to the external sewer hook-up. Start the refrigerator, water
heater, and furnace; as warranted. Light the oven pilot light, as needed. Certain appliances, such as the
refrigerator, will not work properly, if the motor home is not level; so be sure to complete the motor homeleveling process before activating any of the appliances.
Towing Hitch
The Allegro is fully capable of towing typical motor vehicles; the motor home is equipped with a 5,000-pound
towing hitch (Figure 2-8) and associated seven-pin wiring connector. The
motor home is capable of towing light loads and instructions for such are
found in the chassis-manufacturer’s literature in the Owner’s Information
Package provided with the Allegro.
The total weight of the motor home and any vehicle towed by that motor
home must not exceed the Gross Combined Weight Rating (GCWR).
When the motor home is being weighed, remember to account for
passengers and their locations in the motor home. Any vehicles to be
Figure 2-8. Towing Hitch
towed by the motor home should have adequate active braking. The
wiring connector provided is a standard seven-pin connector (see Chapter 7, p. 7-9 for more detail).
2-10
H E A T I N G
&
A I R
C O N D I T I O N I N G
Chapter
3
Heating & Air Conditioning
3-1
H E A T I N G
&
A I R
C O N D I T I O N I N G
Furnace
Warning
Never attempt to modify the furnace. To do so may cause fire, explosion, carbon-
monoxide poisoning, or asphyxiation. If the furnace is malfunctioning, immediately
shut the unit “off” and call a trained service technician to make necessary repairs as
soon as possible.
The Allegro motor home is equipped with a forced-air furnace fueled by LP gas. The furnace is
controlled by the wall-mounted thermostat (Figure 3-1) located inside the motor home—this thermostat
controls both the heating and air conditioning for the motor home.
In the heating mode, the furnace heats air which, in turn, is circulated through
ductwork in the floor of the motor home. If any obstruction(s) block the floor
vent(s) or air-return register, then the furnace will not function properly.
Therefore, any items stored under the cabinets should be carefully stowed to
prevent damaging or crushing the furnace ducting or blocking the warm-air
return.
Figure 3-1. Thermostat
When a furnace is being used for the first time, there may be an initial “burn-off” of manufacturing
compounds or residues left on the heating exchanger or in the ductwork which could produce odors,
fumes, and possibly some smoke. This occurrence is normal and should not cause concern, unless it
persists for an excessive amount of time.
To minimize the after-effects of this “burn-off” process, the initial use of the furnace should be done
with all the doors and windows open to permit normal air circulation to dissipate these odors and fumes.
For routine operation of the furnace, set the thermostat to the desired temperature setting and then turn
“on” the thermostat; in about a minute, the furnace should begin to operate and warm or hot air should
be coming through the ductwork.
To shut down the furnace, turn the thermostat to the “off” position. Even though the thermostat may
be turned “off,” the furnace system will continue to run for about a minute or so to permit a gradual
cool-down of the heating system which is normal.
On a regular basis, thoroughly clean the complete furnace and air-tube passageways to remove dust, lint,
and any other possible obstructions. Leak-test the entire LP gas system at least annually. Also check and
clean the air-blower system annually.
Any access hatches to the furnace are for authorized service personnel only, as there are no userserviceable parts on the furnace. Accordingly, do not attempt to tamper with the interior of the furnace.
3-2
H E A T I N G
&
A I R
C O N D I T I O N I N G
Warning
Be cautious when washing the exterior of the motor home; water should never be
sprayed directly into the furnace vent. Should any water be forced beyond the rain
baffles into the furnace vent, the furnace may rust which, in turn, may cause improper
combustion and produce unwanted by-products of combustion.
Before the beginning of each travel season, the furnace should be thoroughly cleaned and inspected. Any
obstructions, debris, or lint which may obstruct free air flow or impede the operation of the aircirculation system should be removed. For example, accumulated dust or lint could possibly obstruct the
orifices for the pilot light or may accumulate on the blower blades and unbalance the operation of the
blower. Additionally, any debris in the ductwork, when heated by the furnace, could emit unpleasant
odors or possibly become a fire hazard.
Consequently, the furnace system (including ductwork) should be periodically cleaned; annually is
recommended unless the motor home is subjected to dust levels significantly greater than average; in
which case more frequent cleaning is recommended. The Owner’s Information Package provides
recommended cleaning tips and procedures; when needed, a more thorough cleaning should be
performed by a qualified service technician.
Air Conditioning System
It is designed for 120 VAC power supplied either from the external power cord or from the generator.
Any unnecessary heat loading (e.g., exposure to direct sunlight for long periods of time; transmittance of
sunlight through the windows) will work the air conditioning system harder and may compromise the
desired results. Accordingly, if the air conditioning system is to be used, park the motor home in a shady
location whenever possible and close drapes on those windows exposed to direct sunlight. Additionally,
any heat-producing sources (e.g., oven, unnecessary lights) within the motor home will work against the
air conditioning system; so strive to minimize their use.
The air conditioning system is the major consumption device of electrical power in the motor home.
When this system is being used in an RV park, cumulative use of these air-conditioning systems by the
resident vehicles can create a bigger demand for electrical power than is actually available. Accordingly, at
times a “brown-out” condition may arise—this is when the AC voltage normally available drops to a
lesser value (e.g., 10-20% below normal or more).
“Brown-out” conditions cause appliances to draw greater currents to make up for the reduced voltage;
thereby causing circuit breakers to trip or fuses to blow. Under such conditions, your own motor home
is not at fault; simply reset your breakers and/or replace your fuses. Should such conditions continue,
one may wish to turn reduce the electrical load (in this case, turn “off” the air conditioning system for
awhile) or start the electrical generator.
3-3
H E A T I N G
&
A I R
C O N D I T I O N I N G
To cool the motor home, the thermostat inside the Allegro is used—this is the same thermostat which
controls the furnace functions (described earlier). The air-conditioned, cooled air is emitted through the
vents which are located in the roof throughout the
entire coach. The discharge and return air vents run
parallel, front to back, on the ceiling. Note that the
return vents are different from the air conditioning
vents. The supply vents (Figure 3-2) can be closed
off to enhance air flow in various zones of the
motor home. This system allows even distribution
for the returns instead of forcing an excess
Figure 3-2. Supply Vent
Figure 3-3. Round Vent/Filter
amount of return air through two smaller
openings. The even return system takes more of the hot air from the motor home, thereby providing
cooler air throughout the unit. The air conditioning vents that are mounted on the ceiling are round vent
filters (Figure 3-3) that need to be periodically checked for dust accumulation. When dust has
accumulated on the filters, remove them and wash in a mild detergent and warm water.
Thermostatic Controls
The following is a brief overview of how best to use the thermostat (Figure 3-4). For more detailed
instructions, please consult the thermostat literature in the Owner’s Information Package.
1. Use the “System” switch to select either air-conditioning (“cool”) or
heating (“furnace”).
2. Select the desired temperature by adjusting the slide switch to the proper
temperature setting (e.g., 72 F) on the right-hand side of the thermostat.
3. Use the “Fan” switch to select either the “on” (i.e., the fan will run
continuously whether the AC/heating function is running or not)
Figure 3-4. Thermostat
or the “auto” (i.e., the fan will run as long as the AC/heating
function is operating; it will then turn “off” when the AC/heating function stops when the
desired temperature set point is reached).
4. Choose the desired fan speed by selecting either “hi” or “lo”; this will determine the relative air
flow of the cooling and/or heating function.
NOTE: If the electrical system is turned “off” or the thermostat loses power (i.e., power failure), the airconditioning or heating system will resume operation at the last settings programmed into it when
electrical power is again restored.
Liquid Propane (LP) Tank
The Allegro is equipped with an ASME (American Society
of Mechanical Engineers)-approved LP tank (Figure 3-5)
which is equipped with an automatic pressure regulator.
This tank contains liquid petroleum fuel under high
pressure. As this fuel passes through the main valve and
through the regulator, it is converted into a gas and its
pressure is reduced to a safe level for use within the motor
Figure 3-5. Liquid Propane Tank
3-4
H E A T I N G
&
A I R
C O N D I T I O N I N G
home.
A LP gas-distribution system distributes the gas to those appliances using such in the motor home. The
“heart” of this LP gas distribution system is the regulator and that regulator should only be adjusted by a
qualified service technician. Most of the problems encountered in lighting the pilots of these appliances
are caused by regulator mis-adjustments.
The major component of the LP gas supply is a manifold pipe which runs lengthwise underneath the
motor home floor. From this manifold, the various gas appliances are connected by copper tubing with
flared fittings so that connections and dis-connections can readily be made, as needed.
Should any of the secondary tubing develop a leak, either on the tubing proper or at the fittings, do not
attempt to splice any of these lines. Instead, have a qualified service technician run a new length of
tubing to the appliance of concern and then have that line leak-tested before placing it in normal
operation.
To remove, repair, or replace any gas-operated appliance; always close the main gas valve at the LP
tank—this measure will provide an additional element of safety to prevent gas leakage and possible,
subsequent explosion hazards.
However, if a gas leak is noted or suspected, turn “off” the main valve and keep the LP gas system “off”
until that system is inspected by a qualified service technician as soon as possible. Do not delay in
addressing any possible gas leaks with appropriate service because of the inherent hazards to safety.
Warning
When the motor home is not being used, the main LP gas valve must be turned “off.”
Also, turn “off” the main valve when the LP gas tank is to be refueled to avoid the
possibility of ignition fuel fumes by the pilot lights. All gas valves on the gas-operated
appliances with Direct Spark Ignition (DSI) should also be in the “off” position during
refueling and/or maintenance operations. DO NOT store LP, diesel, propane, butane,
or other flammable liquids inside the vehicle as these represent a very real fire hazard
and possible threat to life.
LP Tank Filling Practices
Any LP gas tank associated with the motor home should never be filled to more than 80% of total
capacity; filling should always be done only when the motor home is leveled. If the motor home is not
level, the tank may be overfilled (i.e., more than 80% of capacity) and, thus, subject the motor home to
possible fire or explosion from resultant uncontrolled gas flows.
3-5
H E A T I N G
&
A I R
C O N D I T I O N I N G
LP Gas Regulator
As noted earlier, the LP gas regulator is the “heart” of the LP gas distribution system. This regulator
reduces and controls the pressure of the gas on the outlet end to provide a constant supply of gas at a
constant pressure to the gas-operated appliances. The regulator has a vent to relieve excess pressure on
the inlet side of the regulator, should excess pressure develop in the gas tank and connecting gas line to
that regulator inlet. The vent would normally release the excess LP gas to the atmosphere until the overpressurization condition is eliminated.
This vent should be regularly checked to assure that it is not clogged or obstructed. If that vent is
blocked from normal operation, component or system failures may result. If periodic visual inspection
indicates any sign of corrosion or degradation, contact a qualified service technician to repair the
regulator as soon as possible; DO NOT operate the LP gas system with any faulty component in place.
Occasionally, the inherent moisture in the LP gas can cause a freeze-up of the regulator when the gas
passes through the regulator. The regulator reduces the high pressure of the gas on its inlet side to a
reduced pressure on its outlet side by permitting a controlled expansion of the gas through the
regulator—this gas expansion necessarily cools the gas (by means of the Joule-Thompson effect) and, if
cooled enough, may cause any moisture content to freeze.
To minimize or negate this possibility, always keep the main valve to the LP gas tank closed when the
system is not in use. When the LP tank is empty, keep the main valve closed until re-filling is to be
performed—this process will keep any moisture-laden air from back-flowing into the gas system and
trapping unwanted moisture in the LP gas tank. If an empty LP gas tank has been exposed to the
atmosphere for an extended time, let a qualified service technician purge the tank before its next filling
operation.
Important
When a LP gas regulator is installed or re-installed, the regulator must always be
installed with the gas diaphragm vent facing downwards. For more information,
consult the manufacturer’s literature in your Owner’s Information Package that came
with the motor home.
Carbon Monoxide/LP Gas Detector
Warning
Liquid propane (LP) is extremely flammable and, when contained, explosive when
mixed with air. Consequently, never check for leaks in LP gas lines or appliances with
3-6
H E A T I N G
&
A I R
C O N D I T I O N I N G
an open flame or sparking devices. Do not use any ammoniated or chlorinated
household-type detergents for “bubble testing” possible leak sites—these detergents
may generate fissures or cracks on the metal tubing (e.g., copper) and flared fittings
(e.g., brass). Have your LP gas system leaks repaired ONLY by a qualified service
technician; do not attempt these yourself. Keep the main valve to the LP gas tank
closed and all appliances turned “off” when the motor home is stored. If any of the
valves do not close “leak-tight” by hand, have those valves examined and repaired by a
qualified service technician. DO NOT, under any circumstances, attempt to use a faulty
LP gas system and/or appliances as such represents a safety hazard.
Since LP (i.e., liquid propane) gas is more dense than air, the LP gas will naturally settle to the lowest
point in an enclosed space—in the motor home, this would be the floor.
Because of this fact, the CO/LP gas detector (Figure 3-6) is necessarily
mounted close to the floor. To activate the LP-gas sensor on this detector
for the first time, remove the sensor activation strip, if such was not
performed during the pre-delivery inspection. Please check the CO/LP
gas detector to verify that the detector was properly activated and is ready
to provide the necessary protection. If in doubt, please contact any
qualified service technician for more detailed assistance.
Figure 3-6. CO/LP Gas Detector
If the alarm persists in re-arming and giving further alarms; ventilate the motor home (by opening doors
and windows) and then check for possible LP gas leaks. If the leak cannot be readily found, then close
the main valve to the LP tank and turn “off” all gas appliances and then take the motor home to a
qualified service technician after the ventilation process is concluded and the doors and windows again
shut.
3-7
M A J O R
A P P L I A N C E S
&
A C C E S S S O R I E S
Chapter
4
Major Appliances & Accessories
4-1
M A J O R
A P P L I A N C E S
&
A C C E S S O R I E S
Refrigerator
The Allegro motor home will contain a refrigerator manufactured by The Dometic Corporation.
When the refrigerator is in the “LP gas” mode, make sure that the main LP gas valve is in the “on” position
before attempting to start the refrigerator. Please note that the refrigerator is equipped with a semi-automatic
energy selector (AES) control system which can set automatically to switch between a 120-volt AC system or a
LP-gas operation system.
Warning
The majority of LP gas appliances used in motor homes normally vent to the outside of
the motor home. When your motor home may be parked in close proximity to a fuel
pump (i.e., during re-fueling operations), it is possible that the fuel fumes could enter
this type of appliance and possibly be ignited by the burner flame thereby causing a fire
or explosion. Accordingly, please use extreme caution when re-fueling the motor
home.
A 12-volt power supply (e.g., 12 VDC system of the motor home, auxiliary battery, or converter) is
required for proper operation of the electronic control panel; the 12 VDC power supply must be “on” for
the refrigerator to operate correctly. For electrical operation of the refrigerator, either the external
electrical power line must be connected to the motor home or the on-board electrical generator must be
running to provide the necessary 120-volt AC power. To operate the refrigerator in the LP-gas mode, the
main LP gas valve must be “open.”
Dometic Refrigerator
To start the Dometic refrigerator, press the main power “on/off” button [left-hand side of panel, (Figure
4-1) to the “down” position.
Then press the “temperature
selector” button [right-hand
side of the panel] until the
desired
setting
is
Figure 4-1. Dometic Refrigerator Control Panel
illuminated (i.e., one has
selected one of the indicator lamps, each being numbered “1” through
“5,” where “1” represents “cold” and “5” represents “coldest”).
For automatic mode operation, press the “AES/Auto/Gas” mode
selector [to the right of the “on/off” switch] to turn “on” the
“AES/Auto” lamp [just above that switch]. If 120 VAC is available, the
AC mode indicator lamp will illuminate to indicate that the 120 VAC is
Figure 4-2. Dometic Refrigerator
4-2
M A J O R
A P P L I A N C E S
&
A C C E S S O R I E S
being used. If 120 VAC is not available, the Gas indicator lamp will illuminate indicating that the control
has automatically switched to the “Gas” mode.
If the Check indicator lamp [center of panel] illuminates and the “Gas” mode indicator lamp is “off,” the
controls have failed to ignite the burner in the “Gas” mode. “Gas” operation may be reset by pressing
the main power “on/off” button first to the “off” position and then back to the “on” position. Finally,
press the “temperature selector” button to select the desired temperature level in the refrigerator.
For operation in the LP Gas mode, press the “AES/Auto/Gas” mode selector button to turn “off” the
“AES/Auto” lamp. The “Gas” mode indicator lamp will then illuminate to indicate that the refrigerator
is now being powered by LP gas. Within 45 seconds the burner should be ignited and the unit operating
normally. However, on the initial start-up of the refrigerator, it may take longer than 45 seconds to allow
trapped air to be purged from the LP gas line.
If the gas doesn’t ignite within 45 seconds, the CHECK indicator lamp will illuminate and the “Gas”
mode indicator lamp will go out. To reset when the CHECK indicator lamp is illuminated, press the
main power “on/off” button first to turn “off” the refrigerator, then again to turn “on” the refrigerator
again. NOTE: If successful operation isn’t realized after one or two additional tries, do not continue
attempting to use the “Gas” mode.
Finally, press the “temperature selector” button to choose the desired level of coldness in the refrigerator.
After initial start-up, the thermostatic control should be moved from the “coldest” setting to the desired
temperature range (usually “3”—the mid-point on the scale).
To turn the refrigerator “off,” press the main power “on/off” button to the “off” (i.e., UP) position—
this will shut off all DC power to the refrigerator including the interior light.
Microwave/Convection Oven
The Allegro contains either a microwave oven (Figure 4-2) or an optional convection oven. All
microwave ovens operate on 120-volt AC electrical power,
supplied either by the external electrical hookup or by the
onboard electrical generator in the motor home.
Figure 4-2. Microwave/Convection Range
Between the power source(s) and the microwave oven may be
a surge protector to protect the unit from electrical transients
and power surges. Touch-pad controls on the microwave oven
are used for operating the oven (i.e., cooking temperature,
mode, power level, and cooking time). For basic operating
instructions on the proper use of the microwave or convection
oven, please consult the specific manual in the Owner’s
Information Package.
4-3
M A J O R
A P P L I A N C E S
&
A C C E S S O R I E S
Air-Filtration Fan
In the Allegro, the “exhaust” or air-filtration fan is built into the microwave and its function is to filter
the air and exhaust to the outside. This range hood is equipped with a multi-speed fan and a light for
convenient use. The hood should be used whenever any cooking is performed to filter any airborne
cooking residues and heated air.
Additionally, the range hood can be used for supplemental filtration of other odors and gases including
tobacco smoke, candle fumes, and related vapors. The range hood contains filters which can be removed
and cleaned or replaced to assure sustained normal operation. Consult the particular owner’s manual
contained in the Owner’s Information Package.
Oven and (Optional) Cook Top
The Allegro is equipped with a standard oven with a three-burner range or it may have an optional, threeburner, recessed cook top (Figures 4-3,4). The oven may have a piezoelectric ignition source, rather than
a pilot light, to start the oven. If the oven doesn’t have a piezoelectric ignition source, light the oven by
pushing inward on the oven control knob and rotating it counterclockwise (CCW) to the “pilot on” position, then light the oven pilot
light located at the back left-hand side of the oven burner—this may
take a few seconds until the air in that line is purged and replaced with
the LP gas.
Do not attempt to adjust the oven pilot light as it has been factoryadjusted and factory-set. To extinguish the oven pilot light when use
of the oven is concluded, push inwards on the oven control knob and
turn that knob clockwise (CW) to the “off” position.
Figure 4-3. Three-Burner Recessed
Cook Top
To operate either the three-burner range or the optional, three-burner,
recessed cook top; light the burners by turning “on” the gas control
knob, wait a couple of seconds, then push the red DSI (direct-spark
ignition) button until a flame appears.
If the burner does not start after a few attempts, discontinue the
process, let the released gas dissipate, then try the process again. The
burner knobs operate in a CCW manner and must be gently pushed
inwards as they are being turned. Never use the cook top when the
motor home is in motion.
Figure 4-4. Top View of ThreeBurner Recessed Cook Top
As a safety feature, the following label will be noted in the cooking area:
4-4
M A J O R
A P P L I A N C E S
&
A C C E S S O R I E S
Warning
DO NOT USE cooking appliances as a heating source for the motor home. Cooking
appliances require fresh air for safe operation. Before using any cooking appliance,
make sure that an overhead vent or window is open and/or turn “on” an exhaust fan.
Remember that any LP gas-operated appliance in the motor home will be consuming oxygen in the
motor home. If the motor home is totally closed during such operation, the oxygen level may be reduced
(and the associated carbon monoxide level may be increased) thereby causing possible harm or death to
the occupants through asphyxiation.
Always use these appliances with proper ventilation. Never leave these appliances operating unattended for any
length of time.
DANGER – Notice -- DANGER
IF YOU SMELL GAS, YOU SHOULD IMMEDIATELY:
Extinguish any open flames, pilot lights, and all smoking materials. Do not touch or
operate any electrical appliances or switches. Immediately shut off the gas supply at
the main tank valve or supply connection. Open doors, windows, and other ventilation
openings. Exit the RV to allow entrapped LP gas to dissipate. Have the LP gas system
checked to locate and fix the source(s) of the leakage.
It is wise to have a qualified service technician periodically check the entire LP-gas distribution system in the
motor home. Scheduling such an inspection annually would be a recommended, preventive-maintenance
routine for each motor home owner.
TELEVISION SYSTEM OPERATION
Television Antenna
You can automatically search for channels that are active in your area by editing and scanning channels on your
remote control. To do this you will need to:
4-5
M A J O R
A P P L I A N C E S
•
Press the power button to turn the television ON
•
Select English, press “OK”
•
Select home use, press “OK”
•
Select Cable or Antenna, press “OK”
•
Select Start, press “OK”
•
Auto programming will begin
•
When scanning is complete, press “OK”
&
A C C E S S O R I E S
If you do not receive the desired channels, re-direct the Antenna with Control located in the upper cabinet in
front of the passenger seat. After re-directing the antenna, you must rescan channels.
Tri-Pod Hookup
The tri-pod hookup will use a high isolation A/B Top Push-Button Switch (Figure 4-5) which will allow the
user to switch between two input sources. The “A” switch will allow the user to
operate the optional coach satellite and the “B” switch will allow operation of an
external, portable satellite dish (this dish is not included with the motor home).
The A/B switcher box is located in the bottom shelf in the passenger overhead
cabinet. This switch will eliminate the need to manually change the coax cables
from the tri-pod hookup and the main satellite connection.
Figure 4-5. A/B Switcher Box for TriPod Hookup
Television Satellite Dish Control (Optional)
The RV may be equipped with a TV Satellite Dish control system (Figure 4-6) to permit access to satellite
television. If your motor home is equipped with an optional satellite dish it is
capable of receiving High Definition (HD) satellite signal from Dish Network.
However, you must subscribe to HD service and install a HD receiver. Factory
installed satellite dishes must have a HD receiver in order to obtain a clear
picture. Your satellite dish will not receive High Definition programming from
Direct TV; however, it is capable of receiving standard definition programming
from Direct TV’s Satellite 101.
Figure 4-6. Dome Satellite
Follow the directions in the Owner’s Manual for this dish-control mechanism
to obtain the best orientation of the satellite dish for desired television reception. Remember, that any
additional movement of the motor home after the satellite dish control has been set may possibly cause
degradation or loss of satellite-television reception. In this case, please re-adjust the satellite dish to re-align that
dish for optimal television reception.
4-6
M A J O R
A P P L I A N C E S
&
A C C E S S O R I E S
Television Set(s)
The television set(s) (Figure 4-7) furnished with the motor home are cable-ready. The television(s) are
powered by 120-volt AC electricity; therefore, the motor home must either be plugged into an external source
of AC power or using the on-board power from the generator.
If your motor home is equipped with an optional satellite dish it is
capable of receiving High Definition (HD) satellite signal from Dish
Network. However, you must subscribe to HD service and install a
HD receiver. Factory installed satellite dishes must have a HD
receiver in order to obtain a clear picture. Your satellite dish will not
receive High Definition programming from Direct TV; however, it is
capable of receiving standard definition programming from Direct
TV’s Satellite 101.
Figure 4-7. Television Set
Detailed operation of the television(s) is provided in the accompanying
owners manuals found in the Owner’s Information Package included with the motor home. Generic
operations of the television would include a basic “on/off” switch, volume “up/down” control, channel
“up/down” selector, and menu “up/down” selector—these functions are found both on the television set
itself and on the accompanying remote that comes with the television set.
DVD Player (Optional)
The Allegro motor home may be equipped with an optional DVD player (Figure 4-8) as part of the total
entertainment system. The DVD operation is controlled by
controls both on the DVD proper and the remote furnished with
the DVD. To determine the best use of the capabilities of the
DVD, consult the owner’s manual furnished in the Owner’s
Information Package that came with the motor home. Specialized
functions (e.g., operating all video equipment with one remote)
may require specialized programming of the remote of choice to
provide
ease of operation.
Figure 4-8. DVD Player
AM / FM Stereo System
An AM-FM stereo system (Figure 4-9) with cassette-tape and optional
compact-disc (CD) player may be included in the motor home. This
system is powered by the 12-volt DC system of the motor home and
operates like any conventional car-stereo system.
Figure 4-9. AM / FM Stereo System
4-7
M A J O R
A P P L I A N C E S
&
A C C E S S O R I E S
Cable & Telephone Jack
The Allegro contains an exterior cable jack (Figure 4-10, top) and also a telephone hookup.
This telephone connection permits the owner to access external telephone services (e.g., RV
parks) so that these services are available for use within the motor home proper.
Within the motor home there are several telephone jacks (e.g., living room) for connecting
telephone(s), as desired. Inexpensive telephones can be purchased at any retail electronics
store to provide one with a suitable telephone to have for traveling.
Water Heater
Figure 4-10.
Telephone &
Cable
Connectors
Before the water heater is to be used, first fill the fresh water system and purge the water lines to and from the
water heater by opening all the hot-water faucets until water steadily flows from each one and no “spurting” or
“hissing” sounds are further heard. The water heater holds 6 gallons of water and uses either the LP gas system
or the 120-volt AC electrical system to operate the heater.
Warning
DO NOT APPLY 110 VAC POWER to or LIGHT the water heater until after the water
heater is filled with water and the water lines and heater tank are purged of any trapped
air. Failure to do so will damage the water heater and may cause additional damage to
the motor home.
NOTE: If the Allegro is equipped only with a 4-KW generator and a 30-Ampere service
panel, then the “electrical” side of the water heater will not be operational.
Proper and safe operation of the water heater requires that all safety information provided in the owner’s
manual be read and understood before placing the water heater in service. Take the time to become
familiar with this manual (provided in the Owner’s Information Package).
The water heater is designed for operation either with LP gas or 120-volt AC electricity. Both modes of
operation are now presented.
LP Gas – Electronic Ignition Operation (6-Gallon Models)
1. Turn the remote switch to the “on” position.
2. If the remote-switch light stays “on” longer than 15 seconds, turn the remote switch to the “off”
position and wait 5 minutes.
4-8
M A J O R
A P P L I A N C E S
&
A C C E S S O R I E S
3. Repeat Step One.
4. (For 6-Gallon Models only): For complete shut-down and also before any servicing:
a. Turn the remote switch to the “off” position.
b. Remove the red wire from the left-hand terminal of the ECO switch (ECO to valve).
5. If the water heater fails to operate because of high water temperature, the heater will go into a lockout
condition (indicator light “on”). When the water eventually cools, reset the system by turning the
switch to the “off” position for at least 30 seconds, and then turn the switch back “on.”
6. If a lockout condition persists, contact your authorized dealer.
120-Volt AC Electrical Operation
1. For electrical operation (if the motor-home electrical service is rated greater than 30 Amperes), use the
power switch on the water heater; depending on the particular model, that switch may be located either
at the front or at the rear of the water heater.
2. Completely fill the water heater with water and purge the hot-water lines of any trapped air.
3. Turn the power switch located on the water heater “on.” NOTE: Turning the power “on” to the
water heater without having previously covered the water-heating element with water may burn out the
element and void the warranty.
4. After awhile, check the water heater for proper operation; the water temperature should be
approximately 140°F (60°C).
5. If the manual-reset, high-temperature-limit switch should trip the circuit breaker; reset the switch by
depressing the reset button--use a pencil or other non-metallic object to depress the reset button. If the
high-temperature-limit switch should again trip the circuit breaker, contact an authorized service
technician or an authorized dealer.
6. Both the electrical and gas operations of the water heater may be used simultaneously to reduce
recovery time of heating water up to desired temperature.
For general maintenance of the water heater or specific information about select steps in operating the water
heater, please refer to the owner’s manual for this appliance contained in the Owner’s Information Package.
Warning
DO NOT STORE any combustible or flammable substances near or adjacent to the water
heater. Provide adequate space for ventilation and air circulation.
4-9
M A J O R
A P P L I A N C E S
&
A C C E S S O R I E S
Water Heater Storage
If the motor home is to be stored during the winter months, the water heater should be drained (Figure 4-11)
to prevent damage caused by freezing water contained in the water heater.
To drain the water heater, first turn “off” all electrical power, turn “off” the
LP gas going to the water heater, then turn “off” the water pump. Open
both the hot- and the cold-water faucets to drain the water lines and open
the drain on the water heater to drain the entire system.
When re-activating the water heater after the motor home is taken out of
storage, make sure that the entire water system, including the water heater,
has been filled with water and the lines have been purged of any entrapped
air before relighting the water heater. Failure to do so may allow the waterFigure 4-11.
heating element to be turned “on” before such is immersed in water;
thereby, causing the premature failure of the heating element and voiding the warranty.
Water Heater Drain
Pressure-Relief Valve
The relief valve for over-pressure and over-temperature conditions is located on the exterior of the water
heater. This valve will operate if the water temperature reaches or exceeds 210°F or if the water pressure
reaches or exceeds 150 psig. Since the water system in the motor home is a closed system when all water valves
are shut, the water-heating cycle can raise the temperature (and, consequently, the pressure) of the water in the
water heater; thereby realizing pressure increases approaching 150 psig. Should this pressure be reached, the
pressure-relief valve will begin “weeping,” that is, minor dripping or leakage from that valve until the pressure
drops below 150 psig, at which time the pressure-relief valve will re-seat itself and restrict the water flow. This
is normal operation and should not be a cause for alarm. Do not obstruct or block the pressure-relief valve in
any way, as this would keep the valve from functioning normally and protecting the hot water system.
CB Radio System Antenna Connection (Optional)
The Allegro may be equipped with an antenna and coaxial-cable connection (Figure 4-12) to enable the owner
to install a Citizens Band (CB) radio of choice and operate it conveniently from the
Allegro. The coaxial-cable connection for the radio is found beneath the dashboard
on the driver’s side. Accordingly, with an owner-provided CB radio, that radio can
be used to communicate with other travelers on the road. To use one’s CB system
of choice, simply follow the directions furnished with the CB radio. (Note:
Channel 11 is considered an emergency channel and monitoring this channel may
give one information about road conditions, accidents, and related matters
potentially affecting the travels of the motor-home operator).
Figure 4-12. CB Antenna
Installation
To talk with someone, simply press the “push-to-talk” switch and speak. To listen
to any reply, release the “push-to-talk” switch and listen to the speaker. Remember that communications are
“one-way,” not “two-way” simultaneously—one must talk, then allow some listening time for others to talk.
Consequently, it’s better to make brief transmissions and allow others to comment; rather than making
prolonged speeches and possibly not having anyone answer.
4-10
M A J O R
A P P L I A N C E S
&
A C C E S S O R I E S
Observe the common courtesies (see the owner’s manual for more details) and acceptable speech. Several
states have their Highway Patrols monitor the CB frequencies (check for exact channels for each state of
interest) to learn about highway problems and emergencies. Be aware of these throughout one’s travels, in the
event that they may be needed.
Triple Vision Camera Monitor System
The rear-view monitoring system (Figure 4-13) is provided to aid the driver in backing and parking the motor
home. A camera mounted on the rear of the vehicle feeds a televised view of
the rear of the motor home to the monitor located in the front near the
driver. If the mode switch is in the “manual” mode, the monitor will be “on”
when the ignition switch is turned “on.” If the mode switch is in the
“automatic” mode, the monitor will display the picture from the rearmounted camera only when the transmission is in “reverse” gear. To use this
system effectively, please consult the owner’s manual for this system; this
manual is in the Owner’s Information Package.
Figure 4-13. Triple Vision Camera
Monitor System
Cleaning and General Maintenance:
1. If your Allegro has been parked in direct sunlight resulting in a considerable rise in temperature inside
the motor home, allow the unit to cool off before operating.
2. When the casing becomes soiled, clean it with a soft cloth dampened with a mild detergent solution.
Never use abrasive cleaners or chemical solvents, as they might damage the casing.
Basic Rear View Camera Operation:
1. Depress the POWER switch. The picture appears on the monitor. POWER indicator light up green
To turn off the picture, press it again to release. The monitor become standby condition. POWER
indicator light up red.
2. Adjust the VOLUME control.
3. Adjust the picture contrast and brightness. The DAY/NIGHT selector switch should normally be
kept in the DAY (released) position. When you view the picture at night or in a tunnel, etc., depress the
switch to make the picture less bright (therefore in the NIGHT position). Thus, the picture will be
easy to view even in a dark place.
When you set the gear level to the “R” position with the POWER switch released: The monitor is turned on
and the picture from the camera connected to the CAMERA “A” connector appears irrespective of the
INPUT knob setting.
4-11
M A J O R
A P P L I A N C E S
&
A C C E S S O R I E S
Warning
Note on the power of the monitor: When you press the POWER switch to
release, the monitor becomes standby condition. The power is not turned
off until you set the ignition key to the OFF position.
Do not view TV or video programs while driving.
Warning
About the Liquid Crystal Display (LCD) panel:
Do not press on the LCD panel on the monitor unit as doing so can distort
the picture or cause a malfunction. The picture may become unclear, or the
LCD panel may be damaged.
Clean the LCD panel with a slightly damp soft cloth. DO NOT use solvents
such as benzene, thinner, commercially available cleaners or antistatic
spray.
Warning
If your motor home is parked in a cold or hot place, the picture may not be
immediately clear. The monitor is not damaged. The picture will become
clear after the temperature in your motor home becomes normal.
4-12
M A J O R
A P P L I A N C E S
&
A C C E S S O R I E S
Carbon Monoxide/LP Gas Detector
To protect the driver and other occupants of the motor home, the Allegro is equipped with a carbon
monoxide/LP gas detector (Figure 4-14). Carbon monoxide (CO) is a colorless, odorless, tasteless gas which,
when breathed, bonds to the hemoglobin in the red blood cells and, thus, drastically reduces or blocks the
transfer of oxygen from the lungs to the rest of the body. In sufficient concentrations, CO kills by
asphyxiation. In lesser amounts, CO makes the victim groggy, lethargic, and
unable to think clearly or quickly.
CO is one of the products of combustion for many materials including
petroleum-based products (e.g., gasoline, diesel fuel, propane, butane; among
others). Since many of the appliances and the engines associated with the
motor home produce CO in their normal operations, it is necessary to assure
Figure 4-14. Carbon
Monoxide/LP Gas Detector
that CO levels do not rise to dangerous levels within the motor home. In
sufficiently high concentrations, CO can kill in minutes.
The most susceptible people to CO poisoning are unborn babies, small children, pregnant women, senior
citizens, and people with cardiovascular or respiratory problems. Consequently, it is prudent to check the CO
monitor regularly for normal operation and to remain aware of the symptoms of CO poisoning which include
dizziness, nausea, vomiting, muscular twitching, throbbing in the temples, incoherent thinking and speech,
weakness, sleepiness, and intense headaches.
Warning
Carbon monoxide gas—derived from products of combustion of diesel fuel, LP gas, and
other petroleum-based products—is a deadly gas which can kill motor-home
occupants, if allowed to accumulate in sufficient concentration. Assure that all engine
operations are not restricted—tailpipes and exhaust ports should not be blocked or
restricted in any way. Additionally, any accumulation of exhaust gases outside or
underneath the vehicle should be avoided as such may enter the motor home through
windows or vents—be careful how and where the motor home is parked to avoid such
conditions. Regularly monitor outside conditions to assure that all exhaust gases can
readily be dissipated and not enter the motor home inadvertently.
4-13
M A J O R
A P P L I A N C E S
&
A C C E S S O R I E S
Warning
Never sleep in a motor home when the engine is running—engine exhaust fumes could
enter the motor home and cause disability or death. Regularly check the exhaust
system to note any leakage sites and, if found, discontinue use of the motor home until
they are repaired by a competent, qualified service technician. Do not attempt repairs
on the exhaust system yourself and do not modify (temporarily or permanently) the
exhaust system at all.
Should any of these symptoms be experienced in the motor home, one should IMMEDIATELY evacuate the
motor home and seek medical help. Shut down the motor home and do not attempt to operate it again until
the source(s) of the CO are located and fixed.
In the event of an alarm, the following steps should be taken quickly:
1. If the alarm signal sounds (4 beeps and flashing or solid red light), operate the Test/Mute button.
2. Immediately move to a source of fresh air, either outdoors or by an open door or window. Do a “head
count” to make sure that all people (and pets!) within the motor home have moved to a source of fresh
air, too. Do not reenter the motor home or move away from the source(s) of fresh air until the
emergency responders have arrived, the motor-home interior is sufficiently aired out, and the alarm has
reverted to its normal monitoring function (i.e., no alarms).
3. Call the local emergency services (i.e., 911 in most locales) to summon help -- don’t go back into the
motor home to make this call, but use a cell phone, if available, or have someone else nearby make this
call.
4. Should the CO Detector Alarm again activate within a 24-hour period, repeat Steps 1 through 3 and
also call a qualified service technician to investigate the possible sources of CO (e.g., fuel-burning
equipment and appliances) to locate, identify, and fix such.
4-14
C A B I N E T S
&
F U R N I T U R E
Chapter
5
Cabinets & Furniture
5-1
C A B I N E T S
&
F U R N I T U R E
Cabinets
Your Allegro contains cabinetry (Figure 5-1) installed throughout the entire motor home from the driver’s area,
through the kitchen/dining areas, and back into the bedroom. The cabinetry
has been designed and built to provide ample storage space, to be easily
accessible, and to be conveniently located to support the areas of concern.
Construction of these cabinets incorporates various materials, cabinet doors,
and supports. Door pulls, handles, and knobs are installed in a style
complementing the particular décor of each Allegro so that an aestheticallypleasing, as well as fully functional, storage capacity is realized.
For the many floor plans available in the Allegro product line, cabinet design
Figure 5-1. Cabinetry in the Allegro
has been optimized to provide maximal storage for each and every floor plan
available. Accordingly, the Allegro can readily accommodate the routine materials, supplies, and customerspecific items desired for any travel requirements. Further, these cabinets are designed to contain stored
supplies quite securely during travel to minimize or eliminate the possibility of shifting or spilling of cabinet
contents during travel. Yet, when the motor home is parked, all stored items are readily available in the cabinets
for the convenience of the users.
As the storage requirements will vary somewhat from one floor plan to another, general observations can be
made about the Tiffin-supplied cabinetry which may or may not be applicable for your specific Allegro
configuration.
Cabinets are provided in the kitchen/dining area to accommodate the routine cooking utensils and groceries
normally desired for travel. Storage space within these cabinets
(Figure 5-2) has been so designed to accommodate the typical sizes
and configurations of food supplies (e.g., cereal boxes, condiments,
canned goods, bottled liquids) normally taken on travel trips.
Figure 5-2. Storage Cabinetry
Based on Tiffin Motorhomes’
extensive experience with travel
requirements of the seasoned motorhome users and from Tiffin
Motorhomes’ own research and
development
in
cabinet-design
requirements, the resultant cabinets
offer the greatest storage capacity
possible.
In the bathroom (Figure 5-3) and bedroom, additional cabinets are available for
storage of sundries and toiletries specific to these areas.
Figure 5-3. Bathroom
Cabinets
In the kitchen, a color-coordinated countertop (Figure 5-4) is provided on top of
the floor-mounted cabinets. To maintain the appearance of the countertop, clean with a damp cloth. If
spotting occurs, clean the countertop with a damp cloth and a mild liquid soap. Should some dried-on residue
5-2
C A B I N E T S
&
F U R N I T U R E
still persist, let a damp cloth moistened with the liquid cleaner stand directly on top of that residue for 15-30
minutes to loosen the residue, then clean that spot accordingly. Please note
that strong chemicals, solvents, and cleaners (e.g., oven cleaner) may damage
the surface; so do not use any products not specifically designed for
countertop cleaning.
The countertop may be physically damaged, too, if proper care is not taken.
Do not cut anything (e.g., vegetables, fruits) directly on the countertop;
rather, use a cutting board on top of the countertop to provide necessary
protection to the countertop. Excessive heat may also damage the
Figure 5-4. Kitchen Sink Countertop
countertop; therefore, any pots or pans taken directly from the range or
oven should not be placed directly on the countertop; rather, use trivets or some other form of fireproof heat
insulators to hold very hot pots or pans on the countertop.
All drawers are equipped with metal slides to provide additional load-bearing strength for the drawers and to
permit effortless opening and closing of those drawers, even when they are fully loaded. These metal guides
have a slight “locking” action, when closed. To open those drawers, slightly lift up on the drawer handle and
then pull the drawer open. To close, push the drawer closed until it “clicks” back into place (i.e., the locking
action is engaged).
Any commercial furniture polish or cleaner can be used to clean and polish the cabinetry. Do not try to soak
these wooden surfaces with any water or any other liquid; be sure to wipe up spills or residues of any fluids that
contact these surfaces to preclude any staining or discoloration of the cabinet surfaces.
Furniture
Kitchen, Dining, & Living Room Areas
On all the various floor plans of the Allegro, a built-in dinette booth (Figure 5-5) is standard. This dinette
provides additional storage under the seat area of the booth, in addition to providing additional sleeping
facilities (Figure 5-6).
1. Remove seat back cushions.
2. Slide seat bottoms back.
3. Fold the table leg upwards, while slightly lifting the table,
allow the table to swing down and rest between the two
booth seats; thus, forming the bed (Figure 5-7).
4. Reinstall the seat back cushions and back rests to make up
the mattress for the bed.
Figure 5-5. Dinette Booth
The living room contains a standard sofa (Figure 5-7) which converts into a bed, as required. It may be one of
two styles—either a jack knife bed or an optional air coil hide-a-bed sofa sleeper. The optional air coil hide-abed sofa sleeper includes an air pump. It operates by depressing the black latch and unfolding the bed. The sofa
5-3
C A B I N E T S
&
F U R N I T U R E
is custom coordinated with the décor of the motor home. To convert the sofa into a bed, follow these
directions:
1. Remove the accent pillows.
2. Under a seat cushion locate the “black tab” and slide the tab
to the left or the right and then pull upwards on the seat
portion of the sofa—this will cause the sofa seat to open,
extend,
and
convert into a
bed.
There may also be a swivel Figure 5-6. Dinette Converted into Bed
rocker with adjustable headrest (or barrel chair on some models),
also coordinated with the décor of the motor home.
The driver’s seat is
manually
operated
and has swivel
features. When the
motor home is parked, the driver’s seat can be swiveled to face
into the living room. To swivel this chair, first extend the slide-out
room (see Chapter 8 for additional detail). Then move the chair
backwards as far as possible to gain clearance from the steering
wheel. Now the chair can be swiveled without interference. The
control switch for the driver’s chair is located on the left-hand side in
front of the power base controls.
Figure 5-7. Sofa Bed
Figure 5-8. Optional Air Coil Hide-ABed
In a comparable manner, the passenger’s seat is also a manually operated seat having essentially the same
controls as that of the driver’s seat and it is operated accordingly.
Bedroom Area
If a décor-coordinated, quilted bedspread with accessorized pillow shams and accent pillow(s) are included with
the bedroom suite (Figure 5-9), it is recommended that the
bedspread be dry-cleaned only to preserve the quality and
integrity of the bedspread for the longest time possible.
Treatment of the bedspread with any of the stain-resistant
sprays (e.g., Scotchgard or its equivalent) will also make the
bedspread more resistant to the possibilities of stains and
fabric damage. If maintained properly, the bedroom softgoods accessories will provide years of dependable service and
maintain the desired décor established by the motor-home
owner.
Figure 5-9. Bedroom Decor
5-4
C A B I N E T S
&
5-5
F U R N I T U R E
S T R U C T U R A L
F E A T U R E S
Chapter
6
Structural Features
6-1
S T R U C T U R A L
F E A T U R E S
Chassis Features
The chassis (Figure 6-1) of your Tiffin Motorhomes Allegro was built and is warranted by Workhorse or Ford,
the chassis manufacturers. The operating instructions for that chassis
are included in the Chassis Owner’s Manual which is provided with
your Allegro and is a part of the Owner’s Information Package
furnished to you by your Tiffin Motorhomes Dealership.
Before you begin using your Allegro, please read and follow all
recommendations for the proper care, operation, and maintenance of
the chassis—this will assure you of pleasant, trouble-free use of the
Figure 6-1. Workhorse Chassis
motor home. Should you have any questions about the chassis,
however, you should contact your chassis manufacturer as noted earlier.
TYPICAL FEATURES OF CHASSIS ITEMS PROVIDED BY THE CHASSIS MANUFACTURER
Large 75- gallon gas tank, combined with better fuel efficiency, for less-frequent fill-ups.
Four-wheel, anti-lock, disc brakes providing dependable, quick stopping under almost all conditions.
Gas-charged shock absorbers on all four wheels.
Dual exhausts to help the high-performance engine “exhale” faster for greater efficiency.
Electrical wiring is routed inside the frame members for greater safety and reliability.
Four-speed transmission with overdrive and electronic-controlled shift points for smooth shifting, excellent
performance, and fuel economy. Auxiliary cooler to dissipate more heat.
Steering damper.
Horizontal-mount radiator with either dual, side-by-side cooling fans (GVWR weights 17,000 pounds and
higher) or one large, cooling fan (GVWR weights 15,000 and lower).
One of the largest, most powerful RV engines ever built.
“Comfortilt” feature permits adjusting the angle of the steering wheel for greatest comfort.
Alignment
The Allegro motor home you have purchased has been aligned at the factory prior to shipment to you. During
the first 10,000 miles of operation of your Allegro, the chassis will have a tendency to “settle” and readjust itself
in response to the loading of your vehicle.
Although it normally is not necessary to realign the Allegro before the first 10,000 miles of use; it is,
nonetheless, recommended that you have the Allegro alignment checked after the first loading of the vehicle.
However, if you feel that you have noted some discrepancy or anomaly in steering operation, please contact
your chassis manufacturer or call Tiffin Customer Service at (256) 356-0261 to address your concerns.
6-2
E L E C T R I C A L
F E A T U R E S
Chapter
7
Electrical Features
7-1
E L E C T R I C A L
F E A T U R E S
General Information
There are two electrical systems in your Allegro motor home—these are the 12-volt DC (VDC) system and the
120-volt AC (VAC) system. Most standard appliances require the 120-VAC system, while the majority of the
lighting systems used in the Allegro use the 12-VDC system. The electrical power for the 12 VDC system is
supplied by the batteries of the Allegro; those batteries are, in turn, charged by a power converter.
The electrical power for the 120 VAC is supplied either by the power cord when the Allegro is connected to an
external power source or when the on-board electrical generator is in operation.
Caution
Failure to turn off the 120 VAC appliances when starting or stopping the generator may
damage the transfer switch and/or electrical appliances.
To connect the Allegro to an external source of 120 VAC electrical power, it is first recommended that all of
the circuit breakers are in the “off” position—this is done to prevent any power surge upon connecting the
motor home to the external power source. Then unwind the power cord from the electrical compartment
located in the compartment behind the driver’s-side rear tires. The flexible, power cord supplied with the
Allegro is designed to handle up to either 30 or 50 amperes, depending on the configuration ordered.
Make sure that the pins in the male end of the plug are oriented correctly so that they match the power cable,
and that they are in good condition (i.e., aren’t bent or damaged). If there is a circuit breaker switch at the
“plug” end of the power cord, that breaker should be turned “off” before making the connection. Insert the
plug into the mating outlet and then turn the circuit breaker “on.” Close and lock the electrical compartment
door to protect the contents and to keep them clean and dry. Close the cover on the power box, if so
equipped, to avoid an unintentional disconnection and to keep the contents clean and dry. Then switch the
main breaker to the “on” position. When properly connected, the 120 VAC system provides power to all the
120 VAC circuits and outlets when the main breaker is turned “on.”
Circuit-Breaker Boxes
For the Allegro, the 120 VAC and 12 VDC breaker boxes (Figure 7-1) are typically located beneath the
refrigerator or in the bedroom [if inside the vehicle] or in the storage box
[if outside the vehicle]. The circuit breakers and associated fuses are
installed to protect the electrical system of the Allegro from any
overloads. Do not attempt to change the electrical circuitry or to add
appliances yourself.
Figure 7-1. Circuit Breaker Box
Please consult an authorized Tiffin Motorhomes Dealership or
Tiffin Motorhomes, Incorporated in Red Bay, AL to determine
7-2
E L E C T R I C A L
F E A T U R E S
whether any changes you desire are appropriate and acceptable. Tiffin Motorhomes’ qualified staff of
electricians can readily determine whether any changes sought (e.g., CB radio, amateur radio, satellite television
receiver, personal computer system, and the like) are possible or not and can advise you on how best to realize
these enhancements.
Please note that the 12 VDC fuses and breakers are located in a separate compartment adjoining the 120 VAC
breakers. Fusing is provided for the following 12 VDC circuits: All interior/decorative/overhead lighting,
water heater, TV switching box, slideouts, power roof vents, monitor panel, and 12 VDC disconnect panel.
Auxiliary Start Switch
The auxiliary start switch (Figure 7-2) is located on the driver’s-side console box. This switch briefly connects
the Allegro coach batteries to the chassis batteries—this allows the chassis batteries to
“borrow” power from the coach batteries to assist in starting the engine. If the chassis
batteries cannot themselves start the engine in the “normal” mode, hold down the batteryboost switch and retry starting the engine.
Figure 7-2. Aux.
Start Switch
(Center Switch)
By using the battery-boost switch while trying to start the Allegro engine, a jump-start
situation is realized between the coach and chassis batteries. If the battery-boost switch is
required to start the engine on a regular basis, ask your Tiffin Motorhomes Dealership to
check the chassis batteries and the associated charging system.
Battery Inspection and Care
As the batteries contain a significant amount of electrical energy, they must be handled with due diligence and
care. Some of the routine precautions include:
Warning
Remove rings, metal watchbands, and any other metal jewelry before working around
batteries.
If any metallic object (tool, jewelry, etc.) contacts the positive battery
terminal or any connection made to that terminal AND also contacts the negative
terminal or any of its connections, a SEVERE ELECTRICAL SHORT will occur which could
result in an explosion, fire, and/or personal injury. Lead-acid batteries contain diluted
sulfuric acid which can be dangerous; avoid direct contact with any battery fluids. Wear
eye protection.
7-3
E L E C T R I C A L
F E A T U R E S
Caution
Disconnect the 120 VAC electrical power cord and the negative terminal from the coach
batteries BEFORE working on the Allegro electrical system.
Caution
If the Allegro ever requires any welding operations on the frame, first disconnect the
chassis batteries. Failure to do so will destroy all of the chassis computer system.
The motor-home batteries which constitute the 12 VDC system are contained inside the motor-home entrance
step well (Figure 7-3, top). To access these batteries, open the access
panel (figure 7-3, bottom) on these steps. When access to the batteries is
no longer needed, close and securely fasten the access cover to place
these steps back in service.
When batteries are not used for extended periods of time, they will
gradually lose their electrical charge. Therefore, it is necessary
periodically to recharge the batteries to increase the operational lives of
the batteries. It is also necessary to check the external condition of the
batteries on a regular basis. Look for cracks in the battery case and
cover. Check the vent plugs and replace them if they are cracked or
broken. Keep the battery clean.
Since accumulations of dirt and acid residue around the battery terminals
may provide an electrical path for discharging the battery, the area
around the terminals should be cleaned periodically. One can use an old
toothbrush and a sparse amount of a diluted solution of baking soda
(sodium bicarbonate) and water (distilled or de-ionized, preferred; tap
water, acceptable) to clean and neutralize any acidic build-up around the
battery terminals. If there is any forming on the top of the battery, this
indicates that acidic residues are being neutralized. Rinse the cleaned
areas thoroughly with distilled or de-ionized water (tap water is okay, too).
Figure 7-3. Stairwell (Top) and Battery
Storage Underneath (Bottom)
Avoid getting the baking-soda solution into the battery fill plugs to each battery cell; this would drastically
reduce the effectiveness of the battery (by neutralizing the sulfuric acid in the battery cells) or, worse, “kill” the
battery. Dry the battery cables and terminals to prevent corrosion; to protect those terminals further, use a
plastic ignition spray on the terminals. Do not use grease on the terminals, especially on the metal-to-metal
connections, as grease may act as an insulator and keep the battery electrical power from entering the cables.
7-4
E L E C T R I C A L
F E A T U R E S
If the batteries are not going to be used for an extended period of time, they should be removed from the
Allegro and stored in a warm, dry place. IT IS STRONGLY RECOMMENDED that this service be
performed by a qualified service technician, as the process is usually too complicated for the average owner to
perform. For those who may wish to perform this service themselves, the following procedure is described:
Mark the battery cables (“+” sign or “red” for the positive cable; “ - ” sign or “black” for the negative cable) so
that they can be properly reconnected again later. These batteries would require periodic recharging to maintain
their full charge.
Additionally, the batteries will, over time, lose some of the water used with the sulfuric acid in the batteries.
Following manufacturer’s recommendations as found in the Owner’s Information Package, periodically check
the fluid levels in all the cells of the batteries (be sure to use safety eyewear during this process) and fill those
that are low with water (distilled or de-ionized water is preferred; tap water is okay). Don’t overfill the cells;
follow the filling directions exactly. This battery checkup should be done on a regular basis to realize the fullest
service possible from the batteries over the longest time possible.
If the Allegro is to be stored for an extended period of time, the 12 VDC battery system should be
disconnected—this procedure will prevent unnecessary drain and corrosion of the batteries and their terminals.
Battery Disconnect Panel
The battery disconnect panel (Figure 7-4) is located near the interior step. There is a switch on the right-hand
side of the panel which can disconnect the battery when the
vehicle is to be stored for any appreciable time. Turning this
switch “off” disconnects the coach batteries only, not the chassis
batteries. This feature is designed to prevent the coach batteries
from being drained during storage. This switch also disconnects
all the 12 VDC circuitry from the batteries; thus removing the
Figure 7-4. Battery Disconnect Panel
total electrical load from those batteries, with the exception of
the LP detector.
When the Allegro is removed from storage, turn the switch “on” to reconnect the 12 VDC circuitry to the
coach batteries again and the 12 VDC systems are now reactivated.
120-Volt AC (VAC) Receptacles
Your Allegro Motor Home is equipped with several 120 VAC receptacles (Figure 7-5) located throughout the
interior of the motor home. These 120 VAC receptacles are of the “three-prong”
variety; the third prong being a grounding pin which provides adequate grounding to
protect one from any electrical shock.
For these receptacles to work properly, do not use an adapter, cheater, or extension
cord which defeats the function of the grounding pin. For the same reason, never
remove or bend away the ground prong or pin from any three-prong AC plug so that it
would fit a two-prong AC receptacle (i.e., an ungrounded AC receptacle).
Figure 7-5.
Typical AC
Receptacle
7-5
E L E C T R I C A L
F E A T U R E S
Never operate the Allegro if there is an electrical short present, as an electrical short may deliver an electrical
shock to anyone coming in contact with the exterior of the unit. If you should feel even the slightest of
electrical shock, immediately disconnect the unit from the 120 VAC power source and locate the electrical fault
(i.e., typically, it is a break in the grounding circuit).
Do not reconnect the 120 VAC power until after that electrical fault is fixed—the grounding circuit must be
continuous from the frame to the distribution panel, to the power cord, and to the earth ground so that
electrical-shock protection is realized.
12-Volt DC (VDC) Receptacles
Your Allegro Motor Home may be equipped with a 12 VDC receptacle conveniently located inside of the
center console (Figure 7-6, black receptacle, bottom half of the picture). This 12 VDC
receptacle can be used for providing power to various items, such as cellular phones,
personal computers, or portable communications equipment.
This receptacle is usually found on the bulkhead in front of the passenger’s seat so that
it is conveniently available to be used by the personnel in the cockpit area This
receptacle accommodates the “cigarette-lighter” type of connector.
Figure 7-6. Typical
12VDC Receptacle
(Bottom)
Ground-Fault-Circuit-Interrupt (GFCI) Receptacles
In the kitchen and bath areas, there are 120 VAC GFCI receptacles (Figure 7-7) which provide greater
protection against inadvertent electrical shocks. These specialized GFCI receptacles provide
both overload and short-circuit protection for the user. The electrical receptacles located in
the slide-out are wired through the kitchen GFCI. The exterior receptacles are wired
through the bathroom GFCI. Consequently, if an appliance plugged into a slide-out or
exterior receptacle is not working, check for a tripped GFCI in the kitchen or bathroom.
All GFCI-protected receptacles are marked as such, but only one of them may have two
pushbuttons on the receptacle (as shown in the picture). The upper pushbutton is a “test”
button which can be used to assure that the GFCI function is working—all one need do to
Figure 7-7. GFCI
test this function is to push that upper button: There will be a momentary “click” and the
Receptacle
circuit will be disconnected (i.e., no power is available at the GFCI-protected receptacles).
To reset this GFCI breaker, push the lower button (the “reset” button) to restore power to all the GDCI
receptacles on this circuit.
In addition, these receptacles protect the user from ground faults between an electrically “hot” wire and
ground. The GFCI will not reduce the shock hazard if the short is between a neutral and “hot” wire, or two
“hot-load” wires.
The GFCI should be tested at least once a month. The 120 VAC electrical system must be “on” for the GFCI
to be tested. To test the GFCI the reset button needs to be pushed in fully before starting the test. Push the
test button; this will cause the reset button to pop out which means that the protected circuits have been
disconnected. Push the reset button back in until a “click” is heard—this will re-activate the protected circuit.
If the GFCI is working properly, the reset button will remain in the “in” position.
7-6
E L E C T R I C A L
F E A T U R E S
Converter
As a standard feature on the Allegro, a converter is provided to convert 110 VAC to provide the necessary 12
VDC power for those appliances plugged into that 12 VDC power system. In this manner, most DC-powered
appliances can be used inside or outside the Allegro when connected to an external 120 VAC power hookup;
this prevents undue drain on the on-board 12 VDC battery system. The converter is conveniently situated in
one of the external storage lockers underneath the Allegro. One should not store anything else in this locker to
preclude any accidental electrical short circuits.
Electrical Generator
The electrical generator (either a 4.0 Kilo-Watt [KW], 5.5 KW, 6.0 KW, or 7.0 KW; depending on the particular
Allegro model chosen) is conveniently located in one of
the side compartments in the Allegro motor home. Prior
to starting or stopping the generator (Figure 7-8), make
sure that all the 120 VAC appliances are turned “off.”
Figure 7-8. Electrical Generator
NOTE: The 4.0 KW generator is capable of operating
only one air conditioner at a time. The 5.5 KW generator
is capable of operating two air conditioners at the same
time, but does not have any additional capacity to operate
any other appliances in conjunction with both air
conditioners running.
After the generator has been started, wait until the transfer switch has connected before turning “on” any of the
appliances.
The generator can be started from either the remote-start switch located on the dash or directly at the generator
itself. The hour meter installed on the generator records the number of hours of operation of the generator
motor—this elapsed time is needed for observing necessary maintenance schedules on the generator.
Caution
Failure to turn “off” the 120 VAC appliances when starting or stopping the generator
may damage the transfer switch and/or electrical appliances.
For more detailed operating instructions and to determine necessary preventive-maintenance schedules and
procedures, review the manufacturer owner’s manual.
7-7
E L E C T R I C A L
F E A T U R E S
Automatic Transfer Switch
Your Allegro may be equipped with an automatic transfer switch (exception: Any Allegro having a 4,000-watt
generator will not have an automatic transfer switch). When the generator is turned “on,” this switch
automatically transfers from external power to generator power. There will be a slight delay between the start
of the generator and the electrical connection being made—this delay allows the generator to reach normal
operating speed without needing to supply a required load. When the Allegro is plugged into an external
source, a “click” will be heard in the transfer switch box—this is a normal function and merely indicates that
the unit is changing over from an external power source to the generator.
Resettable Circuit Breakers
The resettable circuit breakers (Figure 7-9) are located in the external storage compartment just forward of the
entrance door. When the circuit breakers are shut down or electrically
tripped, they must be manually reset.
These breakers protect the slide-outs, the AC ignition, the electric step,
the 30-amp ignition system, and the 12 VDC disconnect system. As
needed, manually reset the circuit breaker or breakers as shown in the
accompanying figure.
Be careful when working around these connections as an accidental
electrical short to ground (i.e., momentarily connecting the “positive”
or “hot” terminal to any part of the chassis) can be hazardous and
harmful.
Figure 7-9. Resettable Circuit Breakers
Fuse Blocks
Some of the electrical circuitry within the motor home is protected by various fusing systems. Some of these
fuse blocks (Figure 7-10) are immediately accessible from the driver’s side
underneath the dashboard.
The electrical circuits protected by the under-dash fuse block include:
headlights, panel light for dashboard, tail lights, optional jacks, turn signals,
cruise control, engine computer, accessory fuses, heater and dash air
conditioning. Additionally, there is another chassis fuse panel which works
in conjunction with the chassis fuse panel and provides comparable
protection for the above-listed circuits.
Located beneath the access panel on the dashboard (see Figure 7-11) are
two additional fuse panels; these panels protect the following electrical
systems: mirrors, optional satellite jacks, camera, optional power windows, dash trim, lighter, map light,
optional power seats, and radio.
Figure 7-10. Fuse Blocks
Should there be any electrical failure of these components or systems, the first troubleshooting procedure
should be to check the fuses and have available replacements to replace any blown fuses, as may be warranted.
7-8
E L E C T R I C A L
F E A T U R E S
As an aid to extracting and/or installing fuses in the fuse blocks, one may wish to buy an inexpensive fuse
puller at any electronics or hardware
store. This tool makes the installation or
removal of fuses much easier and
prevents inadvertent damage to nearby
fuses or the fuse block itself.
Figure 7-11. Underdash Fuse Panels
Warning
Never replace a fuse with a fuse rated larger than that which originally came from the
factory. To do otherwise will cause serious damage, overheating of the wiring, and
possible ignition of nearby materials resulting in a fire.
Whenever a fuse has been “blown” and is to be extracted and replaced, it is good practice to examine the wiring
going to that particular fuse to see if there is any noticeable degradation (e.g., wiring insulation nicked, missing,
or melted) which may indicate damage beyond the fusing proper.
Seven-Pin Towing Connector
Your Allegro is equipped with a standard, 7-pin connector (Figure 7-12) near the towing hitch at the rear of the
motor home to supply the necessary circuitry to
control a towed vehicle. The wiring of that
connector is shown in the accompanying diagram.
Make sure that any cable from the vehicle to be
towed is wired correctly to mate properly with the
connections shown in the connector. If in doubt
about proper wiring, have a qualified service
technician prepare and install the necessary cable to
mate with the 7-pin connector on the motor home
to assure proper operation subsequently when
any vehicle is actually towed by the motor home.
Figure 7-12. Bargman Seven-Pin Towing Connector
7-9
E L E C T R I C A L
F E A T U R E S
When the towed vehicle is uncoupled from the motor home and the cable is disconnected from the 7-pin
connector, be sure to close the spring-hinged cover plate on the connector to protect the contact pins from dirt
or debris. In a similar manner, protect the cable end from similar damage, weather, or debris—one such
method could be to place the connector end in a heavy-gauge plastic bag (e.g., polypropylene, polyethylene,
etc.) and secure the bag tightly around the cable with a stout elastic band or tape and then mount the secured
cable in a manner to keep it both from mechanical damage and water intrusion.
When the towed vehicle is again coupled to the motor home via the towing hitch and the cable is again
connected to the 7-pin connector, make sure the resultant connection is tight and solid so that the connection
won’t jar loose during use. Several supplemental methods to secure that connection have been used; some of
which include securing the connection with a strong rubber band or with Velcro-type fasteners to provide a
supplemental mechanical backup to the actual electromechanical connection.
Should a conversion adapter to convert the round, seven-pin connector to a flat, four-pin connector be needed;
such an adapter may be purchased from any RV after-market store.
7-10
S L I D E - O U T
F E A T U R E S
Chapter
8
Slide-Out Features
8-1
S L I D E - O U T
F E A T U R E S
SLIDE-OUT OVERVIEW
Warning
BEFORE ACTIVATING THE SLIDE-OUT FEATURES, please read the slide-out room
instruction manual first. Additionally, the motor home must be parked and the leveling
jacks must be used to level the motor home PRIOR to activating the slide-out features.
General Considerations
Please Note
The Slide-Out Room requires semi-annual inspection (i.e., every six months) to assure
that the slide-out mechanism is properly aligned and functioning correctly. Please
make sure that this inspection is performed every six months to correct any possible
misalignments.
Any slide-out-room feature is actuated by means of a readily accessible, slide-out switch (Figure 8-1). The
rocker switch must be manually held down in the desired position (i.e., either “in”
or “out”) to activate the desired action of the slide-out room and continue to be
held down until the desired action is concluded. Releasing the rocker switch
before the slide-out is fully extended or retracted will stop the slide-out at some
intermediate position. NOTE: The slide-out switch will only operate when
the ignition switch is in the “on” position—there is an interlock which keeps
the slide-out mechanism from operating when the ignition is “on.”
Figure 8-1. Slide-Out Switches
8-2
S L I D E - O U T
F E A T U R E S
Operating Precautions
Warning
Before attempting to extend the slide-out room, check outside and make sure that
there is at least a five-foot clearance around the area where the slide-out room will be
extended.
Before the slide-out-room mechanism is to be used, make sure that the motor home is parked and the leveling
process has been properly completed. Verify that no obstacles (e.g., branches, trees, telephone poles,
power/water hookups, trash bins, and the like) are within a five-foot space envelope of the slide-out room to
preclude damaging the slide-out room when it is finally deployed.
Extending the Slide-Out Room
1. All windows in the slide-out room (Figure 8-2) must be closed and secured before the slide-out room is
to be extended or retracted. Also any loose materials or
possible obstructions should be removed from the
immediate slide-out room area. Make sure the motor home
has been leveled. Make sure that the battery is fully charged
and connected to the electrical system.
2. Verify that there are no obstructions outside which may
interfere with the operation of the slide-out room.
3. Prior to moving the slide-out room in either direction, make
sure that the driver’s chair is moved forward into the driving
area as far as possible and is locked into position.
Figure 8-2. Typical Slide-Out
4. Make sure that the ignition switch is in the “on” position and the park brake engaged, prior to using the
slide-out function; if the ignition switch is “off,” some of the slide-out mechanisms will not work.
5. Push the “out” portion of the rocker switch; allow the slide-out room to go to its fully extended
position—at this point, release the rocker switch (this locks the room into position).
Retracting the Slide-Out Room
1. Before attempting to move the motor home, the slide-out room must be fully retracted.
8-3
S L I D E - O U T
F E A T U R E S
2. Verify that the battery is fully charged and connected to the electrical system.
3. With the ignition switch in the “on” position and the engine running with the park brake set, push the
“in” portion of the rocker switch; allow the slide-out room to go to its fully-retracted position—at this
point, release the rocker switch (this locks the room into position).
Manual Operation: Slide-Out Room
Your Power Gear slide-out system is equipped with a manual override that allows one to extend or retract the
room in the event of a loss of power.
Please Note
If the slide-out room doesn’t move when the rocker switch is depressed, check the
following:
Make sure the ignition switch is turned “on.”
Make sure the park brake is engaged.
Make sure the battery is fully charged and connected.
Make sure the slide-out breakers haven’t been “tripped.” These breakers are located
on the circuit panel on the exterior of the firewall.
After the previous items have been checked and verified and the slide-out room still does not move when the
rocker switch is pressed, follow these simple steps to override the slide-out room manually (Figure 8-3).
1. Turn “off” the ignition switch. Locate the slide-out electrical controller (refer to your Tiffin
Motorhomes dealer or the Tiffin Motorhomes factory for its location). There are two versions of the
controller. For version 1, unplug the six-pin wiring harness to the controller. For version 2, remove
one of the motor leads (either the motor I or the motor II lead from the controller).
2. Locate the slide-out motor; it will be mounted to one side of the slide-out rails. NOTE: If the motor
home has an underbelly or a cover over the motor, these parts must be removed to access the motor.
3. Rotate the brake lever, on the backside of the motor, counter-clockwise (CCW) (looking from the rear
of the motor) about 1/8 of a turn to the released position. This action will release the brake that holds
the room in place.
8-4
S L I D E - O U T
F E A T U R E S
4. Locate the manual override for the slide-out system.
5. The room is now free to move. Using a crescent wrench, crank the room
either “in” or “out” completely (depending on your needs). NOTE: If
the slide-out system is supplied with a gearbox override (optional), use the
crank handle to move the room.
6. When the room is fully “in” or “out,” apply pressure to the wrench and
return the brake lever to its engaged position—this will assure that the
room is locked into a secured position. Take the motor home to an
authorized dealer for service.
Figure 8-3. Manual Slide-Out
Deployment Sequence
8-5
E X T E R I O R
F E A T U R E S
Chapter
9
Exterior Features
9-1
E X T E R I O R
F E A T U R E S
Towing Hitch
On the rear of the Allegro can be found a 5,000-pound towing hitch (Figure 9-1)
capable of handling a tongue weight of 250 pounds. This hitch is installed for
towing a passenger car to be used when the vehicle is parked. The wire connector
installed with this hitch is a standard, seven-pin connector. For more information
on the connector, please see Chapter 7 of this Owner’s Manual.
Exterior Sides
Figure 9-1. Towing Hitch
The sides (Figure 9-2) of your Allegro are constructed of gel-coated fiberglass. To add to this feature, the end
caps are also gel-coated fiberglass. To clean these fiberglass surfaces,
only use warm water and a mild cleanser; gently wash with soft cloths.
Use of stiff bristle brushes or other harsh abrasives may cause scratches
in the fiberglass surfaces. Please note: Tiffin Motorhomes is NOT
responsible for the weathering and/or oxidation of gel-coated surfaces.
Spacious storage compartments are located on the exterior sides of your
Allegro. These external compartments provide ample, additional space
for your belongings while you are traveling. When stowing materials in
these storage compartments, try to “balance” the resultant weight load
from front to rear and from side to side—this will keep the center of gravity
Figure 9-2. Typical Allegro Exterior
of the motor home essentially unchanged and should not adversely affect
the handling characteristics of the motor home when it is in motion.
Security Lights
On the Allegro, exterior security lights (Figure 9-3) are standard features. A light is
installed on the passenger side of the coach to help light that side of the Allegro for added
protection.
This light can serve as a “porch light” when the motor home is parked and the awning is
deployed so that various activities (e.g., sitting outside, grilling, visiting) at dusk and later
can be enjoyed by the motor-home owners and their guests.
Figure 9-3.
Security Light
Roof & Ladder
The Allegro is manufactured with a rubber (optional: fiberglass) roof. Proper care and
routine maintenance of your roof will assure many years of trouble-free performance.
Please see Chapter 14 for details on recommended cleaning instructions. On the
Allegro, a roof ladder (rated capacity: 200 pounds, maximum) may also be included as
an additional feature. The ladder is typically used to permit easy access to the roof for
routine maintenance and periodic inspections.
Figure 9-4. Ladder
9-2
E X T E R I O R
F E A T U R E S
The ladder (Figure 9-4) is hinged so that its lower half can be folded up onto the upper half when the motor
home is in transit.
When folding up that ladder and securing it, be sure that the ball-lock pin is securely fastened through the
locking device to secure the ladder in transit.
Warning
Do not exceed the maximum rating of the ladder (i.e., 200-pound load limit). Do not
attempt to walk on the roof either while it is wet or when condensation is present from
the air-conditioning system, as that surface would be quite slippery.
Leveling System (Hydraulic)
HYDRAULIC LEVELING SYSTEM
The Allegro will be equipped with hydraulic-leveling jacks. These jacks work in pairs: Front, right side, left
side, and rear. Before extending these jacks, the engine must be “off,” the ignition switch must be in the
“ACC” position, and the transmission must be in “park.” The parking brake needs to be set and the tires
blocked securely; then the leveling jacks can be activated.
Caution
DO NOT LIFT the wheels of the motor home off the ground when leveling—if done, the
motor home can tilt forwards or backwards when supported only by the leveling jacks.
Never use the jacks to lift the motor home off the ground to change the tires or
perform any under-chassis maintenance—these jacks are not meant for this type of
service and this misuse would be very dangerous to the operator.
HWH Leveling Control Panel
The HWH Computerized Leveling system (Figure 9-5) requires
minimal effort from the motor-home user. For leveling of the motor
home, perform the following steps:
Manual Leveling (Standard):
1. Turn the ignition switch to the “acc” or “on” position. The
engine must be “off” to level the coach. The transmission
shift must be in position for parking. The park brake must be
9-3
Figure 9-5. HWH Computerized Leveling
System
E X T E R I O R
F E A T U R E S
set either manually or automatically. If the “not in park/brake” light is “on,” check or recheck the shift
and brake position.
2. Press the “hyd” button. The “hydraulic operation” indicator light will turn “on” with a steady glow.
3. On the right-hand portion of the HWH Leveling Control touch panel, note the outline of the motor
home and the various “raise” (i.e., “up” arrow and “lower” (i.e., “down” arrow) touch buttons.
4. Press the respective “raise” (“up” arrow) button to raise the respective side or end of the motor home.
A yellow light to the front, side, or rear of the motor-home outline indicates that that side or end is low.
The “lower” (“down” arrow) buttons will lower the motor home.
Automatic Leveling
1. Turn the ignition switch to the “acc” or “on” position. The engine must be “off” to level the coach.
The transmission shift must be in position for parking. The park brake must be set either manually or
automatically. If the “not in park/brake” light is “on,” check or recheck the shift and brake position.
2. Press the “hyd” button twice—the motor home will automatically level itself.
NOTE: The hydraulic jacks will always work in pairs: Front end, right side, left side, or rear end. During
transit of the motor home, the “Store” position on the HWH Leveling Console must be engaged.
Warning
If the vehicle is equipped with a slide-out, DO NOT OPERATE any room extension until
the leveling and stabilizing procedure has been properly completed. DO NOT RETRACT
the leveling system until the slide-out room has been retracted. NEVER operate the
leveling system when the slide-out is extended.
Caution
DO NOT LIFT the wheels of the motor home off the ground when leveling—if done, the
motor home can tilt forwards or backwards when supported only by the leveling jacks.
Never use the jacks to lift the motor home off the ground to change the tires or perform
any under-chassis maintenance—these jacks are not meant for this type of service and
misuse would be very dangerous to the operator.
9-4
E X T E R I O R
F E A T U R E S
Important
The leveling system should be cycled once a month or whenever the motor home is used to
keep the leveling system in good operating condition.
Electric Steps
The Allegro is equipped with electric door steps (single- or double-step versions). As such, the switch to
operate these steps is located in the door stairwell. When the power switch for the steps is in the “on” position,
simply open the door and the steps will automatically extend.
Detailed operation for the electrical, double-entrance, door steps
(Figure 9-6) is as follows:
1. Turn the step power switch (left-hand side) “on.”
2. Close the door. The step should retract and lock into the
UP position.
Figure 9-6. Electric Steps Switch (Left)
3. Open the door. The step should extend and lock into the
DOWN position.
4. Turn the step power switch “off.” The step should remain in an
extended position when the door is closed. Turning “off” the
power with the step retracted will hold the step in a retracted
position, as well.
5. With the step extended (Figure 9-7), turn the step power switch
“off” and close the entrance door. Turn the vehicle ignition
switch “on.” The ignition override system will go into effect and
the step will automatically retract.
Figure 9-7. Electric Steps Deployed
Caution
If the motor home is driven with the step in the extended position, there is the
possibility of causing major damage to both the step and the motor home.
9-5
E X T E R I O R
F E A T U R E S
6. With the step switch in the “on” position, turn the vehicle ignition switch “off” and open the door.
The step will extend and lock in the DOWN position.
Caution
If the door is opened and closed without allowing the step to extend fully and lock in
the “DOWN” position, the step will retract and lock in the “UP” position. When the door
is re-opened, the step will not extend. The power switch must be turned “on” for the
step to extend.
7. This feature is only operative the first time the door is opened after the vehicle ignition switch is turned
“off.” When the ignition switch is “on,” the step will always activate with the door movement,
regardless of the position of the step power switch.
Caution
Always be sure to “look before you leap”! When opening the entrance door from the
inside, be sure that the step has fully deployed before trying to step outside to avoid
falling and possible injury.
Mirrors
This motor home is equipped with black, convex, manually-controlled, exterior, rear-view mirrors (Figure 9-8).
Always adjust the mirrors for maximum rear visibility prior to driving. If another driver is to drive, be sure the
mirrors are readjusted to accommodate the second driver. The bottom half of each mirror is convex and is also
adjusted manually.
Detailed instructions for these manual adjustments can be found in the manufacturer’s literature available in the
Owner’s Information Package. However, this brief overview of mirror adjustment can begin the process: The
top portion of the mirror should be adjusted horizontally so that you can see your own
motor home in the one-inch surface closest to the motor home; the remaining portion of
the mirror now permits you to see the road behind you. The mirror should be adjusted
vertically so that you can see the rear bumper on the bottom of the plane portion of the
mirror.
The convex mirrors should be adjusted horizontally so that you can see your own motor
home in 1/3 of the mirror. These convex mirrors should then be adjusted vertically to
Figure 9-8. Rear
View Mirror
9-6
E X T E R I O R
F E A T U R E S
allow you to see any other vehicles alongside your motor home.
These mirrors also contain heating elements to defog or de-ice the mirror glass during cold weather operation.
The “on/off” switch for this feature is located by the adjustment control. Further adjustment of the mirror
may be necessary at the swivel portion of the mirror arm.
NOTE: Objects viewed in convex mirrors appear to be smaller and farther away than they actually are.
Consequently, when one is driving, be sure to make allowances for the nearness of other vehicles or
obstructions when one is driving or parking, especially when one is “backing up” the motor home.
9-7
I N T E R I O R
F E A T U R E S
Chapter
10
Interior Features
10-1
I N T E R I O R
F E A T U R E S
Bedspread
As a furnished part of the bedroom suite (Figure 10-1), the bed is covered with a bedspread and matching
accent pillows. For the bedspread and pillow shams, cleaning
instructions are “for dry-cleaning only.”
As the bedspread was made with materials treated for stain
resistance; dry-cleaning will prolong the life of these materials.
Flooring
Figure 10-1. Bedroom Decor
The living room and bedroom floor areas (Figure 10-2) are carpeted with filament-nylon carpeting treated with
Scotch-guard, a stain-resistant coating. In
the Owner’s Information Package, there
is additional literature from the
manufacturer concerning the specifics of
caring for the carpeting which, if
followed, will prolong the appearance and
life of the carpeting (Figure 10-3). Please
become familiar with the recommended
care and cleaning of the carpeting to
assure its prolonged life.
Vinyl tile flooring is standard in the
kitchen and bathroom areas of the motor
Figure 10-3. Typical Carpeting
home. For routine cleaning, sweeping or
vacuuming the floor would be sufficient. If more thorough cleaning is warranted, the flooring can be cleaned
with a damp mop and water.
Figure 10-2. Typical Flooring
For more stubborn stains, a mixture of soap-free household cleaner (e.g., vinegar, ammonia, or comparable
products) and water can be used to advantage. One should not unduly saturate the floor surfaces with water, as
this could damage the flooring substrate.
Ceiling
The ceiling in the Allegro motor home is covered with a vinyl headliner which can be easily cleaned with a
damp, soft cloth and a mild detergent. Take care to clean around any vent areas to prevent any buildup of dirt,
grease, or other accumulations.
10-2
I N T E R I O R
F E A T U R E S
Window Treatments (Optional)
Throughout the Allegro, the window treatments consist of two shades—solar and blackout (Figure 10-4). The
solar shade allows one to see out during the daytime yet blocks most of
the sunlight and heat from entering the motor home. The blackout
shade
creates
complete
privacy
for
nighttime.
Each shade is installed on a manual roller that is operated with a chain.
There is a separate chain for the solar and blackout shades; you will
need to use the specific one for the shade you desire to operate. Pulling
the chain will raise or lower the
solar or blackout shade,
whichever
is
desired.
Figure 10-4. Day/Night Window Shade
Figure 10-5. Night Section of Window
Shade
The chain driven shades are
located on all the windows in the
living area and bedroom. A single
white chain is located in the
window above the kitchen sink
and the bathrooms.
Figure 10-6. Day Section of Window
Shade
10-3
P L U M B I N G
&
B A T H
F E A T U R E S
Chapter
11
Plumbing & Bath Fixtures
11-1
P L U M B I N G
&
B A T H
F E A T U R E S
FRESHWATER SYSTEM
Monitor Panel
The monitor panel (Figure 11-1) permits checking the approximate levels in the fresh, gray, and
black water holding tanks; the LP-gas level; and the
condition of the battery. To use this monitor, simply press
the desired status button to obtain a read-out of the fresh,
gray, and black water tanks and the condition of the
batteries.
The “empty” indicator light will momentarily light when
the button is pressed. If the tank is full, all of the lights will
be “on.” Lights are sequentially arranged to indicate fluid
Figure 11-1. Monitor Panel (Water, LP Gas,
levels in approximately third-tank increments.
For
Battery)
example: if the tank selected is approximately two-thirds
full, then the indicator lights “E” (for “empty”), “1/3”, and “2/3” will be lit.
Figure 11-1. Monitor Panel (Water, LP Gas,
Battery)
On the right hand side of the monitor panel is the water pump switch. The switch controls the
power going to the pump and is used to turn that power either “on” or “off.”
Kitchen Sink
The kitchen sink (Figure 11-2) installed is an acrylic, double-bowl sink
equipped with two sink covers to provide additional counter space when
the sink is not in use. For the sink, cleaning care consists of washing only
with mild detergents and water and using a soft cloth for subsequent
drying and polishing. The faucet in the kitchen may be a single-handle
faucet.
Figure 11-2. Kitchen Sink
Bath Sink, Shower & Accessories
Since the sink (Figure 11-3) in the bathroom is plastic; when cleaning this surface, use care to
prevent scratching or marring it. The dual-handled faucet in the
bathroom was chosen to match the specified decor. The bathing
facilities installed may be a fiberglass shower (Figure 11-4) or
combination shower/tub with a glass shower door. Some floor plans
have fiberglass tubs with shower curtains, rather than glass doors.
Figure 11-3. Bath
Sink
The tub faucet with showerhead, hose, and bracket are coordinated
with the sink faucet.
11-2
Figure
11-4.
Shower
P L U M B I N G
&
B A T H
F E A T U R E S
Water Pump
The water pump is self-priming and totally automatic, operating on demand whenever water is
required. The water pump is used to pressurize the freshwater system when the unit is not
connected to city water. The switches (Figure 11-5) to this pump may be located in the bathroom
and on the monitor panel. To start the pump, follow these instructions:
1. Fill or partially fill the fresh water supply tank.
2. Open the kitchen and bathroom faucets.
3. Turn the water pump switch “on” and allow the water to fill the water line and
the hot water heater.
4. Close each faucet after it delivers a steady stream of water (close the cold-water
faucet first). Leave the hot-water faucets “on” until they also deliver a steady
stream of water. This procedure will assure that the water heater is filled with
water.
5. The water pump should stop running once all faucets are closed.
6. The water pump is now ready for automatic operation. The pump will run when
a faucet is open and stop when a faucet is closed.
7. Never allow the pump to run for long periods of time without water being
present in the supply tank, as doing so may cause physical damage or blow fuses.
Figure
11-5.
Water
Pump
Switch
If water does not flow when a faucet is turned “on” while using the demand system, use the
following troubleshooting chart:
Troubleshooting Chart of Automatic Demand Water System for No Water Flow
SITUATION
1.
2.
1.
2.
3.
4.
Pump running, but no water flow
Pump not running
SOLUTION
Fill Tank
Clear the water line to the pump
Check the pump switch
Check the 12-VDC fuses
Check the electrical connections
Check the battery
All of the water should be drained from the freshwater system when the unit is not in use for
extended periods. For more detailed information regarding the water pump, one should refer to the
water pump manufacturer’s brochure in your Allegro Owner’s Information Package.
City Water Connection
When connecting your unit to city water, be certain to use the water hose manufactured and labeled
for potable water service--this will assure that the hose selected for use will not alter the taste of the
water. To connect the city water supply to the vehicle, connect one end of the hose to the city water
supply; this connection will usually be to a faucet or valve similar to your garden hose valve at home.
11-3
P L U M B I N G
&
B A T H
F E A T U R E S
Turn the city water supply “on” for a few seconds to clear the line. Once the hose has been flushed,
turn the supply “off.” Connect the other
end of the hose to the city-water
connections (Figure 11-6) on the motor
home. Once the city water fill valve is
opened, water is supplied to the
freshwater system including the hot
water heater, faucets, and toilet.
Turn “on” the water supply and open all
of the faucets to clear any trapped air
within the plumbing lines within the
motor home. Once any air pockets have
purged from the water lines and water
Figure 11-6. City Water Connection
flows freely, close all of the faucets. The
city water supply is pressurized; therefore, the water pump is not needed when the water system of
the vehicle is connected to the city water system.
To disconnect from the city water supply on the motor home, close the valve and remove the hose
from the city water supply. Disconnect the hose from the city water connection and store the hose
in the water compartment.
Filling the Freshwater Tank
The freshwater tank is normally filled from the potable water connection; although certain Allegro
models may have an additional valve to permit filling from the city water
connection. The valve (Figure 11-7) located in the service compartment near
the water connection determines whether the city water is going through the
water system or into the freshwater tank.
Figure 11-7. Water
Fill Valve
Since there is not an automatic shut-off when filling the freshwater tank,
check the level from the monitor panel while filling the freshwater tank on
the motor home. The excess water will be vented from an overflow in vent
pipe onto the ground when the capacity of that tank has been reached. This
pipe is installed in the freshwater tank to prevent possible tank rupture from
inadvertent overfilling.
Important
Be sure the potable water fill cap is removed when filling the water tank from a city
water supply (which is typically under 60-80 psig pressure). Failure to do so may
11-4
P L U M B I N G
&
B A T H
F E A T U R E S
result in inadvertent expansion of and possible rupture of the water tank.
All of the water should be drained from the freshwater system when the motor home is not in use
for an extended period of time.
Sanitizing
To assure complete disinfecting of the freshwater system, it is recommended that the following
procedure be performed on a new system, on one that has not been used for a length of time, or
one that may have become contaminated. This procedure is also recommended before long periods
of storage, such as during the winter months:
1. Drain the freshwater tank by opening the drain valves. There is one valve for each water
tank. All of the faucets should be in the closed or “off” position.
2. Prepare a chlorine solution using one gallon of water and one-half cup of chlorine bleach
(5% sodium-hypochlorite solution). Prepare enough of the chlorine solution to administer
one gallon of solution for every 15 gallons of tank capacity. For sanitizing this unit, prepare
4½ gallons of the chlorine solution. This mixture puts a 50 ppm (parts per million) residual
chlorine concentration in the water system that will act as a quick-kill dosage for harmful
bacteria, viruses, and slime-forming organisms. Concentrations greater than 50 ppm may
damage the water lines and/or the tank.
3. Once the freshwater tank is empty, close the drain valves in the water tank.
4. Pump the chlorine solution into the tank by first placing the winterizing hose into the
chlorine solution. Close the valve from the fresh water tank to the pump and open the valve
from the solution to the pump. Turn the tank fill valve from “city water” to “tank fill.”
Turn “on” the water pump until all of the solution is pumped into the freshwater tank.
5. Turn “off” the water pump. Then close the valve to the solution. Open the valve from the
tank to the water pump. Fill the water tank with the city water tank fill (or by using the same
method as was used to put the sanitizing solution into the tank). Remove the water filter
(from the drink dispenser faucet, if installed) and install the bypass pipe to allow the
sanitizing solution access to the faucet. Open each faucet, in turn, including the kitchen
faucet, bath faucet, inside and outside showers, turning “on” both the hot and cold faucets,
and flushing the toilet until all of the air has been purged from the pipes and the water runs
freely. The entire system will then be filled with the sanitizing solution.
6. Allow the 50 ppm disinfecting solution to stand in the system at least four hours.
7. Drain the system and flush it with freshwater. The water system needs to be flushed with
water repeatedly, if necessary, until there is no chlorine taste or smell left in the system. To
11-5
P L U M B I N G
&
B A T H
F E A T U R E S
remove any excessive chlorine taste or odor that might remain, prepare a solution of one
quart of vinegar to five gallons of water. “Rock” the tank containing the solution by moving
the vehicle forward and backward several times to clean the tank; then drain that tank and
refill with clean water.
Water Heater Bypass System
The water heater bypass valve (Figure 11-8) is located next to the water heater. By closing the water
heater supply valve and opening the bypass valve, one can divert water
away from the water heater. This process is performed when
winterizing your motor home. Using the bypass valve will keep
antifreeze out of the water heater when winterizing the motor home.
Draining the water heater during winterizing is a MUST. As shown in
Figure 11-8, one should close the two outside valves and open the
center valve. To prepare the motor home for reuse, open the two
outside valves and close the center valve.
Freshwater Lines
Figure 11-8. Water Heater Bypass
System
Vibration and flexing encountered when the motor home is traveling can cause pipes and fittings to
become loose. Check all of the plumbing connections for leaks at least on an annual basis. If the water
pump runs when all faucets are turned “off,” check for a possible leak. Be sure that the drain valves are
closed. Connections at the kitchen and bathroom faucets normally seal by hand-tightening them and then
making an additional half-turn with a wrench.
If a fitting leak persists, disconnect it completely and visually inspect it for mineral deposits or foreign
material stuck on the sealing surfaces. Clean the surfaces thoroughly and reinstall the fitting. Take the
motor home to an authorized Tiffin Motorhomes service center for additional repairs if the water system
continues to leak. Follow the winterizing instructions given in Chapter 14 to reduce risk of leaks caused
by cracks from freezing pipes. Left unchecked, freezing damage can be extensive and expensive.
11-6
P L U M B I N G
&
B A T H
F I X T U R E S
WASTE WATER SYSTEMS
General Information
The waste drainage system was designed to provide adequate and safe storage and/or disposal of waste
materials. All of the materials used in the fabrication of this system are tested by a nationally-recognized
testing laboratory. The drainage system uses plastic piping and fittings connected to the sinks, toilet, and
holding tanks. This plumbing permits the drainage of these fixtures to an outside termination.
The vehicle should be reasonably level for best operation of both of the wastewater systems (there are
two, separate wastewater systems). The gray-water system is for wastewater from the sinks and shower.
The black-water system is for sewage waste from the toilet. Each wastewater tank has its own control
valve and both drain through a common sewer-drain hose.
Toilet
The toilet (Figure 11-9) operates with water from either the fresh water tank with the water pump “on”
or the city water supply. Before using the toilet, add water to the bottom of
the tank. Refer to the “BLACK WATER TANK” instructions elsewhere in
this chapter. The toilet flushes waste directly into the black-water holding
tank. The toilet uses high-velocity water injection to produce swirl effect in
the bowl.
Figure 11-9. Toilet
The greatest problem that causes stool solids to accumulate in the holding
tank is lack of liquids. When using your toilet, it is wise to fill the toilet 3/4
full of water--this will help wash the solids away from directly below the
toilet and to assure complete dumping of the holding tank. To add water to
the toilet bowl, push down on the flush lever. To flush the toilet, push down
on the lever until the water swirls. A small amount of water should remain in
the bowl.
The toilet should be cleaned regularly for maximum sanitation and operational efficiency. Clean the toilet
bowl with a mild bathroom cleaner. DO NOT USE CHLORINE OR CAUSTIC CHEMICALS,
SUCH AS LAUNDRY BLEACH OR DRAIN-OPENING TYPES, AS THEY WILL DAMAGE
THE SEALS IN THE TOILET AND DUMP VALVES.
Refer to the toilet-manufacturer’s owner’s manual in your Allegro Owner’s Information Package for
complete instructions and a detailed troubleshooting guide.
P-Traps
Each of the sink drains, the shower drain, and the washing-machine drain (if so equipped) has a water trap (Ptrap) to prevent holding-tank odors from entering the vehicle. These traps must have water in them to trap
odors. When the vehicle is in motion, the water may splash out of the sink and shower drains. When the
11-7
P L U M B I N G
&
B A T H
F I X T U R E S
vehicle is stored, the water may evaporate from these traps allowing odors to enter the vehicle. If this occurs,
run water from the faucet into the drain, thus allowing water to fill the traps again.
Black-Water Holding Tank
The “black water” (i.e., sewage) holding tank is located directly beneath the toilet. Before using the toilet, you
will need to treat the tank with water that is mixed with an odor-controlling chemical. These chemicals are
readily available at any RV supply store. Be careful not to spill the chemicals on your hands, clothing, or the
carpet because such may cause a permanent stain. Pull the toilet levers forward to allow the chemicals to mix
with the toilet water. Continue pulling the toilet levers until a depth of at least one inch of solution is directly
under the toilet. Release the levers and the waste tank is now ready for use.
Caution
It is important that you use as much water as possible with each flush. This will help
prevent tissue and other solids from clogging the holding tank outlet.
Caution
Use only approved RV odor-controlling chemicals in the holding tanks. Products
containing ammonia and petroleum will damage the ABS plastic holding tanks and seals.
Gray-Water Holding Tank
The gray-water holding tank is located in the underbelly of the vehicle. It is primarily used for the drainage
from the kitchen and bath sinks and the shower.
Wastewater Disposal
Both of the holding tanks terminate in a valve arrangement that permits draining each tank separately or
together. It is recommended to drain the black-water tank first before draining the gray-water tank. This
procedure permits the water from the gray tank to wash the black-water residue from the drain lines and hose.
The valves that open to release the water are called gate valves.
11-8
P L U M B I N G
&
B A T H
F I X T U R E S
The blade that closed the opening in the sewer drainpipes is connected to the T-handle to release contents of
the tank(s) when pulled. The sewer line must be securely capped during self-containment use to prevent
leakage of waste materials onto the ground or pavement. Do not pull the holding-tank gate valve “open” when
the protective cap is installed on the pipe. Always drain the tank into an acceptable sewer inlet or dump station.
Whenever possible, drain both the holding tanks prior to traveling. The carrying capacity of your vehicle
will be reduced if water is left in the black or gray tanks.
The holding tanks should only be drained when they are at least ¾ full. Doing this will provide a
sufficient volume of water to allow the complete flushing of waste materials in the drain lines and hose.
If the tanks are not ¾ full, add enough water to allow for sufficient flushing.
To empty the wastewater tanks, connect the adapter, supplied with your vehicle, to the drain hose (Figure
11-10). If the adapter is lost or broken, another one can readily
be purchased from any RV supply store. Once you have placed
the adapter on the drain hose, it can remain there for the life of
the hose. One end of the hose threads up through the hole in the
bottom of the service compartment and the other end of the hose
feeds into the sewer at the dump station.
Unscrew the cap from the drain. Connect the hose, with the
adapter in place, to the drain fitting. Open the gate valve
completely by pulling on the T-handle. The tank will start to
drain as soon as the T-handle is pulled. After you have drained
the black-water tank, immediately drain the gray-water tank. This
procedure helps to flush the black water from the sewage hose.
Figure 11-10. Wastewater Drain Hose and
Connection in Sanitation Compartment
When both of the tanks are empty, flush them with a freshwater rinse before you close the valves. The
gray tanks are easily flushed by pouring a couple of gallons of water into a sink drain. The drain outlet is
engineered for quick release of the drain hose adapter. Always close the gate valves and secure the end
cap to prevent leakage while the vehicle is in transit.
After draining the black-water tank, it is recommended to add a holding-tank deodorant to help control
the odor and break down the solids. Follow the instructions given on the holding-tank deodorant
package.
When using dump stations for draining the holding tanks, keep other travelers in mind. Please practice good
housekeeping! Leave the dump stations in good order. Above all, do not pollute!
Sewer Connection and Camping
When camping at parks with sewer connections, it is important to keep the black-water, holding-tank, gate
valve closed at all times, except when dumping. The gray tank can be kept open while hooked to a sewer
connection, but again, the black-water tank must be kept closed. This is done so that an ample quantity of
liquid remains in the tank to provide a smooth flow through the gate and drain valves when dumping.
Sufficient liquid in the tank causes a swirling action that should take any accumulated solid wastes with it.
11-9
P L U M B I N G
&
B A T H
F I X T U R E S
Accumulation of solid wastes in the black-water tank can be avoided by keeping the gate valve closed when
connected to the sewer connection. If the valve is open, solid wastes may accumulate in the tank which may
eventually result in costly repairs.
No-Fuss Flush
This vehicle may be equipped with a flushing system for the black-water holding tank. When draining
your sewer tank, attach a water hose to the sewer spray connection. After the tank is drained, leave the
gate valve “open” and open the water valve to allow water to spray inside the black-water tank; this will
clean the inside of the tank of any debris that may be left inside the tank. After this is done, disconnect
the freshwater hose and close the gate valve.
Caution
Be sure the gate valve is “open” when flushing the tank. Do not use the same hose for
the No-Fuss Flush that is used for filling the freshwater tank.
Exterior Shower
Your Allegro has an exterior shower (Figure 11-11, left side) for your use and convenience outside. That
exterior shower is located in the service compartment, which is
located on the driver’s side of the motor home. The exterior shower
feature allows you to do such things as rinse off sand or grass, muddy
shoes, or bathe yourself outside of your motor home.
The faucet (Figure 11-11, upper right) operates just as it would in
your kitchen or bathroom. In addition to the shower itself, there is a
light to permit use of the shower under low-light conditions.
Figure 11-11. Exterior Shower in Outside
Sanitation Compartment
11-10
W I N D O W S ,
A W N I N G S ,
V E N T S ,
&
D O O R S
Chapter
12
Windows, Awnings, Vents, & Doors
12-1
W I N D O W S ,
A W N I N G S ,
V E N T S ,
&
D O O R S
Windows
The windows on the Allegro are of the sliding type. Double-pane windows are available as an option to
provide additional thermal control (i.e., insulation) to maintain interior temperatures better. In the double-pane
windows, a “dead air” space (filled with a dry, inert gas) is sealed between
two panes of glass—this “dead air” space provides additional thermal
insulation for the windows and prevents them from fogging internally.
Additionally, there may be a reflective coating on the windows to reflect
back a portion of the sunlight to reduce the heating of the motor-home
interior and to reduce the effects of the sun’s “bleaching” of interior fabrics
(curtains, upholstery).
For both the driver’s and passenger’s windows (Figure 13-1), additional sun
shades are available to permit blockage of the sun’s rays which may
interfere with driving. These shades can be deployed, as needed, and then
moved out of the way when no longer desired.
Figure 13-2. Emergency
Exit Window
Figure 13-1. Driver’s and
Passenger’s Section
In the bedroom, one particular window will be marked with an “EXIT” label (Figure
13-2)—this is an emergency escape only to be used when normal exits are blocked or
inaccessible. To use this emergency escape, merely lift the red handles at the bottom
of the window and push outwards to open the window. Should it be necessary to
use this exit, please look for a secure footing when exiting so that no personal injury
is sustained in the process. It is also prudent, when parking the motor home, to be
aware of where this “emergency-exit” window will be situated so that it is not
inadvertently blocked or impeded from its normal, intended operation, should such
become necessary.
Awnings
The power patio awning (Figure 13-3) is standard on the Allegro. The power patio awning is extremely durable
and can be operated during light rain and wind conditions.
However, when periods of heavy rain, or wind is expected; or
you leave the awning unattended the awning should be closed.
Please note that damage caused by wind and rain is not covered
by warranty. To operate the awning follow the instructions
listed below.
To open the awning:
1. Rocker Remote Switch
A. Press and hold the “Extend” button and the
awning will automatically open. If the button is
released the awning will stop. Maintain button
depressed until awning is fully extended then release.
12-2
Figure 13-3. Power Patio Awning (Fully Extended)
W I N D O W S ,
A W N I N G S ,
V E N T S ,
&
D O O R S
B. Verify that the valance is in the correct orientation (see awning instructions found in Owner’s
Information Package, page 2 Figure 1). Tap the rocker switch in the “Retract” direction to
adjust the valance orientation if necessary. Allowing the valance to remain in the hyperextended orientation may create a propensity to pool water, especially in larger (17’-21’)
awnings.
To close the awning:
NOTE: Pinch Hazard. When closing awning, bottom arm will fold down and against back channel.
This area must be kept clear of people and objects. Failure to heed this warning could cause severe
personal injury and/or property damage.
1. Remote Rocker Switch
A. Press and hold the “Retract” button to automatically close awning. If the button is
released the awning will stop. Maintain button depressed until awning is fully
retracted, then release.
IMPORTANT: As an extra safety precaution, visually verify that the awning is fully closed.
To adjust the awning pitch:
NOTE: Pinch Hazard. When adjusting awning pitch, bottom arm will telescope. Keep hands and
objects clear of openings around bottom arm. Failure to heed this warning could cause personal
injury.
1. With awning fully extended, loosen knob on bottom arm.
2. Pull top arm down to lower roller tube to desired height.
3. While holding top arm in place, tighten knob to set pitch.
4. Repeat for hardware on other side.
IMPORTANT: To ensure rain water will run off awning, ensure that one end of the awning is lower
than the other end. This will reduce the potential for water pooling in the center of the awning.
5. Prior to closing awning, loosen knob to allow awning to reset to original position. Lightly tighten knob
to reduce potential for sounds of rattling during travel.
In case of awning power failure or to manually close awning:
IMPORTANT: This procedure will require two people. When this procedure has been performed, the
awning must be serviced by a Dometic service center or a qualified service technician before using
again.
There are two methods of rolling up the awning if it appears there is no power to the awning motor. The
following method should be performed first:
12-3
W I N D O W S ,
A W N I N G S ,
V E N T S ,
&
D O O R S
1. When the power awning hardware is in the open position and the 12 VDC power has been lost the
awning can be closed by supplying auxiliary power to the hardware. Connect the awning motor to an
external 12 VDC power source via user-supplied wire (16 gauge minimum). A good external 12 VDC
power source would be an automobile battery.
2. Locate and unplug the motor and hardware cable connection located in the upper part of the righthand arm.
3. Connect the user-supplied wire leads to the terminals in the connector from the motor. Electrical tape
may be required to keep the wire leads in place. (Do not connect to the one in the hardware).
4. Connect the other end to a 12 VDC battery source. The red wire goes to + and the black to -. If there
is not a problem with the awning motor, this will retract the awning. To avoid motor damage
disconnect battery source immediately after awning is fully retracted.
5. The awning can be extended by reversing the polarity. Place the red wire on the – and the black wire on
the +. Disconnect battery source after awning is fully extended.
If the awning will not retract after performing the steps listed above, perform the following steps.
1. Slide the pull strap (provided) into the utility slot of the FRTA (see awning instructions found in
Owner’s Information Package, page 4 Figure 6).
2. While one person is holding onto the pull strap, remove the screw in the top of the right top
casting. The FRTA will immediately roll in once the bolt is removed. Walk the awning to the closed
position.
3. Align hole where screw was removed and replace screw into top casting to secure awning. NOTE:
The screw removed from top of right casting has to be reinstalled. This is to prevent awning from
opening during travel, personal injury or damage can occur. Have the awning serviced by a
Dometic Service Center or a qualified service technician before attempting to open awning after
this procedure has been performed.
Caution
Since damage resulting from weather is not under warranty, anytime a heavy or
prolonged rain or blustery winds are anticipated, it would be advisable to close the
awning. Similarly, if the awning is to be left unattended for any prolonged length of
time, it would be prudent to close that awning.
NOTE: Be sure that the awning is fully locked into position on both arms before travel. Failure to do so may
cause the awning to deploy when the motor home is in motion.
12-4
W I N D O W S ,
A W N I N G S ,
V E N T S ,
&
D O O R S
For further instructions on how to properly maintain the awning please see the awning instructions found in
the Owner’s Information package.
Vents
The kitchen has a 12 VDC Fantastic vent fan (Figure 13-4) installed to exhaust kitchen odors. When the
external cover is raised (via turning the knurled knob), and the vent power switch is in
the “on” position, the vent fan will operate. When the desired temperature is reached;
one can then turn “off” the vent fan. Even when the fan is “off,” there will still be
some natural convection while the external cover of the fan is still open. The vent fan
should only be left in the “on” mode when the motor home is parked and in use.
If the motor home is to be unattended for long periods of time or is to be in storage,
make sure that the vent fan is turned “off.” Were the fan left “on,” blustery winds
Figure 13-4. 12 VDC Vent Fan
or severe storms may prevent the vent from closing and, consequently, may permit
leakage, with possible damage, into the motor home. The bathroom also contains a 12 VDC, vent fan which is
controlled by an “on/off” switch mounted on the bathroom wall.
Doors
Caution
Always secure the dead bolt lock while the motor home is in motion to prevent
accidental opening of the entrance door.
The primary entrance (Figure 13-5) to the motor home is a radius door having a key lock and a dead bolt for
additional security. There is also a screen door (Figure 13-6)
associated with the entrance door; the screen door will
permit increased air circulation when the entrance door is
open. To enjoy this benefit, the screen door is operated
independently of the entrance door.
To protect the contents of the motor home and the very
motor home itself, it is prudent to lock the motor home
when one is to be away for any length of time. Both the key
lock and the dead bolt should be used for maximum security
Figure 13-5. Front Door
of the motor home.
The Allegro may also have an optional, driver’s-side door (Figure 13-7), which
12-5
Figure 13-6. Front Door &
Screen Door
W I N D O W S ,
A W N I N G S ,
V E N T S ,
&
D O O R S
permits the driver to enter and exit the motor home more conveniently for the routine requirements of motorhome use (e.g., periodic re-fueling operations).
This door may also be regarded as an “emergency” door to be used if the main door is
otherwise inaccessible. Make sure that all occupants of the motor home are aware of this
exit option, should it ever become necessary, and never park the vehicle in such a manner
as to block this exit, even temporarily.
When one leaves the motor home, be sure to secure and lock the driver’s-side door, as
well as the front door, for the desired level of security. Additionally, be sure to close and
secure the sliding window in the driver’s-side door, too.
Figure 13-7.
Driver’s Side
Entrance Door
12-6
R O U T I N E
M A I N T E N A N C E
Chapter
13
Routine Maintenance
13-1
R O U T I N E
M A I N T E N A N C E
EXTERIOR CARE
Important
Damage caused by improperly performed maintenance or inadequate maintenance
is not covered by your Tiffin Motorhomes Limited Warranty.
Washing
Since 2003, Volatile Organic Compound regulations (formulated by EPA) prohibit the use of lead in
paint. Lead made paint quite hard to prevent oxidation. Since
2003, paint manufacturing companies have had to find a new
base for their paints. The paint on your Tiffin motor home
has a polyurethane base called Diamont. While multiple layers
of clear coat sealants protect the paint against oxidation, the
sealant must be protected from deterioration or the paint will
oxidize faster than the lead based paints of prior years.
Paint manufacturers advise against using harsh cleaners such
as Simple Green, Mr. Clean, or liquid dish washing soaps. The
degreasing agents in these cleaners leave a residue on the
sealant, which soften and damage the clear coat in time. It’s
akin to the sticky residue felt on a linoleum floor after
cleaning the floor with any heavy duty, degreasing cleaner.
Figure 13-1. Exterior of Allegro (Typical)
Baby shampoo provides an effective yet gentle cleaner. Without the typical heavy degreasers of most
detergents, baby shampoo cleans without fear of leaving a residue to gum up the clear coat finish.
Generally one ounce (1 oz.) is all you need per five gallon bucket of water. Also, add one-half to one cup
of food grade distilled white vinegar to your wash bucket. If your water is soft, one-half cup is sufficient.
Hard water requires a full cup per five gallon bucket.
Vinegar serves a two-fold purpose. First, it boosts the cleaning ability of the baby shampoo so you don’t
need as much. Second, food grade vinegar is made from grain and slightly acidic. The naturally occurring
acid neutralizes the alkaline in the water to prevent water spots from forming. Make certain your jug of
vinegar states “food grade” or “made for pickles,” otherwise it may be made from petroleum.
Sliding manufacturers for years have recommended using 100% cotton pads like Sof Wash for washing.
Since the introduction of the new lead free paints, lambswool, even softer than cotton, is now
recommended. Tiffin Motorhomes uses the lambswool pad carried by Mary Moppins. It allows you to
safely wash your coach from the ground.
13-2
R O U T I N E
M A I N T E N A N C E
Do not mistake lambswool with imitations. Imitation pads are made from 100% polyester, which is
plastic. Plastic imitations will scratch the finish—but the scratches are so minute that they are barely
noticeable at first. Eventually, continued scratching will remove the clear coat from the surface of your
coach, vehicle, boat, floor, cabinets, and furniture. For this same reason avoid microfiber products to
wash or dry your motor home, car, boat, airplane, motorcycle, vehicle, furniture, or cabinets. Microfiber is
made from 80% polyester.
Likewise avoid washing with brushes. Even though you may not see brush marks now, the damage will
happen as the bristles wear down. One washing and your coach is fine but the next washing leaves it
covered with scratches. Use lambswool wash pads to avoid these issues.
Use only 100% cotton towels to dry your vehicle. Be cautious of terry towels made in Taiwan and China.
They are not checked for fiber content as they enter the USA and usually contain up to 30% polyester.
Adding vinegar to your wash water and washing in the morning or evening will help prevent water spots.
Water spots damage the exterior of your coach the same way they damage glass shower doors. They etch
their way into the surface and removal becomes difficult. Prevention becomes the key. Wash one side at a
time, rinse, and then dry quickly first using Mary Moppins EZE Squeegee followed by a towel placed over
the Cleaning Head. Buff water spots immediately with a 1000 grit polishing compound or RenewzIt—a
product by Mary Moppins which removes water spots, scratches and oxidation.
To remove oil and grease remember an important rule of cleaning: Give your product time to work. Dab
a bit of concentrated cleaner like CleanEz by Mary Moppins—never an orange based cleaner or one with
petroleum distillates—onto a soft cloth. Apply to the oil spot and wait 10 to 15 minutes before rubbing
lightly to remove the oil. Rinse immediately.
Important
When using a polishing compound that does not contain a wax preservative,
reapplying a coat of hard wax after polishing is recommended.
Seals
The seals (Figure 13-2) around the doors, windows, vents, slide-out
trim, and external seams should be checked at least semiannually.
Additionally, the roof seams should be inspected for cracking or
peeling semiannually. If deterioration is noted during a routine
maintenance inspection, reseal the seams or seals with an approved
sealant to prevent leaks.
Your Tiffin Motorhomes dealer can perform the resealing inspections
13-3
Figure 13-2. Window Seals
R O U T I N E
M A I N T E N A N C E
and subsequent work, if any, for you. It is recommended that a Tiffin Motorhomes authorized service
center perform these inspections periodically and perform necessary resealing when necessary.
Proper Sealants for Application
The following sealants are recommended for specific sealing applications, as noted in the table:
Recommended Sealants for Specific Sealing Applications
SEALANT
Plas-T-Cote
Surebond #SB-140
Carlisle #502-LSW Self-Leveling Sealant
Silicone Sealant
Parbond
APPLICATION
Metal or fiberglass roof
Rubber laminated to metal roof and ALL SKYLIGHTS
Rubber roof over wood base
To cover butyl and other sealants; not to be used as the
main sealant
To seal across tops of windows and the like on exterior
surfaces where silicone is not used
Striping and Decals
The striping and decals (Figure 13-3) on your motor home normally require
very little maintenance. Treat these as you would any painted surface on your
motor home. Wash them with mild soap and warm water or any retail car
soap. Never wash the motor home in direct sunlight, while the motor home is
hot, or with hot water. Rinse thoroughly to prevent accumulation of any soap
residues. Use caution with high-pressure wash nozzles. Keep such nozzles at
least 18 inches from the edge of the decals during any washing operations. If
this is not followed, high-pressure water nozzles may cause the decals to
loosen and subsequently to peel. Test small sections of decals when using
Figure 13-3.
any type of cleaning solution.
Allegro Detailing
Important
Do not use solvents such as acetone, MEK, toluene, and the like on the decals. Any
solvent including alcohol may soften and smear colors. Do not use lacquer thinner
or paint thinner on decals. Do not overcoat the decals with clear paint. Do not
allow gasoline or other fuels to come into prolonged contact with the decals.
However, if this should occur, immediately flush the affected area with water.
13-4
R O U T I N E
M A I N T E N A N C E
Important
Do not use harsh detergents, acids, or abrasives which may scratch or dull the
surfaces. The applicator cloth, sponge, or soft-bristled brush should be nonmetallic and non-abrasive.
Important
Remember to check periodically the tightness of your wheel lug nuts.
Roof Care and Maintenance
Proper care and maintenance of your motor home, including your roof, is important for sustained,
trouble-free performance. Normal maintenance is simple and easy and does not require special
materials. The roof of the motor home is fiberglass and can be cared for in the conventional
manner. Keep the roof clean; one should clean the roof at least every three months. The roof
should be professionally inspected on an annual basis for leaks. Sealant may be necessary in the
second year of ownership.
Warning
Use caution when working on the top of your motor home. The wet roof may be
extremely slippery and, as such, a possible safety hazard.
Moisture Management
This section outlines important recommendations to manage moisture in your motor home to avoid
moisture-related damage, such as mold, which is caused by moisture. The materials and methods used to
construct your motor home were selected in part to minimize air leakage and to create a weather tight
exterior shell. However, in order to protect your investment and reduce the risk of moisture-related
13-5
R O U T I N E
M A I N T E N A N C E
damage and costly repairs, attention and care has to be taken to manage moisture inside your RV. Note:
These are only suggestions intended to minimize moisture-related issues with your motor home. If any
concerns arise, contact Tiffin Motorhomes’ Service Department at (256) 356-0261.
Interior Care of Your RV
Signs of excessive moisture can be obvious, such as water droplets forming on surfaces or wet carpet.
Conversely, signs of excess moisture can be subtle, such as condensation forming on metal surfaces.
When symptoms appear it is important to timely determine the cause of the excess moisture and take
appropriate corrective action to prevent moisture related damage.
Control Relative Humidity
Monitoring and controlling relative humidity within the motor home is one of the most important steps
to minimize the risk for moisture-related damage. Ideally, relative humidity
should be at 60% or less. Relative humidity can be monitored utilizing a portable
hygrometer (Figure 13-4), a small device that measures temperature and relative
humidity. Hygrometers are available at electronics or building supply stores. Use
exhaust fans, the air conditioner, and/or a portable dehumidifier to manage
moisture inside the RV to maintain relative humidity at 60% or less. In cold
climates, relative humidity may need to be at 35% or less to avoid window
condensation issues. If the motor home is used the majority of the time in a hothumid climate, it may be difficult to keep relative humidity below 60%. A
dehumidifier will help, but is important to check the condensation (water)
collection bucket regularly or discharge the condensation (water) directly to a
Figure 13-4. Portable
drain.
Hygrometer
Avoid Drastic Thermostat Setbacks
Cooler surface temperatures increase the potential for condensation and surface mold growth. To
minimize the opportunity for condensation to form on interior surfaces, maintain a comfortable
temperature in your RV, and avoid nighttime setbacks of 10 degrees or more. Drastic setbacks that reduce
the indoor air temperature quickly can increase the chance for airborne moisture to condense on cool
surfaces such as windows. If you are away from your RV for an extended number of days, it is
recommended that you do not set the temperature back without taking other measures to manage relative
humidity, including operating a dehumidifier with a continuous drain.
Manage Window Condensation
Window condensation issues can be identified by water or ice-build up, usually at the base of the window.
The majority of these problems can be addressed by managing moisture generated inside the motor
home. Minor condensation issues are not unusual, especially for RVs used in colder climates. The key is to
manage this small amount of moisture if evident by wiping the surface, and as discussed in the “Control
Relative Humidity” section, maintaining a reasonable relative humidity within the unit. To help minimize
window condensation, use exhaust fans vented to the outside, avoid drastic changes in thermostat
13-6
R O U T I N E
M A I N T E N A N C E
settings, do not use “vent-free” heaters and use window coverings wisely. For example, make sure to open
curtains or blinds during the day to allow air to circulate and warm the window surface.
Carpet Care and Moisture Management
To keep your carpet serviceable and looking new for years to come, the carpet should be cleaned when it
shows signs of discoloration or traffic patterns. A steam cleaning system should be used to clean the
carpet unless other noted in your warranty information. To manage moisture from the cleaning process,
the cleaning system needs to be capable of extracting the excess water from the carpet after it has been
cleaned. Important: Be sure the carpet is thoroughly dry before closing up the RV for storage. Water
from the cleaning process can cause significant damage to the RV if the carpet is not completely dry
before closing up the motor home for an extended period.
Cleaning Tile and Wood Floors
Most floors only require a mild detergent and warm water for cleaning. More water on the floor is not
always better for cleaning. Use a damp cloth to clean on a regular basis rather than wet mopping each
time. For more information regarding the maintenance of the tile and wood floors, see the section
entitled, “Woodwork and Floors.”
Storage and Other Isolated Areas within the RV
Storage areas are more difficult to condition since the areas are isolated from the main body of the RV.
The surfaces of these areas are more at risk for condensation and surface mold growth. To minimize this
risk, clean storage areas regularly, and allow an air space between stored items and the exterior wall to
promote air circulation.
Use of Un-Vented Combustion Equipment
Un-vented combustion equipment, such as propane stovetops are a source of moisture within the RV.
For every gallon of fuel consumed, approximately one gallon of water vapor is evaporated into the air.
Whenever possible, operate an exhaust fan in combination with the use of any un-vented combustion
appliance within the RV. Water vapor and other combustion byproducts should be vented to the exterior
of the RV. The RV owner should strictly follow use and maintenance instructions for safe operation of
any combustion equipment, particularly un-vented equipment.
Exterior Care of Your RV
The exterior shell of the RV is the primary weather and moisture barrier. Over
the life of the vehicle, the shell will require regular care and maintenance in
accordance with other instructions for exterior care. The shell includes the roof,
sidewalls, windows, doors, and under-floor of the vehicle. Particular attention
needs to be devoted to ensure these components are maintained to ensure a tight
barrier against bulk water intrusion. The shell should be inspected
periodically for tears, gaps, and condition of sealants in accordance with this
owner’s manual. Areas that require maintenance should be resealed utilizing
13-7
Figure 13-5. Inspecting Slide
Out Gasket
R O U T I N E
M A I N T E N A N C E
a similar, high quality sealant used by the manufacturer. Particular attention should be devoted to ensure
the slide outs are functioning properly. Each time a slide out is used it should be inspected to ensure
proper operation and sealing (Figure 13-5). The slide out gaskets should also be inspected to ensure
proper sealing when the slide out is operated.
Use of Your RV
It is important to remember that the square footage of an RV is significantly less than that of a single
family residence. This fact alone will elevate the relative humidity because there is less volume of air to
help absorb dissipate the humidity. For example, showering and cooking create a lot of humidity in a small
area. In these instances, use of an exhaust fan and opening windows should reduce the relative humidity,
particularly when living in the RV for an extended period.
Severe Environments
Prolonged use of your RV in severe environments—for example in extremely cold or hot-humid climates,
will require extra care and maintenance to avoid moisture-related issues. In both extremely cold and hothumid climates more attention needs to be focused on controlling relative humidity within the RV. It also
may require the use of a portable dehumidifier to manage relativity humidity within an acceptable range.
This is discussed further in the “Interior Care of Your RV” section. If you have any questions about
moisture-related issues in the environment you plan to use the RV in for a majority of the time, contact
Tiffin Motorhomes’ Service Department at (256) 356-0261.
Storage of Your RV
During those periods when your motor home is not in use, care must be taken to ensure moisture sources
are addressed. Ideal storage of your RV would be in an enclosed climate controlled environment. When
this is not possible, the following steps should be taken to ensure moisture is controlled:
•
Turn off all water sources
•
Turn off all combustion appliances
•
Drain the water tank(s)
•
Drain the water heater
•
Open all closets, cabinet doors and drawers
•
Close all windows and entrance doors
•
Open a vent or a window enough to allow for some limited ventilation air flow, but not so far as
to allow snow or rain to enter
13-8
R O U T I N E
M A I N T E N A N C E
•
When storing the RV in high humidity climates (ambient relative humidity is greater than 60%
year round), add a dehumidifier drained to exterior to control humidity inside the RV during
storage
•
Refer to other sections of this owner’s manual for additional recommendations
Modifications to your RV
Consult Tiffin Motorhomes for guidance prior to making any modifications to your RV. It is important
that changes be completed by a qualified service firm to ensure moisture intrusion or accumulation
problems do not occur.
Wet Areas
Areas that are exposed to water spills or leaks should be dried as soon as possible and definitely within 2448 hours. Drying areas quickly minimizes the chance for moisture damage and possible mold growth,
which can begin to form colonies within 48 hours. A variety of methods can be used to help the drying
process:
•
Remove excess water with an extraction vacuum
•
Use a dehumidifier to aid drying
•
Use portable fans to move air across the surface
•
Because moisture is key to mold issues, treat all signs of condensation and spills seriously and deal
with promptly. Failure to deal with a moisture issue promptly may cause more severe issues where
none initially existed, or may make a small problem much worse.
•
Learn to recognize signs of mold—don’t paint over or cover up suspicious discoloration until you
are sure it is not mold. The affected surface must first be cleaned and dried; residual staining may
be painted.
•
Be sure to understand and eliminate the source of moisture accumulation as a part of the cleanup. Otherwise, the same issues will simply reoccur.
•
Small amounts of mold should be cleaned as soon as it appears. Small areas of mold should be
cleaned using a detergent/soapy solution or an appropriate RV household cleaner. Gloves should
be worn during cleaning. The cleaned area should then be thoroughly dried. Dispose of any
sponges or rags used to clean mold.
13-9
R O U T I N E
M A I N T E N A N C E
Tire and Tire Safety Information
This portion of the Owner’s Manual contains tire safety information as required by 49 CFR 575.6. The
National Traffic Safety Administration (NHTSA) can be contacted at 1-888-327-4236. Their web site is:
http://www.safecar.gov and their address is: NHTSA, 400 Seventh St, S.W., Washington, D.C. 20590.
Section One:
The National Traffic Safety (NHTSA) has published a brochure (DOT HS 809 361) that discusses all
aspects of Tire Safety, as required by CFR 575.6. This brochure is reproduced in part below. It can be
obtained and downloaded from NHTSA, free of charge, from the following web site:
http://www.nhtsa.dot.gov/cars/rules/TireSafety/ridesonit/tires index.html
Studies of tire safety show that maintaining proper tire pressure, observing tire and vehicle load limits (not
carrying more weight in your vehicle than your tires or vehicle can safely handle), avoiding road hazards,
and inspecting tires for cuts, slashes, and other irregularities are the most important things you can do to
avoid tire failure, such as tread separation or blowout and flat tires. These actions, along with other care
and maintenance activities, can also:
•
Improve vehicle handling
•
Help protect you and others from avoidable breakdowns and accidents
•
Improve fuel economy
•
Increase the life of your tires
This section presents a comprehensive overview of tire safety, including information on the following
topics:
•
Basic tire maintenance
•
Uniform Tire Quality Grading System
•
Fundamental characteristics of tires
•
Tire safety tips
Use this information to make tire safety a regular part of your vehicle maintenance routine. Recognize that
the time you spend is minimal compared with the inconvenience and safety consequences of a flat tire or
other tire failure.
13-10
R O U T I N E
M A I N T E N A N C E
Safety First-Basic Tire Maintenance
Properly maintained tires improve the steering, stopping, traction, and load-carrying capability of your
vehicle. Under-inflated tires and overloaded vehicles are a major cause of tire failure. Therefore, as
mentioned above, to avoid flat tires and other types of tire failure, you should maintain proper tire
pressure, observe tire and vehicle load limits, avoid road hazards, and regularly inspect your tires.
Finding Your Vehicle’s Recommended Tire Pressure and Load Limits
Tire information placards and vehicle certification labels contain information on tires and load limits.
These labels indicate the vehicle manufacturer’s information including:
•
Recommended tire size
•
Recommended tire inflation pressure
•
Vehicle capacity weight (VCW—the maximum occupant and cargo weight a vehicle is designed
to carry)
•
Front and rear gross axle weight ratings (GAWR—the maximum weight the axle systems are
designed to carry)
For motor homes: Both placards and certification labels are permanently attached to the vehicle door
edge, door post, or glove-box door. You can also find the recommended tire pressure and load limit for
your vehicle in the vehicle owner’s manual.
Understanding Tire Pressure and Load Limits
Tire inflation pressure is the level of air in the tire that provides it with load-carrying capacity and affects
the overall performance of the vehicle. The tire inflation pressure is a number that indicates the amount of
air pressure—measured in pounds per square inch (psi)—a tire requires to be properly inflated. (You will
also find this number on the vehicle information placard expressed in kilopascals (kPa), which is the
metric measure used internationally).
Vehicle manufacturers determine this number based on the vehicle’s design load limit, that is, the greatest
amount of weight a vehicle can safely carry and the vehicle’s tire size. The proper tire pressure for your
vehicle is referred to as the “recommended cold inflation pressure.” (As you will read below, it is difficult
to obtain the recommended tire pressure if your tires are not cold.)
Because tires are designed to be used on more than one type of vehicle, tire manufacturers list the
“maximum permissible inflation pressure” on the tire sidewall. This number is the greatest amount of air
pressure that should ever be put in the tire under normal driving conditions.
Checking Tire Pressure
It is important to check your vehicle’s tire pressure at least once a month for the following reasons:
13-11
R O U T I N E
M A I N T E N A N C E
•
Most tires may naturally lose air over time
•
Tires can lose air suddenly if you drive over a pothole or other object or if you strike the curb
when parking
•
With radial tires, it is usually not possible to determine under-inflation by visual inspection
For convenience, purchase a tire pressure gauge to keep in your vehicle. Gauges can be purchased at tire
dealerships, auto supply stores, and other retail outlets.
The recommended tire inflation pressure that vehicle manufacturers provide reflects the proper psi when
a tire is cold. The term cold does not relate to the outside temperature. Rather, a cold tire is one that has
not been driven on for at least three hours. When you drive, your tires get warmer, causing the air pressure
within them to increase. Therefore, to get an accurate tire pressure reading, you must measure tire
pressure when the tires are cold or compensate for the extra pressure in warm tires.
Steps for Maintaining Proper Tire Pressure
•
Step 1: Locate the recommended tire pressure on the vehicle’s tire information placard,
certification label, or in the owner’s manual
•
Step 2: Record the tire pressure of all tires
•
Step 3: If the tire pressure is too high in any of the tires, slowly release air by gently pressing on
the tire valve stem with the edge of your tire gauge until you get to the correct pressure
•
Step 4: If the tire pressure is too low, note the difference between the measured tire pressure and
correct tire pressure. These “missing” pounds of pressure are what you will need to add
•
Step 5: At a service station, add the missing pounds of air pressure to each tire that is underinflated
•
Step 6: Check all the tires to make sure they have the same air pressure (except in cases in which
the front and rear tires are supposed to have different amounts of pressure)
If you have been driving your vehicle and think that a tire is under-inflated, fill it to the recommended
cold inflation pressure indicated on your vehicle’s tire information placard of certification label. While
your tire may still be slightly under-inflated due to the extra pounds of pressure in the warm tire, it is safer
to drive with air pressure that is slightly lower than the vehicle manufacturer’s recommended cold inflation
pressure than to drive with a significantly under-inflated tire. Since this is a temporary fix, don’t forge tot
recheck and adjust the tire’s pressure when you can obtain a cold reading.
13-12
R O U T I N E
M A I N T E N A N C E
Tire Size
To maintain tire safety, purchase new tires that are the same size as the vehicle’s original tires or another
size recommended by the manufacturer. Look at the tire information placard, the owner’s manual, or the
sidewall of the tire you are replacing to find this information. If you have any doubt about the correct size
to choose, consult with the tire dealer.
Tire Tread
The tire tread provides the gripping action and traction that prevent your vehicle from slipping or sliding,
especially when the road is wet or icy. In general, tires are not safe and should be replaced when the tread
is worn down to 1/16 of an inch. Tires have built-in tread-wear indicators that let you know when it is
time to replace your tires. These indicators are raised sections spaced intermittently in the bottom of the
tread grooves. When they appear “even” with the outside of the tread, it is time to replace your tires.
Another method for checking tread depth is to place a penny in the tread with Lincoln’s head upside
down and facing you. If you can see the top of Lincoln’s head, you are ready for new tires.
Tire Balance and Wheel Alignment
To avoid vibration or shaking of the vehicle when a tire rotates, the tire must be properly balanced. This
balance is achieved by positioning weights on the wheel to counterbalance heavy spots on the wheel-andtire assembly. A wheel alignment adjusts the angles of the wheels so that they are positioned correctly
relative to the vehicle’s frame. This adjustment maximizes the life of your tires. These adjustments require
special equipment and should be performed by a qualified technician.
Tire Rotation
Rotating tires from front to back and from side to side can reduce irregular wear (for vehicles that have
tires that are all the same size). Look in your owner’s manual for information on how frequently the tires
on your vehicle should be rotated and the best pattern for rotation.
13-13
R O U T I N E
M A I N T E N A N C E
A Tire Rotation Example
For maximum mileage, rotate your tires every 5,000 miles. Follow correct rotation patterns.
Tire Repair
The proper repair of a punctured tire requires a plug for the hole and a patch for the area inside the tire
surrounds the puncture hole. Punctures through the tread can be repaired if they are not too large, but
punctures to the sidewall should not be repaired. Tires must be removed from the rim to be properly
inspected before being plugged and patched.
Tire Fundamentals
Federal law requires tire manufacturers to place standardized information on the sidewall of all tires. This
information identifies and describes the fundamental characteristics of the tire and also provides a tire
identification number for safety standard certification and in case of a recall.
13-14
R O U T I N E
M A I N T E N A N C E
Information on Passenger Vehicle Tires
Please refer to the diagram below.
P—The “P” indicates the tire is for passenger vehicles. NOTE: Passenger car tires are not recommended
for use on trailers, because the capacity ratings are not marked on the side walls of these tires. In the event
a passenger car tire is used, the capacity must be de-rated by 10%.
Next number—This three-digit number gives the width in millimeters of the tire from sidewall edge to
sidewall edge. In general, the larger the number, the wider the tire.
Next number—This two-digit number, known as the aspect ratio, gives the tire’s ratio of height to width.
Numbers of 70 or lower indicate a short sidewall for improved steering response and better overall
handling on dry pavement.
R—The “R” stands for radial. Radial ply construction of tires has been the industry standard for the past
20 years.
Next number—This two-digit number is the wheel or rim diameter in inches. If you change your wheel
size, you will have to purchase new tires to match the new wheel number.
Next number—This two- or three-digit number is the tire’s load index. It is a measurement of how
much weight each tire can support. You may find this information in your owner’s manual. If not, contact
a local tire dealer. NOTE: You may not find this information on all tires because it is not required by law.
M+S—The “M+S” or “M/S” indicates that the tire has some mud and snow capability. Most radial tires
have these markings.
13-15
R O U T I N E
M A I N T E N A N C E
Speed Rating—The speed rating denotes the speed at which a tire is designed to be driven for extended
periods of time. The ratings range from 99 miles per hour (mph) to 186 mph. These ratings are listed
below. NOTE: You may not find this information on all tires because it is not required by law.
Letter Rating
Speed Rating
Q
R
S
T
U
H
V
W
Y
99 mph
106 mph
112 mph
118 mph
124 mph
130 mph
149 mph
168* mph
186* mph
*For tires with a maximum speed capability over 149 mph, tire manufacturers sometimes use the letters
ZR. For those with a maximum speed capability over 186 mph, tire manufacturers always use the letters
ZR.
U.S. DOT Tire Identification Number—This begins with the letters “DOT” and indicated that the
tire meets all federal standards. The next two numbers or letters are the plant code where it was
manufactured, and the last four numbers represent the week and year the tire was built. For example, the
numbers 3197 means the 31st week of 1997. The other numbers are marketing codes used at the
manufacturer’s discretion. This information is used to contact customers if a tire defect requires a recall.
Tire Ply Composition and Materials Used—The number of plies indicates the number of layers of
rubber-coated fabric in the tire. In general, the greater the number of plies, the more weight a tire can
support. Tire manufacturers also must indicate the materials in the tire, which include steel, nylon,
polyester, and others.
Maximum Load Rating—This number indicates the maximum load in kilograms and pounds that can
be carried by the tire.
Maximum Permissible Inflation Pressure—This number is the greatest amount of air pressure that
should ever be put in the tire under normal driving conditions.
13-16
R O U T I N E
M A I N T E N A N C E
Additional Information on Light Truck Tires
Please refer to diagram below.
Tires for light trucks have other markings besides those found on the sidewalls of passenger tires.
LT—The “LT” indicates the tire is for light trucks or trailers.
ST—An “ST” is an indication the tire is for trailer use only.
Max. Load Dual kg (lbs) at kPa (psi) Cold—This information indicates the maximum load and tire
pressure when the tire is used as a dual; that is, when four tires are put on each rear axle (a total of six or
more tires on the vehicle).
Max. Load Single kg (lbs) at kPa (psi) Cold—This information indicates the maximum load and tire
pressure when the tire is used as a single.
Load Range—This information identifies the tire’s load-carrying capabilities and its inflation limits.
Vehicle Load Limits
Determining the load limits of a vehicle includes more than understanding the load limits of the tires
alone.
On a motor home, there is a Federal certification label that is affixed to either the hinge pillar, door-latch
post, or the door edge that meets the door-latch post, next to the driver’s seating position. If none of
these locations is practicable, this label will be located to the left side of the instrument panel, or affixed to
the inward-facing surface of the door next to the driver’s seating position.
13-17
R O U T I N E
M A I N T E N A N C E
The certification label will indicate the vehicle’s gross vehicle weight rating (GVWR). This is the most
weight the fully loaded vehicle can weight. It will also provide the gross axle weight rating (GAWR). This
is the most a particular axle can weigh. If there are multiple axles, the GAWR of each axle will be
provided.
For motor homes, in the same location as the certification label described above, there is a vehicle placard.
This placard provides tire and loading information. In addition, this placard will show the vehicle’s seating
capacity for people and a statement regarding maximum cargo capacity.
Cargo Capacities
For motor homes, cargo can be added to the vehicle, up t the maximum weight specified on the placard.
For motorized vehicles, the combined weight of passengers and cargo is provided as a single number. If
fewer people are traveling, more cargo can be added. If more people are involved, the weight of cargo
must be reduced. In any case, remember: the total weight of a fully loaded vehicle, including passengers,
can not exceed the stated GVWR.
For motor homes, the water and propane also need to be considered. The weight of fully filled propane
containers is considered part of the weight of the RV before it is loaded with people or cargo and is not
considered part of the disposable cargo load. Water, however, is a cargo weight and is treated as such. If
there is a fresh water storage tank of 100 gallons, this tank when filled would weigh about 800 pounds. If
more cargo or people are being transported, water can be off-loaded to keep the total amount of cargo
added to the vehicle within the limits of the GVWR so as not to overload the vehicle. Understanding this
flexibility will allow you, the owner, to make choices that fit your travel and camping needs.
When loading your cargo, be sure it is distributed evenly to prevent overloading front to back and side to
side. Heavy items should be placed low and as close to the axle positions as reasonable. Too many items
on one side may overload a tire. The best way to know the actual weight of the vehicle is to weigh it at a
public scale. Talk to your RV dealer to discuss the weighing methods needed to capture the various
weights related to the RV. This would include weights for the following: axles, wheels, hitch and total
weight.
How Overloading Affects Your RV and Tires
The results of overloading can have serious consequences for passenger safety. Too much weight on your
vehicle’s suspension system can cause spring, shock absorber, or brake failure, handling or steering
problems, irregular tire wear, tire failure or other damage.
An overloaded vehicle is hard to drive and hard to stop. In cases of serious overloading, brakes can fail
completely, particularly on steep hills. The load a tire will carry safely is a combination of the size of tire, its
load range, and corresponding inflation pressure.
Excessive loads and/or under-inflation cause tire overloading and, as a result, abnormal tire flexing occurs.
This situation can generate an excessive amount of heat within the tire. Excessive heat may lead to tire
failure.
13-18
R O U T I N E
M A I N T E N A N C E
It is the air pressure that enables a tire to support the load, so proper inflation is critical. Since RVs can be
configured and loaded in many ways, air pressures must be determined from actual loads (determined by
weighing) and taken from the load and inflation tables provided by the tire manufacturer. These air
pressures may differ from those found on the certification label. However, they should never exceed the
tire limitation for load or air pressure. If you discover that your tires cannot support the actual weights, the
load will need to be lightened.
Tire Safety Tips
Preventing Tire Damage
•
Slow down if you have to go over a pothole or other object in the road.
•
Do not run over curbs or other foreign objects in the roadway, and try not to strike the curb
when parking.
Tire Safety Checklist
•
Check tire pressure regularly (at least once a month), including the spare.
•
Inspect tires for uneven wear patterns on the tread, cracks, foreign objects, or other signs of wear
or trauma.
•
Remove bits of glass and foreign objects wedged in the tread.
•
Make sure your tire valves have valve caps.
•
Check tire pressure before going on a long trip.
•
Do not overload your vehicle. Check the Tire Information and Loading Placard or User’s Manual
for the maximum recommended load for the vehicle.
Section Two:
Steps for Determining Correct Load Limit
1. Locate the statement “The combined weight of occupants and cargo should never exceed XXX
lbs” on your vehicles placard.
2. Determine the combined weight of the driver and passengers that will be riding in your vehicle.
3. Subtract the combined weight of the driver and passengers from XXX kilograms or XXX
pounds.
13-19
R O U T I N E
M A I N T E N A N C E
4. The resulting figure equals the available amount of cargo and luggage capacity. For example, if the
“XXX” equals 1400 lbs. and there will be five 150 lb. passengers in your vehicle, the amount of
available cargo and luggage capacity is 650 lbs. (1400-750 (5 x 150) = 650 lbs.)
5. Determine the combined weight of luggage and cargo being loaded on the vehicle. That weight
may not safely exceed the available cargo and luggage capacity calculated in Step #4.
6. If your vehicle will be towing a trailer, load from your trailer will be transferred to your vehicle.
Consult this section to determine how this reduces the available cargo and luggage capacity of
your vehicle.
Section Three:
Glossary of Tire Terminology
Accessory weight—The combined weight (in excess of those standard items which may be replaced) of
automatic transmission, power steering, power brakes, power windows, power seats, radio and heater, to
the extent that these items are available as factory-installed equipment (whether installed or not).
Bead—The part of the tire that is made of steel wires, wrapped or reinforced by ply cords and that is
shaped to fit the rim.
Bead separation—This is the breakdown of the bond between components in the bead.
Bias ply tire—A pneumatic tire in which the ply cords that extend to the beads are laid at alternate angles
substantially less than 90 degrees to the centerline of the tread.
Carcass—The tire structure, except tread and sidewall rubber which, when inflated, bears the load.
Chunking—The breaking away of pieces of the tread or sidewall.
Cold inflation pressure—The pressure in the tire before you drive.
Cord—The strands forming the plies in the tire.
Cord separation—The parting of cords from adjacent rubber compounds.
Cracking—Any parting within the tread, sidewall, or inner liner of the tire extending to cord material.
CT—A pneumatic tire with an inverted flange tire and rim system in which the rim is designed with rim
flanges pointed radially inward and the tire is designed to fit on the underside of the rim in a manner that
encloses the rim flanges inside the air cavity of the tire.
Curb weight—The weight of a motor vehicle with standard equipment including the maximum capacity
of fuel, oil, and coolant, and, if so equipped, air conditioning and additional weight optional engine.
13-20
R O U T I N E
M A I N T E N A N C E
Extra load tire—A tire designed to operate at higher loads and at higher inflation pressures than the
corresponding standard tire.
Groove—The space between two adjacent tread ribs.
Gross Vehicle Weight Rating (GVWR)—The maximum permissible weight of this fully loaded
motorhome.
Gross Axle Weight Rating ((GAWR)—The value specified as the load carrying capacity of a single axle
system, as measured at the tire-ground interfaces.
Hitch Weight—The vertical trailer load supported by the hitch ball.
Innerliner separation—The parting of the innerliner from cord material in the carcass.
Intended outboard sidewall—The sidewall that contains a white-wall, bears white lettering or bears
manufacturer, brand, and /or model name molding that is higher or deeper than the same molding on the
other sidewall of the tire or the outward facing sidewall of an asymmetrical tire that has a particular side
that must always face outward when mounted on a vehicle.
Light truck (LT) tire—A tire designated by its manufacturer as primarily intended for use on lightweight
trucks or multipurpose passenger vehicles.
Load rating—The maximum load that a tire is rated to carry for a given inflation pressure.
Maximum load rating—The load rating for a tire at the maximum permissible inflation pressure for that
tire.
Maximum permissible inflation pressure—The maximum cold inflation pressure to which a tire may
be inflated.
Maximum loaded vehicle weight—The sum of curb weight, accessory weight, vehicle capacity weight,
and production options weight.
Measuring rim—The rim on which a tire is fitted for physical dimension requirements.
Non-pneumatic rim—A mechanical device which, when a non-pneumatic tire assembly incorporates a
wheel, supports the tire, and attaches, either integrally or separably, to the wheel center member and upon
which the tire is attached.
Non-pneumatic tire assembly—A non-pneumatic tire, alone or in combination with a wheel or wheel
center member, which can be mounted on a vehicle.
Normal occupant weight—This means 68 kilograms (150 lbs.) times the number of occupants specified
in the second column of Table I of 49 CFR 571.110.
13-21
R O U T I N E
M A I N T E N A N C E
Occupant distribution—The distribution of occupants in a vehicle as specified in the third column of
Table I of 49 CFR 571.110.
Open splice—Any parting at any junction of tread, sidewall, or innerliner that extends to cord material.
Outer diameter—The overall diameter of an inflated new tire.
Overall width—The linear distance between the exteriors of the sidewalls of an inflated tire, including
elevations due to labeling, decorations, or protective bands or ribs.
Pin Weight—The vertical trailer load supported by the king pin of a fifth wheel hitch.
Ply—A layer of rubber-coated parallel cords.
Ply separation—A parting of rubber compound between adjacent plies.
Pneumatic tire—A mechanical device made of rubber, chemicals, fabric and steel or other materials,
that, when mounted on an automotive wheel, provides the traction and contains the gas or fluid that
sustains the load.
Production options weight—The combined weight of those installed regular production options
weighing over 2.3 kilograms (5 lbs.) in excess of those standard items which they replace, not previously
considered in curb weight or accessory weight, including heavy duty brakes, ride levelers, roof rack, heavy
duty battery, and special trim.
Radial ply tire—A pneumatic tire in which the ply cords that extend to the beads are laid at substantially
90 degrees to the centerline of the tread.
Recommended inflation pressure—This is the inflation pressure provided by the vehicle manufacturer
on the Tire Information label and on the Certification/ VIN tag.
Reinforced tire—A tire designed to operate at higher loads and at higher inflation pressures than the
corresponding standard tire.
Rim—A metal support for a tire or a tire and tube assembly upon which the tire beads are seated.
Rim diameter—This means the nominal diameter of the bead seat.
Rim size designation—This means the rim diameter and width.
Rim type designation—This means the industry of manufacturer’s designation for a rim by style or
code.
Rim width—This means the nominal distance between rim flanges.
Section width—The linear distance between the exteriors of the sidewalls of an inflated tire, excluding
elevations due to labeling, decoration, or protective bands.
13-22
R O U T I N E
M A I N T E N A N C E
Sidewall—That portion of a tire between the tread and bead.
Sidewall separation—The parting of the rubber compound from the cord material in the sidewall.
Test rim—The rim on which a tire is fitted for testing, and may be any rim listed as appropriate for use
with that tire.
Tread—That portion of a tire that comes into contact with the road.
Tread rib—A tread section running circumferentially around a tire.
Tread separation—Pulling away of the tread from the tire carcass.
Treadwear indicators (TWI)—The projections within the principal grooves designed to give a visual
indication of the degrees of wear of the tread.
Vehicle capacity weight—The rated cargo and luggage load plus 68 kilograms (150 lbs.) times the
vehicle’s designated seating capacity.
Vehicle maximum load on the tire—The load on an individual tire that is determined by distributing to
each axle its share of the maximum loaded vehicle weight and dividing by two.
Vehicle normal load on the tire—The load on an individual tire that is determined by distributing to
each axle its share of the curb weight, accessory weight, and normal occupant weight (distributed in
accordance with Table I of CFR 49 571.110) and dividing by 2.
Weather side—The surface area of the rim not covered by the inflated tire.
Wheel center member—In the case of a non-pneumatic tire assembly incorporating a wheel, a
mechanical device which attached, either integrally or separably, to the non-pneumatic rim and provides
the connection between the non-pneumatic rim and the vehicle; or, in the case of a non-pneumatic tire
assembly not incorporating a wheel, a mechanical device which attaches, either integrally or separably, to
the non-pneumatic tire and provides the connection between tire and the vehicle.
Wheel-holding fixture—The fixture used to hold the wheel and tire assembly securely during testing.
Tire Pressure
Correct tire inflation pressure is essential to maximizing the life of the tires (Figures 13-6,7) and
assuring the safety of the vehicle and its occupants. Driving with tires that are not correctly inflated
for the load of the motor home is dangerous and may cause premature wear, tire damage, and/or
loss of control of the motor home.
An under inflated tire will build up excessive heat that may actually approach the vulcanization
temperature of the rubber and lead to tread separation and/or disintegration of the tire.
13-23
R O U T I N E
M A I N T E N A N C E
Additionally, under inflated tires will also cause poor handling of the motor home, rapid and/or
irregular tire wear, and an increase in rolling resistance of the motor home which, in turn, produces a
decrease in fuel economy of operation.
An over inflated tire will reduce the tire’s
“footprint” (i.e., its actual contact with the
road); thus, reducing the traction, braking
capacity, and handling of the motor
home. A tire that is over inflated for the
load that it is carrying will also contribute
to a harsh ride, uneven tire wear, and the
tire itself will be more susceptible to
Figure 13-6. Rear Tires
impact damage.
Figure 13-7. Front Tires
Maintaining correct tire pressure for each loaded wheel position on the
motor home is critically important and must be a part of regular vehicle maintenance.
Tire Maximum Load Rating
Federal law requires that the maximum load rating be molded into the sidewall of the tire. If one
looks at a tire sidewall, one may see some typical information, such as:
Max. Load Single 3640 Lbs at 85 psi cold
Max. Load Dual
3415 Lbs at 85 psi cold
The maximum load allowed for the size tire and load rating and the minimum cold air-inflation pressure
needed to carry that stated maximum load are noted on the tire. Using less air pressure would reduce the
load-carrying capacity of the tire.
The amount of air pressure one needs depends on the weight of the fully loaded motor home.
Consequently, one cannot determine the correct air-inflation pressure, unless one knows the
actual weight of the motor home.
Weighing the Motor Home
Earlier, in Chapter 1, the procedures for weighing the motor home were presented (see p. 1-7). These
procedures provided the weighing of a “non-loaded” (i.e., not stocked with the possessions and
provisions the user would normally have onboard for travel) motor home. Obviously, any additional
weight stored onboard (inside and underneath) the motor home will contribute to the overall weight of
the motor home.
If not stored uniformly throughout the motor home, additional weight of the possessions and provisions
of the motor-home user will load each axle and each tire differently (front-to-rear and side-to-side
distribution of that additional weight). Accordingly, it is necessary to weigh the motor home fully
13-24
R O U T I N E
M A I N T E N A N C E
loaded as the user would have it for travel. Moreover, it is necessary to weigh each tire position
individually.
Overloading the motor home can produce problems with the tires, wheels, springs, brakes, drive train,
and other motor home assemblies. In addition, an overloaded motor home uses more fuel, is more
difficult to handle properly, and can lead to driver fatigue more quickly. In a worst-case condition, if any
component should fail, this could result in loss of control of the motor home and subsequent damage.
In certain states, the Highway Patrol routinely weighs motor homes to check for overloaded axle weights.
Therefore, there are many good reasons for assuring that the motor home is properly loaded and not
overloaded—this can be accomplished through a proper weighing of the fully loaded motor home.
One can find various places that have certified public scales where one’s motor home can be weighed.
For example, moving and storage company lots, farm suppliers with grain elevators, gravel pits, recycling
companies, and large-scale commercial-truck stops are some of the possible locations for weighing the
motor home. One can also check the Yellow Pages of the telephone book for “scales – public” or
“weighers” to determine other locations for weighing the motor home.
A brief overview of the procedure for weighing the motor home is shown in Figure 13-8.
Figure 13-8. Procedure for Weighing the Motor Home (Each Tire Position Individually)
Note 1: From the tire manufacturer’s load and inflation tables or the sidewall of the tires mounted on the motor home.
Note 2: If the motor home has duals, read dual capacity from the tire and multiply by 2 (two) to obtain dual-assembly loadcarrying capacity.
13-25
R O U T I N E
M A I N T E N A N C E
More detailed information can be found in the manufacturer’s literature associated with the chassis and/or
the tires provided with the motor home. For example, the following table (Figure 13-9) illustrates the
inflation pressures for Michelin tires as a function of the loads per position for a specified speed of the
motor home. In this manner, one can determine the appropriate inflation pressures for each of the tires
on the motor home, as a function of the loads
they are to carry on the trip(s) the motor home
is to take. Whenever there is a significant
change in the loading regimen of the motor
home, it would be wise to recalculate the load
weights of the tires to assure optimal use of the
motor home.
Frequency of Checking Tire Inflation
Pressures
When one has determined the “correct” tire Figure 13-9. Typical Inflation Pressures for Motor Home Tires
inflation pressures for each of the motor-home
tires (as a function of the “fully loaded” condition, of course) and inflated the tires under “cold” (i.e., tires
haven’t been driven for more than one mile) conditions; then the air pressures in the tires should be
periodically checked to make sure that they retain their proper pressures. It is recommended that tire
pressures be checked at least once a month (every two weeks would be better) and before any major trip.
On long trips, the tires should be checked every “drive” morning. On short trips (a day or less), the tires
should be checked before one departs on the trip and again before one returns home.
Check tire pressures when they are “cold”; that is, the tires haven’t been driven at all or, at most, less than
one mile before being measured. In this manner, the tire pressure has not been increased by the heating
associated with both tire sidewall and tread flexure associated with traveling. If one must check tires that
are warm or hot, remember that they will necessarily read higher than normal. Do not “bleed” these tires
down to the “cold pressure” readings, as they will probably then be underinflated when they are actually
cool. Don’t make any adjustments to tire pressures when the tires are warm or hot, if such can be
avoided.
To make these tire-pressure measurements, it is recommended that one purchase a quality, truck-tire air
gauge which has an angled dual head. This type of gauge allows one to check inflation pressures of both
the inner dual wheel which has the valve stem pointing towards one and of the outer wheel which has the
valve stem pointing away from one. Pressure-sealing valve caps should always be used to protect the
valve stems and prevent air from escaping from the valve stems.
Tire Wear, Balance, and Wheel Alignment
In addition to tire inflation considerations, the tires should also be periodically examined for other types of
normal “wear and tear.” If installed and maintained properly, all tires mounted on the motor home
should wear in a smooth, even pattern. If the tires begin to show irregular wear patterns and the motorhome alignment is still correct, then sometimes just rotating the tires by changing wheel position and
rotation of the tires will allow the tires to wear evenly. Check with the chassis manufacturer (Ford or
Workhorse) and its literature (in the Owner’s Information Package) for particulars on maintaining proper
13-26
R O U T I N E
M A I N T E N A N C E
wheel alignment. Tire rotation should include the spare tire in the rotation pattern and changing the
direction of rotation of the tires. Tires can be rotated front-to-rear and side-to-side.
Tire Cleaning
Proper cleaning of the tires will assure maximum years of service. A soft brush and the normal mild soap
should be used to clean the tires. Use care in applying any tire “dressing” product as these contain
petroleum derivatives, alcohol, or silicones which may cause deterioration of the rubber, possibly leading
to cracking, and accelerate the aging process. In many instances it isn’t the actual dressing itself, but the
reaction of that product with the antioxidant in the tire. Heat can compound this problem also.
INTERIOR CARE
Important
The fading of upholstery, carpet, and other interior fabrics is generally caused by
excessive sunlight. The drapes, blinds, or other shades should be kept closed
when the vehicle is parked for an extended period of time to minimize the fading.
Normal deterioration of the appearance of such items caused by wear and/or
exposure to strong lighting is not covered by the Tiffin Motorhomes Limited
Warranty.
Carpet
A weekly routine of vacuuming the carpet and fabrics throughout the vehicle is recommended.
Doing such will prevent an undue accumulation of dirt which can detract from the appearance of
the carpeting and, thus, shorten its expected life. Remember to empty or replace vacuum bags
before they become nearly full—this practice will assure that sufficient vacuuming capability is
readily available to handle any and all cleaning situations that may arise. In carpet areas that receive
the most sunlight, close the curtains frequently to prevent fading. Also act quickly when anything is
spilled or dropped onto the carpet to prevent or minimize staining.
Included in the Tiffin Motorhomes Owner’s Information Package is the carpet manufacturer’s
Carpet Care Guide. The Carpet Care Guide lists detailed information on cleaning soiled areas and
removing stains from the carpet installed in the vehicle.
13-27
R O U T I N E
M A I N T E N A N C E
Fabrics
The fabrics used in this Tiffin motor home for the bedspread, draperies, headboard, and valances
(Figure 13-10) contain fire-retardant additives that may be damaged by use of improper cleaning
products. Cleaning instructions for these items are DRY CLEAN ONLY.
Water-based products are not recommended for cleaning the fabrics in your new vehicle.
Most water-based, household-cleaning products are not formulated
for use on these fabrics and may cause
excessive shrinkage or fading. For best
results, the fabrics in this vehicle (Figure
13-11) should be cleaned by a
professional carpet and upholstery
cleaner.
Spills, spots, or stains should be treated as
Figure 13-11. Fabrics in
Living Room
soon as possible to avoid permanent
damage to the fabrics. If a spill occurs,
blot the fluid with a dry towel; do not rub the spill as rubbing may cause the liquid to “set” in the
fabric and cause a stain. When attempting to clean a spot or stain, always start from the outside and
work inward to avoid spreading the stain further.
Figure 13-10. Fabrics in
Bedroom
Some stains or soils are extremely difficult or impossible to be removed completely. These stains
should receive immediate, professional attention. Spills, spots, stains, or soiled areas are the
responsibility of the owner and are not covered by Tiffin Motorhomes Limited Warranty.
Warning
When cleaning the upholstery and fabric of the motor home, do not use lacquer
thinner, nail polish remover, laundry soaps, or bleach. Never use carbon
tetrachloride or gasoline for cleaning purposes. These substances may cause
damage to the materials being cleaned and most are high flammable.
Walls and Ceiling
The wall and ceiling coverings should be cleaned periodically to maintain a new appearance. Use a
non-abrasive cleaner with a soft cloth on the walls. Do not use solvents of any kind, as those
solvents may damage the surfaces being so cleaned.
13-28
R O U T I N E
M A I N T E N A N C E
Dashboard
To keep the dashboard (Figure 13-12) in like-new condition, follow these guidelines:
DO:
•
•
•
Dust and clean the dash with a soft, damp cloth
or chamois, wiping the service gently.
Use a mild detergent and lukewarm water.
Dry the surface, after washing and rinsing, by
blotting with a damp cloth or chamois.
DO NOT:
• Use harsh chemicals that may damage the
dashboard.
Figure 13-12. Dashboard and Instrumentation Panel of
Allegro
• Use cloths containing grit or abrasive
particles or kitchen-scouring compounds
to clean or dust the dashboard.
• Subject the dashboard to hard, direct blows.
• Use boiling water, strong solvents, or other such materials to clean the dashboard as they
will soften the plastic.
Woodwork & Floors
The wood cabinetry (Figure 13-13) should be cared for with furniture polish to sustain the natural
beauty and luster of the wood. This procedure
will also keep the cabinetry looking new, prevent
the wood from drying, and reduce chances of
accidental staining or aging.
Use area rugs and floor mats by the entrance door to
trap dirt. Use soap and water to clean the vinyl
flooring (Figure 13-14), begin by vacuuming the
floor to remove loose dust and dirt. Then, damp
Figure 13-14. Typical Floors
Figure 13-13.
mop the floor with a cleaning solution consisting Bathroom Cabinetry
of any standard cleaning solution available through retail sales outlets (e.g., WalMart, Kmart, Target) or grocery stores. The mop should be damp, but not dripping. To remove candle
wax or chewing gum, carefully scrape off when the material has hardened. For further tips, please see the
manufacturer’s information sheet in your Tiffin Motorhomes Owners Information Package.
Countertops
To care properly for the countertops (Figure 13-15) in your new vehicle, always use a heat pad or
trivet to protect the surface from hot objects that may mar or damage the countertop surface. Hot
13-29
R O U T I N E
M A I N T E N A N C E
pans and heat-producing appliances (such as electric skillets), when set directly on top of the
countertop, can possibly mar the beauty and finish of the product.
Be sure to use a cutting board, rather than cutting directly on the countertop surfaces. Although
minor scratches and cuts can be repaired, a little care will assure that the countertop surfaces will
keep looking new for years.
Avoid using harsh chemicals on the countertop. Wipe the
countertop with a damp cloth to remove water spots. For most
dirt and stains, wipe with a damp cloth and use soapy water or
ammonia-based cleaners (e.g., Windex).
Do not expose the surface to harsh chemicals, such as paint
remover, turpentine, nail polish remover, or any stove and drain
cleansers. If these chemicals should come into contact with the
countertop surfaces, immediately wash off these chemicals,
using appropriate safety measures to avoid injury.
Figure 13-15. Kitchen Sink
Accessories
The brass light fixtures, bath accessories, and faucets can be cleaned by wiping with a soft, damp
cloth. Washing with warm water will remove dry water spots. Do not use cleaners that contain
harsh or abrasive chemicals. Alcohol or other similar solvents should never be used.
Detectors
The CO/LP gas combination detector is self-contained and DOES NOT require any maintenance other
than normal cleaning and periodic testing. The smoke detector installed in the
motor home is a nine-volt, battery-operated detector. The CO/LP gas detector
is 12 volt operated.
The batteries in the smoke and CO/LP gas detectors (Figure 13-16) need to be
tested periodically and replaced when necessary (usually semiannually). When
cleaning the case on any of the detectors, use a damp cloth or paper towel. Do
not spray cleaners or wax directly into the case as this action may cause false alarms
or hinder the normal operation of the detectors.
Figure 13-16. Carbon
Monoxide/LP gas
Detector
An inexpensive battery tester, available from any local electronics retailer, would be a good investment to
make. This tester would allow checking of the batteries in the various alarms, any flashlights used in the
motor home, and batteries in other appliances (e.g., portable radios, MP3 players, CD players, PDAs, and
various electronic games) which may be in the motor home during travels.
13-30
R O U T I N E
M A I N T E N A N C E
Condensation
Important
Since surface condensation within the motor home cannot be controlled by the
manufacturer, damage caused by condensation is not covered by the Tiffin
Motorhomes Limited Warranty.
Damage may occur to your vehicle if excessive condensation exists. Accumulation of condensation
on surfaces within your motor home occurs when warm, moist air contacts a cool surface. It is
most evident on the inside of windows, but this problem can be controlled by:
1. Slightly opening a window or roof vent to allow the moisture to escape from the motor
home.
2. Using a small dehumidifier which is also effective in removing moisture from the air.
Condensation levels are highest during times when a person is cooking or taking a shower in the
motor home, but these occasions are not the only times condensation is present. Walls and ceiling
panels may become wet when the moisture accumulates on these surfaces. Tiffin Motorhomes does
not recommend the use of any catalytic heaters because of resulting extensive condensation.
ROUTINE MAINTENANCE SCHEDULES
Important
Always follow the chassis maintenance guidelines found in the chassis
manufacturer’s owner’s manual.
All routine maintenance is the responsibility of the owner and is not covered by the Tiffin
Motorhomes Limited Warranty. Use the maintenance record found in Chapter 15 to record all
performed maintenance as required.
Please note that any damage caused by improper or unperformed maintenance is not covered by the
Tiffin Motorhomes Limited Warranty. Items supplied by other manufacturers may require specific
13-31
R O U T I N E
M A I N T E N A N C E
individual maintenance not listed herein. Please refer to the manufacturers’ suggested maintenance
guidelines in the Owners Information Package.
Important
Cosmetic adjustments and alignments must be performed within the first three
months from date of original purchase for warranty consideration. Thereafter,
these items are considered routine maintenance.
Monthly
•
Check the water levels of the batteries.
Every Three Months
•
•
•
•
•
•
•
•
•
Check LP gas lines for leaks with soap solution or leak detector.
Clean the microwave hood exhaust fan filter and blades.
Test smoke alarm, carbon monoxide detector, and LP gas detector.
Check operation of windows, latches, and hinges.
Clean the roof ducted air conditioner filter or filters.
Clean and inspect door and window seals; reseal where necessary.
Inspect and reseal around the tub and shower area where necessary.
Lubricate the exterior door hinges and latches with a graphite (silicone) lubricant.
Check, clean, and tighten battery cables and inspect batteries for proper fluid levels.
Every Six Months
•
•
•
•
•
•
•
•
•
Inspect the slide-out for proper seal. If realignment is necessary, please contact an
authorized Tiffin Motorhomes Service Center.
Inspect the exterior rubber slide-out seals and apply an UV inhibitor, such as 303 Protectant.
Change the battery in the smoke detector.
Rotate tires as recommended by the tire manufacturer.
Check all gas appliances for proper operation.
Have the LP system inspected by a qualified technician.
Lubricate the movable parts on the entrance step.
Change the batteries in both the smoke detector and the CO/LP gas detector.
For the optional washer/dryer, inspect the water hoses (both the hot and cold supply lines) to
note any bulges, kinks, cuts, wear, or leaks. Especially note the hot-water hose, as this tends
13-32
R O U T I N E
M A I N T E N A N C E
to degrade faster than the cold-water hose. Replace if hose feels “soft” or “spongy.”
Annually
•
•
•
Inspection of roof seams and joints should be performed by an authorized Motorhomes
Service Center. If resealing is necessary, it is the owner’s responsibility and is not covered by
the Tiffin Motorhomes Limited Warranty.
Sanitize the fresh water system.
Wax and buff all gel-coat surfaces on the vehicle as described previously in this chapter.
Winterizing
To store your vehicle for the winter months, it is necessary to winterize the water system to help
prevent freezing of this system. To do this, follow these instructions:
1. Drain all the water from the water system including the holding tank(s), the hot water heater,
and the water tank; also drain the optional water filter, if installed. For the holding tank(s),
open the gate valve(s) to drain the tanks. (NOTE: this procedure is to be performed only
at a wastewater pumping station to prevent dumping of contaminated water elsewhere). For
the hot water heater, remove the outside cover and then remove the drain plug. When this
tank is drained, replace the drain plug and then replace
the cover. For the water tank, open the green-handled
valve to drain the tank; then close the green-handled
valve. If an optional water filter is installed, remove the
filter cartridge and store it in a clean environment (e.g.,
resealable plastic bag); empty any excess water from the
filter housing and replace the housing.
2.
Turn the by-pass valves at the water heater to the “bypass” position to prevent filling the water heater tank
with antifreeze.
3. Disconnect the inlet connection to the water pump [in
the sanitary service compartment under the motor home]
(Figure 13-17). Attach the supplied, vinyl hose (via the
plastic coupling on the hose) to the inlet connection and
hand-tighten that connection; do not over-tighten.
Figure 13-17. Wintering Process for the
Motor Home
4. Place the other end of the hose into a gallon of freshwater system antifreeze (one can refer
to the local Tiffin Motorhomes dealer or representative for the freshwater antifreeze
formulation for your specific area). NOTE: Do not use automotive antifreeze; use only
antifreeze approved for RV applications; otherwise, damage to the systems being protected
may result.
13-33
R O U T I N E
M A I N T E N A N C E
5. Turn “on” the water pump to start the flow of the antifreeze. Turn “on” each faucet, one at
a time, and allow pure antifreeze to run through that piping. Let about one cup drop into
the drains to protect the traps.
6. When all the antifreeze is withdrawn from the bottle, disconnect the clear vinyl hose from
the water-pump inlet connection and reconnect the inlet line to the water pump. (This may
require more than one gallon of antifreeze).
7. When the winterizing process is completed, turn the water pump “off” and then reconnect
the water line. Store the vinyl hose for future use.
8. Open the water supply valve that controls flow from the pump to the tank to help prevent
freezing on that water line.
Note: Remember, the motor home also has an exterior shower; therefore, this system must be
winterized, as well.
If the motor home is equipped an optional ice maker and/or an optional washer/dryer, the
following additional steps should be taken:
Washer/Dryer (optional)
1. With the washer/dryer power in the “off” position, put ½ quart of R.V.-type antifreeze
in the drum; then close the door.
2. Turn the Program Selector knob to “spin.” Then turn the power “on” and let the
machine go through the spin cycle for one or two minutes.
3. Turn the power “off” and then unplug the washer/dryer or disconnect the power cord.
4. Shut off both water faucets and then disconnect the water-inlet hoses from the faucets
and drain them. This completes the process.
Alternative Washer/Dryer Winterization through the Freshwater System
1. If one is currently pumping antifreeze through the freshwater system, follow these steps
to winterize the washer/dryer:
2. With the washer/dryer power “off,” turn the Wash Temperature knob to “Warm.”
3. Turn the Program Selector knob to “Regular Wash” (located in the “Cotton Heavy
Duty” section of the knob). Then turn the power “on.”
13-34
R O U T I N E
M A I N T E N A N C E
4. When you see antifreeze in the drum, turn the power “off.” Then advance the Program
Selector knob to “Spin.”
5. Turn the power “on” and allow the drum to spin for about 30 seconds.
6. Turn the power “off.” This completes the process.
Depending on whether your particular motor home has a Dometic or a Norcold refrigerator, there are
some steps to be taken in winterizing the optional ice maker associated with that refrigerator. For each
refrigerator model, the proper steps to be taken are these:
Dometic Refrigerator Ice Maker (optional)
1. Shut off the water supply to the ice maker.
2. Place a shallow pan under the water solenoid valve.
3. Remove the inlet fitting to the ice-maker water solenoid valve. Then drain the water from the
supply line.
4. Remove the plastic nut and water line from the outlet side of the water solenoid valve. Then
drain the water from that line. Note: Do not lose the metal insert from the plastic water line.
One recommended way to secure this insert is to place it into a “zip lock” bag, seal the bag, punch
a small hole through the top of the bag above the zip-lock, insert any type of “twist-tie” (i.e.,
paper-coated, flexible metal wire) fastener through the hole, and then secure that bag to the outlet
line for safekeeping.
5. Connect a source of compressed air (up to 20 psig, maximum) onto the inlet fitting of the water
solenoid valve. Apply AC power to the solenoid valve for forcing the icemaker mold assembly
through several harvest cycles.
6. Remove the plastic cover from the mold assembly. The bail arm must be in the “down” (or
“on”) position.
7. Start the harvest cycle with a flat-blade screwdriver inserted into the center of the small gear.
8. Turn the gear counterclockwise (CCW), when the hold switch closes, the mold assembly will
continue to operate through the harvest cycle. During the water-fill sequence of the harvest cycle,
the compressed air will blow out the water trapped in the solenoid valve.
9. Repeat the harvest cycle operation (i.e., steps 7 and 8) several times. Note: Damage to the
solenoid valve can occur if the AC power is applied for more than 20 seconds.
13-35
R O U T I N E
M A I N T E N A N C E
10. Reconnect and tighten the lines on the water solenoid valve. The metal insert must be installed in
the plastic water line going to the outlet side of the water solenoid. Leave the water supply turned
“off” until temperatures are above 0º F (-18º C).
11. Dry out the ice-maker mold assembly with a soft cloth. Place the bail arm in the “up” (“off’)
position.
De-Winterizing
1. To de-winterize your vehicle, open both of the low-point drains to allow the antifreeze
solution to drain from the water system.
2. Next, close the low-point drains and connect your vehicle to the city water system. Put
water in the freshwater tank and pump at least one gallon through the water pump to
remove the antifreeze from the water pump. Keep the water heater supply valve closed
and the water heater bypass valves open. The supply valve for the freshwater tank from
the pump must remain closed.
3. As in winterizing, open the kitchen faucet, bath faucet, inside and outside showers,
turning “on” both the hot- and the cold-water valves and flushing the stool until the
antifreeze solution is flushed out of the system and the water flow is clear.
4. Once the system has been flushed, open the water heater supply valve and close the
water heater bypass valve. Open the freshwater tank supply valve from the pump and
the icemaker valve. Be sure that the water heater tank is completely filled with water
before turning “on” the water-heater power or else significant damage to the tank and
its plumbing may result.
5. Reinstall the (optional) water filter.
6. Be sure to close the fresh water tank drain valves to allow the tank to fill.
Washer/Dryer (Optional)
1. Flush the water pipes.
2. Reconnect the water inlet hoses to the corresponding HOT and COLD faucets; then turn
“on” both water faucets.
3. Plug in the washer/dryer and /or reconnect the power.
13-36
R O U T I N E
M A I N T E N A N C E
4. Run the washer through the “Express” cycle with ½ tablespoon of powder detergent (or
liquid equivalent) to clean out the antifreeze. This completes the process.
13-37
M A I N T E N A N C E
&
D A T A
C H A R T S
Chapter
14
Maintenance & Data Charts
14-1
M A I N T E N A N C E
&
D A T A
C H A R T S
RV Owner’s Data Sheet
Please enter the following information in the table for your future use:
Allegro: Year: __________ Model #: ____________________ Tiffin Serial #: __________________
Appliance
Brand
Model Number
Serial Number
Refrigerator
Air Conditioner
Water Heater
Microwave
Generator
Television, Front
Back-Up Monitor (optional)
AM/FM/CD Stereo
DVD Player (optional)
Reproduction Master – Copy this sheet and use copy to maintain your maintenance records. You
may wish to keep the completed sheets in a three-ring binder for your permanent record.
14-2
M A I N T E N A N C E
&
D A T A
C H A R T S
RV Owner’s Maintenance Record
Please enter the following information in the table for your future use:
Allegro: Year: __________ Model #: ____________________ Tiffin Serial #: __________________
Date / Mileage
Service Work Performed
Performed by
Cost ($)
Reproduction Master – Copy this sheet and use copy to maintain your maintenance records. You
may wish to keep the completed sheets in a three-ring binder for your permanent record.
14-3
M A I N T E N A N C E
&
D A T A
C H A R T S
RV Owner’s Maintenance Record
Please enter the following information in the table for your future use:
Allegro: Year: __________ Model #: ____________________ Tiffin Serial #: __________________
Date / Mileage
Service Work Performed
Performed by
Cost ($)
Reproduction Master – Copy this sheet and use copy to maintain your maintenance records. You
may wish to keep the completed sheets in a three-ring binder for your permanent record.
14-4
M A I N T E N A N C E
&
D A T A
C H A R T S
RV Owner’s Maintenance Record
Please enter the following information in the table for your future use:
Allegro: Year: __________ Model #: ____________________ Tiffin Serial #: __________________
Date / Mileage
Service Work Performed
Performed by
Cost ($)
Reproduction Master – Copy this sheet and use copy to maintain your maintenance records. You
may wish to keep the completed sheets in a three-ring binder for your permanent record.
14-5
M A I N T E N A N C E
&
D A T A
C H A R T S
RV Owner’s Maintenance Record
Please enter the following information in the table for your future use:
Allegro: Year: __________ Model #: ____________________ Tiffin Serial #: __________________
Date / Mileage
Service Work Performed
Performed by
Cost ($)
Reproduction Master – Copy this sheet and use copy to maintain your maintenance records. You
may wish to keep the completed sheets in a three-ring binder for your permanent record.
14-6
M A I N T E N A N C E
&
D A T A
C H A R T S
RV Owner’s Maintenance Record
Please enter the following information in the table for your future use:
Allegro: Year: __________ Model #: ____________________ Tiffin Serial #: __________________
Date / Mileage
Service Work Performed
Performed by
Cost ($)
Reproduction Master – Copy this sheet and use copy to maintain your maintenance records. You
may wish to keep the completed sheets in a three-ring binder for your permanent record.
14-7
M A I N T E N A N C E
&
D A T A
C H A R T S
RV Owner’s Maintenance Record
Please enter the following information in the table for your future use:
Allegro: Year: __________ Model #: ____________________ Tiffin Serial #: __________________
Date / Mileage
Service Work Performed
Performed by
Cost ($)
Reproduction Master – Copy this sheet and use copy to maintain your maintenance records. You
may wish to keep the completed sheets in a three-ring binder for your permanent record.
14-8
M A I N T E N A N C E
&
14-9
D A T A
C H A R T S

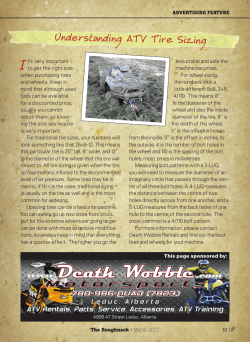


© Copyright 2026