
WYNN® User Guide - Learning Systems Group
WYNN User Guide ® Version 7.0 Freedom Scientific, Inc. 440587-001 Rev. A PUBLISHED BY st Freedom Scientific, Inc., 11800 31 Court North, St. Petersburg, Florida 33716-1805, USA www.FreedomScientific.com Information in this document is subject to change without notice. No part of this publication may be reproduced or transmitted in any form or any means electronic or mechanical, for any purpose, without the express written permission of Freedom Scientific. Copyright © 2012 Freedom Scientific Learning Systems Group, Inc. All Rights Reserved. Patent Numbers 5,875,428 and 6,052,663 WYNN and PEARL are registered trademarks of Freedom Scientific, Inc. Microsoft, Windows 7, Windows Vista, and Windows XP are registered trademarks of Microsoft Corporation in the U.S. and/or other countries. DESIGN SCIENCE, INC. EXPRESSLY DISCLAIMS ANY AND ALL WARRANTIES CONCERNING THIS SOFTWARE AND DOCUMENTATION, INCLUDING ANY WARRANTIES OF MERCHANTABILITY AND/OR FITNESS FOR ANY PARTICULAR PURPOSE, AND WARRANTIES OF PERFORMANCE, AND ANY WARRANTY THAT MIGHT OTHERWISE ARISE FROM COURSE OF DEALING OR USAGE OF TRADE. NO WARRANTY IS EITHER EXPRESS OR IMPLIED WITH RESPECT TO THE USE OF THE SOFTWARE OR DOCUMENTATION. Under no circumstances shall Design Science, Inc. be liable for incidental, special, indirect, direct or consequential damages or loss of profits, interruption of business, or related expenses which may arise from use of software or documentation, including but not limited to those resulting from defects in software and/or documentation, or loss or inaccuracy of data of any kind. Portions Copyright (C) 1995-2009 by Nuance, Inc. The contents of this software application were developed under a grant from the US Department of Education, #H327A090045. However, those contents do not necessarily represent the policy of the US Department of Education, and you should not assume endorsement by the Federal Government. Project Officer, Terry L. Jackson, Ed.D. We want to thank Dr. Cindy Okolo, Professor of Special Education at Michigan State University, MI. Dr. Okolo’s educational expertise and ongoing consultation regarding the PREPARE process was invaluable in development of this product. Sample writing templates were created by Mr. Bruce Waymire, a 7th grade Social Studies & History teacher at H. Clarke Powers School in Loomis, CA. We are grateful for his expertise. This manual was written and edited by Freedom Scientific, a maker of information access tools for people with reading and visual disabilities. The software is subject to a license agreement and limited warranty, the terms of which the user accepts when installing the product. An electronic copy of it is on your installation media as license.txt, as well as in the help directory of your software. WYNN is an IBM Independence Series Product. Technical Support To contact Technical Support by telephone, U.S. customers can call (727) 803-8000, Monday through Friday, 8:30 AM to 7:00 PM (Eastern Time). To contact by e-mail, send questions to [email protected]. To search the knowledge base, visit www.FreedomScientific.com and choose the Support link. ii Table of Contents Introduction ........................................................................................................1 What is WYNN?...............................................................................................1 WYNN Wizard and WYNN Reader ..................................................................1 Stand-alone and Network Versions .............................................................2 What's New in WYNN ......................................................................................2 PAL Tools and the PREPARE Process .......................................................2 New User Interface Graphics ......................................................................4 Other New User Features ...........................................................................4 What’s in this Box? ..........................................................................................6 Online Help ......................................................................................................6 Help Topics .................................................................................................6 Status Bar Help ...........................................................................................6 Context-Sensitive Help ................................................................................7 The Readme File.........................................................................................7 System Requirements .....................................................................................8 Contacting Freedom Scientific .........................................................................9 Installation ........................................................................................................11 Single-User and Non-Network Multi-User Installation ....................................11 Before You Begin ......................................................................................11 WYNN Installation Process .......................................................................11 Activating WYNN.......................................................................................13 Uninstalling WYNN....................................................................................16 WYNN Network Installation ...........................................................................16 Network Installation Overview ...................................................................16 Installing the WYNN Network Server.........................................................17 Configuring User Groups and Folder Permissions .........................................18 Creating a User Group ..............................................................................18 Sharing the Users and WYNNNet Folders ................................................20 Setting the NTFS Permissions ..................................................................21 License Server Software Overview ................................................................21 Installing the License Server Software and Network Authorization Tools ..22 Activating the License Server ....................................................................24 WYNN Network Client Overview ...............................................................26 Adding the Environment Variable LSFORCEHOST ..................................26 Installing the WYNN Network Client ..............................................................27 Special Installation Commands......................................................................28 Account Types: Administrative and Teacher ..................................................29 iii Overview of Account Types .......................................................................29 What is an Administrator Account? ...........................................................29 What is a Teacher Account? .....................................................................30 What is a Student Account? ......................................................................30 What should an administrator do once the software is installed? ..............30 What should a teacher do after the software is installed? .........................31 Check for Updates .........................................................................................32 Book 1: Getting Started ...................................................................................33 Starting WYNN ..............................................................................................33 Multi-User Log In .......................................................................................34 WYNN User Interface ....................................................................................35 Using the File List ..........................................................................................36 WYNN Toolbars .............................................................................................37 Common Toolbar Buttons ..............................................................................37 Next ..........................................................................................................37 Read / Pause ............................................................................................38 Write / Read Only ......................................................................................38 Exact View / Text View ..............................................................................38 File List .....................................................................................................39 File Management Buttons ..............................................................................39 Reading Styles Toolbar .................................................................................39 Study Tools Toolbar.......................................................................................40 Writing Tools Toolbar ....................................................................................40 Web Toolbar ..................................................................................................40 PAL Process ..................................................................................................41 WYNN Menu Bars .........................................................................................41 File ............................................................................................................42 Edit............................................................................................................42 Acquire ......................................................................................................42 View ..........................................................................................................42 Tools .........................................................................................................42 Launch ......................................................................................................42 PAL ...........................................................................................................43 Advanced ..................................................................................................43 Settings .....................................................................................................43 Web ..........................................................................................................43 Windows ...................................................................................................43 Help ..........................................................................................................43 iv Book 2: Basic Tasks in WYNN ........................................................................45 Opening an Existing WYNN Document..........................................................45 Opening Other Documents .......................................................................45 Opening Files Using the WYNN User Files Shortcut .....................................47 Creating Files and Bringing Information into WYNN ......................................47 Creating a New Document in WYNN.........................................................47 Acquiring Images to Create a New Document...........................................48 Creating a New Document Using the Freedom Import Printer ..................48 Opening a PDF file from within WYNN ......................................................48 Converting Files Using the Freedom Import Printer ..................................49 Creating a New Document Using Book Search .........................................50 Reading a Document .....................................................................................50 Skim Reading ................................................................................................51 Exact View and Text View .............................................................................52 Sending a File to Word ..................................................................................54 Saving a Document .......................................................................................55 Save to Audio ................................................................................................56 Printing ..........................................................................................................57 Closing WYNN...............................................................................................57 Book 3: File Management Toolbar ..................................................................59 Scan..........................................................................................................59 New...........................................................................................................60 Open .........................................................................................................60 Close .........................................................................................................60 Save ..........................................................................................................61 Save As.....................................................................................................61 Print ..........................................................................................................61 Clean-up ...................................................................................................61 Save to Audio ............................................................................................62 Book Search .............................................................................................62 Export from WYNN to Word ......................................................................62 Go To Web................................................................................................63 Book 4: Reading Styles Toolbar ......................................................................65 Size ...........................................................................................................65 Line Space ................................................................................................65 Word Space ..............................................................................................66 Margins .....................................................................................................66 Color .........................................................................................................66 Mask .........................................................................................................67 v Self-Pace ..................................................................................................68 Rate ..........................................................................................................68 Pause ........................................................................................................69 Book 5: Study Tools Toolbar ...........................................................................71 Dictionary ..................................................................................................71 Spell ..........................................................................................................71 Syllables....................................................................................................72 Highlight ....................................................................................................72 Extract .......................................................................................................73 Bookmark ..................................................................................................74 Text Note ..................................................................................................74 Voice Notes...............................................................................................75 Notecards..................................................................................................75 PAL Document ..........................................................................................75 Book 6: Writing Toolbar ...................................................................................77 Cut/Paste ..................................................................................................77 Style ..........................................................................................................77 Find ...........................................................................................................78 Go To ........................................................................................................78 Outlines .....................................................................................................78 Adjust ........................................................................................................79 Predict .......................................................................................................79 Word Prediction ........................................................................................79 Homophone ..............................................................................................80 Spell Check ...............................................................................................80 Book 7: Web Toolbar .......................................................................................81 Back ..........................................................................................................81 Forward .....................................................................................................81 Stop ..........................................................................................................81 Refresh .....................................................................................................81 Home ........................................................................................................82 Search ......................................................................................................82 Favorites ...................................................................................................82 History .......................................................................................................82 WebMask™ ..............................................................................................82 Dictionary ..................................................................................................83 Highlight ....................................................................................................83 vi Extract .......................................................................................................83 File List .....................................................................................................84 Close Page ...............................................................................................85 Book 8: PREPARE Process for Teachers .......................................................87 Before You Begin ..........................................................................................87 Step 1. Creating a PAL Document .................................................................88 Saving a PAL File......................................................................................88 Setting Up the PAL Document ..................................................................88 Step 2. Sending the PAL Document to Students ...........................................94 Step 3. Adding Teacher Hints (Optional) .......................................................95 Step 4. Creating and Editing Writing Templates (Optional) ............................96 Creating New Templates ...........................................................................97 Book 9: PREPARE Process for Students .......................................................99 Step 1 – Open and Preview the Document ....................................................99 Step 2 – Read the Document ........................................................................99 Step 3 – Examine the Document .................................................................100 Step 4 – Rework and Summarize the Document .........................................102 Using Linked Source Documents ............................................................ 102 Step 5 – Writing Your Paper ........................................................................103 Book 10: Writing and Editing ........................................................................105 Proofreading Your Writing Using Speech .................................................... 105 Reading Syllables ........................................................................................ 106 Check Your Spelling as You Type ............................................................... 107 Spell Checking Your Document ...................................................................108 Spelling a Word ........................................................................................... 109 Choosing the Correct Word – Homophones ................................................ 110 Book 11: Notecards........................................................................................ 113 Using Notecards .......................................................................................... 114 Opening Notecard Files ..........................................................................114 Typing in Notecards ................................................................................ 114 Adding and Deleting Notecards............................................................... 115 Copying (Cloning) a Whole Notecard ...................................................... 116 Rearranging Notecards ...........................................................................116 Creating Subjects or Titles for Notecards ................................................ 116 Maximizing and Minimizing the Notecard Pane .......................................117 Closing a Notecard File ...........................................................................117 vii Book 12: Writing Templates ..........................................................................119 Creating Templates (Teachers) ...................................................................119 Opening Default Templates.....................................................................119 Editing Templates ................................................................................... 120 Linking a Template to a PAL Document (Teachers) ....................................121 Opening a Template (Students) ...................................................................121 Hiding or Showing Instruction Text in a Template (Students) ...................... 122 Permanently Removing Instruction Text from a Template (Students) ..........122 Publishing Your Paper (Students)................................................................ 122 Book 13: Scanning and Other Ways to Get Material into WYNN ................ 123 Acquiring a Document into WYNN ............................................................... 123 Device Selection ..................................................................................... 123 Acquiring a Page and Making a New Document .....................................123 Acquiring and Inserting a New Page ....................................................... 124 Acquiring and Replacing the Current Page .............................................125 Creating WYNN Files Using the Freedom Import Printer ............................. 126 Opening a PDF file from within WYNN .................................................... 126 Converting Files Using the Freedom Import Printer ................................ 126 Introduction to Workflows ............................................................................127 Acquiring Difficult Text ............................................................................127 Dynamic Zoning (Rearranging Text in an Acquired Document) ............... 128 Document Clean-up (Correcting Text in an Acquired Document) ............130 Document Clean-up Guidelines .............................................................. 132 Guidelines for Increased Scanning Accuracy ..........................................132 Book 14: Launchables ................................................................................... 133 Setting Up Standard Launchable Applications .............................................133 Using Launchables ...................................................................................... 134 Adding Launchables .................................................................................... 134 Changing Launchable Settings ....................................................................135 Deleting a Launchable ................................................................................. 137 Book 15: Book Search ................................................................................... 139 Quick Book Search ...................................................................................... 139 Advanced Book Search ............................................................................... 140 Book 16: User Tasks ...................................................................................... 143 Converting Documents or Voice Notes to Audio Files .................................143 Converting Documents to MP3 or WAV Files ..........................................143 viii Locating Document Audio Files............................................................... 144 Converting Voice Notes to MP3 Files ...................................................... 144 Locating Voice Note Audio Files ............................................................. 145 Listening to Document or Voice Note Audio Files ...................................145 Two-tone Exact View ................................................................................... 146 Appending a File .......................................................................................... 147 Go To a Page.......................................................................................... 147 Changing Page Order .............................................................................147 Exporting Highlights ..................................................................................... 148 Exporting Highlights to a Document ........................................................ 148 Exporting Highlights to an Outline ........................................................... 148 Exporting Text Notes ................................................................................... 149 Renumbering Pages .................................................................................... 149 Restoring the Original Page Numbers ......................................................... 150 Re-recognize Page or Document.................................................................150 Split View .....................................................................................................151 Zoom Exact View ......................................................................................... 151 Word Count .................................................................................................152 Pronunciation Dictionary .............................................................................. 152 Photocopy....................................................................................................153 OCR Correction ........................................................................................... 154 Adding OCR Corrections .........................................................................155 Deleting OCR Corrections .......................................................................155 Multi-user Logins ......................................................................................... 156 Device Selection .......................................................................................... 156 Change Localization Language ...................................................................157 Saving Settings ............................................................................................ 157 Retrieving Settings ...................................................................................... 158 Deleting Settings ......................................................................................... 158 Book 17: Teacher-specific Tasks ..................................................................159 Teacher Lockout .......................................................................................... 159 Activating Teacher Lockout .....................................................................159 Canceling Teacher Lockout ....................................................................159 Broadcasting Documents and Settings ........................................................ 160 Broadcasting Documents to Other Users ................................................ 160 Broadcasting Settings to Other Users ..................................................... 162 Customizing the Toolbar .............................................................................163 Setting Word Prediction Teacher Controls ................................................... 164 What is Word Prediction?........................................................................164 Word Prediction Teacher Controls .......................................................... 165 ix Word Prediction Edit List .........................................................................165 Word Prediction Learning Text ................................................................ 167 Word Prediction Phonetics ......................................................................168 Word Prediction Lists .............................................................................. 169 PAL Setup and Teacher Functions .............................................................. 170 Book 18: Administrator Tasks .......................................................................171 Book 19: General Settings .............................................................................173 Startup Document Group .............................................................................174 Open Untitled Document .........................................................................174 Open Last Document .............................................................................. 174 Always Start in Write Mode ..........................................................................174 Default Print Font Settings Group ................................................................ 174 Name ......................................................................................................174 Size .........................................................................................................174 Left Side Panel Font Settings Group ........................................................... 174 Name ......................................................................................................175 Size .........................................................................................................175 Default File Settings Group ..........................................................................175 Format ....................................................................................................175 Location ..................................................................................................175 Image Output File Type ...........................................................................175 Read Group .................................................................................................176 Check spelling as I type ............................................................................... 176 Auto-capitalize new sentences ....................................................................176 Maximum Number of Open Documents ....................................................... 176 Enable Shift Keys for Fast Forward and Rewind ..........................................176 Book 20: Speech Settings .............................................................................177 Voice Selection ............................................................................................ 178 Apply Settings to All Voices .........................................................................178 Voice Settings Group ................................................................................... 178 Synthesizer ............................................................................................. 178 Language ................................................................................................ 179 Name ......................................................................................................179 Rate ........................................................................................................179 Volume ....................................................................................................179 Punctuation ............................................................................................. 179 Test .........................................................................................................179 x Enable Speech ............................................................................................ 180 User Interface Announcements Group ........................................................ 180 Capital Letters While Typing ...................................................................180 Numbers as Single Digits ........................................................................180 Text .........................................................................................................180 Menus & Dialogs ..................................................................................... 180 Toolbar Buttons ....................................................................................... 180 Messages................................................................................................ 181 Use Emphasis Voice for Bold, Etc........................................................... 181 Extra Pause After Each Sentence ............................................................... 181 Read Aloud As I Type .................................................................................. 181 Skim Read Speaks Paragraph.....................................................................182 Book 21: Workflow Settings ..........................................................................183 What are Workflows? .................................................................................. 183 Workflow Settings ........................................................................................ 183 Workflow Name ........................................................................................... 184 Set as Current ............................................................................................. 187 Modify ..........................................................................................................187 Create New..................................................................................................187 Rename .......................................................................................................187 Remove .......................................................................................................187 Restore Factory Values ............................................................................... 187 Recognition Defaults Group .........................................................................188 Language 1 ............................................................................................. 188 Language 2 ............................................................................................. 188 Acquire Tab .................................................................................................188 Acquisition Mode ......................................................................................... 189 Image Properties Group .............................................................................. 190 Color Mode ............................................................................................. 190 Resolution ............................................................................................... 190 Acquisition Size Group ................................................................................ 191 Full Device Length .................................................................................. 191 Adjust Image Group ..................................................................................... 191 Automatic Contrast / Contrast Slider ....................................................... 191 Progress Notifications Group .......................................................................192 Acquisition Tones .................................................................................... 192 Image Acquired ....................................................................................... 192 Page Placement .......................................................................................... 192 Multipage Acquisition Group ........................................................................192 Process Tab ................................................................................................ 193 xi Image Processing Group .............................................................................194 Keep Exact View As ................................................................................ 194 Despeckle ............................................................................................... 194 Text Processing Group ................................................................................ 194 Discard Blank Pages ............................................................................... 194 Apply OCR Corrections ...........................................................................194 Keep Text Emphasis ............................................................................... 194 Replace Uncertain Text / Uncertain Text Marker .....................................195 Preserve Line Breaks .............................................................................. 195 Page Layout Group...................................................................................... 195 Recognize Columns / Ignore Columns .................................................... 195 Split Facing Pages .................................................................................. 195 Table Processing Group .............................................................................. 196 Action When Pages are Recognized ........................................................... 196 Start Speaking Automatically ..................................................................196 Book 22: Visual Settings ............................................................................... 197 Preferred View ............................................................................................. 197 Font .............................................................................................................198 Name ......................................................................................................198 Size .........................................................................................................198 Text Color ............................................................................................... 198 Background Color ................................................................................... 198 Misspelled Word Color ............................................................................198 Spotlight Group............................................................................................ 198 Text Color ............................................................................................... 198 Background Color ................................................................................... 199 Movement Unit ........................................................................................ 199 Spotlight Type ......................................................................................... 199 Use Solid Toolbar Colors .............................................................................199 Masking Group ............................................................................................ 199 Document Increment ............................................................................... 200 WebMasking™ Increment .......................................................................200 Text Color ............................................................................................... 200 Background Color ................................................................................... 201 Instruction Text Colors ................................................................................. 201 Text .........................................................................................................201 Background ............................................................................................. 201 Extra Space Between Elements Group........................................................ 201 Margins Group ............................................................................................. 201 Left and Right.......................................................................................... 201 xii Use Two Tone for Exact View......................................................................202 Display Highlights as Bookmarks .................................................................202 Book 23: Word Prediction Settings............................................................... 203 Speaking Group........................................................................................... 203 Automatically Speak List .........................................................................203 Repeat List when Finished ......................................................................204 Pause Before Speaking ..........................................................................204 Pause Between Choices .........................................................................204 Make Predictions Using Phonetic Replacements ........................................204 Display Group .............................................................................................. 204 Moving Prediction Box ............................................................................204 Show Prediction Accuracy.......................................................................205 Text Font .................................................................................................205 Text Size .................................................................................................205 Text Color ............................................................................................... 205 Background Color ................................................................................... 205 Text Highlight Color................................................................................. 205 Bold.........................................................................................................206 Italic ........................................................................................................206 Display Words Alphabetically ..................................................................206 Include a Space after Inserted Word ....................................................... 206 Book 24: Other WYNN Settings .....................................................................207 Image View Settings .................................................................................... 207 Exact View Group ................................................................................... 207 Camera View Group ................................................................................ 209 Customize Toolbar ...................................................................................... 210 Web Settings ............................................................................................... 213 Home Page ............................................................................................. 213 History .....................................................................................................214 Maximum Number of Open Web Pages .................................................. 214 Read Hyperlinks ...................................................................................... 214 Auto Complete ........................................................................................ 214 Differential Coloring ..................................................................................... 215 Appendix A: Keyboard Shortcuts .................................................................217 General Commands..................................................................................... 217 Speech Commands ..................................................................................... 217 File Management Commands ......................................................................218 xiii Reading and Editing Commands .................................................................218 Mark-up Commands .................................................................................... 219 Acquisition Commands ................................................................................ 220 Study Tools Commands .............................................................................. 220 PEARL Camera Commands ........................................................................221 Appendix B: Menu System ............................................................................223 File Menu (ALT+F) ....................................................................................... 223 Edit Menu (ALT+E) ...................................................................................... 224 Acquire Menu (ALT+S) ................................................................................ 225 View Menu (ALT+V) .................................................................................... 225 Tools Menu (ALT+T) .................................................................................... 226 Advanced Menu (ALT+A) ............................................................................227 Settings Menu (ALT+G) ............................................................................... 227 Web Menu (ALT+B) ..................................................................................... 228 Window Menu (ALT+W) .............................................................................. 228 Help Menu (ALT+H) ..................................................................................... 228 Appendix C: WYNN Folders and Subfolders ................................................ 229 WYNN 6.0 and Later ................................................................................... 229 WYNN 5.10..................................................................................................231 Appendix D: Network Folder System ............................................................ 233 User Permissions ........................................................................................ 233 Network Authorization Tools ........................................................................234 WYNN Folders and Subfolders ....................................................................235 Network Folder Hierarchy........................................................................236 Appendix E: Activation Options ....................................................................237 Before You Begin: ....................................................................................... 237 Starting the Activation Process ....................................................................238 Activating by Telephone .............................................................................. 239 Requesting an Activation Code by Telephone.........................................239 Activating by FAX ........................................................................................ 242 Requesting an Activation Code by Fax ................................................... 242 Activating using FSActivate.com..................................................................245 Activating using the Activation Media Image Creator Program ................ 248 Activating the License Server through a Software Firewall .......................... 249 General Overview ................................................................................... 249 Finding your Locking Code......................................................................250 xiv Configuring Windows Firewall .................................................................250 Windows 7 .............................................................................................. 251 Windows XP............................................................................................ 251 Appendix F: Command-line Options............................................................. 253 Additional Command-line Options Available in /MoreHelp ...................... 257 xv Introduction What is WYNN? WYNN® (What You Need Now) is a software program for people who struggle with reading and writing. The features in WYNN allow you to: Acquire (that is, scan with a flatbed scanner, snap a picture with the PEARL document camera, or import with the Freedom Import Printer) documents, such as textbook passages, memos, or magazine articles, into WYNN and save them Open a document or Web page and have WYNN read it aloud to you Easily change the way the text looks to make it easier to read Use writing tools to make writing assignments easier Use study tools to help you learn WYNN uses a series of color-coded toolbars to help you quickly access reading and writing assignments (see blue File Management toolbar below). You can do almost everything using the buttons on the toolbars that appear across the top of the screen. For more information, see Book 1: Getting Started. WYNN Wizard and WYNN Reader Two versions of WYNN software are available: WYNN Wizard and WYNN Reader. WYNN Wizard is a full-featured application that includes: Optical character recognition (OCR), which allows you to acquire and read pages, as well as read existing word processing and text files Document composition and editing tools like word prediction, spell checking, and homophone recognition 1 The ability to browse the World Wide Web to assist with topic research Traditional study aids like highlighting, bookmarking, outlining, and dictionary and thesaurus usage Visual and auditory adjustments to make it easier to read and comprehend documents Numerous licensing types, including single-user, multi-user, network, and take-home licensing WYNN Reader includes the same features and functionality that are in WYNN Wizard, except for scanning and OCR capabilities. Use WYNN Reader to read electronic documents, create or edit documents, and browse the Internet for document research. Stand-alone and Network Versions Both WYNN Wizard and WYNN Reader are available as stand-alone or network licensed products. The stand-alone version easily installs onto a single computer, while the network version allows as many clients as possible, based on the number of licenses purchased, to use the software at once over a local area network (LAN) or wide area network (WAN) including both wired and wireless networks. What's New in WYNN There are many exciting new features in this version of WYNN. Below is a brief overview of the new features. PAL Tools and the PREPARE Process PAL tools1. WYNN 7 includes the PAL tools created by Freedom Scientific Learning Systems Group in partnership with Dr. Cindy Okolo from Michigan State University. PAL is a set of tools designed to help students learn from text. 1 The PAL tools were developed under a grant from the US Department of Education, #H327A090045. However, those contents do not necessarily represent the policy of the US Department of Education, and you should not assume endorsement by the Federal Government 2 PREPARE process. The PAL tools include the PREPARE process for reading and studying content-area text. The steps in this process will help students identify key information from text, take notes and summarize that information, and then use their notes to study or to write different genres of text, such as essays and research papers. The PAL left panel and menu provide access to each step in the process. The PAL button on the pink toolbar can also open a PAL file. The PREPARE steps are: Preview, Read, Examine, Pick (what's important), Arrange, Rework, and Explain. (Note that Pick and Arrange are done using the Examine button.) Notecards. Take notes using notecards. The notecards feature is part of the PREPARE process (the Rework step), but it is also a stand-alone feature. Students can take notes using notecards whether they use the PREPARE process or not. Notecards are available from the pink toolbar, or from the File menu. Writing templates. Templates can help during the writing process. WYNN's writing templates are aligned with the Common Core State Standards for education in the United States. Teachers can create or edit templates, including the sample templates provided. Students use the templates to write papers from notes. To open a template outside the PREPARE process, select a WYT format file in the Open dialog box. Sample templates provided. To help teachers and students, several sample templates are included for every user. There are both brief and detailed templates for the three main writing areas as defined by the Common Core State Standards for K-12 students: Persuasive/Argumentative, Narrative, and Informative/Explanatory. Show/Hide Instruction Text. When a student uses templates, there are blocks of instruction text to help him or her in the writing process. When the student is done writing, they can hide the instruction text to see what the document will look like when published. They can always show the instruction text again whenever they want. To hide instruction text, go to View menu and select the last item, Hide Instruction Text. Whenever instruction text is hidden, select Show Instruction Text to display it again. New file formats. We created some new file types to support the new PAL features. PAL files use WYP. Templates use WYT. Notecards use WNC. WYNN files still use WYX. WYNN 7 still supports earlier WYNN file formats, including WYN, ARK, OBX, and OBU. 3 New User Interface Graphics New user interface graphics. All toolbars and other graphics were updated for this release, providing a fresh, modern look, but with the same great functionality. Instead of solid color toolbar buttons, the new buttons have a transparent background with a colored bar under each button. Use solid color legacy toolbar buttons. If you prefer to keep the solid toolbar backgrounds that were used in earlier versions of WYNN, you can do that by checking the item called Use Solid Toolbar Colors in the Visual Settings. Other New User Features Include source citation in extracted documents. Any time you extract highlights or bookmarks to a document, WYNN now includes the name of the source document, or URL of the Web page, for that extracted text. This allows you to keep track of your sources for later use in citations. Extract and convert highlights to outline. In addition to WYNN's ongoing ability to extract highlights to a new document, you can now extract highlights to an outline. You can extract in one of two ways: by color, or in document order. Extract and convert bookmarks to outline. You have the same choices for extracting bookmarks as highlights: by color, or in document order. Save Voice Notes to MP3. You have always been able to create Voice Notes in WYNN documents. Now you can save these notes to an MP3 file for studying later. Add two additional highlight colors. WYNN 7 now has five highlight colors. Lavender and orange were added to the existing blue, green, and magenta colors. Add one additional bookmark symbol. WYNN 7 now has five bookmark symbols. The diamond shape was added to the existing star, circle, square, and triangle. Coordinate color scheme of highlights and bookmarks. The colors used for bookmarks and highlights have been coordinated so the first one is always blue, next one always green, etc. 4 Enhancement of left panel. The left panel, always used for the File List, Favorites, and History, is now also used to display the PAL tools in the PREPARE process. We have added a method to switch from one use of the left panel to another. Use the Previous and Next buttons at the top of the left panel to switch to another use. Note that you must have "opened" that use already, so, for example, you must first press the File List button to switch to its use. And you must invoke the PAL left panel to switch to its use. Save to Audio now available as toolbar button. Everyone loves the Save to Audio feature. We have now added it as a button on the blue toolbar. This function has always been available on the File menu, but we added a toolbar button for easier access. The Save to Audio feature gives you the ability to save your current open document to MP3 or WAV format. Book Search now available as toolbar button. We added a toolbar button on the blue toolbar for Book Search. Book Search lets you search for Bookshare.org, Gutenberg, and Baen books from within WYNN, so you can download and read them at your convenience. Book Search is still available on the Launch menu, but we added a toolbar button for easier access. Export to Word now available as toolbar button. We added a toolbar button on the blue toolbar for Export to Word. This takes the current open document and sends it to Microsoft Word. This function is still available on the Launch menu, but we added a toolbar button for easier access. Setup Launchables is now automatic. Launchables are a way to send your WYNN document to your favorite word processor. We have now made the set-up of Launchables happen automatically when you first log into WYNN after installation. (This automatic installation may take a few minutes, so the launchable items will not be available until this process is done.) Launchables will find all word processors on your computer, and it will set up a link for them in the Launch menu. Usually those word processors are Microsoft Word, WordPad, and Notepad. Note that the Word launchable is now also available as a button on the blue toolbar for user convenience. 5 What’s in this Box? The following items are in your WYNN package. If you discover damaged or missing items, please contact your retailer. Disk wallet containing a WYNN program DVD. You will also get either an Authorization CD or authorization labels and a cover letter, depending on how you purchased WYNN. (Note that if your product is shipped in multiple boxes, your authorization labels will be in one box marked with a label,) Microphone WYNN Quick Start Guide Online Help There are several ways to get help when using WYNN: the help topics, status bar help, context-sensitive help, and the Readme file. Help Topics To open online help, do one of the following: Press the F1 key, or Click the Help menu in the WYNN toolbar, and then click the WYNN Help command. Use the Table of Contents (left window pane), the Index or Search tabs, and the topic links (right window pane) to select and view an area of interest. When you are done, click the Close button – – on the title bar to close the online Help. Status Bar Help When you move the mouse pointer over a menu command, a short description of the command displays in the lower left corner of the WYNN status bar. 6 Context-Sensitive Help WYNN’s context-sensitive help shows information about a specific option or button in a dialog box. There are three ways to access context-sensitive help: the Question Mark button, the F1 key, and the What’s This? button. To use the Question Mark button, do the following: 1. Click the Question Mark button – – in the upper right corner of the dialog box, which changes the appearance of the mouse pointer. 2. Click an item in a dialog box and WYNN displays a context-sensitive help message for that item. To use SHIFT+F1, select an item within a dialog box, and press SHIFT+F1. WYNN displays a context-sensitive help message for that item. To use the What’s This? button, do the following: 1. Use your mouse to right click within the dialog box. The pointer becomes a floating What’s This? button. For example: 2. Click What’s This button to open the context-sensitive help message for that item. The Readme File WYNN’s Readme file gives you the latest software release information. It is available on the root of the WYNN program disk, is shown during product installation and, later, is installed in the WYNN program group. To open and read the Readme file after WYNN is installed: 1. From the Windows Start menu, click All Programs or Programs, and then point to the WYNN program folder. 2. Click the WYNN Readme shortcut to open the Readme file. 7 System Requirements The recommended minimum system requirements are listed below. Operating System 32- and 64-bit versions of Windows® 7, Windows Vista®, and Windows Server® 2008 32-bit versions of Windows XP and Windows Server 2003 Processor speed 500 MHz Intel® Pentium® or faster Memory (RAM) 512 MB minimum Available hard drive space for installation 1.2 GB (on the hard drive containing the Program Files and Windows folders) Video 16-bit high color mode or greater Sound Windows compatible sound card and speakers Screen resolution Screen resolution must be greater than 800 x 600 to display all toolbar buttons Acquisition (scanning) device (optional) A TWAIN scanner or the PEARL camera from Freedom Scientific (for WYNN Wizard) DVD drive Required for product installation. However, it is possible to copy the WYNN DVD contents to a USB thumb drive. This is the preferred installation method for netbooks and other computers that do not have CD or DVD drives. 8 Network Server (for Network WYNN) 32- and 64-bit versions of Windows® 7, Windows Vista®, and Windows Server® 2008 32-bit versions of Windows XP, Windows Server 2003, and Novell Netware 6.0 2.5 GB hard drive space, plus additional space for user files. Network Client (for Network WYNN) TCP/IP network connectivity to the license server License Server (for Network WYNN) 32-bit Windows XP or later Contacting Freedom Scientific Use the following options to contact Freedom Scientific’s support staff. World Wide Web site: www.FreedomScientific.com/lsg Technical Support e-mail: [email protected] Technical Support Telephone: (727) 803-8600 When contacting Freedom Scientific, be prepared to provide the following information: Product name, version number, and serial number (in the About dialog box, which is available from the Help menu) Type of computer hardware you are using Version of Windows running on your machine Exact wording of any messages on your screen What you were doing when the problem occurred Steps you have taken to solve the problem Technical support is available Monday through Friday from 8:30 AM to 7:00 PM, Eastern Time (ET). 9 10 Installation Single-User and Non-Network Multi-User Installation Important: The procedures in this chapter assume that you can access the Internet from your computer for software activation. If you do not have Internet access, refer to Activation Options on page 237 for other activation procedures. Note: The single-user version uses the Authorization CD, while the NonNetwork Multi-User (NNMU) version uses Authorization numbers printed on supplied labels. Note: If you are installing the network version of WYNN, refer to Network WYNN Installation on page 16. Before You Begin Verify the minimum system requirements (see page 8) Verify that you have an Internet connection (required to activate your software quickly using the Internet) Determine if you are installing the Non-Network Multi-User or single-user WYNN version versus the WYNN network version. WYNN Installation Process Important: If you will be using the PEARL camera with WYNN, do not connect the camera to your computer until the WYNN installation is complete. For more information on connecting and setting up PEARL, refer to the PEARL Quick Start Guide. To install WYNN on your computer, do the following: 1. Insert the WYNN disk into your DVD drive. 11 2. The WYNN Setup program starts, and displays installation instructions. Follow these instructions to complete the WYNN installation. Note: If the program does not start automatically, run Setup.exe on the program disk. 3. When prompted, Choose Stand-alone WYNN or Network WYNN installation Choose WYNN Wizard or WYNN Reader installation Choose your language locale, for example, U.S. English or another language Choose if you want to install public domain books. Over 200 books by famous authors are available for your enjoyment. The majority of these books appear in required reading lists for high school and college students, as well as being listed among various posting of the top 100 books of all time. Other books in this collection are included because they are the writings of famous authors, or they are the books that continue the story of another famous book. .(The books are not available for the 40minute demo version downloaded from the Web.) 4. Next, the setup program installs the RealSpeak Solo Direct speech synthesizer. It contains different voices for you to use as WYNN speech. You must accept the End User License Agreement (EULA) to continue installation. (This synthesizer is not available for the 40minute demo version downloaded from the Web.) Note: After fully installing WYNN, you can sample and download other RealSpeak Solo Direct voices by visiting www.freedomscientific.com, selecting Downloads, and then RealSpeak Solo Direct Voices. 5. 12 After installing the synthesizer, WYNN software installation begins. You must accept the EULA agreement to continue installation. The setup program continues and installs WYNN based on the options you previously selected. Follow the installation instructions to complete installation. 6. Finally, start WYNN by clicking the WYNN shortcut on the Windows Desktop. (The WYNN User Files folder is also added to the Desktop.) Note: The first time you launch WYNN after installation, you must complete software activation. It is intended to prevent software piracy and ensure that you are using licensed WYNN software. If you choose not to complete activation at this time, WYNN runs in 40-minute demo mode. When the 40-minute period expires, you must restart your computer to continue using WYNN. Activating WYNN Note: The following procedure assumes that your computer has Internet access. If you cannot connect to the Internet, refer to Activation Options on page 237 for more information. 1. Open WYNN by clicking the WYNN desktop icon or selecting the WYNN program from the Start button. 2. Log in with your user name. A dialog box displays stating that you are currently in 40-minute demo mode. Click Update Authorization. 13 3. If you have the NNMU (Non-Network Multi-User) version of WYNN, skip this step. If you have the Single-user version, you received an authorization CD with your WYNN. Follow the instructions to activate using your Authorization CD. Once the CD is inserted on your system and activation number recognized, you will receive a message that the authorization number has been copied to the your system. Click OK 4. The WYNN Activation dialog box opens. Click Activate. 5. The WYNN activation options appear. Choose Now, using the Internet (Recommended), and click Next. 6. The Authorization Number edit box appears. If you have the NNMU version, the Authorization Number box is blank. Enter the Authorization number that appears on the Authorization number label sheet, and then click Next. If you have the single-user version, your Authorization number is prefilled. Click Next. Important: For the single-user version, the Authorization number also appears on your WYNN product packaging. Type the number into the edit box if it does not automatically appear in the Authorization Number edit box. 14 This process may take several minutes to complete. During this time, the Processing Request dialog appears. You may be prompted to register your software. If you have not registered your software, you are asked to do so now. Registering lets you receive technical support. Choose Register Now and complete the online registration form by following the instructions provided. 7. If the activation is successful, a confirmation message appears. Click Finished, which completes the activation. If the activation fails, a detailed error message appears that recommends you verify or reenter your authorization code, or that you contact Freedom Scientific for assistance. 15 Uninstalling WYNN 1. Click the Start button and choose All Programs. 2. Open the WYNN <VersionNumber> submenu and choose Tools. 3. Choose Uninstall WYNN <VersionNumber>. You can also uninstall WYNN using the Control Panel if you prefer. WYNN Network Installation Network Installation Overview Note: This section is intended for network administrators. It assumes that you are familiar with computer networks, user groups, user accounts, and user permissions. You must have Administrator or Power User access on all machines where the server, license server, and client components are installed. For license server and network details, see page 249. The WYNN Network program and the WYNN Stand-alone program are on the same DVD. The WYNN software package downloaded from the Freedom Scientific Web site can be used to install a demo version of WYNN network or WYNN stand-alone. If you install using the downloaded software package, some of the installation instructions will be slightly different from the information in this chapter. For a list of hardware and software requirements, see System Requirements on page 8. WYNN Network Installation consists of four major parts. Installing the WYNN network server software (page 17). Sharing folders and setting NTFS permission for the WYNNNet and Users folders (page 18). Activating WYNN Network Server (page 22). This allows you to designate a computer running Windows on the network as the ILM license server. 16 This computer issues tokens to the WYNN clients. The number of license seats purchased determines the number of tokens available to client computers on the network. Installing WYNN Network Client (page 27). Tip: Make sure your user permissions are set up correctly or users may have problems saving their profiles, settings, and documents. Installing the WYNN Network Server Note: When upgrading from an older WYNN Network version, disable the old Users share by right-clicking on the folder, selecting Properties, navigating to the Share tab, and selecting Do not share this folder. Network installation requires that you install all server components from the WYNN DVD to the server. During this process, all client installation files are copied to the server and several WYNN folders are created. 1. Do one of the following: If installing from the WYNN DVD, insert the DVD into the server’s disk drive. (Both the network and stand-alone versions of WYNN are on the same DVD.) If installing from the downloaded software package, locate and double-click the executable file. The file has a name similar to WYNN[version number]-32bit-64bit.exe. Important: WYNN’s server components installation program is located in the disk’s root folder. Installation must run from this location. Do not copy and run the installation components from a different medium. 2. The WYNN Setup program starts, and displays installation instructions. Follow these instructions to complete the WYNN installation. Note: If the program does not start automatically run Setup.exe on the program disk. 17 3. When prompted, Choose Network WYNN installation Choose a destination folder for Network WYNN. The default folder is C:\WYNNNet. If you want to install it in a different folder, choose Browse and select a new folder. Choose Next to continue with the installation. Choose a location for users to share their documents and settings. The default document storage folder is C:\WYNNNet\Users. This location must be shared so that all users can access it. Make sure the storage location is shared and then select Next to continue. Note: The installation wizard can automatically share this folder. It will have Full Control permission for the Everyone group during installation and then will be demoted to Read Only permission for the Everyone group once installation is finished. Choose Yes to create this share or No to continue. 4. When installation is complete, you can then set permissions for the folders referenced in the next section. Once that is complete, you can install WYNN Network Client on the workstations. Refer to page 27 for WYNN client installation procedures. During installation, several new folders and subfolders are created on the server (see page 235). For a list of permissions assigned to these folders, see User Permissions on page 233. Configuring User Groups and Folder Permissions Users must be able to access certain folders to use Network WYNN. You can create one user group and set the access for that group, or you can create many users and then set the folder access for each user. Creating a User Group Create a WYNN user group to easily add students who will use the WYNN application. You can allow individual users to access the WYNN folders, but you will have to set folder permissions for each user. If you create a group, you only set folder permissions once for the group. 18 1. Navigate to the Control Panel. 2. Select Administrative Tools. 3. Select Computer Management. The dialog box will vary based on your operating system as shown in the following images. 4. Expand Local Users and Groups and select Groups. 5. In the Action menu (ALT+A) choose New Group or right-click in the right panel and select New Group. 19 6. Enter the Group name ("WYNN Users"). 7. Choose Add to add members 8. Click Create to create the group Sharing the Users and WYNNNet Folders After installing WYNN Network Server, and before installing WYNN Network Client, set the following permissions. For more information about folder permissions, see User Permissions on page 233. Users. If the folder was not shared during installation, do so now and set permissions to Full Control, Change, and Read as described below. WYNNNet. Share the folder and set permissions to Change and Read. To share the folders, follow these instructions: 20 1. Use Windows Explorer to locate the folder. 2. Next, right-click the folder and select Properties. 3. In the Sharing tab, select the Share this folder option. The dialog box will vary based on your operating system. 4. Select the Permissions button and choose Full Control, Change, or Read depending on which folder you are sharing. Note: If you want the permissions to affect only the WYNN user group, add or select the group. While the group is selected, set the permissions. 5. Select OK twice to close the Permissions and User Properties dialog boxes. Setting the NTFS Permissions You must also set NTFS permissions for the folders that WYNN users will access while using the WYNN Network Client. The NTFS permissions are: Users. Full Control as described below WYNNNet. Read & Execute, List, and Read To set the NTFS permissions on the folders, follow these instructions: 1. Use Windows Explorer to locate the folder. 2. View the folder properties 3. Select the Security tab. 4. Select your WYNN User group. 5. In the Permissions section, choose the permissions. The dialog box will vary based on your operating system. License Server Software Overview A WYNN Network Authorization CD is supplied with the Network WYNN version. The following overview describes the three primary steps to installing and configuring a license server computer. Note: If you do not install and activate the license server, the WYNN clients will operate in 40-minute demo mode. The WYNN software package downloaded from the Freedom Scientific Web site does not include the license server software. 21 Select a license server computer The license server must be a physical computer and not a virtual one. You must designate one Microsoft Windows-based computer on the network to be the license server. This can even be the WYNN server. Install the license server on a networked computer that is not running the WYNN client. Make sure that this computer is always accessible. The license server handles requests for tokens. A token allows a WYNN client to use WYNN. The license server issues tokens to the requesting clients until there are no more tokens available. The number of available tokens depends on how many license seats were purchased. For example, if 10 seats are purchased, only 10 simultaneous WYNN sessions are available. If an eleventh computer tries to use the WYNN application, it is denied access to the application until a license seat becomes available. Install the license server software The WYNN Network Authorization CD contains the network authorization utilities, documentation, and tools. Insert the CD into the computer’s disk drive, and follow the on-screen instructions to install the software. Activate the license server computer This is the only computer that requires software activation. The other WYNN client computers do not require authorization or activation since they obtain tokens from the license server. For activation procedures, refer to Activating the License Server on page 24. Installing the License Server Software and Network Authorization Tools The following process describes how to install the license server, which authorizes client computers to use your Freedom Scientific product. This installation also creates a program folder in your Start menu that provides access to the Network Authorization documentation and tools. 22 1. To begin the installation, insert the WYNN Network Authorization CD into the license server computer’s disk drive. The Network Authorization Utilities dialog box appears. Choose Install to continue. Note: If the installation does not begin automatically, run Setup.exe on the program disk. 2. The Network Authorization Utilities installation status appears. The installation briefly pauses, and then launches the InstallShield Wizard for the SentinelLM Server. 3. The InstallShield Wizard for SentinelLM Server starts. Choose Next to begin the license server installation. Note: You can only install the license server on a computer that runs Windows XP or later. The license server does not support other operating systems such as Novell, UNIX, Linux, and so on. 4. Read the license agreement. If you accept the terms and conditions in the agreement, choose Yes. By default, the license server installs in C:\Program Files\Rainbow Technologies\SentinelLM 7.2.0.6 Server. If you want to install the license server in a different folder, choose Browse and select a new folder. Choose Next to continue with the installation. 5. Choose Finish when installation of the SentinelLM Server is complete. The Network Authorization installation status menu appears again. 6. Choose Finish when this installation of the Network Authorization Utilities is complete. The Network Authorization tools and license server are now installed. If you are using Windows XP, the “SentinelLM” service is automatically added to your Windows Services. The installation creates a new folder in your Start menu called Freedom Scientific. See Network Authorization Tools on page 234 for detailed descriptions of each Network Authorization tool. 23 Activating the License Server After installing the license server and Network Authorization tools, you must then activate your Freedom Scientific product license. To do this, you must request an Activation License code from Freedom Scientific. You can use the Internet to receive your Activation License code quickly and easily. Note: When upgrading from an older WYNN Network release, you must also update your authorization using the steps below. Perform the following to activate your Freedom Scientific product. 24 1. From the Start menu, choose All Programs, Freedom Scientific, Network, and Update WYNN Wizard Authorization or WYNN Reader Authorization. 2. Choose the Activate button to begin the activation. 3. Select the Now, using the Internet (RECOMMENDED) option to specify that you want to use the Internet to acquire your Activation License code. Choose Next to continue. 4. Your 20-character Authorization number is automatically inserted into the Authorization Number edit box. If your Authorization number is not shown, type it into the edit box. (Your 20-character Authorization number appears on your WYNN disk package.) Choose Next to continue. 5. You may be prompted to register your software. Registering lets you receive technical support. Choose Register Now and complete the online registration form by following the instructions provided. You can choose to register later, but you must register the next time you activate the software on any computer. 6. After you submit your registration, Internet License Manager (ILM) attempts to activate the software. This process may take several minutes. When the activation is successful, choose Finish. Tip: 7. If Internet License Manager cannot activate the software, you may need to reconfigure your firewall. See page 249 for more information. Start the WLMAdmin utility by opening the Start menu and choosing Programs or All Programs, Freedom Scientific, Network, and Server Administration. If the WLMAdmin utility is running, quit the program and then restart it. You can use this utility to monitor where the license(s) reside and which users are using tokens. 25 WYNN Network Client Overview The final part of network installation requires that you install the WYNN application onto the client computers by running the appropriate Setup.exe file that resides on the server. Do not try to run the client setup from the program disk. Note: If installing from the downloaded software package, locate and doubleclick the executable file. The file has a name similar to WYNN<version number>-32bit-64bit.exe. You do not need to perform additional authorization procedures for these computers. Each time the software is started on the client, it automatically searches for the license server and obtains an authorization token. The number of tokens available depends on the number of users permitted by your license. For example, if you purchase a license for five users, your license server has five tokens available. Each time a user starts the software, the license server assigns the client computer a token. Once all tokens are assigned, no additional clients can receive authorization. If you need your license to support additional users, contact your local distributor or Freedom Scientific to purchase additional seats. To run the Setup.exe file from the server follow the procedures in the Installing the WYNN Network Client section. Adding the Environment Variable LSFORCEHOST Tip: 26 It is strongly recommended that you add the environment variable LSFORCEHOST to the client computers and set it to the name or IP address of the SentinelLM license server. Most networks, especially school networks, need this so the clients can find the correct location for the license server. When the Freedom Scientific program starts, it will only search for a product license on the specified computer. If you have distributed the license over more than one license server and you want the program to search for the first available token, do not add this environment variable. For more information, refer to the System Administrator’s Guide, which is a Network Authorization tool that you installed earlier. Do the following to add the environment variable: For Windows 7, do the following: 1. Click the Start button, right-click Computer, and choose Properties. 2. In the left pane of the System dialog box, click Advanced System Settings. 3. In the Advance tab of the System Properties dialog box, click Environment Variables. 4. Select the New button that appears in the System Variables area, and then enter LSFORCEHOST in the Variable name field and the server name or IP address in the Variable Value field. Click OK to close the dialog box and save the changes. For Windows XP, do the following: 1. Click the Start button, right-click My Computer, and choose Properties. 2. In the System Properties dialog box, select the Advance tab, and choose the Environment Variables button. 3. Select the New button that appears in the System Variables area, and then enter LSFORCEHOST in the Variable name field and the server name or IP address in the Variable Value field. Click OK to close the dialog box and save the changes. Installing the WYNN Network Client Do the following to install the network client version of WYNN. Do not try to run the client setup from the program disk. 1. From the client computer, use Windows Explorer to browse to the WYNN destination folder and run setup.exe. The default file location is: \\<fileserver name>\WYNNNet\WYNN <version number>\Setup.exe 27 Note: If installing from the downloaded software package, locate and doubleclick the executable file. The file has a name similar to WYNN<version number>-32bit-64bit.exe. Note: Make sure you use the UNC share path (\\<fileserver name>\WYNNNet\...). This is the path that WYNN will use to connect to the WYNN server. 2. The WYNN setup program starts and displays installation instructions. 3. When prompted, Choose installation for WYNN Wizard, WYNN Reader, or both. Choose the language locale, for example, U.S. English or another language. If the public domain books are available, choose to install these books. 4. Next, the setup program installs the RealSpeak Solo Direct speech synthesizer. Accept the End User License Agreement and continue to follow the installation instructions. (This synthesizer is not available for the 40-minute demo version downloaded from the Web.) Note: For certain installations, such as an upgrade, it may be necessary to reboot your computer. Click Yes when prompted if this is the case. 5. Click Finish when the install is complete. The WYNN application is installed, and the Network WYNN application and folder shortcuts appear on the client’s desktop. Special Installation Commands The Freedom Scientific setup package is a tool used to install or uninstall multiple components, including the main product. There are a number of special installation commands that may be helpful to network administrators. To install the WYNN network client using these options, do the following: 1. 28 Press WINDOWS Key+R. The Run dialog box opens. 2. Click Browse, and then navigate to the folder where the WYNN network client setup package is located. For example, C:\WYNNNet\WYNN<version number>\setup.exe 3. Next append a command-line option to the end of the file path. For example, C:\WYNNNet\WYNN<version number>\setup.exe <command-line option> Note: Command-line options are listed in Appendix E: Command-line Options beginning on page 253. 4. Click OK to start installation. Account Types: Administrative and Teacher Overview of Account Types There are three types of user accounts beginning with WYNN 7: Administrator, Teacher, and Student. The Administrator account is primarily used by the IT department or other person installing WYNN. Teacher accounts are used by teachers to create and edit certain types of documents. Student accounts have limited editing capabilities for some document types. These three account types are detailed below. What is an Administrator Account? The administrator account, also known as Shared, is used to make changes to other user accounts. For example, the administrator account can elevate student accounts to teacher accounts; assign and change passwords to teacher accounts; and demote teacher accounts to student accounts. The administrator account cannot broadcast files and settings to other users. There can only be one WYNN administrator account. Note: In previous versions of WYNN, the Shared account was used by teachers to broadcast files and lock out features. In WYNN 7 and later, the Shared account has changed and is only used as the Administrator account. Previous functions covered under Shared are now covered under the Teacher account type. 29 What is a Teacher Account? A teacher account can: Broadcast documents and settings to students on a classroom computer, or, if using Network WYNN, to all users on the network. Settings consist of items such as word prediction lists, pronunciation and spelling dictionaries, abbreviations, and OCR corrections. Create and edit PAL (WYP) documents Create and edit Template (WYT) documents Disable features, such as the dictionary, thesaurus, spell checker, homophone checker, word prediction, and Web browsing, for student accounts. Change the current teacher account password What is a Student Account? A student account is the most basic type of account. Students are not allowed to create or edit PAL (WYP) or Template (WYT) files. They can use these files to complete assignments, but they cannot alter the original text in them. Note: All new accounts are created as student account types. After creating a new account, teachers should request that the Administrator elevate their account to Teacher permission level. Then they can create and edit PAL and Template files, broadcast files, and lock out student functionality such as using the Dictionary and browsing the Internet from within WYNN. What should an administrator do once the software is installed? The first thing an administrator should do is log in and set a password for the administrator (shared) account Next, elevate any student accounts that need to be elevated to Teacher accounts. 30 There are several options as this point. (1) The administrator can assign a generic (temporary) password to the teacher accounts. Teachers can then change the generic password to something they prefer, or (2) The administrator can assign specific passwords to the teacher accounts during the elevation process. (3) The administrator can leave the teacher accounts without passwords (not recommended) Finally, the administrator can log out and provide teachers with their account information Note that if the teacher accounts have not yet been created, the administrator can log out and create them, then log back in as Shared to elevate them to Teacher permissions. Also, as teachers create new accounts later, the administrator can elevate individual accounts at that time. Important Note: Teachers will not be able to create and edit PAL and Template files until their user log-in has been elevated to Teacher permissions. This can only be done by the Administrator account. What should a teacher do after the software is installed? A teacher has three options. If an account has not been created, the teacher should create a user account, which will be a student account by default – simply type a user name in the User Log In dialog box, and choose Yes when prompted to add a new user. Next exit WYNN or log out, and inform the administrator that the account has been created. 31 If a teacher account has already been created and configured by the administrator, the teacher should log on, and (1) Use the specific password provided for that account by the administrator, or (2) Use the generic password provided, create a new password, and then give it to the administrator (3) Set a password if the administrator has not already set one. To set a password, log in and then choose Change Password in the Advanced menu. Type your password, confirm it, and press ENTER. Check for Updates Freedom Scientific is continually seeking to improve and expand WYNN. Periodically, WYNN updates are released, so it is recommended that you keep your software up to date. To check for updates after installing the WYNN release, do the following: 1. Click the Help menu and then Check for Updates. 2. The update feature determines if you have the most current release. If you do not, select one or more items from the list and then select INSTALL to begin the update. If your version is up to date, the update feature displays a message indicating that you have the latest version. Note: The network version of WYNN does not support the Check for Updates feature. 32 Book 1: Getting Started This section describes basic tasks that all users can perform to start WYNN, open documents, read documents, use WYNN's study tools, customize WYNN, and save documents. Starting WYNN The first time you start WYNN, you must create a user account with a unique user name before using the software. Not only does this process create your user name, but it also creates your own user folder, which is your default folder that stores your documents. The default folder uses your user name. For network versions of WYNN, your default user folder is stored on the server. Note: All new accounts are created as student account types. After creating a new account, teachers should request that the Administrator elevate their account to Teacher permission level. Then they can create and edit PAL and Template files, broadcast files, and lock out student functionality such as using the Dictionary and browsing the Internet from within WYNN. See Account Types: Administrative and Teacher on page 29 for more information about giving teacher permissions to user accounts. To start WYNN: 1. Double-click the WYNN Wizard or WYNN Reader application icon on your desktop. The User Log-In dialog opens. 2. If you already have a user name, Select it from the list, and click OK. The WYNN application starts, and opens either a blank document, or the last file that was open. If you are a new user, Type your name in the Please Sign In Here box. Click OK. 33 A confirmation window appears. Click Yes. A process begins that accepts your new user name, creates a default folder for your documents, and starts the WYNN application. The WYNN application starts, your user name appears in the upper right corner of the WYNN window, and the Welcome to WYNN file opens. Multi-User Log In If another user wants to log in without quitting WYNN: 1. Choose Log Off <user name> from the File menu or click on the name in the upper right corner. 2. A confirmation message appears. Click Yes. 3. The user can then log in, as previously described, and begin using WYNN. Note: If only one user will be using WYNN on this computer, you can skip the log in process. To do this, choose Enable Multi-User Logins from the File menu. Enable Multi-User Logins should be unchecked. The next time you start WYNN, you will not be asked to log in. Choose this command again to re-enable multi-user logins. 34 WYNN User Interface 1. WYNN Toolbars. This row of buttons contains the common toolbar buttons and the current toolbar’s buttons. The primary toolbars are the blue File Management toolbar, the green Reading Styles toolbar, the pink Study Tools toolbar, and the yellow Writing Tools toolbar. 2. WYNN Menu Bar. All WYNN commands are available using these menus. 3. Title Bar. Displays the name of the open WYNN file. 4. User Name. Shows you who is currently logged in to the WYNN system. The individual’s permissions level also displays. 35 5. File List / PAL Left Panel. The left side navigation pane displays the names of all open documents, including Web pages. Click the File List button to open and close the pane. This area switches to the PAL Left Panel when a PAL (WYP) document is open. It contains buttons that allows teachers to configure PAL documents and students to read, research, take notes, and complete their assignment. 6. Cursor and Page Locator. Indicates which line the cursor is in, and it indicates which page is currently in view. 7. Document Work Area. Your document appears in this scrollable area. Using the File List The File List is a navigation pane that appears on the left side of the WYNN window. It displays the names of all open documents, including Web pages. Do the following to open the File List pane. 1. From any toolbar or the WYNN Web browser, click the File List button. 2. The names of all open WYNN documents display in the File List. Click a file name to open a file. (The names of the other files display as unavailable in the list.) When using the WYNN Web browser, the list pane displays the name of the current Web page, your list of favorite Web sites, or your Web browsing history. Select any item in the list to open the Web page. 36 3. Click Previous or Next to switch among the list of open WYNN files, Web pages, or browsing history. 4. To close the File List pane, click the File List button again. WYNN Toolbars WYNN's toolbars provide quick access to many different commands. There are four primary toolbars, each with different colors and buttons. In addition, there are several buttons available on each toolbar: Next, Read/Pause, Write/ReadOnly, Exact View/Text View, and File List/PAL Left Panel buttons. Each toolbar is described below. Tip: From the Settings menu, choose Custom Toolbar to create a customized toolbar with the commands you use most often. For more information, refer to Customizing the Toolbar on page 163. Common Toolbar Buttons The Common Toolbar buttons always appear as the first five buttons from left to right on the WYNN screen. Use these buttons to: Switch from one toolbar to another Start or stop WYNN from reading aloud Edit a document View a document in its original formatted state or as text Open File List and switch between open WYNN documents Next Click the Next button to cycle through WYNN's four color-coded toolbars. The color of the bar at the top of the button indicates which toolbar will display when you click the button. The color of the up arrow indicates the active toolbar. 37 Read / Pause When you click Read, WYNN reads the document aloud and moves the spotlight along as it reads. While WYNN is reading, this button changes into the Pause button. Click the Pause button to stop reading. Click Read again to resume reading from the current cursor position. Write / Read Only Click Write if you want to edit or make additions to the text of the current document. This button is not available in Exact View, and changes you make in Text View are not visible in Exact View. When the document is in Write mode, this button changes into the Read Only button. Click the Read Only button to return to Read-only mode. You cannot write or edit text in Read-only mode. Exact View / Text View Click the Exact View button to see the current document in its original form, which may be an acquired image, PDF file, Microsoft Word document, or any other supported file format. While in Exact View, you can zoom (using the View menu), read text, and change text and background colors if the document was acquired in black and white mode. You cannot make any changes to the actual document text. When in Exact View, this button changes to the Text View button. Click the Text View button to see just the text of the page, without any formatting, including graphics, line art, tables, and columns that affect how the page appears. While in Text View, you can edit the text or make modifications to how the text looks using the green toolbar’s Visual settings buttons. 38 File List Click the File List button to open the left-hand navigation panel. You can then switch between your open documents. The maximum number of documents you can have opened is determined in General Settings in the Settings menu. You can also use the Window menu to switch between open documents. Either select the document you want to switch to from the menu or choose Next Document. File Management Buttons Use the blue buttons in the File Management toolbar to scan (acquire), create, open, close, print, and save documents. You can also use these buttons to access WYNN’s document clean-up function and the Internet. For information about these buttons, see Book 3: File Management Toolbar. Reading Styles Toolbar Use the green buttons in the Reading Styles toolbar to change the way documents appear visually and audibly in WYNN. You can use these buttons to change the text size, word and line spacing, page margins, text and background color combinations, speech rate, masking settings, reading mode, and the length of pauses between sentences. For more information, see Book 4: Reading Styles Toolbar. 39 Study Tools Toolbar Use the pink buttons in the Study Tools toolbar to access the basic and standard talking dictionaries, spell words audibly, divide words into syllables, highlight text, add bookmarks, view a list of highlighted or bookmarked words, and create text and voice notes. For more information, see Book 5: Study Tools Toolbar. Writing Tools Toolbar Use the yellow buttons on this toolbar to cut and paste text, apply bold, italic, and underline to text, find text in the document, create and work with an outline, enable/disable Word Prediction, check for homophones, and check your spelling. For more information, see Book 6: Writing Toolbar. Web Toolbar The Web toolbar only displays when you are browsing the Web in WYNN. To display the Web toolbar, click the Go To Web button in the File Management toolbar. For more information, see Book 7: Web Toolbar. 40 PAL Process The PAL left panel opens when a PAL document is opened. It contains shortcut buttons that allow teachers to create PAL documents and students to read, research, take notes, and complete their assignment. For more information, see Book 8: PREPARE Process for Teachers and Book 9: PREPARE Process for Students. WYNN Menu Bars The menu bar allows you to access every function and command in WYNN. The menu bar contains 12 menus. The following table describes each menu. Tip: If you wish to have the items on the menus speak, go to the Settings menu, then Speech Settings. From the Speak What option, check Menus and Dialogs. 41 File The File menu allows you to manage files, print documents, view document properties, and more. Edit The Edit menu allows you to switch between read-only and edit modes, cut/copy/paste and select text, apply character formatting, find/replace text and mark-ups, create outlines, and work with page numbering and order. Acquire The Acquire menu allows you to quickly acquire documents by selecting preconfigured workflows. View Use the View menu to show or hide certain elements of the WYNN application. You can also use this menu to switch to and magnify the Exact View for acquired documents. Tools The Tools menu contains reading commands, study tools like a spell checker, dictionary/thesaurus, and homophone checker, and mark-up tools like highlighting and bookmarks. Launch Using the Launch menu, you can add and manage a list of applications (for example, Microsoft Word, Notepad, and so on) so that you can start these programs from within WYNN. 42 PAL The PAL menu allows teachers to set up PAL documents for students. It allows students to use the PAL functions, including the PREPARE process. The process includes supports for reading and studying content-area text. The steps in this process will help students identify key information from text, take notes and summarize that information, and then use their notes to study or to write different genres of text, such as essays and research papers. Advanced The Advanced menu allows you to access a number of special commands and features like Teacher Lockout, the Pronunciation Dictionary, and Word Prediction controls. You can also use this menu to launch external applications and select a scanner. Settings The commands available in the Settings menu allow you to customize WYNN. You can change visual settings, speech preferences, Web settings, masking, word prediction, differential coloring, and more. You can also customize WYNN's toolbars. Web The Web menu provides access to commands you can use to browse the Internet. These commands are similar to those found in popular Internet browser software and include Web navigation, favorites, history, and a refresh command. Windows The Windows menu allows you to switch between documents currently open in WYNN. Help The Help menu lets you view WYNN's online help system. 43 44 Book 2: Basic Tasks in WYNN Opening an Existing WYNN Document To open an existing document: 1. From the blue File Management toolbar, click the Open button. The Select a File to Open dialog appears. All WYNN formatted files saved in your user folder appear. WYNN files use the WYX and OBX file extensions. 2. Locate the file on your computer, and then click Open to load the file. If the file you want to open is not shown in the list, use the Look In combo box to locate and select a different folder. When you reopen a document (WYX or OBX), it always opens to the last page that you were reading. When you reopen a legacy document (WYN or ARK), it always opens to the first page of the document. You can resolve this by saving the file in WYX or OBX format. Opening Other Documents To open files saved in file formats other than WYNN’s default format: 1. From the Files of type combo box, choose one of the following file formats that can be read by WYNN. WYNN (WYX) and OpenBook (OBX) Legacy WYNN (WYN) and OpenBook (OBU and ARK) Portable Document Format (PDF) – WYNN Wizard only Text (TXT) and DOS Text 45 HTML (HTM) Rich Text Format (RTF) DAISY (XML, OPF, NCC.HTML) Audio (MP3, MPG, WAV, WMA, CDA) Image (TIF, TIFF, JPG, JPEG, PCX, BMP, GIF, PNG) Bookshare.org (BKS, BKS2) WordPerfect (WPD) 2. Select the file you want to open. 3. Click Open. When you open a PDF file in WYNN, it becomes available just as if you had scanned it in. When you open other file types, WYNN displays the contents of these files in the Text View without any special formatting. To view these files in their original format, open them in the program they are normally associated with. Tip: You can also press CTRL+O to open a file. Note: By default, the maximum number of documents that can be open at once is two. If you create a new document while the maximum number of documents is already open, WYNN asks you to save changes to the least recently accessed document and then closes it. Note: If you later navigate away from the default file folder location, you can use the User Docs button (which is a shortcut) in the Open dialog box to quickly return to your default file folder (Docs). 46 Opening Files Using the WYNN User Files Shortcut After installing WYNN, the WYNN User Files shortcut appears on your desktop. It provides fast access to the files in your default WYNN folder. To open a document using your WYNN Documents shortcut: 1. From the Windows’ Desktop, double-click the WYNN User Files shortcut. The folder that opens contains your personal default folder and WYNN’s Shared file folder. Your default folder is located in, C:\Users\Public\Documents\WYNN\<version number>\<login name>\Docs, or C:\Documents and Settings\All Users\Documents\WYNN\<version number>\<login name>\Docs (for Windows XP) 2. Open your default folder to access your saved files. Creating Files and Bringing Information into WYNN There are several ways to create new files using the … New button in the blue File Management toolbar Scan button in the blue File Management toolbar Freedom Import Printer Book Search in the Launch menu Creating a New Document in WYNN To create a new document: 1. From the blue File Management toolbar, click the New button. 47 2. Tip: A blank page appears. You can type new text into this document, or click the Scan button to add acquired pages to it. You can also press CTRL+N to create a new document. Acquiring Images to Create a New Document You can acquire (scan) a page using a scanner or PEARL camera to create a new document. To quickly acquire a page, do the following: 1. Place a page face-down on a scanner or face-up under the PEARL camera. 2. Click the Scan button on the blue File Management toolbar. 3. WYNN acquires the page, recognizes the text, and displays the text in a new document in Text View mode. Note: For detailed information about acquiring documents, see Book 13: Scanning and Other Ways to Get Material into WYNN. Creating a New Document Using the Freedom Import Printer WYNN Wizard includes a virtual printer that provides the ability to convert files from PDF files, or any other file format, to a WYNN document. This virtual printer, called the Freedom Import Printer, displays in the list of printer drivers in the Print dialog box. The following provides examples for opening a PDF file and converting it to a WYNN (WYX) document using the Freedom Import Printer. Opening a PDF file from within WYNN There are two ways to bring PDF files into WYNN Wizard: The first is to open the PDF file from within WYNN 48 The second is to open Adobe Acrobat Reader and print the PDF using the Freedom Import Printer. This conversion process is described in Converting Files Using the Freedom Import Printer. To open a PDF using WYNN, do the following: 1. From the blue File Management toolbar, click Open. 2. In the Open dialog box, select Adobe PDF Documents (*.pdf), which is in the Files of Type box. 3. Select the PDF file you want, and click Open. 4. The file is automatically converted to the WYNN file format. Converting Files Using the Freedom Import Printer You can also convert PDF document, or documents from any other file format, into WYNN documents using the Freedom Import Printer. The Freedom Import Printer is only available in WYNN Wizard. Note: This process also works for converting online PDF files. 1. Open a file from any application. 2. From the File menu, choose Print, and select Freedom Import Printer as your printer. 3. If you like, specify the range of pages to be printed. 4. Click OK. 5. The Freedom Import Printer converts the document to a WYNN file. If WYNN is not open, the Virtual Printer will open it. 6. You may wish to save the file as a WYX file after it is opened in WYNN. 49 Creating a New Document Using Book Search Online electronic books that are available for download can be brought directly into WYNN and saved as WYX files. Search for Bookshare.org, Gutenberg, and Baen books from within WYNN. You can search by title or author. If searching for books in Bookshare.org, you can use your individual or organizational membership to download available books. To download books into WYNN, use the Book Search feature available in the Launch menu as described below. For additional information, see Book 15: Book Search . 1. Establish an Internet connection. 2. From the Launch menu choose Book Search, and then Quick Search. 3. In the Quick Book Search dialog box, type the title and author, select the sites to search, and then click Begin Search. 4. The Book Search Results dialog box opens. If the search is successful, a list of books display. 5. Select items in the list, and then click Download. When the download is complete, a message displays stating the location of the file on your computer (your default Docs folder). 6. Click Open Files Now to open the book in WYNN. 7. Click Save in the blue toolbar to save the book as a WYNN (WYX) document. Reading a Document WYNN can read a document or Web page aloud and “spotlight” the spoken words as you read along. To read a document: 1. 50 Open a document or Web page. 2. Select a starting point by clicking a word. The spotlight appears on that word. For example, Tip: 3. To change the appearance of the Spotlight, go to the Settings menu and navigate to the Visual Settings tab. Click the Read button. WYNN reads the document aloud and moves the spotlight along as it reads. In addition, the Read button switches to the Pause button. 4. To stop reading, click the Pause button. 5. To start reading again from the current cursor position, click the Read button. Tip: You can also press F2 or choose Start Reading from the Tools menu to start reading. Skim Reading The Skim Reading feature lets you quickly browse through long documents by reading the first sentence, last sentence, or both of each paragraph in a document. If you are in the middle of a paragraph, WYNN will finish reading the current sentence and then jump to the next sentence base on your selection of First Sentence, Last Sentence, or First and Last Sentence. 51 To start skim reading, 1. Press SHIFT+F2, or click Skim Reading from the Tools menu. 2. To stop reading, press ESC or press the Pause button (F2).. 3. To restart skim reading, press SHIFT+F2 again. Be default, Skim Reading reads the first sentence of every paragraph. To change skim reading options, 1. Click the Settings menu, and then Speech Settings. 2. In the Skim Reads Speaks Paragraph list box, select First Sentence, Last Sentence, or First and Last Sentence. 3. Click OK to apply changes and close Speech Settings. Exact View and Text View When you acquire a document, the WYNN system creates two versions: an exact image view, and a text only view. The exact image view shows the document exactly as it appears in the original. The text only view extracts only the text from the acquired document. Text Only mode is the default view after scanning a document. Note: You can set the default view to Exact View by going to Visual Settings and changing Preferred View. 52 To switch between Exact View and Text View: 1. Click the Exact View button to view the current document in its original form, which may be an acquired image, PDF file, Microsoft Word document, or any other supported file format. For example: In Exact View, you can read the text as it appears in its original format, or zoom-in to enlarge the entire image (using the View menu). If the document was acquired in Black and White, you can also change the background color. When in Exact View, this button changes to the Text View button. 53 2. Click the Text View button only to see the text of the page, without formatting, graphics, line art, tables, and columns. For example: While in Text View, you can edit the text or use any of WYNN's visual modifications from the green toolbar to change how the text appears. This includes changing font size, line and word spacing, and setting Masking to mask out all but the part you are currently reading. Sending a File to Word You can use WYNN’s Launchables feature to send a WYNN document directly to Word as described below. Note: For information about setting up and using launchable applications, see Book 14: Launchables. 54 1. Open a WYNN document. 2. Do one of the following: Click the Launch to Word button in the blue toolbar, or From the Launch menu, choose Word. 3. The WYNN document is sent to Word. Saving a Document To save a document in WYNN: 1. From the blue File Management toolbar, click the Save button. If the file is new, the Select a file to Save to dialog appears. Enter a file name and click Save. If a file with the same name already exists in the selected folder, WYNN asks you if you want to overwrite the existing file. 2. Click the OK button to replace the existing file. Click the Cancel button if you do not want to overwrite the file. If you later navigate away from the default file folder location, you can use the User Docs button to quickly return to your default file folder (Docs). To save a new document, or to save an existing document with a new name: 1. From the blue File Management toolbar, click the Save As button. 55 The Select a file to Save to dialog box appears. If you want to save the file in a different format, click the Save As Type combo box. This allows other programs, such as Microsoft Word, to read this file. If you want to save the file in a different folder on your computer, locate and select the folder using the Save In combo box. 2. Enter a file name into the File name edit box, and click the Save button. Save to Audio With WYNN, you can quickly and easily save the current document or voice note to an audio file. Documents can be saved as MP3 or WAV files, while voice notes can be saved only as MP3 files. For additional information and procedures, see Converting Documents or Voice Note to Audio Files in Book 16: User Tasks. To quickly start this feature, click the Save to Audio button on the blue File Management toolbar. 56 Printing To print a document in WYNN: 1. Open a document in WYNN. 2. Click the Print button on the blue File Management toolbar. 3. Choose the printer you want to use to print the document, and then specify the parts of the document you want to print and the number of copies you want to create. Note: You can choose to print only text that you have highlighted in the document by selecting the Highlight Text Only radio button. You can also choose to print only the content of all text notes in the document by selecting the Text Notes Only radio button 4. Click the OK button to begin printing. Closing WYNN Quitting WYNN logs you out and ends the current session. From the File menu, choose Exit to quit WYNN. Alternatively, click located in the top right corner of the application window or press ALT+F4. If you quit without closing your document, WYNN automatically opens the document the next time you log in. 57 58 Book 3: File Management Toolbar Use the blue buttons on this toolbar to scan (acquire), create, open, close, print, and save documents. You can also use this toolbar to access WYNN’s document clean-up function and the Internet. Tip: To use solid colors for the background of the toolbar buttons, the way earlier versions of WYNN did, choose Visual Settings from the Settings menu, then check the item called Use Solid Toolbar Colors. Scan Place a page face-down on your scanner, or face-up under the PEARL camera, and click the Scan button to begin acquiring (scanning). WYNN scans the page, recognizes the text, and displays it in Text View. You can interrupt the scanning process by clicking the Cancel button. If you acquire additional pages, WYNN inserts these new pages after the page the last page acquired. In order to acquire a document directly into WYNN, you must use WYNN Wizard and have previously installed your scanner. You cannot acquire documents if you are using WYNN Reader or have not installed a scanner or connected a PEARL camera. Tip: To change Scan preferences, choose Workflow Settings from the Settings menu. To use a different scanner or driver, choose Device Selection from the Advanced menu. 59 New Click the New button to create a new WYNN document. You can type new text in this document or acquire new pages in it. Tip: You can also press CTRL+N to create a new document. Open Click the Open button to open an existing file in WYNN. Locate the file on your computer and then click Open to load the file. If the file you want to open is not in the list, use the Look In combo box to select a different folder. See page 47 for the location of user files. You can open other types of files using either WYNN Wizard or WYNN Reader by making a new selection in the Files of Type combo box. WYNN can read legacy WYNN (WYN), Microsoft Word (DOC), text (TXT), HTML (HTM), rich text format (RTF) files and more. WYNN Wizard can also open PDF files. When you open a PDF file in WYNN Wizard, it becomes available just as if you had acquired it in. When you open files of other types, WYNN displays the contents of these files in the Text View without any special formatting. To view these files in their original format, you should open them in the program they are normally associated with, and then print them to WYNN using the Freedom Import Printer driver. Tip: You can also press CTRL+O to open a file. Close Click the Close button to close the active document. If you have made any changes or added mark-ups to the document, WYNN asks you if you want to save them. Click Yes to keep your changes. Click No to discard your changes. WYNN automatically saves any additional pages you have acquired and added to the document. Tip: 60 You can also press CTRL+W to close a document. Save Click the Save button to save changes to your document. WYNN saves the document using the current file name and location. Save As Click the Save As button to save your document with a new file name and/or location. After you click this button, enter a new name for the file in the File Name edit box. You can save the file in a different format by making a new selection in the Save As Type combo box. This allows other programs, such as Microsoft Word, to read this file. If you want to save the file in a different folder on your computer, select the folder in the Save In combo box. Click Save to save your document using the new name and/or location. If a file with the same name already exists in the folder you selected, WYNN asks you if you want to overwrite the existing file. Click OK to replace the existing file. Click Cancel if you do not want to overwrite the file. Print Click the Print button (CTRL+P) to print the active document. Choose the printer you want to use to print the document. Then specify which parts of the document you want to print and the number of copies you want to create. Click OK to begin printing. You can choose to print only text that you have highlighted in the document by selecting the Highlight Text Only radio button. You can also choose to print only the content of all text notes in the document by selecting the Text Notes Only radio button. For more information on these features, refer to the Highlight and Text Note buttons on pages 72 and 74. Clean-up The Clean-up feature (also known as Document Clean-up) corrects any scanning or OCR errors that occur during document scanning. 61 When you click Clean-up, your acquired document appears in a split-screen view that shows text in the upper half and the acquired image in the lower half. Note: Click No Clean-up, and your screen returns to its previous wholescreen view (text or exact). For more information and procedures, see Document Clean-up on page 130. Tip: You can also press SHIFT+F7 to enter and exit Document Clean-up Save to Audio You can save and convert any voice note or document that you can open in WYNN as an MP3 or WAV file. This allows a user to listen to a document later using an MP3 or WAV file compatible device. Note that Voice Notes can be saved only as MP3 files. Documents can be saved as MP3 or WAV files. The Save to Audio feature does not apply to Web pages (HTML files). Book Search With WYNN you can quickly search a variety of sources for books in electronic format. Use the Book Search feature to download your favorite books from Bookshare.org, Project Gutenberg, and the Baen Free Library,. Export from WYNN to Word You can easily and quickly export a document that is currently open in WYNN directly to Microsoft Word. With your document in Word, you can take advantage of the many formatting styles available in a word processor. 62 Go To Web Click the Go To Web button to begin browsing the Internet. You can also open a new Web document. 63 64 Book 4: Reading Styles Toolbar Use the green buttons on this toolbar to change the way documents appear visually and audibly in WYNN. You can use this toolbar to change the text size, word and line spacing, page margins, text and background color combinations, speech rate, masking settings, reading mode, speech rate, and the length of pauses between sentences. Size Click the Size button to increase the size of all text in the Text View of the document. You can cycle eight preset sizes through using this button. The smallest size is 10 points, while the largest size is 72 points. Tip: To specify an exact point size for the text, choose Visual Settings from the Settings menu. Adjust the Text Size slider bar until you find the desired text size and then click OK. Line Space Click the Line Space button to increase the amount of space between all lines of text in the Text View of the document. You can cycle six preset line spacing settings through using this button. Tip: To manually specify the amount of line spacing, choose Visual Settings from the Settings menu. Enter the amount of space you want between lines of text in the Extra Spacing Between Lines edit spin box and click OK. 65 Word Space Click the Word Space button to increase the amount of space between all words in the Text View of the document. You can cycle six preset word spacing settings through using this button. Tip: To manually specify the amount of word spacing, choose Visual Settings from the Settings menu. Enter the amount of space you want between words in the Extra Spacing Between Words edit spin box and click OK. Margins Click the Margins button to increase the amount of blank space between the left and right edges of the page and the document text. You can cycle six preset margin settings using this button. Changes to the document margins are only visible in Text View. Tip: To manually specify margins or define different margins for the left and right side of the page, choose Visual Settings from the Settings menu. Enter the new left and right margins in the Side Margins area and click OK. Color Click the Color button to cycle through preset combinations of text and background colors. These color combinations have been designed to make the page easier to read. The available color combinations are shown below: Black text on a white background Black text on a rose background Black text on a beige background 66 Black text on a sky blue background White text on a black background Tip: To create your own background and text color combination, choose Visual Settings from the Settings menu. Select a new text color and background color from the available choices and click OK. Mask Click the Mask button to cycle through the different masking options. Masking is a special tool that shades certain elements of the document in order to emphasize the current line, sentence, or paragraph. You can only use masking in the Text View of a document. The four masking options are: No masking - No masking is applied to the document. Line masking - Shades all text except the line where the cursor is currently located. Sentence masking - Shades all text except the sentence where the cursor is currently located. Paragraph masking - Shades all text except the paragraph where the cursor is currently located. Tip: To make the shaded background and text lighter or darker, choose Masking from the Settings menu. Note: You can only change masking settings while in Read-only mode. When in Edit mode, you can only see masked text when you press the Read button to read the document. 67 Self-Pace The Self-Pace button allows you to control the pacing of WYNN's speech when reading documents. After you click Self-Pace, choose one of the following reading options: Continuous - When you click the Read button, the spotlight moves to emphasize the text WYNN speaks. WYNN continues reading the document until you click the Pause button. By Line - When you click the Read button, WYNN reads the line of text emphasized by the spotlight and then stops. Click the Read button again to read the next line. By Sentence - When you click the Read button, WYNN reads the sentence emphasized by the spotlight and then stops. Click the Read button again to read the next sentence. By Paragraph - When you click the Read button, WYNN reads the paragraph emphasized by the spotlight and then stops. Click the Read button again to read the next paragraph. Tip: To manually adjust your reading preferences, choose General Settings from the Settings menu. Rate Click the Rate button to increase number of words per minute (WPM) WYNN speaks when reading text. There are five preset speech rate settings that you can cycle through using this button: 130, 160, 190, 220, and 250 WPM. Tip: 68 To manually change the speech rate, choose Speech Settings from the Settings menu. Use the Rate slider to determine how many words per minute WYNN speaks. Pause WYNN pauses slightly after each sentence just as a natural speaker would. You can use the Pause button to increase the length of this pause. There are seven settings that you can cycle through using this button, allowing you to set the amount of pause from 0 to 3 seconds in half-second increments. Tip: To manually specify the length WYNN should pause between sentences, choose Speech Settings from the Settings menu and make a new selection in the Extra Pause After Each Sentence combo box. 69 70 Book 5: Study Tools Toolbar The pink buttons on this toolbar allow you to access the basic and standard talking dictionaries, spell words audibly, divide words into syllables, highlight text, add bookmarks, view a list of highlighted or bookmarked words, and create text and voice notes. Dictionary WYNN includes a talking dictionary that lets you look up definitions and synonyms for words in your document. Click a word and then click the Dictionary button to view the word's dictionary entry. When you click Dictionary, you can choose to look up the word using the Standard dictionary or the Basic dictionary. The Standard dictionary is 7th-8th grade level while the Basic dictionary is 5th grade level. When you finish working with the dictionary, click Close to return to your document. Spell WYNN can spell words that may be difficult to read. To spell a word out loud: Click the word and then click the Spell button. WYNN displays the word and its spelling. WYNN then reads the word, reads and highlights each letter, and reads the word again. To read and spell the word again: Click Repeat. 71 To return to your document: Click Close. This button is not available if you have cleared the Text check box in the Speak What? area of the Speech Settings dialog box. Syllables You can use WYNN to divide words into individual syllables and display the word's phonetic spelling. To see the syllables and the phonetic spelling of a word, click the word and then click the Syllables button. You can click Read Word to if you want WYNN to speak the word aloud. Click Read Phonetics to have WYNN read each individual syllable separately. The Syllables field shows how the word should be divided when hyphenating it at the end of a line of written text. Click Close when you are finished to return to your document. Highlight WYNN allows you to indicate important passages or key words in your document just as you would highlight text in a book. To highlight text in your document: Click the Highlight button and choose a highlight color from the list. Your mouse pointer changes into a highlighter pen. Click and drag the highlighter pen over text you want to highlight. WYNN highlights the text using the color you selected. You can highlight a single word by clicking it. Click the Highlight button again when you are done highlighting text to return to a normal cursor. To erase highlighting, click the Highlight button and then select the eraser at the bottom of the list. Your mouse pointer changes into a pencil eraser. Click and drag the eraser over the highlighting you want to remove. You can erase the highlighting for an individual word by clicking the word. 72 Tip: You can search for highlighted text using the Find toolbar button, or create a list of highlighted text with the Extract toolbar button. To print out just the text you highlighted in the document, click the Print button and select the Highlight Text Only radio button. Extract WYNN allows you to create a new document containing text you have highlighted or bookmarked. You can use this feature to make lists of topic sentences, vocabulary words, useful facts, and more. To create a list, click the Extract button (previously called Lists) and choose the type of list you want to create and how you want to sort it: By Highlight Color - Creates a list of all highlighted words or phrases. Text highlighted in green appears first in the list, text highlighted blue appears second, and text highlighted in magenta appears last. This choice is useful for categorizing information. By Highlight Order - Creates a list of all highlighted words or phrases in the order they appear in the original document. This choice is useful for creating study guides with key points and supporting points. By Bookmark Type - Creates a list of all bookmarked words or phrases from the original document. WYNN sorts the text into groups separated by bookmark type. By Bookmark Order - Creates a list of all bookmarked words or phrases arranged in the order they appear in the original document After selecting, WYNN creates a new document containing the highlighted or bookmarked text. 73 Bookmark WYNN lets you bookmark important passages of text in a document for quick reference. When you choose a bookmark, a beginning and ending bookmark will appear around the word where the cursor is located. To bookmark a phrase, first select the text you wish to bookmark, and then choose your bookmark from the Bookmark button. Bookmarks are a good tool for people who do not benefit from using highlighting. To erase a bookmark, click the Bookmark button and select the eraser at the bottom of the list. Your mouse pointer changes into a pencil eraser. Click and drag the eraser over the bookmarked text. Tip: You can search for bookmarks using the Find toolbar button, or create a list of bookmarked text with the Extract toolbar button. Text Note WYNN allows you to add notes to any location in your document. Teachers can create notes containing messages, questions, or assignments for students. Students can use notes to answer the teacher's questions, create reminders, or ask questions about the text. An icon appears where the note is located. To read the note, double-click the icon. To erase a note, put the cursor to the right of the Note icon and press the Backspace key on your keyboard. Tip: 74 You can search for notes in the document by using the Find toolbar button. When you print your document, all your notes are printed on a separate page with the heading Text Notes. To print just the notes contained in your document, click the Print button and select the Text Notes Only radio button. Voice Notes Voice Notes are useful for those with stronger auditory than visual processing skills. This feature allows you to use the microphone to record a spoken message. Teachers can create Voice Notes containing questions, messages, or assignments for students. Students can use Voice Notes to record answers to the teacher's questions, create reminders, summarize or paraphrase, or ask questions about the text. An icon appears where the Voice Note is located. To listen to the note, double-click the icon. To erase a note, put the cursor to the right of the Note icon and press the Backspace key on your keyboard. Tip: You can search for Voice Notes in the document by using the Find toolbar button. Notecards Notecards allow students to organize their research and thoughts. In WYNN, a student can document this information in a notecard (WNC) file. Select the Notecards button to create a new notecard file. (To open an existing notecard file, use the Open button on the blue toolbar.) Notecards are independent files that can be either used on their own or associated with a PAL document. Notecards are not imbedded in a PAL document, but a notecard file that is opened in a PAL document will use the same file name as the PAL file. PAL Document PAL is a set of tasks comprising a process that students use to help with their studying, reading, writing, and comprehension. Teachers create PAL documents, which are saved using the WYP format. Click this button to locate and open an existing PAL file. 75 76 Book 6: Writing Toolbar Use the yellow buttons on this toolbar to cut and paste text, apply bold, italic, and underline to text, find text in the document, create and work with an outline, enable/disable Word Prediction, check for homophones, and check your spelling. Cut/Paste The Cut/Paste button allows you to cut, copy, and paste text. You must enter Write mode using the Write toolbar button before you can cut or paste text. Tip: You can also press CTRL+C to copy, CTRL+X to cut, and CTRL+V to paste, or you can choose these options from the Edit menu. Tip: You can paste text from WYNN into other applications, such as Microsoft Word. You can also paste text from other applications into WYNN. Use the copy, cut, and paste commands in the other applications just as you would use them in WYNN. These commands usually appear on the application's Edit menu. Style The Style button allows you to apply bold, italics, or underline to text in your document. While in Write mode, click to place your insertion point within a word or select a range of text. Click the Style button and choose Bold, Italic, or Underline. WYNN then applies the formatting to the word or selected text. 77 Tip: Standard Windows commands will also work for these functions: CTRL+B to choose Bold, CTRL+I to add italics, and CTRL+U to underline text. Find Use the Find button to search for and replace text in the active document. If you search for text, you can replace it with new text, if necessary. To find any type of markup, such as highlights, voice notes, and text notes, use the Go To button to quickly open the Go To What dialog box. Go To Click the Go To button to move to a specific page in your document. When you click Go To, a dialog box displays. Enter the page number of the page you want move to and click the Go button. If you only want to move forward or back one page in the document, use the Next Page and Previous Page buttons. Tip: You can also press CTRL+G or choose Go To Page from the Edit menu to perform this command. Outlines Outlines can help you organize the topics and supporting points of your documents. You can use outlines to plan the organization of research papers, summarize study materials, create plots for stories, and more. Click the Outline button to create a new outline file. (To open an existing outline file, use the Open button on the blue toolbar.) 78 Adjust Use the Adjust button to make adjustments to an outline you created using the Outlines toolbar button. This button is only available when you are creating an outline. Move your cursor to a line in your outline and click the Adjust button. After you click Adjust, choose one of the following options: Move Backward - Increases the outline level of the line and all its subitems. Move Forward - Decreases the outline level of the line and all its subitems. Move Up - Moves the line and all its sub-items up by one-step within the current outline level. Move Down - Moves the line and all its sub-items down by one-step within the current outline level. Tip: You can also use the following shortcut keys to adjust the outline: move forward (TAB), move backward (SHIFT+TAB), move up (ALT+UP ARROW), and move down (ALT+ DOWN ARROW). Predict Click the Predict button to activate WYNN's Word Prediction feature. Word prediction helps you write by making spelling suggestions and anticipating the next word you are going to type. This feature can help you with spelling, grammar, and formulating sentences. Word Prediction When Word Prediction is active, click the Speak List button to have WYNN read the list of suggested words. This button is unavailable if you are not using Word Prediction. 79 Homophone A homophone is two or more words that are pronounced alike, but have different meanings and often-different spellings. Click the Homophone button to open WYNN's homophone checker, which works like a spell checker. Spell Check Click the Spell Check button to check your document for spelling errors. If WYNN finds any misspelled words, a dialog box appears that allows you to correct the mistake. Tip: 80 F7 also starts the Spell Check process. Book 7: Web Toolbar The Web toolbar only displays when you are browsing the Web in WYNN. To display the Web toolbar, click the Go To Web button on the File Management toolbar. The following describes each button on this toolbar. Back Click the Back button to return to pages you have previously visited during the current session. Forward Click the Forward button to move forward through pages you have already visited during the current session. You can only use this button if you have already clicked the Back button. Stop Click the Stop button to stop the current page from loading completely. This button is useful if a particular Web page is taking a long time to load or if you accidentally open the wrong page. Refresh Click the Refresh button to reload the current page. Some pages may need to be refreshed in order to display recent updates. Refreshing may also help correct errors if a page does not display properly. 81 Home Click the Home button to return to your home page. Search Click the Search button to search the Web for a particular subject or topic. Enter the topic you want to search for and then click the Search Now button. WYNN submits your search to Google.com and then displays the results on your screen. Favorites Click Favorites to add a Web page to your list of favorites, organize your favorites, or visit pages in your favorites list. History Click the History button to see a list of Web pages you have visited in the past. Choose the day you want to view history for. All the Web sites that you visited are displayed in the left-side panel. Click a Web site to display a list of all pages on the Web site that you visited. Click a Web page name to open the page. WebMask™ Click the WebMask button to enable or disable the WebMasking feature. WebMasking shades distracting images and reduces visual clutter so you can focus on a specific element of the Web page, such as a paragraph or link. You can focus on a page element by clicking near it. 82 Dictionary Click a word and then click the Dictionary button to view the word's dictionary entry. When you click Dictionary, you can choose to look up the word using the Standard dictionary or the Basic dictionary. The Standard dictionary is 7th-8th grade level while the Basic dictionary is 5th grade level. The dictionary entry for the selected word displays. When you finish working with the dictionary, click Close to return to the Web page. Highlight To highlight text in your document: Click the Highlight button and choose a highlight color from the list. Your mouse pointer changes into a highlighter pen. Click and drag the highlighter pen over text you want to highlight. WYNN highlights the text using the color you selected. You can highlight a single word by clicking it. Click the Highlight button again when you are done highlighting text to return the cursor to normal. To erase highlighting, click the Highlight button and then select the eraser at the bottom of the list. Your mouse pointer changes into a pencil eraser. Click and drag the eraser over the highlighting you want to remove. You can erase the highlighting for an individual word by clicking the word. Extract WYNN allows you to create a new document containing text you have highlighted or selected on Web pages. You can use this feature to make lists of topic sentences, vocabulary words, useful facts, and more. To extract Web text, click the Extract button and choose how you want highlights ordered or what you want to extract: 83 By Highlight Color - Creates a list of all highlighted words or phrases. Text highlighted in green appears first in the list, text highlighted blue appears second, and text highlighted in magenta appears last. This choice is useful for categorizing information. By Highlight Order - Creates a list of all highlighted words or phrases in the order they appear in the original document. This choice is useful for creating study guides with key points and supporting points. All Text - Extracts all text on the Web page to a document. You can extract the text into a new document or append it to an existing document. Selected Text – Extracts selected text on the Web page to a document. You can extract the text into a new document or append it to an existing document. After selecting, WYNN creates a new document containing the highlighted or bookmarked text. If you have more than the maximum number of documents open, WYNN asks you to save your changes to the document you have accessed the least recently and then closes it. Tip: If you want to capture all elements of a Web page (not just text), you can send the page to the Freedom Import Printer, which will import the whole page into WYNN. Put your cursor on the page (not on a link or graphic), and select the right-click item Send Page to Freedom Import Printer. File List Click the File List button to open the left-hand navigation panel. You can then switch between your open documents. You can also use the Window menu to switch between open documents. Either select the document you want to switch to from the menu or choose Next Document. See page 47 for the location of user files. 84 Close Page Click the Close Page button when you are finished browsing the Web. WYNN closes the current Web page and displays the last document you were working on. 85 86 Book 8: PREPARE Process for Teachers PREPARE is a set of tasks that provide a process students will use to help with their studying, reading, writing, and comprehension. The steps include: Preview; Read; Examine; Pick what’s important (highlight); Arrange (extract text); Rework (take extracted text and summarize); and Explain. This process will help students identify key information from text, summarize that information, and then use their summaries to write different genres of text. The following is an overview of the tasks a teacher must complete. The end result is a file known as a PAL document. Before You Begin Before you begin, you will need to think about and gather your source material for the PAL project. Keep the following in mind. First, you must have an account with Teacher permissions. PAL files can only be created when using a Teacher account. You need to identify the scope of the project; think about questions and instructions that will help students complete the assignment You must bring information into WYNN. You can do this by scanning material into WYNN, using the Freedom Import Printer to bring PDF or Word files into WYNN, or by typing into a blank document in WYNN. Once your material is in WYNN, you can then save it using the PAL (WYP) format. If your source material includes Web pages or audio files or other documents stored in a network folder, you will be providing links so that students can download files and visit Web pages 87 Step 1. Creating a PAL Document Note: WYNN uses several new document formats, each with its own extension. PAL files use WYP. Templates use WYT. Notecards use WNC. WYNN files still use WYX. WYNN also supports earlier WYNN file formats, including WYN, ARK, OBX, and OBU. Saving a PAL File 1. If you have not already saved your material in PAL format, do that now. From the File menu, select Save As. The “Select a file to Save to” dialog box opens. 2. Type the name of the file in the File name box, and then select WYNN PAL Documents (*wyp) in the “Save as Type” box. 3. Click Save. 4. The PAL panel opens and displays on the left side of the document area. This is known as the left panel. If the PAL left panel does not display at this point, go to the PAL menu and choose Left Panel. Setting Up the PAL Document After saving the document in WYP format, the next step is to begin the PAL configuration. Document Linking 88 1. In the PAL left panel, click the Document Linking button. This opens the PAL Configuration dialog box with focus in the Document Linking tab. 2. The current document (titled “This Document”) displays in the list. 3. To add additional source material, click Insert, which opens the Document Path Configuration dialog box. 4. Click Browse to locate WYNN files, Web page links, PDF files, and other document types that you want to add as source material. You can always edit the links to these files later. You can also change the order that these items display in the list, or delete the items from the list. Note: If your students will be using WYNN Reader, you should only link WYNN files and Web pages, since WYNN Reader cannot convert PDF and other file types. 5. When finished, click Next to continue. 89 Preview Use Preview to insert questions, comments, or instructions into the PAL document. It is intended to guide students and provide ideas to consider when initially reviewing the document. The text should provide concepts that can assist students to better comprehend information within the assigned text. Students will see this information displayed in the Preview pane of their PAL document. Note: The edit box contains default text. If you do not enter new information, then this is the text that will be available to students. 90 Read No setup is required for this step when setting up a PAL document. When students click Read in the PAL left panel, the document text displays without the Preview pane or the Examine pane showing above it. Examine Use Examine to type the instructions or questions that are specific to the text that students read. These questions display in the Examine pane when students click the Examine button. The student reviews the text to answer specific questions, uses highlighters to answer the questions, and then extracts the text for writing or studying. 91 You can configure PAL documents to use bookmark symbols instead of highlighting for students who are color blind. You do this in the set-up for the Examine pane. Choose "Use symbols as question reference" to use these symbols instead of highlighting. When you do that, each question is indicated by a bookmark symbol instead of a highlight color. When the student uses the Examine step, s/he will use bookmark symbol instead of highlighters. And notecards (for the Rework step) will be organized using the same symbols. Most people will use the highlight colors, so the rest of this documentation refers to them. 92 Rework Use Rework to specify details about how students use notecards. You can create titles for each deck of notecards, and you can lock those titles if you want. This prevents students from creating their own titles or not having any titles. You can also prevent students from pasting text from their documents into the notecards, thus requiring them to use their own words. For more information, see Book 11: Notecards. 93 Explain Use Explain to link a writing template for students to use when writing a paper based on their notes. Use the Browse button to find the template file you want to link. When you have identified the template, WYNN will list it in the "Template Document Name" field. Important Note: We strongly recommend that you specify a template here. If you do not, students have to take several extra steps to use templates. Students will have a much better experience if you define a template here.” Step 2. Sending the PAL Document to Students After you are done setting up the PAL document, and after your PAL (WYP) file is closed, you can send (broadcast) the PAL file plus linked documents to your students. Note that you cannot broadcast a document that is open. 94 To do this, 1. In the Advanced menu, choose Broadcast Documents. The Broadcast Documents dialog box opens. 2. In the list, select the WYP file along with other files linked during the PAL document set-up process. To select multiple files, press and hold CTRL while clicking files in the list. 3. Click Broadcast, and then click OK when the confirmation message displays. The files are sent to all students and are saved in their Docs folder. Step 3. Adding Teacher Hints (Optional) Some students need more support with reading and studying. The PAL setup process offers an extra feature called Teacher Hints that lets you place visual cues in areas of the text where you want students to focus their attention. This aids students to answer the questions you wrote in the Examine step. The steps below describe how to enter Teacher Hints in the PAL document and in any other documents that you have linked to the PAL project. Note: To enter Teacher Hints, you must first complete the PAL document setup, as explained earlier, and you must have the PAL (WYP) document open. 1. Make sure that the PAL document is open. 2. If the Examine pane is not visible, Click the PAL menu and choose Examine Next, choose Show Examine Pane. This lets you refer to the questions you wrote in the Examine tab during set-up. 3. Finally, place your cursor on the proper word in the main document, and then select a highlighter color from the Examine button in the PAL left panel. A Teacher Hint is placed into the main document. It displays using the same letter and color that is associated with the question in the Examine pane. 95 Repeat this step to add more hints. To remove a hint, simply place your cursor in front of the hint and press Delete. Tip: If you want to add Teacher Hints to documents that are linked to the PAL document, keep your PAL document open. This will keep the PAL left panel available. 4. When you are done, click the Save button on the blue toolbar to save the files. 5. When you are ready to broadcast the documents to your students, Close the documents If you have already broadcast the documents, you will need to broadcast them again, since they have changed. See Step 2. Sending the PAL Document to Students for broadcast instructions. Step 4. Creating and Editing Writing Templates (Optional) WYNN includes writing templates that are aligned with the Common Core State Standards for United States students. WYNN templates contain areas of “locked” text that is protected against changes by students. The locked (instruction) text contains guidance for students during the writing process. WYNN provides both brief and detailed templates for PersuasiveArgumentative, Informative-Explanatory, and Narrative essays. These templates do not need any teacher input to use, although teachers may edit them to align with their own needs. In addition, teachers can create their own templates at any time. Note: To edit or create templates, you must be logged in to an account with teacher permissions. 96 Creating New Templates Creating a template is a two-step process: first, you must place material into WYNN and save it as a template, and, second, you must specify the text that you want to use as instruction text in the template. Adding Material to the Template File To create a new template, you must first bring material into WYNN. You can do this by scanning, using the Freedom Import Printer, opening a blank document and typing in it, or copying and pasting text from another source. Next, you must save the file using the WYNN template format (WYT). 1. Click the Save As button on the blue toolbar. 2. In the “Select a File to Save To” dialog box, select “WYNN Template Documents (.wyt)” in the Save As Type box, and then click Save. 3. A notification confirming that you want to save the file in WYT format displays. Click OK. Marking Instruction Text Do the following to mark instruction text. 1. Drag your mouse from the first to the last word of text to select the first block of text that you want to use as locked instruction text. 2. From the Edit menu, choose “Mark as Instruction Text,” or press CTRL+ALT+I. WYNN locks the text, adds a colored background, and inserts blank lines before and after it. Instruction text is always a full paragraph, so WYNN will turn your selected text into its own paragraph. 3. Continue to mark all areas of instruction text. Delete any text you don’t need. 4. When done, save the file, and close it. You can then broadcast it to your students. See Step 2. Sending the PAL Document to Students for broadcast instructions. 97 Unmarking Instruction Text Do the following to unmark any block of instruction text, which restores it to regular text. 1. Place your cursor anywhere in the block of marked text. 2. From the Edit menu, choose “Unmark Instruction Text” or press CTRL+ALT+I. The colored background is removed from the text. Removing Instruction Text Do the following to remove all instruction text. This deletes the text from the document. 98 1. From the Edit menu, choose “Remove Instructions.” 2. A notification confirming that you want to permanently delete all instruction text displays. Click OK. The colored background is removed from the text. Book 9: PREPARE Process for Students When your teacher gives you a PAL (WYP) document, you can do many things with it to help you read, comprehend, study, and write papers. First open the PAL document. This will open the left panel showing the buttons in the PREPARE process. The PREPARE process is: Preview, Read, Examine, Pick What’s Important, Arrange, Rework and Explain. These steps are all completed from the PAL left panel. Note that Examine, Pick, and Arrange are all associated with the Examine button. Step 1 – Open and Preview the Document The Preview pane contains text that helps set a purpose for reading the document. The text may include questions to think about while reading or global instructions. Look through the document using these instructions. 1. Click the PAL button in the pink toolbar, and open the WYP file that your teacher sent to you. The file is located in your User Docs folder. Both the PAL left panel and the Preview pane at the top of the document window open. Note that you can view your document in Text View or, if available, Exact View. You can get back to this step later by pressing the Preview button on the PAL left panel. Step 2 – Read the Document In this step, you need to read the document thoroughly, and think about your purpose for reading. 99 1. Press the Read button in the PAL left panel, and begin reading the document. Note that the Preview pane closes and the document displays in full view. If the document contains multiple pages, click the Go To button in the yellow toolbar (or press CTRL+G) to move to a different page. When in Text View, you can also use the scroll bar on the right side of the document window to move to other pages. Step 3 – Examine the Document In this step, you will examine the text to answer specific questions. These questions are in the Examine pane at the top of the document window. As you go through this step, you will be making changes to the document. Be sure to save your document as you work. 1. Examine: Press the Examine button, and read the instructions and questions displayed in the Examine pane at the top of the document window. 2. Pick What’s Important: As you read, use the highlighters to highlight answers to the questions. To use highlighters, press the Examine button again and choose a color from the list. Make sure to use the same highlight color that matches the question in the Examine pane. Note: When you first press the Examine button, your cursor moves to the Examine pane.You must place your cursor into the main document before you can highlight. If you try to use the highlighters by pressing Examine again, they will be grayed out. 100 Note: Your teacher may have provided Teacher Hints in the document. Teacher Hints are marks in a document that give you extra guidance to show where answers might be located. You can use the Teacher Hints to help you focus on important material. 3. Arrange: Next, after answering all questions, you will extract the highlighted text. To do this, click the Examine button again and choose Extract or Extract to Outline. These items are at the bottom of the Examine list. Extract allows you to copy the highlighted text to a new or existing WYX document. If you select a New Document, it opens as a WYX file, and uses the same file name as the WYP file. Extract to Outline does the same, but places the text in outline format. Outlines are always placed into a new file. After selecting the type of extraction, three options are possible: Option 1. If the PAL document is the only file open, the highlighted text is automatically extracted to a WYX file that uses the same file name as the PAL document If multiple files are open, the “Select a WYNN Document for the Extracted Text” dialog box opens and displays a list of files. Option 2. Choose “New WYNN Document” to create a new WYX file that contains the highlighted text. The title of the WYP file also displays above the text. Option 3. Select a file from the list and then choose “Use Selected Document.” This appends the extracted text and WYP file title to the end of the selected file. It can be viewed in Text View mode. Important: The extracted text document will now be displayed. Your original PAL document is still available. To display it, click the Linked Documents button, which is the last PAL button in the left panel. If the PAL buttons are not visible in the left panel, use the Previous or Next buttons to cycle back to the PAL document. 101 Step 4 – Rework and Summarize the Document In this step, you will summarize the highlighted information by writing into notecards, which appear at the bottom of the screen. The purpose of this is to answer the questions in the Examine pane. 1. Click Rework in the left panel. A notecard (WNC) file is automatically created, and the Notecard panel opens at the bottom of the screen. It uses the same file name as the original PAL document. It contains five color coded decks. Each deck uses the question letter as a prefix, and also uses the colors that display in the Examine pane as notecard titles. Your teacher may have added a title to the notecards. 2. Next, select a notecard and type answers to the questions and add other notes that will help you create your final paper. 3. In the blue toolbar, click Save to save the notecards and update the WNC file. Tip: You can close the Examine pane at any time by pressing the small X at the upper right of the pane. You can bring back the Examine pane by pressing the Examine button again. Using Linked Source Documents If your teacher has linked other documents or Web pages to the PAL document, you should now repeat the four steps described earlier in this chapter for each of the other documents. 1. 102 To do this, click Linked Documents (the last PAL button) in the left panel. This shows a list of all documents and Web pages linked to the PAL document. Choose the next one you want to use. 2. Repeat the Preview, Read, Examine, and Rework steps as previously described for each document. In the Examine step, do one of the following: Extract the text to the same WYX file that you created earlier in Step 3 – Examine the Document, or Extract the text to a new WYX file In the Rework step, WYNN automatically opens the notecard file you previously created, so that you can continue to add your thoughts to it. Step 5 – Writing Your Paper When you are finished taking notes for all files and Web pages provided by the teacher, the next step is to begin writing your paper. 1. Click Explain in the left panel. 2. You must save a template file using your own filename before you can write in it. Do one of the following: If the teacher has provided a template, the template opens, and the Save dialog box also opens. In the File Name box, type a file name, make sure the Save as Type box is set to “WYNN Docs (*wyx),” and click Save. 103 If the teacher has not provided a template, you have two choices. You can either use the Explain button to write in a blank file, or you can use the File Open button on the blue toolbar to open a template yourself. (1) If you use the Explain button, a new blank file is created for you to use to write your paper. The Save dialog box also opens. In the File Name box, type a file name, make sure the Save as Type box is set to “WYNN Docs (*wyx),” and click Save. (2) If you use the Open button on the blue toolbar, look in the Templates folder, and select the template file that is most appropriate for your writing task. Note: In a template, the rose-colored text is the teacher’s instructions to help you structure your paper. Type in the clear sections after each block of instruction text. Your notecards are still available to use during the writing process. If the notecards are not displayed on the screen, click the Rework button in the left panel. 3. When you are finished writing your paper, click Save in the blue toolbar. If you used a template, you can hide the instructions so that you can better see the formatting of your final document. To do this, choose the View menu, and then select Hide Instructions. 4. 104 Finally, when your paper is complete, you can print it or export it to Microsoft Word using the Export to Word button in the blue toolbar or to another word processing program using the Launchables menu. Book 10: Writing and Editing Proofreading Your Writing Using Speech A review of your document with WYNN’s speech function turned on is one way of finding and correcting errors. To proofread your document: 1. Open your document and make sure that your computer’s speakers are turned on or that your headphones are plugged in. 2. Place your mouse pointer at the beginning of your document, and click the Read button. WYNN reads your document. To change WYNN’s reading speed, click the Rate button in the green toolbar. You can also fine-tune the speech rate using Speech Settings. 1. Click the Speech Settings command from the Settings menu. 105 2. Change the Rate setting using either the slider or your keyboard’s arrow keys. The speech rate appears below the slider scale as words per minute (WPM). 3. Click the Test button to verify if the speech rate is too slow or too fast. 4. Click OK when you are satisfied with the speech rate. Reading Syllables You can use WYNN to divide words into individual syllables and display the word's phonetic spelling. To see the syllables and the phonetic spelling of a word: 106 1. Click a word in the document, and then click the Syllables button in the pink Study Tools toolbar. The Syllabify box opens at the bottom of the WYNN window. 2. Click Read Word to have WYNN speak the word aloud. 3. Click Read Phonetics to have WYNN speak the word’s phonetic pronunciation aloud. 4. When you are finished, click Close to return to your document. Check Your Spelling as You Type WYNN can check for misspellings as you type. The misspelled words appear in blue text for easy identification and quick correction. To turn on spell checking as you type: 1. From the Tools menu, select Check spelling as I type. 2. Open a new or existing document and begin typing. If you misspell a word, it appears in blue text. For example, This is a misspelled word. 3. Right-click your mouse on the misspelled word. The Spelling options appear. 107 4. Do one of the following: Select the appropriate spelling Ignore the misspelled word Add the word to your personal dictionary Open WYNN’s Spell Checker (see below) After choosing the appropriate option, look for the next misspelled word and repeat this process, or continue typing. Spell Checking Your Document To check your document for spelling errors: 1. Place your mouse pointer at the beginning of the document. Click the Spell Check button on the yellow toolbar , or Click the F7 function key, or WYNN checks your document for spelling errors. If an error is found, the Spell Check dialog box opens. 2. Select one of the following options. Word Not Found: Shows the misspelled word. Replace With: Use the List box arrow to view suggested spelling corrections. Spell Misspelled Word: Click to have WYNN speak aloud, spell aloud, and speak aloud again the misspelled word. Spell Replacement Word: Click to have WYNN speak aloud, spell aloud, and speak aloud the replacement word. Ignore: WYNN does not correct the misspelling of this particular word. 108 Ignore All: WYNN does not correct the misspelling of this word throughout the document for the remainder of the session. Replace: WYNN replaces the misspelled word with the word chosen in the Replace With list box. Replace All: WYNN replaces the misspelled word with the word chosen in the Replace With list box throughout the document. Add to Dictionary: WYNN adds the word that appears in the Word Not Found list box to the user’s personal dictionary. Close: Closes the Spell Check dialog box and returns you to the document. 3. After you choose to ignore, replace, or add the word to WYNN’s dictionary, the spell checker searches for the next misspelled word. The message “Spell checking is complete” appears when WYNN finishes. Spelling a Word If you are unfamiliar with a word in a document, use the Spell function to have WYNN speak, spell, and speak again the word. To spell a word: 1. Click a word in your document. 2. Click the Spell button on the pink Study Tools toolbar. The Spell Word box opens at the bottom of the WYNN window. WYNN speaks the word aloud, spells the word, and then speaks the word again. 3. Click Repeat to hear the spelling again. 4. Click Close when finished. 109 Choosing the Correct Word – Homophones A homophone is two or more words that are pronounced alike, but have different meaning and often-different spelling, such as flower or flour. Use WYNN’s Homophone function to verify the correct word usage in your document. To check your document for homophones: 1. Open a document in WYNN. 2. Do one of the following to start the homophone function: Click the Homophones button in the yellow Writing Tools toolbar , or Select the Homophones command from the Tools menu. WYNN searches your document, from your current mouse pointer position, for homophones. When one is found, the Homophones: Sound-alike Words box opens at the bottom of the WYNN window. It contains a list of homophones and definitions, which allows you to select and use the appropriate word. 3. Click each homophone that appears and read its definition in the Definition list box, or click the Read Definition button to have WYNN speak the definition to you. You can also click the Read Sentence button to have WYNN speak the sentence the homophone was found in. 110 4. Click the Skip button if the correct word is used. You can also choose Skip All to skip all instances of the homophone in the document. If the wrong word is used, choose the word from the Homophones list box and click Replace. After selecting, WYNN continues to search for the next homophone. 5. To stop the homophone search, click Close to return to your document. 111 112 Book 11: Notecards Notecards allow students to organize their research and thoughts. In WYNN, a student can document this information in a notecard (WNC) file. Notecards are independent files that can be either used on their own or associated with a PAL document. Notecards are not imbedded in a PAL document, but a notecard file that is opened in a PAL document will use the same file name as the PAL file. A notecard file consists of five separate decks that are color coded (or symbolcoded, if a teacher has set up a PAL document to use symbols instead of highlights for those students who are color blind) to help students keep their research and work organized. A teacher may assign notecard titles in the PAL Rework step. In this same step, a teacher can also lock titles so that students cannot edit titles, and also control whether or not a student can cut, copy, or paste text from their documents into notecards. The latter forces students to convey information using their own words. The colors or symbols associated with each deck are based on the configuration settings in the Examine step. A student automatically creates a notecard file when he or she clicks Explain in the left panel of a PAL document. The attributes, such as titles, colors or symbols, and position of the notecard decks that a student sees, are based on how the teacher configured notecards when creating the PAL document. A student must assign one or more Notecards to each of the predefined questions. When a notecard is initially created, it displays in the Notecard pane across the bottom of the screen with its file name in the top left corner of the pane. If the notecard file is associated with a PAL document, the file takes on the same name as the PAL document. If a notecard file is created outside of PAL document, the initial file name format is Untitled<number>.wnc. Notecards are also a general purpose utility that can be used outside of the PAL process. The Notecard button, outside of PAL, is found in the pink Study Tools toolbar. This allows the feature to be used by any WYNN user in the same manner that physical notecards would be used. 113 Using Notecards Use notecards to document and organize your ideas collected from your research. Try to limit your notes to a single idea per notecard. A notecard file contains five decks. Each deck is easily identified by colors or symbols. Opening Notecard Files There are several ways to open a notecard file. In a PAL document, click Rework in the left panel. This will open the notecard file associated with the current PAL document. At any time, select the Notecards button on the pink toolbar. This will create and open a new notecard file. At any time, from the File menu, choose New Notecard File. This will create and open a new notecard file. At any time from the File menu, choose Open and then select a WNC file in the Open dialog box. This will open an existing notecard file. Typing in Notecards Note: You will usually view notecards in one of two ways. The main viewing mode is the minimized notecard view, in which notecards are shown in a pane at the bottom of the screen, while your source document or Web page is displayed in the main document window. The other viewing mode is the maximized notecard view, in which thumbnails of the cards are shown in the whole screen. In this view, you can also see an outline of the cards in the left panel. We will refer to these views in the discussion below. 114 To type in a notecard, do the following. 1. In the minimized or maximized notecard view, right-click any notecard and click Edit. 2. The selected notecard moves to the center of the minimized notecard pane, which displays at the bottom of the screen. 3. Click in the notecard’s text area, and begin typing. To cut or copy text from one notecard to another, do the following while viewing the minimized notecard pane. 1. Single-click, or double-click a notecard so that it moves to the center of the notecard pane. 2. Next, select text in the notecard and then use WYNN’s Copy/Paste button on the yellow toolbar to copy the text, or use the keyboard shortcut CTRL+C to copy. 3. Select another notecard, and use WYNN’s Copy/Paste button on the yellow toolbar to paste the text, or use the keyboard shortcut CTRL+V to paste. Note: You can also select text in a notecard and right-click to display the Cut, Copy, or Paste commands. Adding and Deleting Notecards There are a number of ways to add notecards. Select a notecard, right-click, and then click New. A new notecard is inserted after the current notecard. Click the Add Notecard button in the notecard file’s title bar. A new notecard is inserted after the current notecard. To delete a notecard, do one of the following. Select a notecard, right-click, and then click Delete. 115 Select a notecard, and click the Delete Notecard button in the notecard file’s title bar. Click Yes when prompted to delete the notecard. Copying (Cloning) a Whole Notecard You can copy an entire notecard using the Copy button on the top of the minimized notecard pane. This "clones" the whole card. Click on the card where you want to copy the card. You then have two options for pasting the card. Select the notecard Paste button to paste the card before the card you are on. Right-click and select either Paste Before or Paste After to give more control over where you paste the card. Rearranging Notecards You can use drag-and-drop to move notecards to another location. To change the order of notecards or to move among decks, do the following. In any notecard view, including the notecard outline list in the left panel, click and drag a notecard to its new position in the same deck or to a different deck. Creating Subjects or Titles for Notecards If a teacher has defined titles for notecards in a PAL document, each card will already have a subject in the title area. If the teacher locks notecard titles, then you cannot edit the text in the title area for the notecards. A notecard has a tab, title/subject area, and text area. The tab consists of the notecard deck’s color/symbol, deck letter, and notecard number. The subject area contains the notecard title. The text area is where you type your idea or notes. Try to limit your notes to one idea per notecard. Do the following to create a title for a notecard. 116 1. Click in the subject/title area, which is located below the notecard tab. 2. Type a title for the notecard. 3. Save the notecard file. Maximizing and Minimizing the Notecard Pane To expand the notecard pane, click the Maximize button in the upper right corner of the notecard file’s title bar. To minimize the maximized notecard pane, click the Minimize button in the upper right corner of the screen. Closing a Notecard File To close a notecard file, click the Close button in the upper right corner of the notecard file’s title bar, or from the File menu, choose Close, or press CTRL+W. If you have already named your notecard file, it will auto-save when you close it. 117 118 Book 12: Writing Templates A template in WYNN is a document containing preset information that is used as the starting point for student writing assignments. WYNN provides templates for specific written document styles. Each template has blocks of read-only text that provides instructions (called "instruction text") regarding the content that should follow. WYNN templates use the WYT file format. We have provided several templates that were written by a professional educator to correspond to the Common Core State Standards in the United States. They are available in each user’s Templates folder. Teachers can edit these, and can create their own templates. Creating Templates (Teachers) As a teacher, you can, Use and broadcast any of the default template files to students Open and edit a default template file and rename Create your own template Opening Default Templates To open a default template, do the following. 1. From the File menu, click Open. The Open dialog box appears with focus in your Docs folder. 2. Move up one level and select the Templates folder. 3. Select a template from the list and click Open. 119 Editing Templates Templates contain predefined instruction text that is identified with a rose-color background. (Students can change that color if they want.) Teachers can edit the existing text, delete it and replace with your own text, or use the template as is. A student cannot edit instruction text in a template; they can only write in the blank areas between blocks of instruction text. To edit template instructions, open a template file. The instruction text displays with a rose-color background. 120 1. To edit text in blocks of instruction text: You can edit any of the text inside any block of instruction text the same way you would edit any document. 2. To add a new block of instructional text: You can add new blocks of instruction text by typing that text in a blank area in the template. When finished, select the text you wrote, and from the Edit menu, click “Mark as Instruction Text.” This applies a rose-color background to the paragraph. Be sure to add a blank line between paragraphs before you mark a paragraph as instruction text. 3. To turn instructional text back into regular text: You can make any instructional text into regular text by clicking anywhere in a paragraph with the rose background. Next, from the Edit menu, click “Unmark Instruction Text.” The rose background is removed and that paragraph is no longer identified as instructional text. If the text remains in the template, a student can delete or edit that text. 4. To remove instructional text from a document entirely: You can delete all the instructional text from a document by going to the Edit menu, choosing Remove Instructions, and answering Yes to the confirmation dialog. You should not need to use this command, It is intended for students to use after they are done writing and no longer need the instruction text. Save your changes and close the template. Linking a Template to a PAL Document (Teachers) Important Note: We strongly recommend that you specify a template here. If you do not, students have to take several extra steps to use templates. Students will have a much better experience if you define a template here.” 1. You must be logged in using an account with teacher permissions to do this. To associate a template with a PAL document, click the Explain button in the left panel. The Explain tab opens in the PAL Configuration dialog box. 2. Click the Browse button to locate and select the template (WYT) file. The local file path displays in the Template Document Name box. 3. Click OK to save and close the PAL Configuration dialog box, or click Apply to save without closing the dialog box. 4. To broadcast a template, see Broadcasting Documents and Settings later in this document. If you have created or edited a template, you must broadcast it to students for them to use it with their PAL document. Opening a Template (Students) When a student initially opens a template from within a PAL, the default file name is Untitled<number>.wyx. Note that the file extension is automatically changed from WYT to WYX. You must save the template document as a WYNN (.wyx) document before you can type in it. To open a template for a PAL document, students should click the Explain button in the left panel. They can then use their notecards to review ideas and information and begin writing their paper. If the teacher has not provided a template for your PAL document and you want to use one, don’t press the Explain button. Instead, use the Open button on the blue toolbar, look in the Templates folder, and select the template file that is most appropriate for your writing task. 121 To open a template not associated with a PAL document, click the Open button on the blue toolbar, then change the Files of type field to WYNN Template Documents (*.wyt), then click Open after selecting the template file you want. You may need to look in the Templates folder to find the right template. Hiding or Showing Instruction Text in a Template (Students) While a student is writing a paper using a template, he or she may want to see how the paper will look without the instruction text. You can hide the instruction text by going to the View menu and selecting Hide Instructions. This does not remove the instructions, but just hides them until you want to show them again. To show the instruction text again, go to the View menu and select Show Instructions. If you save your paper with instructions hidden, they will still be hidden when you open the paper again. You can always choose Show Instructions to view them because they are always there. Permanently Removing Instruction Text from a Template (Students) When you are completely done with your paper, you may not need to keep the instruction text any longer. You can delete all the instructional text from a document by going to the Edit menu, choosing Remove Instructions, and answering Yes to the confirmation dialog. This will permanently remove the instruction text, so do not do this until you are sure you will not need the instruction text in the future. Publishing Your Paper (Students) After you are done writing a paper using a template, you can save and print it to hand it in. If you want to add more formatting, graphics, or charts, you may want to export your file to a word processor like Microsoft Word. To do this, first save your file. Then use the Export to Word button on the blue toolbar. It will send a copy of your file to Microsoft Word and automatically save it in RTF format. If Word is not open, WYNN will open it for you. 122 Book 13: Scanning and Other Ways to Get Material into WYNN Acquiring a Document into WYNN The acquisition (scanning) feature allows you to read and work with printed materials in WYNN. You can create a new document based on an acquired page or insert acquired pages into existing documents. You can also replace existing pages with acquired pages. Note: You can only acquire documents using WYNN Wizard. Device Selection Note: WYNN automatically detects the camera and scanner drivers that are installed on your computer, and selects one to use as the default. The first time you acquire a document; the software displays a message asking you to confirm the acquisition device selection. If you want to change the device, do the following. 1. From the Advanced menu, choose Device Selection. 2. In the Acquisition Source box, select Scanner or PEARL Camera. 3. If you select Scanner as the acquisition source, select a scanner from the Device box. 4. If necessary, select Properties to fine tune device settings. 5. Click OK to save device selection and close the dialog box, or Cancel to close without saving changes. Acquiring a Page and Making a New Document To acquire a page and create a new document: 1. Place the page you want to acquire face-down on the scanner, or face-up under the PEARL camera. If necessary, refer to your scanner or camera's documentation for more information about your device. 123 2. Click the Scan button on the blue File Management toolbar. WYNN acquires the page, recognizes the text, and displays a new document containing the acquired text. This is known as Text View. Note: If you acquire a page into an existing document, WYNN automatically appends the page to the end of the current document. For more information about acquiring pages into existing documents, see Acquiring and Inserting a New Page below or Acquiring and Replacing the Current Page on page 125. Note: To stop an acquisition in progress, press ESC at any time. 3. To see the original version of the page, click the Exact View button. To return to the text version, click the Text View button. 4. To see both Exact View and Text View, click the View menu, and then choose Split View. Acquiring and Inserting a New Page When acquiring a page into an open WYNN document, WYNN automatically adds the page to the end of the document. To insert the new page in another part of the document, do the following: 124 1. Click the Open button on the blue File Management toolbar, and open the document that you want to add the new page to. 2. Move your cursor to the location where you want to insert the page. Important: The acquired page appears before the selected page. For example, if you want to insert the new page between pages 10 and 11, place your cursor on page 11 before scanning the page. 3. Place the page you want to acquire facedown on the scanner, or face up under the PEARL camera. Refer to your device’s manual for more information on page placement. 4. From the Acquire menu, choose Acquire and Insert New Page. WYNN acquires the page and recognizes the text. It also inserts the new page before the page where you placed the cursor. Note: To stop an acquisition in progress, press ESC at any time. Acquiring and Replacing the Current Page To replace a page in a WYNN document with a newly acquired page: 1. Click the Open button on the blue File Management toolbar, and open the document that you want to add the new page to. 2. Move your cursor to the page you want to replace. 3. Place the page you want to acquire facedown on your scanner, or face up under the PEARL camera. Refer to your device’s manual for more information on page placement. 4. From the Acquire menu, choose Acquire and Replace Current Page. 5. WYNN acquires the page and recognizes the text. WYNN deletes the page where your cursor is located and replaces it with the acquired page. Note: To stop an acquisition in progress, press ESC at any time. 125 Creating WYNN Files Using the Freedom Import Printer WYNN Wizard includes a virtual printer that provides the ability to convert files from PDF files, or any other file format, to a WYNN document. This virtual printer, called the Freedom Import Printer, shows up on the list of printer drivers in the Print dialog box. The following topics provide example for opening a PDF formatted file and converting it to a WYNN (WYX) formatted file using the Freedom Import Printer and WYNN Wizard. Opening a PDF file from within WYNN There are two ways to open PDF files using WYNN Wizard: The first is to open the PDF file from within WYNN The second is to open Adobe Acrobat Reader and print the PDF using the Freedom Import Printer. This conversion process is described in Converting Files Using the Freedom Import Printer. To open a PDF using WYNN, do the following: 1. Start WYNN. 2. From the File menu, choose Open. The Select a File to Open dialog appears. 3. Change the "Files of type" field to Adobe PDF Documents. 4. Select the PDF file you want, and click the Open button. The file is automatically converted to the WYNN file format. Converting Files Using the Freedom Import Printer You can also convert PDF document, or documents from any other file format, into WYNN documents using the Freedom Import Printer. The Freedom Import Printer is only available in WYNN Wizard. Note: This process also works for converting online PDF files. 126 1. From any application, open a file you want to open with WYNN Wizard. 2. From the File menu, choose Print. Select Freedom Import Printer as your printer. 3. If desired, specify the range of pages to be "printed." 4. Select OK. The Freedom Import Printer will convert the document to a WYNN file. If WYNN is not open, the Virtual Printer will open it. You may wish to save the file as a WYX file after it is opened in WYNN. Introduction to Workflows Introduce and then point to back of book for more information. Point out that these are preconfigured scanning/acquisition settings that can be used for the type of document involved or something like that. See Book 21: Workflow Settings for more information. A workflow is a group of pre-defined settings that control how documents and images are acquired and processed. Workflows can acquire single or multiple pages, acquire simple or complex documents with tables and other formatting, or acquire pages manually or automatically. You can also create your own workflow to meet your needs. The settings for each workflow are divided into two groups: Acquire and Process. Acquisition settings control how the workflow acquires images and where the page is placed in the document. Process settings control how text is recognized and where the reading cursor is positioned. Refer to the sections below for details. Acquiring Difficult Text When scanning difficult text, such as very small text, unusual fonts, or unusual layouts, use the workflow best suited for the type of work you are doing, and then use that is best for the task at hand, and then use Dynamic Zoning to make the appropriate changes to the document. See page 128 for Dynamic Zoning procedures. 127 Dynamic Zoning (Rearranging Text in an Acquired Document) Dynamic Zoning allows you to define your own reading order on an acquired page. Dynamic Zoning can also be used to avoid recognition errors from graphics, or to exclude the speaking of headers, footers, or other unwanted text. Note: Use the Dynamic Zoning feature before using the Document Clean-up feature (page 130). 1. From the Advanced menu, click Dynamic Zoning, and then Enable Dynamic Zoning and Show Current Zones. The acquired image appears in Exact View mode with all current reading zones outlined in blue. Take a moment to study the document and determine how you want to redefine reading zones. 128 2. Select the Re-Define button to remove the current zone indicators so that you can redraw the zones in the correct order. 3. Use your mouse to draw a box around each block of text you wish to have spoken. A red outline appears around redefined zones. The reading order is determined by the order in which you define the zones. Do not draw zones around pictures or other graphic images that cannot be spoken. Note: If you make a mistake while redefining zones, click the Revert button to return to the original zones on that page. You may also use Erase to erase all zones created and start over again. 129 4. To continue changing zones on other pages of the acquired document, press the Page Down key until the next page appears. (The message “Loading Page” appears in the lower left corner.) Again, the existing zones appear in blue. 5. Repeat step 2 and 3 to redefine the reading order for the next page. Repeat this process for each page you wish to re-zone. 6. After defining new zones on all pages that apply, select the ReProcess button. This tells WYNN to refresh the document using the newly defined zoning order. Document Clean-up (Correcting Text in an Acquired Document) Use the Document Clean-up feature to correct any scanning or recognition errors that occurred during document scanning. This feature displays both the Exact View and the Text View of the document so you can compare them. This allows you to easily correct errors so that the text is spoken correctly in either view. To correct the text of an acquired document: 1. From the Advanced menu, choose Document Clean-up. WYNN displays the Text View of the document in the top half of the window, and the Exact View of the document in the bottom half of the window. 130 2. Scroll through the Text View, and look for OCR errors. 3. Click an incorrect word you find in the Text View. WYNN moves your insertion point to the word. A pink rectangle appears around the word in the Text View window, while the same word appears as highlighted text in the Exact View window. Note: You can also click a word in the Exact View to place a pink rectangle around the location where the word appears in the Text View. 4. Correct any spelling or scanning errors. Important: When correcting errors, do not delete the whole word. First, type in the corrections, and then delete the errors. Deleting the entire word prior to inserting corrections erases the link that WYNN uses to connect the word in the Text View and Exact View. In this case, WYNN no longer spotlights the word in Exact View when reading. 131 5. Continue searching the Text View window for OCR errors. When you are finished, choose Document Clean-up from the Advanced menu. 6. Click the Save button from the blue File Management toolbar to save your corrections. Document Clean-up Guidelines Keep the following items in mind when using the Document Clean-up feature. 1. Use Exact View to reference original text. 2. Make corrections in Text View. 3. Keep the link between Text View and Exact View by correcting parts of a word at a time until the entire word is corrected. If you delete an entire word in Text View, it breaks the link between Text View and Exact View. The location in Exact View is no longer spotlighted. 4. After closing the Document Clean-up feature, run Spell Check, in Text View mode, to catch random characters or mistaken words. Guidelines for Increased Scanning Accuracy Use OCR Correction (Advanced menu) to catch repeated recognition errors. Modify Scanning Contrast (Settings menu, Scanning Settings command) for light text or dark paper. Use Dynamic Zoning to eliminate recognition of changes or graphics. 132 Book 14: Launchables Launchable applications are word processing or text editing applications that you can launch (run) from the WYNN Launch menu. When you start a launchable, the current WYNN document is sent (“launched”) to the new application in its file format WYNN continues to run in the background. Examples of launchable applications are Microsoft Word, Notepad, and WordPad. This is a quick and easy, one-click way to send your document to Word or other word processor. By sending your document to Word from WYNN, you can save time and take advantage of the many formatting styles available in a word processor. The first time you launch WYNN after installation, it will automatically set up launchables for you. This process runs in the background and may take a few minutes. The launchables will not be available until the process is completed. You can later add more applications to the Launch menu if you want. You can also edit application settings, such as the name that appears in the Launch menu, or delete the application from the Launch menu. Setting Up Standard Launchable Applications Note that since launchables are set up automatically when WYNN is first launched, you will not usually need to do this. If you go to the Launch menu and do not see any entries at the bottom (after Manage Launchables), then launchables have not been set up. Do the following to detect launchable applications on your computer. Note that this is a global feature, so you only need to set it up one time. Once WYNN has been configured for these applications, anyone who uses WYNN on the computer will have access to them from the Launch menu. 1. Choose the Launch menu, and then Setup Standard Launchables. WYNN searches your computer for launchable applications. This may take a few minutes to complete. When complete, WYNN displays a message stating the number of launchable applications found on the computer. 2. Click OK to close the results list. The launchable applications now display in the Launch menu. 133 Once the launchables are set up, you can do the following: To open WYNN files in a launchable application, refer to Using Launchables in the next section. To add more launchables, refer to Adding Launchables. To change launchable settings, refer to Changing Launchable Settings. To remove launchables from the Launch menu, refer to Deleting a Launchable. Using Launchables To send a document from WYNN to a launchable application, do the following: 1. Open a WYNN document. 2. From the Launch menu, choose an application, such as Word, which can be found at the bottom of the menu. 3. The selected application opens. Depending on the setting of the Export Document check box, one of the following will happen. If the check box is selected (the default setting), the current WYNN document opens in the application. Note that a confirmation messages displays if you have previously opened and saved the document using the same launchable. If the check box is cleared, the application launches, but does not open the WYNN document. Adding Launchables To quickly add a launchable application to the Launch menu, do the following. Note that for information about specific launchable settings, see Changing Launchable Settings later in this chapter. 1. From the Launch menu, choose Manage Launchables and then select Add. The Add Launch Application dialog box opens. 134 2. In the Program Path box, type the name of the application’s executable file, for example, Word.exe. 3. Next, click the Automatic Search for Program button. WYNN searches the computer for the application. When complete, WYNN displays a message that the file has been found. 4. Click OK to close the results list. Focus returns to the Add Launch Application dialog box. The path to the application’s executable file displays in the Program Path edit box. 5. In the Menu Name box, type the name of the application. This is the name that will display in the Launch menu. 6. Select the Minimize On Launch check box if you want to minimize the application after it starts. 7. Select the Export Document check box if you want to open the current WYNN document in the application. For example, if you select Word in the Launch menu, Word starts and opens the current document. Note: The Document Location box and the Save as Type list are available when you select this check box. 8. If you select the Export Document check box, do the following. In the Document Location box, decide where you want to save the exported document. By default, the document is saved to the user’s Docs folder. Click Browse for Folder to change where files will be saved. In the Save as Type list, select a file format for the document. 9. Finally, click Add to save your settings and add the application to the Launch menu. Changing Launchable Settings To change the settings for a launchable application, do the following: 135 1. From the Launch menu, choose Manage Launchables and then select Edit. The Launch Programs dialog box opens. 2. Select an application from the list, and then click Edit. The Edit Launch Application dialog box opens. Below are the available settings. Menu Name. This is the name of the launchable application. This is what will display in the Launch menu. Program Path: This is the location of the application’s executable file Browse for Program: Choose to manually locate the application’s executable file Automatic Search for Program: Allows WYNN to automatically search the computer for the application’s executable file Command Line Argument: (For advanced users) Use to edit the command line argument (switch) for an application. For example, using /A with Notepad, forces Notepad to open a text file as ASCII text. To find out what command line arguments can be used with a specific application, refer to the documentation for that program. Minimize On Launch: Select to minimize the application after it opens Export Document: Select to automatically launch the application and export the current WYNN document to the application Document Location: Enter the path to the folder where you want to save documents Browse for Folder: Use to manually locate the folder that will display in the Document Location box Save as Type: Select a file format for the document Update: Choose to save changes and close the Edit Launch Application dialog box 136 Cancel: Choose to close the dialog box without saving changes 3. Make changes to the application’s settings, and then click Update to save the changes. Deleting a Launchable To delete a launchable from the Launch menu, do the following: Tip: 1. If WYNN found Word, Notepad, and WordPad as launchables, but you only want students to use Word, you can use this item to delete Notepad and WordPad. From the Launch menu, choose Manage Launchables and then select Delete. The Launch Programs dialog box opens. 2. Select an application from the list, and then click Delete. 3. Confirm that you want to delete the launchable application. The application no longer appears in the Launch menu. 137 138 Book 15: Book Search Quick Book Search With WYNN you can quickly search a variety of sources for books in electronic format. Use the Book Search feature to download your favorite books from the Baen Free Library, Bookshare.org, and Project Gutenberg. To search for a book: 1. From the Launch menu, choose Book Search, and then select Quick Search. Alternatively, you can press CTRL+K. 2. Enter the title or author of the book you are searching for. 3. Choose the online book providers you want to include in the search by selecting the corresponding check boxes. Clear the check boxes next to the providers you do not want to include in the search. Note: In order to download copyrighted books from BookShare.org, you must establish a Bookshare.org user account. If you have an account, select the Login to Bookshare.org check box. When you begin the book search, you will be prompted to enter the e-mail address and password for your Bookshare.org account. If you do not select the Login to Bookshare.org check box, WYNN will only search Bookshare.org for books that are not copyrighted. 4. Click the Begin Search button to search for books. A list of books that match your criteria displays. Note: If you cannot find the book(s) you want to download, you can revise your search. Click the Revise Search button and then enter a different title or author. Additionally, when searching Bookshare.org, books that are only available remotely are not included in the results list. 5. When the search is complete, scroll through the list of books. Click to select the check boxes next to the books you want to download. 139 6. Activate the Download button or press ALT+D to begin downloading the books. The file(s) are saved in the Books folder of your Library. Even if you have changed the default file location in the General Settings dialog box, downloaded books are always saved in this folder. 7. When the download is complete, activate the Open Files Now button to view your downloaded books. Activate the Done button to view the file(s) at a later time. Advanced Book Search The Advanced Book Search feature provides you with additional search options. To perform an advanced search: 1. From the Launch menu, choose Book Search and then select Advanced Search. Note: You can also activate the Advanced Search button in any dialog box. 2. Enter keywords to search for in the Contains edit box. 3. In the Search combo box, choose whether to search for these keywords in the titles or author names. Repeat this process for the second edit box. 4. Choose one of the following options: Ignore – Ignore books with titles or authors containing the keyword specified in the second edit box. And – Search for all keywords you entered in both edit boxes. Or – Search for books with titles or authors containing keywords in either the first edit box OR the second edit box. 5. 140 Choose the online book providers you want to include in the search by selecting the corresponding check boxes. Clear the check boxes next to the providers you do not want to include in the search. Note: In order to download copyrighted books from BookShare.org, you must establish a Bookshare.org user account. If you have an account, select the Login to Bookshare.org check box. When you begin the book search, you are prompted to enter the e-mail address and password for your Bookshare.org account. If you do not select the Login to Bookshare.org check box, WYNN will only search Bookshare.org for books that are not copyrighted. 6. Click the Begin Search button to search for books. Choose and download books just as you would during a Quick Search. 141 142 Book 16: User Tasks Converting Documents or Voice Notes to Audio Files You can save and convert any voice note or document that you can open in WYNN as an MP3 or WAV file. This allows a user to listen to a document later using an MP3 or WAV file compatible device. Before converting a large document to audio, verify that you have enough hard disk space to create and store the file. For example, a 150 page document requires approximately 1 GB of temporary disk space to complete the conversion. Once the conversion is complete, the temporary disk space is free again for use. The resulting audio file is considerably smaller than the temp file. A large document may take several minutes to convert and process to an audio format. Please be patient when converting large, multi-page files to audio. Voice Notes can be saved only as MP3 files. Documents can be saved as MP3 or WAV files. Note that this feature does not apply to Web pages (HTML files). Converting Documents to MP3 or WAV Files Do the following to convert documents to MP3 or WAV files. Note that WAV files are very large, so the default save format is MP3. 1. Open a document. 2. Click the Save to Audio button on the blue toolbar. You can also go to the File menu and choose Save to Audio. (Note that the command is unavailable for HTML files or when using the WYNN Web browser.) 143 3. Select Document Text and then select one of the following options to convert one or more pages. Select Current Page to convert only the current page to an MP3 or WAV file, or Select Page Range to convert the entire document or a range of pages to audio. The default is to save the entire document, so this field will show the page range for the document. If converting a range, you can enter the specific number of pages. You can use dashes or commas between each number. For example, 1-2 will save pages one and two. To save the pages as a single file, select the Save Range as a Single File check box. 4. Click the OK button. 5. The Save As dialog box opens. Type a file name in the File name edit box. Select MP3 or WAV as the file type. Click the Save button. WYNN converts the text to audio and saves the file to your Audio folder in your User folder. Locating Document Audio Files If you later navigate away from the default file folder location, you can use the User Docs button (which is a shortcut) in the Open or Save dialog boxes to quickly return to your default file folder (Docs). Once in the Docs folder, click the Up One Level button and then open the Audio folder. You can now select and open your audio file Converting Voice Notes to MP3 Files To convert a voice note to an MP3 audio file, do the following: 1. 144 Open a document. 2. Choose the File menu and then the Save to Audio command. (Note that the command is unavailable for HTML files or when using the WYNN Web browser.) 3. Select Voice Notes and then select one of the following options to convert one or more pages. Use the "Selected Voice Note" option to convert the selected Voice Note to an MP3 file, or Select the "Voice Note Range" option to convert all voice notes or specific voice notes. If converting a range, enter the specific voice notes. For example, 1-2 will save voice notes one and two. You can use dashes or commas between each number. To save the voice notes as a single file, select the Save Range as a Single File check box. 4. Click OK. 5. The Save As dialog box opens. Type a file name in the File name edit box Click the Save button. WYNN converts the text to audio and saves the file to your Audio folder in your User folder. Locating Voice Note Audio Files If you later navigate away from the default file folder location, you can use the User Docs button (which is a shortcut) in the Open or Save dialog boxes to quickly return to your default file folder (Docs) Once in the Docs folder, click the Up One Level button and then open the Audio folder You can now select and open your audio file Listening to Document or Voice Note Audio Files 1. Click your WYNN User Files folder icon located on your desktop 2. Double-click your <user name> folder 145 3. Double-click the Audio folder 4. Double-click the MP3 or WAV file. The file opens using your default audio player. Two-tone Exact View Use the same custom colors for Exact View as you do in Text View. If you prefer using a light blue background, this new feature will set your Exact View background to light blue, too. Two-tone Exact View is found on the View menu, or by using the keyboard shortcut CTRL+2. Use Two-tone mode to apply text and background colors to a color or grayscale image in both Exact View and Split View. The default setting for this option is off, which means that changes made to the text colors will only apply to the Text View, or the Text View area of Split View. Note: This setting is not available if the open document does not have an Exact View. To turn on Two-tone mode: 1. Open a document that contains an Exact View color or grayscale image. 2. Click the View menu, and select Use Two Tone for Exact View, or press CTRL+2. When on, you can change the text and background colors and apply them to any open color or grayscale documents in Text View, Exact View, and Split View. To quickly switch Two-tone mode on or off, Click the View menu, and then click Two Tone, or Press CTRL+2. 146 Appending a File You can append the contents of another file to the end of the currently open document. Note: Before you append a file, you should save a copy of your document using the new filename for the merged documents. That way you won't overwrite the existing document. 1. Open a document. 2. From the File menu, choose Append File. The “Select a File to Append” dialog box opens and displays a list of document files (WYX, WYN, and OBX, ARK) in your Docs folder. 3. Select a file from the list, and then click Append. 4. The file is added to the end of the currently open document. The “Select a File to Append” dialog box closes. 5. Repeat this procedure to append more files to the document. 6. When finished, press CTRL+S to save the document. Go To a Page To move to the newly added pages, do one of the following: Use the scroll bar on the right side of the document window, or Click the Go To button in the yellow Toolbar (CTRL+G), to jump to a specific page Changing Page Order To rearrange pages in the document, click the Edit menu, and choose Move Page to move the current page before the previous page or behind the next page, or to the beginning or end of the document. 147 Exporting Highlights You can export any highlighted text in a document or Web page to a new or existing WYNN document as described below. You can also export the highlighted text to a document using an outline format. Exporting Highlights to a Document 1. With highlighted text in the current document, click File and choose Extract Highlights. 2. Next, choose to export the highlighted text to the new document by highlight color, or by the order in which the highlighted text appears in the document. When exporting by color, text is arranged in the new document according to colors in the Highlight list. For example, text highlighted in cyan (light blue) appears first, and then text highlighted in green, magenta, orange, and lavender. When exporting by order, text is arranged in the new document in the order that it appears in the original document. 3. In the “Select a WYNN Document for the Extracted Text” dialog box, choose to export the text to a new WYNN document, or select an existing WYNN document from the list. Note: If you choose to extract to a new document, the document uses the same file name as the original document and appends “-list<number>” to the file name. Exporting Highlights to an Outline 148 1. With highlighted text in the current document, click File and choose Extract Highlights to Outline. 2. Next, choose to export the highlighted text to the new outline document by highlight color, or by the order in which the highlighted text appears in the original document. When exporting by color, text is arranged in the new outline document according to colors in the Highlight list. For example, text highlighted in cyan (light blue) appears first, and then text highlighted in green, magenta, orange, and lavender. When exporting by order, text is arranged in the outline document in the order that it appears in the original document. 3. Next, the highlighted text displays in a new WYNN document. The document uses the file name format “Document-outline<number>.” Exporting Text Notes 1. With text notes in the current document, click File and choose Extract Text Notes. 2. In the “Select a WYNN Document for the Extracted Text” dialog box, choose to export the text to a new WYNN document, or select an existing WYNN document from the list. Note: If you choose to extract to a new document, the document uses the same file name as the original document and appends “-list<number>” to the file name. Renumbering Pages WYNN allows you to change the page numbering for your document. You might want to do this in order to maintain the original page numbering for scanned documents. You can give each page in the document a different page number, but each page number must be greater than the preceding page number. WYNN displays the page number of the current page on the status bar. To renumber the pages in your document: 1. Move your cursor to the page you want to renumber. 2. From the Edit menu, choose Renumber Pages. 3. Enter a new page number. 149 4. Click OK to renumber the page. WYNN changes the page numbers for this page and all subsequent pages in the document, unless it encounters another renumbered page later in the document. Restoring the Original Page Numbers To revert back to a simple page numbering sequence that begins with page one and ends with the last page of the document: 1. From the Edit menu, choose Renumber Pages. 2. Select the Revert to Original Page Numbers check box. 3. Click OK to restore the original page numbering. The first page of the document will now be page one. Re-recognize Page or Document If you are not satisfied with the quality of the recognized text from an acquisition, you can re-recognize the current page or the entire document without re-acquiring it. Only pages containing Exact View images can be rerecognized. If you attempt to re-recognize pages containing bookmarks, text notes, highlights, or voice notes you have added, you are given the choice to continue the re-recognition and overwrite any mark-ups, or cancel the process. This gives you an opportunity to save your marked-up document using a different filename and then re-recognize without losing your marked-up copy. Re-recognize Page: Choose this option to improve the quality of the current page. When used, the current page is replaced with the newly recognized text and the page begins reading from the top. If the current page does not have an Exact View image, this option is unavailable. Re-recognize Document: Choose this option to improve the quality of the entire document. If none of the pages have exact images, this option is unavailable. If you attempt to re-recognize a document containing pages with and without Exact View images, a message informs you that not all pages contain Exact View images and that these pages cannot be re-recognized. To continue, select Yes to re-recognize all pages with Exact View images. Select No to cancel the recognition process. 150 When re-recognizing pages, the settings from the currently active workflow are always used with the exception of Recognize Columns. For example, if Recognize Columns is selected for the current workflow, and you think you might get better results re-recognizing the page with it off, open the Acquire menu and click Recognize Columns to clear the option. Then, try rerecognizing the page or document again. Split View See Exact View and Text View simultaneously. This provides easy comparison of the original document and the resulting Text View, which allows visual tailoring to assist with visual processing difficulties. To use Split View, go to the View menu and select Split View. When finished with Split View, use the Exact View/Text View button on any toolbar to go back to either Text or Exact View. Zoom Exact View Exact View is a viewing mode that displays an acquired page exactly as the original document appears. When in Exact View you can zoom in or zoom out to best suit your reading preference. Note that if an exact view image is available when using Split View mode, you can zoom in or zoom out to view the image in the lower half of the screen. 1. Open a Word document or a document that was acquired using a scanner or PEARL camera. 2. Switch to Exact View mode by clicking the Exact View button available in any toolbar. 3. From the View menu, choose Zoom View, and select one of the following: Zoom In (also available by pressing CTRL+PLUS). Incremental increase Zoom Out (CTRL+MINUS). Incremental decrease Page Width (CTRL+SHIFT+W). Instantly zooms so that the width of the image is in the window 151 Page Height (CTRL+SHIFT+H). Instantly zooms so that the height of the image is in the window Default Zoom (CTRL+SHIFT+D). Instantly zooms to the default zoom level 4. For continuous zoom, press and hold CTRL+PLUS or CTRL+MINUS. Word Count To see the number of words in the active document: 1. From the Tools menu, choose Word Count. 2. WYNN displays the number of words in the document. 3. Click OK when you have finished reviewing the word count. Pronunciation Dictionary The Pronunciation Dictionary allows you to define how WYNN pronounces words that it reads aloud. Speech synthesizers do a good job of pronouncing words through a combination of text-to-speech programming and internal dictionaries. However, there may be some words that the synthesizer does not pronounce properly. These words vary from synthesizer to synthesizer. Using WYNN's Pronunciation Dictionary, you can change the pronunciation of any word. To add a new word, phrase, or acronym to the Wynn pronunciation dictionary: 1. On the Advanced menu, click Pronunciation Dictionary. The Pronunciation Dictionary dialog appears. 152 2. Scroll through the Word List to make sure that the new text does not appear in the pronunciation dictionary. 3. Type the new word into the Word edit box. 4. Enter a pronunciation for the word in the Pronunciation edit box. Try spelling the word phonetically using simple combinations of consonants and vowels. Use spaces to separate letters if you want WYNN to say the name of the letter rather than make the associated sound (this is useful for acronyms). Tip: You can also use spaces to isolate phonetic sounds created by two or more letters. The synthesizer clearly pronounces these sounds when reading the word. 5. Click Test to hear the new pronunciation of the word. Continue adjusting the pronunciation until you achieve the desired pronunciation. 6. When you are satisfied with the pronunciation, click the Add button to update the Pronunciation Dictionary. 7. Click Close to return to the active document. Photocopy You can acquire a document or image and immediately send a copy of it to your printer. Do the following to create a photocopy. 1. Choose Photocopy from the Launch menu or press ALT+C, P. 2. Specify how many copies you want to make, and then select the printer you want to use to create the copy. 3. If necessary, click Properties to change the paper size, orientation, and margins. 4. Select the Acquisition Tones check box if you want WYNN to play tones as the image is being acquired. 5. Select the Image Acquired check box if you want WYNN to play a camera shutter sound once it has acquired the image from the scanner or camera. 153 6. Select the Fit Printed Page check box to resize the acquired image so the entire document fits within the margins of the printed page. This is useful if the acquired page has narrow margins, but you are printing using wider margins. Clear this check box to print the image in its original size, fitting as much text as possible in the specified margins. Depending on the size of your print margins compared to the dimensions of the original acquired image, portions of the document may not be printed. 7. Determine the color mode you want to use when acquiring in the Color Mode combo box. Choose from color, black and white, black and white fax, or gray scale. You must have a color printer and scanner capable of scanning in color to create color photocopies. 8. Leave the Automatic Contrast check box checked to automatically adjust the contrast depending on the page being photocopied. If you clear this option, you can then use the contrast slider to manually adjust the contrast from 0 to 16. Lower numbers produce darker copies while higher numbers produce lighter copies. Setting it to 8 is considered normal contrast. The contrast settings are ignored if the acquisition source is set to use the PEARL camera. 9. Click OK to begin acquiring the image or document. When the acquisition is complete, the item is printed using the designated printer. OCR Correction The OCR Correction command allows you to specify how WYNN should recognize certain errors that typically occur when scanning printed text. WYNN's OCR engines usually do a very good job of identifying text correctly. However, due to the wide range of type styles, fonts, and reproduction qualities for documents you are likely to encounter, WYNN may not be able to correctly identify all words. 154 Adding OCR Corrections To add corrections for words identified incorrectly during scanning: 1. From the Advanced menu, choose OCR Correction. 2. The Word List displays words that commonly appear when an OCR engine identifies a word incorrectly. Select a word to see the misidentified word and the correct word. 3. Enter the misidentified word. 4. Enter the correct word. When WYNN recognizes text, it will replace the misidentified word with the correct word. 5. Select the Case Sensitive check box if you want letters of the corrected word to be in the same case as the misidentified word. Leave this check box cleared if you want the corrected word to always appear exactly as it does in the Correct Word edit box. 6. Click the Add button to add the new word to the list. 7. If you want to apply the current OCR corrections to the active document, click the Apply to Current Document button. WYNN searches for misidentified words and replaces them with the correct word. 8. Click Close. Deleting OCR Corrections To delete a word from the OCR corrections list: 1. From the Advanced menu, choose OCR Correction. 2. The Word List displays words that are commonly created when an OCR engine misidentifies a word in a document. 3. Select the misidentified word you want to delete. 4. Click the Delete button. 155 Multi-user Logins If another user wants to log in without quitting WYNN: 1. Choose Log Off <user name> from the File menu or click on the name in the upper right corner. 2. A confirmation message appears. Click Yes. 3. The user can then log in, as previously described, and begin using WYNN. Note: If only one user will be using WYNN on this computer, you can skip the log in process. To do this, choose Enable Multi-User Logins from the File menu. Enable Multi-User Logins should be unchecked. The next time you start WYNN, you will not be asked to log in. Choose this command again to re-enable multi-user logins. Device Selection Note: WYNN automatically detects the camera and scanner drivers that are installed on your computer, and selects one to use as the default. The first time you acquire a document; the software displays a message asking you to confirm the acquisition device selection. If you want to change the device, do the following. 156 1. From the Advanced menu, choose Device Selection. 2. In the Acquisition Source box, select Scanner or PEARL Camera. 3. If you select Scanner as the acquisition source, select a scanner from the Device box. 4. If necessary, select Properties to fine tune device settings. 5. Click OK to save device selection and close the dialog box, or Cancel to close without saving changes. Change Localization Language 1. From the Advanced menu, choose Change Language. 2. Select a language from the list. Note that a check mark identifies the current language setting. Your language change will take effect the next time you start WYNN. Saving Settings When you change WYNN's settings, the changes take effect immediately, and the settings are automatically saved. All of WYNN's settings can be viewed or modified by using the Settings menu. Your default settings are auto-saved using the file name Default.atp. If you want to share your settings with another user, move your settings to another computer that has WYNN installed, or use different settings configurations for different tasks, you can save your settings using a different name, one that you can retrieve later when needed. To save your current WYNN settings: 1. From the Settings menu, choose Save Settings. 2. Enter a name for the settings. If you enter a name other than Default, you must later retrieve the settings in order to apply them. 3. Click Save to save the settings. 4. If you specify a name for your settings that is already in use (such as default), WYNN will ask you to confirm that you want to overwrite the existing settings. Click Yes to replace the old settings with your new settings. Click No to retain your old settings. You can restore the original factory settings at any time by retrieving the settings file named Factory Default. Tip: You can also save only a single type of setting. For instance, you may only want to save the current speech settings without saving the current visual settings. To do this, uncheck the All Settings item, check the Speech Settings item, then click Save to save only the specified settings. 157 Retrieving Settings When WYNN starts, settings stored in the default settings file for the current user are automatically loaded. Sometimes a teacher will broadcast a settings file to students. The students must retrieve that file before they can use it. To load a different configuration of saved settings: 1. From the Settings menu, choose Retrieve Settings. 2. Select the settings file you want to use. 3. Click OK to load the saved settings. Deleting Settings When you no longer need a settings file that you created, you can delete it. To delete a settings file: 158 1. From the Settings menu, choose Delete Settings. 2. Select the settings file you want to delete. 3. Click OK to delete the saved settings. Book 17: Teacher-specific Tasks Teacher Lockout Teacher Lockout allows you to disable certain WYNN features, including the dictionary, thesaurus, spell checker, homophone checker, word prediction, and Web browsing. This is useful for test-taking, when students are not supposed to use modules like dictionaries or the Internet to complete the test. Teacher Lockout remains in effect for all log-ins until you cancel it or restart WYNN. Activating Teacher Lockout To disable one or more features with Teacher Lockout: 1. From the Advanced menu, choose Teacher Lockout. 2. Select the check box next to each feature that you want to disable. Click the Select All button if you want to disable all the features. Clicking the Clear All button clears all the check boxes. 3. In the PASSWORD edit box, enter a password of five to eight characters. You can use this password to cancel the Teacher Lockout at any time. 4. Type your password again in the CONFIRM PASSWORD edit box. 5. Click the OK button. 6. A message displays informing you that the features you selected are now disabled. Click OK to continue. Canceling Teacher Lockout To cancel Teacher Lockout and re-enable all WYNN features: 1. From the Advanced menu, choose Cancel Teacher Lockout. 159 2. Enter your password. 3. Click the OK button. 4. A message displays informing you that the WYNN features are no longer disabled. Click OK to continue. Tip: If you forget your password, just click to quit WYNN. When you restart WYNN, all locked-out features will be available again. Broadcasting Documents and Settings Broadcasting is a powerful function that allows teachers to broadcast WYNN files and settings all users on a computer or network. You can log on to a single computer and download files and settings for just the user accounts on a specific computer, or, if using the network version of WYNN, you can broadcast files and settings to all users on the network, regardless of which computer they use to log in. Note: To broadcast documents or settings, you must sign in to WYNN using a Teacher account. The Broadcast Documents and Broadcast Settings commands are only available when you log in as a teacher. Broadcasting Documents to Other Users You can send documents to other WYNN users. This allows you to copy documents located in your Docs folder to the Docs folder that belongs to each user. To broadcast documents to other users, 1. 160 Log in using your Teacher account. From the Advanced menu, click Broadcast Documents. 2. Select the document you want to broadcast. Hold down CTRL and click to select multiple documents. Note: You can only broadcast closed documents. If the document is open, you must close it first before you can broadcast it. 3. Click Broadcast to send the documents to all other users. 161 Broadcasting Settings to Other Users WYNN allows you to send your abbreviation definitions, OCR corrections, personal spell check dictionary, pronunciation dictionary, word prediction lists, custom toolbars, and so on to all other users. To broadcast customized or modified settings to other users: 162 1. Log in using your Teacher account. From the Advanced menu, click Broadcast Documents. 2. From the Advanced menu, click Broadcast Settings. 3. Select the type of settings you want to broadcast. Hold down CTRL and click to select multiple types of settings. 4. Click Broadcast to send the settings to all other users. Customizing the Toolbar To create a new toolbar containing only certain buttons that you specify, choose Custom Toolbar from the Settings menu. You can have WYNN display this toolbar instead of the standard rotating toolbars in order to provide quick access to commonly used commands. To create a custom toolbar: 1. From the Settings menu, choose Custom Toolbar. 2. In the Available Buttons list, select a button to add to the custom toolbar. 3. Click Add to place the button on the custom toolbar. Note that if you want to remove a button from the custom toolbar, select it in the Custom Toolbar list. Then click the Remove button. Tip: 4. The buttons will be displayed in the order you select them, so be sure to first add the button you want on the left side of the toolbar, then add the button you want next to it to the right, and so on. You can add a total of 12 buttons to the custom toolbar. 163 5. Select the Show Custom Toolbar radio button to replace the standard rotating toolbars with your custom toolbar. You can select the Show Default Toolbar radio button to restore the standard toolbars at any time. 6. Click the OK button. 7. If you want to use this custom toolbar in future WYNN sessions or alternate between custom toolbars, be sure to save your settings. Refer to the help topic Saving, Retrieving, and Deleting Settings for more information. You can as many toolbars as you need, but be sure to save each toolbar under a different name. Tip: WYNN includes a number of sample custom toolbars designed to address particular task and environments. To retrieve these toolbars, choose Retrieve Settings from the Settings menu. Setting Word Prediction Teacher Controls What is Word Prediction? Word prediction helps students write by making spelling suggestions and anticipating the next word he or she is going to type. It is useful for people who have difficulty with spelling, grammar, and formulating sentences. When writing with you use word prediction as you write, WYNN suggests possible spellings of the word you are typing. It also suggests the next word in the sentence, based on patterns in the English language, certain writing styles, and even your own documents. Word prediction can be quickly started by, Clicking the Predict button in the yellow Writing toolbar, or Choosing Word Prediction in the Tools menu 164 Word Prediction Teacher Controls To customize the word and phrase suggestions provided by the Word Prediction feature, choose Word Prediction Teacher Controls from the Advanced menu. You can use these controls to increase/decrease the size of the word list, define phonetic spelling information, add words and phrases to the word prediction list, choose writing styles, and more. Each tab of the Teacher Controls multi-page dialog box is described in a separate section. Word Prediction Edit List The Word Prediction Edit List tab allows you to select a different size word list or add words to the list for the current user. Tip: You can search for words already in the word prediction list. To do this, enter the word and then click Search. WYNN displays a list of phrases containing the word. Adding Words/Phrases to the List To add a word or phrase to the word prediction list: 1. From the Advanced menu, choose Word Prediction Teacher Controls. 2. Click the Word Prediction Edit List tab. 3. Click the Add a Word button. 4. Type the word you want to add to the word prediction list. 5. Specify whether the word is a verb, noun, or other by selecting the corresponding radio button. 6. WYNN automatically displays some suggestions based on the spelling of the word and the word's part of speech. For verbs, WYNN suggests how the word should appear when used in the various tenses. 165 For nouns, WYNN suggests how the word should be pluralized and how it should be used in different situations. For other words, WYNN asks you to enter three phrases where the word is used in context. 7. Review the suggestions and correct any that do not reflect proper usage. 8. Click OK to add the word. Deleting Words/Phrases from the List To delete a word or phrase from the word prediction list: 1. From the Advanced menu, choose Word Prediction Teacher Controls. 2. Click the Word Prediction Edit List tab. 3. Type one or more words in the phrase you want to delete. 4. Click the Search button. 5. Select the phrase you want to delete. 6. Click the Delete Selected Phrase button. 7. Click OK. Restoring the Default List To remove all changes you have made to your personal word prediction list and restore the default list: 166 1. From the Advanced menu, choose Word Prediction Teacher Controls. 2. Click the Word Prediction Edit List tab. 3. Click the Clear All Personal Learned Text button. 4. Click OK to restore the default word list. Click Cancel to keep your personalized word list. Word Prediction Learning Text Use the Word Prediction Learning Text tab to have the word prediction system learn new words from a file or the current document. You can also have WYNN learn words as you type. To analyze and learn vocabulary patterns from a plain text file or the current document: 1. From the Advanced menu, choose Word Prediction Teacher Controls. 2. Click the Word Predication Learning Text tab. 3. If you want WYNN to learn from the current document, click Current Document. If you want WYNN to learn vocabulary patterns from a plain text file, click the TextFile button. Locate the file and select it. Click Open. 4. WYNN adds new phrases from the current document or text file to the word prediction list. To analyze and learn vocabulary patterns as you type: 1. From the Advanced menu, choose Word Prediction Teacher Controls. 2. Click the Word Predication Learning Text tab. 3. Select the Automatically Learn as I Type check box. 4. If you want WYNN to check the spelling of each word or phrase before adding it to the word prediction list, select the Spell Check Each Word Before Learning check box. 5. Click OK. Now WYNN will add words and phrases that you type in your documents to the word prediction list. 167 Word Prediction Phonetics Use the Word Prediction Phonetics tab to add, modify, or delete phonetic associations. This feature allows you to customize Word Prediction so that it corrects commonly misspelled phonetic sounds. For example, phonetic associations allow WYNN to recognize f as a possible misspelling of the sound created by the letters ph. Adding Phonetic Associations To add a new phonetic association to the word prediction list: 1. From the Advanced menu, choose Word Prediction Teacher Controls. 2. Click the Word Prediction Phonetics tab. 3. In the Phonetic edit box, type the incorrect phonetic spelling of the sound. 4. Type a comma. 5. Type the correct spelling of the sound. For example, to recognize f as a possible misspelling of the sound created by the letters ph, type "f,ph" in the Phonetic edit box. This creates a phonetic association between f and ph. 6. Click the Add button. 7. Click the OK button to save your changes. Modifying Phonetic Associations To modify an existing phonetic association: 168 1. From the Advanced menu, choose Word Prediction Teacher Controls. 2. Click the Word Prediction Phonetics tab. 3. Select the phonetic association you want to modify in the List of Phonetic Associations. 4. In the Phonetic edit box, change the phonetic association. 5. Click the Update button. 6. Click the OK button to save your changes. Deleting Phonetic Associations To delete phonetic associations: 1. From the Advanced menu, choose Word Prediction Teacher Controls. 2. Click the Word Prediction Phonetics tab. 3. Locate the phonetic association in the List of Phonetic Associations and select it. 4. Click Delete. Tip: If you do not want to delete a phonetic association, yet you do not want it to apply to the current document, clear the adjacent check box. You can restore the association at any time by selecting the check box again. Use the Clear All and Select All buttons to quickly select or clear all the check boxes. Word Prediction Lists The Word Prediction Lists tab allows you to select which writing styles you want word prediction to use. These vocabulary categories have been developed from detailed linguistic research and analysis of 100 million words of spoken and written English. To change the writing styles WYNN uses when predicting words and phrases: 1. From the Advanced menu, choose Word Prediction Teacher Controls. 2. Click the Word Prediction Lists tab. 169 3. Do the following: Select the check box next to each writing style you want WYNN to use Clear the check box next to each writing style you do not want to use 4. Click OK. PAL Setup and Teacher Functions For information about creating and distributing PAL documents, see Book 8: PREPARE Process for Teachers. 170 Book 18: Administrator Tasks Network administrator tasks are described throughout this document. Use the list below to location this information. For an overview of WYNN network installation, see WYNN Network Installation beginning on page 16. To install the network server, see Installing the WYNN Network Server on page 17. To install the network client, see WYNN Network Client Overview beginning on page 26. For a list of command-line options, see Special Installation Commands beginning on page 28. For an overview of license server installation, see License Server Installation and Configuration Overview beginning on page 21. Additional information is available beginning on page 249. For details about user permissions, network authorization tools, and network folders, see Network Folder System on page 229. For product activation information, see Activation Options on page 237. For information about creating user accounts, see Administrative and Teacher Accounts on page 29. 171 172 Book 19: General Settings Use General Settings to determine if WYNN opens with a blank document or the previously read document, and how WYNN reads the document, for example nonstop, after it opens. These settings also configure the default file type, format, and location, the maximum number of documents that can be open at one time, the font family and size for printed documents, and more. Below is a description of each item in the General Settings dialog box. 173 Startup Document Group Open Untitled Document Select this option to open a new document (Untitled) each time WYNN starts. If you do not select it, the last document used will open automatically. Open Last Document Select this option if you want the last document used to automatically open the next time WYNN starts. If you do not select it, a new file (named Untitled) automatically opens instead. Always Start in Write Mode Write mode means that you can edit, add, or delete text in the Text View of the current document. This check box is selected by default so that the software always starts in Write mode. The opposite of Write mode is Read-Only, which means that you cannot edit documents. You can always switch between the two modes by clicking the Write/Read-Only button on any toolbar. Default Print Font Settings Group Name Select a font from this list to use when printing documents. Size Select a point size to use when printing documents. This allows you to set how large or small the text will be in your printed documents. Left Side Panel Font Settings Group The File List panel displays the names of files and Web pages currently open. You can show this panel on the left side of the main program window, or hide it from view. Click the File List button to show or the panel; click the red X in the upper right corner of the File List to close the panel. 174 Name Select a font to use for the text in the File List panel. Size Select a point size to use for the text in the File List panel. Default File Settings Group Format The Default File Format combo box allows you to specify the default file format to use when saving WYNN documents. The default format is WYX. You can change the file format of a document at any time by using the Save As button on the File Management toolbar. You should only change this setting if you are going to regularly save WYNN documents using a certain file format. Location In the Default File Location edit box, specify the default folder for saving and retrieving files. You must specify a complete file path, including the drive letter. You can save and retrieve files from other folders if necessary. Refer to the help topics Save, Save As, and Open for more information on saving and opening files. For stand-alone WYNN the default folder location is, C:\Users\Public\Documents\WYNN\<version number>\[login name]\Docs For Windows XP, the default folder location is, C:\Documents and Settings\All Users\Documents\WYNN\<version number>\[login name]\Docs Image Output File Type Select a file type to use for the Acquire Image Only workflow. The default file type is JPEG (*.jpg). 175 Read Group Use the items in this group to choose how WYNN should read documents aloud. Continuous: The spotlight moves to emphasize the text WYNN reads. WYNN continues reading the document until you click the Pause toolbar button. Non-continuous: WYNN reads the text emphasized by the spotlight and then stops. Click the Read toolbar button again to have WYNN continue to read the text. To change the amount text WYNN reads at one time, make a new selection in the Movement Unit combo box in Visual Settings. Check spelling as I type WYNN can check your text for misspelled words as you type if you select this box. Potentially misspelled words display with blue text. You can also set this item using the Tools menu. Auto-capitalize new sentences Select this check box to have WYNN capitalize the first letter of the first word at the beginning of a sentence. Maximum Number of Open Documents Use this combo box to limit the maximum number of documents that can be open at the same time. Select No Limit if you want WYNN to allow you to have any number of documents open at the same time. The default is No Limit. Enable Shift Keys for Fast Forward and Rewind Select this check box to use the LEFT SHIFT key to rewind and repeat when reading text, and the RIGHT SHIFT key to skip ahead when reading text. The Spotlight also moves to the new cursor location in the text. 176 Book 20: Speech Settings Use these options to customize how WYNN reads documents, menus, dialog boxes, toolbar buttons, and messages. You can hear what your customized voice sounds like by clicking the Test button. Note: Some of these speech options may not be available, depending on the synthesizer you have selected. If an option is unavailable for your synthesizer, it is grayed out. 177 Voice Selection You can assign different voices for reading and editing text (Reading Voice), reading items in menus and dialog boxes (Menu Voice), and reading emphasized text such as bold, underline, and italic (Emphasis Voice). This can help distinguish what is being read. After selecting the type of voice, you can customize and adjust items such as volume and reading speed for each voice. Apply Settings to All Voices When selected, any changes made to the current voice (for example, the Reading Voice) are also made to other voices (for example, the Menu Voice and the Emphasis Voice). Settings are immediately applied after clicking the OK or Apply buttons. Note that the next time you open Speech Setting, the check box is cleared; however, the previous changes made still apply to all voices. The check box is cleared by default. Voice Settings Group Note: Whenever you open the Speech Settings dialog, the Reading Voice is selected, and the Voice Settings Group is therefore called Reading Voice Settings Group. If you change to the Menu Voice, this group will be displayed as Menu Voice Settings Group. The instructions below assume you are making changes for the Reading Voice. Synthesizer Use this to select a speech driver (RealSpeak Solo Direct or SAPI 5) WYNN should use for speaking and reading text. After selecting a synthesizer, you can use the Language and Name options to select a reading voice that is ideal for you. If you choose RealSpeak Solo Direct, the synthesizer that comes with WYNN, you can choose among all its voices and languages for speech. Additional voices and languages are available at www.freedomscientific.com, by selecting Downloads and then RealSpeak Solo Direct Voices. If you choose SAPI 5, you can use any SAPI 5 voice that you have purchased and installed on your computer. 178 Language Use this to select the language your speech synthesizer should use when reading text. This setting does not enable WYNN to translate words in other languages. However, WYNN reads text written in this language using the appropriate pronunciation and accent. Name Select a female or male reading voice from the Name list. The available voices will vary based on the selected language. If you cannot find a specific voice, change the Language or Synthesizer option. Rate Use the Rate slider to determine how many words per minute (WPM) WYNN speaks. Volume Move the Volume slider to the left to decrease the volume of WYNN's speech. Move the slider to the right to increase the volume. Punctuation Select how much punctuation you want announced when reading. The choices are None (to announce no punctuation), Some, Most, and All (to announce all punctuation). Test Click this button to read the sample text using the current voice settings. You can then make adjustments to the Reading Voice Settings and start the test again. When you are finish, click OK or Apply to save your changes. 179 Enable Speech Select this check box to turn on speech when reading. Clear the check box to turn off speech. If you click the Read button while speech is turned off, the Spotlight will move and highlight text, but no speech will be used. Also, when speech is off, the Voice Settings are unavailable. User Interface Announcements Group Capital Letters While Typing Select this check box to have WYNN announce "cap" before each uppercase letter while you are typing. This setting only applies if you have Read Aloud As I Type set to Character or Both Character and Word. Numbers as Single Digits Select to announce numbers as a series of single digits while reading a document. For example, 123 is read as "one, two, three." Text Select this check box if you want WYNN to read the text in documents. It must be selected if you want WYNN to read your documents aloud when you click the Read button. Menus & Dialogs Select this check box if you want WYNN to read menus and commands. WYNN also reads the text displayed in dialog boxes, such as the names of check boxes and buttons. Toolbar Buttons Select this check box if you want WYNN to announce the names of the toolbar buttons when you hover the mouse pointer over them. 180 Messages Select this check box if you want WYNN to read the text of message boxes and error messages. Use Emphasis Voice for Bold, Etc. Select to indicate words that are printed in bold, italic, or underlined text by using different voice settings. When selected, you should also modify the Emphasis Voice (available in the Voice Selection combo box) so that you can hear a difference between the Reading and Menu voices. Many people set the Emphasis Voice to a higher volume than the Reading Voice. Extra Pause After Each Sentence WYNN pauses slightly after each sentence just as a natural speaker would. Select an item in this combo box to increase the length of this pause from 0.5 to 3 seconds. This extra pause can be helpful for people who need more time to absorb auditory information. Read Aloud As I Type Use this to control how WYNN repeats what you type. Select one of the following: Off: WYNN does not speak as you type. Character: WYNN speaks each character you type. Word: WYNN speaks each complete word you type after you press SPACEBAR. Both Character and Word: WYNN speaks each character you type and then reads the word you typed. Sentence: WYNN reads back the last sentence you typed. Both Word and Sentence: WYNN speaks each word you type and then reads the entire sentence. 181 Skim Read Speaks Paragraph Skim Reading allows you to read the first sentence, last sentence, or both of each paragraph in a document. Press SHIFT+F2 to start skim reading, or select Skim Reading from the Edit menu. If you are in the middle of a paragraph, the software will finish reading the current sentence and then jump to the next sentence based on your selection of First Sentence, Last Sentence, or First and Last Sentence. 182 Book 21: Workflow Settings What are Workflows? A workflow is a group of pre-defined settings that control how images are acquired and processed. Workflows can acquire single or multiple pages, acquire simple or complex documents with tables and other formatting, or acquire pages manually or automatically. You can also create your own workflow to meet your needs. The settings for each workflow are divided into two groups: Acquire and Process. Acquisition settings control how the workflow acquires images and where the page is placed in the document. Process settings control how text is recognized and where the reading cursor is positioned. Refer to the sections below for details. Workflow Settings Note: Earlier versions of WYNN used Scanning Settings to set individual aspects of how WYNN scanned documents. The Workflow Settings replaces and enhances the capabilities of Scanning Settings. Choose Workflow Settings from the Settings menu to select a different workflow, change current workflow settings, or create a new workflow when acquiring pages and images. Below are descriptions of the workflow options and settings. To customize workflow settings, use the options available in the Acquire tab page (see page 188) and the Process tab page (see page 193). Workflow changes are persistent across WYNN sessions. You do not have to save the workflow (using the Save the Settings command) each time you make a change. 183 Workflow Name Select a workflow to use when acquiring pages or images using a scanner, the PEARL camera, the Freedom Import Printer, a PDF file, or an image file. Below are the standard workflows. All workflows acquire and process images in color except as noted. If you want to acquire or process using black and white or grayscale, you can modify the settings for a workflow. This will probably speed up the acquisition and processing. Acquire and Read: This workflow acquires and processes a single image. The new page is added to the end of the document and the cursor is moved to the top of the new page. This workflow is best for quickly reading short documents, such as letters and recipes, and is the active workflow when WYNN starts for the first time. You can change both acquisition and process settings for this workflow. 184 Acquire Image Only: This workflow acquires the image and saves it as an image file, without performing the recognition process. This workflow is useful if you want to create and save an image file to be used later as a graphic. Acquired images can be saved as JPEG (default), BMP, PCX, PCX Fax, PNG, TIF Fax, TIF B&W, TIF LZW, TIF RLE, or TIF Uncompressed files. Since there is no processing involved, you can only modify Acquisition settings for this workflow. Freedom Import Printer: Use this workflow to recognize and open documents that WYNN cannot open directly. If a document can be opened in any application that supports printing, it can be opened in WYNN by printing it to the Freedom Import Printer. This is a specialty workflow. It cannot be set as your current workflow. Since there is no acquisition involved, you can only modify Process settings for this workflow. Multipage Automatic: Use this workflow to automatically acquire multiple pages and append them to the document. When using the PEARL camera, the workflow can be configured to detect motion as you turn the page, and then acquire the image when movement under the camera stops. To use motion detection, make sure to set the Page Acquisition Delay timer to 0. You can change both acquisition and process settings for this workflow. Multipage Prompt for Pages: This workflow allows you to continue reading from your current location and acquire new pages that are appended to the end of the document. After each new page is acquired, WYNN displays a dialog box with the options described below. After selecting an action, the dialog box closes and you can continue reading where you left off in the document. You can change both acquisition and process settings for this workflow. Acquire Another Page: Choose this button to have WYNN acquire the next page and append it to the document. 185 Turn Pages Over: After acquiring one side of each page in a double-sided document, choose this to acquire the opposite side of each page and have it inserted into the document in the correct page order during recognition. For instance, if you were acquiring three double-sided pages, WYNN would first acquire pages 1, 3, and 5, you would next select Turn Pages Over, and then WYNN would acquire pages 6, 4, and 2 in that order. The pages would then be placed in the correct order during the OCR (processing) step. In order for pages to be sorted correctly in the document, make sure you always acquire the opposite side of the last page, even if it is blank. This option is not available if you have already activated it, or if you have enabled the Split Facing Pages setting for the current workflow. Note: This feature is most useful with scanners that have an automatic document feeder. Finished Acquiring Images: Choose this button to stop image acquisition. To start another acquisition, click the Scan button, or use the Acquire menu commands. Paperback Books: Automatically acquires multiple pages in grayscale, but with Split Facing Pages turned on. PDF File: This workflow is used by default when you open a PDF file from within WYNN. It is a specialty workflow, which means that you can only modify process settings. It cannot be set as your current workflow. If WYNN is unable to process the particular file, you are prompted to use the Freedom Import Printer instead. If you choose Yes, WYNN switches to the Freedom Import Printer specialty workflow and resumes processing. Selecting No cancels the recognition, and the PDF file is not opened. Process Image File: This is a specialty workflow that is used by default when you open an image file (TIFF, JPEG, and so on) from within WYNN. Use it to configure how WYNN processes image files. It cannot be set as your current workflow. Worksheets - Color: Acquires a single page in color and appends it to the document. Worksheets - Black & White: Acquires a single page in grayscale and appends it to the document. 186 Set as Current Choose this button to make the selected workflow the active workflow. When you start an acquisition, WYNN uses the settings for the active workflow to acquire and recognize the page. This button is not available if the workflow in the list is a specialty workflow (because specialty workflows are automatically triggered when needed) or is already set as the active workflow. Modify Choose this button to open a dialog box where you can change the Acquire and Process settings for the selected workflow. Create New Choose this button to open the Acquire and Process wizard that guides you through creating a new workflow based on the settings of the currently selected workflow in the list. This button is not available for specialty workflows. Rename Choose this button to rename the selected workflow. You can only rename workflows that you create. This button is not available if the workflow selected in the list is a factory or specialty workflow. Remove Choose this button to delete the selected workflow. This button is not available if the workflow selected in the list is a factory or specialty workflow, or if the custom workflow you want to delete is still set as the active workflow. Restore Factory Values Choose this button to reset the selected workflow to its default settings. This button is only available if the selected workflow is labeled as "Modified" following the workflow name. 187 Recognition Defaults Group Use the items in this group to specify the languages that WYNN uses during the recognition process. (Note that this does not refer to the languages spoken by WYNN; rather it refers to the characters that WYNN identifies during the recognition process.) This is useful if the document you are acquiring has text that contains accent marks, umlauts, or other characters unique to a particular language. The recognition languages selected for Language 1 and Language 2 apply to all workflows. Language 1 Use this item to specify the language used to read and decipher text. Select the language that corresponds to the language of the printed page you are acquiring. This allows correct recognition of characters unique to that language. Language 2 Use this item to specify a second recognition language used to recognize acquired text. WYNN uses the languages selected for both Language 1 and Language 2 to recognize text. This is helpful if the document contains text from more than one language. Acquire Tab The settings on the Acquire tab page control how the workflow acquires images and where the page is placed in the document. These options are described below. 188 Acquisition Mode Use this box to specify whether WYNN acquires (scans) a single page or multiple pages. Single: WYNN acquires one page from the scanner or camera, processes it, and begins reading. To acquire another page, you will need to press the acquire keystroke again. Single page acquisition mode is the default setting for all workflows except Paperback Books, Multipage Prompt for Pages, and Multipage Automatic. Multiple: Lets you acquire a batch of pages for later processing. Some additional options become available when this mode is selected. 189 Image Properties Group Color Mode Select the color mode you want to use when acquiring pages. Color is the default acquisition setting for all workflows. Some workflows use black and white or grayscale for processing the image, but they all use color to acquire the image. Color: Acquires and recognizes pages of colored text, art, and photographs in color. The results of color scanning are only apparent while you are in Exact View. For this reason you must have Keep Exact View As (page 194) set to color in the workflow you want to use for acquiring pages in color. Gray Scale: Select this item if it is not necessary to have the Exact View image in color. Resolution Resolution is measured in dots per inch (dpi). The higher the resolution, the more dots per inch resulting in larger image files. The Resolution box allows you to select from 200, 300, 400, 500, or 600 dpi. The resolution is set to 300 dpi for all workflows. Many scanners have a standard setting of 300 dots per inch (dpi). However, if you are reading pages printed in very small type and have a scanner that can resolve as finely as 400 dpi, you may see improved recognition accuracy. For 400 dpi to be effective, your scanner must have an optical resolution of at least 400 by 400 dpi. An optical resolution of 300 by 600 dpi is not adequate. Note: This setting is ignored if the acquisition source is the PEARL camera. 190 Acquisition Size Group Full Device Length When this check box is selected, WYNN acquires the full length of the scanner bed, or the entire field of view under the PEARL camera (9 inches by 12 inches (22.86 cm by 30.48 cm)). If you clear this option, you can then specify how much of the scanner bed is scanned or how much of the area under the camera is captured. This item is selected by default in all factory workflows. Partial Acquisition Available only when the Full Device Length check box is cleared, this slider control allows you to specify how much of the scanner bed, or how much of the area under the PEARL camera, is acquired starting from the top. You can set it anywhere between 10 and 90 percent. Partial Acquisition is a useful way to preview your acquisition since WYNN acquires just enough of the page for you to get an idea of the content. Adjust Image Group If you are using a scanner to acquire images, these options control the light-todark contrast ratio in the acquired document. Note: This item is equivalent to the Scanning Contrast setting in earlier versions of WYNN. Automatic Contrast / Contrast Slider Select this check box to have WYNN automatically adjust the contrast accordingly depending on the type of page being acquired. If this option is unchecked, you can then use the contrast slider to manually adjust the contrast from darkest to lightest. You should only manually change the contrast if a particular page is not being recognized correctly on automatic contrast. Note: If the acquisition source is the PEARL camera, the contrast settings are ignored. 191 Progress Notifications Group Acquisition Tones Select this check box to hear tones during the acquisition process. The default for the item is unchecked. Image Acquired Select this check box to hear a camera shutter sound when an image is acquired from the scanner or camera. The default for this item is checked. Page Placement Select one of the following options to specify where to place the acquired page in the document. Append to Document: New page(s) are placed at the end of the document. Insert After Current Page: New page(s) are inserted consecutively after the current page. Insert Before Current Page: New page(s) are inserted before the current page. Replace Current Page: The current page is replaced with the newly acquired page. Multipage Acquisition Group The options in this group are available when Acquisition Mode is set to Multiple. Use these options to specify how to acquire multiple pages. Prompt for Pages: After each image acquisition, a message displays that allows you to acquire another page, turn the page over to acquire odd and even pages, or finish image acquisition. 192 Automatically Acquire Pages: Select to acquire new pages after a certain period of time, automatically through a document feeder attached to a scanner, or as soon as PEARL detects the page has been turned and there is no movement under the camera. When using automatic acquisition, use the Page Acquisition Delay box to set a time delay from 0 to 25 seconds. This delay is from the time the image is acquired until the next acquisition begins. Duplex Mode: If your scanner has a duplexer, select this check box to use this feature. Process Tab Use the Process tab settings to control how text is recognized and where the reading cursor is positioned. These options are described below. 193 Image Processing Group Keep Exact View As The Exact View image can be saved as color, grayscale, or black and white. To change the color mode of the Exact View, select a mode from the list. Note: If the color setting for Acquire is set to Grayscale, the page you scan will not have any color. Even if you set Keep Exact View As color, the image will still be displayed in Exact View in grayscale. Despeckle Select this check box to correct pages that do not have a clean, clear background, such as photocopies or newspapers. Text Processing Group Discard Blank Pages Select this check box to delete blank pages after you scan them. Clear this check box to retain the original page numbering and order. This item is unchecked by default, so WYNN will keep blank pages. Apply OCR Corrections Select this check box to apply OCR corrections to documents as they are scanned. The OCR Correction feature lists misidentified words and their appropriate replacements. You can add, delete, or change words in this list. This item is selected by default. Keep Text Emphasis Select this check box to keep attributes such as bold and italics during OCR. This item is selected by default. 194 Replace Uncertain Text / Uncertain Text Marker Select this check box to insert a special character, or marker, next to text that WYNN is having difficulty recognizing. Enter the special character you want to use to mark uncertain text in the Uncertain Text Marker edit box. This item is cleared by default. Preserve Line Breaks Select this check box to keep line breaks during recognition. Use this option if you are acquiring a document where retaining the line breaks where they actually appear in the original text can improve the flow when reading, such as for poetry or computer programs. This item is cleared by default. Page Layout Group Recognize Columns / Ignore Columns Recognize Columns: When selected, the OCR process analyzes the text and automatically detects columns if they are present. Each column is handled in order, from top to bottom, left to right, before handling the next column. This setting does not preserve the columnized layout in WYNN, but it does ensure that correct reading order is observed for columnized text. This is the default setting for all workflows. Ignore Columns: When selected, it causes the OCR process to disregard column boundaries that may exist. This means that each line of text is recognized from left to right, all the way across the page, potentially spanning multiple columns. This method does preserve columnized layout, but creates incorrect reading order for the reader. Split Facing Pages Select this check box to scan two side-by-side pages of a paperback book in a single scan. Each page is stored separately, with separate page numbers. This helps maintain the original page numbering. Clear this check box when scanning individual pages. 195 Table Processing Group The options in this group configure how documents containing tables, such as financial or statistical information, is processed. Tables can be organized either by row or column. Select Organize by Row to lay out the table text as rows with space between the column items. This is the default setting for all workflows. Select Organize by Column to lay out the table text as columns with space between the row items. Action When Pages are Recognized The options in this group control where the reading cursor is positioned after a new page is recognized. Select Move to New Page to move the cursor to the top of the newly recognized page. Select Remain at Current Reading Position to keep the cursor at its current position in the document even after the new page is added. Start Speaking Automatically Select this check box so that WYNN automatically begins reading from the top of the newly acquired page as soon as it is recognized and the text becomes available. If the check box is cleared, use the Read button to read the text. This item is unchecked by default for all workflows. 196 Book 22: Visual Settings To change the way text appears in your documents, choose Visual Settings from the Settings menu. Preferred View Select the view to use when you open a document. Options available are Text View, Exact View, and Split View. All documents you open in the future will open in this view. You can always use the View toolbar button to switch to a different view. 197 Font Name Choose the font you want to use to display text in your documents. Size Use the Text Size slider to make text in your document appear larger or smaller. Text can be any size between 8 points and 72 points. Text Color In the Text Color combo box, choose the color you want to use to display text in your documents. Background Color In the Background Color combo box, choose a background color for your documents. You should choose a background color that complements the text color you chose (e.g., white text on a black background, dark blue text on a sky blue background, etc.) Misspelled Word Color In the Misspelled Word Color combo box, select a color to use to display misspelled words. The default color is blue. Spotlight Group Text Color The spotlight color is used to indicate where the cursor is within the spotlight. Choose a color for this text in the Spotlight Text Color combo box. The default spotlight text color is red. 198 Background Color The spotlight moves to emphasize text that WYNN reads in your documents. Choose a color for the spotlight in the Spotlight Background Color combo box. The default spotlight background color is yellow. Movement Unit Select the amount of text spotlighted when reading a document. The cursor can spotlight by word, line, sentence, or paragraph. The default movement unit is word. Spotlight Type Select the type of spotlight cursor to use when reading documents. Block spotlighting uses the values selected for the Text Color, Background Color, and Movement Unit options. Ruler spotlighting uses the values selected for the Text Color and Background Color options. The ruler displays as a thick line under the text and a thin line above the text. The ruler spotlight is available for Text View and Split View. The default spotlight type is block. Use Solid Toolbar Colors Use solid background colors for the four rotating toolbars. Clear this check box to use a transparent background with a colored underbar. Masking Group Masking is a special tool that shades certain elements of the document in order to emphasize the current line, sentence, or paragraph. You can only use masking in Text View or Split View of a document. Note: Masking is only visible in Read-only mode, not in Write mode. Also, if you turn Masking on and then switch to Write mode, you cannot access certain WYNN commands, such as spotlighting. Be sure to turn Masking off before switching to Write mode to use these commands. You can turn Masking back on at any time. 199 Document Increment Use this option to choose how much of the current paragraph should remain unshaded when reading a document. No Masking: No Masking is applied to the document. Line: Shades all text except for the line where the cursor is currently located. Sentence: Shades all text except for the sentence where the cursor is currently located. Paragraph: Shades all text except for the paragraph where the cursor is currently located. WebMasking™ Increment Use this option to select the amount of text, by line, sentence, or paragraph that is masked when reading a Web page. The mask uses the same color selected in the Font Background Color box. No Masking: No WebMasking is applied to the Web page. Line: Applies a background shade, or mask, to the line where the cursor is currently located on the Web page. Sentence: Applies a mask to the sentence where the cursor is currently located on the Web page. Paragraph: Applies a mask to the paragraph where the cursor is currently located on the Web page. Text Color Use the Text slider to make text shaded by masking lighter or darker. This setting is only available after you select a Masking or WebMasking increment. 200 Background Color Adjust the Background slider to make the shaded area of the document lighter or darker. This setting is only available after you select a Masking or WebMasking increment. Instruction Text Colors Text Select a color to use for the instruction text in a WYNN template (WYT) document. The default color is black. Background Select a background color to use in a WYNN template (WYT) document. The default color is rose. Extra Space Between Elements Group Use the Extra Space Between area to increase the amount of space between all characters, words, lines, and sentences in your document. This allows more fine tuning than is available in the Word Space and Line Space toolbar buttons on the green toolbar. Margins Group Left and Right Enter the amount of space (in inches) you want between the left and right edges of the screen and the text of your documents. You can specify any margin size from 0.0 to 3.0 inches. This allows more fine tuning than is available in the Margins toolbar button on the green toolbar 201 Use Two Tone for Exact View Select to make the document appear in Exact View with text and background colors just as it does in Text View. Display Highlights as Bookmarks Select this box to make WYNN draw bookmark symbols to indicate highlighted text instead of using the highlight colors. Clear to see the highlight colors. 202 Book 23: Word Prediction Settings To customize the appearance and behavior of the Word Prediction feature, choose Word Prediction Settings from the Settings menu. Speaking Group The settings in the Speaking area determine how WYNN speaks the contents of the prediction box. Automatically Speak List Select this check box if you want WYNN to read the contents of the prediction box whenever the list of predicted words changes. 203 Repeat List when Finished Select this check box if you WYNN to continue reading the contents of the prediction box until you manually stop speech. Pause Before Speaking Use the Pause Before Speaking slider to adjust the amount of time (in seconds) WYNN waits before reading the contents of the prediction box. Pause Between Choices Use the Pause Between Choices slider to adjust the length of time (in seconds) WYNN pauses between reading each word choice in the prediction box. Make Predictions Using Phonetic Replacements Select this check box to use phonetic mappings to help suggest correct spellings for the word you are typing. WYNN looks at the current word and makes suggestions based on the phonetic sounds in the word. For example, if you typed the word fone, the word phone would appear in the list of word choices. Clear this check box if you do not want to use this feature. Note: You can create additional phonetic associations by using the Word Prediction teacher controls. Refer to the help topic Word Prediction Phonetics for more information. Display Group The settings in the Display area control the appearance of the prediction box. Moving Prediction Box Select this check box if you want the prediction box to follow the insertion point as you type. Clear this check box to leave the prediction box in a static location on the screen. You can click and drag the box to another location. 204 Show Prediction Accuracy Select this check box if you want WYNN to indicate the grammatical suitability of each suggested word. WYNN displays small colored shapes next to each word choice: Green circle: This word choice has a high probability of being grammatically correct in the sentence. Orange square: This word choice has an average probability of being grammatically correct in the sentence. Black triangle: This word choice has a low probability of being grammatically correct in the sentence. Text Font In the Text Font combo box, select the font you want to use to display word choices in the prediction box. Text Size In the Text Size combo box, select the size (in points) you want to use when displaying word choices in the prediction box. Text Color In the Text Color combo box, select which color you want to use to display word choices in the prediction box. Background Color In the Background Color combo box, select a color for the background of the prediction box. Choose a color that contrasts well with the text color. Text Highlight Color In the Text Highlight Color combo box, select a color for the currently highlighted word choice in the prediction box. 205 Bold Select the Bold check box if you want words in the prediction box to appear in bold text. Italic Select the Italic check box if you want words in the prediction box to appear in italic text. Display Words Alphabetically Select this check box to sort word choices alphabetically in the prediction box. Clear this check box to sort word choices by statistical frequency in English usage. Include a Space after Inserted Word Select this check box to automatically add a space after a word when you chose it from the prediction box. If you clear this check box, you must manually type a space after each word you choose from the prediction box. 206 Book 24: Other WYNN Settings Image View Settings Use these settings to configure the view for both Exact View and Camera View. Exact View Group Default Zoom Select the default zoom level used for Exact View when you open a file or acquire an image. This setting persists across WYNN sessions so when you close this document, or open another document, the same magnification level is used. The following options are available: 207 Page Width: Sets the Exact View zoom level so the width of the image is in the window. This is the default setting. Page Height: Sets the Exact View zoom level so the height of the image is in the window. Maximum Zoom Level: Zooms in for maximum magnification level. Minimum Zoom Level: Zooms out to provide the minimum magnification level. Current Zoom Level: Sets the default zoom level to match the current Exact View zoom level of the open file. Background Color Select a color to use for the background around the edges of a scanned document. For example, if you scan a single page and zoom out so you can see the area the scanner picked up outside the page boundary, that background area will use the selected Background Color. Panning Properties Panning allows you to continuously scroll the page left or right, up or down. It is useful when an image does not entirely fit in the Exact View window. To pan, press and hold WINDOWS Key and then press the UP, DOWN, LEFT, or RIGHT ARROW keys. Once panning begins, release the keys. To stop panning, press the same keystroke again. The options below allow you to adjust the panning speed. Forward Speed: Select the panning speed to use when panning to the right in Exact View. Choose a value from 1 to 20, with 1 being the fastest. To pan forward, press WINDOWS Key+RIGHT ARROW. Vertical Speed: Select the panning speed to use when panning up or down in Exact View. Choose a value from 1 to 20, with 1 being the fastest. To pan up, press WINDOWS Key+UP ARROW. To pan down, press WINDOWS Key+DOWN ARROW. Reverse Speed: Select the panning speed to use when panning to the left in Exact View. Choose a value from 1 to 20, with 1 being the fastest. To pan left, press WINDOWS Key+LEFT ARROW. 208 Camera View Group Note: The Camera View settings only apply to the view from the PEARL camera. Camera View displays a real-time view from the PEARL camera; meaning that as you move items around under the camera, such as turning pages or removing and replacing objects, the image on the screen will update accordingly. This is different from Exact View which only shows the image once it has been acquired. Default Zoom Select the default zoom level used for Camera View. This setting persists across WYNN sessions. Note that if you make a change, you must restart WYNN before the new setting takes affect. The following options are available: Page Width: Instantly zooms enough so the width of the image is in the window. This is the default setting. Page Height: Instantly zooms enough so the height of the image is in the window. Maximum Zoom Level: Zooms in for maximum magnification level. Minimum Zoom Level: Zooms out to provide the minimum magnification level. Current Zoom Level: Sets the default zoom level to match the camera's current magnification. Overlay Color To distinguish the part of the image that is to be acquired from the rest of the image, WYNN displays an overlay rectangle. An overlay emphasizes a part of an image by increasing the difference in brightness/contrast between it and the rest of the image. The overlay rectangle is always displayed and moves as you pan so the same portion of the image is always covered. If you change the page size in the PEARL properties, or change how much of the image is acquired in the Workflow Settings, the overlay will also change to reflect the new settings. To change PEARL properties, open the Advanced menu, select Device Selection, and then click Properties. 209 Transparency Use this slider to adjust the level of the overlay's transparency. Transparency ranges from 0 to 100 percent. Panning Properties Line Wrap: Select this check box to automatically wrap to the next line when you reach the right edge of the screen while panning in Camera View mode. Otherwise, panning will stop at the right edge of the screen when panning from left to right. This check box is selected by default. Point Size: This option indicates the height of one line. If Line Wrap is selected, this setting determines how far WYNN needs to wrap in order to move to the next line. The default size is 10. Line Delay (in seconds): Use this option to determine how long WYNN should pause when wrapping to the next line. The default is one second. Forward Speed: Select the panning speed to use when panning to the right in Camera View. Choose a value from 1 to 20, with 1 being the fastest. To pan forward, press WINDOWS Key+RIGHT ARROW. Vertical Speed: Select the panning speed to use when panning up or down in Camera View. Choose a value from 1 to 20, with 1 being the fastest. To pan up, press WINDOWS Key+UP ARROW. To pan down, press WINDOWS Key+DOWN ARROW. Reverse Speed: Select the panning speed to use when panning to the left in Camera View. Choose a value from 1 to 20, with 1 being the fastest. To pan left, press WINDOWS Key+LEFT ARROW. Customize Toolbar To create a new toolbar containing only certain buttons that you specify, choose Custom Toolbar from the Settings menu. You can have WYNN display this toolbar instead of the standard rotating toolbars in order to provide quick access to commonly used commands. 210 To create a custom toolbar: 1. From the Settings menu, choose Custom Toolbar. 2. In the Available Buttons list, select a button to add to the custom toolbar. 3. Click Add to place the button on the custom toolbar. Tip: To remove a button from the custom toolbar, select it in the Custom Toolbar list. Then click the Remove button. Tip: The buttons will be displayed in the order you select them, so be sure to first add the button you want on the left side of the toolbar, then add the button you want next to it to the right, and so on. 4. You can add a total of 12 buttons to the custom toolbar. 211 5. Select the Show Custom Toolbar radio button to replace the standard rotating toolbars with your custom toolbar. You can select the Show Default Toolbar radio button to restore the standard toolbars at any time. 6. Click the OK button. 7. If you want to use this custom toolbar in future WYNN sessions or alternate between custom toolbars, be sure to save your settings. Refer to the help topic “Saving, Retrieving, and Deleting Settings” for more information. You can as many toolbars as you need, but be sure to save each toolbar under a different name. Tip: 212 WYNN includes a number of sample custom toolbars designed to address particular task and environments. To retrieve these toolbars, choose Retrieve Settings from the Settings menu. Web Settings To change your home page, history preferences, hyperlink reading options, and auto-complete options, choose Web Settings from the Settings menu. Home Page Enter the complete address of the Web page that you want to use as your home page. Your home page is automatically displayed when you begin browsing the Web with WYNN. A Web address is usually written in the format http://www.myhomepage.com. Tip: The home page for WYNN's Web browser is the same as the home page set in your computer's copy of Internet Explorer. If you change your home page in WYNN, it will also change the home page in Internet Explorer outside WYNN. 213 Tip: You can click the Use Current button to designate the Web page you are currently viewing as your home page. This is also useful if you do not know the address of a Web page you want to designate as your home page. History Enter the number of days you want WYNN to retain information about Web pages you have recently visited. You can use the History button on the Web toolbar to view your history of visited pages. Tip: Click the Clear History button to delete the list of Web pages you have visited. Maximum Number of Open Web Pages In the combo box, select the maximum number of Web pages you would like open at a time. The default is Unlimited. Read Hyperlinks Use these commands to determine if WYNN reads hyperlink text aloud when you hover your mouse cursor over a Web link. When checked, Read Hyperlinks enables WYNN to speak the hyperlink text. A slight delay is typical when you are waiting for WYNN to speak after you mouse-over or tab to the hyperlink. It is best to have some delay so that WYNN will not start reading hyperlinks that you did not intend to read. You can set the reading delay that occurs by choosing Delay Before Reading Hyperlinks and selecting one of the following values: 0.5, 1, 1.5, or 2 seconds. Auto Complete By checking Auto-complete Web addresses, WYNN can automatically complete a previously visited Web address when you are retyping it into the address bar. 214 Differential Coloring To change the color of specific characters or words in your documents, choose Differential Coloring from the Settings menu. You can use differential coloring for exercises involving certain types of prefixes or suffixes or to emphasize letter combinations that may be difficult to distinguish. To display certain characters or words in a different color: 1. From the Settings menu, choose Differential Color Settings 2. In the Character String edit box, type the character(s) or word(s) you want to differentiate. 3. In the Differential Color combo box, choose the color you want to use to display the character string you entered. 4. Select the Whole Words Only check box to apply the differential coloring to the character string only when it appears by itself. Clear this check box to apply differential coloring to the character string even when it appears as part of a larger word. 5. Select the Show Differential Coloring check box to enable differential coloring. Clear this check box if you do want WYNN to apply differential coloring to text. 6. Click Add to add the character string to the Defined Combinations list. Tip: 7. You can delete a character string by selecting it in the Defined Combinations list and clicking Remove. WYNN will no longer apply differential coloring to the character string. Click the OK button. To save these settings for future use, choose Save Settings from the Settings menu. See the help topic “Saving, Retrieving, and Deleting Settings” for more information. 215 216 Appendix A: Keyboard Shortcuts This section lists keystrokes you can press to perform various functions in WYNN. In addition to these keystrokes, all standard Microsoft Windows shortcut keys are available. General Commands General Commands Shortcut Keys Start WYNN ALT+CTRL+W Quit WYNN ALT+F4 Switch between Text View and Exact View CTRL+SHIFT+V Show/Hide Menu Bar SHIFT+F3 Show/Hide Status Bar SHIFT+F5 Help F1 Speech Commands Speech Commands Shortcut Keys All speech options (text, toolbars, menus, dialog boxes, messages) ALT+G, P, ALT+A Begin/Stop Reading F2 Toolbars ALT+G, P, ALT+T Menus and Dialog boxes ALT+G, P, ALT+M 217 File Management Commands File Management Commands Shortcut Keys Open File CTRL+O Close Document CTRL+F4 or CTRL+W Create New Document CTRL+N Save Document CTRL+S Print CTRL+P View Document Properties CTRL+R Reading and Editing Commands 218 Reading and Editing Commands Shortcut Keys Begin Reading F2 Switch between Read-only Mode and Edit Mode CTRL+E Go to Page CTRL+G Undo CTRL+Z Copy Selected Text CTRL+C Cut Selected Text CTRL+X Paste Text from Clipboard CTRL+V Select All CTRL+A Delete Selected Text DELETE Bold Selected Text CTRL+B Italicize selected Text CTRL+I Reading and Editing Commands Shortcut Keys Underline Selected Text CTRL+U Find Text CTRL+F Find/Replace Text CTRL+H Insert Page Break CTRL+ENTER Delete Page Break CTRL+SHIFT+ENTER Delete Current Page CTRL+DELETE Look Up Selected Word in the Standard Dictionary F4 Look Up Selected Word in the Thesaurus SHIFT+F4 Spell Check F7 Spell Word F6 Mark-up Commands Mark-up Commands Shortcut Keys Go To (Any Markup) CTRL+G Highlight Selected Text F8 Insert Bookmark F9 Insert Text Note F10 Insert Voice Note F11 219 Acquisition Commands Acquisition Command Shortcut Keys Acquire (Scan) a Page F3 Switch between Text View and Exact View CTRL+SHIFT+V Document Clean-up SHIFT+F7 Enable Dynamic Zoning and Show Current Zones CTRL+F5 Redefine Zones on Current Page CTRL+D Re-recognize Document CTRL+Q Study Tools Commands 220 Study Tools Command Shortcut Keys Dictionary F4 Spell Current Word F6 Spell Checker F7 Highlight F8 Insert Bookmark F9 Create Text Note F10 Create Voice Note F11 PEARL Camera Commands PEARL Camera Command Shortcut Keys Acquire (Scan) and Read Page F3 Stop Automatic Acquisition ESC Cycle Among Text View, Exact View, Split View, and Camera View CTRL+SHIFT+V Increase Zoom (press and hold for continuous zoom) CTRL+PLUS or CTRL+SHIFT+MOUSE WHEEL FORWARD Decrease Zoom (press and hold for continuous zoom) CTRL+MINUS or CTRL+SHIFT+MOUSE WHEEL BACKWARD Rotate Camera View Right CTRL+SHIFT+R Rotate Camera View Left CTRL+SHIFT+L Grab Image and Move in any Direction ALT+LEFT MOUSE BUTTON (press and hold) Incremental Pan View Down WINDOWS Key+CTRL+DOWN ARROW Incremental Pan View Up WINDOWS Key+CTRL+UP ARROW Incremental Pan View Left WINDOWS Key+CTRL+LEFT ARROW Incremental Pan View Right WINDOWS Key+CTRL+RIGHT ARROW Continuous Pan View Down WINDOWS Key+DOWN ARROW Continuous Pan View Up WINDOWS Key+UP ARROW 221 222 PEARL Camera Command Shortcut Keys Continuous Pan View Left WINDOWS Key+LEFT ARROW Continuous Pan View Right WINDOWS Key+RIGHT ARROW Increase Speech Rate CTRL+ALT+PAGE UP Decrease Speech Rate CTRL+ALT+PAGE DOWN Toggle Camera LED On or Off CTRL+L Appendix B: Menu System This section lists each command available on the WYNN main menu bar. The second column lists the shortcut keys you can press to quickly activate the corresponding command. File Menu (ALT+F) File Menu Commands Access Keys New ALT+F, N Open ALT+F, O Close ALT+F, C Save ALT+F, S Save As ALT+F, A Save to Audio ALT+F, D Save Pages ALT+F, G Login Different User ALT+F, L Append File to Current Document ALT+F, F Export Highlights ALT+F, I Export Bookmarks ALT+F, B Export Text Notes ALT+F, E Print ALT+F, P Print Preview ALT+F, V Document Properties ALT+F, R Exit ALT+F, X 223 Edit Menu (ALT+E) 224 Edit Menu Commands Access Keys Edit Mode/Read-only Mode ALT+E, E Undo ALT+E, U Cut ALT+E, T Copy ALT+E, C Paste ALT+E, P Delete ALT+E, D Select All ALT+E, S Bold ALT+E, B Italic ALT+E, I Underline ALT+E, U Find Text... ALT+E, F Find/Replace Text... ALT+E, R Find Mark-up... ALT+E, M Go to Page... ALT+E, G Renumber Pages... ALT+E, A Insert Page Break ALT+E, B Delete Page Break ALT+E, K Move Page... ALT+E, M Delete Current Page ALT+E, L Create Outline ALT+E, O Outline Adjustments ALT+E, J Acquire Menu (ALT+S) Acquire Menu Commands Access Keys Workflow ALT+S, W Acquire Page ALT+S, A Acquire and Replace Current Page ALT+S, R Acquire and Insert New Page ALT+S, I Recognize Columns ALT+S, Z Split Facing Pages ALT+S, F View Menu (ALT+V) View Menu Commands Access Keys Show Exact View ALT+V, E Show Text View ALT+V, T Split View ALT+V, L Camera View ALT+V, C Hide Study Tools in Exact View ALT+V, H Menu Bar ALT+V, M Toolbar ALT+V, T Two Tone ALT+V, O File List AVT+V, F Zoom Exact View ALT+V, Z Page Scrolling ALT+V, P 225 Tools Menu (ALT+T) 226 Tools Menu Commands Access Keys Start Reading ALT+T, S Spell Check ALT+T, P Spell Check As I Type ALT+T, E Word Count... ALT+T, R Spell Word... ALT+T, W Syllabify Word... ALT+T, Y Homophones ALT+T, M Word Prediction ALT+T, O Basic Dictionary... ALT+T, B Standard Dictionary... ALT+T, D Thesaurus... ALT+T, T Start Highlight ALT+T, H Highlighter Pens ALT+T, G Lists ALT+T, L Insert Bookmark ALT+T, I Bookmark Type ALT+T, B Insert Text Note... ALT+T, N Insert Voice Note... ALT+T, V Advanced Menu (ALT+A) Advanced Menu Commands Access Keys Pronunciation Dictionary ALT+A, P Dynamic Zoning ALT+A, Z Document Cleanup ALT+A, D OCR Correction... ALT+A, O Scanner Selection... ALT+A, S Teacher Lockout ALT+A, T Word Prediction Teacher Controls... ALT+A, W Settings Menu (ALT+G) Settings Menu Commands Access Keys Save Settings... ALT+G, S Retrieve Settings... ALT+G, R Delete Settings... ALT+G, D Speech Settings... ALT+G, P Visual Settings... ALT+G, V Scanning Settings... ALT+G, C General Settings... ALT+G, G Masking... ALT+G, M Differential Coloring... ALT+G, O Word Prediction... ALT+G, I Custom Toolbar... ALT+G, T 227 Settings Menu Commands Access Keys Web Settings... ALT+G, W Web Menu (ALT+B) Web Menu Commands Access Keys Back ALT+B, B Forward ALT+B, F Stop ALT+B, T Refresh ALT+B, R Home ALT+B, H Close Web ALT+B, C Search the Web ALT+B, W Go To Web Page... ALT+B, G History... ALT+B, Y Favorites... ALT+B, A Window Menu (ALT+W) Window Commands Access Keys Next Document ALT+W, N Help Menu (ALT+H) 228 Help Menu Commands Access Keys Search for help on... ALT+H, S WYNN Help... ALT+H, H About WYNN... ALT+H, A Appendix C: WYNN Folders and Subfolders Below are the folders created during product installation. WYNN: Default location for WYNN user files [version number]: Default location for WYNN user files for a specific WYNN release Public Domain Books: Contains all public domain books, which are available to all users. It is created for WYNN 7.0 and later. Shared: This folder is shared among users on the network. It contains the subfolders Docs, Settings, and Audio. Files that are used for broadcasting are placed in these folders. [username]: An individual user’s folder that has the same label as the user’s log in ID. It contains audio files, documents, user settings, and templates. Audio: For the Shared folder, it contains MP3 and WAV files for broadcasting. For the User folder, it contains MP3 and WAV files saved by the user. Docs: For the Shared folder, it contains all sample WYNN files. For the User folder, it contains the user’s saved files. Settings: For the Shared folder, it contains default and broadcast system settings. For the User folder, it contains new system settings created and saved by the user. Templates: It contains default templates for PAL documents. WYNN 6.0 and Later Files for WYNN 6.0 and later are stored in the tree structure outlined below. The easiest way to find these folders is to click the WYNN Users Files shortcut on your desktop, which opens the 7.0 folder. To access WYNN 6.0 files, navigate up one level in Windows Explorer and then open the 6.0 folder. 229 WYNN 6.0 Public Domain Books Shared [Docs] [Settings] [username 1] [Audio] [Docs] [Settings] [username 2] [Audio] [Docs] [Settings] [etc.] 7.0 Public Domain Books Shared [Docs] [Templates] [Settings] [username 1] [Audio] [Docs] [Templates] [Settings] [username 2] [Audio] [Docs] [Templates] [Settings] [etc.] 230 WYNN 5.10 If WYNN 5.10 is also installed on your computer, then the following tree structure is shown when you click the WYNN Users Files shortcut. The WYNN 7.0 folder opens. To access files for earlier versions of WYNN, navigate up one level in Windows Explorer and then open the appropriate folder. WYNN [username 1] (5.1) [username 2] (5.1) [etc.] (5.1) 6.0 Shared [username 1] [username 2] [etc.] 7.0 Public Domain books Shared [username 1] [username 2] [etc.] 231 232 Appendix D: Network Folder System Note: The following provides quick references for network administrators. User Permissions Folder Permissions (Sharing Tab) Users Full Control, Change, and Read WYNNNet Change and Read Folder NTFS Permissions (Security Tab) Users Full Control WYNNNet Read and Execute, List Folder Contents, and Read License Read and Execute, List Folder Contents, and Read 233 Network Authorization Tools Network Authorization Tool Description Quick Start Guide The quick start guide for Freedom Scientific Network Authorization. Server Administration Launches the WLMAdmin utility that allows you to monitor the license server and perform some administrative actions. Note: Freedom Scientific products are identified by the following product keys: Code | Product 00 | JAWS 10 | MAGic 20 | OpenBook 30 | WYNN Wizard 40 | WYNN Reader 234 Service Loader Adds or removes the license server as a service called “SentinelLM” in your Windows NT System Service registry. On Windows NT systems, the license server must be running as a service in order to authorize client systems. System Administrator’s Guide Contains additional information on license management, installation, optional features, administrator commands, user options, and environment variables. Uninstall Network Setup Uninstalls Network Authorization documentation and tools and (optionally) the license server. Update WYNN Authorization Begins the activation process for your Freedom Scientific product. WYNN Folders and Subfolders Below are the folders created during product installation. WYNNNet: Default Network WYNN folder. WYNN [version number]: Default location for the WYNN Network Client setup file. USERS: Contains all user folders that are created when a user initially logs on to WYNN. During installation, this folder can be renamed and saved to a new location on the server instead of WYNNNet, the default Network folder. Note that the location where documents are stored must be shared before completing the installation. SHARED: This folder is shared among users on the network. It contains the subfolders Docs, Settings, and Audio. Files that are used for broadcasting are placed in these folders. USER: An individual user’s folder that has the same label as the user’s log in ID. DOCS: For the Shared folder, it contains all sample WYNN files. For the User folder, it contains the user’s saved files. SETTINGS: For the Shared folder, it contains default and broadcast system settings. For the User folder, it contains new system settings created and saved by the user. AUDIO: For the Shared folder, it contains MP3 and WAV files for broadcasting. For the User folder, it contains MP3 and WAV files saved by the user. Note: After installing the server components, the Net.ini file is created. It identifies the location of different user information, and is useful for IT personnel for troubleshooting. The file is located in C:\WYNNNet\Users\WYNN\[version number]. 235 Network Folder Hierarchy Below is a tree view of the WYNN folders and subfolders. C:\WYNNNet WYNN<version number> setup.exe Users WYNN <version number> Shared [Docs] [Settings] [Audio] [username1] [Docs] [Settings] [Audio] [username2] [Docs] [Settings] [Audio] [etc.] 236 Appendix E: Activation Options Software activation is an easy, one-time process that uses a 20-character Authorization code to help Freedom Scientific verify your product’s license. The Authorization code is available on the Authorization CD and WYNN’s CD package. Use the Authorization CD to copy the code to your computer. This saves the time and trouble of having to manually type the 20-character code during the Activation process. If you do not have immediate Internet access, use the procedures in this chapter to activate your product. Before You Begin: 1. Locate your 20-character Authorization number, which appears on the WYNN product packaging. 2. Install your 20-character Authorization number as previously described in Activating WYNN on page 13. 3. There are several ways to activate WYNN. Determine which method you want to use. For example: Use the Internet to connect directly to Freedom Scientific and use the automated activation process. This is the fastest method and is recommended, as described in WYNN Installation Process on page 11. Call Freedom Scientific’s Customer Support and request that an Activation License code be sent to you by e-mail or on a CD. Send a fax to Freedom Scientific’s Customer Support and request that an Activation License code be sent to you by e-mail or on a CD. Use another computer with Internet connectivity to download an Activation License code from FSActivate.com. Once it is received, it can be copied to a disk or CD and used to activate WYNN. 237 Starting the Activation Process Until you activate WYNN, the Activation dialog box appears each time you try to open the WYNN application. To start the activation process: 238 1. Select the WYNN application shortcut from the desktop. 2. From the WYNN Activation dialog box, click Activate. 3. A WYNN dialog box appears. It contains the various activation methods. If you do not have immediate Internet access to activate the WYNN application, choose one of the following activation methods: Activating by telephone, see below Activating by fax, see page 242 Activating using FSActivate.com, see page 245 Activating by Telephone There are two ways to request activation by calling Freedom Scientific directly. Call and request that an Activation code be emailed to you. Call and request that an Activation code be mailed to you. Note: Activation by mail takes several days to complete since a CD must be mailed to you. Requesting an Activation Code by Telephone To activate your product after receiving the Activation code in an email: 239 240 1. From the WYNN Activation dialog, select Telephone to receive activation by mail, and click Next. 2. Record your Locking code and the Customer Service phone number. Click Quit and exit WYNN activation. Keep your Locking code, Customer Service phone number, and Authorization number, which also on your WYNN CD package, in a safe place. You will need this information later when calling Freedom Scientific. 3. Call Customer Service (727-803-8015), request an Activation License code, and provide your Locking code and Authorization number. 4. If activating using an Activation code received by email, When the email arrives, start WYNN, select Activate, select Telephone to receive activation by mail, and click Next. Copy the 100-plus character code from the email message, and paste it into the Activation License Code edit box. Click Next. If activating using an Activation code received by mail, When the Activation License code CD arrives, insert it into the computer’s CD-ROM drive, and let the auto-run feature start the Activation program. When requested, click Activate Using Authorization CD, and follow the on-screen instructions. If necessary, enter your Locking code and Authorization number when requested. If activation is successful, a confirmation message appears. 5. Click Finished, which completes the activation. 241 If the activation fails, a detailed error message appears that recommends you verify or reenter your authorization code, or that you contact Freedom Scientific for assistance. Activating by FAX You can print, complete, and fax a request form to Freedom Scientific’s Customer Service requesting that an Activation License code be sent to you by email or postal service. Note: This method of activation takes several days to complete since a CD must be mailed to you. Requesting an Activation Code by Fax To receive the Activation code using email: 242 1. From the WYNN Activation dialog, select Telephone to receive activation by mail, and click Next. 2. Record your Locking code. Keep your Locking code and Authorization number, which appears on your WYNN product box, in a safe place. You will need this information later. 3. Click Back, select Fax, and click Next. The Activation License code request form appears. 243 4. Print and complete the form, and fax it to Customer Service (727-8038001). Make sure that you enter your Authorization number, and if requesting an Authorization number by email, a valid email address. 5. Quit the WYNN Activation dialog box. 6. If activating by email, When the Activation License code arrives by e-mail, start WYNN, select Activate, select Telephone to receive activation by mail, and click Next. Copy the 100-plus character Activation License code from the email message, and paste it into the Activation License Code edit box. Click Next. 244 If activating by mail, When the Activation License code CD arrives, insert it into the computer’s CD-ROM drive, and let the auto-run feature start the Activation program. When requested, click Activate Using Authorization CD, and follow the on-screen instructions. If necessary, enter your Locking code and Authorization number when requested. If activation is successful, a confirmation message appears. 7. Click Finished, which completes activation. If activation fails, a detailed error message appears that recommends you verify or reenter your activation license code, or that you contact Freedom Scientific for assistance. Activating using FSActivate.com Another method for obtaining an Activation License code is to download the code using another person’s computer, and then copying the code to your computer using a floppy disk or CD-ROM. Note: The other person’s computer must have Internet access. Using your computer: 245 1. From the WYNN Activation dialog, select Activation generated from www.FSActivate.com, and click Next. 2. Record your Locking code. Keep your Locking code and Authorization number, which appears on your WYNN CD package, in a safe place. You will need this information later. 246 3. Quit the WYNN Activation dialog box. Using the other person’s computer: 1. Use a trusted third party’s computer with Internet access to connect to Freedom Scientific’s product activation page (http://www.FSActivate.com). 2. Click Continue, and scroll down until the Authorization number and Locking Code edit boxes appear. 3. Enter your Authorization number and Locking code, and click Submit License Request. 4. Save the generated License code as an HTML or text file to a floppy disk or CD-ROM and transport to your computer. Using your computer: 1. At your computer, start WYNN, and select Activation generated from www.fsactivate.com to receive activation by mail. 2. Insert the floppy disk or CD-ROM into your computer, and copy the 100-plus character License code from the file. 3. Paste the entire License code into the Activate License Code edit box, and click Next. 247 If activation is successful, a confirmation message appears. 4. Click Finished, which completes activation. If activation fails, a detailed error message appears that recommends you verify or reenter your Authorization number, or that you contact Freedom Scientific for assistance. Activating using the Activation Media Image Creator Program The Activation Media Image Creator program provides an alternative method if you must activate several computers that do not have access to the internet. To activate these computers, you need: One computer that can access the Internet and download the Activation Media Image Creator program The Locking codes and the Authorization numbers of the computers that require activation Do the following to download this program: 248 1. Using your browser, enter the URL www.fsactivate.com. 2. Select the FS Product Activation Site link and then select Continue. 3. Select the Activation Media Image Creator link. 4. Read the on-screen instructions and download the Activation Media Image Creator program. Follow the on-screen instructions provided with the program. Activating the License Server through a Software Firewall Note: The following provides a general overview for reconfiguring your firewall settings. For a specific example of how to configure your firewall settings using Windows Firewall, refer to Configuring Windows Firewall on page 250. For license server information, see License Server Installation and Configuration Overview on page 21. General Overview If your firewall software prevents you from activating WYNN using the Internet, reconfigure the firewall to allow the following files to run: FSActivate.exe CAUtil.exe CAUtil.enu Once you have reconfigured your firewall, retry the activation process. The following is a complete list of all files that need to be allowed by the firewall when using WYNN: File Name Connection Type Incoming Port Outgoing Port C:\Program Files\Freedom Scientific\Activator\1.1\ CAUtil.dll TCP/IP 80 80 C:\Program Files\Freedom Scientific\Activator\1.1\ CAUtil.dll TCP/IP 20 21 C:\WYNNNet\FSAuth.exe UDP 5093 5093 249 File Name Connection Type C:\Program Files\Freedom Scientific\Activator\1.1\ FSActivate.exe Incoming Port TCP/IP Outgoing Port 80 80 If you cannot reconfigure the firewall, or if you still cannot activate the software, go to www.FSActivate.com. Follow the instructions on the Web page to retrieve an Activation License code. Finding your Locking Code To use FSActivate.com, you need your Authorization number and the license server’s Locking code. Do the following to find the Locking code: 1. From the Start button, choose All Programs, Freedom Scientific, Network, and Update WYNN Authorization. 2. Choose Start Activation. 3. If you are asked to insert your Authorization CD, specify that you want to enter the Authorization number manually. 4. Choose Activate. 5. Select the Telephone to Receive Activation by Mail option and press ENTER. The server's Locking code is shown on the page that appears. 6. After you copy the Locking code, choose Quit. Configuring Windows Firewall The following describes how to configure and open ports using Windows Firewall for use with WYNNNet. 250 Windows 7 To configure Windows Firewall, 1. From the Start button, select Control Panel. 2. In the search box, type firewall and click Windows Firewall. 3. Select Allow a Program or Feature through Windows Firewall. This is in the left pane of the Windows Firewall dialog box. 4. Click Change Settings, select the check box for Client Activator, and then click Ok. To open ports, 1. From the Start button, select Control Panel. 2. In the search box, type firewall and click Windows Firewall. 3. Select Advanced Settings. This is in the left pane of the Windows Firewall dialog box. 4. Next, select Inbound Rules. This is in the left pane of the Windows Firewall with Advanced Security dialog box. 5. Select New Rules in the right pane. 6. Follow the instructions for the New Inbound Rule Wizard. The default page is C:\Program Files\Freedom Scientific\Activator\1.1\FSActivate.exe. Windows XP 1. From the Start button, select Control Panel. 2. Select Windows Firewall, and then select the Exceptions tab. 251 3. Select the Add Port button, enter a name in the Name field (for example, UDP port 5093), enter port number 5093 in the Port field, and select the UDP radio button. Click OK. UDP port 5093 now appears in the Programs and Services list box. 4. 5. Repeat step 3 for the following ports: Port Number Connection Type 5094 UDP 5096 UDP 80 TCP 21 TCP 20 TCP From the Exceptions tab, click the Add Program button. The Add a Program dialog box appears. 6. Click the Browse button, locate, and then select the FSActivate.exe file. For example: C:\Program Files\Freedom Scientific\Activator\1.1\FSActivate.exe. FSActivate now appears in the Programs list. 7. 252 Select the OK button to close and save the Windows Firewall settings. Appendix F: Command-line Options The following explains the available, optional command-line options. These commands are not case sensitive. /? Displays the command-line options listed below. /MoreHelp Displays additional help information, if available, about the setup package such as a list of setup types. The installation process is not performed. Example: c:\package.exe /MoreHelp /ExtractSettings <Path-to-file> Outputs the contents of Settings.ini to the output file specified. The installation process is not performed. If the output file already exists, it is overwritten. If there are spaces in the path to the file, the path must be enclosed in quotes. Example: c:\package.exe /ExtractSettings "c:\FS setup\OldSettings.ini" /ReplaceSettings <Path-to-file> Specifies an initialization file for the setup package engine to use instead of the Settings.ini file stored in the resources. This flag can be used if any of the contents in Settings.ini must be overridden. If there are spaces in the path to the file, the path must be enclosed in quotes. Example: c:\package.exe /ReplaceSettings "c:\FS setup\NewSettings.ini" 253 /ReplaceLanguage <Path-to-file> Specifies a resource DLL for the setup package engine to use instead of the resource DLL file stored in the bootstrapper. This flag can be used to specify an alternate, external set of resources for the installation. If there are spaces in the path to the file, the path must be enclosed in quotes. Example: c:\package.exe /ReplaceLanguage "c:\FS setup\NewResources.dll" /Log [Path-to-file] Outputs the setup package process to a log file. Specifying a path to the log file is optional. If not specified, the log file will be created under the same folder as the setup executable and be named FS_Setup_Package.log. Example: c:\package.exe /Log The log file is created under c:\FS_Setup_Package.log. c:\package.exe /Log "c:\myFolder\mySetup.log" The log file is created under c:\myFolder\mySetup.log. /Type <name> Specifies the setup type to use instead of the default. To view a list of available setup types, use the /MoreHelp command-line option, or check the list of options later in this section titled Additional Command-line Options. Example: c:\package.exe /type Silent /Passthru <Installer1 [, Installer2, ..., InstallerN]>@<Command> This argument will append the specified command to the specified installers in a given package. 254 <Installer1 [, Installer2, ..., InstallerN]> - this portion of the argument specifies the installers which will receive the command. Each of the Installer strings should correspond to a section name in Settings.ini. <Command> - the command to append to each of the specified installer's command-line. If you wish to passthrough a command that includes the characters /, - or # you must use the following escape sequences: Sequence String #0 # #1 - #2 / Note: All occurrences of # in <Command> are interpreted as the beginning of an escape sequence. All instances of # and the character which follows the # will be replaced if a matching string can be found. If no corresponding string can be found then the # and the character following it will be removed. For example, the sequence ## in <Command> would be removed whereas #0 would be replaced with #. Example: c:\Package.exe /passthru AnInstaller,AnotherInstaller@#2l Assume that the following is the Settings.ini from the above package.exe. ---Begin Settings.ini--[default] PreInstall = AnotherInstaller|AThirdInstaller MainInstall = AnInstaller [AnInstaller] 255 Name = AI File = msiexec.exe Arguments = /i AI.msi [AnotherInstaller] Name = AnI File = AnI.exe [AThirdInstaller] Name = AtI File = AtI.exe ---End Settings.ini--The complete command-line executed for AnInstaller would be: msiexec.exe /i AI.msi /l The complete command-line executed for AnotherInstaller would be: Ani.exe /l /SkipPreReq <PreReq1,PreReq2> Specifies a comma-delimited list of prerequisites to skip during installation. Use with caution as missing prerequisites may cause the product to malfunction. Examples: /SkipPreReq FIP, FIP64 /SkipPreReq FIPSilent,FIP64Silent 256 Additional Command-line Options Available in /MoreHelp The following is additional help information about the WYNN setup package command-line options. The Passthru commands are case sensitive, but the other commands are not case sensitive. /Type <SetupTypeName> Specifies the setup type to use instead of the default. The following is a list of available setup types: Silent Silently installs a Stand-alone US English Wizard without displaying any installation dialog boxes or prompts. To change the installation directory, use /Passthru WYNNSilent@WYNNPATH=<Path-to-file>. Repair Repairs an installation of WYNN. Once the repair begins, you will not be able to cancel the operation. During the repair, progress dialogs are displayed and a clicking tone is played. At the end, you will be prompted to restart your computer. SilentRepair Silently repairs an installation of WYNN without displaying any installation dialog boxes or prompts. SilentReaderEng Silently installs a Stand-alone UK English Reader without displaying any installation dialog boxes or prompts. To change the installation directory, use /Passthru WYNNREADERENGSilent@WYNNPATH=<Path-to-file>. SilentReaderEnu Silently installs a Stand-alone US English Reader without displaying any installation dialog boxes or prompts. To change the installation directory, use /Passthru WYNNREADERENUSilent@WYNNPATH=<Path-to-file>. 257 SilentWizardEng Silently installs a Stand-alone UK English Wizard without displaying any installation dialog boxes or prompts. To change the installation directory, use /Passthru WYNNWIZARDENGSilent@WYNNPATH=<Path-to-file>. SilentReaderEngNet Silently installs a Network UK English Reader without displaying any installation dialog boxes or prompts. To change the installation directory, use /Passthru NETWYNNREADERENGSilent@WYNNPATH=<Path-to-file>. SilentReaderEnuNet Silently installs a Network US English Reader without displaying any installation dialog boxes or prompts. To change the installation directory, use /Passthru NETWYNNREADERENUSilent@WYNNPATH=<Path-to-file>. SilentWizardEnuNet Silently installs a Network US English Wizard without displaying any installation dialog boxes or prompts. To change the installation directory, use /Passthru NETWYNNWIZARDENUSilent@WYNNPATH=<Path-to-file>. SilentWizardEngNet Silently installs a Network UK English Wizard without displaying any installation dialog boxes or prompts. To change the installation directory, use /Passthru NETWYNNWIZARDENGSilent@WYNNPATH=<Path-to-file>. SilentBothEngNet Silently installs a Network UK English Reader and Wizard without displaying any installation dialog boxes or prompts. To change the installation directory, use /Passthru NETWYNNENGSilent@WYNNPATH=<Path-to-file>. SilentBothEnuNet Silently installs a Network US English Reader and Wizard without displaying any installation dialog boxes or prompts. To change the installation directory, use /Passthru NETWYNNENUSilent@WYNNPATH=<Path-to-file>. 258 /NoPublicBooks Do not install the public domain books. /SilentFIPOnly Silently installs only the Freedom Import Printer. /Serial <SerialNumber> Specifies the serial number during a silent install. 259 260 Index acquiring Back, 81 document cleanup, 130 blue buttons, 1, 39, 59 new document, 123 Bookmark, 74 new page, 124 Bookmark Order, 73 overview, 123 Bookmark Type, 73 replacing current page, 125 broadcast, 160 activate broadcast documents, 160 by fax, 242 broadcast settings, 162 by Internet, 13 browser, 63 by telephone, 239 buttons License Server, 249 Common, 1, 37 using Activation Media Image Creator, 248 File Management, 1, 39, 59 Reading Styles, 1, 39, 65 using FSActivate.com, 245 Study Tools, 1, 40, 71 activating software, 13, 237, 239, 242, 245, 248, 249 Universal, 1, 37 Activation Media Image Creator, 248 Writing Tools, 1, 40, 77 Adjust, 79 cleaning up scanned text, 130 Advanced, 43 Clean-up, 61 Authorization code, 237 Close, 60 Authorization number, 237 Color, 66 261 context-sensitive help, 7 File, 42 correct word usage, 110 File Management, 39, 40, 59, 81 correcting scanned text, 130 Find, 78 creating documents, 47 firewall, 249, 250 customer support, 9 FSActivate, 237 Cut/Paste, 77 getting help, 6 default folder, 47 Go To, 78 default user folder, 33 Go To Web, 63 definitions, 110 green buttons, 1, 39, 65 Device Selection, 123 Help, 6, 43 Dictionary, 71, 83 Highlight, 72, 83 doc, 60 Highlight Color, 73, 84 Docs folder, 47 Highlight Order, 73, 84 Document Clean-up, 130 highlighting text, 57 Document Clean-up guidelines, 132 homophones, 80, 110 Documents folder, 47 how to Dynamic Zoning, 128 activate software, 13, 237 Edit, 42 add words to pronunciation dictionary, 152 e-mail, 9 broadcast files, 160 Exact View, 38, 52, 130 broadcast settings, 162 F1 key, 6 correct scanned text, 130 262 log in, 33 Note, 74 move scanned text, 128 OCR, 1 open other documents, 45 Online Help, 6 print, 57 Open, 60 rearrange scanned text, 128 opening a PDF file, 45 save a file, 55 opening other documents, 45 HTML, 46 Other Docs, 39, 84 License code, 247 Outlines, 78 License Server, 249 Pause, 38, 69 Line Space, 65 PDF, 45, 46, 60 Lists, 83 PEARL camera, 221 Locking code, 240, 246, 250 phonetic spelling, 106 Margins, 66 pink buttons, 1, 40, 71 Mask, 67 Predict, 79 menu bar, 41 Print, 61 multi-user log in, 34, 156 printing, 57 network version, 2 pronouncing words, 152 New, 60 Pronunciation Dictionary, 152 Next, 37 proofreading, 105 NNMU, 11 Rate, 68, 106 Non-Network Multi-User, 11 Read, 38 263 Read Only, 38 Size, 65 reading speed, 105 skim reading, 51 Reading Styles, 39, 65 Sound-alike Words, 110 Readme file, 7 Speak List, 79 Re-Define, 129 Spell, 71 Re-Process, 130 Spell Check, 80 Revert, 129 spelling, 107–9 rtf, 46, 60 spotlight, 51 Save, 55, 61 starting WYNN, 33 Save As, 55, 61 status bar help, 6 scanning Status Bar Help, 6 clean-up, 130 Study Tools, 40, 71 difficult text, 127 Style, 77 guidelines, 132 switching views, 52–54, 52–54 inserting a page, 124 syllables, 106 moving text, 128 Syllables, 72 new document, 123 technical support, 9 Self-Pace, 68 Text Note, 57, 74 serial number, 9 Text View, 38, 52, 130 Settings, 43 txt, 45, 60 single-user, 2, 11, 14 User Files, 47 264 user folder, 33 Windows, 43 user interface, 6, 35 Word Space, 66 user name, 35 workflows View, 42 settings, 183 Voice Notes, 75 types, 184 Web, 43, 63 Write, 38 Web site, 9 Writing Tools, 40, 77 Web toolbar, 40, 81 WYNN Reader, 2 WebMask, 82 WYNN Wizard, 1 What's This? help, 7 yellow buttons, 1, 40, 77 265 266
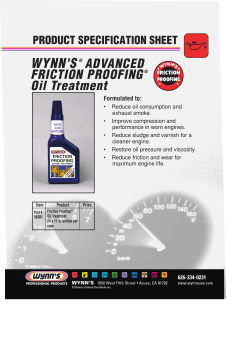


© Copyright 2026