
Part II
Magento
Enterprise Edition
User Guide
Part II:
Product Catalog
Search & SEO
Version 1.14.2
Contents
Product Catalog
1
Chapter 1: Visual Merchandiser
3
Visual Merchandiser Configuration
4
Category Options
14
Hero Products
18
Smart Category Rules
21
Rebuilding Smart Categories
Using the Merchandiser Window
27
28
Product Search
34
Download SKUs
36
Clone Category IDs
37
Mass Product Assignment
38
Chapter 2: Navigation
41
Top Navigation
42
Breadcrumb Trail
43
Layered Navigation
44
Filterable Attributes
45
Price Navigation
47
Chapter 3: Categories
51
Category Levels
52
Creating Categories
53
Updated: 4/18/2015
Modifying Categories
56
Root Categories
57
Copyright © 2015 Magento, Inc. All rights reserved.
Hidden Categories
59
General Information
60
Display Settings
62
Custom Design
64
Category Products
66
Category Permissions
67
Category Permission Setup
68
Chapter 4: Managing Attributes
71
Attribute Input Types
72
Date & Time Custom Options
Creating Attributes
73
75
Deleting Attributes
78
Creating an Attribute Set
78
Attribute Quick Reference
81
Attribute Properties
83
Attribute Frontend Properties
86
Chapter 5: Flat Catalog
89
Setting Up a Flat Catalog
90
Chapter 6: Creating Products
93
Product Types
94
Simple Product
96
Creating a Simple Product
Grouped Product
Creating a Grouped Product
Configurable Product
Creating a Configurable Product
Virtual Product
Creating a Virtual Product
Bundle Product
Creating a Bundle Product
Downloadable Product
96
99
99
102
103
108
108
111
111
116
Creating a Downloadable Product
117
Downloadable Product Options
121
Magento Enterprise Edition User Guide, Version 1.14.2
iii
Gift Card
124
Gift Card Workflow
125
Creating a Gift Card
126
Gift Card Accounts
128
Gift Card Account Settings
Chapter 7: Product Information
133
General
134
Product Meta Information
137
Recurring Profile
138
Design
144
Gift Options
145
Websites
146
Product Categories
147
Related Products
148
Up-sells
150
Cross-sells
151
Custom Options
152
Chapter 8: Inventory
155
Inventory Setup
156
Managing Stock
158
Stock Availability
162
Message Scenarios
165
Product Page
165
Catalog Page
168
Out of Stock Threshold
169
Product Alerts
iv
130
170
Setting Up Product Alerts
170
Managing Stock for Configurable Products
172
Chapter 9: Product Pricing
173
Prices
174
Special Price
176
Tier Price
177
Package Price
179
Magento Enterprise Edition User Guide, Version 1.14.2
Minimum Advertised Price
180
MAP Logic
180
MAP Setup
182
Product Group Price
185
Product Group Price Setup
186
Group Price Attribute
187
Chapter 10: Product Images
189
Thumbnail Gallery
190
Light Boxes and Sliders
191
Zoom
191
Image Size and Type
192
Adding Product Images
194
Placeholders
196
Watermarks
197
Shopping Cart Thumbnails
200
Chapter 11: Swatches
201
Swatch Workflow
202
Text-Based Swatches
202
Swatches in Layered Navigation
203
Swatch Configuration
Adding New Attribute Values
Preparing Swatch Images
Uploading Swatch Images
203
207
208
209
Setting Up Dynamic Images
212
Swatch Localization
217
English as Primary Language
217
Other Primary Languages
217
Clearing the Cache
Search & SEO
220
221
Chapter 12: Storefront Search Tools
223
Quick Search
224
Magento Enterprise Edition User Guide, Version 1.14.2
v
Advanced Search
225
Search Results
227
Popular Search Terms
230
Chapter 13: Catalog Search Configuration
233
MySQL Catalog Search
234
Solr Catalog Search
236
Search Suggestions
237
Weighted Search
238
Solr Configuration
239
Chapter 14: Managing Search Terms
245
Adding Search Terms
246
Related Search Terms
247
Search Recommendations
249
Chapter 15: SEO Best Practices
251
Meta Information
252
Sitemap
253
Catalog URLs
254
Dynamic URL
254
Static URL
254
URL Key
254
Store Code
254
HTML Suffix
255
Category Path
255
Dynamic Media URLs
255
Setting Up Catalog URLs
257
Duplicate URL Key Priority
260
Canonical Meta Tag
261
Chapter 16: URL Redirects
263
Configuring URL Rewrites
Automatic Product Redirects
265
Creating URL Redirects
266
Product Redirect
vi
264
269
Magento Enterprise Edition User Guide, Version 1.14.2
Category Redirect
271
Custom Redirect
274
Index
Magento Enterprise Edition User Guide, Version 1.14.2
277
vii
Product Catalog
In this section…
Visual Merchandiser
Navigation
Categories
Attributes
Flat Catalog
Creating Products
Product Information
Inventory
Pricing
Images
Swatches
Chapter 1:
Visual Merchandiser
Visual merchandising is a term used in retail to describe the art and science of floor
plan development and the multi-dimensional presentation of products. In your
Magento Enterprise Edition store, you might think of the category-based navigation as
the floor plan, and the multi-dimensional presentation of products as a dynamic
selection of products that changes according to conditions that you specify.
Important! Visual Merchandiser requires Magento Enterprise Edition, version 1.14.1 or
greater. If you need support for any other version of Magento, please contact On Tap.
In this chapter, you will learn how to use Visual Merchandiser to attract customers and
increase sales. Topics include:
l
Visual Merchandiser Configuration
l
Category Setup
l
Hero Products
l
Using the Merchandiser Window
l
Automatic Sorting
l
Smart Category Rules
l
Visual Merchandiser Cache
l
Product Cache
l
Clone Category IDs
l
Mass Product Assignment
Magento Enterprise Edition User Guide, Version 1.14.2
3
Visual Merchandiser Configuration
Chapter 1: Visual Merchandiser
Visual Merchandiser Configuration
The Visual Merchandiser configuration determines the layout of the merchandiser window,
the format of the products in the category, and way updates are managed when smart
category rules dynamically change the selection of products.
Process Overview:
Step 1: Define the Page Layout
Step 2: Set Visibility Options
Step 3: Complete the Smart Category Options
Step 4: Define the Sorting Order
To configure Visual Merchandiser:
1.
On the Admin menu, select System > Configuration.
2.
In the panel on the left, under Catalog, select Catalog.
3.
Click to expand the Visual Merchandising Options section. Then, follow these step to
complete the configuration.
Step 1: Define the Page Layout
4
1.
To determine which attributes appear in the product block, enter the code of each attribute
that you want to include, separated by a comma. By default, the color, name, and price
attributes appear.
2.
In the Column count field, enter the number of product blocks that appear on each row of
the merchandiser window. To make the window resemble your storefront, use the same
number of columns that are used to display the product list when viewed as a grid.
3.
If you want to include additional images from the gallery for reference, set Show extra
images to “Yes.” When the Max extra images thumbnail field appears, enter the number
of additional images you want to include from the gallery.
Magento Enterprise Edition User Guide, Version 1.14.2
Chapter 1: Visual Merchandiser
Visual Merchandiser Configuration
Attributes in Product Block
You can hover over each thumbnail to view a larger image. If you decide that one of the
thumbnails is a better choice, you must open the product in edit mode, and change the
Base Image assignment.
Thumbnail Images and Creation Date
4.
To help you decide which products to feature based on the age of each product, set Show
creation date to “Yes.”
Magento Enterprise Edition User Guide, Version 1.14.2
5
Visual Merchandiser Configuration
5.
Chapter 1: Visual Merchandiser
Do one of the following to determine how the system manages dynamic page loads:
l
l
If the category has a large number of products, set the Ajax page load threshold to the
maximum number of products that you want the system to manage before triggering
Ajax page loads. Ajax page loads prepares the next batch of product images in advance.
When the customer scrolls down the page, the images appear without delay.
To disable Ajax page loads, leave the field blank.
Step 2: Set Visibility Options
Depending upon the configuration, products that are set to “Not Visible Individually,” such
as simple products that are associated with a configurable product, and disabled products
can be either grayed out or hidden from view.
Product Visibility Settings
1.
2.
For products with a Visibility setting of “Not Visible Individually,” do one of the following:
a.
To display a grayed-out image, set Hide not visible products to “No.”
b.
To hide the products from view, set Hide not visible products to “Yes.”
For products with a Status setting of “Disabled,” do one of the following:
a.
To display a grayed-out image, set Hide disabled products to “No.”
b.
To hide the products from view, set Hide disabled products to “Yes.”
“Grayed Out” Products
6
Magento Enterprise Edition User Guide, Version 1.14.2
Chapter 1: Visual Merchandiser
3.
Visual Merchandiser Configuration
To prevent other administrators from using the Category Products tab to change category
positions, set Hide category position input fields to “Yes.” The input fields in the Position
column disappear and the position of each item is set to zero.
Category Products with Position Input Fields Removed
Step 3: Complete the Smart Category Options
1.
2.
To ensure that any smart category rules that are in place remain current, do the following:
a.
Set Rebuild on product save to “Yes.”
b.
Set Rebuild on category save to “Yes.”
To update to categories automatically on schedule, set Rebuild on cron to “Yes.”
To determine the time interval between scheduled updates, set Cron Schedule to indicate
the length of time between updates. The character positions in the cron format represent
the number of minutes, hours, days, weeks, and months between cron updates. The default
interval is set to run every two hours, starting at midnight, as follows:
0 */2 * * *
To override the cron schedule and update the categories immediately, click the Rebuild
Category Products for Smart Categories button.
Magento Enterprise Edition User Guide, Version 1.14.2
7
Visual Merchandiser Configuration
Chapter 1: Visual Merchandiser
Step 4: Define the Sorting Order
1.
2.
To determine where new products are added by smart category rules in relation to other
products in the list, set New product handling to one of the following:
l
Add to top
l
Add to bottom
Enter a number in the Minimum stock threshold field to establish a section at the top of a
sorted list that contains products with quantities that are below the threshold.
Products that are in stock, but below the threshold are sorted separately from the rest of
the list, and appear at the top of the list in ascending order. Products with the lowest
quantities in stock have the highest placement in the list.
3.
Enter a number of months from 1 – 12 in the Best seller data period field, to determine
the sort order of products based on the monthly aggregation of Bestsellers report data. The
default value is 6.
4.
Enter the name of the Color attribute code to use to sort products by color. The default
attribute name is color.
5.
On separate lines in the Color order box, enter each color value that you want to use as a
sorting parameter.
Color values are case sensitive, and the spelling must match the value that is entered in
the Manage Labels and Options section of the color attribute.
8
6.
When complete, click the Save Config button.
7.
When prompted to refresh the cache, click the Cache Management link. Then, select the
checkbox of each invalid cache, and click Submit.
Magento Enterprise Edition User Guide, Version 1.14.2
Chapter 1: Visual Merchandiser
Visual Merchandiser Configuration
Visual Merchandising Options
Magento Enterprise Edition User Guide, Version 1.14.2
9
Visual Merchandiser Configuration
Chapter 1: Visual Merchandiser
Field Descriptions
FIELD
SCOPE
DESCRIPTION
List attribute codes
Global
Determines the product attributes that appear in
each product block. Separate multiple attribute
codes with a comma. By default, each block
includes the color, name, and price.
Column count
Global
Determines the default number of columns used
to display products in the merchandiser window.
By default, the number of columns is set to 4.
To make the merchandiser window more closely
resemble your storefront, make the column count
match the layout of the product listing when
viewed in grid mode.
Show extra images
Global
Determines if additional images from the gallery of
each product appear as thumbnails for reference
when working in the merchandiser window.
Thumbnails can help you choose the image you
want to use. Hover over a thumbnail to update the
main image. Options include:
10
Yes
Displays the Max extra images
thumbnail field, with a default
value of 4. Enter the number of
extra thumbnail images you want
to show.
No
Does not include extra thumbnail
images from the gallery.
Show creation date
Global
Shows the date each product was created in the
merchandiser window to help you decide which
products to feature. Options include: Yes / No
Ajax page load threshold
Global
Enables Ajax page loads when a category
contains more products than the specified
threshold. Ajax page loads prepares the next set
of images that are needed in advance. When the
customer scrolls down the page, the images can
load without delay. Only the number of images
that are needed for the next display are made
ready. The default Ajax page load threshold is 10.
Magento Enterprise Edition User Guide, Version 1.14.2
Chapter 1: Visual Merchandiser
Visual Merchandiser Configuration
Field Descriptions (cont.)
FIELD
SCOPE
DESCRIPTION
To disable Ajax page loads, leave this field empty.
Disabling Ajax page loads causes the entire
category to be read into memory at the same time.
If a category has a large number of products, it
might slow down the system, or fail to load
properly.
Hide not-visible products
Hide disabled products
Global
Global
Hides products that have visibility set to either
“Not Visible Individually” or “Search.” Options
include:
Yes
Products that are not visible do not
appear in the merchandiser
window, but remain in the
category.
No
Products that are not visible
appear in the merchandiser
window for reference, but are
grayed out.
Hides products that are currently disabled.
Options include:
Yes
Disabled products do not appear in
the merchandiser window, but
remain in the category.
No
Disabled products appear in the
merchandiser window, but are
grayed out. The products are
assigned a sort position at the end
of the list.
Hide category position
input fields
Global
Prevents category positions from being manually
updated with Manage Categories. Options
include: Yes / No
Rebuild on product save
Global
Determines if smart category rules are rebuilt
when the product is saved. Options include:
Magento Enterprise Edition User Guide, Version 1.14.2
11
Visual Merchandiser Configuration
Chapter 1: Visual Merchandiser
Field Descriptions (cont.)
FIELD
Rebuild on category save
Rebuild on Cron
Cron Schedule
SCOPE
Global
Global
Global
DESCRIPTION
Yes
(Recommended) When product is
saved, any changes to attributes
that are required for smart
category rules are queued for
Cron.
No
Does not rebuild smart category
rules when a product is saved.
Determines if smart category rules are rebuilt
when the product is saved. Options include:
Yes
(Recommended) When category
is saved, any changes to
attributes that are required for
smart category rules are queued
for Cron.
No
Does not rebuild smart category
rules when a related category is
saved.
Determines if category updates are processed
automatically by Cron. Options include:
Yes
(Recommended) Processes
queued updates to categories
automatically.
No
Does not automatically process
queued updates to categories.
Defines the interval of time used by Cron to
schedule when category updates are processed.
The default interval is set to run every two hours,
starting at midnight, as follows:
0 */2 * * *
The character positions in the Cron format
represent the number of minutes, hours, days,
weeks, and months between cron updates.
Rebuild Category Products for Smart Categories 12
Magento Enterprise Edition User Guide, Version 1.14.2
Chapter 1: Visual Merchandiser
Visual Merchandiser Configuration
Field Descriptions (cont.)
FIELD
SCOPE
DESCRIPTION
Global
Overrides the cron schedule and rebuilds
categories.
New product handling
Global
Determines where a smart category rule adds
new products dynamically in relation to other
products in the list. Options include
Add to top / Add to bottom.
Minimum stock threshold
Global
Establishes a sorting order threshold based on a
minimum number of products in stock.
Products that are in stock, but below the threshold
are sorted separately from the rest of the list, and
appear at the top of the list in ascending order.
Products with the lowest quantities in stock have
the highest placement in the list.
Products with quantities over the threshold are
listed after the products with minimum quantities.
Best seller data period
(months)
Global
Determines the sort order of products in the
category based on the monthly aggregation of
Bestsellers report data. Default value: 6
Options range: 1 – 12
Color attribute code to use
Global
Determines the attribute that is used to sort
products by color. Default value: color
Color order
Global
Defines the sequence and priority of colors values
used to sort products by color. Color values are
case sensitive, and must match the spelling of the
corresponding attribute values. Enter each color
value on a separate line in the text box.
Any products with colors that are not included in
the Color order appear in the list after the products
that are sorted by color.
Magento Enterprise Edition User Guide, Version 1.14.2
13
Category Options
Chapter 1: Visual Merchandiser
Category Options
The position of products in the category can be specified manually by dragging and
dropping products into position in the Visual Merchandiser window, or by applying a
predefined sort order.
The Visual Merchandiser category options can be set up separately for each store view. The
options determine the selection of products, their relative position in the list, and the
attributes that are available for use with smart category rules.
Visual Merchandiser Category Setup
Process Overview:
Step 1: Set the Scope of the Configuration
Step 2: Set Up the Options
Step 3: Save, Refresh, and Verify
14
Magento Enterprise Edition User Guide, Version 1.14.2
Chapter 1: Visual Merchandiser
Category Options
Step 1: Set the Scope of the Configuration
1.
On Admin menu, select Catalog > Manage Categories.
2.
To set the scope of the configuration, set Choose Store View in the upper-left corner to the
store view where the settings apply.
3.
In the category tree on the left, select the category that you want to edit.
Step 2: Set Up the Options
1.
Click the Visual Merchandiser tab.
2.
If you want to Only include products matched by rules, select “Yes.” Otherwise, select
“No.” To learn more, see: Smart Category Rules.
3.
In the Hero Products field, enter the SKU of each product that you want to appear at the
top of the list. To learn more, see: Hero Products.
4.
Set Automatic sort to one of the following:
l
None
l
Move best sellers to top
l
Move low stock to top
l
Move out of stock to bottom
l
Special price to top
l
Special price to bottom
l
Newest products first
l
Highest margin first
l
Sort by color
Automatic sort overrides and resets any drag-and-drop positions that were set manually in
the Visual Merchandiser window.
Visual Merchandiser Options
Magento Enterprise Edition User Guide, Version 1.14.2
15
Category Options
Chapter 1: Visual Merchandiser
Step 3: Save, Refresh, and Verify
1.
When complete, click the Save Category button.
2.
When prompted to refresh the cache, click the Cache Management link. Then, select the
checkbox of each invalid cache, and click Submit.
3.
On the Admin menu, select Catalog > Categories > Manage Categories. Select the
category you were working on, and click the Visual Merchandiser tab to return to the
setup.
4.
To test the results, click the Show Visual Merchandiser button.
If the merchandiser window doesn’t appear, it might be minimized. Hover over the browser
icon in the taskbar at the bottom of the screen, and click the thumbnail to open the
merchandiser window.
Show Visual Merchandiser
5.
Verify that the product selection, hero products, sorting, and smart category logic work
correctly. If you need to make adjustments, change the settings and try again.
Field Descriptions
FIELD
16
DESCRIPTION
Only include products
matched by rules
Determines if the list includes only products that are matched by
promotional rules. Options include: Yes / No
Hero Products
Identifies “hero” products that always appear at the top of the list.
Enter the SKU of each “hero” product, separated by a comma.
Automatic sort
Determines the order that the list is automatically sorted. When a
category is set to automatically sort, any drag-and-drop positions
are reset. Options include:
Magento Enterprise Edition User Guide, Version 1.14.2
Chapter 1: Visual Merchandiser
Category Options
Field Descriptions (cont.)
FIELD
DESCRIPTION
None
No automatic sorting order is specified.
Move best sellers
to top
Products that appear in the store’s
monthy aggregation of bestsellers
appear at the top of the list.
Move low stock to
top
Products with quantities lower than the
minimum threshold appear at the top of
the list in ascending order. Products with
the lowest quantities appear first.
Move out of stock
to bottom
Products that have reached the out of
stock threshold appear at the bottom of
the list.
Special price to top Products with special prices appear at
the top of the list.
Special price to
bottom
Products with special prices appear at
the bottom of the list.
Newest products
first
Products are sorted by age, with the
newest products at the top of the list.
Highest margin
first
Products with the highest profit margins
appear at the top of the list.
Sort by color
Products are sorted by color, based on a
list of colors that you define.
Magento Enterprise Edition User Guide, Version 1.14.2
17
Hero Products
Chapter 1: Visual Merchandiser
Hero Products
Hero products are identified by SKU and appear in a special section at the top of the
merchandiser window. They can be dragged and dropped to new positions only within the
Hero Products section. Unlike other products in the category, hero products do not have
Move to Top and Move to Bottom arrows.
Hero Products in Merchandiser Window
18
Magento Enterprise Edition User Guide, Version 1.14.2
Chapter 1: Visual Merchandiser
Hero Products
To assign hero products:
1.
On the Visual Merchandiser tab under Options, use one of the following methods do obtain
the SKUs you need.
Method 1: Download the SKUs
1.
On the Visual Merchandiser tab, click the Show Visual Merchandiser button.
2.
At the top of the merchandiser window, set the Options control to “”Download SKUs.”
Then, click the Submit button.
Download SKUs
3.
When prompted to open or save the file, click Open. You now have a list of SKUs in
your spreadsheet that you can use for reference.
Downloaded SKUs
Magento Enterprise Edition User Guide, Version 1.14.2
19
Hero Products
Chapter 1: Visual Merchandiser
Method 2: Use the Products Tab
1.
Click the Products tab. The SKU column is to the right of the product name.
Category Products Tab
2.
20
Use the filter controls to find the SKUs you need. Then, return to the Virtual
Merchandiser tab.
2.
Enter the SKUs in the Hero Products field, separated by commas. The hero products
appear in the order that the SKUs are entered.
3.
When complete, click the Save Category button.
4.
Click the Visual Merchandiser tab. Then, click the Show Visual Merchandiser button to
see how they look.
Magento Enterprise Edition User Guide, Version 1.14.2
Chapter 1: Visual Merchandiser
Smart Category Rules
Smart Category Rules
Smart category rules dynamically change the product selection according to a set of
conditions. Each category can have one smart category rule, but a single rule can have
many conditions.
You can show only the products that meet the conditions of the rule, or add them to the
list of products already in the category. For example, you can create a smart category for a
specific brand. Products of the same brand are automatically added, even if they’re not
assigned to the same category. You can add as many conditions to the expression as
needed to describe the products to include.
Each condition has an attribute, value, and logical operator. Only attributes with the “Use
in Product Listing” property set to “Yes” are available for smart category rules. If you want
to use an attribute that is not included in the list, open the attribute in edit mode, and set
“Use in Product Listing” to “Yes.”
Although Date attributes are not supported, you can use the Date Created or Date Modified
attributes to define a date or range of dates. For example, to include only products that
were created during the past week, set Date Created to a value of “<7.”
Add Attribute
Magento Enterprise Edition User Guide, Version 1.14.2
21
Smart Category Rules
Chapter 1: Visual Merchandiser
To create a smart rule:
1.
From the category’s Visual Merchandiser tab, click the Add Attribute button. Then, do the
following:
a.
Select the Attribute you want to base the condition upon.
Attributes Available for Smart Category Rules
2.
b.
Enter the Value to be matched.
c.
Select the Logic that is needed to form the expression.
Repeat this process for each attribute needed to describe the condition(s) to be met. For
example, to match products that were created between 7 and 30 days ago, do the following:
a.
Set Date Created to “<30.”
b.
Set Logic to “AND.”
c.
Set Date Modified to “>7.”
Smart Category Attribute Date Range
3.
22
To limit the product selection to only those that meet the conditions of the rule, set the
Only include products matched by rules option to “Yes.”
Magento Enterprise Edition User Guide, Version 1.14.2
Chapter 1: Visual Merchandiser
Smart Category Rules
Only Include Products Matched by Rules
4.
To select a sort order that is automatically applied as the product selection changes, set
Automatic Sort to one of the following:
l
Move out of stock to bottom
l
Special price to top
l
Special price to bottom
Automatic Sort
5.
When complete, click the Save Category button.
Magento Enterprise Edition User Guide, Version 1.14.2
23
Smart Category Rules
Chapter 1: Visual Merchandiser
Field Descriptions
FIELD
Attribute
24
DESCRIPTION
Identifies the attributes upon which the logic of the smart
category is based. To include multiple attributes, click the Add
Attribute button. Options include:
Apply MAP
Applies the Minimum Advertised Price to
products in the smart category.
Clone Category
IDs
Gives you the ability to dynamically
include products from another category.
Enter the ID of the category to be cloned
into the Value field. For multiple
categories, separate each ID with a
comma.
Date Created
(days ago)
Includes products that were created
within the number of days specified.
Date Modified
(days ago)
Includes products that were updated
within the number of days specified.
Image Label
Includes products based on the Image
Label value.
Manufacturer’s
Suggested Retail
Price
Includes products that match the MSRP
value specified.
Name
Includes products that match the product
Name value specified.
Price
Includes products that match the Price
value specified.
Small Image
Includes products that match the Small
Image value specified.
URL Key
Includes products that match the URL
Key value specified.
Date Created
(days ago)
Includes products that were created
within the number of days specified.
Status
Includes products that match the Status
value specified. Available values:
Enabled / Disabled
Magento Enterprise Edition User Guide, Version 1.14.2
Chapter 1: Visual Merchandiser
Smart Category Rules
Field Descriptions (cont.)
FIELD
DESCRIPTION
Thumbnail
Includes products that match the
Thumbnail value specified.
Thumbnail Label
Includes products that match the
Thumbnail Label value specified.
URL Key
Includes products that match the URL
Key value specified.
Apply MAP
Applies the Minimum Advertised Price to
products in the smart category.
Clone Category
IDs
Gives you the ability to dynamically
include products from another category.
Enter the ID of the category to be cloned
into the Value field. For multiple
categories, separate each ID with a
comma.
Date Created
(days ago)
Includes products that were created
within the number of days specified.
Date Modified
(days ago)
Includes products that were updated
within the number of days specified.
Image Label
Includes products based on the Image
Label value.
Manufacturer’s
Suggested Retail
Price
Includes products that match the MSRP
value specified.
Name
Includes products that match the product
Name value specified.
Price
Includes products that match the Price
value specified.
Short Description
Includes products that match the Short
Description value specified.
Small Image
Includes products that match the Small
Image value specified.
Small Image Label
Includes products that match the Small
Image Label value specified.
Magento Enterprise Edition User Guide, Version 1.14.2
25
Smart Category Rules
Chapter 1: Visual Merchandiser
Field Descriptions (cont.)
FIELD
Value
DESCRIPTION
Special Price
Includes products that match the Special
Price value specified.
Status
Includes products that match the Status
value specified. Available values:
Enabled / Disabled
Thumbnail
Includes products that match the
Thumbnail value specified.
Thumbnail Label
Includes products that match the
Thumbnail Label value specified.
URL Key
Includes products that match the URL
Key value specified.
Specifies the value that the attribute that is needed to meet the
condition. Unless an operator is specified, the default “equal to”
operator is applied. Operators include:
=
Equal to
>
Greater than
<
Less than
!
Not equal to
>=
Greater than or equal to
<=
Less than or equal to
*
Wildcard that can be used to match textbased attributes with multiple values.
For example, *Blazer* matches any
product name that includes the word
Blazer.
Logic
26
Specifies the logical operator that is needed to describe multiple
conditions. Options include: AND / OR
Magento Enterprise Edition User Guide, Version 1.14.2
Chapter 1: Visual Merchandiser
Smart Category Rules
Rebuilding Smart Categories
Whenever the attribute values of a product change, the smart rules that are in effect can
alter the position of the SKU in product listings. Based on the value of the attributes, a
product might be included, or excluded from the dynamically-generated list of products
that is assigned to the category.
Because the process is subject to continual change, categories are scheduled to be rebuilt on
an ongoing basis. Changes are queued, and the categories are rebuilt according to cron
schedule. Changes can also be queued whenever a category or product is saved. When
necessary, you can override the scheduled cron job to initiate a rebuild of the category. Due
to the nature of the scheduled task, there might be a delay of about five minutes before the
update is reflected in the storefront.
The Rebuild Visual Merchandiser Categories button in Cache Management can be used at
any time to initiate a rebuild of smart category products. The same override can be initiated
from the Visual Merchandiser configuration.
Rebuild Visual Merchandiser Smart Categories
Method 1: From Cache Management
1.
On the Admin menu, select System > Cache Management.
2.
On the Cache Storage Management page, under Additional Cache Management, click the
Rebuild Smart Category Products button.
Method 2: From Visual Merchandiser Configuration
1.
On the Admin menu, select System > Configuration.
2.
Under Cron schedule, click the Rebuild Category Products for Smart Categories button.
Magento Enterprise Edition User Guide, Version 1.14.2
27
Using the Merchandiser Window
Chapter 1: Visual Merchandiser
3.
In the panel on the left, under Catalog, select Catalog. Then, click to expand the Visual
Merchandiser section.
4.
While you’re in the configuration, verify that:
5.
l
Rebuild on product save is set to “Yes.”
l
Rebuild on category save is set to “Yes.”
When complete, click the Save Config button.
Using the Merchandiser Window
The merchandiser window is where Visual Merchandiser gets its name. Its visual drag-anddrop interface makes it easy to arrange and rearrange products in any category.
Process Overview:
Step 1: Define the Scope and Product Selection
Step 2: Sort the List
Step 3: Arrange the Products
Step 4: Save Changes and Refresh
Step 1: Define the Scope and Product Selection
1.
On Admin menu, select Catalog > Manage Categories.
2.
In the category tree on the left, select the category that you want to edit.
3.
Click the Visual Merchandiser tab.
4.
Click the Show Visual Merchandiser button.
Visual Merchandiser appears in a pop-up window, and lists the products in the category
selected. You can drag the window to another position on the screen, but it cannot be
resized.
If the category was previously set to sort automatically, all product positions are reset
when the Merchandiser window opens.
5.
28
To set the scope of the configuration, set the Storefronts control at the top of the window
to the website or store view where the settings apply.
Magento Enterprise Edition User Guide, Version 1.14.2
Chapter 1: Visual Merchandiser
Using the Merchandiser Window
Set the Configuration Scope
6.
To remove a product from the category, click to select the product. Then, click the Detach
button in the lower-left corner of the product block. The product is removed from the
category, but remains in the catalog. The change does not become permanent until you
click the Save positions button.
Detach Product
Step 2: Sort the List
1.
Set the Options control at the top of the window to one of the following:
l
Move best sellers to top
l
Move low stock to top
l
Move out of stock to bottom
l
Special price to top
l
Special price to bottom
Magento Enterprise Edition User Guide, Version 1.14.2
29
Using the Merchandiser Window
l
Newest products first
l
Highest margin first
l
Sort by color
Chapter 1: Visual Merchandiser
The selected sort order overrides and resets any drag-and-drop positions that were
manually set.
2.
Resort the list as many times as needed while working in the merchandiser window.
Sort Options
Step 3: Arrange the Products
Method 1: Drag and Drop
Drag and drop cannot be used on hero products, because they have a fixed position at the
top of the list.
1.
Click the product you want to move, and hold the mouse button down. To select multiple
products, do either of the following:
l
l
To select a contiguous group of products, hold down the Shift key, and click the first
and last product in the group.
To select multiple scattered products, hold down the Ctrl key, and click each product.
The header of the selected product(s) turns blue, and the cross hairs
2.
30
cursor appears.
Drag the product(s) to the new position, and release the mouse button.
Magento Enterprise Edition User Guide, Version 1.14.2
Chapter 1: Visual Merchandiser
Using the Merchandiser Window
Drag and Drop Product into Position
Method 2: Move to Top / Bottom
1.
To move a product to the top of the list, click the Move Top arrow at the lower-right
corner of the product block.
2.
To move a product to the bottom of the list, click the Move Bottom arrow, at the lowerright corner of the product block.
Step 4: Save Changes and Refresh
1.
To save the updated product positions, click the Save Positions button.
2.
When prompted to refresh the cache, click the Cache Management link. Then, select the
checkbox of each invalid cache, and click Submit.
Magento Enterprise Edition User Guide, Version 1.14.2
31
Using the Merchandiser Window
Chapter 1: Visual Merchandiser
Product Controls
CONTROL
DESCRIPTION
Move to Top
Moves the selected product(s) to the top of the list.
Move to Bottom
Moves the selected product(s) to the bottom of the list.
Detach from
Category
Removes the product from the category. The product remains in
the catalog, but is no longer assigned to the category.
Window Controls
CONTROL
DESCRIPTION
Storefronts
Sets the scope of the merchandiser window. Select the website
where the settings to apply.
Options
The sort options provide several predefined ways to sort the list.
You can reapply a sorting order as needed after you have dragged
and dropped products into new positions. The selected sort order is
reapplied whenever the cron schedule is triggered to update smart
category rules.
Sort Options
Move best sellers
to top
Products that appear in the store’s monthy
aggregation of bestsellers are moved to the
top of the list.
Move low stock to
top
Products with quantities lower than the
minimum threshold appear at the top of the
list in ascending order. Products with the
lowest quantities appear first.
Move out of stock
to bottom
Products that have reached the out of
stock threshold are moved to the bottom of
the list.
Special price to top Products with special prices appear at the
top of the list.
32
Special price to
bottom
Products with special prices appear at the
bottom of the list.
Newest products
first
The newest products appear at the top of
the list.
Magento Enterprise Edition User Guide, Version 1.14.2
Chapter 1: Visual Merchandiser
Using the Merchandiser Window
Window Controls (cont.)
CONTROL
DESCRIPTION
Highest margin
first
Products with the highest profit margins
appear at the top of the list.
Sort by color
Products are sorted by color, based on a
list of colors that you define.
Utilities
Mass Product
Assignment
Assign multiple products to the
category, or remove multiple products
from the category.
Download SKUs
Downloads the SKUs in the category to a
CSV file.
Submit Applies the selected option to the products in the merchandiser
window.
Search Locates products in the catalog, based on name or SKU. The
search results appear in a list below the search box. Matching
products that are already in the category can be moved to the top of
the list. Products that are not in the category can be assigned to the
category.
Save Positions The Save Positions button in the upper-left corner of the
merchandiser window saves any changes made to the category
and product positions.
Magento Enterprise Edition User Guide, Version 1.14.2
33
Using the Merchandiser Window
Chapter 1: Visual Merchandiser
Product Search
The Search box in the upper-right corner of the merchandiser window can be used to find
products in the catalog, based on name or SKU. For products that are already in the
category, you can move them to the top of the merchandiser list. For products in other
categories, you can add them to the category, so they appear in the merchandiser window.
Even if a product is not yet assigned to a category, you can use Visual Merchandiser to add
the product to a category.
Visual Merchandiser Search
To search for products in the store catalog:
1.
2.
In the Search box, do one of the following:
l
Enter the Name, or partial name of the product(s) that you want to find.
l
Enter the SKU, or partial SKU of the product(s) that you want to find.
Click the Search button.
The list of search results appears below. If there are many matches, a vertical scroll bar
appears. Any product that is already in the category is marked with a green Move to Top
arrow. Products in other categories have a green Add to Category
34
button.
Magento Enterprise Edition User Guide, Version 1.14.2
Chapter 1: Visual Merchandiser
Using the Merchandiser Window
Visual Merchandiser Search Results
3.
To move a product in the category to the top of the list, click the Move to Top
arrow. The
results show immediately in the merchandiser window.
If you have a large catalog, sometimes moving a product to the top of the list can make it
easier to drag and drop it into another position.
4.
To add a product from another category, click the Add to Category
button.
The new product appears in the upper-left position of the merchandiser window.
Product Added to Category
5.
To save both category assignment and position changes, click the Save Position button.
Magento Enterprise Edition User Guide, Version 1.14.2
35
Using the Merchandiser Window
Chapter 1: Visual Merchandiser
Download SKUs
The Download SKUs utility is an easy way to generate a list of all the SKUs in the category.
To download SKUs:
1.
On the Visual Merchandiser tab, click the Show Visual Merchandiser button.
2.
At the top of the merchandiser window, set the Options control to “”Download SKUs.”
Then, click the Submit button.
Download SKUs
3.
When prompted to open or save the file, click Open. You now have a list of SKUs in
your spreadsheet that you can use.
Downloaded SKUs
36
Magento Enterprise Edition User Guide, Version 1.14.2
Chapter 1: Visual Merchandiser
Using the Merchandiser Window
Clone Category IDs
When setting up a smart category rule, you can dynamically clone products from multiple
categories, based on category ID.
Clone Category IDs
To clone a category:
1.
To determine the category IDs that you need, click the category in the category tree. The
category ID is at the top of the page, in parentheses after the category name.
2.
Return to the original category you were working on, and click the Visual Merchandiser
tab.
3.
In the Smart Category section, click the Add Attribute button. Then, do the following:
4.
Under Attribute, select “Clone category ID.”
5.
Under Value, enter the ID of the category you want to clone. To clone multiple categories,
separate each ID with a comma.
6.
You can add more conditions as needed, to complete the rule.
Magento Enterprise Edition User Guide, Version 1.14.2
37
Using the Merchandiser Window
Chapter 1: Visual Merchandiser
Mass Product Assignment
Visual Merchandiser gives you the ability to assign multiple products to the category, as
well as remove multiple products from the category. This can be a real time saver if you
work with a large number of products.
Mass Product Assignment
To assign multiple products to the category:
1.
Before you begin, prepare the list of the SKUs that you want to assign to the category.
2.
At the top of the merchandiser window, set the Options control to “Mass Product
Assignment.” Then, click the Submit button.
3.
When the box appears, enter each SKU to be assigned on a separate line. The SKUs can be
typed or pasted in to the box.
Enter SKUs to be Assigned
38
Magento Enterprise Edition User Guide, Version 1.14.2
Chapter 1: Visual Merchandiser
4.
Using the Merchandiser Window
To assign the products to the current category, click the Assign button.
The newly added products appear in upper-left of the merchandiser window.
Multiple Products Added to Category
5.
To make the category assignments permanent, click the Save positions button.
To remove multiple products from the category:
1.
At the top of the merchandiser window, set the Options control to “Mass Product
Assignment.” Then, click the Submit button.
2.
When the box appears, enter each SKU to be removed from the category on a separate line.
The SKUs can be typed or pasted in to the box.
3.
Click the Remove Products button.
The products are removed from the merchandiser window.
4.
To make the change permanent, click the Save positions button.
Magento Enterprise Edition User Guide, Version 1.14.2
39
Using the Merchandiser Window
Chapter 1: Visual Merchandiser
Notes
40
Magento Enterprise Edition User Guide, Version 1.14.2
Chapter 2:
Navigation
The term navigation refers to methods shoppers use to move from one page to another
in your store. The main menu, or top navigation of your store is primarily a list of
categories. The category structure of your catalog is the main way people find products
in your catalog. You will also find categories in the breadcrumb trail that runs across
the top of most pages, and in the layered navigation that appears on the left side of
some two- or three-column pages. These are all examples of how categories can be used
to navigate throughout your store.
For a product to be visible in your store, it must be assigned to at least one category.
Each category can have a dedicated landing page with an image, static block, a
description, and list of products. You can also create special designs for category pages
that become active for a specific period of time such as for a holiday season or
promotion.
Categories in Main Menu
Magento Enterprise Edition User Guide, Version 1.14.2
41
Top Navigation
Chapter 2: Navigation
Top Navigation
The main menu of your store displays the selection of categories that are available in your
catalog. You can think of the top navigation as different departments in your store. A toplevel category serves as a landing page for all the subcategories below. The position and
presentation of the top navigation might vary by theme, but the way it works is the same.
Main Menu
The first level of categories below the root typically appear as options in the main menu.
Below that, you can have as many additional subcategories as needed. The category
structure of your catalog can influence how well your site is indexed by search engines. The
deeper a category, the less likely it is to be thoroughly indexed. As a general rule, anywhere
between one and three levels is considered to be the best. You can set the maximum
number of levels that are available in your top navigation in the system configuration.
42
Magento Enterprise Edition User Guide, Version 1.14.2
Chapter 2: Navigation
Breadcrumb Trail
Breadcrumb Trail
A breadcrumb trail is a set of links that shows where you are in relation to other pages in
the store. You can click any link in the breadcrumb trail to return to a previous page. Here’s
an example of a breadcrumb trail from the Magento Demo Store:
HOME / ACCESSORIES / JEWELRY / PEARL STUD EARRINGS
The breadcrumb trail can be configured to appear on CMS content pages, as well as catalog
pages. The format and position of the breadcrumb trail varies by theme, but it is usually
located in the upper-left, just below the header.
Breadcrumb Trail
To add breadcrumbs to CMS pages:
1.
On the Admin menu, select System > Configuration.
2.
In the Configuration panel on the left, under General, select Web. Then, do the following:
3.
a.
Click to expand the Default Pages section.
b.
Set Show Breadcrumbs for CMS Pages to “Yes.”
When complete, click the Save Config button.
Show Breadcrumbs for CMS Pages
Magento Enterprise Edition User Guide, Version 1.14.2
43
Layered Navigation
Chapter 2: Navigation
Layered Navigation
Layered navigation makes it easy to find products based on category, price range, or any
other available attribute. Layered navigation usually appears in the left column of search
results and category pages and sometimes on the home page. The standard layered
navigation includes a “Shop By” list of categories and price range. You can configure the
way layered navigation appears in your store, including the product count and price range.
Layered Navigation by Category and Price
To set up layered navigation:
1.
On the Admin menu, select System Configuration.
2.
In the Configuration panel on the left, under Catalog, select Catalog.
3.
Click to expand the Layered Navigation section. Then, do the following:
Configure Layered Navigation
44
Magento Enterprise Edition User Guide, Version 1.14.2
Chapter 2: Navigation
Layered Navigation
a.
To display the results after each attribute, set Display Product Count to “Yes.”
b.
Set Price Navigation Step Calculation to one of the following:
c.
l
Automatic
l
Manual
For a manual calculation, enter a number in the Default Price Navigation Step field to
determine how the price ranges are grouped. For example, if you enter 100, the prices
appear in groups of 100.
Manual Price Navigation Step
4.
When complete, click the Save Config button.
Filterable Attributes
Layered navigation can be used to search for products by category or by attribute. For
example, when a shopper chooses the Apparel/Shoes category from the top navigation, the
initial results include all products in the shoes category. The list can be filtered further by
choosing a specific color or size, or by specifying values for both color and size. For an
attribute to be included in layered navigation, its property settings must be set to make it
filterable.
Anchor categories can be set to appear in an additional section that filters the list by
attribute value. The attribute section appears only if a category is set to “Is Anchor.” Each
attribute can be configured to display the number of matching records found.
The attribute properties, combined with the product properties, determine which attributes
can be used as filters for layered navigation. Only those with the catalog input type of
Dropdown, Multiple Select or Price can be used as filterable attributes.
Magento Enterprise Edition User Guide, Version 1.14.2
45
Layered Navigation
Chapter 2: Navigation
Filterable Attributes In Layered Navigation
Step 1: Set the Attribute Properties
1.
On the Admin menu, select Catalog > Attributes > Manage Attributes.
2.
Click to open the attribute in edit mode, and do the following:
a.
b.
Scroll down to the Frontend Properties section, and set Use In Layered Navigation to
one of the following:
l
Filterable (with results)
l
Filterable (no results)
Set Use In Search Results Layered Navigation to “Yes.”
Step 2: Make the Category an Anchor
1.
On the Admin menu, select Catalog > Manage Categories.
2.
In the Categories panel on the left, click to open the category.
3.
On the Display Settings tab, set Is Anchor to “Yes.”
4.
Click the Save Category button.
To test the setting, go to your store and select the category in the top navigation. The
selection of filterable attributes for the products in the category appears in the layered
navigation.
46
Magento Enterprise Edition User Guide, Version 1.14.2
Chapter 2: Navigation
Layered Navigation
Price Navigation
Price navigation can be used to distribute products by price range in layered navigation.
You can also split each range in intervals. There are several ways to calculate price
navigation:
l
Automatic (Equalize Price Ranges)
l
Automatic (Equalize Product Counts)
l
Manual
With the first two methods, the navigation steps are calculated automatically. The manual
method lets you specify a division limit for price intervals. The following example shows
the difference between price navigation steps of 10 and 100.
Iterative splitting is a technique that provides the best distribution of products among price
ranges. With iterative splitting, after a customer chooses to view the $0.00-$99 range, the
customer can drill-down through several sub-ranges of prices. Price-range splitting stops
when the number of products reaches the threshold set by the Interval Division Limit.
Example: Price Navigation Steps of 10 and 100
PRICE STEP BY 10
PRICE STEP BY 100
$20.00 - $29.99 (1)
$0.00 - $99.99 (4)
$30.00 - $39.99 (2)
$100 - $199.99 (5)
$70.00 - $79.99 (1)
$400.00 - $499.99 (2)
$100.00 - $109.99 (1)
$700.00 and above (1)
$120.00 - $129.99 (2)
$150.00 - $159.99 (1)
$180.00 - $189.99 (1)
$420.00 - $429.99 (1)
$440.00 - $449.99 (1)
$710.00 and above (1)
Magento Enterprise Edition User Guide, Version 1.14.2
47
Layered Navigation
Chapter 2: Navigation
To configure price layered navigation:
1.
On the Admin menu, select System > Configuration. Then in the panel on the left, under
Catalog, select Catalog.
2.
In the upper-left corner, set Current Configuration Scope to the store view to be
configured.
3.
Click to expand the Layered Navigation section.
4.
If you want to display the number of products in parentheses after each filtered item, set
Display Product Count to “Yes.”
5.
Set Price Navigation Steps Calculation to one of the following methods:
Method 1: Automatic (Equalize Price Ranges)
Set Price Navigation Steps Calculation to “Automatic (Equalize Price Ranges.)” This
setting uses the existing price layered navigation algorithm, and is similar to the
Automatic option in earlier versions of Magento.
Layered Navigation
Method 2: Automatic (Equalize Product Counts)
1.
Set Price Navigation Steps Calculation to “Automatic (Equalize Price Ranges).”
2.
Set Display Price Interval as One Price to “Yes” if you want to display a single price
when multiple products with the same price.
3.
In the Interval Division Limit field, enter the threshold for a number of products
within a price range. The range cannot be further split beyond this limit. The default
value is 9.
Automatic (Equalize Product Counts)
48
Magento Enterprise Edition User Guide, Version 1.14.2
Chapter 2: Navigation
Layered Navigation
Method 3: Manual
1.
Set Price Navigation Steps Calculation to “Manual.”
2.
Enter a value to determine the Default Price Navigation Step.
3.
Enter the Maximum Number of Price Intervals allowed, up to 100.
Manual
6.
When complete, click the Save Config button.
Field Descriptions
FIELD
SCOPE
DESCRIPTION
Display Product Count
Store View
Determines if the product count appears after
each attribute, price range, and category. Options
include: Yes / No
Price Navigation Step
Calculation
Store View
Indicates the method used to determine the price
navigation step. Options include:
Automatic
(equalize price
ranges)
Bases the calculation on
the price range of
products in the group.
Automatic
(equalize product
counts)
Bases the calculation on
the number of products in
the group.
Establishes a threshold
for the minimum number
of products in the group,
to prevent them from
being divided into smaller
groups.
Manual
Magento Enterprise Edition User Guide, Version 1.14.2
Uses the division limit
that you enter for price
intervals.
49
Layered Navigation
Chapter 2: Navigation
Field Descriptions (cont.)
FIELD
Default Price Navigation
Step
SCOPE
Store View
Maximum Number of Price Store View
Intervals
50
DESCRIPTION
Determines the number of products that are
included in each step.
Establishes a limit for the number of price
intervals that appear in layered navigation.
Magento Enterprise Edition User Guide, Version 1.14.2
Chapter 3:
Categories
Every product in your catalog must be assigned to at least one category. Before you add
products to your catalog, you must first establish the basic category structure of your
catalog. The number of subcategory levels that you can have in the top navigation is set
in the system configuration.
Categories in Main Menu
Magento Enterprise Edition User Guide, Version 1.14.2
51
Category Levels
Chapter 3: Categories
Category Levels
The number of subcategory levels that you can have in the top navigation is set in the
system configuration. By default, there is no limit to the number of levels of subcategories
you can set up. In the following image, the Home & Decor category has a depth of two
levels.
Subcategory Levels
To set the depth of the top navigation:
1.
On the Admin menu, select System > Configuration.
2.
In the panel on the left, under Catalog, select Catalog.
3.
Click to expand the Category Top Navigation section.
4.
To place a limit on the number of subcategories that can be used in the top navigation,
enter the number in the Maximal Depth field.
The default Maximal Depth value is 0, which does not limit the number of subcategory
levels you can have.
5.
When complete, click the Save Config button.
Category Top Navigation
52
Magento Enterprise Edition User Guide, Version 1.14.2
Chapter 3: Categories
Creating Categories
Creating Categories
When working in the Admin, the category structure is like an upside-down tree, with the
root at the top. Each section of the tree can be expanded and collapsed. Any disabled or
hidden categories are grayed out.
Category Structure
Step 1: Create a Category
1.
On the Admin menu, select Catalog > Manage Categories.
2.
Before you begin, set Choose Store View to the store or view. By default, the scope of the
category configuration is set to “All Store Views.”
3.
In the category tree, click the category that is to be the parent of the new category. The
parent is the level just above the new category.
If you’re starting from the beginning without any data, there might be only two categories
in the list: “Default Category,” which is the root, and an “Example Category.”
4.
Click the Add Subcategory button.
Magento Enterprise Edition User Guide, Version 1.14.2
53
Creating Categories
Chapter 3: Categories
Category Tree
Step 2: Complete the General Information
1.
54
In the General Information section, do the following:
a.
(Required) Type the Name of the category.
b.
(Required) To enable the category, set Is Active to “Yes.”
c.
You can enter a URL Key for the category, or let the system automatically create one
that is based on the category name.
2.
If supported by your theme, you can display a Thumbnail image in the main menu for
each category. Click the Choose File button and select the image to upload.
3.
In the Description box, enter a paragraph or two of descriptive text for the category
landing page.
4.
To display an Image at the top of the category landing page, click the Choose File button
and select the image to upload.
5.
Complete the category meta data:
l
Page Title
l
Meta Keywords
l
Meta Description
6.
(Required) To include the category in the main menu, set Include in Navigation Menu to
“Yes.”
7.
Click the Save Category button. Then, take note of the following:
Magento Enterprise Edition User Guide, Version 1.14.2
Chapter 3: Categories
l
l
l
Creating Categories
The new category now appears in the tree. If it’s not in the correct position, you can
drag it to another location in the tree.
In addition to the category name, it has an ID number shown in parentheses, just after
the name at the top of the page.
A URL Key that is based on the category name has been generated for the category.
Category URL Key
Step 3: Complete the Display Settings
You can configure the category landing page to display both a static block and product list,
or one or the other. A static block can provide additional information, including text,
images, and even embedded video.
Display Settings
1.
On the Display Settings tab, do the following:
a.
Set Display Mode to one of the following:
l
Products Only
l
Static Block Only
l
Static Block and Products
b.
If applicable, set CMS Block to the static block that you want to appear on the
category page.
c.
If you want this category page to display the “Filter by Attribute” section of layered
navigation, set Is Anchor to “Yes.”
Magento Enterprise Edition User Guide, Version 1.14.2
55
Creating Categories
d.
2.
Chapter 3: Categories
Clear the checkbox under Default Product Listing Sort By. Then select one of the
available values to sort the list. By default, all available attributes are listed. The
default values typically include:
l
Best Value
l
Name
l
Price
When complete, click the Save Category button.
Modifying Categories
After a category is established, it can be edited, moved to another position in the category
tree, or deleted from the catalog. However, if your catalog is live, you should consider how
the change might impact any existing links to products in the category. For example, if
your product URLs include the category path, and the category name is changed, any
existing links to products in the category will be broken. To avoid this problem, you can
configure your catalog to automatically create a permanent redirect if the URL key changes.
You can also use the URL Redirect tool to redirect traffic from an old URL to a new one.
To move a category:
1.
On the Admin menu, select Catalog > Manage Categories.
2.
To move a category, simply drag-and-drop it to a new location. Category order changes are
saved automatically.
To delete a category:
1.
On the Admin menu, select Catalog > Manage Categories.
2.
Click to select the category you want to delete.
A deleted category cannot be restored, so make sure that you have selected the correct
category before proceeding.
3.
56
Click the Delete Category button to save your changes.
Magento Enterprise Edition User Guide, Version 1.14.2
Chapter 3: Categories
Creating Categories
Root Categories
The catalog structure is like an upside-down tree, with the root on top. All categories in
your catalog are nested below the root. Because the root category is the highest level of the
catalog, your store can have only one root category active at a time. You can, however,
create additional root categories for alternate catalog structures, different stores, and views.
The root category is not visible to customers in the store, and does not have a URL key.
Root Categories
Step 1: Create a New Root Category
1.
On the Admin menu, select Catalog > Manage Categories.
2.
In the upper-left of the Manage Categories page, click the Add Root Category button.
Then, do the following:
a.
Enter a Name for the root category.
b.
Set Is Active to “Yes.”
c.
Click the Choose File to upload a Thumbnail Image for the root category.
d.
Enter a Description of the root category.
e.
Click the Choose File button to upload an Image to the root category.
f.
Complete the following meta data:
Magento Enterprise Edition User Guide, Version 1.14.2
57
Creating Categories
g.
Chapter 3: Categories
l
Page Title
l
Meta Keywords
l
Meta Description
If you want this root category to be in the main menu, set Include in Navigation
Menu to “Yes.”
3.
Click the Display Settings tab. Then, set Is Anchor to “Yes.”
4.
When complete, click the Save Category button.
Step 2: Add Subcategories to the New Root
1.
From the Categories page, click the General tab.
2.
In the category tree on the left, click to select the new root category you created in the last
step.
3.
Click the Add Subcategory button.
4.
Give the subcategory a Name, and set Is Active to “Yes.”
5.
Click the Save Category button.
6.
Repeat this process to create as many subcategories as you need.
Step 3: Apply the New Root Category to Your Store
58
1.
On the Admin menu, select System > Manage Stores.
2.
On the Manage Stores page, under Store Name, click the Main Store link.
3.
Change Root Category to the new root category.
4.
Click the Save Store button.
Magento Enterprise Edition User Guide, Version 1.14.2
Chapter 3: Categories
Creating Categories
Hidden Categories
There are many ways to use hidden categories. You might want to create additional
category levels for your own internal purposes, but show only the higher-level categories to
your customers. Or, you might want to link to a category that is not included in the
navigation menu.
To create hidden categories:
1.
On the Admin menu, select Catalog > Manage Categories.
2.
In the Categories panel on the left, select the category you want to exclude from the
navigation.
3.
On the General Information tab, do the following:
a.
Set Is Active to “No.”
b.
Set Include in Navigation Menu to “No.”
4.
On the Display Settings tab, set Is Anchor to “No.”
5.
Although the category is hidden, you can still create additional subcategories beneath it,
and make them active. Complete the following settings for each hidden subcategory:
a.
On the General Information tab, set Is Active to “Yes.”
b.
On the Display Settings tab, set Is Anchor to “Yes.”
As active categories, you can now link to them from other places in your store, but they will
not appear in the navigation menu.
6.
When complete, click the Save Category button.
Magento Enterprise Edition User Guide, Version 1.14.2
59
General Information
Chapter 3: Categories
General Information
On the General Information tab, complete the basic information about the category you are
creating or editing. You can enter keywords to improve the way the category is indexed by
search engines, create a URL key for the category, and activate or deactivate the category.
General Information
60
Magento Enterprise Edition User Guide, Version 1.14.2
Chapter 3: Categories
General Information
Field Descriptions
FIELD
SCOPE
DESCRIPTION
Name
Store View
(Required) The category name appears in the
navigation, and also in the URL key of the
category page and associated product pages.
Is Active
Store View
(Required) To make this category available,
select “Yes.” Options include: Yes / No
URL Key
Store View
The URL Key is a relative path to the category,
and is automatically generated when the category
is saved. The URL Key must be all lower-case
characters, with no spaces. As a best practice,
each word is separated by a hyphen. If you edit
the default URL key, a custom redirect is created
automatically. A root category does not have a
URL key.
Thumbnail Image
Store View
If supported by your theme, a thumbnail image
can be associated with each category and appear
as part of the option in the main menu of the store.
Description
Store View
The category description, if used, appears below
the category image- and before the product list.
Image
Store View
The category image, if used, appears at the top of
the category page, before the description and
product list.
As an alternative, you can display a CMS static
block in place of the description and image. (See
Category Display Settings.)
Page Title
Store View
The category page title appears in the browser tab
and title bar. As a best practice, the title should be
not more than twelve words in length, and should
include a combination of primary and secondary
keywords.
Meta Keywords
Store View
Keywords are used by some search engines. You
can use a keyword search tool to identify highvalue keywords that relate to your category. A
general rule is to use no more than thirty
keywords, or 180 characters. Avoid repeats, and
empty words such as “a,” “an,” “or” and “that.”
Magento Enterprise Edition User Guide, Version 1.14.2
61
Display Settings
Chapter 3: Categories
Field Descriptions (cont.)
FIELD
SCOPE
DESCRIPTION
Meta Description
Store View
Enter a description of the category, using
approximately twenty-five words or 150
characters.
Include in Navigation
Menu
Store View
(Required) Determines if the category is included
in the main menu. Options include:
Yes
To include this category in the top
navigation, select “Yes.”
No
Hides the category, although still
active. Hidden categories appear
in layered navigation, but not the
main menu.
Display Settings
The Display Settings determine which content elements appear on a category page and the
order that products are listed. You can enable CMS blocks, set the anchor status of the
category, and manage sorting options from this page.
Display Settings
62
Magento Enterprise Edition User Guide, Version 1.14.2
Chapter 3: Categories
Display Settings
Field Descriptions
FIELD
Display Mode
SCOPE
Store View
DESCRIPTION
Determines the content elements displayed on
the category page. Options include:
Products Only
Static Block Only
Static Block and Products
CMS Block
Store View
To display a CMS static block at the top of the
category page, select the name of the block from
the list.
Is Anchor
Global
When set to “Yes,” includes the “filter by attribute”
section in the layered navigation. Options
include: Yes / No
Available Product Listing
Sort By
Store View
(Required) The default values are Value, Name,
and Price. To customize the sorting option, clear
the Use All Available Attributes checkbox and
select the attributes you want to use. You can
define and add attributes as needed.
Default Product Listing
Sort By
Store View
(Required) To define the default “Sort By” option,
clear the “Use Config Settings” checkbox and
select an attribute.
Layered Navigation Price
Step
Store View
By default, Magento displays the price range in
increments of 10, 100, and 1000, depending on
the products in the list. To change the Price Step
range, clear the “Use Config Settings” checkbox.
Magento Enterprise Edition User Guide, Version 1.14.2
63
Custom Design
Chapter 3: Categories
Custom Design
The Custom Design tab gives you control over the look and feel of a category and all
assigned product pages, including the content blocks and page layout. You can customize a
category page its assigned products for a promotion or to differentiate the category from
others and increase sales. For example, you might develop distinctive design for a brand or
special line of products.
Custom Design
To create a custom category design:
1.
If the parent category of the selected category has already been customized and you want to
use same settings, set Use Parent Category Settings to “Yes.”
2.
To apply the custom design to all the products assigned to the category, set Apply to
Products to “Yes.” Otherwise, the customization applies to only the category page.
3.
To apply a different theme to the category, select the theme you want to use from the
Custom Theme list.
4.
To apply the category design to a specific range of time, click the calendar to select both the
Active From and Active To dates. Otherwise, the design will take effect when you save the
changes to the category.
5.
Click the Save Category button to save your changes.
Field Descriptions
FIELD
Use Parent Category
Settings
64
SCOPE
Store View
DESCRIPTION
To inherit the design settings from the parent
category set this option to “Yes.” Options
include: Yes / No
Magento Enterprise Edition User Guide, Version 1.14.2
Chapter 3: Categories
Custom Design
Field Descriptions (cont.)
FIELD
SCOPE
DESCRIPTION
Apply to Products
Store View
To apply the custom settings to all products in the
category, set to “Yes.” Options include: Yes / No
Custom Theme
Store View
Select the custom theme you want to apply from
the list of available themes.
Active From
Store View
If applying a custom theme for a period of time,
enter the beginning date, or select the date from
the calendar.
Active To
Store View
If applying a custom theme for a period of time,
enter the ending date, or select the date from the
calendar.
Page Layout
Store View
To apply a different layout to the category page,
select one of the following:
Custom Layout Update
Store View
Magento Enterprise Edition User Guide, Version 1.14.2
No layout updates
This option is preselected
by default and does not
apply layout changes to
the category page.
Empty
This option lets you
define your own page
layout.(Requires an
understanding of XML.)
1 column
Applies a one-column
layout to the category
page.
2 columns with left
bar
Applies a two-column
layout with a left sidebar
to the category page.
2 columns with
right bar
Applies a two-column
layout with a right sidebar
to the category page.
3 columns
Applies a three-column
layout to the category
page.
You can further customize the theme by making
layout updates in XML code.
65
Category Products
Chapter 3: Categories
Category Products
The Category Products tab lists the products that are currently assigned to the category.
From the list, you can easily add and remove products from the category.
Category Products
To assign products to a category:
1.
From the category record, click the Category Products tab. Then, do the following:
a.
Use the filters and checkbox control to find the products you want to assign:
l
l
l
66
To display all products assigned to the category, set the checkbox control to “Yes.”
To display all products not assigned to the category, set the checkbox control to
“No.”
To display all products, set the checkbox control to “Any.”
b.
Press the Search button.
c.
To list all products again, click the Reset Filter button.
2.
Select the checkbox of each product you want to assign to the category.
3.
When complete, click the Save Category button.
Magento Enterprise Edition User Guide, Version 1.14.2
Chapter 3: Categories
Category Permissions
Category Permissions
Category permissions allow you to control access by customer group. After completing the
general category permission settings, you can fine-tune the permissions for each category.
To define category permissions:
1.
On the Admin menu, select Catalog > Categories > Manage Categories.
2.
In the category tree, click to select the category.
3.
Click the Category Permissions tab. Then, click the New Permission button and do the
following:
Add New Permission
a.
Select the Website where the permission applies.
b.
Select the Customer Group to which the permission applies.
c.
Under Browsing Category, choose one of the following options:
d.
e.
Allow
Allows products in the category to be browsed.
Deny
Does not permit the category to be browsed.
Use Parent
Applies the parent category permissions.
Under Display Product Prices, choose one of the following options:
Allow
Displays category prices.
Deny
Does not display category prices.
Use Parent
Applies the parent category permissions.
Under Add to Cart, choose one of the following options:
Allow
Allows products in the category to be placed in the shopping cart.
Deny
Does not allow products from the category in the shopping cart.
Use Parent
Applies the parent category permissions.
4.
To add more permissions, click the New Permission button and repeat the process.
5.
When complete, click the Save Category button.
Magento Enterprise Edition User Guide, Version 1.14.2
67
Category Permissions
Chapter 3: Categories
Category Permission Setup
Category permissions can be used to control access to the category based on customer
group. Before assigning permissions to a specific category, you must configure category
permissions for your store.
To set up category permissions:
1.
On the Admin menu, select System > Configuration.
2.
In the panel on the left, under Catalog, select Catalog. Click to expand the Category
Permissions section, and do the following:
Configuring Category Permissions
3.
To activate category permissions, set Enable to “Yes.” By default, this will apply the
restrictions to all categories.
4.
Set Allow Browsing Category to one of the following:
l
l
l
5.
l
l
68
To grant permission to only members of specific customer groups, select “Yes for
Specified Groups.” Then, select each group that has permission to browse the category.
To deny access to the category and redirect to another page, select “No, Redirect to
Landing Page.” When prompted, select the page that you want visitors to see instead of
the category page.
Set Display Product Prices to one of the following:
l
6.
To grant everyone permission to browse the category, select “Yes, for Everyone.”
To grant everyone permission to see product prices, select “Yes, for everyone.”
To grant permission to only members of specific customer groups, select “Yes for
Specified Groups.” Then, select each group that has permission to view product prices.
To turn off the display of product prices for the category, select “No.”
Set Allow Adding to Cart to one of the following:
Magento Enterprise Edition User Guide, Version 1.14.2
Chapter 3: Categories
l
l
l
Category Permissions
To grant everyone permission to add products from the category to their shopping carts,
select “Yes, for everyone.”
To grant permission to only members of specific customer groups to add products from
the category to their shopping carts, select “Yes for Specified Groups.” Then, select each
group that has permission to purchase the products.
To prevent everyone from adding products in the category to their shopping carts, select
“No.”
7.
To prevent members of specific customer groups from searching the catalog, select each
group in the Disallow Catalog Search list.
8.
When complete, click the Save Config button.
Field Descriptions
FIELD
SCOPE
DESCRIPTION
Enable
Global
Activates category restrictions. By default, using
this feature restricts all categories. Options
include: Yes / No
Allow Browsing Category
Website
Options include:
Display Product Prices
Website
Magento Enterprise Edition User Guide, Version 1.14.2
Yes, for Everyone
Allows all visitors and
customers to the browse
the category.
Yes, for Specified
Customer Groups
Allows only members of
selected customer groups
to browse the category.
No, Redirect to
Landing Page
Denies access to the
category and redirects to
the selected page.
Controls the display of product prices for the
category. Options include:
Yes, for Everyone
Allows everyone to see
the price of products in
the category.
Yes, for Specified
Customer Groups
Allows only members of
selected customer groups
to see the price of
products in the category.
69
Category Permissions
Chapter 3: Categories
Field Descriptions (cont.)
FIELD
SCOPE
DESCRIPTION
No
Allow Adding to Cart
Disallow Catalog Search
by
70
Website
Website
Turns off the display of
product prices for the
category.
Determines who can purchase products from the
category. Options include:
Yes, for Everyone
Allows everyone to place
products from the
category into their
shopping carts.
Yes, for Specified
Customer Groups
Allows only members of
selected customer groups
to place products from the
category into their
shopping carts.
No
Does not allow anyone to
place products from the
category into their
shopping carts.
Identifies the customer groups that are not
allowed to search for products in the category.
Magento Enterprise Edition User Guide, Version 1.14.2
Chapter 4:
Managing Attributes
Attributes are the building blocks of your product catalog, and describe specific
characteristics of a product. Here are a few ways you can use attributes to enhance the
shopping experience:
l
Input controls for product options
l
Provide additional information on product pages
l
Search parameters
l
In product comparison reports
l
As layered navigation “Shop By” parameters
l
In catalog and shopping cart price rules
Each attribute contains a value that describes a characteristic of a product, such as
“color” or “fabric.” The “color” attribute with the “dropdown” input type might contain
many values, although only a few apply to any given product. Because a single
attribute can be used with multiple products, your store needs to have only one
attribute for color.
You can create as many attributes as you need, and assign the most common value as
the default, to make it easy for your customers to select the option.
The attributes that make up a product are combined into an attribute set, which is
used as template to create new products. The attribute set determines which fields are
included in a product, and how they are grouped in the Product Information panel.
Magento has a default attribute set with a standard selection of product attributes such
as Name, Price, Description, and so on. If you want to keep it simple, you can use the
default attribute set for your entire catalog.
Magento Enterprise Edition User Guide, Version 1.14.2
71
Attribute Input Types
Chapter 4: Managing Attributes
Attribute Input Types
When viewed from the Admin, attributes are the fields that you complete when you create a
product. The input type that is assigned to an attribute determines the type of data that
can be entered and the format of the field or input control. To the customer, attributes
provide information about the product, and are the options and data entry fields that must
be completed to purchase a product.
Input Types
INPUT TYPE
72
DESCRIPTION
Text Field
A single line input field for text.
Text Area
A multiple-line input field for entering paragraphs of text such as a
product description. You can use the WYSIWYG Editor to format
the text with HTML tags, or type the tags directly into the text.
Date
Contain date values. Dates can be selected from a popup
calendar, or drop-down list. Depending on the configuration,a
date can be typed directly into the field, selected from a popup
calendar, or drop-down list.
Yes / No
Displays a drop-down with predefined options of “Yes” and “No.”
Dropdown
Displays a drop-down list of values. Only one item can be
selected at a time. The Dropdown input type is a key component
of configurable products.
Multiple Select
Displays a drop-down list of values. To select more than one
option, hold the Ctrl key down and click each item.
Price
Used to create price fields in addition to the predefined attributes,
Price, Special Price, Tier Price and Cost. The currency used is
determined by your system configuration.
Media Image
Gives you the ability to associate an image with a product, that is
something other than a product image. For example, you might
include the product logo, care instructions, or an image of the
ingredients from a food label. When you add a media image
attribute to the attribute set of a product, it becomes an additional
image type, along with Base, Small, and Thumbnail. The media
image attribute can be excluded from the thumbnail gallery, but is
still available to be used.
Fixed Product Tax
Lets you define FPT rates based on the requirements of your
locale. To learn more, see: General Tax Settings.
Magento Enterprise Edition User Guide, Version 1.14.2
Chapter 4: Managing Attributes
Attribute Input Types
Date & Time Custom Options
You can customize the format of date and time fields, and select the input control used for
dates. Dates values can be selected from a drop-down list, or from a popup JavaScript
calendar. The following page has an example of each type of date input control.
Date Input Controls
To format date/time fields:
1.
On the Admin menu, select System > Configuration.
2.
In the panel on the left, under Catalog, select Catalog.
3.
Click to expand the Date & Time Custom Options section. Then, do the following:
a.
To display the JavaScript calendar as an input control for date fields, set Use
JavaScript Calendar to “Yes.”
b.
To establish the Date Fields Order, set each to one of the following:
c.
d.
l
Month
l
Day
l
Year
Set your preferred Time Format to one of the following:
l
12h AM/PM
l
24h
To set the Year Range for the drop-down year values, enter the year in YYYY format to
establish the beginning and ending from and to dates.
Magento Enterprise Edition User Guide, Version 1.14.2
73
Attribute Input Types
Chapter 4: Managing Attributes
If left blank, the field defaults to the current year.
Date & Time Custom Options
4.
When complete, click the Save Config button.
Field Descriptions
FIELD
SCOPE
DESCRIPTION
Use JavaScript Calendar
Store View
Determines if the JavaScript calendar is used as
an input control for date fields. If set to “No,” a
separate dropdown appears for each part of the
date field. Options include: Yes / No
Date Fields Order
Store View
Establishes the order of the three date fields.
Options include: Day / Month / Year
Time Format
Store View
Sets the time format to either a twelve or twentyfour hour clock. Options include:
12h AM/PM
24h
Year Range
74
Store View
Defines the beginning and ending range of years
that appear in the drop-down Year field. The value
must be entered in YYYY format.
Magento Enterprise Edition User Guide, Version 1.14.2
Chapter 4: Managing Attributes
Creating Attributes
Creating Attributes
The properties of an attribute determine how it can be used in your catalog and how it
appears throughout your store. In addition to the basic properties, there are additional
properties for drop-down and multiple-select input types, their values, and associated
labels. The title, or label, identifies the attribute in the Admin and your storefront. If your
store is available in multiple languages, you can enter a different translated label for each
language.
Attributes can be created using the Manage Attributes tool, and also from inside a product
record.
Manage Attributes
Step 1: Define the Attribute Properties
1.
On the Admin menu, select Catalog > Attributes > Manage Attributes. Then, click the Add
Attribute button.
2.
In the Attribute Properties section, complete the following required (*) properties:
a.
Enter a unique Attribute Code to identify the attribute internally. The code should be
all lowercase characters without spaces.
b.
In the Apply To list, choose each product type that is associated with the attribute.
Magento Enterprise Edition User Guide, Version 1.14.2
75
Creating Attributes
Chapter 4: Managing Attributes
Attribute Properties
3.
4.
Complete the remaining Attribute Properties as needed.
a.
Set Scope to the indicate where the attribute will be available.
b.
Set Catalog Input Type for Store Owner to the type of input control used by the store
administrator during data entry.
c.
To prevent duplicate values from being entered in this field, set Unique Value to “Yes.”
d.
To require that a value must be entered in the field before the record can be saved, set
Values Required to “Yes.”
e.
To run a validity test of data entered into the field, set Input Validation for Store
Owner to the type of data the attribute should contain.
In the Frontend Properties section, complete as many of the settings as needed.
Frontend Properties
76
Magento Enterprise Edition User Guide, Version 1.14.2
Chapter 4: Managing Attributes
Creating Attributes
Step 2: Define the Label and Values
1.
2.
In the Attribute Information panel on the left, select Manage Label / Options. Then, do the
following:
a.
In the Manage Titles section, under Admin, enter a descriptive label to identify the
field during data entry.
b.
The next column determines how the label appears in your storefront. You can leave
the box blank to use the Admin label as the default.
c.
If your store is available in multiple languages, enter a translated label into each box,
as needed.
For drop-down or multiple-select input types, do the following:
a.
In the Manage Options section, click the Add Option button.
b.
In the new row, under Admin, type the value you want to use in your store's Admin.
c.
Enter the value you want your customers to see. (Leave blank to use the Admin value
as the default.)
d.
If applicable, enter a translated value for each language supported.
e.
Enter a number to determine the Position of this value in relation to other options in
the list.
f.
Select Is Default to automatically select this value.
g.
Repeat these steps for each value you want to add to the list.
Manage Label / Options for Dropdown Input Type
3.
When complete, click the Save Attribute button.
The attribute appears in the Manage Attributes list, sorted in alphabetical order by
Attribute Code. Use the Page controls to view each page of the list.
Magento Enterprise Edition User Guide, Version 1.14.2
77
Creating an Attribute Set
Chapter 4: Managing Attributes
Deleting Attributes
If you created sample data while setting up your store, it is possible that you now have
some attributes that aren’t needed for your catalog. When an attribute is deleted, it is
removed from any related products and attribute sets. System attributes are part of the core
functionality of your store and cannot be deleted.
To delete an attribute:
1.
On the Admin menu, select Catalog > Attributes > Manage Attributes.
2.
In the list, find the attribute and click to open the record.
3.
Click the Delete Attribute button.
4.
When prompted to confirm, click OK.
Creating an Attribute Set
One of the first steps when creating a product is to choose the attribute set that is used as a
template for the product record. The attribute set determines the fields that are available
during data entry, and the values that appear to the customer.
Manage Attribute Sets
Your store comes with an initial attribute set called “default” which contains a set of
commonly-used attributes. If you would like to add only a small number of attributes, you
can add them to the default attribute set. However, if you sell products that require specific
types of information, such as cameras, it might be better to create a dedicated attribute set
that includes the special attributes (fields) needed to describe the product.
A single attribute can be used by as many different attribute sets as is necessary. For
example, the attribute “color” can be included in an attribute set for clothing, paint, or for
any number of different products.
78
Magento Enterprise Edition User Guide, Version 1.14.2
Chapter 4: Managing Attributes
Creating an Attribute Set
To create an attribute set:
1.
On the Admin menu, select Catalog > Attributes > Manage Attribute Sets.
2.
Click the Add New Set button. Then, do the following:
Edit Set Name
3.
a.
Enter a Name for the attribute set.
b.
In the Based On field, select another attribute set from which this attribute set is to
inherit attributes. This option enables you to reuse the attributes already defined in a
set to build other attribute sets. The simple option is to leave the Default option that
appears in this field.
Click the Save Attribute Set button. The next page displays the following:
l
l
l
4.
The top left of the page shows the name of the attribute set defined earlier. You have the
option to edit the name because this value is for internal use.
The center of the page shows a hierarchical tree representing Groups for attributes.
The right side of the page shows a list of defined attributes that are not assigned to this
attribute set.
Select the attribute to be assigned to this Group by dragging them from the Unassigned
Attributes area on the right into the relevant Group in the middle of the page.
System Attributes are marked with a dot and cannot be removed from the Groups list.
However, you can drag them to another Group in the attribute set.
5.
When the attribute set is complete, click the Save Attribute Set button.
Magento Enterprise Edition User Guide, Version 1.14.2
79
Creating an Attribute Set
Chapter 4: Managing Attributes
Edit Attribute Set
To create a new attribute group:
1.
In the Groups section of the attribute set, click the Add New button.
2.
Enter a Name for the new group, and click OK.
3.
Do either of the following:
l
Drag Unassigned Attributes to the new group.
l
Drag attributes from any other group to the new group.
The new group becomes a section in the Product Information panel for any product that is
based on this attribute set.
80
Magento Enterprise Edition User Guide, Version 1.14.2
Chapter 4: Managing Attributes
Attribute Quick Reference
Attribute Quick Reference
Product Type Properties
PROPERTY
DESCRIPTION
Apply To
Identifies the product types that can use the attribute. Visibility
must be set to include the catalog.
Use to Create
Configurable Product
Identifies an attribute that is used to create a drop-down list of
options for a configurable product.
Data Entry Properties
PROPERTY
DESCRIPTION
Default Value
Displays a common entry as a starting value.
Unique Value
Prevents duplicate values from being entered.
Values Required
Requires a value to be entered before the record can be saved.
Input Validation
Performs a validation check of the data, based on data type, or
format.
Search and Navigation Properties
PROPERTY
DESCRIPTION
Use in Quick Search
Lets customers use the Search box to find items based on the
value of the attribute.
Use in Advanced Search
Includes the attribute as a field on the Advanced Search form.
Use in Layered Navigation
Includes the attribute in the layered navigation that is displayed
for category lists.
Use in Search Results
Layered Navigation
Includes the attribute in the layered navigation that is displayed
for search results lists.
Position
Determines the position of the attribute when listed with others in
the layered navigation list.
Use in Product Listing
(Depending on theme) Includes the attribute in the product
listing.
Use for Sorting in Product
Listing
(Depending on theme) Includes this attribute as an option in the
Sort By list, which can be used to sort a product list.
Magento Enterprise Edition User Guide, Version 1.14.2
81
Attribute Quick Reference
Chapter 4: Managing Attributes
Rules and Comparison Properties
PROPERTY
DESCRIPTION
Comparable on Front-end
Includes the attribute in the Compare Products report.
Use for Promo Rule
Conditions
Allows the attribute to be used as the basis of a condition that
triggers a promotional Price Rule or Shopping Cart rule.
Presentation Properties
PROPERTY
82
DESCRIPTION
Visible on Product View
Page
Includes the attribute on the Additional Information tab of the
product view page.
Allow HTML Tags on
Frontend
Permits text fields and areas to be manually tagged with HTML.
Enable WYSIWYG Editor
Makes the WYSIWYG Editor available for tagging a text field or
text area with HTML.
Magento Enterprise Edition User Guide, Version 1.14.2
Chapter 4: Managing Attributes
Attribute Properties
Attribute Properties
The Attribute Properties define the individual characteristics that determine how an
attribute can be used in the product catalog.
Attribute Properties
Property Descriptions
PROPERTY
DESCRIPTION
Attribute Code
(Required) A unique identifier for internal use. The Attribute Code
must begin with a letter, but can include a combination of
lowercase letters (a-z) and numbers (0-9). The code must be less
than thirty characters in length and cannot include any special
characters or spaces, although an underscore (_) can be used to
indicate a space.
Scope
Limits the use of an attribute to a specific store view or website.
Options include: Store View / Website / Global
Catalog Input Type for
Store Owner
Determines the data type and input control that is used to
manage the product from the store Admin. Options include:
Text Field
A single line input field for text.
Text Area
A multiple-line input field that can display
paragraphs of text formatted with HTML.
Date
An input field for date values. The date
can be typed directly into the field, or
selected from a list or calendar.
Yes/No
A drop-down list with predefined options
of “Yes” and “No.”
Magento Enterprise Edition User Guide, Version 1.14.2
83
Attribute Properties
Chapter 4: Managing Attributes
Property Descriptions (cont.)
PROPERTY
Default Value
DESCRIPTION
Dropdown
A drop-down list of configurable options,
from which only one can be selected.
Multiple Select
Displays a drop-down list of configurable
options. To select more than one option,
hold down the Ctrl key and click each
item.
Price
An input type that can be used to create
price fields in addition to the predefined
attributes: Price, Special Price, Tier
Price and Cost.
Media Image
An additional image that can be included
in the attribute set of a product.
Fixed Product Tax
An input type that gives you the ability to
define FPT rates based on the
requirements of your locale.
Assigns a starting value to the attribute to help during data entry.
To assign a default value for Multiple Select or Dropdown input
types, see: Creating Attributes.
A default value cannot be set for Multiple Select, Dropdown, or
Fixed Product Tax input types.
Unique Value
To prevent duplicate values in a data entry field, set Unique
Value to “Yes.” Options include: Yes / No
Values Required
To require that a value to be entered in this field before the record
can be saved, set Values Required to “Yes.” Options
include: Yes / No
Input Validation for Store
Owner
Performs a validation check of the data entered in the field,
based on the following options:
None
Decimal Number
Integer Number
Email
URL
Letters
84
Magento Enterprise Edition User Guide, Version 1.14.2
Chapter 4: Managing Attributes
Attribute Properties
Property Descriptions (cont.)
PROPERTY
DESCRIPTION
Letters (a-z, A-Z) or Numbers (0-9)
Apply To
(Required) Identifies the product types to which this attribute
applies. Options include:
All Product Types
Selected Product Types
Simple Product
Grouped Product
Configurable Product
Virtual Product
Bundle Product
Downloadable Product
Gift Card
Use to Create
Configurable Product
(Dropdown input type only) Select “Yes” if this attribute will be
used to create a drop-down list for a configurable product.
Options include: Yes / No
Magento Enterprise Edition User Guide, Version 1.14.2
85
Attribute Frontend Properties
Chapter 4: Managing Attributes
Attribute Frontend Properties
The Frontend Properties determine how an attribute can be used in your store. You can
specify how attributes are used in search, layered navigation, product comparisons, price
rules, and sorting. For text attributes, you can enable the WYSIWYG editor and specify if
HTML tags can be used to format the value.
Frontend Properties
Property Descriptions
PROPERTY
DESCRIPTION
Use in Quick Search
Select “Yes” if you want people to be able to search the catalog
based on the value of this attribute. Options include: Yes / No
Search Weight
(Solr Only) Assign a value from 1 – 5 to weight the search.
Use in Advanced Search
Gives shoppers the ability to enter their search criteria through a
form. Options include: Yes / No
Using too many attributes can slow down search.
86
Comparable on Front-end
Select “Yes” to include this attribute as a row in the Compare
Products report. Options include: Yes / No
Use In Layered Navigation
(Dropdown, Multiple Select and Price input types only) Includes
the attribute as a filter in the “Shop By” section of layered
navigation. Options include:
Magento Enterprise Edition User Guide, Version 1.14.2
Chapter 4: Managing Attributes
Attribute Frontend Properties
Property Descriptions (cont.)
PROPERTY
DESCRIPTION
No
The attribute is not used in layered
navigation.
Filterable (with
results)
Lists only products that match the filter
value.
Filterable (no
results)
Lists all attribute values, even those that
do not apply to any product in the list.
Layered navigation appears on a
category page only if there are filterable
attributes available.
Use In Search Results
Layered Navigation
To include the attribute in the layered navigation for search
results, select “Yes.” Options include: Yes / No
Use for Promo Rule
Conditions
To make the attribute available for use in price rules, select
“Yes.” Options include: Yes / No
Position
Determines the position of the attribute in layered navigation in
relation to other filterable attributes.
Enable WYSIWYG
(Text Area input type only) To display the editor when entering or
editing the attribute value, select “Yes.” The editor can be used to
format field descriptions with HTML tags. Options include:
Yes / No
Allow HTML Tags on
Frontend
(Text Field and Text Area input types only) To be able to format
the attribute value with HTML tags, select “Yes.” Options
include: Yes / No
Visible on Product View
Page on Front-end
(Simple and virtual products only) To include the attribute on the
Additional Information tab of the product page, select “Yes.”
Options include: Yes / No
Used in Product Listing
Depending on the theme, includes the attribute in the product
summary that appears in catalog listings, and also makes the
attribute available for use in smart category rules. Options
include: Yes / No
Used for Sorting in Product Depending on theme, includes the attribute as a “Sort By” option
Listing
for catalog listings. Options include: Yes / No
Magento Enterprise Edition User Guide, Version 1.14.2
87
Attribute Frontend Properties
Chapter 4: Managing Attributes
Notes
88
Magento Enterprise Edition User Guide, Version 1.14.2
Chapter 5:
Flat Catalog
Magento uses the Entity-Attribute-Value (EAV) model for storing customer, product,
and category data in its database. Although the EAV model enables you to have
completely extensible attributes for those objects, object attributes are stored in
multiple tables rather than one very large table.
Because attributes are stored in many tables—and that includes copies of some of the
same attributes—SQL queries can be long and complex. The flat catalog feature creates
new tables on the fly, where each row contains all necessary data about a product or
category.
In earlier versions of Magento, it was necessary to rebuild the flat catalog every time
you made changes to product attributes or product-category associations. In this
release, the flat catalog is updated for you—either every minute, or according to your
Magento cron job.
Flat catalog options not only enable the flat catalog and flat product indexers but also
enable indexing for catalog and shopping cart price rules. If you have a large number of
SKUs (500,000 or more), Magento can index catalog and shopping cart price rules
quickly if you enable the flat catalog product option.
Magento Enterprise Edition User Guide, Version 1.14.2
89
Setting Up a Flat Catalog
Chapter 5: Flat Catalog
Setting Up a Flat Catalog
Before you enable a flat catalog for a live store, make sure to test the configuration in a
development environment.
Use Flat Catalog
Step 1: Enable Flat Catalog
90
1.
On the Admin menu, select System > Configuration.
2.
In the panel on the left, under Catalog, select Catalog.
3.
Click to expand the Frontend section. Then, do the following:
a.
Set Use Flat Catalog Category to “Yes.”
b.
Set Use Flat Catalog Product to “Yes.”
4.
When complete, click the Save Config button.
5.
When prompted to refresh the Page Cache, click the Cache Management link in the
message at the top of the workspace and follow the instructions.
Magento Enterprise Edition User Guide, Version 1.14.2
Chapter 5: Flat Catalog
Setting Up a Flat Catalog
Step 2: Verify the Results
Method 1: Verify the Results for a Single Product
1.
Open one browser tab to the store Admin, and log in as an administrator.
2.
On a second browser tab, navigate to your store’s home page.
3.
On the Admin menu, select Catalog > Manage Products. Then, do the following:
a.
Choose a product to modify. Then, click to open the product in edit mode.
b.
On the General tab, in the Name field, add the text “_DEMO” to the product name.
4.
Click the Save button.
5.
In your store, search for the product you edited, and browse to its assigned category.
If necessary, refresh the page to see the result of the change you made. The change occurs
either within the minute or according to your cron job schedule.
Method 2: Verify the Results for Multiple Products
1.
On a second browser tab, navigate to your store’s home page.
2.
On the Admin menu, select Catalog > Categories > Manage Categories.
3.
In the upper-left corner, set Current Configuration Scope to one of the following:
4.
l
All Store Views
l
A specific store view
In the panel on the left, select an existing category. Click the Add Subcategory button,
and do the following:
a.
In the Name field, enter “Demo Category.”
b.
Set Is Active to “Yes.”
c.
Click the Save Category button.
Magento Enterprise Edition User Guide, Version 1.14.2
91
Setting Up a Flat Catalog
Chapter 5: Flat Catalog
New Subcategory
d.
Click the Category Products tab. Then, click the Reset Filter button to display all
products.
e.
Select the checkbox of several products to add them to the new category. Then, click
the Save Category button.
Category Products
5.
In your store, find the category you created.
If necessary, refresh the page to see the result of the change you made. The change occurs
either within the minute or according to your cron job schedule.
92
Magento Enterprise Edition User Guide, Version 1.14.2
Chapter 6:
Creating Products
Choosing a product type is one of the first things you must do to create a new product.
In this chapter, you will learn how to create a product of each type. To learn more
about all the available options, see Product Information.
If you are just starting out, you can create a few sample products, and experiment with
each type. Before building your catalog, make sure to read Navigation by Category and
Catalog URL Options. This material will give you a good understanding of the
relationship between your store navigation, the categories in your catalog.
Products in Catalog
Magento Enterprise Edition User Guide, Version 1.14.2
93
Product Types
Chapter 6: Creating Products
Product Types
Simple Product
A simple product is a physical item with a single
SKU. Simple products have a variety of pricing and
of input controls which makes it possible to sell
variations of the product. Simple products can be
used in association with grouped, bundle, and
configurable products.
Grouped Product
A grouped product presents multiple, standalone
products as a group. You can offer variations of a
single product, or group them for a promotion. The
products can be purchased separately, or as a group.
Configurable Product
A configurable product appears to be a single product
with lists of options for each variation. However,
each option represents a separate, simple product
with a distinct SKU, which makes it possible to track
inventory for each variation.
Virtual Product
Virtual products do not have a physical presence,
and are typically used for such things as services,
warranties, and subscriptions. Virtual products can
be used in association with grouped and bundle
products.
94
Magento Enterprise Edition User Guide, Version 1.14.2
Chapter 6: Creating Products
Product Types
Bundle Product
A bundle product let customers “build their own” from
an assortment of options. The bundle could be a gift
basket, computer, or anything else that can be
customized. Each item in the bundle is a separate,
standalone product.
Downloadable Product
A digitally downloadable product that consists of one
or more files that are downloaded. The files can
reside on your server or be provided as URLs to any
other server.
Gift Card Product
There are three kinds of gift cards: virtual gift cards
are sent by email, physical gift cards are shipped to
the recipient, and combined gift cards are a
combination of the two. Each has a unique code,
which is redeemed during checkout. Gift cards can
be used in association with grouped products.
Magento Enterprise Edition User Guide, Version 1.14.2
95
Simple Product
Chapter 6: Creating Products
Simple Product
One of the keys to harnessing the power of product types is learning how and when to use a
simple, standalone product. Simple products can be sold individually, or as part of a
grouped, configurable, or bundle product. A simple product with multiple, custom options
is sometimes referred to as a composite product.
Simple Product
Creating a Simple Product
The following instructions take you through the process of creating a simple product with
the basic fields. Each required field is marked in the Admin with a red asterisk (*). After
you complete the required settings and save the product, you can add images and complete
the remaining product information as needed.
Process Overview:
Step 1: Choose the Attribute Set
Step 2: Complete the Basic Information
Step 3: Complete the Remaining Product Information
Step 1: Choose the Attribute Set
The first step is to choose the attribute set, which is used as a template for the product
record. The product in this example is based on the Default attribute set, which includes a
standard of set of fields that can be used for most products.
96
Magento Enterprise Edition User Guide, Version 1.14.2
Chapter 6: Creating Products
Simple Product
1.
On the Admin menu, go to Catalog > Manage Products.
2.
In the upper-right corner of the Manage Products page, click the Add Product button.
3.
In the Create Product Settings section, do the following:
a.
Accept the “default” Attribute Set, or select another.
b.
Set Product Type to “Simple.”
c.
Click the Continue button.
Step 2: Complete the Basic Information
The basic set of required fields must be completed before the product record can be saved.
The Product Information panel groups related fields by topic and the required fields are
marked with a red asterisk (*).
1.
2.
3.
In the Product Information panel, select General. Then, complete the required fields as
follows:
a.
Enter the product Name as you want it to appear in all catalog listings.
b.
In the Description box, enter the main description that will appear on the Product
Detail page.
c.
Enter a Short Description of the product.
d.
Assign a unique SKU for the product.
e.
Enter the Weight of the product, which is used to calculate shipping.
f.
Set Status to “Enabled.”
g.
Set Visibility to “Catalog, Search.”
In the Product Information panel, select Prices. Then, complete the required fields as
follows:
a.
Enter the Price that you will charge for the product.
b.
Set Tax Class to the appropriate tax classification for the product.
In the Product Information panel, select Inventory. Then, do the following:
a.
If you do not need to keep track of inventory for the product, set Manage Stock to
“No.”
b.
If you want to keep track of inventory, set Manage Stock to “Yes.” Then, do the
following:
l
In the Qty field, type the quantity of the item that is currently in stock.
l
Set Stock Availability to “In Stock.”
Magento Enterprise Edition User Guide, Version 1.14.2
97
Simple Product
4.
5.
6.
Chapter 6: Creating Products
To be visible in your catalog, the product must be assigned to a category. To assign the
product to a category, do the following:
a.
In the Product Information panel, select Categories.
b.
In the category tree, click to expand the section where the item belongs.
c.
Select the checkbox of each category where you want the product to appear.
If your Magento installation has multiple websites, the product must be assigned to each
one where the product is available for sale. (This option appears only if multiple websites
exist in the store hierarchy.) To configure the scope of the product, do the following:
a.
In the Product Information panel, select Websites.
b.
On the Websites tab, select the checkbox of each website where the product is available
for sale.
After completing these steps, click the Save and Continue button.
At this point, the product should be visible on the assigned category page of your catalog.
Until the product image is uploaded, a placeholder appears in its place.
Step 3: Complete the Remaining Product Information
Although not required, there is still more product information to complete. At the very
least, you will want to upload product images and complete the meta data. In addition,
you can create additional custom options.
Things to Remember
A simple product can have custom options with a variety of input controls, which
makes it possible to sell many product variations from a single SKU.
Custom options are not tracked as separate inventory items.
A simple product that is included in a configurable, or bundle product type cannot
have custom options.
98
Magento Enterprise Edition User Guide, Version 1.14.2
Chapter 6: Creating Products
Grouped Product
Grouped Product
A grouped product is made up of multiple, standalone products that are presented as a
group. You can offer variations of a single product, or group them by season or theme to
create a coordinated set. Each product can be purchased separately, or as part of the group.
Grouped Product
Creating a Grouped Product
The following instructions take you through the process of creating a grouped product with
the basic fields. Each required field is marked in the Admin with a red asterisk (*). After
you complete the required settings and save the product, you can add images and complete
the remaining product information, as needed.
Process Overview:
Step 1: Create the Grouped Product
Step 2: Add the Associated Products
Step 3: Configure the Shopping Cart Thumbnails
Magento Enterprise Edition User Guide, Version 1.14.2
99
Grouped Product
Chapter 6: Creating Products
Step 1: Create the Grouped Product
The first step is to choose the attribute set, which is used as a template for the product
record. The product in this example is based on the Default attribute set, which includes a
standard of set of fields that can be used for most products.
1.
On the Admin menu, select Catalog > Manage Products. Then, click the Add Product
button.
2.
In the Create Product Settings section, select the Attribute Set you want to use as a
template for the product.
3.
Set Product Type to "Grouped Product," and click the Continue button.
4.
Complete the main configuration settings as you would for a simple product, with the
following exceptions:
l
l
5.
A grouped product does not have price options because the price of each item in the
group originates from the associated product.
You can set quantity increments and stock availability for the group as a whole, but the
inventory of individual items is managed by the associated products.
Click the Save and Continue button.
Step 2: Add the Associated Products
1.
In the Product Information panel on the left, select the associated products.
If you need help finding the products, use the filter controls at the top of a column.
2.
Select the checkbox of each product you want to include in the group.
3.
Click the Save button to save your changes.
Step 3: Configure the Shopping Cart Thumbnails
1.
On the Admin menu, select System > Configuration.
2.
In the Configuration panel on the left, under Sales, select Checkout.
3.
Click to expand the Shopping Cart section. Then, set Grouped Product Image to one of
the following:
4.
100
l
Product Thumbnail Itself
l
Parent Product Thumbnail
Click the Save Config button to save the setting.
Magento Enterprise Edition User Guide, Version 1.14.2
Chapter 6: Creating Products
Grouped Product
Things to Remember
A grouped product is essentially a collection of simple associated products.
Simple and virtual products associated with a grouped product cannot have custom
options.
Each item purchased appears individually in the shopping cart.
The thumbnail image in the shopping cart can be set to display the image from the
grouped product record, or from the associated product.
Magento Enterprise Edition User Guide, Version 1.14.2
101
Configurable Product
Chapter 6: Creating Products
Configurable Product
A configurable product looks like a single product with drop-down lists of options for each
variation. However, each option is actually a separate simple product with a unique SKU,
which makes it possible to track inventory for each product variation. You could achieve a
similar effect by using a simple product with custom options, but without the ability to
track inventory for each variation.
Although a configurable product uses more SKUs, and may initially take a little longer to
set up, it can save you time in the long run. If you plan to grow your business, the
configurable product type is a better choice.
Configurable Product
After the configurable product is set up, you have the option to replace the drop-down lists
with swatches. Swatches are often used to show colors, patterns, and textures.
102
Magento Enterprise Edition User Guide, Version 1.14.2
Chapter 6: Creating Products
Configurable Product
Creating a Configurable Product
The following instructions take you through the process of creating a configurable product
with the basic fields. Each required field is marked in the Admin with a red asterisk (*).
After you complete the required settings and save the product, you can add images and
complete the remaining product information, as needed.
Process Overview:
Step 1: Create Attributes for Drop-down Options
Step 2: Create the Attribute Set
Step 3: Create the Configurable Product
Step 4: Add the Associated Products
Step 5: Make Any Necessary Price Adjustments
Step 6: Configure the Shopping Cart Thumbnails
Step 1: Create Attributes for Drop-Down Options
Create an attribute for each drop-down list of options that you want to include in the
configurable product. If the attribute already exists and has the correct properties, you can
add it to the attribute set in the next step. To learn more, see: Creating Attributes.
Required Attribute Properties
PROPERTY
Scope
SETTING
Global
Catalog Input Type for Store Dropdown
Owner
Apply to
Configurable Product or All Product Types
Use to Create Configurable
Product
Yes
Step 2: Create the Attribute Set
1.
On the Admin menu, select Catalog > Attributes > Manage Attribute Sets. Then, click the
Add New Set button.
2.
Assign a Name to the attribute set.
3.
In the Based On list, select an existing attribute set, such as “Default,” to use as a
template. Then, click the Save Attribute Set button.
Magento Enterprise Edition User Guide, Version 1.14.2
103
Configurable Product
Chapter 6: Creating Products
4.
Starting from the list of Unassigned Attributes, drag and drop each attribute you want to
include in the product to the center column. You can arrange them in any order.
5.
To group the attributes in their own section of the Product Information panel, do the
following:
a.
In the Groups section, click the Add New button.
If prompted by your browser, select “Temporarily Allow Scripted Windows” to continue.
Then, click the Add New button again.
b.
When prompted, enter a Name for the new group. Then, click the OK button.
The new group appears at the bottom of the Groups column.
c.
Drag and drop each attribute that you created for the dropdown options to group
where you want them to appear.
6.
Click the Save Attribute Set button.
7.
When prompted to update your cache and index, click the links in each message and
follow the instructions.
Step 3: Create the Configurable Product
1.
On the Admin menu, select Catalog > Manage Products. Then, click the Add Product
button.
2.
In the Create Product Settings section, do the following:
a.
Select the Attribute Set that you created for the product.
b.
Set Product Type to “Configurable Product,” and click the Continue button.
3.
In the Select Configurable Attributes section, select the checkbox of each attribute that you
want to include in the product. Then, click the Continue button.
4.
Complete the Product Information as you would for a simple product, with the exception
of the following fields:
l
l
5.
104
On the Prices tab, the Price is a required field, but is used as a default price. The price
of each individual associated product can be adjusted accordingly.
On the Inventory tab, Manage Stock is set to “No” by default, because inventory is
managed for each associated product.
When complete, click the Save and Continue Edit button.
Magento Enterprise Edition User Guide, Version 1.14.2
Chapter 6: Creating Products
Configurable Product
Step 4: Add the Associated Products
Process Overview:
Method 1: Quick Simple Product Creation
Method 2: Create Empty
Method 3: Copy from Configurable
1.
In the panel on the left, select the last option, Associated Products.
2.
Then, use one of the following methods to add the associated products.
Method 1: Quick Simple Product Creation
This method automatically creates the associated products and optionally, assigns a Name
and SKU to each one.
1.
2.
In the Quick Simple Product Creation section, make sure that the Autogenerate
checkbox is selected for both Name and SKU. This optional setting adds the name
and SKU from each associated product to those of the configurable product. Then,
complete these fields as follows:
a.
Enter the Weight.
b.
Set Status to “Enabled.”
c.
Set Visibility to “Not Visible Individually.”
To complete the fields for the drop-down lists, do the following:
a.
Select the value you need from each list to create the first product.
b.
Enter the Qty, and set Stock Availability to “In Stock.”
c.
Click the Quick Create button to create the associated product record.
Repeat this step for the values needed for each associated product. As each associated
products is created, it is added to the list at the bottom of the page.
Method 2: Create Simple Associated Product
This method opens a blank Product Information form, which you can complete for each
associated product.
1.
In the Create Simple Associated Product section, click the Create Empty button. A
pop-up window with a blank Product Information form appears.
2.
Complete the required fields as you would for any simple product.
3.
Click the Save button to add the associated product.
Magento Enterprise Edition User Guide, Version 1.14.2
105
Configurable Product
Chapter 6: Creating Products
Method 3: Copy from Configurable
This method opens a Product Information form that contains the values already entered
for the configurable product. The only fields that need to be completed are the Name, SKU,
and values for each drop-down list.
1.
In the Create Simple Associated Product section, click the Copy From Configurable
button. A pop-up window with the basic Product Information from the configurable
product appears.
2.
Complete the following required fields:
l
SKU
l
Weight
3.
Complete the fields with values for each drop-down list.
4.
Click the Save button to add the associated product to the configurable product
record.
Step 5: Make Any Necessary Price Adjustments
Use the Super Products Attributes Configuration section to make price adjustments to a
specific associated product. The adjustment can be entered as a fixed value or percentage,
and is made in relation to the price of the configurable product.
Step 6: Configure the Shopping Cart Thumbnails
1.
On the Admin menu, select System > Configuration.
2.
In the panel on the left, under Sales, select Checkout.
3.
Click to expand the Shopping Cart section. Then, set Configurable Product Image to one
of the following:
4.
106
l
Product Thumbnail Itself
l
Parent Product Thumbnail
Click the Save Config button to save the setting.
Magento Enterprise Edition User Guide, Version 1.14.2
Chapter 6: Creating Products
Configurable Product
Things to Remember
A configurable product allows the shopper to select options from drop-down lists.
Each option is actually a separate, simple product.
The drop-down list values are based on attributes that must be set up in advance with
required settings. The attribute Scope must be set to “Global,” and Use to Create
Configurable Product must be “True.” The drop-down attributes must be included in an
attribute set, which is then used as a template for the configurable product.
Swatches can be used instead of drop-down lists for product variations.
The simple products associated with a configurable product cannot include custom
variants or options, and must be based on the same attribute set that is used to create
the configurable product. The associated products can be generated automatically
from inside with configurable product record.
The thumbnail image in the shopping cart can be set to display the image from the
configurable product record, or from the associated product.
Magento Enterprise Edition User Guide, Version 1.14.2
107
Virtual Product
Chapter 6: Creating Products
Virtual Product
Although virtual products are not physical in nature, they do represent something that can
be sold, such as a membership, service, warranty, or subscription. Virtual products can be
sold individually, or included as part of the following product types:
l
Grouped Product
l
Bundle Product
The process of creating a virtual product and a simple product is nearly the same.
However, because a virtual product is not shipped, there is no Weight field or option to
include a gift card.
Virtual Product
Creating a Virtual Product
The following instructions take you through the process of creating a virtual product with
the basic fields. Each required field is marked in the Admin panel with a red asterisk (*).
After you complete the required settings and save the product, you can complete the
remaining product information as needed.
Process Overview:
Step 1: Choose the Attribute Set
Step 2: Complete the Required Fields
Step 3: Complete the Remaining Product Information
108
Magento Enterprise Edition User Guide, Version 1.14.2
Chapter 6: Creating Products
Virtual Product
Step 1: Choose the Attribute Set
1.
On the Admin menu, select Catalog > Manage Products.
2.
In the upper-right corner of the Manage Products page, click the Add Product button.
3.
In the Create Product Settings section, do the following:
a.
Accept the “default” Attribute Set, or select another.
b.
Set Product Type to “Virtual Product.”
c.
Click the Continue button.
Step 2: Complete the Required Fields
The panel on the left groups related fields by topic, according to the attribute set. All
required fields are marked with a red asterisk (*).
1.
On the General tab, complete the required fields as follows:
a.
Type the product Name as you want it to appear in all catalog listings.
b.
In the Description box, enter the main description that will appear on the product
view page.
c.
Enter a Short Description of the product.
d.
Assign a unique SKU to the product.
e.
Set Status to “Enabled.”
f.
Set Tax Class to the appropriate setting for your area.
g.
Set Visibility to “Catalog, Search.”
2.
On the Prices tab, enter the Price you intend to charge for the product or service.
3.
If you’re not going to manage your inventory, you can skip this section. Otherwise,
complete the required fields on the Inventory tab as follows:
a.
Under Manage Stock, clear the Use Config Settings checkbox. Then, set Manage
Stock to “Yes.”
b.
In the Qty field, enter the quantity of the item currently in stock.
c.
Set Stock Availability to “In Stock.”
4.
If applicable, on the Website tab, select the checkbox for the website where the product or
service will be available for sale.
5.
On the Categories tab, assign the product to the appropriate categories, as follows:
Magento Enterprise Edition User Guide, Version 1.14.2
109
Virtual Product
6.
Chapter 6: Creating Products
a.
In the Product Category tree, click to expand the section where the item belongs.
b.
Select the checkbox to assign the product to each category where you want the product
to be listed in the catalog.
When the required fields are complete, click the Save and Continue button.
Step 3: Complete the Remaining Product Information
You have now completed the required fields. The next step is to complete the rest of the
product information as needed for this product. The meta information and product images
are a good place to start.
Things to Remember
Virtual products can be used for anything that is not physical in nature, such as
services, subscriptions, and warranties.
Virtual products are much like simple products, but without the Weight and Allow Gift
Message fields.
Shipping Options appear during checkout only if there is also a physical product in the
cart.
110
Magento Enterprise Edition User Guide, Version 1.14.2
Chapter 6: Creating Products
Bundle Product
Bundle Product
A bundle is a “build your own,” customizable product. Each item in a bundle can be based
on one of the following product types:
l
Simple Product
l
Virtual Product
Bundle Product
Creating a Bundle Product
The following instructions take you through the process of creating a bundle product with
the basic fields. Each required field is marked with a red asterisk (*). After you complete the
required settings and save the product, you can complete the remaining Product
Information as needed.
Process Overview:
Step 1: Create the Bundle Product
Step 2: Complete the Product Information
Step 3: Add Bundle Items
Step 1: Create the Bundle Product
1.
On the Admin menu, select Catalog > Manage Products. Then, click the Add Product
button.
2.
In the Create Product Settings section, select the Attribute Set for the product.
Magento Enterprise Edition User Guide, Version 1.14.2
111
Bundle Product
3.
Chapter 6: Creating Products
In the Create Product Settings section, do the following:
a.
Accept the “default” Attribute Set, or select another.
b.
Set Product Type to “Bundle Product.” Then, click the Continue button.
Create Product Settings
Step 2: Complete the Product Information
1.
Complete the product information as you would for a simple product, with the exception of
the following fields:
2.
On the General tab, set both the SKU and Weight fields to one of the following:
l
Dynamic
l
Fixed
If using a Fixed value, enter the actual value in the field to the right.
Dynamic SKU and Weight
3.
On the Prices tab, set Price to one of the following:
l
Dynamic
l
Fixed
If using a Fixed value, enter the actual value in the field to the right.
Dynamic Price
112
Magento Enterprise Edition User Guide, Version 1.14.2
Chapter 6: Creating Products
4.
5.
Bundle Product
Then, set the Price View to one of the following:
l
As Low as
l
Price Range
Click the Save and Continue Edit button.
Step 3: Add Bundle Items
1.
In the Product Information panel on the left, select the last option, Bundle Items.
2.
Then in the Shipment section, set Ship Bundle Items to one of the following:
l
Together
l
Separately
Shipment
3.
In the Bundle Items section, click the Add New Option button.
4.
In the Default Title box, enter a label for the bundle item, as you want it to appear on the
Customize Product page. Then, do the following:
Bundle Items
a.
5.
Set Input Type to one of the following:
l
Drop-down
l
Radio Buttons
l
Checkbox
l
Multiple Select
b.
Set Is Required as needed.
c.
In the Position field, enter the order that you want this item listed in relation to other
items included in the bundle.
Click the Add Selection button. Then, do the following:
Magento Enterprise Edition User Guide, Version 1.14.2
113
Bundle Product
Chapter 6: Creating Products
Select Products
a.
Click the Reset Filter button to display the list of products.
b.
Select the checkbox of each product that you want to include in this item.
c.
In the Qty to Add column, enter the quantity of each item to be included.
6.
Click the Add Selected Product(s) to Option button.
7.
When the items appear in the Bundle Items list, do the following:
a.
Set User Defined Qty to one of the following:
Yes
Displays an input box so the customer can change the quantity.
No
Prevents the customer from changing the default quantity.
b.
Enter a number in the Position column of each item to determine its place in relation
to other items.
c.
To make an item the default selection, select the Default option of the item to be preselected in the form.
Bundle Items
114
8.
Repeat steps 3-7 for each bundle item you want to include.
9.
When complete, click the Save button to save the bundle product.
Magento Enterprise Edition User Guide, Version 1.14.2
Chapter 6: Creating Products
Bundle Product
Field Descriptions
FIELD
DESCRIPTION
SKU
Determines if each item is assigned a variable, dynamic SKU, or
if a fixed SKU is used for the bundle. Options include:
Fixed / Dynamic.
Weight
Specifies the weight is calculated based on the items selected,
or is a fixed weight for the entire bundle. Options include:
Fixed / Dynamic.
Price View
Specifies whether the product price is shown as a range, from
the least expensive component to the most expensive (Price
Range), or the least expensive shown (As Low As). Options
include: Price Range / As Low As.
Ship Bundle Items
Specifies if individual items can be shipped separately.
Things to Remember
A bundle is a “build your own” product.
Bundle items can be simple or virtual products, but without custom options.
The Price View can be set to a price range or “As Low As.”
The SKU and Weight of a bundle product can be set to either “Fixed” or “Dynamic.”
The Quantity can be set to a preset or user-defined value.
Items can be shipped together or separately.
Magento Enterprise Edition User Guide, Version 1.14.2
115
Downloadable Product
Chapter 6: Creating Products
Downloadable Product
A downloadable product can be anything that you can deliver as a file, such as an eBook,
music, video, software application, or an update. You can offer an album for sale, and sell
each song individually. You can also use a downloadable product to deliver an electronic
version of your product catalog.
Because the actual download doesn’t become available until after the purchase, you can
provide samples, such as an excerpt from a book or a clip from an audio file, that the
customer can try from the product page.
Download with Sample
Downloadable products can be configured to require that the customer log in to an account
to receive the link, or can be sent by email and shared with others. The status of the order
before the download becomes available, default values, and other delivery options are set in
the configuration.
The files for download can be either uploaded to your server, or linked to on a different
server on the Internet.
Downloadable product file names can include letters and numbers. You can to use either a dash
or underscore character to represent a space between words. Any invalid characters in the file
name are replaced with an underscore.
116
Magento Enterprise Edition User Guide, Version 1.14.2
Chapter 6: Creating Products
Downloadable Product
Creating a Downloadable Product
The following instructions take you through the process of creating a downloadable product
with the basic fields. Each required field is marked in the Admin with a red asterisk (*).
After you complete the required settings and save the product, you can add images and
complete the remaining product information as needed.
Process Overview:
Step 1: Choose the Attribute Set
Step 2: Complete the Basic Product Information
Step 3: Complete the Download Information
Step 4: Complete the Samples Information
Step 5: Complete the Remaining Product Information
Step 1: Choose the Attribute Set
The first step is to choose the attribute set, which is used as a template for the product
record. The product in this example is based on the Default attribute set, which includes a
standard of set of fields that can be used for most products.
1.
On the Admin menu, go to Catalog > Manage Products.
2.
In the upper-right corner of the Manage Products page, click the Add Product button.
3.
In the Create Product Settings section, do the following:
a.
Attribute Set is currently set to “Default.” You can leave it as it is, or select another.
b.
Set Product Type to “Downloadable Product,” and click the Continue button.
Create Product Settings
Step 2: Complete the Basic Product Information
The basic set of required fields must be completed before the product record can be saved.
The Product Information panel groups related fields by topic and the required fields are
marked with a red asterisk (*).
1.
In the Product Information panel, select General. Then, do the following:
a.
Enter the product Name as you want it to appear in all catalog listings.
b.
In the Description box, enter the main description for the Product Detail page.
Magento Enterprise Edition User Guide, Version 1.14.2
117
Downloadable Product
2.
Chapter 6: Creating Products
c.
Enter a Short Description of the product.
d.
Assign a unique SKU for the product.
e.
Set Status to “Enabled.”
f.
Set Visibility to “Catalog, Search.”
In the Product Information panel, select Prices. Then, complete the required fields as
follows:
a.
Enter the Price that you will charge for the product.
The price entered becomes the base price of the download and is listed in the catalog
before the customer selects items for download. Any additional price that is associated
with an individual download is added to the base price.
b.
3.
4.
5.
6.
Set Tax Class to the appropriate tax classification for the product.
In the Product Information panel, select Inventory. Then, do the following:
a.
To not keep track of inventory for the product, set Manage Stock to “No.”
b.
If you do need to keep track of inventory, set Manage Stock to “Yes.” Then, do the
following:
l
Set Manage Stock to “Yes.”
l
In the Qty field, type the quantity of the item that is currently in stock.
l
Set Stock Availability to “In Stock.”
In the Product Information panel, select Categories. Then, do the following:
a.
In the category tree, click to expand the section where the item belongs.
b.
Select the checkbox of each additional category where you want the product to appear.
To make the product available on multiple websites, it must be assigned to each one. (This
option appears only if you have multiple websites.) To configure the scope of the product,
do the following:
a.
In the Product Information panel, select Websites.
b.
Select the checkbox of each website where the product will be available for sale.
After completing these steps, click the Save and Continue Edit button.
Step 3: Complete the Download Information
118
1.
In the Product Information panel, select Downloadable Information.
2.
In the Links section, do the following:
Magento Enterprise Edition User Guide, Version 1.14.2
Chapter 6: Creating Products
a.
Enter a Title for the list of downloadable products.
b.
Set Links can be purchased separately to one of the following:
l
l
3.
To offer a single download of this item, select “No.”
a.
Enter the Title and Price of the download.
b.
To limit the number of downloads per customer, enter the Max number of downloads.
To allow unlimited downloads, select the Unlimited checkbox.
c.
Set Sharable to your preference.
l
Select “No” to require that customers log in to their accounts to access the download
link.
Select “Yes” to send the link by email, which customers can then share with others.
Under Sample, use one of the following methods to deliver a sample of the downloadable
product.
l
l
5.
If you want to offer multiple download links, such as to sell individual songs on an
album, select “Yes.”
Click the Add New Row button, and do the following:
l
4.
Downloadable Product
Select the File option. Then, click the Browse
upload to the server.
button, and select the sample file to
Select the URL option. Then, paste the full URL of the sample file.
Under File, use one of the following methods to deliver the actual downloadable product.
l
l
Select the File option. Then, click the Browse
button, and select the file to upload.
Select the URL option. Then, paste the full URL of the file that is available for
download.
6.
In the Sort Order field, enter a number to indicate the sequence that this download will be
listed with other downloads on the product page.
7.
To add another download, click the Add New Row button, and repeat the process.
Links
Magento Enterprise Edition User Guide, Version 1.14.2
119
Downloadable Product
Chapter 6: Creating Products
8.
When complete, if uploading files to the server, click the Upload Files button.
9.
Click the Save and Continue Edit button.
Step 4: Complete the Samples Information
1.
Click to expand the Samples section.
2.
Enter a Title for the section of samples on the product page.
3.
Click the Add New Row button. Then, do one of the following:
l
l
Select the File option. Then, click the Browse
upload.
button, and select the sample file to
Select the URL option. Then, paste the full URL of the sample file.
Add New Sample
4.
To add a new row, click the Add New Row button, and repeat the process.
5.
When complete, click the Save button.
6.
When prompted to refresh the index and cache, click the links in the message at the top of
the workspace, and follow the instructions.
At this point, the product should be visible on the assigned category page of your catalog.
Until a product image is uploaded, a placeholder appears in its place.
Step 5: Complete the Remaining Product Information
Although not required, there is other product information to complete. At the very least,
you will want to upload product images and complete the meta data.
120
Magento Enterprise Edition User Guide, Version 1.14.2
Chapter 6: Creating Products
Downloadable Product
Things to Remember
Downloadable products can be uploaded to the server, or linked to from another
server on the Internet.
You can determine the number of times a customer can download a product.
Customers can be required to log in before going through checkout.
Downloads can be delivered for orders in a “Pending” or “Invoiced” state.
Downloadable Product Options
The configuration settings determine guest checkout, default values, and delivery options
for downloadable products.
To configure downloadable products:
1.
On the Admin menu, select System > Configure.
2.
In the panel on the left, under Catalog, select Catalog.
3.
Click to expand the Downloadable Product Options section.
4.
Configure the options as described in the following field descriptions.
5.
When complete, click the Save Config button.
Downloadable Product Options
Magento Enterprise Edition User Guide, Version 1.14.2
121
Downloadable Product
Chapter 6: Creating Products
Field Descriptions
FIELD
DESCRIPTION
Order Item Status to
Enable Downloads
Website
Determines the status that an order must have
before downloads become available. Options
include: Pending / Invoiced
Default Maximum Number
of Downloads
Website
Determines the default number of downloads
available to a customer. Options include: Yes / No
Shareable
Website
Determines if customers must log in to their
accounts to access the download link. Options
include:
Yes
Allows the link to be sent by email,
which can then be shared with
others.
No
Requires customers to log in to
their accounts to access the
download link.
Default Sample Title
Store View
The default title for all sample files.
Default Link Title
Store View
The default link for all downloadable titles.
Opens Links in New
Window
Website
Determines if the download link opens in a new
browser window. Options include: Yes / No
Use Content Disposition
Store View
Determines how the link to the downloadable
content is delivered, as an email attachment, or
as an inline link in a browser window. Options
include:
Disable Guest Checkout if
Cart Contains
Downloadable Items
122
SCOPE
Website
Attachment
The download link is delivered
as an email attachment.
Inline
The download link is delivered
as an inline link on a web
page.
Determines if guests who are purchasing
downloadable products must log in to an account
to complete the checkout process. Options
Include:
Magento Enterprise Edition User Guide, Version 1.14.2
Chapter 6: Creating Products
Downloadable Product
Field Descriptions (cont.)
FIELD
SCOPE
DESCRIPTION
Yes
If the cart contains downloadable
products, the guest will have to
either register for an account, or
login to an existing account to
complete the purchase.
No
The download link is delivered as
an inline link in the body of the
email message.
Guest checkout is available for downloadable
products only if Sharable is set to "Yes."
Magento Enterprise Edition User Guide, Version 1.14.2
123
Gift Card
Chapter 6: Creating Products
Gift Card
There are three kinds of gift card products: virtual gift cards sent by email, physical gift
cards, which can be shipped to the recipient, and a combination of the two. Each gift card
has a unique code, which can be redeemed by only one customer during checkout. A code
pool must be established before gift cards can be sold.
Physical Gift Card
Virtual
The gift card is sent to the recipient by email. The order requires an email address for the
recipient. A shipping address is not necessary.
Physical
The gift card is shipped to recipient’s address, which is required during the purchase of the
gift card.
Combined
The gift card is shipped and emailed to the recipient. The recipient’s email and shipping
address is required to purchase the gift card.
124
Magento Enterprise Edition User Guide, Version 1.14.2
Chapter 6: Creating Products
Gift Card
Gift Card Workflow
Gift card accounts can be redeemed in the shopping cart, similar to the way a coupon is
applied to an order. There is a block with a data entry field for entering the gift card code,
with a button that applies it to the items in the cart. In addition, customers can check their
gift card status and the remaining balance in their gift card accounts.
Multiple gift card accounts can be applied to a shopping cart. Each time a gift card is
applied, the amount appears in the order totals block, and is subtracted from the grand
total. The full balance of each gift card is subtracted from the shopping cart total. Multiple
gift cards are applied in ascending order. Accounts with the smallest remaining balances
are applied first, until the customer runs out of cards, or until the grand total is zero. If the
grand total is zero, the last account applied to the cart receives a partial deduction, and
any cards that have not applied to the cart will not receive a deduction. The actual
deductions occur only once the order is placed.
The price of a gift card can be configured at the time of purchase. Depending on the price
configuration, there will be either a drop-down list of price options, a field, or a
combination of the two. All amounts are displayed in the currency used in the store, but
the actual amount of the gift card is converted to the base currency after it is added to the
cart.
The customer enters the Sender Name (and Sender Email for a virtual or combined gift
card) and Recipient Name (and the Recipient Email for a virtual or combined gift card). If
the customer is logged in, the Sender Name (and Sender Email, if applicable) is entered
automatically from information in the customer’s account. Depending on how the gift card
is configured, there may also be a Message text area.
Purchasing a Gift Card
Magento Enterprise Edition User Guide, Version 1.14.2
125
Gift Card
Chapter 6: Creating Products
If multiple gift cards are purchased in one order, and the type is virtual or combined, all
the corresponding gift card codes are sent to the recipient in one email.
For all gift card types, the generated account codes will be shown in the order information
page in the admin. This allows you to retrieve the code to place it on the physical gift card,
if necessary.
If an order with a gift card product is canceled or refunded, you must manually cancel the
gift card account. You can either delete the account entirely, or deactivate it.
Creating a Gift Card
The following instructions take you through the process of creating a gift card with the
required fields. Each required field is marked with a red asterisk (*). After you complete the
required settings and save the product, you can add images and complete the remaining
product information, as needed.
Process Overview:
Step 1: Create the Gift Card Product
Step 2: Set Up the Gift Card Pricing
Step 3: Complete the Gift Card Information
Step 1: Create the Gift Card Product
126
1.
On the Admin menu, select Catalog > Manage Products. Then, click the Add Product
button.
2.
In the Create Product Settings section, select the Attribute Set you want to use as a
template for the product.
3.
In the Create Product Settings section, do the following:
a.
Accept the “default” Attribute Set, or select another.
b.
Set Product Type to “Gift Card.”
c.
Click the Continue button.
4.
You can complete most of the Product Information as you would for a simple product.
5.
Click the Save and Continue button.
Magento Enterprise Edition User Guide, Version 1.14.2
Chapter 6: Creating Products
Gift Card
Step 2: Set Up the Gift Card Pricing
1.
In the panel on the left, click Prices.
2.
To add predefined gift card prices, click the Add Amount button. Then, enter a price of the
gift card as the Amount.
Repeat this step to add more pricing options.
3.
Set Allow Open Amount to one of the following:
No
Requires customers to select a predefined gift card amount.
Yes
Allows customers to enter their own gift card amount. If using an open
amount, complete the following to specify the minimum and maximum
amounts allowed:
Open Amount Min Value
Open Amount Max Value
4.
Click the Save button.
Step 3: Complete the Gift Card Information
1.
In the panel on the left, select Gift Card Information.
2.
Set Card Type to one of the following:
l
Virtual
l
Physical
l
Combined
3.
Specify whether the value of the gift card Is Redeemable. If so, the amount can be
transferred to store credit upon creation.
4.
Set Lifetime (days) to the number of days remaining before the gift card expires. If you do
not want to set a limit for the lifetime of the card, leave this field blank.
5.
Set Allow Gift Message to “Yes,” if you want the customer who purchases the Gift Card to
be able to include a message for the recipient. A gift message can be included for both
virtual (emailed) and physical (shipped) gift cards.
6.
Set Email Template to the template that you want to use for the notification email that is
sent when a gift card account is created.
7.
Click the Save button.
Magento Enterprise Edition User Guide, Version 1.14.2
127
Gift Card
Chapter 6: Creating Products
Things to Remember
A “code pool” of unique numbers must be generated before a gift card can be offered
for sale.
The three types of gift cards are: Virtual, Physical, and Combined.
Gift cards can be set to “Redeemable” or “Non-Redeemable.”
The lifetime of a gift card can be unlimited, or set to a number of days.
The value of a gift card can be set to a fixed amount, or set to an open amount with a
minimum and maximum value.
A gift card account for the customer can be created when the order is placed, or at the
time of invoice.
Gift Card Accounts
A gift card account is automatically created for each Gift Card that is purchased. The value
of the gift card can then be applied toward the purchase of a product in your store. You can
also create gift card accounts from the Admin.
Gift Card Accounts
128
Magento Enterprise Edition User Guide, Version 1.14.2
Chapter 6: Creating Products
Gift Card
To create a gift card account:
1.
On the Admin menu, select Customers > Gift Card Accounts.
2.
In the upper-right corner, click the Add Gift Card Account button.
3.
In the Information section, make sure that Active is set to “Yes.”
This field determines if the balance of the account can be redeemed in the shopping cart
before checkout. Also, the value in this field determines it the balance from the gift card
account can be transferred to a customer's store credit.
Information
4.
If applicable, set Website to the website where this gift card account can be used.
5.
Enter the starting Balance of the gift card account.
6.
Enter the Expiration Date for the gift card. If left blank, the gift card account will not
expire.
7.
In the Gift Card Account panel on the left, click Send Gift Card. Then, do the following:
Send Gift Card
8.
a.
In the Recipient Email field, enter the email address to which an email notification of
this gift card account will be sent. This field is optional, and no email will be sent if it
is left blank.
b.
In the Recipient Name field, enter the name of the person who will receive the gift
card message.
c.
Set Send Email from the Following Store View to the language store view that is
associated with the gift card.
Do one of the following:
Magento Enterprise Edition User Guide, Version 1.14.2
129
Gift Card
Chapter 6: Creating Products
l
l
If no recipient has been added, click the Save button to save the gift card.
Click the Save & Send Email button to save the changes and send the gift card by email
to the recipient.
Gift Card Account Settings
Use the System Configuration Gift Card settings to establish the default settings for all gift
cards sold through your store. The code pool is a pre-generated set of unique gift card codes
in a specific format. Codes from the code pool are used each time a gift card account is
created. It is the responsibility of the administrator to ensure that there are enough codes
available for the gift cards. Make sure to generate a code pool before offering gift cards for
sale. By default, Magento generates 1,000 codes. A new pool is not generated if there are
still unused codes available.
Gift Card Account General Settings
To establish the gift card code pool:
1.
On the Admin menu, select System > Configuration.
2.
In the Configuration panel on the left, under Sales, select Gift Cards.
3.
Click to expand the Gift Card Account General Settings section.
4.
Complete the code format fields according to your preference.
5.
When you are ready, click the Generate button to create the new code pool.
When complete, the message, “New code pool was generated” appears.
To configure your store to sell gift cards:
130
1.
On the Admin menu, select System > Configuration.
2.
In the Configuration panel on the left, under Sales, select Gift Cards.
3.
Click to expand the Gift Card Email Settings. Then do the following:
Magento Enterprise Edition User Guide, Version 1.14.2
Chapter 6: Creating Products
4.
5.
Gift Card
a.
Set Gift Card Notification Email Sender to the email identity that you want to appear
as the sender of gift card notifications sent from your store.
b.
Set Gift Card Notification Email Template to the template you want to use for the
email notifications.
Click to expand the Email Sent from Gift Card Account Management section. Then, do
the following:
a.
Set Gift Card Email Sender to the identity that you want to appear as the sender of
gift cards from your store.
b.
Set Gift Card Template to the template you want to use for the gift card.
Click to expand the Gift Card General Settings section. Then, set the following fields to the
default values that you want to use for gift card purchases:
l
Redeemable (Yes / No)
l
Lifetime (days)
l
Allow Gift Message (Yes / No)
l
Gift Message Maximum Length
l
Generate Gift Card Account when Order Item is (Ordered / Invoiced)
Depending on your location, there may be laws in place that forbid gift cards from having
expiration dates. Check your local laws before setting a lifetime for your gift cards.
Magento Enterprise Edition User Guide, Version 1.14.2
131
Gift Card
Chapter 6: Creating Products
Field Descriptions
FIELD
132
SCOPE
DESCRIPTION
Code Length
Global
Determines the length of the gift card code.
Code Format
Global
Determines the format of the gift card code.
Options include: Alphanumeric / Numeric
Code Prefix
Global
Defines any prefix added to the beginning of the
code.
Code Suffix
Global
Defines any suffix added to the end of the code.
Dash Every X Characters
Global
If you want to include dashes in the code,
determines the number of characters between
each dash.
New Pool Size
Global
Determines the size of the new code pool to be
generated.
Low Code Pool Threshold
Global
Determines the number of records in the code
pool that triggers an alert that the pool needs to be
replenished.
Magento Enterprise Edition User Guide, Version 1.14.2
Chapter 7:
Product Information
The Product Information panel provides access to the full range of settings which make
up a product record. The information in this section can be used for reference when
creating a product of any type.
The selection of Product Information tabs, and the organization of the fields on each
page is determined by the attribute set that was used to create the product. As a result,
some fields in your product might differ from what is shown in the examples.
Product Information
Magento Enterprise Edition User Guide, Version 1.14.2
133
General
Chapter 7: Product Information
General
Use the General tab to enter information about the product. In addition to providing basic
information about the product, this section determines the product's visibility in the
catalog and search.
General
Button Descriptions
BUTTON
134
DESCRIPTION
Create New Attribute
Gives you the ability to create a new attribute while working in
product edit mode. Although you can save the new attribute, it is
not automatically included in the attribute set that is associated
with the current product.
WYSIWYG Editor
Opens the editor so you can format the description fields with
HTML. The frontend properties of the description attributes must
set to allow HTML.
Magento Enterprise Edition User Guide, Version 1.14.2
Chapter 7: Product Information
General
Field Descriptions
FIELD
SCOPE
DESCRIPTION
Name
Store View
(Required) The name of the product you want to
appear in catalog. The name is also used to autogenerate the URL Key.
Description
Store View
(Required) The main product description that
appears on the product page.
The text should be plain ASCII text. HTML tags
can be used to format the description if permitted
by the attribute properties.
Do not paste text directly from a word processor,
because the text might include print control codes
that will not render correctly. To strip out any
control codes, save the file as a .txt file before
copying and pasting te text into the product
description.
Short Description
Store View
(Required) Depending on the theme, the Short
Description might appear on catalog pages.
Because of its length, it is often used for RSS
feeds.
SKU
Global
(Required) The Stock Keeping Unit is a unique
identifier for each individual product or service
provided.
Weight
Global
(Required) The weight of the product is a decimal
value used for shipping calculations, and refers to
the standard measurement system used by
shipping carriers in your locale. In the United
States, weight is measured in pounds and
ounces, whereas countries on the metric system
measure weight in grams and kilograms.
Set Product as New from
Date
Website
Sets the beginning date for the range of time the
product is featured in the “New Product” block on
the Home page. The date can be typed directly
into the box, or selected from the calendar.
Set Product as New to
Date
Website
Sets the ending date for the range of time the
product is featured in the “New Product” block on
the Home page.
Magento Enterprise Edition User Guide, Version 1.14.2
135
General
Chapter 7: Product Information
Field Descriptions (cont.)
FIELD
SCOPE
DESCRIPTION
Status
Website
(Required) The Status indicates when the product
is ready to be offered for sale in your store.
Options include: Enabled / Disabled.
URL Key
Store View
The URL Key determines the online address of
the product. It is added to the base URL of the
store, and appears in the address bar of a
browser.
The URL Key should be all lowercase characters,
with hyphens instead of spaces. Magento initially
creates a default, “search engine friendly” URL,
based on the product name.
Do not type the suffix .html in the URL Key,
because use of the suffix is controlled by your
store configuration. To learn more, see , SEO
URL Options.
Visibility
136
Store View
(Required) Determines the level of visibility the
product has throughout the store. Options include:
Not Visible
Individually
The product may be
associated with a one-tomany product, but is not
listed in the catalog.
Catalog
The product appears in
the catalog listing, but is
not included in Search
results.
Search
The product appears in
search results, but is not
listed in the catalog.
Catalog, Search
The product is listed in
the catalog and search
results.
Country of Manufacture
Website
Select the manufacturer of the product. To add
new options to the list, see Manage
Label / Options.
Enable RMA
Website
Determines if Return Merchandise Authorization
is available for the product. Options include: Yes /
No / Use Config
Magento Enterprise Edition User Guide, Version 1.14.2
Chapter 7: Product Information
Product Meta Information
Product Meta Information
Your product meta data is the first level of contact with potential customers who are
searching for a product. The title and description are selling tools that will either help to
motivate a visitor to click your link or not. It is wise to use a descriptive title and a
description that includes relevant words that a potential customer might search.
The information is read by search engines that index your site. Although Google no longer
places a value on meta keywords, other search engines continue to use the information. It’s
a good practice to incorporate high-value keywords in your product titles and related
content.
Meta Information
Field Descriptions
FIELD
SCOPE
DESCRIPTION
Meta Title
Store View
The title appears in the title bar and tab of your
browser, and is also used as the title on a search
engine results page (SERP).
Meta Keywords
Store View
Enter relevant keywords for the product. Consider
using keywords that customers may use to find
the product.
Meta Description
Store View
Write a few sentences to describe the product.
Though not visible to the customer, some search
engines include the meta description on the
search results page.
Magento Enterprise Edition User Guide, Version 1.14.2
137
Recurring Profile
Chapter 7: Product Information
Recurring Profile
Recurring Profiles are most often used for subscriptions or products with installment
payment plans. When such a product is purchased from your store, the customer is
redirected to a third-party payment system. The customer enters into a recurring payment
agreement to authorize the payment system to charge the customer account according to
the recurring profile settings. When a customer purchases a product with recurring
payments, the profile parameters specified from Magento are transferred to the payment
system. Magento supports recurring profiles for items paid with PayPal Express Checkout.
For example, to set up a product with monthly subscription payments, the following
parameters are specified in the recurring profile of the product. The customer is charged by
the payment system once a month, for a year.
Billing Period Unit:
Month
Billing Frequency:
1
Maximum Billing Cycles:
12
You can also set up a trial period where the customer pays a special, introductory price for
a period of time. When the trial ends, the customer is charged the regular amount.
Creating a recurring profile for a product does not create additional sales orders.
In the third-party payment system, a recurring profile is an accounting record that
captures payments on a regular basis and according to the payment schedule defined in the
recurring profile. A recurring profile submits the information about the frequency of a
payment being initiated to the payment system.
The Recurring Profile tab appears by default for simple and virtual products. However you
can configure it to become available for other product types by changing the Apply To
property of the recurring_profile attribute. To learn more about recurring profiles, see:
Working with Recurring Profiles in the knowledge base.
To set up a recurring profile:
138
1.
On the Admin menu, select Catalog > Manage Products. Find the product in the list, and
click to open it in edit mode.
2.
In the panel on the left, select Recurring Profile.
3.
Set Enable Recurring Profile to “Yes.” The section expands to include additional options.
Magento Enterprise Edition User Guide, Version 1.14.2
Chapter 7: Product Information
Recurring Profile
Recurring Profile
4.
In the Schedule section, do the following:
Schedule
5.
a.
To let the customer determine the starting date for the payments, set Customer Can
Define Start Date to “Yes.”
b.
In the Schedule Description field, enter a brief description of the recurring payment.
The description is used as the name of the recurring payment on the Review
Information page.
c.
In the Maximum Payment Failures filed, enter the number of times payment can fail
before the recurring profile is suspended.
d.
To automatically initiate a payment transactoin at the end of the next billing cycle, set
Auto Bill on Next Cycle to “Yes.”
In the Billing section, do the following:
Billing
a.
Set Billing Period Unit to the period of time that defines the billing cycle.
b.
Set Billing Frequency to how often a payment transaction is initiated during the
billing cycle.
Magento Enterprise Edition User Guide, Version 1.14.2
139
Recurring Profile
Chapter 7: Product Information
c.
6.
In the Maximum Billing Cycles field, enter the maximum number of payments
allowed for the recurring profile. If left blank, the the customer will continue to be
charged until the recurring profile is canceled.
In the Trial Period section, do the following:
Trial Period
a.
Set Trial Billing Period Unit to the period of time that defines the billing cycle during
the trial period.
b.
Set Trial Billing Period Frequency to how often a payment transaction is initiated
during the trial billing cycle.
c.
In the Trial Billing Period Cycles field, enter the maximum number of payments
allowed during the trial period.
d.
In the Trial Billing Amount field, enter the product price during the trial period.
The trial billing period parameters are optional, but if specified, make sure that all fields are
complete. Otherwise, the payment system will not authorize the payment.
7.
In the Initial Fees section, do the following:
Initial Fees
8.
140
a.
In the Initial Fees field, enter the amount that the customer is charged at the time of
purchase. The initial fee is paid only once during the life of a subscription.
b.
To cancel if the initial payment fails, set Allow Initial Fee Failure to “Yes.” If set to
“No,” the initial fee is added to the customer’s outstanding amount and is charged by
the payment system as soon as the customer account has a sufficient amount.
When complete, click the Save button.
Magento Enterprise Edition User Guide, Version 1.14.2
Chapter 7: Product Information
Recurring Profile
Field Descriptions
FIELD
SCOPE
DESCRIPTION
SCHEDULE
Customer Can Define
Start Date
Global
Determines if the customer can set the starting
date for the payments. Options include:
Yes
Displays the Recurring Profile
Start Date as an option on the
product page.
No
The customer cannot set the start
date.
Schedule Description
Global
A brief description of the recurring payment. The
description appears as the name of the recurring
payment on the review information page of the
payment system. If left empty, the name of the
selected product appears as the name of the
recurring profile.
Maximum Payment
Failures
Global
Determines the number of failed scheduled
payments before the recurring profile is
automatically be suspended.
Auto Bill on Next Cycle
Global
Determines if the payment system automatically
initiates a payment transaction after the regular
billing cycle.
In the event of a number of payment failures and
the customer has an outstanding amount, the
customer is charged in the next billing cycle.
Options: Yes / No
BILLING
Billing Period Unit
Global
Determines the period of time included in a
subscription billing cycle, and how frequently a
payment transaction is initiated. Options include:
Day
Week
Two Weeks
Month
Year
Magento Enterprise Edition User Guide, Version 1.14.2
141
Recurring Profile
Chapter 7: Product Information
Field Descriptions (cont.)
FIELD
SCOPE
DESCRIPTION
Billing Frequency
Global
Determines how often within the billing period a
payment transaction is initiated for the recurring
profile.
Maximum Billing Cycles
Global
Limits the number of payments that can be made
during a billing cycle. If you do not specify the
maximum of billing cycles, the recurring profile
remains permanently active and the customer is
charged by the payment system until the recurring
profile is suspended or canceled.
Global
Determines the period of time included in a trial
subscription billing cycle, and how frequently a
payment transaction is initiated. Options include:
TRIAL PERIOD
Trial Billing Period Unit
Day
Week
Two Weeks
Month
Year
142
Trial Billing Frequency
Global
Determines how often during the billing period a
payment transaction is initiated for the recurring
profile.
Maximum Trial Billing
Cycles
Global
Limits the number of recurring payments that can
be made during a trial billing cycle.
Trial Billing Amount
Global
The price of the product during the trial period.
Magento Enterprise Edition User Guide, Version 1.14.2
Chapter 7: Product Information
Recurring Profile
Field Descriptions (cont.)
FIELD
SCOPE
DESCRIPTION
INITIAL FEES
Initial Fee
Global
The amount the customer is charged at the time of
purchase. The initial fee is paid only once during
the life of a subscription.
Allow Initial Fee Failure
Global
Determines if the payment profile is suspended if
the initial fee payment fails. In case the field is set
to No, Options include:
Magento Enterprise Edition User Guide, Version 1.14.2
Yes
The payment profile is suspended
if the initial fee fails.
No
The initial fee is added to the
customer’s outstanding amount
and is charged by the payment
system as soon as the customer
account has the sufficient amount.
143
Design
Chapter 7: Product Information
Design
The Design page gives you the ability to apply a different theme to the product page, and
make updates to the XML code that controls the page layout.
Design
Field Descriptions
FIELD
144
SCOPE
DESCRIPTION
Custom Theme
Store View
To apply a custom theme, select the one you
want from the list of available themes.
Active From
Store View
If applying a custom theme for a period of time,
enter the beginning date, or select the date from
the Calendar.
Active To
Store View
If applying a custom theme for a period of time,
enter the ending date, or select the date from the
Calendar.
Custom Layout Update
Store View
You can further customize the theme with XML
coding.
Page Layout
Store View
To apply a different layout to the product page,
select one of the following:
No layout updates
(Default) Does not apply
any layout changes.
Empty
For custom layouts, such
as a 4-column page.
Requires an
understanding of XML.
Magento Enterprise Edition User Guide, Version 1.14.2
Chapter 7: Product Information
Gift Options
Field Descriptions (cont.)
FIELD
Display product options in
SCOPE
Store View
DESCRIPTION
1 column
Applies the 1-column
layout.
2 columns with left
bar
Applies the 2 column
layout.
2 columns with
right bar
Applies the 2-columns
with right bar layout.
3 columns
Applies the 3 column
layout.
Determines the place on the page where the
product options appear. Options include: Product
Info Column / Block after Info Column
Gift Options
Gift Options determine if customers have the option to add a gift message and to gift wrap
the product during checkout. To configure gift options for the store, see: Gift Options
Configuration.
To set up gift options for a product:
1.
On the Admin menu, select Catalog > Manage Products. Then, click to open the product
in edit mode.
2.
In the panel on the left, select Gift Options. Then, do the following:
Gift Options
3.
a.
To allow the customer to enter a gift message, set Allow Gift Message to “Yes.”
b.
To offer gift wrapping for this product, set Allow Gift Wrapping to “Yes.”
c.
To charge for gift wrapping, enter the amount in the Price for Gift Wrapping field, as a
decimal, without the currency symbol.
When complete, click the Save button.
Magento Enterprise Edition User Guide, Version 1.14.2
145
Websites
Chapter 7: Product Information
Field Descriptions
FIELD
SCOPE
DESCRIPTION
Allow Gift Message
Global
Determines if a gift message is available for the
product. Options include: Yes / No
Allow Gift Wrapping
Store View
Determines if gift wrapping is available for the
product. Options include: Yes / No
Price for Gift Wrapping
Global
Determines if there is an additional charge to gift
wrap the product. Enter the price without a
currency symbol.
Websites
If your Magento installation has multiple websites, stores, or views, you can set the scope
of a configuration setting, product, category, or attribute to apply to a specific website,
store, or store view. To learn more, see: Websites, Stores & Views.
Websites
To assign a product to a store view:
146
1.
In the Product Information panel on the left, select Websites.
2.
Select the checkbox for each store view where the product is offered for sale.
3.
When complete, click the Save button.
Magento Enterprise Edition User Guide, Version 1.14.2
Chapter 7: Product Information
Product Categories
Product Categories
Every product in your catalog must be assigned to at least one category. Before you can
add products to your catalog, you must first establish its basic category structure. A
product cannot be saved until after it has been assigned to at least one category.
Product Categories
To set up the product categories:
1.
In the Product Information panel on the left, select Categories.
2.
In the category tree, select the checkbox of each category to which you want to associate the
product. Click the plus [+] icon to show any available subcategories.
A single product can be assigned to more than one category.
3.
When complete, click the Save button.
Magento Enterprise Edition User Guide, Version 1.14.2
147
Related Products
Chapter 7: Product Information
Related Products
Related products are meant to be purchased in addition to the item the customer is
viewing. Simply click the checkbox of a product to place it in the shopping cart. The
placement of the Related Products block varies according to theme and page layout. In the
example below, it appears at the bottom of the Product View page. With a 2 column layout,
the Related Product block often appears in the right column.
Related Products
148
Magento Enterprise Edition User Guide, Version 1.14.2
Chapter 7: Product Information
Related Products
To set up related products:
1.
In the Product Information panel on the left, click Related Products.
2.
Click the Reset Filter button in the upper-right to list all the available products, or use the
search filters at the top of each column to find specific products.
3.
In the list, select the checkbox in the first column of any product you want to feature as a
related product.
Select Related Products
4.
When complete, click the Save button.
Magento Enterprise Edition User Guide, Version 1.14.2
149
Up-sells
Chapter 7: Product Information
Up-sells
Up-sell products are items that your customer might prefer instead of the product currently
viewed. An item offered as an up-sell might be of a higher quality, more popular, or have
better profit margin. Up-sell products appear on the product page, under a heading such
as, “You may also like.”
Up-Sells on Product Page
To select up-sell products:
150
1.
In the Product Information panel, select Up-sells.
2.
Click the Reset Filter button in the upper-right to list all the available products, or use the
search filters at the top of each column to find specific products.
3.
In the list, select the checkbox in the first column of any product you want to feature as an
up-sell.
4.
When complete, click the Save button.
Magento Enterprise Edition User Guide, Version 1.14.2
Chapter 7: Product Information
Cross-sells
Cross-sells
Cross-sell products are similar to impulse purchases positioned next to the cash register in
the checkout line of a grocery store. Products offered as a cross-sell appear on the shopping
cart page, just before the customer begins the checkout process.
Cross-sells Offered During Checkout
To set up cross-sell products:
1.
In the Product Information panel on the left, click Cross-sells.
2.
Click the Reset Filter button in the upper-right to list all the available products, or use the
search filters at the top of each column to find specific products.
3.
In the list, select the checkbox in the first column of any product you want to feature as a
cross-sell.
Cross-Sell Product
4.
When complete, click the Save button.
Magento Enterprise Edition User Guide, Version 1.14.2
151
Custom Options
Chapter 7: Product Information
Custom Options
Custom options are an easy way to offer a selection of product variations that do not rely
on attributes. The limitations are that you cannot track inventory based on any variation,
and that a product with custom options cannot be used with a configurable, grouped, or
bundle product. Custom options are a good solution if your inventory needs are simple.
Custom Options on Product Page
To create custom options:
152
1.
On the Admin menu, select Catalog > Manage Products.
2.
In the list, open the product record in edit mode.
3.
In the panel on the left, select Custom Options.
4.
In the upper-right corner, click the Add New Option button. Then, do the following:
a.
In the Title field, enter a name for the property.
b.
Set the Input Type you want to use for data entry.
c.
Set Is Required to “Yes” if the option must be selected before the product can be
purchased.
d.
In the Sort Order field, enter a number to indicate the order of this item in the list of
options. Enter the number 1 to display this option first.
Magento Enterprise Edition User Guide, Version 1.14.2
Chapter 7: Product Information
Custom Options
Custom Options
5.
Click the Add New Row button. Then, complete the following:
Add New Row
6.
a.
In the Title field, enter a name for this option.
b.
In the Price field, enter any markup or markdown from the base product price that
applies to this option.
c.
Set Price Type to one of the following:
Fixed
The price of the variation differs from the price of the base product
by a fixed monetary amount, such as $1.
Percentage
The price of the variation differs from the price of the base product
by a percentage, such as 10%.
d.
Enter a SKU to identify the option. The option SKU is added as a suffix to the SKU of
the product record.
e.
In the Sort Order field, enter a number to indicate the order of this item in the list of
options. Enter the number 1 to display this option first.
When complete, click the Save button.
Magento Enterprise Edition User Guide, Version 1.14.2
153
Custom Options
Chapter 7: Product Information
Notes
154
Magento Enterprise Edition User Guide, Version 1.14.2
Chapter 8:
Inventory
Managing stock creates opportunities for customer engagement by displaying stock
availability messages in your store, and giving your customers the opportunity to
receive product alerts. Even if your store doesn’t have a large inventory of products,
your customers can benefit from the way you manage your inventory.
Inventory settings can be made for the catalog as a whole, and fine tuned for each
individual product. In addition to controlling stock levels, the inventory settings
determine how backorders and returned items are managed.
If your needs are simple, you might choose not to manage inventory at all. However,
inventory management is more than just keeping track of how many products you have
on hand.
Topics in this chapter:
l
Inventory Setup
l
Managing Stock
l
Stock Availability Messages
l
Out of Stock Threshold
l
Product Alerts
Magento Enterprise Edition User Guide, Version 1.14.2
155
Inventory Setup
Chapter 8: Inventory
Inventory Setup
The Product Stock Items configuration determines the default product inventory settings.
The configuration applies to individual products, rather than to the contents of the cart as
a whole.
To configure the default inventory settings:
1.
On the Admin menu, select System > Configuration.
2.
In the panel on the left, under Catalog, select Inventory.
3.
Click to expand the Product Stock Options section.
4.
Enter the default settings for each item, as described in the following field descriptions.
5.
When complete, click the Save Config button.
Product Stock Options
Field Descriptions
FIELD
Manage Stock
156
SCOPE
Global
DESCRIPTION
Determines if you use full inventory control to
manage the items in your catalog. Options
include:
Yes
Activates full inventory control to keep
track of the number of items currently in
stock.
No
Does not keep track of the number of
items currently in stock.
Magento Enterprise Edition User Guide, Version 1.14.2
Chapter 8: Inventory
Inventory Setup
Field Descriptions (cont.)
FIELD
Backorders
SCOPE
Global
DESCRIPTION
Determines how your store manages backorders.
A backorder does not change the processing
status of the order. Funds are still authorized or
captured immediately when the order is placed,
regardless of whether the product is in stock.
When the product becomes available, it will be
shipped. Options include:
No Backorders
Does not accept
backorders when
product is out of
stock
Allow Qty Below 0
Accepts
backorders when
the quantity falls
below zero.
Allow Qty Below 0 and
Notify Customer
Accepts
backorders when
the quantity falls
below zero, but
notifies
customers that
orders can still be
placed.
Maximum Qty Allowed in
Shopping Cart
Global
Determines the maximum number of a product
that can be purchased in a single order by
customer group. By default, the maximum
quantity is set to 10,000.
Qty for Item's Status to
Become Out of Stock
Global
Determines the stock level at which a product is
considered to be out of stock.
Minimum Qty Allowed in
Shopping Cart
Global
Determines the minimum amount of an item that
is available for purchase according to customer
group. By default, the minimum quantity is set to
1.
Click the Add Minimum Qty button to enter a
different value for a specific customer group.
Magento Enterprise Edition User Guide, Version 1.14.2
157
Managing Stock
Chapter 8: Inventory
Field Descriptions (cont.)
FIELD
SCOPE
DESCRIPTION
Notify for Quantity Below
Global
Determines the stock level at which notification is
sent that the inventory has fallen below the
threshold.
Enable Qty Increments
Global
Determines if items can be sold in quantity
increments. Options include: Yes / No
Qty Increments
Global
Establishes the number of products that make up
a quantity increment.
Automatically Return
Global
Credit Memo Item to Stock
Determines if items included on credit memos are
automatically returned to inventory. Options
include: Yes / No
Managing Stock
Magento has both a short and long version of the Inventory options, depending on whether
you need to manage inventory for the product. To take full advantage of Magento’s
advanced inventory management capabilities, Manage Stock must be enabled. The long
form appears only when Manage Stock is set to “Yes.” The initial values reflect the default
Product Stock Option configuration.
Inventory (Short Form)
To complete the required inventory settings:
1.
2.
158
In the Product Information panel, select Inventory. Then, do the following:
a.
Clear the checkbox below the Manage Stock field. Then, set Manage Stock to “Yes.”
b.
In the Qty field, type the number of units you currently have in stock.
c.
Set Stock Availability to “In Stock.”
When complete, click the Save button.
Magento Enterprise Edition User Guide, Version 1.14.2
Chapter 8: Inventory
Managing Stock
Inventory (Long Form)
Field Descriptions
FIELD
Manage Stock
SCOPE
Global
DESCRIPTION
Determines if you use full inventory control to
manage the items in your catalog. Options
include:
Yes
Activates full inventory control to
keep track of the number of items
currently in stock. (To change the
setting, clear the Use Config
Settings checkbox and select
“Yes.”)
No
Does not keep track of the number
of items currently in stock. (This is
the default setting.)
Qty
Global
(Required) The quantity of the item in stock.
Qty For Item’s Status to
become Out of Stock
Global
Specifies that below a level of your choosing, the
product will become out of stock.
Minimum Qty Allowed in
Shopping Cart
Global
Determines the minimum amount of this item that
is available for purchase. By default, the minimum
quantity is set to 1.
Magento Enterprise Edition User Guide, Version 1.14.2
159
Managing Stock
Chapter 8: Inventory
Field Descriptions (cont.)
FIELD
160
SCOPE
DESCRIPTION
Maximum Qty Allowed in
Shopping Cart
Global
Determines the maximum number of this item that
can be purchased in a single order. By default, the
maximum quantity is set to 1000.
Qty Uses Decimals
Global
Determines if customers can use a decimal value
rather than a whole number when entering the
quantity ordered. Options include:
Can be divided into
Multiple Boxes for
Shipping
Global
Backorders
Global
Yes
Permits values to be entered as
decimals, rather than whole
numbers, which is suitable for
products sold by weight, volume or
length.
No
Quantity values must be entered
as whole numbers.
Determines if parts of the product can shipped
separately.
Options include: Yes / No
Determines how your store manages backorders.
A backorder does not change the processing
status of the order. Funds are still authorized or
captured immediately when the order is placed,
regardless of whether the product is in stock.
When the product becomes available, it will be
shipped. Options include:
No Backorders
Does not accept
backorders when product
is out of stock
Allow Qty Below 0
Accepts backorders
when the quantity falls
below zero.
Allow Qty Below 0
and Notify
Customer
Accepts backorders
when the quantity falls
below zero, but notifies
customers that orders
can still be placed.
Magento Enterprise Edition User Guide, Version 1.14.2
Chapter 8: Inventory
Managing Stock
Field Descriptions (cont.)
FIELD
SCOPE
DESCRIPTION
Notify for Quantity Below
Global
Sends a notification to you when the quantity in
stock falls below this number.
Enable Qty Increments
Global
Allows the product to be sold in quantity
increments.
Qty Increments
Global
Sets the number used as the basis of quantity
increments.
Stock Availability
Global
Determines the current availability of the product.
Options include:
Magento Enterprise Edition User Guide, Version 1.14.2
In Stock
Makes the product
available for purchase.
Out of Stock
Unless Backorders are
activated, prevents the
product from being
available for purchase
and removes the listing
from the catalog.
161
Stock Availability
Chapter 8: Inventory
Stock Availability
You can define an inventory level that becomes the threshold to determine when an item
needs to be reordered. The out of stock threshold can be set to any number greater than
zero.
Another way you can use the stock availability threshold is to manage products that are in
high demand. If you want to capture new customers, rather than sell to high-quantity
buyers, you can set a maximum quantity to prevent a single buyer from taking out your
entire inventory.
Your catalog can be configured to display the availability of each item as “In Stock” or “Out
of Stock” on the product page. The configuration setting applies to the catalog as a whole,
and the message changes according to the stock status of the product. There are several
display variations possible, including how “out of stock” products are managed in the
catalog and search results lists.
“In Stock” Message on Product Page
162
Magento Enterprise Edition User Guide, Version 1.14.2
Chapter 8: Inventory
Stock Availability
Process Overview:
Step 1: Configure Inventory Stock Options
Step 2: Set Product to Manage Stock
Step 3: Set “Out of Stock” Threshold
Step 1: Configure Inventory Stock Options
1.
On the Admin menu, select System > Configuration.
2.
In the Configuration panel on the left, under Catalog, select Inventory.
3.
Click to expand the Stock Options section. Then, do the following:
Stock Options
a.
b.
4.
To configure how “out of stock” products are handled in the category and search
results lists, set Display Out of Stock Products to one of the following:
Yes
Includes “out of stock” products on catalog pages.
No
Omits “out of stock” products from catalog pages.
To configure the stock availability message on the product page, set Display products
availability in stock in the frontend to one of the following:
Yes
Displays an availability message indicating the product stock status.
No
Does not display an availability message.
Click the Save Config button to save the setting.
Magento Enterprise Edition User Guide, Version 1.14.2
163
Stock Availability
Chapter 8: Inventory
Step 2: Set Product to Manage Stock
1.
On the Admin menu, select Catalog > Manage Products.
2.
In the list, click to open the product. Then in the Product Information panel on the left,
select Inventory.
3.
If necessary, clear the Use Config Settings checkbox, and set Manage Stock to “Yes.”
Then, complete the inventory settings as needed.
4.
Make sure that Stock Availability is set to “In Stock.”
5.
Click the Save button to save the product settings.
Step 3: Set "Out of Stock" Threshold
1.
On the Inventory tab, set the Qty for Item’s Status to Become Out of Stock to a value
above zero.
2.
To set the quantity of the product that is allowed in the cart, set the following fields to the
appropriate values for your product, store, and strategy:
3.
l
Minimum Quantity Allowed in Shopping Cart
l
Maximum Quantity Allowed in Shopping Cart
To be notified when stock drops below the threshold, clear the Use Config Settings
checkbox. Then, set Notify for Quantity Below to a number to establish the threshold. The
default the value is 1.
If you need time to restock your inventory, you can use this value to indicate when it is
time to replenish.
164
Magento Enterprise Edition User Guide, Version 1.14.2
Chapter 8: Inventory
Stock Availability
Message Scenarios
You can use a combination of configuration settings to control stock availability messages
on product pages and in listings of products on catalog pages.
“In Stock” Message
Product Page
There are several variations of messaging available for the product page, depending on the
combination of Manage Stock and Stock Availability settings.
“Out of Stock” Message
Magento Enterprise Edition User Guide, Version 1.14.2
165
Stock Availability
Chapter 8: Inventory
Example 1: Show Availability Message
Scenario 1: This combination of settings causes the availability message to appear on the
product page, according to the stock availability of each product.
STOCK OPTIONS
MESSAGE
Display product availability in stock in the frontend:
Yes
Product Inventory
Manage Stock
Yes
Stock Availability
In Stock
Out of Stock
“Availability: In
Stock”
“Availability: Out
of Stock”
Scenario 2: When stock is not managed for a product, this combination of settings can be
used to display the availability message on the product page.
STOCK OPTIONS
MESSAGE
Display product availability in stock in the frontend:
Yes
Product Inventory
Manage Stock
166
No
“Availability: In
Stock”
Magento Enterprise Edition User Guide, Version 1.14.2
Chapter 8: Inventory
Stock Availability
Example 2: Hide Availability Message
Scenario 1: This combination of configuration and product settings prevents the
availability message from appearing on the product page.
STOCK OPTIONS
Display product availability in stock in the frontend:
MESSAGE
No
Product Inventory
Manage Stock
Yes
Stock Availability
In Stock
None
Out of Stock
None
Scenario 2: When stock is not managed for a product, this combination of configuration
and product settings prevents the availability message from appearing on the product
page.
STOCK OPTIONS
Display product availability in stock in the frontend:
MESSAGE
No
Product Inventory
Manage Stock
Magento Enterprise Edition User Guide, Version 1.14.2
No
None
167
Stock Availability
Chapter 8: Inventory
Catalog Page
The following display options are possible for the category and search results lists,
depending on the product availability and configuration settings.
“Out of Stock” Message on Category Page
Example 1: Show Product with “Out of Stock Message”
This combination of configuration settings includes out of stock products in the category
and search results lists, and displays an “out of stock” message.
STOCK OPTIONS
168
MESSAGE
Display Out of Stock Products
Yes
Display product availability in stock in the frontend
Yes
Display Out of Stock Products
Yes
Display product availability in stock in the frontend
No
“Out of stock”
None
Magento Enterprise Edition User Guide, Version 1.14.2
Chapter 8: Inventory
Stock Availability
Example 2: Show Product without “Out of Stock Message”
This combination of configuration settings includes out of stock products in the category
and search results lists, but does not display a message.
STOCK OPTIONS
MESSAGE
Display Out of Stock Products
Yes
Display product availability in stock in the frontend
No
None
Example 3: Hide Product Until Back in Stock
This configuration setting omits out of stock products entirely from the category and
search results lists, until they are back in stock.
STOCK OPTIONS
Display Out of Stock Products
MESSAGE
No
None
Out of Stock Threshold
You can define an inventory level that becomes the threshold to determine when an item
needs to be reordered. The out of stock threshold is set to a number above zero.
To set the out of stock threshold:
1.
In the Product Information panel, select Inventory.
2.
Set the Qty for Item’s Status to Become Out of Stock to a value above zero.
To change the quantity allowed in cart:
This option is helpful for products in high demand. If you want to capture a larger number
of new customers rather than selling high volumes to high-quantity buyers, you can set a
maximum quantity to prevent a high-quantity buyer from taking out your entire inventory.
1.
In the Product Information panel, select Inventory.
2.
Change the Minimum and Maximum Quantity Allowed in Shopping Cart fields to
appropriate values for your product, store, and strategy.
To be notified when stock drops below threshold:
1.
In the Product Information panel, select Inventory.
2.
Clear the Use Config Settings checkbox, and set Notify for Quantity Below to indicate the
level when you want to be notified. By default, the value is set to 1.
Magento Enterprise Edition User Guide, Version 1.14.2
169
Product Alerts
Chapter 8: Inventory
Product Alerts
You can enable your customers to subscribe to two types of customer alerts by email: price
change alerts and in-stock alerts. For each alert type, choose whether to enable users to
subscribe to it, and select the email template to use. Also, select a sender display name,
which applies to both alert types.
Product Alerts
The price change alert creates a Sign up for price alert link on every product page.
Customers can click the link to subscribe to alerts related to the product. Whenever the
price changes, or the product goes on special, the customer receives an email alert.
The in-stock alert creates a link called “Sign up to get notified when this product is back in
stock” for every product that is out of stock. Customers can click the link to subscribe to the
alert. When the product is back in stock, customers receive email notification that the
product is available. Products with alerts have a Product Alerts tab in the Product
Information panel that lists the customers who have subscribed to an alert.
Setting Up Product Alerts
These settings enable you to select how often Magento checks for changes that require alerts
to be sent. Additionally, you can select the recipient, sender, and template for emails that
are sent if the sending of alerts fails.
To set up product alerts:
1.
On the Admin menu, select System > Configuration.
2.
In the panel on the left, under Catalog, select Catalog.
3.
Click to expand the Product Alerts Run Settings section. Then, do the following:
a.
b.
170
To determine how often product alerts are sent, set Frequency to one of the following:
l
Day
l
Week
l
Month
To determine the time of day product alerts are sent, set Start Time to the hour,
minute, and second.
Magento Enterprise Edition User Guide, Version 1.14.2
Chapter 8: Inventory
4.
Product Alerts
c.
In the Error Email Recipient field, enter the email of the person to be contacted if an
error occurs.
d.
In the Error Email Sender field, select the store identity that appears as the sender of
the error notification.
e.
Set Error Email Template to the transactional email template to be used for the error
notification.
When complete, click the Save Config button.
Product Alert Run Settings
Field Descriptions
FIELD
SCOPE
DESCRIPTION
Frequency
Global
Choose how often product alerts are sent out:
Daily, Weekly, or Monthly.
Start Time
Global
Choose what time of day the product alert
process starts. This time should be after any price
or inventory updates are performed.
Error Email Recipient
Global
Identify the email address of the person (normally
a store administrator) who should receive an email
notification when there is an error in the product
alert process.
Error Email Sender
Global
Select the role that the email will be “from.”
Error Email Template
Global
Select the email template to use for product alert
error notifications.
Magento Enterprise Edition User Guide, Version 1.14.2
171
Product Alerts
Chapter 8: Inventory
Managing Stock for Configurable Products
By default, Manage Stock is turned off for a configurable product, because the inventory is
managed through each associated product. However, at times it may be necessary to apply
inventory settings to a configurable product as a whole, such as to set quantity increments
and change the stock availability.
To enable quantity increments:
1.
On the Inventory tab of the configurable product, clear the Use Config Settings checkbox,
and set Manage Stock to “Yes.” The Enable Qty Increments field appears.
2.
To sell the product in quantity increments, do the following:
a.
Below the Enable Qty Increments field, clear the Use Config Settings checkbox. Then,
set Enable Qty Increments to “Yes.”
b.
In the Qty Increments field, enter the number of products that you want to sell
together as a single batch.
To set product as “Out of Stock:”
172
1.
On the Inventory tab of the configurable product, clear the Use Config Settings checkbox,
and set Manage Stock to “Yes.” The Stock Availability field appears.
2.
To temporarily remove the product from sale, set Stock Availability to “Out of Stock.”
3.
When you are ready to offer the product for sale, set Stock Availability to “In Stock.”
Magento Enterprise Edition User Guide, Version 1.14.2
Chapter 9:
Product Pricing
Magento Enterprise Edition supports a number of pricing options that you can use for
promotions, and to meet minimum advertised price requirements.
Topics in this chapter include:
l
Prices
l
Special Price
l
Tier Price
l
Package Price
l
Minimum Advertised Price
l
Product Group Price
Magento Enterprise Edition User Guide, Version 1.14.2
173
Prices
Chapter 9: Product Pricing
Prices
The Prices tab is used to establish the pricing structure that is associated with a product.
Options include special and tier pricing, and manufacturer’s suggested retail price.
Prices
Field Descriptions
FIELD
SCOPE
DESCRIPTION
Price
Global
The retail price of the product.
Group Price
Global
Sets up promotional prices for specific customer
groups within the selected website.
Special Price
Website
To offer a Special Price, enter a discounted price
and complete the date range fields to establish
when the promotion goes into effect.
When available, the retail price is crossed out and
the special price appears below in a large, bold
font.
174
Special Price From Date
Website
Sets the beginning date for the range of time the
Special Price is offered.
Special Price To Date
Website
Sets the ending date for the range of time the
Special Price is offered.
Tier Price
Website
Tier pricing is used to offer a quantity discount.
The discount can be applied to specific customer
groups within the selected website.
Magento Enterprise Edition User Guide, Version 1.14.2
Chapter 9: Product Pricing
Prices
Field Descriptions (cont.)
FIELD
SCOPE
DESCRIPTION
Apply MAP
Website
When applied, hides the actual product price from
the customer. Options include: Yes / No / Use
Config
Display Actual Price
Website
Determines when the customer can see the
actual product price. Options include:
In Cart
Displays the actual
product price in the
shopping cart.
Before Order
Confirmation
Displays the actual
product price only at the
end of the checkout
process, just before the
order is confirmed.
On Gesture
Displays the actual
product price
Use Config
Displays the actual price
according to the
configuration setting.
Manufacturer’s Suggested
Retail Price
Global
The retail price as suggested by the manufacturer
(MSRP).
Tax Class
Website
(Required) Determines the tax class associated
with the product. Options include:
None
The item is not subject to
tax.
Default
The item is subject to the
tax rules associated with
the “default” tax class.
Taxable Goods
The item is subject to the
tax rules associated with
the “Taxable Goods” tax
class.
The manner in which product taxes are calculated
is determined by the configuration of your store.
Magento Enterprise Edition User Guide, Version 1.14.2
175
Special Price
Chapter 9: Product Pricing
Special Price
To offer a Special Price, enter a discounted price and complete the date range fields to
establish when the promotion goes into effect. On both the catalog list and product pages,
the regular price is crossed out, and the Special Price appears in bold red.
Special Pricing
To display a special price:
176
1.
In the Product Information panel on the left, select Prices.
2.
Enter the amount of the Special Price.
3.
Complete the Special Price From Date and Special Price To Date to define the period of
time that the special price is in effect. You can pick the dates from the Calendar to the
right of each field.
4.
Click the Save button to save your changes.
5.
When prompted to update the cache and indexes, follow the instructions at the top of the
page.
Magento Enterprise Edition User Guide, Version 1.14.2
Chapter 9: Product Pricing
Tier Price
Tier Price
Tier pricing lets you offer a quantity discount from oth the catalog list and product detail
pages. The discount can be applied to a specific store view or customer group.
Tier Price “As Low as”
l
On the catalog page, the product price includes the words, “As Low As: $110.49”
l
On the product page, the calculated quantity discount has the message:
Buy 2 for $__._ each and save _%
Buy 4 for $__._. each and save _%
The prices in the storefront take precedence from the highest to the lowest quantity.
Therefore, if you have a tier for the quantity 5 and one for the quantity 10 and a customer
adds 5, 6, 7, 8 or 9 items to the shopping cart, then the customer gets the discounted price
that you specified for the quantity 5 tier. As soon as the customer adds the 10th item, the
discounted price specified for the quantity 10 tier supersedes the quantity 5 tier and that
discounted price (of 10) applies instead.
To display a tier price:
1.
In the Product Information panel on the left, select Prices.
2.
In the Tier Price section, click the Add Tier button. Then, do the following:
Magento Enterprise Edition User Guide, Version 1.14.2
177
Tier Price
Chapter 9: Product Pricing
Tier Price
a.
Select the Website to which the tier pricing applies.
b.
Select the Customer Group for whom the tier pricing is available.
To apply a tier to multiple groups, but not all groups, create multiple tiers, each with
the same Qty and Price information and select a different customer group for each.
178
c.
In the Qty field, enter the quantity that must be ordered to receive the discount.
d.
In the Price field, enter the adjusted price of the item.
3.
When complete, click the Save button.
4.
When you are prompted to update the cache and indexes, follow the instructions in the
message at the top of the workspace.
Magento Enterprise Edition User Guide, Version 1.14.2
Chapter 9: Product Pricing
Package Price
Package Price
Unlike a unit price, a package price refers to multiple items of the same product that are
packaged together and sold as a single unit. A six-pack of soft drinks is an example of
package pricing.
To sell multiple products as a package:
1.
On the Admin menu, select Catalog > Manage Products.
2.
In the list, click to select the product you want to sell as a package.
3.
In the panel on the left, select Inventory. Then, do the following:
a.
Set Qty for Item’s Status to Become Out of Stock to the lowest inventory threshold for
this item. (If necessary, clear the Use Config Settings checkbox.)
The number should be a multiple of the number of items in the package. For example,
for a six-pack, the threshold might be 6, 12, 18, and so on.
4.
b.
Set Enable Qty Increments to “Yes.”
c.
Set Qty Increments to the number of units included in the package. For example, 6.
When complete, click the Save Config button.
Magento Enterprise Edition User Guide, Version 1.14.2
179
Minimum Advertised Price
Chapter 9: Product Pricing
Minimum Advertised Price
Merchants are sometimes prohibited from displaying a price that is lower than the
manufacturer’s suggested retail price (MSRP). Magento’s Minimum Advertised Price (MAP)
gives you the ability to remain in compliance with the manufacturer’s requirements while
offering your customers a better price. Because requirements differ from one manufacturer
to another, you can configure your store to prevent the display of your actual price on
pages where it is not allowed to appear according to the terms of the manufacturer.
“Click for Price” Gesture with Popup
MAP Logic
For products that allow configuration from the storefront, with prices that depend on a
selected option, (such as custom options, or simple products with their own SKUs and
stock management), the following logic is implemented:
l
l
MAP applies to the main price; prices of the options, bundle items, and associated
products (which add or subtract from the main price) are displayed normally.
If a product does not have a main price, and its price is derived from the prices of
associated products (such as with a grouped product), the MAP settings of the
associated products are used.
The MAP application logic for other price settings is as follows:
l
If tier pricing is set, the tier price appears according to the Display Actual Price setting.
l
If a special price is set, it is considered to be the actual price for MAP.
In the order management and customer management tools, as well as in the reports
sections of the Admin, only the actual price appears.
180
Magento Enterprise Edition User Guide, Version 1.14.2
Chapter 9: Product Pricing
Minimum Advertised Price
If a product added to the shopping cart has MSRP specified, the price will not be crossed-out in
the mini shopping cart or in the shopping cart.
Using MAP with Product Types
PRODUCT TYPE
DESCRIPTION
Simple, Virtual
The actual price does not automatically appear on catalog list
and product pages, but is included only according to the Display
Actual Price setting. Custom option prices appear normally.
Grouped
The prices of associated simple products do not automatically
appear on catalog list and product pages, but are included only
according to the Display Actual Price setting.
Configurable
The actual price does not automatically appear on catalog list
and product pages, but is included only according to the Display
Actual Price setting. Option prices appear normally.
Bundle with fixed price
The actual price does not automatically appear on catalog pages,
but is included only according to the Display Actual Price setting.
The prices of bundle items appear normally.
MAP is not available for bundled products with dynamic pricing.
Downloadable
The actual price does not automatically appear on catalog list
and product pages, but is included only according to the Display
Actual Price setting. The price associated with each download
link appears normally.
Using MAP with Price Settings
PRICE SETTING
Tier Price
DESCRIPTION
If tier pricing is set, the tier pricing message is not displayed in
the catalog. On the product page a notification is displayed that
indicates that the price can be lower when ordering more than a
certain quantity, but the discount is displayed in percentages
only. For associated products of a grouped product, the
discounts are not displayed on the product page.
The tier price is shown according to the Display Actual Price
setting.
Special Price
If the Special price is specified, the special price is displayed
according to the Display Actual Price setting.
Magento Enterprise Edition User Guide, Version 1.14.2
181
Minimum Advertised Price
Chapter 9: Product Pricing
MAP Setup
MAP can be configured at both the global and product levels. There are a variety of
configuration options that you can use to remain in compliance with the terms of your
agreement with the manufacturer, while still offering your customers a better price. Your
store’s MAP settings can be applied to all products in your catalog or configured for only
specific products.
On the global level, you can enable/disable the functionality, apply it to all products, define
how the actual price is displayed, and edit the text of the MAP related messages and
information tips that appear in the store. When MAP is enabled globally, product-level
MAP settings become available. For a product you can choose to apply MAP, specify the
MSRP, and define how the actual price is displayed. Product-level MAP settings override
the global MAP settings.
Minimum Advertised Price Configuration
To configure MAP globally:
1.
On the Admin menu, select System > Configuration.
2.
In the upper-right corner, set Current Configuration Scope to the website where the
configuration applies.
3.
In the panel on the left, under Sales, select Sales. Then, click to expand the Minimum
Advertised Price section, and do the following:
4.
To activate MAP, set Enable MAP to “Yes.”
a.
182
Set Apply MAP (Default Value) to one of the following:
Magento Enterprise Edition User Guide, Version 1.14.2
Chapter 9: Product Pricing
l
l
b.
5.
Minimum Advertised Price
To apply MAP to certain products, select “No.”
To apply MAP by default to all products and hide all prices throughout the site,
select “Yes.”
To determine when and where you want your actual price to be visible to the
customer, set Display Actual Price to one of the following:
l
In Cart
l
Before Order Confirmation
l
On Gesture (on click)
When complete, click the Save Config button.
To configure MAP for a specific product:
1.
On the Admin menu, select System > Configuration.
2.
In the Configuration panel on the left, under Sales, click to expand the Minimum
Advertised Price section. Then, do the following:
a.
Set Enable MAP to “Yes.”
b.
Set Apply MAP (Default Value) to “No.”
c.
Complete the remaining settings as needed. Then, click the Save Config button.
3.
Select Catalog > Manage Products, and open the product record.
4.
In the Product Information panel on the left, selectPrices. Then, do the following:
5.
a.
Enter your Price that is lower than the manufacturer’s minimum advertised price.
b.
Set Apply MAP to “Yes.”
c.
Set Display Actual Price according to your preference.
d.
Enter the Manufacturer’s Suggested Retail Price.
When complete, click the Save button.
Magento Enterprise Edition User Guide, Version 1.14.2
183
Minimum Advertised Price
Chapter 9: Product Pricing
Minimum Advertised Price Configuration
Field Descriptions
FIELD
DESCRIPTION
Enable MAP
Website
Activates Minimum Advertised Price for your
store. Options include: Yes / No
Apply MAP
Website
Applies MAP by default to all products in the
store. Options include:
Display Actual Price
184
SCOPE
Website
Yes
Initially hides all prices in the
store, and displays them
according to the Display
Actual Price setting.
No
Does not apply MAP to all
products, by default. If MAP is
enabled, it can still be applied
to products individually.
Determines where the actual price of a product is
visible to the customer.Options include:
Magento Enterprise Edition User Guide, Version 1.14.2
Chapter 9: Product Pricing
Product Group Price
Field Descriptions (cont.)
FIELD
SCOPE
DESCRIPTION
In Cart
Displays the actual product
price in the shopping cart.
Before Order
Confirmation
Displays the actual product
price at the end of the
checkout process, just before
the order is confirmed.
On Gesture
Displays the actual product
price in a popup when the
customer clicks the “Click for
price” or “What’s this?” link.
Default Popup Text
Message
Store View
The popup text message that appears when the
customer selects the “Click for price” link from a
category list or product view page.
Default “What’s This” Text
Message
Store View
The pop-up text message that appears when the
customer clicks the “What’s this?” link from the
product view page.
Manufacturer's Suggested
Retail Price
Store View
The retail price as suggested by the manufacturer
(MSRP).
Product Group Price
Product Group Price enables you to set promotional prices for different customer groups at
the product level. Group price can be used with the following product types:
l
Simple
l
Configurable
l
Virtual
l
Bundle
l
Downloadable
For bundle products, the group price is specified as a discount percentage. If bundle items
have their own group prices set for the same customer group, then the discount specified
for the whole bundle product applies to the group prices.
For the Grouped and Gift Card product types, the Group Price is not applied, even if these
product types are selected in the Apply To field of the group_price attribute. In this case,
for Grouped products, the Group Price field does not appear on the Prices page in Product
Information. For Gift Card products, the Group Price field appears, but is not used.
Magento Enterprise Edition User Guide, Version 1.14.2
185
Product Group Price
Chapter 9: Product Pricing
Product Group Price Setup
The display of group prices in the store follows the general logic used for Magento pricing.
If, in addition to the regular price, a product has promotional price(s), the lowest price
appears in the storefront. If a product custom option has price set as a percentage, then the
lowest promotional price is used as base for the calculation. The same logic applies when
the associated products (the options) of a configurable product have prices set as a
percentage.
Examples: Promotional Prices in Storefront
The following table illustrates how the minimum promotional price logic is implemented.
The table provides several examples, but does not include all possible combinations of
promotional price settings.
ADMIN PRICE
PRICE IN STOREFRONT
Price = $4
For customers from the tier price group(s): $ 4
Special Price = $5
As low as: $3
Tier Price = $3
For customers from other groups: $4
Price = $5
For all customers:
Special Price = $3
Regular Price: $5
Tier Price = $4
Special Price: $3
Price = $5
For customers from the catalog price rule group:
Special Price = $3
Regular Price: $5
Tier Price = $4
Special Price: $2
Price after a catalog price
rule applied = $2
For customers from other groups:
Regular Price: $5
Special Price: $3
Price = $5
Special Price = $4
Group Price = $3
For customers from the price group:
Regular Price: $5
Special Price: $3
For customers from other groups:
Regular Price: $5
Special Price: $4
Important! When a group price is set for a product, then the catalog price rules for the
corresponding customer groups are applied to the group price, not to the regular price.
186
Magento Enterprise Edition User Guide, Version 1.14.2
Chapter 9: Product Pricing
Product Group Price
To set up a group price for a product:
1.
On the Admin menu, select Catalog > Manage Products. Then in the list, click to open the
product in edit mode.
2.
In the panel on the left, click Prices. Then, do the following:
3.
a.
In the Group Price field, click the Add Group Price button.
b.
Select the target Customer Group and enter the product Price for the group. The
Website column defines the scope of the Group Price field.
When complete, click the Save button.
Group Price Attribute
The list of product types for which group price can be specified is defined in the group_
price attribute properties. The product types that can be used with the attribute are
configured in the Apply To property.
Regular Price
The value of the price system product attribute, which by default, corresponds to the Price
specified on the Prices tab in Product Information.
Promotional Price
A product price that is defined by any of the following system product attributes:
special_price, group_price, or tier_price; or the resulting price after a catalog
price rule is applied.
Magento Enterprise Edition User Guide, Version 1.14.2
187
Product Group Price
Chapter 9: Product Pricing
Notes
188
Magento Enterprise Edition User Guide, Version 1.14.2
Chapter 10:
Product Images
Using images of consistent quality, size, and proportion gives your product catalog a
professional look with commercial appeal. If you have a large catalog with several
images per product, you can easily have hundreds, if not thousands of product images
to manage. Before you get started, it’s a good idea to establish a naming convention for
your image files, and organize them so you can find the originals if you ever need them.
The Images tab in the Product Information panel is used to upload and manage
individual images for the current product. You can upload multiple images for each
product, with different images for each website or store view. However, if you have a
large quantity of images to manage, it is more efficient to import, rather than upload
each one individually. To learn more, see: Importing Product Images.
Product Images
Magento Enterprise Edition User Guide, Version 1.14.2
189
Thumbnail Gallery
Chapter 10: Product Images
Thumbnail Gallery
The thumbnail gallery on the product page can be used to display multiple images of the
product. Although the position of the gallery varies by theme, it is usually just below the
main image on the product page. When a thumbnail is clicked, the image appears, by
default in a popup window that allows you to browse through the images.
Thumbnail Gallery Popup
190
Magento Enterprise Edition User Guide, Version 1.14.2
Chapter 10: Product Images
Thumbnail Gallery
Light Boxes and Sliders
Many stores use a third-party light box or slider to display product images in a more
elegant fashion. Typically with a light box, whenever a thumbnail image is clicked, it
replaces the main image on the page. You can use the left and right arrows in the light box
to browse through the images, or click a thumbnail to view a specific image. When zoom is
activated, you can click the main image and move the cursor around to magnify different
parts of the image. The magnified selection appears to the right of the image.
Zoom
Magento displays a magnified portion of the image on mouseover, provided that you have
uploaded a larger image that can be used to zoom in for a closer look.
Zoom
Magento Enterprise Edition User Guide, Version 1.14.2
191
Image Size and Type
Chapter 10: Product Images
Image Size and Type
As a best practice, you should standardize the size of your images so they appear at the
highest possible resolution. A single product image can be displayed in several different
sizes throughout your catalog. In addition to the main image on the product page, are
smaller images and thumbnails.
Image types are used in different places in your catalog. If you have only one product
image, you can use the same image for each type. If you do not assign an image to each
type, a placeholder image is used to mark its place in the catalog.
To configure product images:
1.
On the Admin menu, select System > Configuration.
2.
In the panel on the left, under Catalog, select Catalog.
3.
Click to expand the Product Image section. Then, do the following:
a.
In the Base Image Width field, enter the maximum width that the base image is to be
rendered.
b.
In the Small Image Width field, enter the maximum width that the small image is to
be rendered.
Product Image
4.
192
When complete, click the Save Config button.
Magento Enterprise Edition User Guide, Version 1.14.2
Chapter 10: Product Images
Image Size and Type
Image Types
IMAGE TYPE
Thumbnail
DESCRIPTION
Thumbnail images appear in the thumbnail gallery, shopping cart,
and in some blocks such as Related Items. Example size:
50 x 50 pixels
Small Image
The small image is used for the product images in listings on
category and search results pages, and to display the product
images needed for sections such as for Up-sells, Cross-sells,
and the New Products List. Example size:
470 x 470 pixels
Base Image
The base image is the main image on the product detail page.
Image zoom is activated if you upload an image that is larger
image than the image container. Example sizes:
470 x 470 pixels (without Zoom)
1100 x 1100 pixels (with Zoom)
Media Image
(Optional) A media image you the ability to associate additional
images with a product, that are other than a product image. For
example, you might include the product logo, care instructions, or
an image of the ingredients from a food label.
If you add a media image attribute to the attribute set of a
product, it is listed as an additional image type, along with Base,
Small, and Thumbnail. You can set it to "Exclude" so it doesn't
appear in the gallery.
Magento Enterprise Edition User Guide, Version 1.14.2
193
Adding Product Images
Chapter 10: Product Images
Adding Product Images
The Images tab is used to upload and manage images for a single product. You can upload
multiple images for the product, and maintain different images for each website or store
view. However, if you have many images to manage, you might prefer to import them,
rather than upload product images individually. Because Magento does not convert image
file formats, any file conversion that is necessary must take place before the files are
uploaded or imported.
Adding Product Images
To add product images:
194
1.
If the images are to be used for only a specific store view, set Choose Store View in the
upper-left corner to identify the view where the images will be used.
2.
In the panel on the left, click Images.
3.
Click the Browse Files button, and select the product images files you want to upload to
your store.
4.
Click the Upload Files button to upload the selected images to your store. Then, for each
image, do the following:
a.
Enter a descriptive Label for the image. This text appears on mouseover and can
improve indexing by search engines.
b.
If using multiple images, enter a numeric value in the Sort Order field to determine
the sequence in which they appear in the thumbnail gallery.
Magento Enterprise Edition User Guide, Version 1.14.2
Chapter 10: Product Images
5.
Adding Product Images
c.
To prevent an image from being included in the thumbnail gallery, click the Exclude
checkbox. For example, if the product has only one image, there’s no reason to include
it in the gallery.
d.
To delete any image, select the Remove checkbox.
When complete, click the Save and Continue Edit button.
To add images to the gallery:
Follow the same process for adding a new product image. For best results, gallery image
files should be the same size and proportion as the main product image.
Field Descriptions
FIELD
SCOPE
DESCRIPTION
Image
On mouseover, a thumbnail of each uploaded
image appears.
Label
The descriptive “Alt” text that appears on
mouseover. Including a label for each image
improves indexing by search engines, and
accessibility for people who use screen readers.
Sort Order
Determines the order in which images are
displayed in the gallery.
Thumbnail
Store View
A very small image that appears in the shopping
cart and in some blocks, such as Related Items.
Small Image
Store View
Appears in product listings on the category and
search results pages, and also used in additional
sections such as Up-sells, Cross-sells, and the
New Products List.
Base Image
Store View
The main image on the product page. If a very
large image is uploaded, it can be used to produce
the magnified area displayed during image zoom.
Media Image
Store View
(Optional) The Media Image appears only if an
attribute of the Media Image type is included in the
attribute set.
Exclude
Select the Exclude checkbox to prevent the
image from being listed in the thumbnail gallery.
Remove
Select the Remove checkbox to delete the image.
All selected images are deleted when the product
record is saved.
Magento Enterprise Edition User Guide, Version 1.14.2
195
Placeholders
Chapter 10: Product Images
Placeholders
Magento uses a temporary image as a placeholder until permanent product images are
available. The initial placeholder image is the Magento logo, which you can replace with
placeholder images of your own design.
Product Placeholder Image
To upload placeholder images:
1.
On the Admin menu, select System > Configuration.
2.
In the Configuration panel on the left, under Catalog, select Catalog.
3.
Click to expand the Product Image Placeholders section. Then, do the following:
a.
For each image type, click the Browse button to upload the placeholder image you
want to use for the Base Image, Small Image, and Thumbnail images. If you like, you
can use the same image for each type.
b.
When complete, click the Save Config button.
Product Image Placeholder Configuration
196
Magento Enterprise Edition User Guide, Version 1.14.2
Chapter 10: Product Images
Watermarks
Watermarks
If you have gone to the expense of creating your own original product images, there is not
much you can do to prevent unscrupulous competitors from stealing them with the click of
a mouse. However, you can place a watermark on each image to identify it as your property
and make it a less convenient target. The watermark file can be either a .jpg (jpeg), .gif, or
.png image.
Example: Watermark Positions
The watermark used in the following examples is a .png file 470 x 470 pixels square, with
a black logo and transparent background. The size and opacity were later adjusted to 100 x
100 pixels at 10% using the watermark configuration settings in the Admin panel. You can
experiment with different watermark settings until you find the look you want.
None
Tile
Top Left
Top Right
Bottom Left
Bottom Right
Center
Stretch
Magento Enterprise Edition User Guide, Version 1.14.2
197
Watermarks
Chapter 10: Product Images
To place watermarks on product images:
1.
On the Admin menu, select System > Configuration.
2.
In the Configuration panel on the left, under General, select Design.
3.
Click to expand the Product Image Watermarks section. Then, complete the following
steps for the Base, Small, and Thumbnail images:
4.
a.
Enter the Watermark Default Size, in pixels. For example: 200 x 300
b.
Enter the Watermark Opacity, as a percentage. For example: .40
c.
Click the Browse button and select the image file to upload.
d.
Set Watermark Position to your preference.
When complete, click the Save Config button.
Product Image Watermarks
198
Magento Enterprise Edition User Guide, Version 1.14.2
Chapter 10: Product Images
Watermarks
Field Descriptions
FIELD
SCOPE
DESCRIPTION
Base Image Watermark
Default Size
Store View
The default size of the watermark for the Base
Image. (For example, 470 x 470)
Base Image Watermark
Opacity, Percent
Store View
The percentage of opacity applied to the
watermark for the Base Image.
Base Image Watermark
Store View
The file with the watermark image to be uploaded
for the Base Image. (The image file can be .jpg
(jpeg), .gif, and .png.)
Base Image Watermark
Position
Store View
The position of the watermark for the Base Image.
Options include:
Stretch
Tile
Top/Left
Top/Right
Bottom/Left
Bottom/Right
Small Image
Store View
(Same as above.)
Thumbnail Image
Store View
(Same as above.)
Magento Enterprise Edition User Guide, Version 1.14.2
199
Shopping Cart Thumbnails
Chapter 10: Product Images
Shopping Cart Thumbnails
The thumbnail images in the shopping cart give customers a quick overview of each item.
However, for products with multiple options, the standard product image may not match
the actual item purchased. If the customer purchased a pair of red shoes, ideally, the
thumbnail in the shopping cart should show the product in the same color.
Thumbnails for grouped and configurable products can display either the image from the
“parent” or associated “child” product in the current store view.
Shopping Cart Thumbnail
To configure shopping cart thumbnails:
1.
On the Admin menu, select System > Configuration.
2.
In the Configuration panel on the left, under Sales, select Checkout.
3.
Click to expand the Shopping Cart section, do the following:
Shopping Cart Configuration
a.
b.
4.
200
Set Grouped Product Image to one of the following:
l
Product Thumbnail Itself
l
Parent Product Thumbnail
Set Configurable Product Image to one of the following:
l
Product Thumbnail Itself
l
Parent Product Thumbnail
When complete, click the Save Config button.
Magento Enterprise Edition User Guide, Version 1.14.2
Chapter 11:
Swatches
Swatches provide an alternate way to display the selection of options for configurable
products. Rather than choosing an option from a drop-down list, customers can make
their selection by clicking a swatch. Configurable swatches can be used on the product
page, product list, and in layered navigation.
In this chapter, you will learn how to use swatches to make the presentation of
configurable products more appealing and informative.
Topics in this chapter include:
l
How Swatches are Used
l
Swatch Configuration
l
Adding New Attribute Values
l
Preparing Swatch Images
l
Uploading Swatch Images
l
Swatch Images Cache
Color and Size Swatches on Product Page
Magento Enterprise Edition User Guide, Version 1.14.2
201
Swatch Workflow
Chapter 11: Swatches
Swatch Workflow
On the product page, swatches can be used to indicate the combinations of color and size
that are currently available. Any option that is not available is crossed out. In the following
example. the pistachio loafer is available only is size 8, so the rest of the sizes are crossed
out. You can click each color swatch to see the available sizes, and click each size swatch to
see the available colors. When a swatch is selected, the value appears in the input field,
and the selected swatch is outlined as the current selection.
Unavailable Size Swatches Crossed Out
Swatches can be set up to display the corresponding product image when the swatch is
clicked. For example, from the product list or product page, you can click the swatch to
change the color of the main image.
Text-Based Swatches
If there isn’t an image available for a swatch, the attribute value appears as text. A textbased swatch is like a button with a text label, and behaves in the same way as a swatch
with an image. In the following example, the color swatches are identified with a text label
for the color name, just as the shoe size swatches have a text label for the size. If the size
attribute values were “Small,” “Medium,” and “Large,” rather than numbers, then that text
would appear in the swatches instead.
Text-Based Color and Size Swatches
202
Magento Enterprise Edition User Guide, Version 1.14.2
Chapter 11: Swatches
Swatch Configuration
Swatches in Layered Navigation
Swatches can also be used in layered navigation, if the Use in Layered Navigation property
of the corresponding attribute is set to “Yes.” The following example shows both text-based
and color image swatches in layered navigation.
Color Swatches in Layered Navigation and Product List
Swatch Configuration
This discussion begins with the understanding that you already have configurable products
in your catalog. If you do not have working configurable products, you will need to set
them up to continue.
General Settings
Step 1: Complete the Configuration
1.
On the Admin menu, select System > Configuration.
2.
In the panel on the left, under Catalog, select Configurable Swatches.
3.
Click to expand the General Settings section. Then, do the following:
Magento Enterprise Edition User Guide, Version 1.14.2
203
Swatch Configuration
Chapter 11: Swatches
a.
Set Enabled to “Yes.”
b.
In the list of Products Attributes to Show as Swatches in Product Detail, select each
attribute whose values you want to appear as a swatch.
The list includes only the attributes that can be used to create configurable products.
The attribute must be the Dropdown type, and Use to Create Configurable Product
must be set to “Yes.”
c.
Select the Product Attribute to Use for Swatches in Product Listing.
Because of the limited space in the product listing, only one attribute can chosen to
appear as a swatch in the product list.
4.
To set the size of the swatches used on the product detail page, do the following:
a.
Click to expand the Swatch Dimensions on Product Detail Page section.
b.
Enter the Width and Height in pixels.
Just for reference, the swatches in the product page examples in this guide are 35
pixels square.
Swatch Dimensions on Product Detail Page
5.
To set the size of the swatches used in the product listing, do the following:
a.
Click to expand the Swatch Dimensions in Product Listing section.
b.
Enter the Width and Height in pixels.
Swatch Dimensions in Product Listing
6.
204
To set the size of the swatches used in layered navigation, do the following:
a.
Click to expand the Swatch Dimensions in Layered Navigation section.
b.
Enter the Width and Height in pixels.
Magento Enterprise Edition User Guide, Version 1.14.2
Chapter 11: Swatches
Swatch Configuration
Swatch Dimensions in Layered Navigation
7.
When complete, click the Save Config button.
8.
If prompted that the cache needs to be refreshed, click the Cache Management link in the
message at the top of the workspace. Select the checkbox of each invalid cache. Then, with
the Actions control set to “Refresh,” click the Submit button.
While you’re in Cache Management, notice the Flush Swatch Images Cache button in the
Additional Cache Management section at the bottom of the page. If you ever need to
update or replace existing swatches, this is how you can clear all cached swatches.
Step 2: Test the Swatches in Your Store
1.
Verify that the swatches work correctly from your storefront. Even without any swatch
images, the text-based swatches should appear in the store, and work correctly.
2.
If any drop-down options from the configurable product are missing from layered
navigation, do the following:
l
Verify that the attribute frontend property, Use in Layered Navigation is set to “Yes.”
l
Return to Cache Management and click the Flush Magento Cache button.
Field Descriptions
FIELD
SCOPE
DESCRIPTION
GENERAL SETTINGS
Enabled
Store View
Enables swatches for the configurable products in
your store. By default, swatches are not enabled.
Options include: Yes / No
Product Attributes to Show Store View
as Swatches in Product
Detail
Lists all drop-down attributes that can currently be
used with swatches. Select each attribute that
you want to appear as a swatch on the product
page. You can include more attributes in the list if
they meet the requirements for configurable
product options.
Product Attributes to Use
for Swatches in Product
Listing
Store View
Magento Enterprise Edition User Guide, Version 1.14.2
Select one attribute to appear in the product
listing.
205
Swatch Configuration
Chapter 11: Swatches
Field Descriptions (cont.)
FIELD
SCOPE
DESCRIPTION
SWATCH DIMENSIONS: PRODUCT DETAIL PAGE
Width
Store View
The width, in pixels, of swatches that appear on
the product page.
Height
Store View
The height, in pixels, of swatches that appear on
the product page.
SWATCH DIMENSIONS: PRODUCT LISTING
Width
Store View
The width, in pixels, of swatches that appear in
the product list.
Height
Store View
The height, in pixels, of swatches that appear in
the product list.
SWATCH DIMENSIONS: LAYERED NAVIGATION
Width
Store View
The width, in pixels, of swatches that appear in
layered navigation.
Height
Store View
The height, in pixels, of swatches that appear in
layered navigation.
Swatch dimensions do not include any border that might be added with CSS.
206
Magento Enterprise Edition User Guide, Version 1.14.2
Chapter 11: Swatches
Swatch Configuration
Adding New Attribute Values
As you add products to your catalog, you will need to update the attribute values that
correspond to each swatch. For example, if you sell clothing, you will need to add new
colors to the color attribute to match the products. You can add as many values as you
need to any attribute that is represented by a swatch. We use color as an example, but the
process is the same for any attribute you might use.
Add New Color Value
To add new colors:
1.
On the Admin menu, select Catalog > Attributes > Manage Attributes.
2.
In the list, open the color attribute in edit mode.
3.
In the panel on the left, click Manage Label / Options. Then, do the following:
a.
In the list under Manage Options, click the Add Option button.
b.
Under Admin, enter the names of the color as you want it to appear when working
from the Admin. Then, enter the name of the color for each language supported, as you
want it to appear in the storefront.
c.
To determine the order in which the colors appear, enter a number in the position
column.
d.
Repeat this process for as many colors as you need.
4.
Click the Save Attribute button.
5.
When prompted to refresh the cache, click the Cache Management link. Then, refresh any
cache that is invalid.
Magento Enterprise Edition User Guide, Version 1.14.2
207
Preparing Swatch Images
Chapter 11: Swatches
Preparing Swatch Images
A swatch image can provide an accurate representation of color, and also illustrate a
pattern or texture. There are two different methods you can use to create swatches for your
products. You can use either method, or a combination of both.
l
l
The default method is to create global swatches that represent a plain color, and upload
them to Media Storage.
You can also create custom swatches that illustrate a fabric or texture, and upload them
to a specific product.
The size of the swatch that is set in the configuration, and the size of the uploaded image
determine the level of detail that can be seen in the swatch. To show a pattern clearly,
make sure that the image is large enough to capture the essence of the design. To show a
fabric weave, texture, or grain of leather, capture the image at as high a resolution as
possible, and crop the image as close to the display size of the swatch as possible. Any
reduction in size makes the detail harder to see.
Capture Swatch from Product Image
To capture a swatch, you can open the main product image in a photo editor, and crop a
section from the image. You can also use the eyedropper tool to pick up the exact color you
need, and fill the swatch with the selected color. If you have the product available, you can
take a photograph of the fabric with your camera. The swatches below were captured from
the side of a shoe in the main product image.
Swatch Samples
208
Magento Enterprise Edition User Guide, Version 1.14.2
Chapter 11: Swatches
Preparing Swatch Images
Uploading Swatch Images
The swatches folder in Media Storage is the most common place where uploaded swatch
images are stored. Swatch images that are uploaded to Media Storage are globally available
and can be used by any product. The name of each uploaded image file must exactly match
the attribute value that it represents. In this example, each file name is a color.
Swatches in Media Storage
Swatches can also be associated with a specific product, and uploaded directly to the
product’s thumbnail gallery. Swatches that are uploaded directly to a product do not
appear in the gallery or in layered navigation. However, in some cases, there are
advantages to using this method. It is also the recommended method for languages with a
non-Latin character set, such as Arabic, Chinese, Cyrillic, or Japanese.
The system uses a “fall back” method to locate swatches. It looks first to see if there are any
swatches associated with the product image. If it doesn’t find a swatch, it then looks in
Media Storage.
Method 1: Upload Swatches to Media Storage
Before uploading swatch images, make sure that the file names exactly match the
corresponding attribute values. For example, if you upload a file named “gray.png,” it will
match the attribute value “Gray,” but not “Grey.”
File names are converted to lowercase. In addition, any characters other than a-z and 0-9
are replaced with a hyphen. Therefore, the swatch name “Royal Blue” becomes “royal-blue.”
If you have access to the server, swatch files can be uploaded to the following location:
Magento Enterprise Edition User Guide, Version 1.14.2
209
Preparing Swatch Images
Chapter 11: Swatches
[Magento install directory]/media/wysiwyg/swatches
1.
On the Admin menu, select CMS > Pages > Manage Content.
2.
In the list, click to open any page in edit mode.
The purpose of this step is to launch the editor. Media Storage can be accessed from any
place the editor is used.
3.
In the panel on the left, select Content.
4.
From the editor, click the Insert Image button. In the directory tree on the left, click the
swatches folder, and do the following:
a.
Click the Browse button, and locate the swatch image that you want to upload.
You can upload individual images, or multiple images at the same time.
b.
Click the Upload Files button to copy the file to Media Storage.
Newly uploaded images appear at the bottom of the list.
Uploading Multiple Swatches
210
5.
When you are done, click the Close button in the upper-left corner of the Media Storage
window. Then, click the Back button to exit the editor.
6.
If prompted to refresh the cache, click the Cache Management link in the message at the
top of the workspace, and refresh any cache that is invalid.
7.
Go to your storefront to verify that the swatches work correctly. The text-based swatches
should now be replaced with the swatch images that you uploaded.
Magento Enterprise Edition User Guide, Version 1.14.2
Chapter 11: Swatches
8.
Preparing Swatch Images
If any options from the configurable product are missing from layered navigation, return to
Cache Management and click the Flush Magento Cache button.
Method 2: Upload Swatches as Product Images
This method can be used for swatch images that are associated with a specific product.
Swatches uploaded with this method take precedence over those in Media Storage.
1.
On the Admin menu, select Catalog > Manage Products.
2.
Find the product the configurable product in the list, and open the record in edit mode.
3.
If the image is for a specific store view, set Choose Store View to the store view where the
images will be used.
4.
In the panel on the left, click Images. Then, do the following:
a.
Click the Browse Files button, and select the product images files you want to upload
to your store.
b.
Click the Upload Files button to upload the selected images to your store.
Product Swatch with Label
c.
Enter a Label for each swatch image uploaded, in the following format: color name,
followed by a hyphen, and the word “swatch.” This label identifies the image as a
swatch that is associated with this specific variation of the product.
color-swatch
Do not select any of the remaining options. It is not necessary to select the Exclude
checkbox, because by default, Swatch images do not appear in the thumbnail gallery.
Magento Enterprise Edition User Guide, Version 1.14.2
211
Setting Up Dynamic Images
Chapter 11: Swatches
5.
When complete, click the Save button.
6.
When prompted to clear the cache, click the Cache Management link in the message at the
top of the workspace, and refresh any cache that is invalid.
Setting Up Dynamic Images
Dynamic images change when the corresponding swatch is clicked, and can be used on the
product and product listing pages. The easiest way to understand this is to see how the
products are set up.
Swatches
With this technique, each associated product must have an image that depicts the
variation, even if the products are different sizes of the same color. These are the images
that appear dynamically when the swatch is clicked. As with all swatch images, the
dynamic image does not appear in the thumbnail gallery.
Method 1: Upload Images to Configurable Product
When you view this product in the store and click a swatch, the corresponding product
appears as the main product image. You can click any swatch to change the image. Also,
notice in the example below that the fourth swatch is a miniature version of the Royal Blue
product image. Because there isn’t a Royal Blue swatch available, the fall-back method
used the product image with the “Royal Blue” label.
212
Magento Enterprise Edition User Guide, Version 1.14.2
Chapter 11: Swatches
Setting Up Dynamic Images
Dynamic Product Image
1.
Each associated simple product has a single product image that depicts the variation.
Because these images are not swatches, they do not need the “-swatch” suffix. The product
variations used in this example are labeled “Royal Blue,” “Pink,” and “Red.”
Image Uploaded to Associated Simple Product
2.
The Color attribute for each variation is set to the correct color.
Set Value of Color Attribute
Magento Enterprise Edition User Guide, Version 1.14.2
213
Setting Up Dynamic Images
3.
Chapter 11: Swatches
In addition to the standard product images, images for each product variation are also
uploaded to the configurable product, and given labels that exactly match the
corresponding color attribute values. No options are selected for the product variations.
Although these images are not swatches, they will be used if no other swatch is available.
Images Uploaded to Configurable Product
Method 2: Upload Swatches to Configurable Product
This method features custom swatches that are uploaded to the configurable product. Each
associated product has a product image that depicts the variation. When you click each
swatch, the corresponding product image appears.
214
Magento Enterprise Edition User Guide, Version 1.14.2
Chapter 11: Swatches
Setting Up Dynamic Images
Dynamic Image
1.
An image is uploaded to each associated product that shows the product variation.
Image Uploaded to Associated Simple Product
2.
The Color attribute of the product variation is set to the correct color.
Set Value of Color Attribute
Magento Enterprise Edition User Guide, Version 1.14.2
215
Setting Up Dynamic Images
3.
Chapter 11: Swatches
In addition to the standard product images, a complete set of the swatch images is
uploaded to the configurable product, and labeled as a swatch for each variation. In this
example, the swatches are named:
l
Royal Blue-swatch
l
Charcoal-swatch
l
Red-swatch
l
Khaki-swatch
Images Uploaded to Configurable Product
216
Magento Enterprise Edition User Guide, Version 1.14.2
Chapter 11: Swatches
Swatch Localization
Swatch Localization
If you use a language other than English for attribute values, it is recommended that you
upload swatch images to each configurable product record, rather than upload the images
to Media Storage. Swatch image file names that are uploaded to Media Storage are also
used as CSS classes, and can only include the characters a-z, A-Z, and 0-9. Characters from
non-Latin alphabets, such as Arabic, Chinese, Cyrillic, and Japanese are not recognized by
the system.
English as Primary Language
By default, the same swatch image can be used for all languages. The easiest way to
localize a swatch is to simply translate the attribute label that appears in the store.
However, if the translated labels include accented characters, see the next section.
The system uses a simple fallback strategy to locate a suitable swatch. The system looks
first for a swatch image that is based on the current language. If no image is found, the
system looks next for an attribute label that is associated with the configurable product
option.
Using Manage Attribute / Labels, you can enter a translated label for each language
supported. For example, the label for the color value “Red” would be entered as “Rot” for
German. The following table shows the relationship between the attribute label, the product
image label, and the image file name:
ATTRIBUTE LABEL
IMAGE LABEL
IMAGE FILE NAME
Red
Red-swatch
media/wysiwyg/swatches/red.png
Rot
Rot-swatch
media/wysiwyg/swatches/rot.png
Other Primary Languages
If possible, we recommend that you upload swatch images from the Magento Admin, which
allows you to use any character in the image file name. However, if either of the following is
true, you must upload swatches directly to the server:
l
l
If you use a language other than English and the translated labels have Latin characters
with diacritics (that is, accented characters)
Your localized images have names that do not transliterate from UTF-8 to ASCII using
PHP.
Swatch images are located on the server in the following directory:
media/wysiwyg/swatches/. If you choose to upload images directly to the server, you
must understand how attribute labels are converted to image names.
Magento Enterprise Edition User Guide, Version 1.14.2
217
Swatch Localization
1.
Chapter 11: Swatches
The label is transliterated from UTF-8 to ASCII.
a.
If the label contains Latin characters with diacritics, many of the characters are
transliterated to ASCII. For example, Ô is converted to ^O.
b.
If the label cannot be transliterated into ASCII, no swatch images can be uploaded
from media/wysiwyg/swatches/. Languages with characters that cannot be
transliterated include Cyrillic, Chinese, Japanese, and Arabic.
c.
If the language contains characters that cannot be transliterated to ASCII, do one of
the following:
l
l
Upload all swatch images to each configurable product
In the Admin, change the attribute values to English as the primary language, and
set up the swatch files in English.
2.
The label is converted to lowercase.
3.
Any characters other than 0-9 and a-z are replaced with the dash character (-).
Conversion Examples
Label Conversion
LABEL
CONVERTS TO
Königsblau
media/wysiwyg/swatches/k-onigsblau.png
Weiß
media/wysiwyg/swatches/weiss.png
красный
(No transliteration is possible, and no image is uploaded.)
Common Transliteration Values
Transliterated Characters
CHARACTER
TRANSLITERATION
REPLACEMENT
French
218
À
`A
-a
Â
^A
-a
Æ
AE
ae
Ä
"A
-a
Ç
C
c
É
'E
-e
Magento Enterprise Edition User Guide, Version 1.14.2
Chapter 11: Swatches
Swatch Localization
Transliterated Characters (cont.)
CHARACTER
TRANSLITERATION
REPLACEMENT
È
`E
-e
Ê
^E
-e
Ë
"E
-e
Î
^I
-i
Ï
"I
-i
Ô
^O
-o
Œ
OE
oe
Ö
"O
-o
Ù
`U
-u
Û
^U
-u
Ü
"U
-u
Ÿ
"Y
-y
Ä
"A
-a
Ö
"O
-o
Ü
"U
-u
ß
ss
ss
Ñ
~N
-n
Á
'A
-a
É
'E
-e
Í
'I
-i
Ó
'O
-o
Ú
'U
-u
German
Spanish
Magento Enterprise Edition User Guide, Version 1.14.2
219
Clearing the Cache
Chapter 11: Swatches
Clearing the Cache
Swatch images are resized and cached before they are used. Swatch images are stored on
the server in the Magento installation directory, at the following location:
[Magento install directory]/media/catalog/swatches/
Whenever changes are made to existing swatch images, the swatch cache must be flushed
before the changes can be seen in the store.
To flush the swatch cache:
1.
On the Admin menu, select System > Cache Management.
2.
In the Additional Cache Management Section, click the Flush Swatch Images Cache
button.
Flush Swatch Images Cache
220
Magento Enterprise Edition User Guide, Version 1.14.2
Search & SEO
In this section…
Storefront Search Tools
Catalog Search Configuration
Managing Search Terms
SEO Best Practices
URL Redirects
Chapter 12:
Storefront Search Tools
Research shows that people who use search are more likely to make a purchase than
those who rely on navigation alone. In fact, according to some studies, people who use
search are nearly twice as likely to make a purchase.
Magento Enterprise Edition has a powerful search engine that you can use as is, or
enhance to make even more effective. In this chapter , we will examine the search tools
that are available to your customers while shopping in your store, including:
l
Quick Search
l
Advanced Search
l
Search Results
In addition, Magento’s layered navigation gives your customers the ability to filter
product options by price, manufacturer, or any other criteria to reduce the time it takes
to make a purchase.
Magento Enterprise Edition User Guide, Version 1.14.2
223
Quick Search
Chapter 12: Storefront Search Tools
Quick Search
The Quick Search box in the upper-right corner helps visitors find products in your catalog.
The search text can be the full or partial product name, or any other word or phrase that
describes the product.
To use quick search:
1.
Type the first few letters of what you are looking for into the search box.
2.
Press either the Enter key or the button to the right of the search box to retrieve a list of
matching products from the catalog.
Quick Search
224
Magento Enterprise Edition User Guide, Version 1.14.2
Chapter 12: Storefront Search Tools
Advanced Search
Advanced Search
Advanced Search lets shoppers search through your catalog by entering values into a form.
Because the form contains multiple fields, a single search can include several parameters.
The result of the search is a list of the products that match the search criteria. A link to
Advanced Search is in the footer of your store.
Advanced Search
Each field in the form corresponds to an attribute from your product catalog. You can
determine which fields to include by setting the attribute frontend properties to “Include in
Advanced Search.”
As a best practice, you should include only the fields that your customers are most likely to
use to find a product, because too many can slow down the search.
To use advanced search:
1.
In the footer of the store, click the Advanced Search link.
2.
In the Search Settings form, enter any value you want to match in as many fields as
necessary. You can find records based on a full or partial match.
3.
Click the Search button at the bottom to display the results.
Magento Enterprise Edition User Guide, Version 1.14.2
225
Advanced Search
Chapter 12: Storefront Search Tools
Search Settings
4.
If you don’t see what you are looking for in the search results, click Modify your search and
try another combination of values.
Search Results
226
Magento Enterprise Edition User Guide, Version 1.14.2
Chapter 12: Storefront Search Tools
Search Results
Search Results
Search Results include all products that match the parameters entered in the Quick Search
box or the Advanced Search form. All pages that list products have the same controls. The
only difference is that some display the result of a search query, and others display the
result of navigation.
Search results can be viewed in a grid or list format, and the records can be sorted by any
number of parameters. Page controls are used to sort the list, change the format, and to
advance from one page to the next. Depending on the layout, the left column of the page
may include layered navigation under the “Shop By” heading, with products listed by
category and attribute.
Search Results with Page Controls
Magento Enterprise Edition User Guide, Version 1.14.2
227
Search Results
Chapter 12: Storefront Search Tools
Page Controls
CONTROL
DESCRIPTION
View As
Displays the list in either a Grid or List format.
Sort By
Changes the sort order of the list.
Show Per Page
Determines how many products appear per page.
Pagination Links
Navigation links to other pages.
To configure the page settings:
1.
On the Admin menu, select System > Configuration.
2.
In the panel on the left, under Catalog, select Catalog.
3.
Click to expand the Frontend section. Then, adjust the settings according to your
preference.
4.
When complete, click the Save Config button.
Catalog Frontend Search Configuration
228
Magento Enterprise Edition User Guide, Version 1.14.2
Chapter 12: Storefront Search Tools
Search Results
Field Descriptions
FIELD
List Mode
SCOPE
Store View
DESCRIPTION
Determines the format of the search results list.
Options include:
Grid Only
Formats the list as a grid
of rows and
columns.Each product
appears in a single cell of
the grid.
List Only
Formats the list with each
product on a separate
row.
Grid (default / List)
Products appear in Grid
view, but can be toggled
to List view.
List (default / Grid)
Products appear in List
View, but can be toggled
to Grid view.
Products per Page on Grid
Allowed Values
Store View
Determines the number of products displayed in
Grid View. To provide a selection of options, enter
multiple values separated by commas.
Products per Page on Grid
Default Value
Store View
Determines the number of products displayed per
page by default, in Grid View.
Products per Page on List
Allowed Values
Store View
Determines the number of products displayed in
List View. To provide a selection of options, enter
multiple values separated by commas.
Products per Page on List
Default Value
Store View
Determines the number of products displayed per
page by default, in List View.
Allow All Products per
Page
Store View
If set to “Yes,” includes the “ALL” option in the
“Show per Page” control.
Product Listing Sort by
Store View
Determines the sort order of the search results
list. The selection of options is determined by the
Display Settings of the category and the available
attributes. The default is set to “Use All Available
Attributes,” and typically includes:
Magento Enterprise Edition User Guide, Version 1.14.2
229
Popular Search Terms
FIELD
Chapter 12: Storefront Search Tools
SCOPE
DESCRIPTION
Best Value
Name
Price
Use Flat Catalog Category
Global
Enables the flat category structure. Options
include: Yes / No
Use Flat Catalog Product
Global
Enables the flat product structure. Options
include: Yes / No
Allow Dynamic Media
URLs in Products and
Categories
Store View
Allows dynamic media URLs, rather than static
URLs.
Popular Search Terms
The Popular Search Terms pages lists the search terms that have been used by visitors to
your store, and ranks them by popularity. Search terms appear in a “tag cloud” format,
where the size of the text indicates the popularity of the term. The link to the Popular
Search Terms page is located in the footer of your store.
By default, Popular Search Terms is enabled as a search engine optimization tool, but has
no direct connection to the catalog search process. Because the Search Terms page is
indexed by search engines, any terms included on the page will help improve your search
engine ranking and the visibility of your store.
Popular Search Terms
230
Magento Enterprise Edition User Guide, Version 1.14.2
Chapter 12: Storefront Search Tools
Popular Search Terms
To configure Popular Search Terms:
1.
On the Admin menu, select System > Configuration.
2.
In the Configuration panel on the left, under Catalog, select Catalog. Then, do the
following:
3.
a.
Click to expand the Search Engine Optimizations section.
b.
Set Popular Search Terms to “Enable.”
When complete, click the Save Config button.
Popular Search Terms
Magento Enterprise Edition User Guide, Version 1.14.2
231
Popular Search Terms
Chapter 12: Storefront Search Tools
Notes
232
Magento Enterprise Edition User Guide, Version 1.14.2
Chapter 13:
Catalog Search Configuration
This chapter explains how to configure Catalog Search for your specific installation. The
available search options depend on the search engine that is used for your Magento
installation. By default, Magento uses MySQL. Follow the instructions that apply to
your system.
MySQL
MySQL is the default search engine used by Magento Enterprise Edition.
Solr
Solr is not included in Magento Enterprise Edition, and must be installed separately. If
your Magento installation uses Solr, there is a slightly different set of configuration
options and features.
Magento Enterprise Edition User Guide, Version 1.14.2
233
MySQL Catalog Search
Chapter 13: Catalog Search Configuration
MySQL Catalog Search
By adjusting the Catalog Search configuration, you can control the behavior of the search
operations and determine the size of valid query text, and the display of search
recommendations.
To configure catalog search:
1.
On the Admin menu, select System > Configuration.
2.
In the Configuration panel on the left, under Catalog, select Catalog. Then, click to expand
the Catalog Search section.
Catalog Search (using MySql Fulltext)
3.
234
To limit the length and word count of search query text, do the following:
a.
Set Minimal Query Length to the minimum number of characters that can be
submitted in a query.
b.
Set Maximum Query Length to the maximum number of characters that can be
submitted in a query.
c.
Set Maximum Query Words Count to the maximum number of words that can be
submitted in a query.
4.
Accept the default Search Engine, “MySql Fulltext.”
5.
Set Search Type to one of the following:
Like
To perform a search based on individual keywords.
Fulltext
To perform a search based on the full text of each attribute, ranked
by relevance.
Combine (Like
and Fulltext)
To perform a search based on a combination of the two types,
matching keywords and taking relevance into consideration.
Magento Enterprise Edition User Guide, Version 1.14.2
Chapter 13: Catalog Search Configuration
MySQL Catalog Search
6.
To limit the number of records that can be used with layered navigation, enter the
maximum number allowed in the Apply Layered Navigation if Search Results are Less
Than field. To allow any number of records, enter 0.
7.
To display related search terms as recommendations, set Enable Search
Recommendations to “Yes.” Then, do the following:
8.
a.
In the Search Recommendations Count field, enter the maximum number of
recommendations displayed for a search.
b.
To show the number of recommendations per term in parentheses after the
recommendation, set Show Results Count for each Recommendation to “Yes.”
When complete, click the Save Config button.
Field Descriptions
FIELD
SCOPE
DESCRIPTION
Minimal Query Length
Store View
The minimum number of characters allowed in a
catalog search.
Maximum Query Length
Store View
The maximum number of characters allowed in a
catalog search.
Maximum Query Words
Count
Store View
The maximum number of words allowed in a
query.
Search Engine
Global
Identifies the search engine used to process
requests for catalog data. By default, Magento
Enterprise uses the MySql Fulltext search engine.
Options include: MySql Fulltext / Solr
Search Type
Store View
Determines the search operation performed by the
MySql engine. Options include:
Magento Enterprise Edition User Guide, Version 1.14.2
Like
Performs a search based
on individual keywords.
Fulltext
Performs a search based
on the full text of each
attribute and ranks each
by relevance.
Combine (Like and
Fulltext)
This combination of Like
and Fulltext matches by
keyword, but takes into
consideration its
relevance.
235
Solr Catalog Search
Chapter 13: Catalog Search Configuration
Field Descriptions (cont.)
FIELD
Apply Layered Navigation
if Search Results are Less
Than
SCOPE
Store View
DESCRIPTION
Sets the maximum number of search results that
are displayed as a list. Any results over the
number are shown as layered navigation. To apply
layered navigation to all search results, enter 0.
Using layered navigation for all search results
can impact performance.
Enable Search
Recommendations
Store View
Determines if search recommendations are
offered when a search returns no results. Options
include: Yes / No
Search Recommendations
Count
Store View
Specifies the number of search terms offered as
recommendations. By default, no more than five
are shown.
Show Results Count for
Each Recommendation
Store View
When set to "Yes," the number of products found
for the proposed search recommendation is
shown in the brackets. Options include: Yes / No
Solr Catalog Search
Solr is a standalone, enterprise-scale search server that communicates easily with
applications. Because Solr is highly scalable, it is used to power some of the world’s most
high-traffic Internet sites.
Solr provides improved search performance and search results relevancy, support for
spelling, synonyms and stop words, and improved layered navigation performance. Solr is
especially recommended for sites with heavy traffic and search loads. Products are added to
the search engine index as each product is saved in the Admin, so the index is kept up to
date without any need for manual intervention.
Magento quick search performed by the Solr search engine provides the following options:
l
Search terms suggestions based on the corrected customer’s misspelling
l
Search results according to the specified weight of an attribute
l
Search results for layered navigation
All of the attributes that are available for layered navigation are added to Solr index. As a
result, Solr can also be used to generate the layered navigation. To add these attributes to
Solr search results, the store administrator must enable Solr for catalog navigation.
236
Magento Enterprise Edition User Guide, Version 1.14.2
Chapter 13: Catalog Search Configuration
Solr Catalog Search
Search Suggestions
Solr can be configured to identify misspelled words and offer suggestions. When a customer
makes a spelling mistake, the message, “Did you mean:” appears with a link to a suggested
product. The number of suggestions offered is set in the configuration.
To configure suggestions:
1.
On the Admin menu, select System > Configuration.
2.
In the panel on the left, under Catalog, select Catalog.
3.
Click to expand the Catalog Search section, and do the following:
4.
a.
Verify that Search Engine is set to “Solr.”
b.
Set Enable Search Suggestions to “Yes.”
c.
In the Search Suggestions Count field, enter the number of suggestions to be offered to
the customer. The default value is 2.
d.
Set Show Results Count for Each Suggestion to “Yes.” (Depending on the store
theme, this number is usually shown in brackets next to the suggestion.)
When complete, click the Save Config button.
Solr Search Suggestions
Magento Enterprise Edition User Guide, Version 1.14.2
237
Solr Catalog Search
Chapter 13: Catalog Search Configuration
Weighted Search
With Solr enabled, product attributes that are enabled for quick search have an additional
Search Weight parameter. This parameter denotes the priority a specific attribute has in the
Solr search. If Solr is enabled, it is also used for Advanced Search, but the search weight is
not used there in generating search results.
When a customer enters a term in the search field on your web store, one of the parameters
that the Solr search engine takes into account in generating results is the attribute search
weight. Attributes whose search weight is greater will be searched and returned first by Solr.
For example, if there are two attributes in the system, “color” with a search weight of 1 and
“description” with a search weight of 3. When a customer searches for the word “red,” Solr
will return a list of products whose color attribute is red and will not include in the list the
products whose description contains the word “red.” This result happens because the search
weight of the “color” attribute is higher than that of the “description” attribute.
To set the search weight properties of an attribute:
1.
On the Admin menu, select Catalog > Attributes > Manage Attributes.
2.
Find the attribute in the list, and click to open the record.
3.
Scroll down to the Frontend Properties section, and do the following:
a.
To include the attribute in Quick Search box queries, set Use in Quick Search to “Yes.”
b.
To include the attribute as a field on the Advanced Search form, set Use in Advanced
Search to “Yes.”
c.
To establish the search value of the attribute, set Search Weight to a number from 1 to
5, where 1 is the greatest weight, and 5 is the least.
Greater search weights have higher priority in returned results. If no value is specified,
all attributes have a search weight of 1.
4.
238
When complete, click the Save Attribute button.
Magento Enterprise Edition User Guide, Version 1.14.2
Chapter 13: Catalog Search Configuration
Solr Configuration
Solr Configuration
Solr’s additional search options can be configured by adjusting the Catalog Search settings.
To learn more, see How to Use the Solr Search Engine With Magento Enterprise Edition in
the Knowledge Base.
To configure Solr catalog search:
1.
On the Admin menu, select System > Configuration.
2.
In the Configuration panel on the left, under Catalog, select Catalog. Then, click to expand
the Catalog Search section.
3.
Verify that Search Engine is set to “Solr.”
4.
To limit the length and word count of search query text, do the following:
5.
a.
Set Minimal Query Length to the minimum number of characters that can be
submitted in a query.
b.
Set Maximum Query Length to the maximum number of characters that can be
submitted in a query.
c.
Set Maximum Query Words Count to the maximum number of words that can be
submitted in a query.
To offer search terms as suggestions, do the following:
a.
Set Enable Search Suggestions to “Yes.”
b.
To display the number of times each suggested term has been used as a search term,
set Show Results Count for Each Suggestion to “Yes.”
6.
To display related search terms as recommendations, set Enable Search
Recommendations to “Yes.”
7.
When complete, click the Save Config button.
Magento Enterprise Edition User Guide, Version 1.14.2
239
Solr Configuration
Chapter 13: Catalog Search Configuration
Solr Catalog Search
To configure catalog navigation:
1.
On the Admin menu, select System > Configuration.
2.
In the panel on the left, under Catalog, select Catalog.
3.
Click to expand the Catalog Search section, and do the following:
4.
240
a.
Verify that Search Engine is set to “Solr.”
b.
Set Enable Solr Engine for Catalog Navigation to “Yes.”
When complete, click the Save Config button.
Magento Enterprise Edition User Guide, Version 1.14.2
Chapter 13: Catalog Search Configuration
Solr Configuration
Field Descriptions
FIELD
SCOPE
DESCRIPTION
Minimal Query Length
Store View
The minimum number of characters in a catalog
search.
Maximum Query Length
Store View
The maximum number of characters in a catalog
search.
Maximum Query Words
Count
Store View
The maximum number of words in a query.
Search Engine
Global
Identifies the search engine used for the site. For
this configuration, the search engine is: Solr
Solr Server Hostname
Global
The fully qualified host name or IP address of the
Solr server.
Solr Server Port
Global
Identifies the port used by the Solr server. Any
unused port can be assigned to Solr.
Solr Server Username
Global
(Optional) The Solr user name, if required for
authentication.
Solr Server Password
Global
(Optional) The Solr password, if required for
authentication.
Solr Server Timeout
Global
The number of seconds of inactivity before the
server times out.
Solr Server Path
Global
Specifies the path to the Solr server. Accept the
default entry, unless you have customized Solr or
have changed the deployment path. The value
must match the webapp_name value in the Solr
installation, and is entered without leading or
trailing backslashes.
Indexation Mode
Global
Determines how Solr processes indexed content.
Options include:
Magento Enterprise Edition User Guide, Version 1.14.2
241
Solr Configuration
Chapter 13: Catalog Search Configuration
Field Descriptions (cont.)
FIELD
SCOPE
DESCRIPTION
Final commit
(Default) Offers better
performance than a partial
commit. Solr processes the
content when you initiate a
reindex. Users see content
from the previous index, and
the store remains available for
other requests.
Indexing begins after all
unneeded data is removed
and new data is added. Users
see the results of the indexed
data immediately.
Partial commit All content is removed after
reindexing. As content is
gradually reindexed, users
see only the indexed results.
Engine
autocommit
Enable Search
Suggestions
Store View
Content is put into the index
queue but is not committed.
You must configure Solr to
commit at regular intervals (for
example, every 5 minutes) or
when a certain number of
uncommitted items is
reached.
Determines if search suggestions are displayed
for common misspellings. When enabled, search
suggestions are offered for any request that
returns no results. Search suggestions can
impact the performance of search.
Options include: Yes / No
242
Search Suggestions Count Store View
The maximum number of suggestions offered.
Default value: 2
Show Results Count for
Each Suggestion
Determines if the number of search results is
shown for each suggestion. (Depending on
theme, the number usually appears in brackets
after the suggestion.)
Store View
Magento Enterprise Edition User Guide, Version 1.14.2
Chapter 13: Catalog Search Configuration
Solr Configuration
Field Descriptions (cont.)
FIELD
SCOPE
DESCRIPTION
Options include: Yes / No
Enable Solr Engine for
Catalog Navigation
Global
Magento Enterprise Edition User Guide, Version 1.14.2
Determines if Solr is used for layered navigation.
Options include: Yes / No
243
Solr Configuration
Chapter 13: Catalog Search Configuration
Notes
244
Magento Enterprise Edition User Guide, Version 1.14.2
Chapter 14:
Managing Search Terms
You can learn what your customers are looking for by examining the search terms they
use to find products in your store. If enough people are looking for a product that you
don’t carry, perhaps it’s time to add it to your catalog. Meanwhile, rather than have
them leave them empty handed, why not redirect them to another product in your
catalog? Here are a few ways you can leverage your customers’ search terms:
Landing Page
The landing page for a search term can be a content page, a category page, a product
detail page, or even a page on a different site.
Suggestions
(Solr Only) If a search returns no results, and there is no alternate landing page for the
term, a selection of closely matching terms can be offered as possible solutions. The
text, “Did you mean:” appears, followed by a list of suggestions.
Recommendations
Recommendations are similar to suggestions, but are drawn from the selection of
related search terms. If a search returns no results, related search terms can be offered
as recommendations.
Synonyms
One way to improve the effectiveness of catalog search is to include different terms that
people may use to describe the same item. You don’t want to lose a sale just because
someone is looking for a “sofa,” and your product is listed as a “couch.” You can
capture a broader range of search terms by entering the words, “sofa” “davenport,” and
“loveseat” as synonyms for “couch,” and direct them to the same landing page.
Misspelled Words
Use search terms to capture common misspellings and redirect them to the appropriate
page. For example, if you sell wrought iron patio furniture, you know that many people
misspell the term as “rod iron,” or even “rot iron.” You can enter each misspelled word
Magento Enterprise Edition User Guide, Version 1.14.2
245
Adding Search Terms
Chapter 14: Managing Search Terms
as a search term, and make them synonyms for “wrought iron.” Even though the word is
misspelled, the search will be directed to the page for “wrought iron.”
Adding Search Terms
As you learn new words that people use to search for products in your catalog, add them to
your search terms list to direct people the closely matching products in your catalog.
General Information
To add a new search term:
1.
On the Admin menu, select Catalog > Search Terms.
2.
Click the Add New button. Then, do the following:
3.
a.
In the General Information section, in the Search Query box, type the word or phrase
that you want to add as a new search term.
b.
Select the Store where the search term will be used. If your store is available in
multiple languages, select the applicable store view.
c.
If this term is a synonym for another search term, enter the other term in the
Synonym For field. Any search for the synonym will be automatically redirected to the
page for the other term.
d.
To redirect the search results to another page in your store, or to another website, type
the full URL of the target page in the Redirect URL field.
e.
If you want this term to be available for use as a suggestion whenever a search returns
no results, set Display in Suggested Terms to “Yes.”
When complete, click the Save Search button.
To edit a search term:
246
1.
On the Admin menu, select Catalog > Search Terms.
2.
Click the row of any record to open the search term in edit mode.
3.
Make the necessary changes.
4.
When complete, click the Save Search button.
Magento Enterprise Edition User Guide, Version 1.14.2
Chapter 14: Managing Search Terms
Related Search Terms
To delete a search term:
1.
In the list, select the checkbox of the term to be deleted.
2.
In the upper-right corner of the list, set the Actions control to “Delete.”
3.
When complete, click the Submit button.
Related Search Terms
The Related Search Terms section of a search term record lets you associate other terms
with the search term. You can use the information to keep a running total of how many
people are searching for the same thing. Related search terms can also be offered as
suggestions and recommendations whenever a search returns no results.
Related Search Terms
To set up related search terms:
1.
On the Admin menu, select Catalog > Search Terms.
2.
In the list, click to open the search term in edit mode.
3.
In the Related Search Terms section, do the following:
Magento Enterprise Edition User Guide, Version 1.14.2
247
Related Search Terms
4.
Chapter 14: Managing Search Terms
a.
Click the Reset Filter button to generate a list of all search terms.
b.
In the first column, select the checkbox of each search term that is related to the term
that is listed in the General Information section of the record. There’s probably more
than one page of search terms. Don’t forget to look at the rest!
c.
Click the Save Search button.
d.
In the first column, set the Search Filter to “Any.”
When complete, click the Search button.
Field Descriptions
FIELD
DESCRIPTION
Search Query
(Required) Contains the actual text that was used as a search
term.
Store
(Required) Identifies the store and/or views where the search
term is available.
Number of results
(Required) Displays how many products were returned in the
search results since the last time the term was submitted.
Only search terms with results are offered as suggestions.
248
Number of Uses
(Required) Displays the total number of times this term has been
used. This number is used to determine the “Top 5 Search
Terms” section of the Dashboard report.
Synonym For
If this term is a synonym for another search term, enter the other
term in this field. Any searches for the synonym will be redirected
to the page for the other term.
Redirect URL
Enter the full URL of the page that is displayed when this search
term is used. The Redirect URL can be a product, category, or
content page within your site, or a page on another site.
Display in Suggested
Terms
Determines if this search term is available for use as a
suggestion. For example, you may deliberately enter a
misspelled word as a search term, but would not want to use the
misspelled word as a suggestion. Options include: Yes / No
Magento Enterprise Edition User Guide, Version 1.14.2
Chapter 14: Managing Search Terms
Search Recommendations
Search Recommendations
With search recommendations set up, the store administrator can specify the search
recommendations list for a specific search term. The search engine provides the standard
search results, and also proposes the list of related terms with the search results. Using
search recommendations greatly expands the search results that are available to customers.
Search recommendations independent of the search engine and can be used with both
MySQL and Solr.
For better performance, Magento also splits the searched word combination into separate
words and automatically provides search recommendations for each of them, if these are
available in the system. For example, if a visitor searches for the phrase “hp laptop,” the
search system splits the phrase into two words, “hp” and “laptop,” and provides five search
recommendations for the first term and twelve for the second one.
When search recommendation are enabled and a visitor searches for a term that has search
recommendations, the search results appear as well as any related search terms (the search
recommendations), followed by the number of times the term has been used. Each
recommendation is linked to a catalog page.
To enable search recommendations:
1.
On the Admin menu, select System > Configuration. Then in the panel on the left, under
Catalog, select Catalog.
2.
Click to expand the Catalog Search section, and do the following:
a.
3.
Set Enable Search Recommendations to one of the following:
Yes
If available, uses Solr instead of the default MySQL search to generate
the layered navigation.
No
Uses the Magento-native catalog and layered navigation.
b.
Set Search Recommendations Count to your preference.
c.
Set Show Results Count for Each Recommendation
When complete, click the Save Config button.
Magento Enterprise Edition User Guide, Version 1.14.2
249
Search Recommendations
Chapter 14: Managing Search Terms
Notes
250
Magento Enterprise Edition User Guide, Version 1.14.2
Chapter 15:
SEO Best Practices
Search engine optimization is the practice of fine-tuning the content and presentation
of a site to improve the way the pages are indexed by search engines. Magento
Enterprise Edition provides a number of tools that you can use to improve the way
search engines index your site.
Topics in this chapter include:
l
Meta Information
l
Sitemap
l
URL Options
l
Canonical Meta Tag
l
URL Redirects
Additional Resources
Site Search
The Seven Forgotten Pages of Magento and How to Optimize Them
A Data-Driven Strategy for Conversion Optimization
Benchmarking Your OMS
Increasing Conversion Rates
Magento Enterprise Edition User Guide, Version 1.14.2
251
Meta Information
Chapter 15: SEO Best Practices
Meta Information
Your store is loaded with places where you can enter keyword-rich meta data to improve
the way search engines index your site. While setting up your store, you might have
entered preliminary meta data, with the intention of finishing it later. Over time, you can
fine-tune the meta data to target the buying patterns and preferences of your customers.
Meta Title
The meta title appears in the title bar and tab of your
browser, and search results listings. The meta title
should be unique to the page, and less than 70
characters in length.
Meta Keywords
Although some search engines ignore meta
keywords, others continue to use them. The current
best practice is to incorporate high-value keywords in
the meta title and meta description.
Meta Description
Meta descriptions provide a brief overview of the
page for search results listings. Ideally, a meta
description should be between 150-160 characters in
length, although the field will accept up to 255
characters.
252
Magento Enterprise Edition User Guide, Version 1.14.2
Chapter 15: SEO Best Practices
Sitemap
Sitemap
The default Magento sitemap has links to every product and category in your store, and
can help improve the way your products are indexed by some search engines. Like a table of
contents, the sitemap also gives visitors a quick overview of the organization of your
catalog. To switch between the category and product lists, click the link on the right. By
default, the footer of your store includes a link to the sitemap.
The sitemap can be formatted as a nested, tree-like structure, or as a simple list. The
number of lines included per page, and the use of indentation is set in your system
configuration.
Because the Magento sitemap does not include CMS pages, it is not a complete index to the
content on your site. In addition to the default sitemap, it is recommended that you also
generate a Google sitemap that can be used for reference when your site is indexed by
Google.
To set up the sitemap:
1.
On the Admin menu, select System > Configuration. Then in the panel on the left, under
Catalog, select Catalog.
2.
Click to expand the Sitemap section. Then, set the following options according to your
preference:
l
Use Tree Like Category Sitemap
l
Minimum Lines per Page
Sitemap Configuration
3.
Scroll down the page and click to expand the Search Engine Optimizations section. Then,
set Autogenerated Site Map to “Enable.”
4.
When complete, click the Save Config button.
Magento Enterprise Edition User Guide, Version 1.14.2
253
Catalog URLs
Chapter 15: SEO Best Practices
Catalog URLs
The URLs that you assign to products and categories play a major role in determining how
well your site is indexed by search engines. Before you start building your catalog is an
ideal time to consider the available options.
Dynamic URL
A dynamic URL is created “on the fly,” and might include a query string with variables for
the product ID, sort order, and the page where the request was made. When a customer
searches for a product in your store, the resulting URL might look something like this:
http://mystore.com/catalogsearch/result/?q=tee+shirt
Static URL
A static URL is a fixed address for a specific page. A static URL can be displayed in a
search-engine friendly format, or one that references products and categories by ID. Searchengine friendly URLs include words that people might use to look for a product, and are
created by enabling Web Server Rewrites.
http://mystore.com/accessories/eyewear.html
http://mystore.com/catalog/product/view/id/409/s/
chelsea-tee-409/category/16/
URL Key
The URL key is the part of of a static URL that describes the product or category. When
you create a product or category, an initial URL key is automatically generated based on
the name. The URL key should consist of lowercase characters with hyphens to separate
words. A well-designed, “search engine friendly” URL key might include the product name
and key words to improve the way it is indexed by search engines. The URL key can be
configured to create an automatic redirect if the URL key is changed.
Store Code
The store code can be included in the URL. However, it might cause problems if third-party
services, such as PayPal, are configured to work with a URL that does not include the code.
By default, the store code is not included in URLs.
254
Magento Enterprise Edition User Guide, Version 1.14.2
Chapter 15: SEO Best Practices
Catalog URLs
HTML Suffix
Your catalog can be configured to either include or exclude the .html suffix as part of
category and product URLs. There are various reasons why people might choose to use or
to omit the suffix. Some believe that the suffix no longer serves any useful purpose, and
that pages without a suffix are indexed more effectively by search engines. However, your
company might have a standardized format for URLs, that requires a suffix.
The most important thing to understand is that the suffix is controlled by your system
configuration. Never type the suffix directly into the URL key of a category or product.
(Doing so will result in a double suffix at the end of the URL.) Whether you decide to use
the suffix or not, be consistent and use the same setting for all your product and category
pages. Here are examples of a category URL with, and without, the suffix.
http://mystore.com/accessories/eyewear.html
http://mystore.com/accessories/eyewear/retro-chic-eyeglasses
Category Path
You can configure the URL to either include or exclude the category path. By default, the
category path is included in all category and product pages. The following examples show
the same product URL with, and without, the category path.
http://mystore.com/accessories/eyewear/retro-chic-eyeglasses
http://mystore.com/retro-chic-eyeglasses
To prevent search engines from indexing multiple URLs that lead to the same content, you
can exclude the category path from the URL. Another method is to use a canonical meta
tag to let search engines know which URLs to index, and which to ignore.
Dynamic Media URLs
A dynamic media URL is a relative reference to an image or other media asset. When
enabled, dynamic media URLs can be used to link directly to assets in media storage, or
even on a CDN. For example, you can use the WYSIWYG Editor to insert an image into a
product description field. As with all markup tags, the code is enclosed in double curly
braces. The format of a dynamic media URL looks like this:
{{media url="path/to/image.jpg"}}
Magento Enterprise Edition User Guide, Version 1.14.2
255
Catalog URLs
Chapter 15: SEO Best Practices
If you prefer to use a static URL, you can change the configuration setting. If dynamic
media URLs are included in your catalog, but later the setting is disabled, each reference in
your catalog will appear as a broken link. However, the links can be restored by again
enabling dynamic media URLs. Using dynamic media URLs can enhance your catalog, but
can also impact the performance of catalog search.
Allow Dynamic Media URLs in Products and Categories
To configure dynamic media URLs:
1.
On the Admin menu, select System > Configuration.
2.
In the Configuration panel on the left, under Catalog, select Catalog.
3.
In the Frontend section, set Allow Dynamic Media URLs in Products and Categories to
either “Yes” or “No.”
4.
Click the Save Config button to save the setting.
To use static URLs by default for media files:
By default, images inserted into the catalog from media storage have relative, dynamic
URLs. If you prefer to use a static URL, you can change the configuration setting.
256
1.
On the Admin menu, select System > Configuration.
2.
In the Configuration panel on the left, under General, select Content Management.
3.
In the WYSIWYG Options section, set Use Static URLs for Media Content in WYSIWYG
for Catalog to “Yes.”
4.
Click the Save Config button to save the setting.
Magento Enterprise Edition User Guide, Version 1.14.2
Chapter 15: SEO Best Practices
Catalog URLs
Enable WYSIWYG Editor
Setting Up Catalog URLs
Catalog URLs play a major role in how well your store is indexed by search engines. All of
the following options use web server rewrites to change the format of the URL.
URL Suffix
Determines if a suffix, such as “html” or “htm,” is used for
category URLs. Do not enter a period before the suffix,
because it is applied automatically.
Store Code
Inserts the Store Code of the current view in the URL
immediately after the Magento root.
Category Path
Determines if category paths are included in product URLs.
However, doing so can impact SEO by creating multiple
URLs that give the appearance of duplicate content.
To configure the URL suffix:
1.
On the Admin menu, select System > Configuration.
2.
In the panel on the left, under Catalog, select Catalog.
3.
Click to expand the Search Engine Optimizations section. Then, do the following:
a.
Set Product URL Suffix to “html” or “htm.” Do not include a period before the suffix.
b.
Set Category URL Suffix to “html” or “htm.” Do not include a period before the suffix.
c.
Set the category path to your preference. To omit the category path from product
URLs, set Use Categories Path for Product URLs to “No.”
Magento Enterprise Edition User Guide, Version 1.14.2
257
Catalog URLs
Chapter 15: SEO Best Practices
Search Engine Optimizations
4.
When complete, click the Save Config button.
5.
After the setting is saved, you will be prompted to refresh the cache. Click the Cache
Management link in the message at the top of the workspace. Then, follow the instructions
to refresh the cache.
To configure the store code for URLs:
1.
On the Admin menu, select System > Configure. Then in the panel on the left under
General, select Web.
2.
Click to expand the URL Options section.
3.
Set Add Store Code to your preference.
URL with Store Code
http://www.yourdomain.com/magento/store-view/index.php/url-identifier
URL without Store Code
http://www.yourdomain.com/magento/index.php/url-identifier
258
Magento Enterprise Edition User Guide, Version 1.14.2
Chapter 15: SEO Best Practices
Catalog URLs
Field Descriptions
FIELD
SCOPE
DESCRIPTION
Autogenerated Site Map
Store View
Determines if the Magento site map is
implemented in the store. When enabled, a link to
the site map appears in the footer. Options
include: Enable / Disable.
Popular Search Terms
Store View
Determines if Popular Search Terms is
implemented in the store. Options include: Enable
/ Disable.
Product URL Suffix
Store View
Determines if a suffix, such as html or htm, is
applied to product URLs. If used, do not include a
period before the suffix, because it is applied
automatically.
Category URL Suffix
Store View
Determines if a suffix, such as html or htm, is
applied to category URLs. If used, do not include
a period before the suffix, because it is applied
automatically.
Use Categories Path for
Product URLs
Store View
Determines if category paths are included in
product URLs. Doing so can cause multiple URLs
that lead to the same page. To learn more, see:
Canonical Meta Tag.
Create Permanent
Redirect for URLs if URL
Key Changed
Store View
Determines if a permanent redirect is created
automatically whenever a URL key changes.
When implemented, the Create Custom Redirect
for old URL checkbox that appears below the
product URL Key field is selected by default.
Options include: Yes / No.
Page Title Separator
Store View
Identifies the character that separates the
category name and subcategory in the page title
that appears in the browser.
Use Canonical Link Meta
Tag for Categories
Store View
If there are multiple URLs that point to the same
category page, uses a canonical meta tag to
identify the category URL that search engines
should index. Options include: Yes / No.
Use Canonical Link Meta
Tag for Products
Store View
If there are multiple URLs that point to the same
product page, uses acanonical meta tag to
identify the product URL that search engines
should index. Options include: Yes / No.
Magento Enterprise Edition User Guide, Version 1.14.2
259
Duplicate URL Key Priority
Chapter 15: SEO Best Practices
Field Descriptions (cont.)
SCOPE
FIELD
DESCRIPTION
Priority for Duplicated URL Global
Keys
Establishes the course of action to take in the
case of a duplicate URL key. Options include:
Redirect - Category - Product
Redirect - Product - Category
Category - Redirect - Product
Category - Product - Redirect
Product - Redirect - Category
Product - Category - Redirect
Duplicate URL Key Priority
The Priority for Duplicated URL Keys option determines which URL “wins” if a user chooses
a link to an allowed duplicate URL key. For example, if a product and category both have a
URL key of shoes, you can choose which URL you prefer the user to see.
Example 1: Valid URLs
Suppose you have the following set of URL keys. All of them are allowed because they're
associated with different entity types.
ENTITY TYPE
NAME
URL KEY
SAMPLE URL
Category
shoes
shoes
http://www.example.com/shoes.html
Product
shoes
shoes
http://www.example.com/shoes.html
Custom URL
Redirect
shoes
shoes
http://www.example.com/shoes.html
Example 2: Priority Setting
Because all three entities have the same URL, what happens when a store visitor requests
http://www.example.com/shoes.html? If no URL key matches your priority setting,
Magento continues through the priorities in order, until a match is found. CMS URL keys
have the lowest priority.
PRIORITY SETTING
Default setting:
RESULT
Custom URL Redirect
1. Redirect
2. Category
3. Product
260
Magento Enterprise Edition User Guide, Version 1.14.2
Chapter 15: SEO Best Practices
Canonical Meta Tag
PRIORITY SETTING
1. Category
RESULT
Shoes Category
2. Redirect
3. Product
To configure URL key priority:
1.
On the Admin menu, select System > Configuration.
2.
In the panel on the left, under Catalog, select Catalog.
3.
Click to expand Search Engine Optimizations. Then, set Priority for Duplicated URL Keys
to one of the following:
l
Redirect-Category-Product
l
Redirect-Product-Category
l
Category-Redirect-Product
l
Category-Product Redirect
l
Product-Redirect-Category
l
Product-Category-Redirect
4.
When complete, click the Save Config button.
5.
When prompted to refresh the cache, click the Cache Management link in the message
above the workspace. Follow the instructions to refresh the cache.
Canonical Meta Tag
Some search engines penalize websites that have multiple URLs that point to the same
content. The canonical meta tag tells search engines which page to index when multiple
URLs have identical or very similar content. Using the canonical meta tag can improve
your site ranking and aggregate pageviews. The canonical meta tag is placed in the <head>
block of a product or category page. It provides a link to your preferred URL, so search
engines will give it greater weight.
Example 1: Category Path Creates Duplicate URLs
For example, if your catalog is configured to include the category path in product URLs,
your store will generate multiple URLs that point to the same product page.
http://mystore.com/furniture/living-room/microfiber-sofa-sleeper
http://mystore.com/microfiber-sofa-sleeper
Magento Enterprise Edition User Guide, Version 1.14.2
261
Canonical Meta Tag
Chapter 15: SEO Best Practices
Example 2: Category Page Full URL
When canonical meta tags for categories are enabled, the category page of your store
includes a canonical URL to the full category URL:
http://mystore.com/furniture/living-room/microfiber-sofa-sleeper
Example 3: Product Page Full URL
When canonical meta tags for products are enabled, the product page includes a canonical
URL to the domain-name/product-url-key because product URL keys are globally unique.
http://mystore.com/microfiber-sofa-sleeper
If you also include the category path in product URLs, the canonical URL remains domainname/product-url-key. However, the product can also be accessed using its full URL,
which includes the category. For example, if the product URL key is microfiber-sofa-sleeper
and is assigned to the Furniture > Living-Room category, the product can be accessed
using either URL.
You can avoid being penalized by search engines by omitting the category from the URL, or
by using the canonical meta tag to direct search engines to index either by product or
category. As a best practice, it is recommended that you enable canonical meta tags for
both categories and products.
To enable the canonical meta tag:
1.
On the Admin menu, select System > Configuration.
2.
In the panel on the left, select Catalog.
3.
Click to expand the Search Engine Optimizations section.
4.
If want search engines to index only pages that have a full category path, do the following:
5.
6.
262
a.
Set Use Canonical Link Meta Tag for Categories to “Yes.”
b.
Set Use Canonical Link Meta Tag for Products to “No.”
If you want search engines to index only product pages, do the following:
a.
Set Use Canonical Link Meta Tag for Products to “Yes.”
b.
Set Use Canonical Link Meta Tag for Categories to “No.”
When complete, click the Save Config button.
Magento Enterprise Edition User Guide, Version 1.14.2
Chapter 16:
URL Redirects
The URL Redirect tool lets you change any URL that is associated with a product,
category, or CMS page. When the redirect goes into effect, any links that point to the
previous URL are redirected to the new address.
The terms rewrite and redirect are often used interchangeably, but refer to slightly
different processes. A URL rewrite changes the way a URL appears in the browser. A
URL redirect, on the other hand, updates the URL that is stored on the server. A URL
redirect can be either temporary or permanent. Your store uses URL redirects to make it
easy for you to create search engine friendly URLs and to preserve existing links.
Create Custom Redirect for Old URL
Magento Enterprise Edition User Guide, Version 1.14.2
263
Chapter 16: URL Redirects
Configuring URL Rewrites
URL rewrites make it possible to make “search engine friendly” URLs by adjusting the
format and content. Initially, all Magento URLs include a file called “index.php” that
resides in the root folder. By default, the file name appears in the URL just after the name
of the root folder. When Web Server Rewrites are enabled, the system rewrites the URL to
omit “index.php.” The rewrite has no impact on performance or site rank, and is more of a
usability issue than anything else.
URL without Web Server Rewrite
http://www.yourdomain.com/magento/index.php/storeview/url-identifier
URL with Web Server Rewrite
http://www.yourdomain.com/magento/storeview/url-identifier
To enable URL rewrites:
1.
On the Admin menu, select System > Configuration.
2.
In the panel on the left under General, select Web.
3.
Click to expand the Search Engine Optimization section.
4.
Set Use Web Server Rewrites to “Yes.”
Search Engine Optimization
5.
264
When complete, click the Save Config button.
Magento Enterprise Edition User Guide, Version 1.14.2
Chapter 16: URL Redirects
Automatic Product Redirects
Automatic Product Redirects
Your store can be configured to automatically generate a permanent redirect whenever the
URL key of a product changes. In the product record, the checkbox below the URL key
indicates if permanent redirects are enabled for your catalog. If your store is already
configured to automatically redirect catalog URLs, making a redirect is as easy as updating
the URL key.
Create Permanent Redirect
To set up automatic redirects:
1.
On the Admin menu, select System > Configuration.
2.
In the panel on the left, under Catalog, select Catalog.
3.
Click to expand the Search Engine Optimizations section. Then, set Create Permanent
Redirect for URLs if URL Key Changed to “Yes.”
4.
When complete, click the Save Config button.
To automatically redirect catalog URLs:
1.
On the Admin menu, select Catalog > Manage Products.
2.
Find the product in the list, and click to open the record.
3.
In the URL Key field, do the following:
a.
Make sure that the Create Custom Redirect for old URL checkbox is selected. If not,
complete the instructions to enable automatic redirects.
b.
Update the URL Key as needed, using all lowercase characters and hyphens instead of
spaces.
Magento Enterprise Edition User Guide, Version 1.14.2
265
Creating URL Redirects
Chapter 16: URL Redirects
4.
When complete, click the Save button.
5.
When prompted to refresh the cache and index, click the links in the messages that appear
at the top of the workspace. Follow the instructions.
The permanent redirect is now in effect for the product and any associated category URLs.
6.
To view the redirect records, select Catalog > URL Redirects. The most recent custom
redirects are at the top of the list.
Creating URL Redirects
The URL Redirect tool can be used to create product and category redirects, and custom
redirects for any page in your store. When the redirect goes into effect, any existing links
that point to the previous URL are seamlessly redirected to the new address. The following
instructions show how to use the URL Redirect tool to create three different kinds of
redirects:
l
Product Redirect
l
Category Redirect
l
Custom Redirect
All redirects reference a “Target Path” and “Request Path,” as shown in the following
examples. The “Request Path” is the old URL, and the “Target Path” is where you want the
URL to go from now on.
Example 1: Permanent 301
FIELD
VALUE
Target Path
category-1.html
Request Path
catalog/category/id/6
Redirect Type
Permanent 301
Example 2: Temporary 302
FIELD
266
VALUE
Target Path
catalog/category/id/6
Request Path
product.html
http://magentocommerce.com
Redirect Type
Temporary 302
Magento Enterprise Edition User Guide, Version 1.14.2
Chapter 16: URL Redirects
Creating URL Redirects
You can use redirects to create additional URLs for items, as a temporary seasonal change,
or as a permanent change. Redirects can be created for any valid path, including CMS
content pages. Internally, the system references products and category by ID. No matter
how often the URL changes, the ID remains the same. Here are some ways you can use
URL redirects:
Original URL
http://www.example.com/peripherals/ergonomic-keyboard.html
Additional Product URL
http://www.example.com/best-keyboard.html
Additional Category URL
http://www.example.com/all-on-sale.html
http://www.example.com/save-now/spring-sale
URL Redirect Management
Magento Enterprise Edition User Guide, Version 1.14.2
267
Creating URL Redirects
Chapter 16: URL Redirects
Field Descriptions
FIELD
Type
DESCRIPTION
Indicates the type of redirect to be made. The type cannot be
changed after the redirect is created. Options include:
Category
Product
Custom
Request Path
The URL of the page that is to be redirected. Depending on your
configuration, the Request Path might include the .html suffix
and category. For example:
brandname
brand/brandname
catalog/category/view/id/56
private-sale-shoes/prima-pump.html
brand/brandname.html
A Request Path must be unique, and not have been used
previously.If you have made several attempts to redirect the
same page, you should delete any unsuccessful redirects and
refresh the cache.
Target Path
The URL that points to the destination page. The Target Path can
be a different CMS page, or the result of a search. To avoid
getting a 404 "Page Not Found" error, the path must exactly
match what the system expects to find. The following examples
are valid target paths:
brandname
brand/brandname
catalog/category/view/id/52
catalogsearch/advanced/result/?brand=brandname
http://magentocommerce.com
Redirect Type
Indicates whether the redirect is temporary or permanent.
Options include:
No
Temporary (302)
Permanent (301)
Description
268
Describes the purpose of the redirect. This field is for reference
and is not visible to customers.
Magento Enterprise Edition User Guide, Version 1.14.2
Chapter 16: URL Redirects
Creating URL Redirects
Product Redirect
Before you begin, you should know exactly what you want the redirect to accomplish. Just
remember— the “Request Path” is the old URL, and the “Target Path” is where you want the
URL to go from now on.
Product ID
Process Overview:
Step 1: Get the Product ID of the Target URL
Step 2: Create the Product Redirect
Step 3: Refresh the Index
Step 4: Test the Redirected URL
Step 1: Get the Product ID of the Target URL
1.
On the Admin menu, select Catalog > Manage Products.
2.
Find the product in the list that is the destination of the redirect, and take note of its
product ID.
Step 2: Create the Product Redirect
1.
On the Admin menu, select Catalog > URL Redirects.
2.
In the upper-right corner, click the Add URL Redirect button.
3.
In the Select URL Redirect Type section, set Type to “Product.”
Magento Enterprise Edition User Guide, Version 1.14.2
269
Creating URL Redirects
Chapter 16: URL Redirects
URL Redirect Type
4.
In the list, find the product that you want to redirect, and click to open the record.
5.
Scroll down to the bottom of the Select Category tree, and click the Skip Category
Selection button.
6.
In the URL Redirect Information section, do the following:
URL Redirect Information
a.
If you have multiple stores, set Store to the specific view where the redirect applies.
b.
In the Request Path field, enter the old URL key.
To help you enter the correct format, the Target Path initially echoes the Request path
URL by product ID. To redirect the product, simply replace the ID in the URL with the ID of
the target product.
c.
In the Target Path field, replace the old product ID with the one of the product that
you want to be the new destination for the URL.
d.
Set Redirect Type to one of the following:
e.
7.
l
Temporary (302)
l
Permanent (301)
For your own reference, enter a brief description of the rewrite.
When complete, click the Save button.
Your new product redirect now appears at the top of the list of redirects.
270
Magento Enterprise Edition User Guide, Version 1.14.2
Chapter 16: URL Redirects
Creating URL Redirects
New Product Redirect
Step 3: Refresh the Index
1.
On the Admin menu, select System > Index Management.
2.
Select the Catalog URL Rewrites checkbox.
3.
Set the Actions control to “Reindex Data,” and click the Submit button.
Step 4: Test the Redirected URL
Test the redirected URL from your store, to make sure that it works correctly.
Category Redirect
Before you begin, you should know exactly where you want the redirect to go. Just
remember— the “Request Path” is the old URL, and the “Target Path” is where you want the
URL to go from now on.
URL Redirect Management
Magento Enterprise Edition User Guide, Version 1.14.2
271
Creating URL Redirects
Chapter 16: URL Redirects
Process Overview:
Step 1: Get the Category ID of the Target URL
Step 2: Create the Category Redirect
Step 3: Refresh the Index
Step 4: Test the Redirected URL
Step 1: Get the Category ID of the Target URL
1.
On the Admin menu, select Catalog > Categories > Manage Categories.
2.
In the category in the tree, find the target category and click to open the record.
3.
Take note of its category ID at the top of the page.
Category ID
Step 2: Create the Category Redirect
1.
On the Admin menu, select Catalog > URL Redirects.
2.
In the upper-right corner, click the Add URL Redirect button
3.
In the Select URL Redirect Type section, set Type to “Category”
Category URL Redirect
4.
272
In the category tree, click to select the category that is being redirected.
Magento Enterprise Edition User Guide, Version 1.14.2
Chapter 16: URL Redirects
Creating URL Redirects
Select Category
5.
In the URL Rewrite section, do the following:
a.
If you have multiple stores, elect the Store where the redirect applies.
b.
In the Request Path field, enter the old URL.
c.
In the Target Path field, enter the new URL.
d.
Set Redirect Type to one of the following:
e.
6.
l
Temporary (302)
l
Permanent (301)
For your own reference, enter a brief description of the rewrite.
When complete, click the Save button.
URL Redirect Information
Your new category redirect now appears at the top of the list of redirects.
Step 3: Refresh the Index
1.
On the Admin menu, select System > Index Management.
2.
Select the Catalog URL Rewrites checkbox.
3.
Set the Actions control to “Reindex Data,” and click the Submit button.
Magento Enterprise Edition User Guide, Version 1.14.2
273
Creating URL Redirects
Chapter 16: URL Redirects
Step 4: Test the Redirected URL
Test the redirected URL from your store, to make sure that it works correctly. Make sure
that the URL you test goes directly to the category, rather than to a subcategory. For
example:
http://yourstore.com/catalog/category/view/id/56
http://yourstore.com/catalog/category/view/s/my-category/id/56/
Custom Redirect
You can use a custom redirect to reroute CMS pages, or any other type of page. For
example, if you change the URL key of the privacy policy from privacy-policycookie-restriction-mode to privacy-policy, the link in the cookie restriction mode
message will return “404 - Page Not Found.” To redirect traffic to the new URL key, create a
custom rewrite with the following settings:
ID Path:
privacy-policy
Request Path:
privacy-policy-cookie-restriction-mode
Target Path:
privacy-policy
Redirect:
Permanent (301)
Before you begin, figure out the URL keys that you need for the ID Path, Request Path, and
Target Path. Just remember— the “Request Path” is the old URL, and the “ID Path” and
“Target Path” are the new URL.
New Custom Redirect
274
Magento Enterprise Edition User Guide, Version 1.14.2
Chapter 16: URL Redirects
Creating URL Redirects
Process Overview:
Step 1: Get the Unique Identifier of the Page to be Redirected
Step 2: Create the Custom Redirect
Step 3: Refresh the Index
Step 4: Test the Redirected URL
Step 1: Get the Unique Identifier of the Page to the Redirected
The unique identifier of the page to be redirected might be the relative path to a page in
your store, such as: brand/search/result/brandname
Step 2: Create the Custom Redirect
1.
On the Admin menu, select Catalog > URL Redirects.
2.
In the upper-right corner, click the Add URL Redirect button.
3.
In the Select URL Redirect Type section, set Type to “Custom.”
Custom URL Redirect
4.
In the URL Redirect Information section, do the following:
a.
If you have multiple stores, select the Store where the redirect applies.
b.
In the Request Path field, enter the unique identifier of the original URL. To redirect
any page in your store, enter the relative path to the page. For example:
brand/search/result/brandname
c.
In the Target Path field, enter a valid URL for the new destination.
l
l
d.
To redirect to another CMS page in your store, enter the relative path to the page,
without a leading forward slash.
To redirect to a page on a different site, enter the fully qualified URL of the new
destination. For example:
new-page
URL key of target page.
somewhere/new-page
Relative path to target page, without leading forward
slash.
http://magento.com
Fully-qualified URL of target page on external website.
Set Redirect Type to one of the following:
Magento Enterprise Edition User Guide, Version 1.14.2
275
Creating URL Redirects
e.
Chapter 16: URL Redirects
l
Temporary (302)
l
Permanent (301)
For your own reference, enter a brief Description of the rewrite.
URL Redirect Information
5.
When complete, click the Save button. Your new redirect now appears at the top of the list.
6.
When prompted that the cache has become invalid, click the link in the message at the top
of the workspace, and follow the instructions to refresh the cache.
Step 3: Refresh the Index
1.
On the Admin menu, select System > Index Management.
2.
Select the Catalog URL Rewrites checkbox.
3.
Set the Actions control to “Reindex Data,” and click the Submit button.
Step 4: Test the Redirected URL
Test the redirected URL from your store to make sure that it works correctly.
276
Magento Enterprise Edition User Guide, Version 1.14.2
create 75
delete 78
filterable 45
Index
group 80
information 77
input types 72
A
layered navigation 81
Add
price 187
Root Category 57
product 81
Add to Category, Visual Merchandiser 35
properties 75
Additional Cache Management 27
quick search 81
Advanced Search 81, 225
set 71, 78, 102, 133
Solr 236
Ajax page load threshold, Visual
system 79
Attribute set
Merchandiser 11
Allow
create 103
attributes
Adding to Cart 68
Browsing Category 68
Gift Message 145
HTML tags 82, 87
dropdown 202
Attributes, Smart Category 24
Auto Bill, recurring payment 139
Autogenerate
HTML Tags on Frontend 87
Anchor
Site Map 253
Automatic
category 57-58
Apply MAP, Smart Category 24-25
redirect 265
Automatic Sort, Visual Merchandiser 15,
As Low As, bundle product 113
17
Associated Product 100, 105
attribute
dropdown 201
swatch values 207
Attribute 71
advanced search 81
code 83
B
Backorders 155, 157, 160
Base
image 193-194, 196
Best practice
SEO 251
Color 13
Magento Enterprise Edition User Guide, Version 1.14.2
277
Index
Bestseller
Sort by 13
Billing
recurring payment 140-141
Block
category 62, 64
name 61
page 62
path, in URL 255, 259, 262
permissions 68
Permissions 67
Products 66
Breadcrumb trail 43
redirect 271
Browsing Category 67
root 57
Bundle Product 95, 111
Search, disallow 70
group price 185-187
tree 51
Items 113
URL key 55
Category options, Visual Merchandiser 14
C
Click for price 185
Cache Management 27, 220
Canonical meta tag 255, 259, 261
Catalog
flat 89
images 192
Input Type for Store Owner 76
Search 136
Category 41, 147
create 51
Description 61
Display Settings 62
General Information 60
grayed out 51
hidden 59
ID 55
image 61
landing page 55, 64
levels 42
Levels 52
modify 56
278
Clone Category IDs, Smart Category 24-25
Clone Category IDs, Visual Merchandiser 37
CMS
Block, category 63
page redirect 274
page, breadcrumbs 43
Code
Format, Gift Card 132
Pool, Gift Card 124, 130, 132
Column
dimensions
layout 64
Column count, Visual Merchndiser 10
Combine, Search Type 235
Combined Gift Card 124, 127
Compare Products 82, 86
Comparison properties 82
Composite product 96
configurable
swatch 201
Magento Enterprise Edition User Guide, Version 1.14.2
Index
configurable product
swatch 201
Configurable Product 94
create 102
image 107
inventory 172
Manage Stock 172
configurable products 203
Configuration
search, default 234
Copy from Configurable 106
Create
New Attribute 134
Simple Associated Products 105
Credit Memo
Return to Stock 155, 158
Cron 12, 27
Cross-sells 151
Custom
Design
Category 64
layout 65
Layout Update
product 144
Layout Update, category 65
Options 96, 152
redirect 274
Theme 65, 144
URL redirect 260
Customer
group
category permissions 67
permissions 70
Magento Enterprise Edition User Guide, Version 1.14.2
D
Date Created, Smart Category 24-25
Date Modified, Smart Category 24-25
Date, input type 72
Default
Value 81
Design
custom, category 64
product 144
Detach Category, Visual Merchandiser 29
Detach from Category, Visual Merchandiser 32
Development environment 90
Discount
quantity 177
Display
Actual Price 175, 184
in Suggested Terms 246
Mode, category 63
Product Prices
category permissions 67
Settings
Category 62
Download
links 118
samples 120
Download SKUs, Visual Merchandiser 19, 33
Downloadable Product 95
configure 121
create 116
Drag and Drop, Visual Merchandiser 30
Drill-down, price 47
Dropdown
attribute 103
279
Index
input type 72
Flat
dropdown attributes 202
catalog 89, 230
Duplicate
setup 90
content 261
Flush Swatch Image Cache 205
URL key 260
Flush Swatch Images Cache 220
Dynamic
Frontend
media URL 255
media URLs 230
properties 76
Fulltext, Search Type 235
URL 254
values, bundle product 111
dynamic image swap 212
G
General
Product Information 134
E
Gift Card 95, 124
EAV 89
account 128
eBook download 116
account, multiple 125
Empty, page layout 65
balance 125
Enable
configure 130
Qty Increments 172
create 126
Search Recommendations 235, 249
deactivate 126
WYSIWYG Editor 82
email template 131
Equalize
expiration date 131
Price Ranges, layered navigation 48
lifetime 127
Product Counts, layered navigation 48
multiple 126
partial deduction 126
F
prices 127
Fee failure, recurring payment 141
Filter
by Attribute 56
Filterable
attribute 45, 87
Fixed Product Tax
input type 72
redeem 125
refund 126
status 125
type 127
Gift Options
product 145
Gift Wrapping
product 145
280
Magento Enterprise Edition User Guide, Version 1.14.2
Index
Global
attribute scope 103
Grid
zoom 191
Image Label, Smart Category 24-25
In Anchor, category 63
Only 229
In Stock 162
View As 227
Include in
Group price 185-187
Advanced Search 225
group_price attribute 185-187
Navigation Menu 59, 62
Grouped Product 94
create 99
Indexation Mode, Solr 241
Initial Fees, recurring payment 143
Input type
H
bundle product 113
Hero products, Visual Merchandiser 15
Hero Products, Visual Merchandiser 16
Input Validation 81
Inventory 155, 158
configurable product 172
Hero Products, Visual Merchandiser | Default.EE 1-
Configuration 156, 158
14-1 | [107] 18
Manage Stock 162
Hidden
category 51, 59
Invoiced
order, download product 121
Hide category position input fields, Visual
Merchandiser 11
Is Active 61
Hide disabled products, Visual Merchandiser 11
Is Anchor 56, 58
Hide not-visible products, Visual Merchandiser 11
Iterative splitting, price navigation 47
HTML
in product description 87
product descriptions 72
suffix 254
L
Landing page 245
layered navigation
swatch 203
I
Layered Navigation 44, 63, 81
Image
filterable 45
catalog, add 194
Interval Division Limit 48
placeholder 98, 120, 196
product count 44
size 192
Solr 240, 243
sort order 195
Layered Price Navigation Step 63
watermarks 197
Magento Enterprise Edition User Guide, Version 1.14.2
281
Index
Layout
Media Storage
custom 65
Light box 190
swatch 209
Meta
Like, Search Type 235
Description, product 137
List Attribute Codes, Visual Merchandiser 10
Information 137, 252
List Mode 229
category 60
List Only 229
Description 252
List, View As 227
Keywords 60, 252
Listing Sort By, category 63
product 98
localization
Title 252
swatch 217
Information, product 120
Logic, Smart Category 26
Information, Title 137
Keywords, product 137
M
tag, canonical 261
magnify image 191
Magnify image 191
Minimum Advertised Price 180
Misspelled words
redirect 245
Main menu 42
Solr 239
Main Menu
Categories 52
Manage
Attribute Sets 78
Stock 158, 162, 172
Manufacturer's suggested retail price 180
Manufacturer, product 136
MAP (Minimum Advertised Price) 175, 180
Mass Product Assignment, Visual Merchandiser 33
Move to Bottom, Visual Merchandiser 32
Move to Top, Visual Merchandiser 31-32
MSRP (Manufacturer's Suggested Retail Price) 175,
180
Multiple
Select, input type 72
Music download 116
MySQL 233
Fulltext Search 234
Mass Product Assignment, Visual Merchandiser |
Default.EE 1-14-1 | [222] 38
Maximal Depth 42
Maximal Depth, Top Navigation 52
Media
N
Navigation 59
menu 54, 62
Image 193, 195
properties 81
image, input type 72
top 42
URL 255
282
Magento Enterprise Edition User Guide, Version 1.14.2
Index
No
Price 173-174
layout updates 65
Not
Visible Individually 136
Number of Results, Search Term 248
adjustment 106
attributes 187
display on gesture 175
drill-down 47
input type 72
O
Minimum Advertised Price (MAP) 180
On Gesture, display price 175
Operators, Smart Category 26
Out of Stock 161-162, 164, 169
navigation 44, 47
package 179
product group 185-187
Range, bundle product 111
Special 176
P
Tier 177
Package
pricing 179
Page
Title Separator 259
Page Layout 65, 144
product 144
Pagination
controls 227
links 227
Parent
category 64
Pending
order, download product 121
Permanent
(301) 268
Redirect 265, 276
Permissions
category 67
Physical Gift Card 124, 127
Placeholder image 196
View, bundle product 111
Price Rule
condition, attributes 86
Price Type
Fixed 153
Percentage 153
Priority
duplicate URL keys 261
Product
Bundle 111
Configurable 102
create 93
Description
HTML 87
Downloadable 95
Gift Card 124
Group Price 185-187
Grouped 99
image, zoom 191
images 98, 120, 189-190, 194
Popular Search Terms 230, 259
Magento Enterprise Edition User Guide, Version 1.14.2
283
Index
Information 133
Quick Search 224
Custom Options 152
attributes 86
Design 144
Solr 236
Inventory 158
Quick Simple Product Creation 105
Prices 173
list 56, 87
Sort by 229
name 135
R
Rebuild on category save, Visual Merchandiser 28
Rebuild on product save, Visual Merchandiser 12,
Redirect 269
27
relationships 148, 150-151
Rebuild Smart Categories 27
Simple 96
Recommendations
thumbnails 190
Search 236
Virtual 108
search terms 245
Product Alerts
configuration 170
run settings 170
product list
swatch 204
product page
swatch 204
Recurring Profile 138
Redeem
gift card 127
Redirect
category 271
custom 274
misspelled words 245
Product Search, Visual Merchandiser 34
product 269
Product Stock Options 156
Search Term 248
Product View Page, visible on 87
type 268, 276
Products
URL 263
per page 229
Regular price 187
Related
Q
Products 148
Quantity
Search Terms 247
Discount 177
Remove Products, Visual Merchandiser 39
Increments 161, 172, 179
Request Path, rediect 266
Query
length 235
word count 235
284
Root
category 51, 57
Run settings, product alerts 170
Magento Enterprise Edition User Guide, Version 1.14.2
Index
Number of Results 248
S
Samples
download 120
Save Positions, Visual Merchandiser 33
Schedule
recurring payment 141
Scope 83
global attribute 103
Scope, Visual Merchandiser 28
related 247
SEO 251
SERP 137
Set Product as New from/to Date 135
Ship
Bundle Items 115
Shipping
bundle product 113
Shop By 44
Seach
Visual Merchandiser 33
Shopping
cart
search
tools, storefront 223
Search
configure 233-234
default 234
index, Solr 236
quick 224
Recommendations 249
enable 236
Suggestions 237, 239
Type, MySQL 235
weight 86
Solr 239
Weighted 238
Search engine 235
friendly URLs 254
optimization 251
Search results 227
count 235
Solr 239
Search Terms 245
add 246
thumbnails 100
Shopping Cart
thumbnails 106, 200
Show creation date, Visual Merchandiser 10
Show extra images, Visual Merchandiser 10
Simple Product 94
create 96
Site Map 259
Sitemap 253
SKU 134-135
dynamic, bundle product 112
use of 102
SKUs, download 19, 36
Slider 190
Small Image 192-193, 195
Smart Category 12
Smart Category Rule 87
Smart Category Rules 21
Smart Category, rebuild 27
Software download 116
Solr 233, 236
configuration 241
Magento Enterprise Edition User Guide, Version 1.14.2
285
Index
configure 239
Suggestions
install 236
Search Terms 245
layered navigation 240
Solr 237
Server Path 241
Sort
Super Products Attributes Configuration 106
swatch 102, 201
attributes 86
add values 207
by color 13
attribute values 207
product list 63
configuration 203
Sort By 227
dimensions 204, 206
Sort Options, Visual Merchandiser 29, 32
dynamic image swap 212
Special Price 174, 176
image cache 220
Static Block
image labels 211
category page 55
images 208
Static URL 254
layered navigation 203
Status
localization 217
product 134, 136
text label 202
Stock Availability 161-162
upload images 209
catalog page 168
upload to product 211
Configurable Product 172
swatches 202
product page 166
swatches folder, Media Storage 209
scenarios 165
Synonym For 246, 248
Stock Threshold
Synonyms
Sort by 13
Stock, Manage 158
search terms 245
System
Store
attribute 79
code, in URL 254
Store Hierarchy
product 98
Storefronts, Visual Mechandiser 28, 32
Subcategory 51-52, 59
Submit
Virtual Merchandiser 33
Subscription
T
Tag
cloud 230
Target Path, redirect 266, 268
Tax
Class, price 175
Temporary (302) 268
purchase by 138
286
Magento Enterprise Edition User Guide, Version 1.14.2
Index
Temporary redirect 276
Text
suffix 136, 254, 259
URL Key, Smart Category 24-26
Area, input type 72
Use
Field, input type 72
Dynamic Media URLs 230
Thumbnail 193-194, 200
Flat Catalog Category 230
gallery 190
Flat Catalog Product 230
Image
for Promo Rule Conditions 82, 87
category 61
in Advanced Search 238
Smart Category 25-26
in Quick Search 238
Thumbnail Label
Parent Category Settings 64
Smart Category 25-26
Tier Price 174, 177
to Create Configurable Product 103
Use in Layered Navigation
Top Navigation
Depth 52
swatch 205
Use in Product Listing 21
Trial period, recurring payment 140, 142
Utilities, Visual Merchandiser 33
U
V
Unique Value, attribute property 81
Value, Smart Category 26
Up-sell products 150
Values Required 81
URL
View
category path 255
product 98, 118
dynamic 254
View As 227
Key 136, 254
Virtual
category 60
Gift Card 124, 127
Key, category 61
Key, priority 260
Product 94, 108
Visibility
options 254
product 136
redirect 263
Visible on Product View Page 82
redirect, create 266
Visual Merchandiser 3, 28
redirect, custom 260
Configuration 4
rewrite 56
static 254
store code 254
Magento Enterprise Edition User Guide, Version 1.14.2
W
Watermark 197
287
Index
Websites
product 146
Weight
Bundle Product 115
dynamic, bundle product 112
product 134-135
Weighted Search 238
What's this? link 185
WYSIWYG Editor
enable 72
enable for input 87
Y
Yes/No, input type 72
Z
Zoom, product image 191
288
Magento Enterprise Edition User Guide, Version 1.14.2
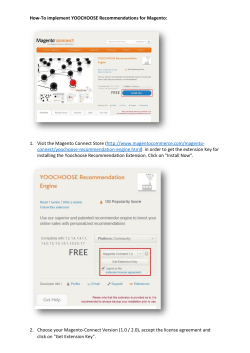
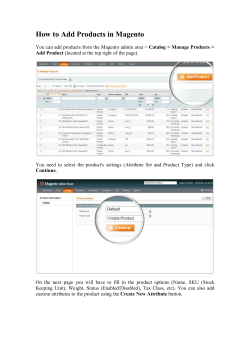


© Copyright 2026