Create a Flyer and Business Card Using Microsoft Publisher
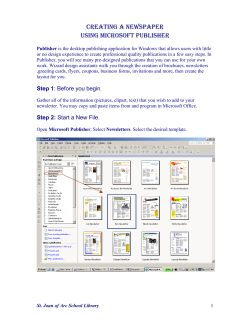
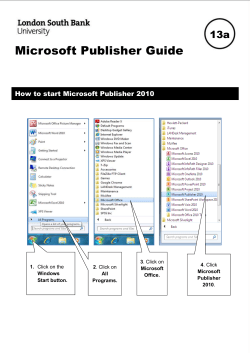
Create a Flyer and Business Card Using Microsoft® Publisher Microsoft® Publisher can be used to design your business cards, flyers, brochures, letterhead, and many other documents. There is a wizard which will lead you through the process of creating many documents. You can use the wizard in Publisher or follow these steps. ©ACEnet, Inc., 2003 Creating a Flyer and Business Card in Microsoft® Publisher 385 Create a Flyer Using Microsoft® Publisher Remember the card and the flyer should: 1. Follow the rules of design in Chapter 18. Proximity: Reduce the number of visual units on a page by grouping related items close together. Alignment: To create a clean, organized page, choose one alignment and use it throughout the page. Avoid center alignment. Lack of alignment is the biggest cause of unpleasant looking pages. Repetition: Try to create a sense of unity throughout the page by repeating a color, style, line thickness, texture, etc. Contrast: Either make all of the elements on the page the same (font, color, thickness, spacing, shape, etc.) or make them markedly different. 2. Appeal to your target market. Refer to Chapter 5 on Target Market and Chapter 14 on your company’s position. Follow these steps to create a business flyer: ® 1. Go to the Start Menu → Programs → Microsoft Publisher. 2. Choose Publications by Design 3. From the Design Sets window, choose Special Event Sets 4. Scroll through the choices and select the type of flyer you like best. Make sure you select a flyer and not a brochure, postcard, Web site, or invitation. 5. Double click on the flyer of your choice. 6. At this point one of two things may happen: 386 ©ACEnet, Inc., 2003 If the copy of Publisher that you are using has not been opened before, a Personal Information dialog box will appear asking your input of personal information. If so, go to Step 7. If the copy of Publisher that you are using has been opened before, the Personal Information dialog box will not appear but instead the Flyer Wizard Introduction page will appear. If so, skip to Step 9. Creating a Flyer and Business Card in Microsoft® Publisher 7. Fill in as much of this information as you can in the Personal Information dialog box. This includes: Information about your primary business Your name; give yourself a title The address of your business Your phone number and email, or make up fictional numbers if you prefer. The name of your business Your slogan Choose a color scheme, if you wish Don’t bother with the logo section just now. We’ll deal with that later. 8. Click Update. Go to Step 9 or 10. 9. Click Next. 10. The Flyer Wizard Color Scheme window appears. Choose a color scheme. If you have just filled out the Personal Information dialog box then you may have chosen a color scheme, but if you wish you can chose another different one at this point. Once a color scheme has been selected, click Next. 11. Choose the paper size you would like to use. 12. Decide which Tear-off item you want to include on your flyer and click that button. You can see how the different items will look when added to your flyer just by clicking on each different button. When you’ve selected a Tear-Off item, click Next. 13. Click No, you do not want a placeholder for customer’s address. Click Next. 14. Click Primary Business Information set. This is the information you added in Step 6. If you filled in the Personal Information dialog box in Step 6, you probably don’t need to update it at this point. If you did not get the Personal Information dialog box in Step 6, this is your opportunity to update or change the personal information stored by Publisher. Click on Update to open the Personal Information dialog box and enter your information. Once you’ve changed whatever information you need to change, once again click Update. 15. Click Finish. Now you are done with the Wizard and you can begin editing the flyer yourself. You can click Hide Wizard if you want to close the Wizard. 16. Start with the event title. What are you promoting? Are you going to have a sale or a contest or a giveaway? Click inside the text box to change the text. 17. At some point, name and save your Publisher file; Publisher may even prompt you to save your work. ©ACEnet, Inc., 2003 Creating a Flyer and Business Card in Microsoft® Publisher 387 18. In the upper right corner, click in the date text box and type in the correct date for your event. Do the same for the time. 19. If you are having trouble reading your flyer, go to the View menu and drag down to Zoom. If you choose 100%, you will see the flyer at actual size. 20. You can replace the graphic with your logo by right clicking on the graphic then select Change Picture, Picture, and From File. Locate your logo and choose Insert. 21. In the large text box, describe your event. What will take place? Who is sponsoring it? Are there prizes or giveaways for attending? 22. Describe your location in the textbox below the large one. 23. Add your name and phone number in the appropriate text box. 24. In the Highlights box, you can list the special aspects of your event. 25. If you selected to include a coupon, you can edit it as you did the rest of your flyer. To change the clipart on the coupon, double click on the graphic and the clipart library should open. Type a word related to the image you want. When you find an image you want, click on it and drag to the right to insert it into your flyer. If a dialog box appears and tells you the image is stored elsewhere, you can either choose another ® image or ask for the Microsoft CD with the clipart library on it. 26. If you haven’t already saved your flyer, save it on your hard drive. All you need to do now is print some! 388 ©ACEnet, Inc., 2003 Creating a Flyer and Business Card in Microsoft® Publisher Create a Business Card Using Microsoft® Publisher Wizard ® 1. Go to the Start Menu → Programs → Microsoft Publisher. 2. Choose Publications By Wizard and in the Wizard menu list, choose Business Cards. Select one style of business card using plain paper. 3. Click Start Wizard. 4. If you have already completed a flyer, your business information will automatically be added to your business card. You are now in the Wizard. Click Next. 5. Choose your color scheme. Click Next. 6. Decide whether you want your card to be vertical (portrait) or horizontal (landscape). Click Next. 7. Select Yes to include a place to add your logo. Click Next. 8. From the Print Tiling window, select One in the Center of the Page. When you are finished with the Wizard, you will print one for your instructor to check. For now, click Next. When you ready to print a page of business cards on cardstock paper, you will need to go back to this option and choose “several on a page.” 9. From the Personal Information window, select Primary Business information. Click Finish. The Wizard is done and you can edit the card yourself. Click Hide Wizard if you want to close the Wizard. 10. To insert your business logo in your card, do the following: 11. Right click on the graphic placeholder (it is the area of the card that has the word Organization in it). 12. From the pop-up menu, select Logo Creation Wizard. 13. From the Logo Creation Wizard window select “Picture file that I already have” and then click on Insert Picture. 14. From the Insert Picture window, locate the logo image file you created ® with Microsoft Paint. Click Insert. 15. Your logo is now placed in the graphic placeholder in the business card. If necessary, resize the logo image using the resize handles. 16. Print this preliminary version of your business card and have your instructor check it. 17. Name and save your business card. ©ACEnet, Inc., 2003 Creating a Flyer and Business Card in Microsoft® Publisher 389
© Copyright 2026

