
How to…
How to…
1. How to Get Around in TireShop(System Navigation)
2. How to Set Up System Defaults
3. How to Set Up Store Defaults
4. How to Start Your Initial Setup in TireShop
5. How to Set Up Inventory Types and Categories
6. How to Set Up Brands/Lines
7. How to Set Up Tire Inventory
8. How to Set Up Parts and Wheels
9. How to Assign Colors to Inventory Items
10. How to Set Up Add-ons (Balancing, valve stems, fees, etc.)
11. How to Set Up Service Packages (Oil Changes, Transmission Flush, Etc.)
12. How to Link to Aftermarket Parts Houses
13. How to Link to CARFAX “Quick VIN”for Fast Vehicle Entry
14. How to Set Up Courtesy Check Lists
15. How to Create a New Order
16. How to Add Items to an Order
17. How to Sell from History
18. How to Decline Items
19. How to Take a Payment and Close Orders
20. How to Alert Customers of Completed Orders Via Text Messsage
21. How to Set up a Customer Charge Account
22. How to Receive Money on Account
23. How to Quick Quote Tire Pricing
24. How to Create an Estimate
25. How to Close Out a Day and Process End of Day Reports
26. How to Process Inventory Re-Order Reports
27. How to Receive Inventory
28. How to Transfer Inventory Between Stores
29. How to Do a Physical Inventory Count
30. How to Setup Price Levels
31. How to Setup Pricing in TireShop
32. How to Setup Your Service Charge Rate
33. How to Assign Service Charges to Overdue Accounts
34. How to Print or Email Statements
35. How to Setup Promotions
36. How to Setup Tire Spiffs
37. How to Process a Pay Out/Pay In
1
38. How to Print to Screen
39. How to Save or Email Anything That Prints
40. How to Backup Your Information
41. How to Perform Simultaneous Tasks
42. How to Setup Existing Accounts with Balances
43. How to Add a New Customer Using Phone Lookup
44. How to Be Warned of Customer Wait and Drop Off Time
45. How to Track Employee Activity
46. How to Merge Customer and Vehicle Information
47. How to Use the Employee Time Clock System
48. How to Send an Email to FreedomSoft From Within TireShop
49. How to Setup Order Types (National Accounts, etc.)
50. How to Setup and Process Accounting Posts
51. How to Use the Customer Relationship Management Tool (Direct Marketing)
52. How to Track Lift Items
53. How to Setup Pre-Defined Notes
54. How to Record and Register DOT Numbers
55. How to Use an Excel Spreadsheet to Update Your Cost
56. How to Track Core and Return Credits for Non-stock Items
57. How to Open TireShop Reports in Microsoft Excel
58. How to Create a Quick Estimate
59. How to Purge Old Data Out of TireShop
60. How to Setup TireShop for Goodyear Rebate Programs
61. How to Setup a Customized Sales Analysis
62. How to Create Custom Vehicle Bulletins
63. How to Use TireShop to Increase Your Profits
2
1. How to Get Around in TireShop(System Navigation)
a. Moving around in the main menu can be done one of several ways. One way is with
the arrow keys on your keyboard (up, down, left, right). Another way is by pressing
the appropriate letter that is underlined on a menu item (For example, press “s” to go
to Sales). You can also navigate through the menu with the mouse, but that is the
slowest route.
b. There are several keyboard shortcuts that allow you to easily navigate through
TireShop.
• “Insert” Key – This key is used anytime you want to ADD something in
TireShop. It can be used to add a new open order, add items to an order, add
a new customer, add a new vehicle, add new inventory, etc.
• “Delete” Key – This key is used to DELETE something in TireShop
(Orders, items on orders, customers, inventory, etc.).
1. Some things (like customer records, inventory records) in TireShop are
made inactive rather than being completely deleted. When these items
are “deleted” they are hidden from view in an “inactive” list. This way
you retain all of the history for those items without it showing up in
your inventory or customer list. You can also reactivate an item by
accessing your inactive list and “deleting” the item from the inactive
list. To access the inactive list press “Alt+Delete” from anywhere in
the inventory or customer listing. An inactive list can also be accessed
from most of the other listings in TireShop (labor items, package list,
inventory types and categories, brand list, vehicle list, employee list,
vendor list, etc.)
• “Tab” Key – This is used to VIEW information about an item, order,
customer, inventory item, etc.
• “Backspace” Key – This key is used to EDIT information about items,
orders, etc.
• “Page Down” Key – This is used as the SAVE button. When editing
information in TireShop (like editing inventory, customers, etc.) you can
press “Page Down” at any time to save the information you have added.
• “F10” Key – This key is used to PRINT invoices and reports throughout
TireShop.
• “Alt + F10” – Print to screen. Anything that prints in TireShop can be
viewed on the screen rather than sent to a printer. This can be helpful for
quickly glancing at reports without having to wait for them to be printed out.
When you press “Alt+F10” you will see “Screen Print” appear at the topright of the screen. The next time you print from TireShop it will be
displayed on the screen rather than going to the printer. After printing to the
3
•
•
•
•
screen, the “Screen Print” message will disappear, and TireShop will revert
to normal.
“Shift + F10” – Export to Excel. TireShop also allows you to open any
report from TireShop in Microsoft Excel. Just press “Shift+F10” and you
will see the words “EXPORT REPORT” at the top right-hand side of the
screen. The next time your print a report in will be opened in Excel instead
of going to your printer. Excel will need to be installed on your machine or
the server, depending on your configuration.
“F11” Key – Used to LOGIN/LOGOUT of TireShop. This can be done
from any screen in TireShop.
“F12” Key – Used to EXIT TireShop. This can be done from any screen in
TireShop.
“Alt + F9” – Multitasking Window. Bring up a list of commonly used
functions from anywhere in TireShop.
•
•
“Alt + Z” – Quick Quote Shortcut
“Alt + F1” – Quick Clock-In/Out Shortcut. Clock in an employee from
anywhere in TireShop.
•
“CTRL+E” – Allows you to email opened and closed invoices, estimates,
quotes, and statements. (See point #33 and #38 for more information)
“CTRL+T” – Allows you to sent a text message from the open orders,
closed orders, and estimate listing. (See point #19 for more information)
•
2. How to Set Up System Defaults
a. Go to “Utility” > “System Defaults”.
b. Cash, Credit, Estimate, and Statement Messages
4
Here you can create different default messages that will be printed on each
off the invoice types.
c. Miscellaneous
• Delete Open Orders? – By default TireShop does not delete voided open
orders, but rather stores them in an area of closed order so that they may be
viewed later. To see voided open orders go to “Sales” > “Closed Orders” >
“F2 Sort” > “Void”.
•
•
•
•
•
•
•
•
•
•
•
•
Report Errors – Determines whether errors are automatically reported to
Freedomsoft.
Print All to Screen – If a printer is not available, this option can be turned on
an all reports will be displayed on the screen instead of going to a printer.
All Caps? – You can choose to only use capital letters within TireShop for a
more uniform look.
Accounting Type? – Choose your accounting type.
Auto-Credit Grace Days – You can set extra “Grace Days” when using
TireShop to automatically manage credit accounts. This will add an extra
amount of days before TireShop revokes a delinquent accounts credit. For
example, if you set the Grace Days to 15, a customer with net30 terms
would, in effect, become net45. See point #15 from more information.
Vehicle Entry Mode – When entering new vehicle records using the
Year/Make/Model, you can choose whether TireShop uses the Fitment
Group or Motor Information database.
Zero item quantites? – Decide whether you want to allow items to be added
to orders with a 0 quantity.
Split Terms on Statements? – Decide whether you want split term payments
to be displayed on payments.
Price Matrix Cost – Determine your default cost to price off of when using
the pricing matrix: Last, Average, or Current (cost imported from
spreadsheets).
Auto-close paid orders? – If this is set to “Y” the system will automatically
close orders that have been paid in full and an invoice has been printed. If it
is set to “N” you will be prompted if you’d like to close the order.
Store-specific Quotes – If this is set to “Y” you will only see items that are
in stock in your store in the Quick Quote area (only applies to multiple store
installs).
5
3. How to Set Up Store Defaults
a. Go to “Supplemental” > “Store Setups”, highlight the store you wish to setup and
press “F4 Setup”.
• WO, Invoice, and Receipt Copies – Number of copies to print (0 = prompt)
• Price Level – Enter default price level. If nothing is selected, TireShop
defaults to the “List” price level.
• Tax Labor? – Apply sales tax to labor items at point of sale?
• Tax FET? – Apply sales tax to FET?
• Invoice Number – Choose your starting invoice number.
• Operating Cost – Enter the daily operating cost for the store. This number is
used in the Profit Analysis.
• Update Inventory Store – If you have two stores using a shared inventory,
enter the store number whose inventory will be updated.
• Quote Misc. – Default miscellaneous value used for Quick Quotes.
• Cash Drawer – Enter the starting cash drawer amount for the store.
• Labor Rate – Enter default store labor rate.
• Vehicle Miles Required? – Choose whether you want a vehicle’s miles to be
recorded on an order before the order can be closed.
• Persistent Item Menu? – This option assumes that most orders will be made
up of more that one item. After adding an item to an order this will keep the
item menu open, as opposed to going back to the open order.
• Multi-Store Receipts? – Allow multiple stores on inventory receipts?
• Lift Tracking? – Turn on/off TireShop’s lift/upsell tracking.
• PTG Part Category Req? – Choose whether you’d like to require a category
to be assigned at point-of-sale for parts that come from the MOTOR part
and labor guide.
• Sublet Labor Category Req? – Choose whether you’d like to require a labor
category to be assigned at point-of-sale for sublet labor items.
• Salesman Prompt? – Choose whether you want to be prompted for an
outside salesman at point of sale.
• Customer Source Required? – Choose whether you want a new customer’s
source to be required. Sources can be set up at Customers > Customer
Source.
6
•
Cost Warning? – Show a warning for blank cost on PO or receipt items?
•
Stock Quantity Warning? – Show warning when sale quantity exceeds instore stock?
PTG Labor Category Req? – Choose whether you’d like to require a
category to be assigned at point-of-sale for labor items that come from the
MOTOR part and labor guide.
Customer Wait Warning and Limit – Enter the elapsed customer wait time
(in minutes) for warning and Limit.
Customer Pick Up Warning and Limit – Enter the remaining customer pick
up time (in minutes) for warning and limit.
Check List Service – assign a check list service to every invoice. See point
#12.
Receipt/PO Default Cost – Default cost used on inventory receipts and POs;
last or current.
•
•
•
•
•
b. You can change the default sorts for various listings in TireShop. To do this, press
“F2 Set Sorts” from the Store Setups listing.
• Part Sort – sort by description, part number, description (in stock), part
number (in stock), category, and brand/line.
• Tire Sort – sort by raw size, description, part number, brand/line, raw size
(in stock), description (in stock), part number (in stock), and category.
• Wheel sort- sort by wheel size, description, part number, description (in
stock), part number (in stock), and category.
• Open Order Sort – sort by invoice number, complete, incomplete, or
customer name.
• Closed Order Sort – sort by invoice number, close date, or customer name.
• Estimate Sort – sort by invoice number or customer name.
7
Tire Quote Sort –sort by raw size/price, raw size/price (in stock), raw
size/ply/price, raw size/profit, or raw size/margin.
rd
c. 3 Party setups – The F6 3RD PARTY button allows you to setup connections with
several vendors that TireShop integrates with.
• American Tire Setup – TireShop has a tie-in with American Tire
Distributors that gives the ability to download ATD’s inventory and stock
from your closest warehouse. Once this is done you will be able to quote
ATD tires from the Quick Quote area and add non-stock ATD tires to open
orders.
1. From the Store Setup area press “F7 ATD Setup” and enter your ATD
user ID, password, and store number.
2. For more information see point #23f.
• NAPA/IAP setup – setup links to non-stock part vendors like NAPA,
AutoZone, O’Reilly’s, etc. This will allow you to browse their inventories,
add parts to your TireShop invoice, and order the parts electronically. For
more information see point #12.
• PHONE - this allows you to set your account information from 5551212.com. This will allow you to add new customers by adding their home
phone number into the system. For more information see point #42.
• Merchant Parnters / X-Charge – These credit card processor options allows
you to tie your credit card processing into TireShop.
• TCI – TireShop has a tie-in to TCI/Michelin. To setup this connection
highlight a store and press the “ALT+M TCI/MICHELIN” button. Press
“INSERT” and assign and CODE (TCI should work), NAME (Tire
Centers), VENDOR, and TYPE CODE (TIRE). You’ll also need a userID
and password from TCI. Contact your account rep and ask for your TIPS
API Access userID and password.
• EZYTIRE - TireShop has the ability to connect to other tire vendors through
EZYTIRE. For pricing and availability please contact us and we will get you
in touch with EZYTIRE.
d. You have the ability to setup bays in the Store Setup area, then assign open orders to
bays at point of sale.
• To set up bays go to “Supplemental” > “Store Setup” > “F8 Bays”. Press
“Insert” to create new bays.
• To assign an open order to a bay go to the Open Order listing, highlight an
order, and press “Alt+B”.
•
4. How to Start Your Initial Setup in TireShop
a. The initial setup in TireShop starts in the “Supplemental” menu. Once you’ve got this
covered you can move on to setting up inventory types and inputting inventory. You
can start from the top of the Supplemental menu and work your way down.
• Employees – Add employees with the “Insert” key. To edit an employee’s
access permissions and setup a username and password, highlight the
employee’s name in the Employee Listing and press “F7 Access”. The
“Tab” key turns on/off different areas of the menu in TireShop. With one of
the menu items highlighted, you can press “Enter” to drill down into submenus. Permissions for an employee can be cloned from another employee
8
•
•
•
•
•
by pressing the “F7 Clone User” button. Press the “F8” key to set up a
username and password.
Labor Items – Press “Insert” to add labor items to the listing. *Tip* - any
labor that is based off of your hourly labor rate should be created with a
dollar amount of $0. At point of sale, TireShop will calculate the price based
on the number of hours entered. Labor items that are not based on your labor
rate (Mount & Balance, etc.) should be created with the appropriate dollar
amount.
Vendors – Press “Insert” to add vendors to your vendor list. For vendors that
you buy non-stock (outside purchase) items for, be sure to set the “Nonstock?” field to “Y”.
Sales Tax – To set up your sales tax rate go to “Supplemental” > “Taxes and
Fee” > “Sales Tax Tables”. From here you can set the sales tax rate on your
state. This can also be broken down into city or county if necessary. For
instance, you can set up a city sales tax of 4% (0.04) and a state sales tax of
3% (0.03) and TireShop will charge a total of 7% sales tax.
Taxes and Fees > Other Taxes/Fees – Add all of your taxes and fees other
than sales tax. (Tire Disposal Fee, Disposal Taxes, Shop Supplies, Road
Hazard, etc.) These can be set up as a flat dollar amount or percentage. You
also have the ability to set a minimum and maximum dollar amount per
invoice.
Payment Types – Setup all of the different payment types you will accept.
You can configure the system to open an electronic cash drawer when
certain payments are made, as well as require a signature on an electronic
signature pad. This way that signature is printed on the invoice and saved in
the program should you need to print an invoice copy later. Please contact
us for more information on electronic signature pads.
5. How to Set Up Inventory Types and Categories
a. Before adding inventory items you will need to set up your inventory types and
categories. To do this go to “Inventory” > “Inventory Types”. The three most
common inventory types used in TireShop are Tires, Wheels, and Parts. Most of your
inventory can be broken up into categories within these inventory types. If you
require additional inventory types they can be added by pressing “Insert” from the
Inventory Type Listing. To add categories under an inventory type, highlight an
inventory type and press “F6 Categories”. For example, under your tire inventory
type you can set up categories for passenger tires, light truck tires, farm tires, tubes,
etc.
6. How to Set Up Brands/Lines
a. To set up your inventory brands, go to “Inventory” > “Brand List”. From here you
will add all of your brands (tires, wheels, parts, etc.) by pressing “Insert”. You can
also add lines underneath a brand by highlighting the brand and pressing “F6 Line”
(for example, Harmony and Symmetry lines under a Michelin brand).
7. How to Set Up Tire Inventory
a. To add new tire inventory, go to “Inventory” > “Inventory List” > “Tire Listing”.
Press “Insert” to add a new item, and add the tire information on the next screen.
Instructions for each field will appear at the bottom of the screen.
9
•
•
•
In many cases you will be adding multiple tires into your inventory that are
very similar. In this case you can clone an inventory item and only change
the information that is different. To do this, highlight an inventory item you
have already entered in the listing and press “Ctrl + Insert”.
You have the option to set a minimum and maximum quantity when adding
a tire or other inventory item. These numbers are used by the re-order report.
For example, let’s say you setup a tire with a maximum of 20 and a
minimum of 10. If you have 8 in stock and run a re-order report, the report
will show that you need to order 12 tires to return to your maximum. If your
stock falls anywhere below your minimum, a re-order report will show you
how many you need to order to return to your maximum. Minimums and
maximums can either be set up on a company-wide level or on a store level.
The min and max fields on the item edit screen control the company-wide
levels. To edit the store level mins and maxes, highlight the tire and press
“F7 Stock”, then press “Tab” on the correct store.
For more information about running re-order reports see point #26.
8. How to Set Up Parts and Wheels
a. Before adding parts and wheels you must setup your categories for each. Go to
“Inventory” > “Inventory Types”. Highlight “Part Inventory” or “Wheel Inventory”
and press “F6 Category”. Press “Insert” to add new categories.
b. To add parts and wheels into your inventory, go to “Inventory” > “Inventory List” >
“Part Listing” or “Wheel Listing”. Press “Insert” to add new items and fill in the
appropriate information about the items. Parts and Wheels can also be cloned by
using “Ctrl + Insert”.
9. How to Assign Colors to Inventory Items
a. Within TireShop, you have the ability to assign colors to different groups of inventory
items or individual inventory items. These colors can represent anything the user
wishes them to represent. For example, you may assign the color red to any
discontinued tires. This way all of your discontinued tires will be clearly visible at
point of sale.
b. You can assign a color to individual inventory items or use TireShop’s batch function
to assign a color to a group of inventory items.
10
To assign a color to an individual item, go to “Inventory” > “Inventory List”
> “Tire Listing” (for example). Highlight a tire and press “Tab” to view the
item. Press “Backspace” to edit, and then scroll to the “Color” field and type
in a color code. If you do not know a specific color code, type anything into
the field and press enter to be presented with a list of colors to choose from.
• To assign a color to a group of items, press the “F4 Batch” button from any
inventory list and choose “Colors”. The Tire Search Criteria window will
appear to help you narrow down your search. If you wanted to assign a color
to a specific line of tires, fill in the “Brand” and “Line” fields, then press
“Page Down”. A list of all the items fitting your criteria will appear. Press
“F4 Batch” then “Set Color” to assign a color to all of the items.
• You can also use these colors to indicate items that you’d like your
salespeople to push. For instance, you could assign the color green to all
items that you are making a certain dollar amount or margin on. All of your
high profit items will now be easily visible at point of sale.
c. Colors can also be assigned to labor items and service packages.
•
10. How to Set Up Add-ons (Balancing, valve stems, fees, etc.)
a. In TireShop, Add-ons are items that will be automatically added to an order when
certain items are sold. Inventory item, labor items, taxes/fees, service packages, and
even lines of text can be used as add-ons. A few commonly used add-ons would be:
Adding a tire disposal fee to certain categories of tires, adding valve stems to tire
sales, and adding a shop supplies fee when parts are sold.
b. There are 2 ways to setup add-ons in TireShop. One way attaches add-ons to
inventory that you have already input into TireShop. The other way will
automatically attach add-ons to new inventory you input into TireShop.
11
•
•
•
•
To set up add-ons for future inventory, go to “Inventory” > “Inventory
Types”. From here you can attach add-ons to inventory types by pressing
“F4 Add-Ons”, or attach add-ons to inventory type categories by
highlighting the appropriate inventory type and pressing “F6 Category”.
Pressing “F4 Add-Ons” will bring up a list of any add-ons attached to that
category. To add a new add-on press “Insert”. You can add inventory items,
labor, taxes and fees, packages, or a line of text as an add-on. Add-Ons can
be set for all stores or for individual stores.
To set up add-ons for items that you’ve already added to your inventory, go
to “Inventory” > “Inventory List” > “Tire Listing” (for example). Press “F4
Batch” and choose “Add-Ons”. This will bring up a Search Criteria window
for you to narrow down your list to just the inventory that you want to attach
add-ons to. For example, to search for a list of all your passenger tires, type
the category code for passenger tires in the “Category Code” field and press
“Page Down” to save the information and advance to the next step. From
here you can press “F4 Batch” then “Create Add-On” to attach an add-on to
every passenger tire that you have in inventory.
You can also attach add-ons to individual inventory items by highlighting an
item in an inventory list, pressing “F6 Add-ons”, and pressing “Insert”.
Add-ons can also be attached to labor items from the labor item listing.
11. How to Set Up Service Packages (Oil Changes, Transmission Flush, Etc.)
a. To set up a service package, go to “Inventory” > “Packages” > “Package List”. Press
“Insert” to add a new package and the Package Edit window will open.
• Code – Create a unique code for the package.
• Description – Type in the package description.
• Itemize on WO? – Choose yes if you want the individual package items
listed on the work order.
• Category – If you’ve created package categories, you can assign one here.
• Save History? – If you choose yes, the history of this package will be saved
to the customer record. For example, let’s say we create an oil change
package and set it to save the history. If a customer brings in a vehicle and
has a standard oil change done, the details of that oil change are saved. The
next time the customer brings in the vehicle for another oil change you can
choose to add that oil change to the order just as it was done the previous
time. This means you won’t need to choose which type of oil or filter are
required for the vehicle. TireShop remembers that information for you.
12
Print Sticker – Choose yes if you have a compatible sticker printer setup.
Check List – This is where you would enter a check list code for a check list
to be associated with the package you are creating. For instance, if you set
up an oil change check list with the code “OIL”, you would enter that here
so that checklist would be printed on the invoice when this package is sold.
• Service Interval Miles and Months – Enter the recommended service
interval miles and months for this service package.
b. With the new package highlighted, press “Enter” to open the package. Press “Insert”
to add labor, parts, tires, wheels, or a line of text to the package. You can also choose
“Prompt” to be prompted for a particular item from a category. For example, a basic
oil change package can be set up to prompt you with a list of only your bulk oils at
point of sale. This way, when this package is sold only your bulk oils will be
available to add to the order. In the example below, we have created a prompt item
called “Oil” that has a default maximum quantity of “5”. We have decided that the
only items that should be available to choose from are parts with a category of
“BULKO”. Some of the other options are:
•
•
Ask for Quantity? – Choose whether you should be prompted for an item
quantity. In this case, we want to be prompted for how many quarts of oil
are required for an oil change. If 6 quarts of oil were added to an oil change,
the customer would be charged for 1 additional quart that went over the 5
quart maximum. If we were setting up a prompt item for an oil filter we
could change this setting to “N”. We know that each oil change requires
only 1 filter, so we don’t need to be prompted for a quantity.
• Up Charge? – This is where you decide if you want an up charge to be
applied to the package price if certain items are added. For example, if we
were to set up a prompt item for an oil filter and then assign a $4.00 price to
it, we might want to add an up charge if we add an oil filter to the package
that we would normally sell for $10.00. This up charge needs to be set up on
the individual items from your inventory listing.
• Taxable? – Choose whether this item should be taxed.
• Print? – Choose whether this item should be printed on the invoice
underneath the package name.
c. Once you have all the items and labor added to a package, highlight each item and
press “F4 Price” to edit its price. Adjust each price until you’ve come up with the
•
13
total price of your service package.
12. How to Link to Aftermarket Parts Houses
a. Napa PROLink – TireShop allows you to view and order parts directly from your
local Napa store. To do this you’ll need to setup the connection to Napa in the “Store
Setup” area of TireShop.
• Go to “Supplemental” > “Store Setup” > “3RD PARTY” > “NAPA”.
• The NAPA Setup screen will appear. Enter your User ID which is the store
number of your servicing NAPA store and is always a 9 digit number (This
number is on every TAMS invoice). Next, enter your NAPA "ACCESS"
password in the password field…this normally starts with a “D”. Then enter
the DC Code, Country Code (1 for USA), and Customer Type (13 for
“brake/tire/muffler”). If you do not know your NAPA store number or
password, you may contact your servicing NAPA store and they will can
provide it for you or contact 1-888-SET-NAPA for help.
• Enter F248GT25A9 into the “Integrator ID” field and enter PART into the
“Type Code” field. Set the vendor code from your TireShop vendor list in
the “Vendor Code” field. Save your work by pressing the “Page Down” key
or by pressing the “Save” button.
• Press the “F8 Utilities” button from the NAPA setup screen. Select “Add
User” then choose “yes” at the prompt. This will create a PROLink User ID
and add it to the “PROLink User ID” field in TireShop. Next, press the “F8
Utilities” button again and select “Add Store”. Choose “yes” at the prompt.
• Once this is set up, open an order in TireShop and press “Insert” to open the
Item Menu. Choose “Non-Stock” and select “NAPA PROLink”. This will
open the NAPA quote screen in TireShop.
•
Press “Insert” to add items to the NAPA quote. The NAPA PROLink
window will open. From the NAPA PROLink window you can search by
keyword in the “Description” field, search by “Job Type” or “Category”,
search for a specific part number, or choose one of the “Quick Select”
options. In the example below we’ve done a keyword search for “Dome
14
Light”.
•
Once you’ve completed the search, a list of items will appear on the screen.
To add an item to the NAPA quote, click the “TRANSFER” button (located
under the quantity field). Continue adding more items if needed. Once all
the items have been transferred you can close the NAPA PROLink window.
•
On the NAPA quote you will see all the items that you transferred from the
NAPA PROLink window. Press the “F8 Transfer” key in TireShop to add
the items to your TireShop order. TireShop will open a new window and ask
you if you’d like to electronically order the parts from the NAPA quote.
Select “Yes” to order the parts.
15
b. IAP (Internet Auto Parts) – TireShop has the ability to tie-in with several
aftermarket parts houses through IAP. (Carquest, O’Reillys, Auto Zone, etc) This
allows you to add parts from various suppliers directly to an order in TireShop, as
well as process the order electronically.
• To setup an IAP connection go to “Supplemental” > “Store Setups” >
highlight store and press “F3 3RD PARTY“, then IAP.
• Press “Insert” to create a new parts house entry. Create a code and name for
the parts house. In the “Vendor Code” field, select the vendor from your
vendor listing that corresponds with the parts house. Use the “Type Code”
and “Category” fields to place add-ons from the corresponding inventory
type and category onto items sold from this parts house. The information for
the remaining fields can be obtained by contacting the parts house. Ask for
your IAP or internet settings. Alternatively, you can contact
[email protected] and they will be able to supply you with all the
information you need to set up the connections to your part stores. Just let
them know that you need the IAP settings for TireShop and give them your
store’s name and address, and the part store’s name and address. IAP can
also be reached at 877-527-8966 (then choose option 2).
• Once you have the connections set up, go to an open order in TireShop and
press “Insert” > then choose “Non-Stock” to select a parts house. Once you
choose a parts house the IAP web interface will appear.
16
13. How to Link to CARFAX “Quick VIN” for Fast Vehicle Entry
a. TireShop and CARFAX have a tie-in that allows you to add vehicles to the system by
simply typing in a vehicle’s license plate number. This gives you the VIN and
Year/Make/Model all within seconds.
b. To setup the link to CARFAX go to SUPPLEMENTAL > STORE SETUPS > F3 3RD
PARTY, then CARFAX. The CARFAX setup window will appear in the lower-right
corner.
•
Select the “CONFIGURE” option by highlighting it and pressing ENTER.
In the “LOCATION ID” field type in your store’s phone number with the
17
dashes (for example, 336-626-7542). The “VIN LOOKUP URL” will fill in
automatically. Press the PAGEDOWN key to save.
• Next, press the “CARFAX” button again and choose “AUTHORIZE” to
send the new location ID to CARFAX.
• Lastly, press “CARFAX” one more time and choose “TURN ON” to read
CARFAX’s terms and conditions statement. This authorized the
transmission of vehicle data be to be sent back to CARFAX. To accept,
press “Y” then press PAGEDOWN to save. The service should be ready to
use shortly.
c. To use the CARFAX feature create and order as usual. After selecting a customer the
system will prompt you to select a vehicle for the order. You’ll see a new
“CARFAX” button on the vehicle listing screen.
d. Press the “CARFAX” button and enter the license plate number. The license plate
state will default to the state your store is located. You can change that if needed as
well. Press PAGEDOWN to save.
e. You can also access a vehicle’s CARFAX history from within TireShop. From the
open order, press INSERT then choose HISTORY. You’ll see a CARFAX button
here. Pressing this opens a web page that displays all of the vehicle’s previous
CARFAX history.
14. How to Set Up Courtesy Check Lists
a. Courtesy Check lists can be setup and assigned to packages. When the package is
sold, the check list will print out on the customer’s invoice.
b. To set up check lists go to “Inventory” > “Packages” > “Check Lists”. Press “Insert”
to add a new check list and give it a code and description. With the check list
highlighted press ”Tab” to view it and edit the check list. This will bring up a list of
items on your check list. Press “Insert” to add new items (i.e. brakes, alignment,
fluids, etc). Once a check list item has been created, press “F4” to add different
options for the item (checked, replaced, etc).
c. A check list needs to be added to a package before it can be used. To do this go to
“Inventory” > “Packages” > “Package List”, highlight a package, press “Tab” to view
18
it, then press “F6” to edit the package info. In the “Check List” field type the code of
the check list you’d like to use.
d. When a package is sold that has a check list associated with it, the check list can be
accessed by highlighting the package on an open order and pressing “Alt + C”.
Pressing “Enter” will toggle through the options you’ve set for the check list.
e. You can also set up a generic checklist to be applied to all open orders. To set this up
you’ll need to first create your generic checklist. Next, you’ll need to create a new
service package called “Courtesy Checklist”, or whatever you’d like to call it. Then
you’ll assign the generic checklist to this new “Checklist Package”. The last thing
you’ll need to do is go to your “Store Setups” in the Supplemental menu and go to the
“Setup” option. Enter your new Check list package code in the “Check List Service”
field. This tells TireShop to add this service package and checklist to every order. In
the event that you have an order that doesn’t need a checklist the Courtesy Check
package can be deleted and the checklist will be removed.
15. How to Create a New Order
a. Go to “Sales” > “Open Orders”. To add a new order press “Insert”. Select the
customer from your customer list (you can simply begin typing a customer’s last
name or company name) or press “Insert” to add a new customer. Press “Enter” to
select the customer. Select vehicle from vehicle list or press “Insert” to add a new
vehicle. A vehicle can be added by VIN number or year/make/model. Press “Enter”
to select a vehicle.
b. To create an order for a cash ticket with no customer or vehicle information, press
“Alt + Q QuickSale” from the open order listing.
c. Orders can also be created from the open order listing by scanning a vehicle’s VIN
barcode with a handheld scanner. If the vehicle has been in your store before,
TireShop will create an order and assign the customer and vehicle to that order. If the
vehicle has not been in the store before, TireShop will create an order for that vehicle
with no customer information. You can add the customer information later by
pressing the “F8 Customer” button on the order screen.
16. How to Add Items to an Order
a. Once you have opened a new order, press “Insert” from the open order screen to open
a list of items to be added. (Tires, Parts, Wheels, Labor, etc.) To choose a tire,
highlight “TIRES” and press “Enter”. If you have added a vehicle to the order,
TireShop will go directly to the tire size that fits that vehicle.
b. To add a tire to the order, highlight the tire you want and press “Enter”. Type in the
number of tires you want to add to the order and confirm the price. Press “Page
Down” to save and add the tires to the order.
19
c. Another way to add items to an order very quickly is with the “Quick Add” feature.
(This is the text field in the lower left-hand corner) If you know the tire size you want
to sell, type in the size directly from the open order screen. (For example, 2056016.)
Press “Enter” and a window will appear listing all the tires you have in that size. This
“Quick Add” field can also be used with part numbers, descriptions, and service
package codes.
17. How to Sell from History
a. TireShop gives you the option to view a customer’s sales history from within an order
and sale directly from that list. To see customer history from an open order, press
“Insert” and choose “History”. You will be shown a list of all the items that have
been purchase by this customer for this vehicle. This will also show you the date the
item was purchased, the quantity that was purchased, your current stock, the number
of lapsed miles and months since the purchase, and your current selling price. Any of
these items can be added to the current order by highlighting it and pressing “Enter”.
b. From this screen you also have options to:
• View and print the vehicle’s maintenance schedule.
• View a list of every service you offer that has been done in the past for this
vehicle that is due again. (“F5 Due Now”) This is based off of the service
interval miles and months that you set up on the individual service packages.
• View a list of every service you offer that has never been done for this
vehicle, but should have been done based off of the car’s mileage. (“F6
Open”)
• View a list of services that will be due on future visits. (“F8 Due Later”)
• You can also print a Service Review for a customer from this screen (F10)
that lists out the due now, due later, and open services.
18. How to Decline Items
a. TireShop gives you 2 ways to remove items from an open order: deleting the item or
declining the item. If an item is deleted, the item is removed from the order and no
history is saved about the item. When an item is declined:
• The item is printed on the invoice and noted as a recommended item.
20
The next time an order is opened for the same customer and vehicle,
TireShop will prompt you with the declined item and give you the option to
add the item to the new order, delete the item permanently, or ignore the
prompt until the customer returns again.
• The history of all declined items is recorded and can be viewed and
followed up on from the CRM Analysis.
b. To decline an item, highlight an item on an open order and press “Alt+D”.
•
19. How to Take a Payment and Close Orders
a. Once an order is completed, go to the Open Order Listing and highlight the order you
want to take a payment on. Press “F7 Payment” and fill in the payment type and
payment amount. If the order is paid in full, you will be asked if you want to print or
email a copy of the invoice for the customer. You will then be prompted to close the
order. To take a partial payment, press the “F7 Payment” key and change the received
amount to the amount of the partial payment. You can continue to add payments until
the order is paid in full.
b. The last option on the Payment Edit window determines whether the payment is
being taken on the counter or in the office. If you decide to take office payments then
you will need to do two cash reconciliations at the end of the day: one for the counter
and one for the office.
c. If you have customers that always want their invoices emailed to them, you can set
TireShop to automatically email them with their orders are closed. This is set on a
field after the email address on the customer record.
21
20. How to Alert Customers of Completed Orders Via Text Message
a. When an order is completed, TireShop allows you to send a text message to the
customer to let them know that the vehicle is ready to be picked up.
b. To do this, first you need to have a mobile number on the customer record, as well as
the mobile carrier that they use. There is a field for the mobile carrier next to the
mobile number.
c. When an order is completed and the vehicle is ready to be picked up you can press
the “F8 Complete” button on the Open Order Listing to show that the order is
complete. If that customer has a mobile number and mobile carrier on the customer
record then TireShop will pop up a window asking if you’d like to send them a text
message letting them know that the vehicle is ready to be picked up.
d. The default message for the text message is “Your vehicle is ready for pickup at (your
store name)” but that can be changed if you like by going to “Supplemental” >
“Mobile Carriers” > “Set Text” for each carrier.
e. You can also freehand a text message by pressing “Ctrl+T” from the order, the open
or closed order listing, or from the estimate listing.
21. How to Set up a Customer Charge Account
a. Highlight the customer you’d like to approve for credit in the Customer Listing. If
you haven’t already created the customer press “Insert” to add a new customer record.
Fill in the appropriate fields and press “Page Down” to save. Press “Tab” to view the
customer information, then “F8 Credit”. From here you have options on approving
them for credit, statements, finance charges, credit limit and credit terms. In the
“Approved” field you can choose, yes, no, or auto. If you choose “Auto” TireShop
will manage the account for you, revoking a customer’s credit if they are delinquent
on payments or exceed their credit limit.
b. This is also where you would go to revoke someone’s credit.
22. How to Receive Money on Account
a. Go to “Sales” > “ROA”. Find the appropriate charge customer and press “Enter”.
You will be given the option to see “All Unpaid Invoices” or “All Invoices”. Choose
“All Unpaid Invoices”. Highlight the appropriate invoice, and press “F7 Payment”.
b. To print a receipt, press “F4” and choose “Last Payment”.
c. If you’d like to pay off more than one invoice with a single payment, take the full
payment amount on the oldest invoice you are paying off. TireShop will tell you that
this is an overpayment and ask you what you’d like to do with the change. Choose
“Carry Change to Other Invoices”. The extra amount will now show on the screen in
red. Now you can highlight the next invoice you’d like to pay off and press “F8 Use
Carry” and the remaining change will be applied to this invoice.
23. How to Quick Quote Tire Pricing
a. Use the Quick Quote to quickly and easily quote tire prices. Quick Quotes include
sales tax, add-ons, and any other taxes and fees that are associated with a tire. Go to
“Sales” > “Quick Quote” or press “Alt + Z” to go to the Quick Quote area. Type in
the raw size of the tire you are searching for. (For example, 2056016.) Press “F9
Frame” to see only the size you have searched for. Press “Enter” to see an on-screen
quote. Press “Backspace” to edit the number of tires to be quoted and the unit price.
22
Press “F10 Print” to print a quote.
b. If you’d like to view recent sales activity before quoting a tire, highlight the tire and
press “Alt+A”.
c. You can also use Fitment Group information to quote a tire for a specific vehicle.
From the Quick Quote press “Alt + T” and select the year/make/model. You will be
shown a list of all the tires you carry that will fit that vehicle. You can also access
wheel fitment information from this area.
d. You can create a Good/Better/Best quote to give a customer a range of options. First
type in a raw size or use Fitment Group to find the tire size you are looking for.
Highlight a tire and press “F5 Good/Best” to select a “good” tire. Highlight another
tire and press “F5” to select a “better” tire. Highlight another tire and press “F5” to
select a “best” tire. Press “F10 Print” to print a good/better/best quote showing all
three tires.
e. TireShop gives you the ability to dual quote staggered sizes for vehicles that have
different tire sizes on the front and rear.
• From the quick quote press “F3 Search”. You have an option to search for
two different tire sizes at the same time.
• Once you’ve search for your tires, highlight the front tire and press “F5
Good/Best”. Now highlight your back tire and press “F5 Good/Best” again.
Now that you have your two tires highlighted press “Alt+D Dual Quote” to
bring up a quote for both tires that you’ve selected.
f. TireShop uses a tie-in with American Tire Distributors and TCI/Michelin to allow
you to quote tires from the Quick Quote screen. This allows you to see a listing of
available tires, their current stock at the closest warehouse to your location, cost, and
FET. TireShop will also run these prices through the tire price matrixes you have set
up and show you your selling price for each tire. To view the American Tire List,
press “Alt+L” from the tire quick quote screen. To view tires from TCI press “Alt+I”.
• In order for this to work, you will need to enter your ATD and TCI
credentials in the store setup area. To do this go to “Supplemental” > “Store
Setups” > “F6 3RD PARTY”. ATD requires your ATDOnline userID,
23
password, and store number. TCI requires your TIPS API access userID and
password. You should be able to get that userID and password from your
TCI account rep.
• The ATD data will download automatically each night. In the event that you
needed to download the list manually, you can go to “Inventory” >
“American Tire” > “Download Product List”.
g. TireShop gives you the ability to create a new open order or estimate from a quote.
First, highlight a tire and press “Enter”. Edit the quantity and unit price if needed,
then press “Alt + O” to create a new open order or “Alt + E” to create a new estimate.
24. How to Create an Estimate
a. To create an estimate go to “Sales” > “Estimates”, and press “Insert” to add a new
estimate. Creating an estimate works the same way as creating an open order. You
can convert an estimate into an open order by highlighting the estimate and pressing
“F4 Open”. This will take the estimate out of your Estimate Listing and place it in
your Open Orders Listing.
25. How to Close Out a Day and Process End of Day Reports
a. Closing out a day includes printing out any daily reports you prefer and balancing
your cash drawer. To print daily reports go to “Sales” > “Daily Reports”. From here
you can print a Cash Sales Report, Charge Sales Report, ROA Report, etc.
b. To balance your cash drawer, go to “Sales” > “Daily Reports” > “Cash Closeout”.
Press “Backspace” to edit, and then begin entering your end of day cash. Once
completed, TireShop will tell you what your bank deposit should be for that day.
24
26. How to Process Inventory Re-Order Reports
a. To run a re-order report go to “Inventory” > “Re-Order”. Here you will have options
to run a re-order report based on inventory type, category, vendor, and brand. You
can run the report based on minimums and maximums you have set up on the
individual inventory records or by the quantity sold in a specific time period.
b. Once you run the re-order report you have the option to edit quantity, edit vendors,
add or remove tires to the report, and create a purchase order from the re-order report.
27. How to Receive Inventory
a. TireShop has 2 ways to handle receiving inventory, the Inventory Receipt and the
Purchase Order. When you order inventory, but don’t want to enter it into TireShop
until you’ve received it, that’s when an inventory receipt would be used. A purchase
order is created at the time you order inventory and is received later when the
inventory arrives. The purchase order gives you the ability to track inventory that
you’ve ordered, but haven’t received yet.
• To use the Inventory Receipt, go to “Inventory” > “Inventory Receipts” >
“Open”. To create a new inventory receipt press “Insert” and enter the
vendor your order is from and the invoice number or packing number. Once
inside the open receipt, press “Insert” to begin adding items to the receipt.
Add all of the inventory items you’ve received, along with the quantities and
cost of each. Press “F4 Close” from the Inventory Receipt Listing to close
the receipt and update your inventory.
• To create a new Purchase Order, go to “Inventory” > “Purchase Orders” >
“Open POs”. Press “Insert” to add a new PO and fill in the information
requested (Vendor, PO number, ETA Date, etc.). Select the new PO you’ve
created and begin adding items by pressing “Insert”. Once you are finished
adding the entire inventory to be ordered, your PO can be printed out by
pressing “F10 Print”. When your inventory arrives and you are ready to
receive it into TireShop, go to your Open POs and select the purchase order.
If all of your order has arrived, press “F6 Receive All”, and then close the
PO from the PO listing to receive all the items into inventory. If only a
portion of the order has arrived, select those items individually by
highlighting the item, pressing “Tab”, and then press “Backspace” to enter
the number of items that have arrived. To add the items that have arrived
into inventory, press “F4 Close” from the Open PO Listing. TireShop will
prompt you with the option to backorder the item that have not arrived yet.
Choosing this option will close the current PO and create a new PO
containing the items that have not arrived.
25
28. How to Transfer Inventory Between Stores
a. If you’d like to transfer inventory from one store to another, go to ”Inventory” >
“Inventory Transfer” > Open. Press “Insert” to add a new transfer, then press “Insert”
again to add inventory. After you choose the inventory item, edit the quantity being
transferred as well as which store the inventory is being transferred to/from.
b. When a transfer is received, go to the open transfers list and press “F4 Close” to close
the transfer and update your inventory at each store.
29. How to do a Physical Inventory Count
a. To do an Inventory Count (for example, tires), go to “Inventory” > “Inventory List” >
“Tire Listing”. Press “F4 Batch” then select “Update Inv.”. Fill in any search criteria
that you prefer. If you want to do a count on a specific brand or size, this is where you
would set that up. For an example, if you wanted to do a count on only your Cooper
tires, you would type in your Cooper code in the “Brand” field. Press “Page Down” to
save and go to the next step. A list of all of your Cooper tires will be shown. Press
“F10 Print” to print out an inventory count sheet for your Cooper tires. After you’ve
completed your count, if you have inventory discrepancies you can scroll down and
highlight the inventory item and press “Tab” to edit the inventory quantity.
30. How to Setup Price Levels
a. Before you set up all of your pricing in TireShop, you’ll want to determine how many
Price Levels you’d like to use. With TireShop you can setup as many or as few price
levels as you need. By default, TireShop is already set up with a “List” (retail) price
level. You may also want to set up other price levels such as: Wholesale, Car Dealer,
etc. You have complete control over how many price levels you use and what they are
named. To set up tire price levels go to “Inventory” > “Price Levels” > “Tire Price
Levels”. From the “Tire Price Level Listing” press “Insert” to create a new price
level. Next, you can assign the new level a code and description, as well as determine
whether you’d like the new prices to be rounded up (for example, to 0.95).
b. Once you have your levels and pricing set up, you will be able to assign specific
customers to specific price levels. This way, when a customer who receives special
26
pricing walks into your store, they are given the correct price every time. To assign a
price level to a customer go to “Customers” > “Customer Listing”. With the
appropriate customer highlighted, press “Tab” to view the customer information, then
“Backspace” to edit. Scroll down to the “Level” field and type the Price Level code
that you wish to assign to this customer.
c. From any inventory list you will be able to access a list showing each price level and
its price, by pressing “F8 $Levels”.
31. How to Setup Pricing in TireShop
a. With TireShop you have two ways to handle your pricing: Fixed Pricing and Matrix
Pricing. With Fixed Pricing, you decide the exact selling price and you determine
when the price changes. With Matrix Pricing, TireShop handles your pricing for you
based off of your cost. If your cost goes up, then your price goes up automatically,
based on different parameters that you will set up.
b. Fixed Pricing is the most basic form of pricing in TireShop. With Fixed Pricing you
assign a price, and that price doesn’t change unless you change it. This gives you a lot
of control, but it also takes time to keep up to date. To update an inventory item’s
fixed price, go to an Inventory List, highlight the item, press “Tab” to view,
“Backspace” to edit, and change the “List Price” field.
• Batching – TireShop gives you the ability to update the fixed prices on many
different items at once. This can be done by pressing “F4 Batch” from the
Inventory List and selecting “Pricing”. This brings up a search criteria box that
allows you to search for a specific group of items (for example, all of your
Michelin passenger tires). The resulting pricing screen looks like this…
From here we have a great deal of information about this group of tires
including: Size, Brand, Description, Current Price Level, Price, Cost, and
Margin. We also have a “New” price column on the far right. This is a column
that we can tweak until we are satisfied with it, and then use it to overwrite the
“List Price”. TireShop gives you a great deal of options in adjusting this new
price by using the “Batch” button.
27
Here we can adjust our margins by a certain percentage, adjust the new price by
a specific dollar amount or percentage, etc. Once you are happy with the
changes made to the “New” price, you will need to choose the “REPLACE ALL
L-PRICES WITH NEW PRICES”. After that is done you will be selling off of
the adjustments that were just made. If you save this by accident or want to
undo the changes for any reason, TireShop gives you the option to undo the last
changes that were made. This can only be done if you haven’t left the pricing
area.
• The “F9 Levels” button on the pricing screen is used to edit different price
levels.
c. Matrix Pricing is another way to handle pricing within TireShop. When using matrix
pricing, your selling price is adjusted automatically by TireShop when your cost
changes. Matrix Pricing works off of a set of parameters that you create to price your
inventory based on your cost. The matrix can be set to price off of your last cost,
weighted average cost, or a current cost imported from a spreadsheet. This is setup in
the “Miscellaneous” area (see #2). To set up these matrixes go to “Inventory” >
“Price Levels” > “Tire Price Levels” (for example). It is usually best to start setting
up your matrixes for your List Price level first. Highlight “List Price” and press “F4 $
Matrix”. Here is a very stripped down example of what a matrix set could look like…
28
In this example, we’ve set up three matrix lines to handle our Michelin passenger
tires (based on different cost), one matrix line to handle any passenger tires that are
not Michelin tires, and one matrix line to handle all other tires. It’s important to note
that the order these matrix lines are in is of great relevance. When a tire is set to price
off of the matrix, it gets priced by starting at the top of this list and working its way
down until it finds a line that is true of that tire. So if we had the last line (in this
example) at the top of the list, every tire that cost between $0 and $99,999 would be
priced at a 32% margin above cost. To move lines up or down in the list, hold the
“Ctrl” key down and press the up or down arrow keys.
• When you set up these matrix lines you have a couple more options you can
set up. You can set a minimum dollar amount above cost and an extra dollar
amount above cost to add. For example, lets say we have a Michelin
passenger tire that cost you $50. In the example we have above, the tire
would be priced at $69.45 (28% margin). If we set that first matrix line with
a minimum dollar amount of $25, the price of the tire would be kicked up to
$75. To add to that, if we set that first line to have an extra dollar amount of
$5, the tire would be priced at $80. The dollar amount above cost can also
be used by itself to price your inventory. You can set up a matrix line to just
price a segment of tires at a certain dollar amount above cost.
• Once you have your matrix lines set up for your List Price, you can copy
those over to a different price level and adjust the matrix lines to your liking.
To do this, highlight a price level other than “List Price” and press “F4 $
Matrix”. You should see a blank Price Matrix list, with a “Copy” option at
the bottom. Here you can copy the List Price matrixes you’ve already set up
over to this new price level. Once those are copied, adjust the matrix lines as
needed.
• Once you’ve got your price levels and matrixes set up you’ll want to set
your inventory to work off of them. To do this go to “Inventory” >
“Inventory List” > “Tire Listing” (for example), press the “F4 Batch” button
and select “Pricing”. You will be presented with a Search Criteria screen. To
set all of your tires to the matrix pricing leave everything as it is and press
“Page Down”. This will bring up the pricing screen for all of your tires. To
set these to the matrix pricing, press “F3 Batch”, then choose “Replace New
Prices With Zero (set to matrix price). You will see all of the prices in the
“New” column change and the “F” should change to an “M”, letting you
know that the price is based off of the matrixes you set up. If you’d like to
adjust your price matrix before saving these “New” prices, press “Alt+M” to
access your price matrix. To save these “New” prices, press “F3 Batch” then
choose “REPLACE ALL L-PRICES WITH NEW PRICES”. Once your
inventory is being priced off of matrix pricing, your prices will be updated
automatically as you receive inventory and your cost changes.
• A couple things to remember.
1. In TireShop, setting an inventory item’s list price to $0 sets that item
to work off of matrix pricing. This can be done from any inventory list
for individual items by viewing the item info and setting the “List
Price” to $0.
2. If a “List Price” other than $0.00 is manually set, that item’s price will
be set to a Fixed Price and the price will not automatically update as
your cost changes.
29
3. To set different price levels to matrix pricing, press the “F9 $ Levels”
button from the pricing screen and choose the level you wish.
4. On the pricing screen you will see a column for cost as well as a
column telling you whether the matrix is set to price off of last cost (L)
or average weighted cost (A). If you have the matrix set to work off of
last cost, TireShop has a built-in feature to prevent your list price from
dropping too low in the event that your cost drops (for example, tires
bought at a special price). If the last cost of an item ever falls below
the average cost, TireShop’s matrix automatically prices the item off
of the average cost.
32. How to Setup Your Service Charge Rate
a. To setup your service charge rate go to “Customers” > “Service Charges” > “Set
Service Charge Rate”. Press “Backspace” to edit, and enter your service charge rate
percentage. (For example, 1.80 = 1.8%)
33. How to Assign Service Charges to Overdue Accounts
a. Go to “Customers” > “Service Charges” > “Add Charges” and type the last date to
include service charges on past due accounts.
b. If you make a mistake, go to Delete Charges to delete all service charges added the
previous time.
34. How to Print or Email Statements
a. To process your monthly statements, go to “Customers” > “Statements”. Press “F10”
and select “Print All”.
b. If the printing of your statements gets interrupted for any reason, go back to your
statement list highlight the last statement that was printed, press “F10”, then choose
“Print Rest”. TireShop will continue to print your statements from that point on.
c. If you’d like to print the individual invoices associated with your statements, you can
do that by pressing “F10 Print”, then choosing “Invoice Range”. You will be given
several options to choose from including: Customer, Date Range, Store Number, and
whether you want to print invoices for customers with a $0 balance. To print every
invoice associated with your current statements, leave the customer field blank, set
the start date back one year, and make sure the “Zero Balance?” field is set to “N”.
d. Statements can also be batch emailed to customers that prefer email. To do so, add an
email address on their customer record and change the “Statement” field under their
credit options to either “E”(email) or “B”(both email and paper statement). When you
are ready to email the statements go to your statement listing and press “Ctrl+E”, then
choose “Email All”. You can also email individual statements from this area.
35. How to Setup Promotions
a. To set up a promotion, (for example, a sale price for a standard oil change) go to
“Supplemental” > “Promotions” and press “Insert” to create a new promotion. Type
in a code and name for the promotion, along with the start and end dates and whether
or not you will require a coupon for the promotional price.
b. Press “Insert” to add an inventory item, labor, or package to the promotion. Once
you’ve selected an item, type in the promotional price and press “Enter” to save. The
new price of the promotional item will now show up in red until the promotion
reaches the end date you have assigned. If a coupon is required, you will be prompted
30
at point of sale.
36. How to Setup Tire Spiffs
a. First, go to “Inventory” > “Inventory Types” > and highlight “Tire Inventory”. Press
“Tab” then “Backspace” and make sure the “Spiff?” field is set you “Y”.
b. Next, go to “Inventory” > “Spiff Listing” > “Tire Spiff Listing”. Press “Insert” to
begin adding tires to be spiffed. When you select a tire you will be prompted for the
spiff amount.
c. A spiffed tire will be highlighted in yellow when viewed in the inventory list.
d. To run a spiff analysis, go to “Analysis” > “Spiff Analysis” and input a date range for
the analysis. To mark spiffs for a specific employee as paid, highlight the employee in
the spiff analysis and press “F6 Payout”.
e. Tires are not the only inventory type that can be spiffed. To spiff other inventory
types follow the same procedure in point (a) for a different inventory type.
37. How to Process a Pay Out/Pay In
a. In order to keep your cash drawer balanced from within TireShop, any money taken
from the cash drawer will need to be accounted for. For example, if you take out
$20.00 for lunch go to “Sales” > “Cash Drawer” > “Cash Pay In/Out” and press “F6”
to add a pay out. This will be accounted for when you do your Cash Closeout at the
end of the day.
b. To run a Pay Out / Pay In report go to “Sales” > “Cash Drawer” > “Cash Drawer
History”, then press “F10 Reports” and choose “Paid In/Out”.
38. How to Display Any Report on the Screen
a. Anything that prints from TireShop can be viewed on your screen as well. This way
you can quickly view reports and analysis without wasting paper and time. To print to
the screen press “Alt + F10” and the words “Screen Print” will appear in the upper
right corner of your screen. The next time you print something it will go to the screen
rather than your printer.
39. How to Save or Email Anything That Prints
a. Anything that prints in TireShop can be saved to your computer or emailed. To do
this, first you will need to print the document to the screen. Hold down the “Alt” key
and press “F10”. The phrase “Screen Print” will appear in the upper right corner of
TireShop. Now go to an invoice or report that you’d like to see and press F10, or print
it as usual. Instead of going to the printer, the report should be displayed on the
screen. To save the document, click the save icon
and choose the file type you’d
like to save to. (for example, PDF) To email the document, click the mail icon
and
choose the file type you’d like to save the document as before mailing. (This requires
some setup with your mail client).
b. You can also email open orders, closed orders, estimates, quotes, receipts, or POs by
highlighting the item and pressing “Ctrl+E”. This allows you to email directly
through TireShop.
40. How to Backup Your Information
a. Within TireShop is a backup function to protect you from losing your data. It is very
important to keep these backups current, and we suggest doing a backup every day.
That way if your computer crashes or if something else were to happen to it, you will
have a backup of all your important information. An easy and cheap device to backup
31
to is a small flash drive. In a multi-store situation, backups should be performed at the
main store. (store with server computer)
b. To do a backup to a flash drive, first insert the flash drive into an open USB slot on
your computer. Your computer will assign a drive letter to the drive. You can find out
what the drive letter is by going to “My Computer”. From TireShop go to “Utility” >
“Backup Menu” > “Backup Path” and set the drive letter assigned to your flash drive
and a name for the folder to backup to. For example, F:\Backup. Once that is setup,
go to Backup Data and press “Enter” to start the backup.
c. You may also consider setting up an automatic offsite backup as well. There are
several services available that can do this. Please see your hardware specialist for
assistance on automatic backups.
41. How to Perform Simultaneous Tasks
a. By pressing "Alt + F9", TireShop allows you to perform many common activities
without leaving what you are currently doing. For example, from an open order you
can press “Alt +F9” to quickly access the Quick Quote area of TireShop and give a
tire quote over the phone. Once you are done, press “Esc” to instantly return to the
open order where you left off. "Alt+F9" will work anywhere in the system.
42. How to Setup Existing Accounts with Balances
a. For your initial setup in TireShop you may need to setup a customer with an existing
balance, you must first add the customer to your customer listing and approve them
for credit (See #18).
b. Once this is done, go to your open order listing and press “Insert” to add a new order.
Select the appropriate customer and press “Esc” to bypass the vehicle selection.
c. Press “Insert” and select “MISC” then “Non-Defined”. In the “description” field type
“BALANCE FORWARD”. In the “Unit Price” field type the entire balance. Make
sure the “Tax Code” field is set at 0. If you have a great deal of balances to forward
into TireShop, it may help speed things up to add a “Balance Forward” item in your
Pre-defined Miscellaneous item list. To do this go to “Supplemental” > “Misc.
Charges”. Press “Insert” to create a new miscellaneous item called “Balance
Forward”. Once created, this item can be accessed from an open order by pressing
“Insert”, selecting “Misc”, and choosing “Pre-defined”. You can also add this to an
32
order by typing the code you set up for the balance forward into the “Quick Add”
field on the open order.
d. Press “Esc” to go back to the open order listing and press “F7 Payment” with the
invoice highlighted. For “Payment Type” choose CHARGE.
• You may wish to backdate the close date for these balance forwards to a
date prior to using TireShop. This way these “existing balance tickets”
won’t show up as sales on your sales analysis. To change to close date, go to
“Utility” > “Change Close Date”. The date should be blank, meaning that
TireShop is picking up the current date from the computer clock. Change the
date to a time before using TireShop. Once you are done entering your
existing accounts with balances it is VERY IMPORTANT to go back to
“Utility” > “Change Close Date” and blank out the date. TireShop will then
use the computer clock as the close date once again.
43. How to Add a New Customer Using Phone Lookup
a. TireShop works with an internet telephone lookup called 555-1212. With this lookup,
adding new customers to an open order is as simple as typing their home phone
number. 555-1212 will do a quick telephone lookup and fill in the customer’s name
and address for you in TireShop. When you open a new order, and don’t have the
customer in your customer listing, press “F4 Phone” and enter the phone number. If
555-1212 finds a listed home phone number, it will add the information it finds for
you into TireShop.
b. To subscribe to this service you will need an account with 555-1212. They have very
inexpensive plans starting at $10 for 100 phone lookups. 555-1212 will assign you a
username and password which will need to be entered into TireShop. To do this, go to
“Supplemental” > “Store Setups” > “3RD PARTY” > “PHONE”. Enter the email
address you used to sign up with in the “Phone Lookup ID” field and your password
in the “Phone Lookup PW” field. These fields are case sensitive, so make sure to
enter them exactly as they were created. To get more information on phone lookup
packages go to www.555-1212.com
44. How to Be Warned of Customer Wait and Drop Off Time
a. With TireShop you can be made aware of how long a customer has been waiting or
how soon a customer will pick up just by looking at the open order listing. The “S”
column to the far left is the status column. To change an order’s status, highlight the
order and press “Alt + S”. This toggles between “Waiting” (W), “Drop Off” (D), and
“Hold” (H).
• If a customer is waiting, their status will change colors based on how long
the order has been open. The status will change to yellow when the
“Customer Wait Warning” has been reached. This is set up in “Store
Setups”. The status will change to red when the “Customer Wait Limit” has
been reached. A wait list can be accessed by pressing “Alt + W”.
• If a customer has dropped off a vehicle, the status will change to yellow
when the “Customer Pick Up Warning” has been reached and red when the
“Customer Pick Up Limit” has been reached. This is also set up in “Store
Setups”. To set the pick up time for drop offs, press “Alt + D” to access the
drop off list and press “Backspace” to edit the pick up time.
45. How to Track Employee Activity
33
a. There are 2 tools within TireShop to help you track the activity of employees. These
tools are the Daily Exception Report and the Activity Log. It is important that each
employee use their own userID and password in TireShop to be able to track
employee activity.
• The Daily Exception Report is located a “Sales” > “Daily Reports”. This is a
summary of key changes in TireShop that have been made by employees.
These include changed dollar amounts, changed item quantity, changed
mechanic, changed or deleted payments, changed salesman, changed time
records, items entered at or below cost, price reduced at POS, re-opened
orders, and voided orders.
• The Activity Log can be accessed from the Daily Exception Report by
pressing “F6 Act. Log” or by going to “Utility” > “Activity Log”. The
Activity Log extensively records activity done within TireShop. You can
search for activity done by a specific employee, on a specific date or date
range, on a specific computer. You can also search for activity done on a
specific file type (inventory, add-ons, payments, etc.) or a specific invoice,
PO, etc. When TireShop records a change made it also records the
employee, computer, time, date, action done, and the starting and ending
value that were changed.
46. How to Merge Customer and Vehicle Information
a. TireShop allows you to merge duplicate customers and duplicate vehicles, while
saving the history from both records.
b. To merge duplicate customer records go to “Customers” > “Customer Merge”.
Choose the customers you wish to merge, with the correct customer in the second
field. TireShop will save the customer information (name, address, phone number,
etc.) from the customer record in the second field, and save the histories from both
customer records.
c. To merge duplicate vehicle records go to “Customers” > “Customer Listing”,
highlight the customer with duplicate vehicles, and then press “F7 Vehicles”. Press
“F9 Veh Merge”. TireShop will save the vehicle information from the vehicle record
in the second field, and save the histories from both vehicle records.
d. If you need to detach a vehicle from one customer record and attach it to a different
one, go to “Customers” > “Vehicles”, highlight the vehicle, then press “F4
Customers”. Delete the old customer from the list, then add the new customer by
pressing “Insert”. This only deletes the association to the vehicle, not the actual
customer record.
47. How to Use the Employee Time Clock System
a. TireShop includes a complete time clock system that can be accessed by going to
“Supplemental” > “Employees” > “Time Clock”. Here you can clock in/out (to
quickly log in/out press “Alt + F1” from anywhere in the system), access Time
Maintenance, and run a Time Analysis.
• Time Maintenance will show you a list of all employees that are currently
logged in, as well as give you options to log employees in/out and change
time records.
• The Time Analysis can be run for any date range that you choose (daily,
weekly, monthly) and shows you a list of all employees and their hours
34
worked.
48. How to Send an Email to FreedomSoft From Within TireShop
a. Anytime you’d like to send us an email, you can quickly go to “Help” > “Send
Email” and send us an email right from TireShop. Please provide your name and
return email address or phone number with your email.
49. How to Setup Order Types (National Accounts, etc.)
a. Go to “Supplemental” > “Order Types”, to access the National Account/Adjustment
Listing. Press “Insert” to create a new account, and then fill out the Order Type Edit
screen.
b. Once created, you can open a new National Account order from the open order listing
by pressing “Alt + N”. Add items to the order and close it.
c. To review claims for your national accounts, go to “Supplemental” > “Order Types”.
Highlight an order type in the National Account/Adjustment Listing and press
“Enter” to view claims. To receive a credit on an open claim, highlight the claim and
press “Tab” to view it, then “Backspace” to edit.
50. How to Setup and Process Accounting Posts
a. First, you will need to define the accounting type by going to “Utility” > “System
Defaults” > “Miscellaneous”. Set the “Accounting Type” field to “Q” (QuickBooks),
“G” (Generic), or “M” (MAS90).
b. Next, define the account codes by going to Accounting > Account Codes. Press
“Insert” to create a new account code.
• Account Code – This field must be unique.
• Description – Account code description.
• Account Type – You must select from a fixed list of account types.
35
Pay In? – The field controls whether or not the account code can be used for
pay-ins.
• Pay Out? – This field controls whether or not the account code can be used
for pay-outs.
• Contra Account? – This field is used in special situations to reverse the
normal debit/credit balance for the account type.
c. Enter the appropriate GL account number from your accounting system for each
account code. When the account codes are defined the system automatically creates a
GL account entry for each account code and store number. You may want an account
code to fall to separate GL accounts for individual stores. Go to Accounting > GL
Accounts then press “Tab” to edit a GL entry.
• GL Account – Enter the appropriate GL account for your accounting
system. If QuickBooks is used, the system will display a list of QuickBooks
accounts to select from.
• Class – This field is provided so you can define an accounting class, if
desired. This allows the system to match any classes that are defined within
QuickBooks.
d. Map the defined account codes to the different accounting “entities” within TireShop.
• Inventory Types – *Note* - The account codes for inventory items can be
set in 3 places - on the inventory type, the inventory category, or the
individual inventory items. When an accounting post is created, the system
will look at the individual inventory items first. If no accounting code is
defined for the item, this system will check the category. If no accounting
code is defined for the category, the system will use the account code
defined for the inventory type.
1. Select “Inventory” > “Inventory Types” from the main menu.
a. To define accounts for the category, select the “F6 Categories”
button.
2. Select the “Accounts” button.
3. Enter the appropriate accounting codes.
a. Sales
•
36
b.
c.
d.
e.
f.
g.
h.
Non-stock sales (if defined)
Special-order sales (if defined)
Miscellaneous sales (parts only)
Inventory
Special-order inventory (if defined)
Cost-of-goods sold
Purchases clearing
•
Labor Items - *Note* - The account codes for labor items can be set in 2
places – on the labor category, or the individual labor items. When an
account post is created, the system will look at the individual labor items
first. If no accounting code is defined for the item, the system will then
check the labor category.
1. Select “Supplemental” > “Labor” Items from the main menu.
a. To define accounts for the category, select the “F7 Categories”
button.
2. Select the “Accounts” Button.
3. Enter the appropriate accounting codes.
a. Sales
b. Cost-of-goods sold
•
Packages - *Note* - The account codes for packages can be set in 2 places –
on the package category, or the individual packages items. When an account
post is created, the system will look at the individual items first. If no
accounting code is defined for the item, the system will then check the
package category. Package sales all fall to the same sales account. They are
NOT broken out into individual sales accounts for labor, parts, etc.
1. Select “Inventory” > “Packages” from the main menu.
a. To define accounts for a package category, select “F7
Categories” and select the “Accounts” button.
2. View the package and select the “F6 Pkg Info” button.
3. Enter the appropriate sales codes.
a. Sales
•
Payment Types
1. Select “Supplemental” > “Payment Types” from the main menu.
2. Edit the payment type and enter the appropriate account code.
•
Sales Tax
1. Select “Supplemental” > “Taxes and Fees” > “State Sales Tax”.
2. Edit the tax code and enter the appropriate account code.
•
Taxes and Fees
1. Select “Supplemental” > “Taxes and Fees” from the main menu.
2. Edit the fee and enter the appropriate account code.
•
Miscellaneous Charges
1. Select “Supplemental” > “Misc. Charges” from the main menu.
37
2. Edit the charge and enter the appropriate account code.
e. Define the accounting codes for miscellaneous accounting functions
• Select “Accounting” > “Miscellaneous Accounts” from the main menu.
• Assign account codes to the appropriate miscellaneous functions.
1. Pre-paid sales – Used to post payments taken against open orders.
2. Service charges – Used to post service charge income.
3. Cash drawer over/under – Used to post cash over/short balances.
4. PO Shipping expense – Used to post shipping expense for POs.
5. PO Shipping clearing – Used to post PO shipping charges due to
vendors.
6. PO Tax Expense – Used to post sales tax for purchase orders.
7. PO Tax Clearing – Used to post PO tax charges due to vendors.
8. A/R Split? Flag to keep accounts receivable transactions from being
lumped together.
f. Create the accounting posts
• Select “Accounting” > “Accounting Posts” from the main menu.
• Press “Insert” to add a new post and select a date and store number for the
post.
• Press the “F4 Export” key to export to QuickBooks or to a file.
51. How to Use the Customer Relationship Management Tool (Direct Marketing)
a. TireShop features a Customer Relationship Management Tool that can be found by
going to “Customers” > “CRM Analysis”. The CRM Analysis allows you to search
for customers that meet certain criteria, then print follow-up postcard, print labels, or
export the customer list to a file that another marketing company can use. The CRM
Analysis allows you to search for:
• New Customers – Customers that have been added between a certain date
range.
• Good Customers – Customers that have done $X amount of business with
you.
• Charge Customers – Customers that have in-house charge accounts with
you.
• Inactive Customers – Customers who have done no business with you in X
amount of days.
• Delinquent Customers - Customers with past due balances.
• Service Reminders – Customers who have purchased service packages from
you. (Can be used to mail oil change reminder postcards.)
• Inspection Reminders – This can be used to produce a list of customers with
vehicle that are due for a service inspection for a particular month.
• Vehicle Promotion – This can be used for several things. It can be used to
search for customers with certain kinds of vehicles and for customers who
have bought a specific raw size tire. It can also be used to search for
customers with X amount of miles since their last tire purchase.
• Declined Items – Customers that have declined items can be followed up
with using this tool. You can even print out a call list showing you the name,
vehicle, telephone number, item declined, item price, and the date the item
was declined.
38
•
Promotion Follow-Up – Follow-up with customers that have purchased
items on promotion.
b. To gather a customer list, highlight one of the CRM options and press “F3 Get Data”.
Fill in the search criteria to narrow down your list and press “Page Down” to save and
search for results.
c. Once you have obtained your results, press “Enter” to review the list of customers.
Use the “Delete” key to delete unwanted customers from the list. Once you are
satisfied with the list, go to the CRM main menu and choose “Alt+E Email”, “Alt+P
Post Card”, “Alt+B Labels”, or “Alt+X Export”. TireShop prints to standard 8 1/2” x
11” post card stock and 1” x 2 5/8” labels.
d. Here are a few examples of how you could use the CRM analysis.
• Send an inspection recommendation to customers with tires nearing the end
of their tread life.
• Send thank-you cards to new customers or customers who have taken part in
a promotion.
• Send delinquency letters to customers with past due balances.
• Send out inspection reminders.
• Send a discount coupon to customers on the month of their birthday.
• Send an invitation and discount coupon to customers that haven’t done
business with you in several months.
• Send out oil change reminders.
• Follow-up on declined items.
52. How to Track Lift Items (Up sales)
39
a. TireShop can track the sales of lift items, those that are added to an order off of a
salesperson’s recommendation. TireShop also has several reports to show you how
your sales have been affected by these lift items.
b. To turn on TireShop’s lift tracking system go to “Supplemental” > “Store Setups” >
“F4 Setup”. Choose “Y” in the “Lift Tracking” field.
c. The salesperson will need to identify items on an order as “lift items” for TireShop to
track them. To do this, the “Lift” field will need to be toggled to “Y” when a “lift
item” is added to an order. You can also assign a “Lift Employee” to track who
recommended the item.
d. TireShop has several reports to show you the results these “lift items” have on your
business. Go to “Sales” > “Daily Reports” > “Lift Reports” to view them. You can
view reports based on stores, individual employees, days, or months.
53. How to Setup Pre-Defined Notes
a. TireShop gives you the option of creating pre-defined notes that can be used on order
notes.
b. To create a pre-defined note go to “Supplemental” > “Notes”. Press “Insert” to create
a note and give it a subject. Next, press “F5 Note” to create the actual note.
c. To use the pre-defined note press “F5 Note” from either your Open Order Listing or
the Open Order screen, then select “F8 PreDefined”. Select your note, then save.
54. How to Record and Register DOT Numbers
a. TireShop gives you the ability to record DOT numbers at point of sale, run reports on
those DOT numbers, and upload that information to CIMS Tire Registration to
register those DOT numbers for you.
b. To record a DOT number, highlight a tire on and open order and press the “Alt+O
DOT No.” button. Next, press “Insert” and record the DOT number and the quantity
of tires that use that DOT number. You can add several DOT numbers if needed.
40
c. TireShop also allows you to require DOT numbers to be recorded when certain
categories of tires are added to an order. To set this up, go to “Inventory” >
“Inventory Types”, highlight TIRE INVENTORY and press “F6 Categories”.
Highlight the categories that you’d like DOT numbers to be required on and press
“Tab”. You’ll see an option called “DOT # REQUIRED?” If that is set to “Y” a DOT
number will be required on tires of that category before the order can be closed.
d. To run a DOT Analysis to review DOT numbers that have been entered into TireShop
go to “Analysis” > “Inventory Analysis” > “Tire Analysis” > “DOT Analysis”. Set
the date range and store # for the report.
e. We also work with CIMS Tire Registration so that TireShop can automatically upload
your DOT information to them. This is setup at SUPPLEMENTAL > STORE
SETUPS > 3RD PARTY > CIMS CONFIG. You’ll need to have an account with
CIMS and they will need them to create a folder for you on their FTP site to upload
the information to. They will also need to supply you with a password. Please contact
Angela Trayer at CIMS Tire Registration to set this up (330-794-9190,
[email protected]).
55. How to Use an Excel Spreadsheet to Update Your Cost
a. TireShop has a tool built in to import new costs from a spreadsheet. The new cost is
imported into an items “Current Cost” field. TireShop cross-references your part
numbers with the part numbers from the spreadsheet.
b. First you’ll need a spreadsheet with a column for your part number and a column for
your new cost. You can also have a column for new FET values. You can use a
spreadsheet with or without column headers.
c. Go to an inventory list in TireShop (tires, for example) and press “F4 Batch”. Choose
“Update Cost”, then “Import File”.
d. A file browser will appear. Use this to find your excel spreadsheet. Highlight the file
in the file browser and press “Enter” to select it.
e. You will be asked if your spreadsheet has column headings and whether you’d like to
import FET. Next you’ll be asked which column contains your part numbers and
which contains your new cost.
f. A new screen will appear showing all of your matches and the updated costs. To
apply the changes and overwrite the existing current costs, press “F3 Batch” and
choose “REPLACE CURRENT COST WITH IMPORTED COST”.
g. If you are using the pricing matrix the system with automatically update your current
pricing using the newly imported current cost, if the new current cost is higher than
the existing last or average cost.
56. How to Track Core and Return Credits for Non-stock Items
a. Whenever you add a non-stock part to an order, there is a field labeled “Core” where
your employees can enter the core charge for the part. Next to that is a field labeled
“Keep?” which indicates whether or not the core should go back to the vendor. It
defaults to “N”, because the core charges normally get returned to the vendor. If “Y”
is chosen the core charge is passed along to the customer. As long as your employees
put the core charge in the field, the core credit should be handled automatically in the
accounting posts. If items are added to the invoice using the NAPA or IAP interfaces,
the core charge should be put in automatically.
b. When you view a non-stock part within an invoice there is a button labeled “Return”
at the top of the screen. If your employees want to return the part, all they have to do
is select the “Return” button and hit “Yes” at the prompt. This will remove the item
41
from the order and mark it for return to the vendor. The accounting post will pick it
up and generate the credit for the part.
c. To track your outstanding credits for cores and returns go to ANALYSIS >
INVENTORY ANALYSIS > NON-STOCK ANALYSIS. You can choose to view
the analysis for items on OPEN ORDERS, CLOSED ORDERS, or ESTIMATES. To
view all the outstanding items that you are expecting credit for go to the CLOSED
listing, then press F3 SEARCH and set the “Only show items with credit due” field to
”Y”.
d. To receive credits go to ANALYSIS > INVENTORY ANALYSIS > NON-STOCK
ANALYSIS > RETURN PARTS. Enter the vendor and credit memo number to create
a credit memo. Next, press INSERT to add items to the credit memo. A list of items
with credit due from that vendor will be displayed. Select the items that you’ve
received credit for then press ESCAPE. Press the F4 CLOSE button to finalize the
credit memo.
57. How To Open TireShop Reports in Microsoft Excel
a. All reports in the system can be converted into a spreadsheet and opened up in
Microsoft Excel. To do this, first press SHIFT+F10 on the keyboard. You should see
the words “Export Report” in the top right-hand corner of the screen. The next report
that you run in the system will open up in Excel instead of printing. Excel will need to
be installed on your machine or the server, depending on your configuration.
58. How to Create a “Quick Estimate”
a. The Quick Estimate is designed to allow you to create an estimate without having to
record customer information from anywhere in the system. If you are pricing over the
phone and have no customer information available you can create a Quick Estimate,
add the vehicle information and begin creating the estimate very quickly.
b. To create the Quick Estimate press ALT + X from anywhere in the system. An
estimate with the customer “Quick Estimate” will be created and you will be
prompted to add a vehicle. Once the vehicle is added you can begin to build your
estimate. Once you are finished with the estimate press ESCAPE to back out of the
estimate area. At this point you will be asked if you would like to delete the Quick
Estimate or keep it.
59. How to Purge Old Data Out of TireShop
a. At some point you may wish to delete old data like closed invoices, old inventory
receipts and POs, etc out of the system. To do this you’ll use the PURGE DATA
option under the UTILTY menu. First choose the date that you’d like to delete all
previous data from, then chose the categories that you’d like to purge.
b. It is recommended that you create a backup of your data before used the purge utility,
should you change your mind or make a mistake.
42
60. How to Setup TireShop for Goodyear/Michelin Rebate Programs
a. Goodyear Rebate Program
• TireShop has the ability to send Goodyear daily sales information for their
rebate programs. This eliminates the need to manually send them sales
reports if you are part of their rebate program.
• To set this up you’ll need to contact your Goodyear rep and get some
information from them. You’ll need your “Non-Sig” number and a userID
and password for their FTP site. This will all be entered into TireShop under
SUPPLEMENTAL > STORE SETUPS > 3RD PARTY > GY REBATE.
• The last thing you’ll need to do is to tell the systems what brands are
included in this rebate program. Go to INVENTORY > BRANDS, then
highlight a brand that qualifies and edit it. You’ll see an option that says
“GY REBATE?” Set that to “Y” for all brands that apply.
• Please contact us to make sure the system is setup to automatically send this
information back to Goodyear at night.
b. Michelin EDI Program
• Please contact us to help you setup TireShop with the Michelin EDI
Program.
61. How to Setup a Customized Sales Analysis
a. TireShop gives you the option to setup custom sales analysis under ANALYSIS >
SALES ANALYSIS > CUSTOM. You can create as many different ones as you’d
like.
b. This allows you to customize how you’d like to see the sales analysis. You can group
items together, or break out certain categories. For instance, you might be interested
in seeing all sales related to tires. You could create a new report here that includes tire
sales, tire labor, tire fees, tire discounts, and tire parts. That way you can see all that
43
information on one report. You can even combine those into one group if you’re just
interested in getting a total sales number.
c. To create a new report go to ANALYSIS > SALES ANALYSIS > CUSTOM and
press “ADD” to create a new report. Give the report a unique code and name.
d. With the new report highlighted press the “GROUPS” button. You can create as
many groups as you like. Press “ADD” to create a new group. For example, if you
wanted all of your tire sales info in one group then add a group called TIRE SALES.
e. Once the group is added press “F4 SETUP” to setup what is included in the group.
Press “ADD” again to add different categories of items into the group.
62. How to Create Custom Vehicle Bulletins
a. TireShop allows you to create custom alerts to pop up when certain vehicles are
added to orders. This way you can alert your salespeople to information they may
need to know about the vehicle.
b. To setup a custom bulletin go to CUSTOMERS > VEHICLES > CUSTOM
BULLETINS. Press “ADD” to create a new bulletin and select a starting year, make,
model (you can also choose a submodel and engine size if you’d like to narrow it
down that far), and ending year. Once you created the vehicle parameters press the
“F5 NOTES” button to setup your custom alert. This will be displayed any time a
vehicle of this type is added to an open order or estimate.
63. How to Use TireShop to Increase Your Profits
a. TireShop has several tools to help you increase your profits and make more money.
With very little effort, you can be on your way to increasing your car count and
increasing your dollars per ticket. Here are several ways this can be done.
• Set up service interval miles and months on service packages – TireShop
tracks when services should be performed based on the current mileage of a
vehicle and the service intervals that you set up for service packages. If a
service that has been performed in the past is due to be done again, it will
appear in the “Due Now” listing in the service history. To access this history
listing, press “Insert” from an open order, choose “History”, then press “F5
Due Now”. This shows you all the services that have been done for this
vehicle in the past that are due again. It also shows you the lapsed miles and
months since the last service, the current price of the service, and allows you
to add the service directly to the order by selecting it with “Enter”. The “F6
Open” button shows you all the services that should have been done at some
time during the life of the vehicle, based on its current mileage. A “Service
Review” page can be printed out for your customers with these items listed
on it.
• Declined Items – (Also see point #17) When items are declined, rather than
deleted from orders, a history of that item is recorded in TireShop. The next
time an order is opened for the customer, TireShop will prompt the salesman
with an option to add the previously declined item(s) to the current order.
For example, if a customer declines a 4-wheel alignment, TireShop will
suggest that the item be added to an order the next time the customer comes
in with the same vehicle. TireShop also gives you the ability to generate a
call list showing the customer name, customer phone number, vehicle, and
item declined. This can be used to follow-up with customers who have
declined items or services and schedule the work to be done.
44
•
•
•
•
•
•
•
Courtesy Checklist – TireShop gives you the option to create custom
checklists that can be printed on the customer’s invoice showing the items
that were checked and their resolutions. This gives you the opportunity to
inspect the vehicle and present your recommendations to the customer. The
key to making more money isn’t always higher car count, but taking better
advantage of opportunities that are already present. (Also see point #13)
CRM Analysis – (Also see point #50) TireShop’s Customer Relationship
Management and Direct Marketing Analysis can be used to search for
customers meeting certain criteria and use that list to generate postcards or
labels. This tool can be used to:
1. Send an inspection recommendation to customers with tires nearing
the end of their tread life.
2. Send thank-you cards to new customers inviting them back to your
store.
3. Send out inspection reminders.
4. Send a discount coupon to new customers or to customers on the
month of their birthday.
5. Send an invitation and a discount coupon to customers that haven’t
done business with you in several months.
6. Send out oil change reminders.
7. Follow up on declined items.
Matrix Pricing – (Also see point #29 and 30) TireShop’s matrix pricing
ensures that you are maintaining steady margins even when your cost
fluctuates.
Quick Lube Upcharging – TireShop gives you the tools you need to
process oil changes just like a dedicated quick lube store. This includes
charging for extra quarts of oil that some vehicles require, and automatically
upcharging for expensive oil filters. (Also see point #11)
Profit Priority Tire Displays – When you’re quoting tires, TireShop gives
you the ability to sort the tire listing from most to least profitable. (Also see
point #3B)
Good/Better/Best Quoting – TireShop gives you the ability to quote
multiple tires at once with its Good/Better/Best quoting feature. (Also see
point #22)
Road Hazard and Shop Supplies Add-ons – Setup road hazard fees or
shop supplies fees (or any other type of fee) easily using TireShop. These
fees can be a flat dollar amount or a percentage of the item it is added to.
Once created, these fees can easily be attached to items and automatically
added to an order when those items are sold. (Also see point #4 and #10)
45
46
Open Order Listing
Columns
Buttons
1.
1.
2.
3.
4.
5.
“C” Completed Column – A checkmark indicates that
the order has been completed. Highlight an order and
press “F8” to add a checkmark.
2. “S” Status Column – Cycle order status options by
pressing “Alt+S”. The status options are: Waiting,
Drop-off, and Holding.
3. Order # Column – Indicates the order number.
4. Date Added Column – Indicates when the order was
created.
5. “SLM” Salesman Column – Indicates the salesperson
that opened the order.
6. Type Column – If the order is for a national account or
some other order type it will be indicated in this
column.
7. “P” Payment Column – A checkmark represents that
the invoice has been paid in full. A “P” represents a
partial payment.
8. “A” Credit Approval Column - A checkmark
represents that the customer has been approved for an
in-house credit account.
9. Customer Column – Customer name.
10. Vehicle Column – Indicates the vehicle attached to the
order.
11. Amount Column – Indicates the total balance of the
invoice.
6.
7.
8.
9.
10.
11.
12.
13.
14.
15.
16.
17.
“Add” – Create a new open order.
“View” – View the details of the highlighted order.
“Void” – Delete the highlighted open order.
“Exit” – Exit the open order listing.
“Sort” – Change the order the listing is sorted by. You
can sort by: order number, completed orders,
uncompleted orders, or customer name.
“Close” – Close an order that has been paid in full.
“History” – View customer and vehicle history. You
can view: all previous items purchased for the vehicle,
all previous items purchased by the customer, all
previous orders for the vehicle, or all previous orders
for the customer.
“Payment” –Take a payment against the highlighted
order.
“Complete” –Add a checkmark to the “Completed”
Column.
“WO” – Print a work order.
“Invoice” – Print an invoice.
“Drop List” – View a list of vehicles that have been
dropped off and when they will be picked up.
“Nat/Adj” – Create a national account order.
“Profit” – view profit on open orders.
“QuickSale” – Create a cash ticket with no customer or
vehicle information.
“Status” – Change the order status between waiting,
drop-off, and holding.
“Wait List” – View a list of waiting customers and how
long they have been waiting.
47
Open Order Detail
Buttons
1. “Add” – Add items to the order.
2. “View” – View highlighted item information. (Change quantity, price, etc.)
3. “Delete” – Delete highlighted item from the order.
4. “Exit” – Exit the open order detail and go back to the open order listing.
5. “Order Info” – View order information, add PO#, change salesman, add promised time, etc.
6. “Fees” – View and edit fees associated with the highlighted item.
7. “Note” – Add a note to the order. The note is printed on the invoice in the service remarks.
8. “Sub-Items” – View and edit items that make up a service package.
9. “Vehicle” – View and edit vehicle information. (Mileage, tag #, etc.)
10. “Customer” – View and edit customer information. (Tax code, price level, credit approval,
etc.)
11. “WO” – Print work order.
12. “Invoice” – Print invoice.
13. “CheckList” – View and edit courtesy checklist associated with a highlighted service package.
14. “Decline” – Decline an item. Item will show as recommended on invoice and will be
automatically recommended by TireShop the next time an order is opened for the customer.
15. “Motor” – View Motor Data information. (Filter specs, lube specs, maintenance schedule, part
and labor guide (GEN5), TPMS specs, PMSST (Preventative Maint. Service Sched. Time.)
16. “DOT No.” – Assign DOT numbers to tires.
17. “Profit” – View profit by item.
18. “Fitment Group” – Tire lookup by Yr/Make/Model using Fitment Group information.
48
Quick Quote Screen
Buttons
1. “View” – View details about highlighted tire.
2. “Quote” – Enter quote edit screen to edit price or quantity. You may also print a quote, open
an estimate, or open an order from the edit screen.
3. “Print” – Print a quote for the highlighted tire.
4. “Exit” – Exit the Quick Quote area.
5. “Sort” – Change the order the tires are listed in. You can sort by price, profit, or margin.
6. “Search” – Opens the Tire Search Criteria screen to help you search for specific tires.
7. “On Hand” – Shows you only the tires that you currently have in stock in the listing.
8. “Good/Best” – The “Good/Better/Best” option is used to create a quote for up to 3 tires.
9. “Add Ons” – View and edit the add-ons associated with a tire.
10. “Stock” – View and edit the current stock of the highlighted tire across all of your stores.
11. “$ Levels” – Shows you the price of the tire for each of your price levels.
12. “Frame” – the frame button is used to narrow down the tire listing to only the size you have
searched for. If you search for a 2056016 tire size then press “Frame”, only your 2056016 tires
will show in the list.
13. “Activity” – View the sales activity of the highlighted tire. This gives you a list of every time
the tire has been sold and what price it sold for.
14. “Catalog” – this gives you a way to reference certain items as being associated with a tire. For
instance, you could reference a specific sized tube that fits a tire.
15. “ATD List” – View a listing of available tires from American Tire Distributors.
16. “Rim Sort” – With a tire highlighted, used this to see a listing of other tires with the same rim
size.
17. “Fitment Group” – Look up a tire size by Yr/Make/Model.
49
Estimate Listing Screen
Buttons
1.
2.
3.
4.
5.
6.
7.
8.
9.
“Add” – Add items to the estimate.
“View” – View the details of the highlighted estimate.
“Delete” – Delete highlighted estimate.
“Exit” – Exit the estimate listing and go back to the main menu.
“Sort” - Change the order the listing is sorted by. You can sort by estimate number or customer
name.
“Open” – Convert the highlighted estimate into an open order.
“Note” – Add a note to the estimate. The note is printed on the estimate in the service remarks.
“Detail” – Print a detail report for all of your estimates.
“Profit” – View profit on estimates.
50
Inventory Listing Screen
Buttons
1. “Add” – Create a new inventory item.
2. “View” – View information about the highlighted item.
3. “Delete” – Delete the highlighted items. When inventory items are “deleted” they are actually
just made inactive and hidden from your inventory list. This way you retain all of the sales
history for that item without it showing up in your inventory list. You can also reactivate an
item by accessing your inactive list and “deleting” the item from the inactive list. To access the
inactive list press “Alt+Delete” from anywhere in the inventory listing.
4. “Exit” – Exit the inventory listing.
5. “Sort” – Change the order the items are listed in.
6. “Search” - Opens the Search Criteria screen to help you search for specific items.
7. “Batch” – The batch function is used to make changes to a group of items at once. You have
the options of editing add-ons, pricing, colors, or doing an inventory count.
8. “Note” – Attach a note to an item.
9. “Add Ons” – View and edit the add-ons associated with an item.
10. “Stock” - View and edit the current stock of the highlighted item across all of your stores.
11. “$ Levels” – Shows you the price of the item for each of your price levels.
12. “Activity” – View all activity for the highlighted item. This includes receipts, transfers, sales,
purchase orders, and adjustments. You also have the option of seeing all activity done between
a date range.
13. “Accounts” – View and edit accounting codes.
14. “Catalog” – this gives you a way to reference certain items as being associated with another
item. For instance, you could reference a specific sized tube that fits a tire.
15. “Rim Sort” – With a tire highlighted, used this to see a listing of other tires with the same rim
size.
51
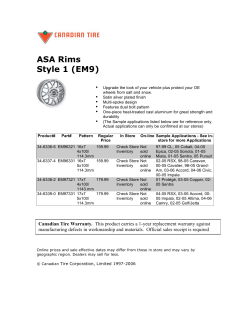


© Copyright 2026