
How To Get eLifeTools’ Upgraded Compulife Forms CHOOSE THE FORM YOU WANT
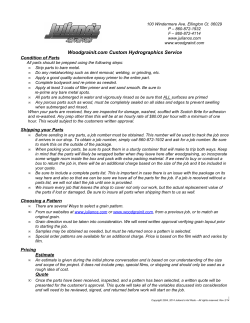
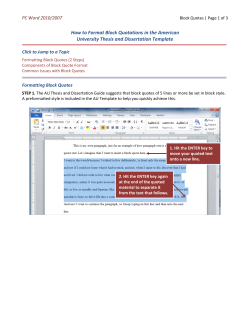
How To Get eLifeTools’ Upgraded Compulife Forms & How to Install the Form on Your Site 1 CHOOSE THE FORM YOU WANT There are 6 form styles to choose from. Each of the 6 form styles has an associated link. Copy the link of the Form you want. It will be what we’ll use to change the look and feel of your form. GREEN GREY NAVY https://googledrive.com/ host/0BzbebZvylwa0TzJFT2VRTzdoMUU https://googledrive.com/ host/0BzbebZvylwa0NlZTcU5lNDh2dGc https://googledrive.com/ host/0BzbebZvylwa0blZWZ2ktd01vWWs PURPLE ROYAL https://googledrive.com/ host/0BzbebZvylwa0YlJhamU4c0hyWXc https://googledrive.com/ host/0BzbebZvylwa0el9PYzFpMU85TnM 2 MAKE SURE YOUR QUOTE.HTML FORM IS HOSTED Note: If you have trouble with the following steps, feel free to contact my website assistant, JK Allen for assistance. I’ve arranged a discounted flat $35 rate, if you purchased Compulife through my link, for JK to add this form to your site. (Do-It-Yourself Instructions) While this guide may be a bit technical, anyone can do this. Just read every single line from here on out, take it slowly, and it will work. Here we go… Open the attached folder and save the quote.html file to your computer. Next, you need to host your Quote.html file by uploading it to your hosting account server. While each hosting service provider is a little different, the overall approach to doing this is fairly simple to accomplish. Before uploading your form, make sure its name is quote.html and saved under the root folder of the appropriate URL. You can Jk Allen [email protected] www.GrowthEffect.com 720-336-0065 When you sign up for Compulife they send you an email with a zip file attached to it. Inside that folder is a quote.html file. The email looks like this: also upload the quote.html via FTP. If you get stuck, do a quick Google search for “how to upload file to root folder of + your host name” For example: You might search “How to upload file to root folder of Bluehost” ...or simply call your hosting provider. Once your quote.html file is uploaded to the root folder of your website, go to step 3. 3 EDIT YOUR QUOTE.HTML FILE To edit your form, you need to right click and select edit from your hosting server cpanel or FTP. There are two areas you’ll be editing. The first is toward the top portion of the form. Specifically, you will be editing the line the starts with: <link href=”http://linklinklinklinklink.com” type=”test/css” rel=”stylesheet”> At this point, you need to copy your chosen style sheet link (from step one), for the color scheme you want to use. Paste that link over the highlighted portion of the link, as displayed above. Note: Be sure that your link is wrapped with quotation marks or this will not work. Example below: This is what the upper portion of the file looks like. The portion that you will need to change (by pasting) is the area that’s underlined in red. The second edit will be made toward the bottom of the form. Specifically we’ll be editing the submit button area. Just scroll to the bottom of the form and it’s about 10 lines up. This is how it looks by default: <input type=”submit” name=”CqsComparison” value=” Compare Now “ > This needs to be added to the end before >: class=”submit-btn” So in the end, it should look exactly like this: <input type=”submit” name=”CqsComparison” value=” Compare Now “ class=”submit-btn”> Optional: Add Name, Phone, and Email to Quote Form If you would also like to collect Name, Phone and Email, get back into your hosting account, and edit the quote.html file. You need to copy and paste the code below into the quote.html form in a very specific place. Find the face values on the form. Right below the face values, below </tr> and before <input type add this code: <tr> <td style=”text-align:right;” class=”gray_cell”><b>Name:</b> </td> <td class=”gray_cell”> <input name=”Name” type=”text”/> <i> <span style=”color: grey;” color=”grey”>Required</span> </i> </td> </tr> <tr> <td style=”text-align:right;” class=”gray_cell”><b>Phone:</b> </td> <td class=”gray_cell”> <input name=”Phone” type=”text”/> <i> <span style=”color: grey;” color=”grey”>Required</span> </i> </td> </tr> <tr> <td style=”text-align:right;” class=”gray_cell”><b>Email:</b> </td> <td class=”gray_cell”> <input name=”Email” type=”text”/> <i> <span style=”color: grey;” color=”grey”>Required</span> </i> </td> </tr> Note: We are just saying the name and email and such is required. They’re not really on Compulife’s form. Also, you can find the colors above and change them to match your site. Receive Emails of Quote Requests with Contact Info Before this step, we need to make note of our Compulife user number, which you can find by opening the original email Compulife sent you (the one with the quote.html attachment). It’s the 4 digit number in this link in the body of that email: Ok, now back to our quote.html editing. In order to receive emails of the quotes people get on your site, we need to edit one last bit of code. Toward the top of your file, find: <form action=”http://www.compulife.net/cgi-bin/cqsl.cgi” method=”POST” target=“_top”> And change it to: <form name=”consumer_id” action=”http://www.compulife.net/cgi-bin/COMPLIFE/USER/1104/ consumer_id.php” onSubmit=”return checkform()” method=”POST” target=”_top”> Note: Change out my 4 digit Compulife # with yours! Also Optional: The standard Header text is “Instant Life Insurance Quote” and the standard Submit Button text is “Compare Now”, which looks like this: You can change this text by editing this Header code toward the top of the file. Simply change the text to whatever you want it to say: As for the Submit text, same thing here. Just edit the text. It is found at the very bottom of the file, about 10 lines up from the bottom line here: Save the form and close it after making changes. You should now be able to open a new browser tab and type in: www.YourSite.com/quote.html and you should see a form that looks similar to this: Note: You won’t see anything else on the page. So if you like, you can create links on your site to your /quote. html page and people can get a quote there. However, if you want to display your form in the sidebar of your site, which I recommend, go to step 4. 4 DISPLAY YOUR FORM ON YOUR WEBSITE Now it’s time to display your form on your website. The best way to do this is by using an iframe. To use an iframe, all you have to do is use the following code. You will need to update one portion of the code, which is the part below displayed in highlight. <iframe src=”http://YourSite.com/quote.html” width=”390″ height=”400″ frameborder=”0″></></iframe> HINT: You may have to adjust the width and height in the iframe code to fit the form to your site. If you want to add it to your sidebar, in Wordpress go to Appearance -> Widgets, and drag a Text box like this: HINT 2: If you are using WordPress, there are many places where you can display your form. If you want to display it on a page, be sure to add your iframe code in the Text editor, not Visual editor. ...to your sidebar widgets like this: ...and paste the iframe code into the text box like this: ...Save and Close HINT 3: You may also have to adjust the size of your sidebar column. If you’re using the Thesis Theme, which I recommend, it should fit very well already, or you can easily adjust the column width by going to Thesis Skin Design -> Layout, Fonts, Sizes, Colors -> Click Layout & Dimensions If you don’t use Thesis, you may still be able to edit the sidebar width. If your theme has its own sub-menu on your Wordpress menu, it will probably be under there. Support If you have troubles completing these steps, feel free to contact JK for assistance. Jk Allen [email protected] www.GrowthEffect.com 720-336-0065 This informational guide is proprietary to eLifeTools.com, and intended solely for recipients who have purchased Compulife through www.elifetools.com/compulife. Please do not share or reproduce the contents of this instructional without consent from eLifeTools. Thank you.


© Copyright 2026