
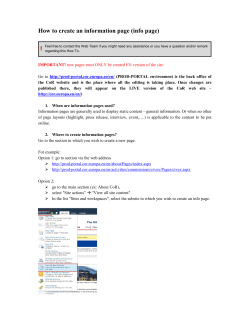
How to create a VACANCY page
How to create a VACANCY page
!
Feel free to contact the Web Team if you might need any assistance or you have a question and/or remark
regarding this How To.
Go to http://prod-portal.cor.europa.eu/en/ (PROD-PORTAL environment is where all the
editing is taking place. Once changes are published there, they will appear on the LIVE version
of the CoR web site – http://cor.europa.eu/en/)
ALL
vacancies
should
be
created
in
portal.cor.europa.eu/en/about/jobs/Pages/jobs.aspx
a
central
location:
http://prod-
1. How to find the Jobs section?
There are two ways to get to this location:
1) On the bottom menu of the web site, you may find the Jobs section under About CoR.
2) Go to the section "About CoR" (http://prod-portal.cor.europa.eu/en/about/Pages/index.aspx) and
select "vacant jobs" or "jobs" in the navigation zone of the "About CoR" landing page.
This will lead you to the Jobs section of the web site.
2. How to upload your vacancy documents?
ALL documents should only be uploaded in the document library of the EN site. http://prodportal.cor.europa.eu/en/about/jobs/Documents/Forms/AllItems.aspx?View={BF5E5AE5-61CF-475EA323-880F3C60ECFA}&FilterField1=DocIcon&FilterValue1=
In the "jobs" section (http://prod-portal.cor.europa.eu/en/about/jobs/Pages/jobs.aspx) , go to the left
side of the Ribbon on top of the page and select Site Actions > View All Site Content.
You will be redirected in a navigation page in the back office where you will see some Libraries in the
main screen.
Under Document Libraries press on the link Documents.
This will lead you to the following page where you press the arrow next to Type and select (Empty)
in order to browse through the existing document sets created.
Document sets is a sharepoint jargon name for a folder of documents. A document set should
always include various language versions of one same document.
Then go the tab Documents on the Ribbon and press New Document. Select Corweb DocumentSet
from the list.
A popup window will open where you would be asked to fill in the Properties of the new
DocumentSet (you only need to fill in the mandatory ones with the asterisk).
* Under Name you will NOT be allowed to use the slash character (/), so replace by dash (-)
Under Keywords, you will need to put Recruitment as well as the type of Recruitment (Permanent
staff / Temporary staff / National expert).
After finishing with the editing of properties and saving, you will need to upload your PDF files in
your newly created document set.
To do so, go under the tab Documents and press Upload Document. From the list you may either
select Upload Document or Upload Multiple Documents, depending on the amount of documents to
upload.
For your convenience and simplification, since the DocumentSet already has the name and title of the
Vacancy Reference, you can simply upload the documents as EN.pdf, FR.pdf, etc.
After the documents are uploaded, you can modify their properties. You will need to change the
Content Type to CorWeb DocumentSetItem and fill in the Language field (English / French, etc.)
and then save.
In the document properties, you will need to change the Content Type to CorWeb
DocumentSetItem, Name = the language of the document (EN, FR, DE…), the title=the reference of
the vacancy and the Language field (English / French, etc.) and then save.
Important! Fill in the same title (= same reference of vacancy) for each of the document in your
document set since you will need to filter on the title to show your documents on the page.
Check In all documents. You may do so by clicking on the arrow and selecting Check In on the list
(below Edit Properties)
Finishing with the DocumentSet, you will now proceed to the creation of the actual page.
3. How to create a vacancy page?
Under Site Actions, select New Page.
A popup window will appear where you will need to fill in the new page name (use the reference
number with dashes):
The new page is now created (but not published), and we need to fill in the rest of the properties and
elements.
The first thing we need to do is change the Page Layout. In order to do so, we go to the Page tab,
press on Page Layout and select CorWeb Vacancy Page from the list.
Please have in mind that you can only scroll on the list while being on top of your web page,
otherwise you may not see the whole list.
Your page will then have the following appearance:
As you may observe, all fields under Detail of the vacancy notice are dynamic elements. In order to
fill them, we have to fill in the fields at the bottom of our page as follows:
- Nr is the vacancy Reference number.
- Deadline will be the deadline mentioned on the vacancy notice (press on the calendar icon to select
date)
- Directorate: Click on the icon next to the field to select the respective directorate from the list.
Press select and then OK.
- Function Group: Click on the icon next to the field to select the respective function group (AD /
AST) from the list. Press select and then OK.
- Management: Tick the box, only if this is a managerial post.
- Unit/Service: Copy text from vacancy notice if available.
- Group: Copy text from vacancy notice.
- Location: Copy text from vacancy notice.
- Date: This is the date of availability of the vacancy. Select from the calendar icon.
- Abstract: Copy text of Brief description of main responsibilities from vacancy notice.
- Language: Select from list by clicking the icon next to the field or start writing the name of the
language (English, French, etc.) on the field space and this will appear for selection.
- Keywords: Recruitment, Permanent staff / Temporary staff / National expert.
- Scheduling End Date: Select On the following date (date will be the deadline mentioned on the
vacancy notice - press on the calendar icon to select date)
After filling the properties and metadata of the page go to the top of the page on your Ribbon, select
the Page tab and under the Save & Close button, press on the arrow to select Save and Keep
Editing from the list. This will let the changes appear under the Details section, while you will still be
able to edit your page.
Your page should now look like this:
Now we should add the rest of the content of the vacancy notice.
DO NOT copy paste your content text straight from an email or Word into the 'Page Content'
field it will break the website style.
To import your content into the webage, follow the instructions:
Copy the content from your word document
Click on the "page content" zone in your page layout
The "Editing Tools – Format Text" tab will be activated
Click on "Paste", then select "Paste plain text"
Your content text will now be copied into the webpage content zone.
ATTENTION – The formatting of the text will be lost (bold, hyperlinks, bullet points,…)
To reformat the text correctly, please use the "Editing tools" in the Sharepoint ribbon (similar to
word formatting tools). (see screenshot below)
-
bold
NEVER use italic and underline on a webpage (bad practice: italic (poor quality
readability), underline (confusion with underlined hyperlinking)
ALWAYS format bulleted/numbered list using the Sharepoint editing tools (DO NOT do
it manually)
DO NOT USE: Heading 1 and Heading 2 for titles or subtites (these are already
preformatted in Sharepoint for page titles (heading 2) and banner title (heading 1)
Heading 3: to be used for subtitles in the content text
Heading 4: to be used for sub-subtitles (if needed)
Following that step, move to the Related Information section on the right of the page and click on
Add a Web Part:
The following list will appear. Select Custom and CoR Web Document Set CQWP and press Add.
The following will appear:
Placing the cursor next to the label CoR Web Document Set CQWP an arrow and a tick box will
appear. Press on the arrow to show the list and select Edit Web Part.
Scrolling to the top of your page, you will see a menu with the properties of the Web Part.
next to Query for the menu to expand and then change the following.
Click on the
Source: Select Browse (leave it to the 2nd bullet point). A window will appear where you need to
click on the
OK.
buttons of Home > About CoR to expand the menu. Then select Jobs. Then click on
After this, under Content Type, select CorWeb Document Content Types in the first field and
CorWeb DocumentSetItem in the second one.
Then put the filter as follows, so as for the DocumentSet created for this vacancy to be displayed.
Title should be the same as the title field of the document properties.
Press OK to close the menu.
The DocumentSet with the PDFs uploaded should now appear under Related Information.
Verify your page is correct and SAVE.
Then go to Page tab and press Check In.
Following that, go to Publish tab and press Submit.
This screen will appear. Press Start.
4. Page publish workflow
Once your page is submitted for approval, the webteam will approve or reject the page.
> If your page is rejected you will receive an email explaining why it is rejected and what you
should correct/modify to your page.
> If your page is approved, the webteam will:
1) Approve and publish your page
2) Replicate your page in ALL language variations of the site
> Once your page is replicated you must publish the page in ALL language variations
TIP: When the page is replicated, it remains in draft on the other language variations of the site
and is not visible to the pubic. You need to go on the page in each of the language variations to
publish it.
5. Translate the content of the page in the appropriate linguistic version of the site:
Your page in the original language has now been published in ALL language variations.
You can proceed to the replacing the content of the original language with the translation.
You know that the original version of the page has been published in the EN site and replicated to all
language variations of the site.
Page in the original version on the EN variation: http://prodportal.cor.europa.eu/en/about/jobs/Pages/CDR-AD5-AD6-19-12.aspx
Go to the site in the chosen language to replace the content with a translation:
For example, GO TO the page in the French version of the site: http://prodportal.cor.europa.eu/fr/about/jobs/Pages/CDR-AD5-AD6-19-12.aspx
Site actions Edit page
Page content: Replace title and content with the translation. The documents under related
information should not be modified.
Make the necessary changes to page properties, in particular translate the abstract + adapt the
language to the language of the page content.
When finished:
Page Save and close Publish Submit for approval Webteam to publish/reject page


© Copyright 2026