
How to? In Office 365
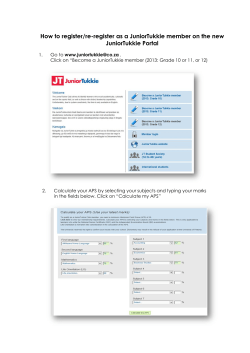
How to? In Office 365 How to login to Office365? 1. Click the “Office 365 Login” icon on the desktop of your computer. 2. Click the Firefox icon. “Office 365” is the 1st item under QUICK LINKS on the DCS Quick Launch Page. 3. Click the “District Email Login” button on the district website OR your school website. 4. Go to https:// login.microsoftonline.com and bookmark the page for later use. The login is for an organizational account. Type your login name…in most cases [email protected] Type your password. Your initial password was sent directly to you on the pony or sent to your principal. You will have to change your password the first time you login. How to send an email? When you click “+ new mail” from the upper left corner of the Office365 Outlook screen, your cursor starts in the “To:” field of a new email. Type any portion of a name. A box appears beneath where you are typing with suggestions and “Search Contacts and Directory”. The system will find any email account that matches what you have typed. To verify you have selected the correct person, you can right‐click on their name to view their detailed information ( school, title, etc.) How to attach a document or insert a picture in an email? Once you are in an email, click on “insert” with the paper clip in front of it. Choose “attachment” and browse to the file you are sending, and it will appear under the “Subject” line. Choose “picture” and browse to the picture you are sending, and it will appear in the body of your e‐mail where the cursor is blinking. How to create a signature for all of my email? Make sure you are in the “Outlook” part of Office365. Click on the gear in the upper right hand corner next to your name. Choose the menu item “options”. Choose the item “settings”. Fill in the box for your signature. If you want your signature to go onto all email you are sending click the “Automatically include my signature on messages I send”. How to change the Time Zone? Make sure you are in the “Outlook” part of Office365. Click on the gear in the upper right hand corner next to your name. Choose the menu item “options”. Choose the item “settings”. Choose “regional”. Set the Current Time Zone to (UTC 6:00) Central Time (US & Canada). Click ”Save”. How to Block or Allow email from specific email accounts? Make sure you are in the “Outlook” part of Office365. Click on the gear in the upper right hand corner next to your name. Choose the menu item “options”. Choose the item “block or allow”. The “safe senders and recipients” are the email accounts you never want blocked even if they are regarded as SPAM. Scroll down a little and you will see “blocked senders”. This is where you put email accounts you do not wish to receive anymore. How to see contacts in Office365? There are two kinds of contacts in Office365. “My Contacts” – These are the contacts you created for yourself. These are seen only by you and no one else in the system can send to your contacts or the groups you create. These will mostly be email accounts that are not a part of our system such as vendors, people from other school districts and personal contacts. “Directory” – These are the contacts created within the email system for everyone to see. This list includes all employees of DeSoto County Schools and the groups created for email distribution. You can see both by clicking on the “People” part of Office365. The 1st section on the left side of the screen is “My Contacts”. These are the contacts and/or groups that you created. The 2nd section on the left side of the screen is “Directory”. The entire employee email list is here along with groups that were created for use. You can see the users by clicking on “All Users” or see the groups by clicking on “All Groups”. If you click on “Directory” you will see both users and groups. Once you click on a user or group you will see the details on the right side of the screen. Click on the envelope icon to send a group email or click on the calendar icon to schedule a group meeting. How to create and manage contacts? Make sure you are in the “People” part of Office365. You can search for a contact by typing any portion of a name in the search box and a list of potential matches will be displayed. If you need to add an email for a vendor or someone outside of our system, do that here. Click “+ new” in the upper left hand corner. Choose whether to create a user or a group; Type in the information for the contact. If you create a group, you can add people from your personal contacts, the users, contacts, or groups from the Directory in Office365. How to add a photo of myself to my email? You need a photo in an image file (ex. .jpg, .bmp) stored on your computer. Choose your name from the Office365 menu bar. Click on “Change” below the picture square. Click on the blue box with the white folder in it. Browse to where your photo is located on your computer and select it. Don’t forget to “Save” it. The photo will not appear immediately. It might take several minutes or several hours. How to create folders to hold email for certain projects or from certain people? When you are in the “Outlook” part of Office365, there will be a list of email related items down the left hand side of the screen. Your name should appear on that list. Right click on your name and choose “create new folder”. Name the folder and tap the Enter key. Whenever you receive an email from a particular person or dealing with a particular subject, click and drag the email to that folder. How to filter email for certain words? Make sure you are in the “Outlook” part of Office365. Click on the gear in the upper right hand corner next to your name. Choose the menu item “options”. Choose the item “organize email”. You will be creating an “inbox rule” so that you can block email with certain words in the subject or body. Click the + sign and choose “Delete messages with specific words in the subject…”. Name the rule, “Yucky words”. Click the drop down arrow to choose to delete email with certain words in the subject or in the subject and/or body. You are prompted to add words to this list. Type each of them in the box, then click the +. Choose “OK”. Then you choose how to handle it, “Delete the message”. Don’t forget to click “Save”. Also, “Inbox Rule” can alert you to “important words” or senders, by sending you a text message when messages arrive based on your important words or senders list. How to change my password? Make sure you are in the “Outlook” part of Office 365. Click on the gear in the upper right hand corner next to your name. Choose the menu item “options”. The screen opens up in “account”. On the right side of the screen, one of the choices is to “Change your password”. For security purposes, the system will ask you to login again before you change your password. How to set up an automated reply from my email account? On days when you will not be working and checking email it might be nice to have the system reply for you so that people don’t feel they are being ignored. Make sure you are in the “Outlook” part of Office365. Click on the gear in the upper right hand corner next to your name. Choose the menu item “set automatic replies”. Choose “send automatic replies”. Choose the time for the automatic responses to be active. Scroll down to choose to send an automatic response to “senders outside my organization”. Don’t forget to click “Save”.


© Copyright 2026