
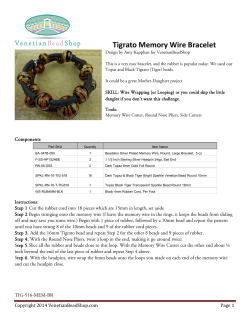
Make Pendant necklaces : How to Make a Pendant
Presents
Make Pendant
Necklaces:
How to Make a Pendant
and Other
Necklace Designs
Make pendant necklaces: How to Make
a pendant and other necklace designs
7
DISCO DARLING
Making the most of disc beads
BY KEIRSTEN GILES
3
10
CHINESE WRITING
STONE PENDANT
MOKUME GANE
HEART PENDANT
Set an irregular stone
with pickets
Combine alternative metals with
conventional materials
BY LEXI ERICKSON
BY ROGER HALAS
NECKLACES COME IN ALL SHAPES AND SIZES, which is
one of the great things about them if you like developing
your own jewelry designs. You can make other types of
jewelry in different styles from ancient to Edwardian to
punk, too – you just have more ground to work with if
you’re creating jewelry that’s worn around the neck.
Pendants are perfect for showing off interesting patterns
because you have enough room to show the whole pattern,
but pendants work just as well for something small, simple, and
uniform. Like pendant necklaces, necklaces without a focal or
with a focal area made of multiple elements can be as big or
little as you or your customers like. Either way, necklaces simply
stand out: if you’re going to wear just one piece of jewelry that
you want to be noticed, it’s probably going to be a necklace.
In this convenient e-book, you’ll learn to set a large
patterned gem in a silver bezel and see how to create
a complementary silver and copper element to make
the pendant really special. You’ll also learn how to take
advantage of metal’s malleability to create a 3D heart
pendant with mokumé gané, a layered metal whose
patterns stretch and compress as you form the heart
(create your own mokumé as shown with sterling, bronze,
and traditional alloys or buy sheet as metal stock), and
add a wink of sparkle with a small faceted gem. Or you
can create your own pattern as you put together an
impressive necklace using turquoise and wood button
beads linked together with copper wire and jump rings for a
contemporary look on a traditional form.
Start your next necklace making venture with these varied
necklace designs and see where they lead you!
Merle White
Editorial Director, Interweave Jewelry Group
©F+W Media, Inc. | All rights reserved | F+W Media grants permission for any or all pages in this issue to be copied for personal use.
www.JewelryMakingDaily.com 2
Set an irregular stone with pickets
C
hinese writing stone has a drama in its high-contrast
patterning that is hard to ignore. But when a stone
is so dramatic, it must be cut beautifully, so I called
one of my favorite cutters and asked for a selection.
This stone, though large, jumped out at me immediately
because of its shape and demanding presence. It’s a
true “in your face” stone, and I fell in love with it.
Though there are many cutters out there with a variety of shapes and colors, when picking out a stone, you
must consider several factors. Of course, the cut must
show off the uniqueness of the stone, color, pattern,
and/or shape. But there are many cutters who do not
take into consideration the shape of the stone and how
PROJECT BY
Chinese Writing Stone Pendant
Lexi Erickson
Opening Photo: JIM LAWSON
Project Photos: HELEN DRIGGS
it works for the jewelry designer. Gary Wilson’s stones
are easy to design with because all are cut beautifully.
When looking at the stone I thought of the fireworks for
the Olympics in Beijing, and the lovely Chinese chrysanthemums. I wanted to incorporate those feelings with
the stone, and by offsetting the stone, a design was
born.
With an offset stone, you must have metal backing
the entire stone, otherwise the bezel will not fit correctly and the stone will be unstable. Many thanks to Andy
Cooperman for teaching me his “picket” technique for
holding irregular found objects and stones.
©F+W Media, Inc. | All rights reserved | F+W Media grants permission for any or all pages in this issue to be copied for personal use.
www.JewelryMakingDaily.com 3
S K I L L S yo u n ee d
•
fabrication
•
soldering
•
•
bezel setting
patience
M ateria ls a n d Tools yo u n ee d
M at e r i a l s
Chinese charm
Chinese Writing Stone
Dental floss
20-gauge sterling
Tools
22-gauge copper
Layout tools: fine Sharpie pen
or dividers
Sterling silver curved tubing
for bail
1.5mm x 6mm sterling flat wire
Hard solder and easy wire
solder
Liver of sulfur
Bur Life
Hand tools: jeweler’s saw and
blades, sterling and letter
stamps, files, hand and needle,
sandpaper (3M Imperial Micro
Finishing Film, 20 and 15 micron), pliers, bezel pusher
Soldering tools: T-pins, old
extra long needle nose pliers,
soldering tank and torch, fire-
Annealing insurance
I flux when annealing. The flux
turns clear at 1100º, and that is
when your metal is annealed. If
you wait for “cherry red,” it may
be too late.
brick, flux, flux brush, tweezers,
copper tongs, pickle
Other tools: flex shaft, cut-off
wheels, light green 3M radial
bristle discs, White Advantedge
wheel and pink Advantedge
knife edge wheel
Sources
Tools & Materials: Most of the
tools and materials for this
project will be available from
well stocked jewelry supply
vendors.
1.5 x 6 mm sterling flat wire:
David H. Fell Co., www.dhfco
.com
Chinese charm (#695-534
“friend”): Rio Grande, www
.riogrande.com
T-pins: available at craft stores
Chinese Writing Stone: Gary B.
Wilson, www.garywilsonstones
.com
will lie. If it’s too far off your top plate,
the stone’s attachment will be unstable
and could break off with wear.
because you do not want it to uncoil
suddenly while you are annealing. Pickle
and rinse.
{Photo 2} Saw around drawn pattern.
File as needed.
{Photo 4} Using wide flat pliers and
your fingers, form flat wire around
stone. (This will take some strength in
your hands.) Don’t fit too tightly. Treat
wire exactly as you would a bezel.
➤ If additional filing is needed between
the “petals” of the chrysanthemum, file
them with a triangular needle file.
{Photo 1} Hold Sharpie pen continuously
at same angle, and draw around stone.
Allow room for picket bezel to fit with
slight lip beyond bezel.
Sand the entire piece with 20 micron finishing film, going in one direction. Hallmark your piece with “Sterling” and your
initials on the back at this time. Set aside.
➤ If you have a set of dividers, they will
work equally well or better. Remember
to overlap the stone onto your top plate,
in this case the “chrysanthemum,” and
take into consideration where the stone
{Photo 3} Anneal flat wire.
➤ The wire will be very stiff, so coil it
and place it on the firebrick. Secure it
with T-pins. Make sure it is securely held
{Photo 5} File or smooth edges to a butt
joint with white Advantedge wheel. Solder closed with hard solder. Pickle and
rinse.
{Photo 6} Make sure bezel is flat onto
back plate. Because we will be soldering from stick, this is extremely important. Flux.
Stick Soldering
“Soldering from the stick,” or “stick soldering,” has been used by plumbers for years. I
learned this at Manny’s trading post back in
the 1950s from an old Navajo Indian, who set
the most intricate bezel covered pieces in
just minutes using the same technique. Once
you master it, your soldering of bezels will
become much faster and easier.
©F+W Media, Inc. | All rights reserved | F+W Media grants permission for any or all pages in this issue to be copied for personal use.
www.JewelryMakingDaily.com 4
1
2
3
4
5
6
7
8
{Photo 7} Holding wire solder with
tweezers in your dominant hand and
torch with your other hand, heat piece
until flux is clear. Introduce wire solder
along inside of bezel where it joins back
plate. If piece is not hot enough to accept solder, solder will ball up on end.
Keep heating piece and reintroduce
solder again a few seconds later. When
it flows, pull solder around bezel with
flame. This takes patience.
{Photo 8} Using your solder pick, make
sure your bezel is down by pressing with
side of your pick along top of flat wire
bezel. Remember, your flame must be
where you are pressing down. It does no
good to push down if your flame is not
on that spot. Quench, pickle and rinse.
9
➤ My favorite soldering picks come
from Allcraft Tool & Supply. They are
strong and thick, and do not lose their
temper and bend when held firmly
against something.
{Photo 9} Placing dental floss behind
stone, and leaving enough to hold onto,
test fit stone into bezel. Do any clean up
on inside of bezel.
{Photo 10} I use an emery board for
acrylic nails cleanup outside of bezel.
{Photo 11} Using a cut-off wheel — and
wearing safety glasses — cut down into
flat wire bezel, being careful not to touch
back plate with cut-off wheel. Cut at least
4 “pickets,” each about 2–3mm wide.
10
➤ I tried to cut mine to follow the shape
and spacing of the lightly colored parts
of the stone.
Cut small pieces of copper and file edges for decoration on top of chrysanthemum to mirror design on stone. Sweat
some solder on back of them all with
easy, pickle and rinse.
➤ It will be easier to find tiny parts if
you put some warm pickle in a small yogurt container and just drop small pieces in there instead of in the bottom of
the crock pot.
{Photo 12} Position copper “writing”
on “chrysanthemum” and solder.
Pickle and rinse.
11
©F+W Media, Inc. | All rights reserved | F+W Media grants permission for any or all pages in this issue to be copied for personal use.
12
www.JewelryMakingDaily.com 5
14
13
A charm
soldered
to the back
adds interest.
➤ I chose to use a “noodle,” a curved
piece of tubing as a slider bail. File one
side of the “noodle” flat and solder to
the back plate. At the same time, I soldered a Chinese charm to the back, just
for added interest.
{Photo 13} Polish copper bits of “writing” with Advantedge knife edge pink
high polish wheel, keeping wheel off silver back plate.
Insert stone into bezel. Using bezel
pusher, push pickets over to hold stone
in place.
ing,” repolish with Advantedge knife
edge wheel.
LEXI ERICKSON has been teaching
high school and college metals for 23
years. Check out her website and blog
at www.lexiericksondesigns.com.
{Photo 14} Using 3M disc (I call them
spiders), clean inside of bezel around
stone. Finish as you choose. I prefer
using a patina with a brass brush and
pumice. If patina darkens copper “writ-
LET US INSPIRE
the Artist in You
From cover to cover, Jewelry Artist brings
you unique jewelry and gem projects in an
easy-to-follow format.
SUBSCRIBE TODAY!
jewelryartistmagazine.com
©F+W Media, Inc. | All rights reserved | F+W Media grants permission for any or all pages in this issue to be copied for personal use.
www.JewelryMakingDaily.com 6
tools & supplies
disco
darling
Making the most of
disc beads.
By Keirsten Giles
I’m a fool for disc beads,
rondelles, and heishi, and
wanted to find new ways to
use them. This technique
treats them more like
buttons, and shows off their
patterns and colors.
©F+W Media, Inc. | All rights reserved | F+W Media grants permission for any or all pages in this issue to be copied for personal use.
• Center-drilled discs or button
beads, assorted sizes
• Assorted small rondelles/heishi
for accent beads
• 14-gauge copper wire
• 20- or 22-gauge copper wire
• Round copper stamping blanks,
assorted sizes
• 4mm copper jump rings, 3
• 6mm copper jump rings, 7
• 10mm copper jump rings, 2
• 3mm copper rolo chain, two 6"
lengths
• Clasp
• Ball-peen hammer
• Large utility hammer
• Steel bench block
• Center punch
• Drill with miniature bit (1–1.5 mm)
• Large block of scrap wood to drill on
• Decorative metal stamps
• Doming (dapping) set
• Vise (optional)
• Digital camera (optional)
• Jewelry tumbler and mixed steel
shot
• Steel tongs or pliers for torching
head pins
• Propane or MAPP torch
• Round-nose pliers
• Chain-nose pliers
• Bent-nose pliers
• Flush cutter
• Nylon-jaw pliers
• Pickle pot
• Pickling medium
• Copper tongs
• Liver of sulfur
• Steel wool
• Fine-grit sandpaper
www.JewelryMakingDaily.com 7
Resources: Copper wire and sheet: Monsterslayer, monsterslayer.com. Turquoise
discs: Fire Mountain Gems and Beads,
firemountaingems.com. Wood discs and
pukalets: Beads and Pieces, beadsandpieces.
com. Bench block, copper tongs, liver of
sulfur, Sparex pickling medium: Rio Grande,
riogrande.com. Doming set, metal punch
for copper blanks: Harbor Freight Tools,
harborfreight.com. Mini vise: Jewelry Supply,
jewelrysupply.com. Metal stamps: Sparkling
Shamrock, etsy.com/shop/sparkling
shamrock. Magnesite discs: Happy Mango
Beads, happymangobeads.com. Rolo chain:
Lima Beads, limabeads.com.
from the spool of 14g wire, make a simple loop on the
1 Working
end with round-nose pliers. Use the round-nose pliers to create a
“snake” shaped base for the pendant, keeping in mind the number and
size of disc beads available to cover it. When you have the right size,
cut the wire and make another simple loop. Use a ball-peen hammer
and steel bench block to work harden and texture the base wire.
the number of beads
the base wire with a liver of sulfur solution; rinse and dry.
3 Count
2 Patina
in your design. Using the
Tumble in the rotary tumbler to polish. Lay out the beads on the
base wire and take a picture with your digital camera, or sketch the
design on paper, so you can refer to it as you work.
torch and 20- or 22-gauge wire,
make enough 3" ball-end head
pins for all of the beads. Place
the head pins in the pickle
solution. Once they are clean,
remove them with copper tongs,
rinse, and dry them. Clean the
head pins with steel wool, patina
them in a liver of sulfur solution,
rinse and dry; polish in the rotary
tumbler. Place the head pins
ball-end up in the vise and hammer the heads flat.
metal “bowl” beads
a decorative design
4 Create
5 Create
from copper discs. Use
on the metal blank using
metal blanks or make your own
with metal sheet and a disc cutter. Smooth the edges with finegrit sandpaper if needed. Mark
the center of the disc with a
center punch for drilling. Drill the
hole.
a utility hammer, steel bench
block, and metal stamps. Use
the dapping set to dome the
disc with the design facing up.
Make as many as you like. Patina
the discs with liver of sulfur and
tumble to polish.
©F+W Media, Inc. | All rights reserved | F+W Media grants permission for any or all pages in this issue to be copied for personal use.
www.JewelryMakingDaily.com 8
the head pins, begin
6 Using
attaching the beads to the
attaching beads
7 Continue
to the base. Once all the
jump rings, attach
8 Using
a chain or other stringing
base wire—starting anywhere.
Make sure each bead is wrapped
very tightly, at least 3 times
around the base, so it doesn’t
move. Use bent-nose pliers to
wrap close to the base wire.
Once the bead is secure, trim the
excess wire and tuck the end in
tightly with bent- or chain-nose
pliers.
beads are attached, the back of
the pendant will look something
like the second picture above or
shown enlarged below.
material to the simple loops on
each side of the pendant. Attach
a clasp to the end of the chain.
Keirsten Giles is a self-taught jewelry
designer, juggling a full-time day job with
her craft. She professes to have acquired
all of her current jewelry skills from the
Internet, and firmly believes she can learn
anything else she needs to know from
a carefully worded Google search. Her
favorite material is currently metal, especially copper. Her long-range goals include
soldering and enameling. Her work is available on Etsy and through her website, www.
lunestudio.com.
©F+W Media, Inc. | All rights reserved | F+W Media grants permission for any or all pages in this issue to be copied for personal use.
www.JewelryMakingDaily.com 9
project
Skills
n
n
n
forging
stone setting
soldering
Mokume Gane
Heart Pendant
Combine alternative metals with
conventional materials
By Roger Halas
L
ike a living, breathing entity,
mokume is one of those things
that is never exactly predictable,
which makes it fascinating to work with.
It will inspire you, let you experiment,
and if you’re accustomed to working
with precious metals, it will let you save
some money.
This project covers the basics
of mokume coupled with some
rudimentary fabrication skills. It will
familiarize you with the principle of
annealing a laminate, which can be
tricky. It also covers forging, and
how this affects the ultimate pattern,
plus finishing and how a patina can
really charge some life into a piece.
Altogether, this is a challenging
exercise, but if you keep your head clear
you will end up with a result that will
dazzle that special someone in your life.
Opening Photo: Jim Lawson;
Project Photos: by the author
M at e r i a l s
One ounce mokume gane billet
12 gauge round sterling silver wire
14 gauge sterling silver sheet
26 gauge fine silver sheet
8mm gemstone, any variety
Ferric chloride patina
Tools
Soldering tools: torch setup.
Forging tools: medium weight hammer, anvil, large
mushroom dapping set.
Other tools: flex shaft; round carbide cutting bur; 5/16"
and 5/64" drill bits; sanding drum
Hand tools: jewelers saw, small file, bezel pusher, duct tape
Finishing tools: 400 grit sandpaper, 400 grit radial bristle brush
sources
Most of the tools and materials for this project will be available
from well stocked jewelry supply vendors.
©F+W Media, Inc. | All rights reserved | F+W Media grants permission for any or all pages in this issue to be copied for personal use.
www.JewelryMakingDaily.com 10
Photo 1 Start out with a mokume gane billet. The most
readily available choice is a sterling silver and copper
combination, which works fine, but you can go with
something else. Here, I used a laminate involving four
metals: sterling silver, bronze, and two traditional Japanese alloys, shibuichi and shakudo. The reason: mokume gane is all about constrasts. More metals, more
contrast. More fun.
Photo 2 Anneal the billet, being careful not to melt
the edges. When doing this, flux the billet and
spread medium silver solder around the edges.
This binds it, which prevents it from splitting apart
during forging.
1
Photo 3 Using the medium weight hammer, forge the
billet. I find it best to start out in the center and then
work my way out in a circular pattern. The billet will
cool fast, so when it starts to harden, it will make a
clanging sound. At that point, stop hammering, and
heat up the metal again. Continue forging to about
5mm in thickness.
Photo 4 With the round cutting bur, start cutting
divots on one side of the billet. By doing this, you’ll
expose the metal layers beneath, revealing a series of
bull’s-eyes.
Photo 5 Use the sanding drum to grind
a sweep across the other side of the
billet, making it thinner as you move
toward the edge. This will create the
impression that the finished heart has
two distinct sides.
2
Photo 6 Heat the billet again, then
forge it level. Here, it’s extremely
important that you forge evenly in
every direction, using calculated hammer blows, otherwise the bull’s-eyes
will start to distort. I find this to look
messy so I avoid it. Forge the metal
down until it’s about the equivalent of
12 gauge sheet.
5
3
4
6
©F+W Media, Inc. | All rights reserved | F+W Media grants permission for any or all pages in this issue to be copied for personal use.
www.JewelryMakingDaily.com 11
7
8
Photo 7 Grind the edges of your new mokume sheet
into the shape of a heart. File the top of the heart
to refine the cusp. Although it is a slower process, using the small hand file provides more control than a
motorized tool.
Photo 8 Use the 5/64 inch bit to drill a hole near the
base of the cusp. This will accommodate the 12
gauge wire that will ultimately rivet the bail to the
heart. Drill a hole on the right side of the heart with
the 5/16 inch bit for the 8mm stone setting.
The opening will allow light to pass through
the setting and will brighten the stone color.
9
Photo 9 Dome the heart. To
make this easier, heat the piece,
but don’t get it too hot. Then
work it over with the large
mushroom head in the appropriate dapping block. Adding this
curvature gives the finished piece
a sense of dimension, rather than
just sitting flat. It’s not totally
necessary, but I think it looks
better.
10
11
Photo 10 When domed, sand the
top layer of metal to refine the
mokume pattern. The flex shaft
with an aluminum oxide sanding
drum works fine, or you can do this
by hand with sandpaper — either
method works.
Photo 11 Cut 1.5mm x 26.5mm strip
of 26ga. fine silver sheet. Bend this
around the 5/16 inch drill bit to create
a bezel for the 8mm stone. Solder
ends together.
12
Photo 12 Before soldering the bezel
to the heart, go over the heart with
the 400 grit radial bristle brush.
This creates a nice, even finish on
the piece which makes it semi-polished while still porous enough to
respond effectively to a patina.
©F+W Media, Inc. | All rights reserved | F+W Media grants permission for any or all pages in this issue to be copied for personal use.
www.JewelryMakingDaily.com 12
13
14
Photo 13 Solder the bezel onto the heart.
Photo 14 Set the stone with the bezel
pusher, being careful not to chip the stone.
Here, because of the colors of the metals, I
decided to use a garnet.
Photo 15 Make the bail. Cut 1.75" x 1.25" of
16ga. sterling sheet. Round off the ends
with a file. Drill two holes with the 5/64 inch
bit.
15
Photo 16 Bend the bail by hand around the
/16 inch drill bit. Then, saw it down the
middle with the jeweler’s saw and pull the
two sides apart — like bunny ears. Refine
with 400 grit sandpaper. Polishing the bail
with a buffer looks better, because it creates contrast, but that’s up to you.
5
Photo 17 Cover the front of the piece with
duct tape to protect it while you’re riveting
the bail. Cut 8mm of the 14 gauge round
sterling wire. Hammer the rivet into place.
Patina the piece with ferric chloride, then
buff it with a rouge cloth. Since this is a
larger piece, I put mine on a fairly thick
chain.
16
ROGER HALAS is a self-taught lapidary, metalsmith and jewelry designer in southern California.
When not making jewelry he works as a professional photographer, martial arts instructor and
aspiring screenwriter who encourages others to
explore their creativity.
17
©F+W Media, Inc. | All rights reserved | F+W Media grants permission for any or all pages in this issue to be copied for personal use.
www.JewelryMakingDaily.com 13


© Copyright 2026