
Document 219498
4-BTV, 5-BTV, 6-BTV Multiband HF Vertical Antennas New Assembly and High Performance Installation Instructions DXE-BTV-INSTALL GUIDE - Rev 0e Cost: $5.00 To be certain to get optimum performance from this vertical design, please assemble and install your new antenna according to these DX Engineering Assembly and High Performance Installation Instructions. These instructions are intended to replace those originally supplied by the manufacturer. © DX Engineering 2012 P.O. Box 1491 ∙ Akron, OH 44309-1491 Phone: (800) 777-0703 ∙ Tech Support and International: (330) 572-3200 Fax: (330) 572-3279 ∙ E-mail: [email protected] -1- Table of Contents Chapter 1 - Introduction Congratulations ! Over 50 Years Ago Hustler BTV antennas You gotta be kidding me...... Basic Assembly and Enhanced Operating Assembly 4 4 5 6 6 Chapter 2 - General Information Warning and Overhead Power Line Safety Basic Tools Required Assembly Notes 7 7 7 Chapter 3 - Common Starting Information Installation Sequence Site Selection Mounting Pipe Concrete or No Concrete – That is THE Question Coaxial Cable to Mounting Pipe 8 9 9 10 11 Chapter 4 - Some Really Good Information Get the Best Performance From Your New Quarter-Wave Vertical Antenna Some Brief Words on Ground Mounting, Elevated Mounting, and Radial Wires How to Put Radial Wires Down Without Digging Radial System Considerations 11 12 13 14 Chapter 5 - Basic BTV Assembly Assembling Vertical Aluminum Antenna Sections & Element Clamps Hustler 4 BTV - Package Contents & Assembly Hustler 5 BTV - Package Contents & Assembly Six Blade Spider for the 4-BTV and 5-BTV only Three Blade Spider for the 5-BTV only 80 Meter Resonator and Whip Installation for the 5-BTV and 6-BTV Hustler 6 BTV - Package Contents & Assembly Hustler Base Assembly Mating the Vertical Sections to the Base Section Installing Radials & Feedline on the Hustler Base Coax RF Choke Basic Tuning 17 19 21 23 23 23 24 26 27 28 29 29 Chapter 6 - DX Engineering Enhanced Antenna Systems Special Hustler BTV Packages Available from DX Engineering Radial Plate to Mounting Pipe Attaching Ground Radial Wires to the Radial Plate Tilt Base Mounting Plate to Mounting Pipe BTV Antenna Base Section to Tilt Base Testing the Tilt Base Alternate Feedpoint Connections The DXE-VFCC-H05-A Vertical Feedline Current Choke 30 32 33 34 34 35 36 37 Chapter 7 - Tuning Understanding Trap Calibration Hustler Traps Hustler Trap Calibration - Resonance Adjustment Procedure Tuning the 80 Meter Resonator Whip for the 5-BTV and 6-BTV 39 40 42 43 -2- Chapter 8 - Guying the Hustler BTV Antenna System 44 Chapter 9 - Reference Information Elevated Mounting of the Hustler BTV Antenna The Quarter-Wave Vertical on a Metal Roof What Trap Do I Have? Hustler BTV Replacement Parts Diagram Weatherproofing Coaxial Cable Connections Lightning Protection - For Any Installation Hustler BTV Specifications 45 46 48 49 50 50 51 Chapter 10 - Additional Operating Bands Adding Additional Operating Bands to your Hustler BTV Antenna 54 Chapter 11 - Recommended Accessory Items For Assembly For Quick Tilt Action For Tuning 55 55 56 Additional Accessories for Your Hustler BTV 56 Technical Support and Warranty 60 Note: DX Engineering is constantly upgrading information and developing new products to enhance your amateur radio experience. Please check the DX Engineering web site for the latest information: www.DXEngineering.com Manual Updates and Information Every effort is made to supply the latest manual revision with each product. Occasionally a manual will be updated between the time your DX Engineering product is shipped and when you receive it. Please check the DX Engineering web site (www.dxengineering.com) for the latest revision manual. The Hustler Antenna Company introduced this product over 50 years ago, with little attention to maximizing performance. It was designed to be an easy-to-install antenna with minimal grounding, which provided easy - or no - tuning and wide bandwidth but mediocre performance. DX Engineering decided to take this popular product and show how its performance could be greatly increased by proper installation, including the addition of an adequate radial ground system. This results in lowering the resonant frequency, and also altering the impedance at resonance. Hence - the need to adjust the traps, which was not “allowed” by the manufacturer, and the possible addition of a shunt coil at the feedpoint. You can install the antenna according to the New-Tronics instructions and make some contacts with little attention to ultimate performance. Our BTV Guide takes you into areas which result in departing from the simple installation and the need to make more adjustments than originally described. That is the reason we designed the tilt base, for easy raising and lowering between adjustments. The overall experience should be an effort which started with an inexpensive trap vertical, and finished with a high performance antenna installation providing very satisfying results. -3- Chapter 1 - Introduction Congratulations ! 50 Years Ago Hustler BTV antennas You gotta be kidding me...... Basic Assembly and Enhanced Operating Assembly 4 4 5 6 6 Congratulations on your purchase of one of the most versatile HF multi-band antennas, the Hustler HF Base model 4-BTV, 5-BTV or 6-BTV, or a complete DX Engineering Hustler High Performance HF Vertical System Package: models DXE-HSR-4BTV-P, DXE-HSR-5BTV-P or DXE-HSR-6BTV-P. Your new Hustler HF antenna system offers automatically selected multi-band coverage with an omni-directional pattern. The high quality, low-loss traps are adjustable, so you may tune the antenna for low SWR and maximum performance in virtually all types of installations. The Hustler BTV Series HF Base Vertical is mechanically and electrically superior to other brands, and will offer years of top performance. If the system is installed with the DX Engineering Hustler antenna options according to the recommendations and instructions in this manual, the full capabilities of this antenna are realized DX Engineering has worked extensively with the Hustler BTV series of antennas and has custom manufactured the best quality optional items to enhance the HF operating performance. Using DX Engineering parts will ensure that your Hustler BTV antenna will enable you to achieve an outstanding presence on the amateur bands for years to come. Over 50 Years Ago! The Hustler HF Base Four Band Trap Vertical antenna was a new concept in 1959. This unique multiband antenna with an exclusive low-loss trap design was developed and introduced to Amateurs by Hustler, Inc. of Cleveland, Ohio, offering quarter-wave antenna performance for 40, 20 15 and 10 meters , but requiring no band switching! Later, the Hustler Four Band Trap Vertical, known around the world as the 4-BTV, was made available with an 80 meter resonator, and the 5-BTV was born. When the Amateur bands expanded in 1979, the last of the series offerings designed by Hustler, the 6-BTV, added 30 meters, for an unequalled vertical antenna. Since 1985 the New-Tronics Antenna Corporation in Mineral Wells, Texas, has been making high quality antennas for HF, VHF and UHF Amateur and Commercial customers, including the “Hustler BTV Series”. Since 2003, DX Engineering has offered Hustler Antennas and has developed a complete system of innovative accessories and Add-On Kits specifically for the Hustler BTV series. Amateurs now have the choice of complete Hustler BTV Series High Performance packages for their HF needs, including the ability to turn their Hustler into a “9-BTV” covering all bands 80 through 10 meters. DX Engineering joins New-Tronics Antenna Corporation in celebrating over 50 years of service with the famous Hustler HF Base Four Band Trap Vertical – The Hustler 4-BTV. -4- Hustler BTV Antennas The Hustler 4-BTV is a four-band trap vertical antenna providing an omni directional pattern. The 4-BTV is designed as a self supporting vertical to provide optimum performance on the 10, 15, 20 and 40 meter bands. This antenna is designed for installations with restricted space. The Hustler 4-BTV is approximately 19 feet tall. It can also be adapted to operate on the 75/80 meter band by adding the RM-80S resonator and the 4457-1 three blade spider assembly on top of the 4-BTV. If the 75/80 meter resonator is attached to the 4-BTV, it may be desirable to guy the antenna above the 20 meter trap with small diameter polypropylene rope. The Hustler 5-BTV is a five-band trap vertical antenna. This antenna includes the RM-80S resonator and the 4457-1 three blade spider assembly. The 5-BTV is designed to provide excellent performance on the 10, 15, 20, 40 and 75/80 meter bands. The Hustler 5-BTV is approximately 24 feet tall. The Hustler 6-BTV is a six-band trap vertical antenna. The 6-BTV is designed to provide excellent performance on the 10, 15, 20, 30, 40 and 75/80 meter bands, using four traps and the RM-80S resonator. The design of the 6-BTV is sleek, with no capacity spiders and is approximately 25 feet tall. The Hustler BTV antennas provide automatic electrical selection of the bands through the use of optimum Q traps, which are individually and precisely tuned at New-Tronics. The traps are parallel tuned circuits which provide efficient isolation between the vertical sections, permitting multi-band operation. Efficient operation over the many ham bands at good SWRs is possible in a proper installation. The Hustler BTV antennas were designed to provide optimum performance from both an electrical and mechanical standpoint. Mechanically, this antenna boasts a heavy duty base and heavy duty aluminum tubing. The mechanical assembly is accomplished with all stainless steel hardware. The use of clamps permits re-adjustment if necessary, and allows tuning of each band. The mechanical construction is such that guying is not ordinarily needed. The performance provided by the Hustler BTV antenna is better than any other antenna of this type. Broad banding is such that one setting permits both phone and CW operation on most bands. The antenna provides a nominal 52 Ω base impedance when installed and tuned according to instructions. The radiation efficiency is equivalent to, or greater than, other trap verticals. -5- You gotta be kidding me...... When you first looked at this manual you probably wondered "What is all this?!?!?!" Do I really need to read all this stuff? Well, this manual was put together using many years of antenna design experience in making the Hustler BTV Vertical Antenna perform to the utmost. DX Engineering has sold thousands of Hustler BTVs with DX Engineering add-on parts that have been engineered, tested and proven to enhance the operation of the Hustler BTV series of antennas. We suggest you read the entire manual before starting assembly. When you install any antenna, you want the maximum performance and these instructions will help you achieve that goal with the Hustler BTV. Can you install the antenna without all these extra parts? Sure, but your performance will be far less than optimum. DX Engineering constantly examines the performance of the Hustler BTV series antennas and continually engineers add-ons to get the best possible HF performance. When installed using these instructions and DX Engineering accessories, you will have an antenna system that will exceed your expectations and provide you with years of great contacts on the HF Amateur bands! Basic Assembly and Enhanced Operating Assembly: We at DX Engineering believe that the Hustler BTV antenna is great and can be installed quickly to get you on the air making contacts. Through years of experience, DX Engineering has engineered and manufactured add-ons that will make the Hustler BTV performance even better! Do you need the high performance options now? No, you can get started with the basic system and add enhancements over time. Many hams that have added DX Engineering BTV antenna options have exclaimed the resulting higher performance was like getting a new antenna! This manual has chapters for: Basic assembly instructions for those wanting to install a BTV right out of the box with no performance enhancing options. (Chapter 5) Assembly using DX Engineering options that have been engineered to obtain maximum performance from a BTV antenna system. (Chapter 6) You'll want to read all the information in order to make an informed decision for your installation. Proper planning for your installation will provide you with years of great operation on the HF bands using the Hustler BTV series antenna. To be certain to get optimum performance from this vertical design, please assemble and install your new antenna according to these DX Engineering Assembly and High Performance Installation Instructions. These instructions may be used in place of those originally supplied by the manufacturer. The Hustler BTV series of antennas is manufactured by New-Tronics Antenna Corporation, Mineral Wells, Texas. -6- Chapter 2 - General Information Warning Overhead Power Line Safety Basic Tools Required Assembly Notes 7 7 7 7 WARNING! INSTALLATION OF ANY ANTENNA NEAR POWER LINES IS DANGEROUS Warning: Do not locate the antenna near overhead power lines or other electric light or power circuits, or where it can come into contact with such circuits. When installing the antenna, take extreme care not to come into contact with such circuits, because they may cause serious injury or death. Overhead Power Line Safety Before you begin working, check carefully for overhead power lines in the area you will be working. Don't assume that wires are telephone or cable lines: check with your electric utility for advice. Although overhead power lines may appear to be insulated, often these coverings are intended only to protect metal wires from weather conditions and may not protect you from electric shock Keep your distance! Remember the 10-foot rule: When carrying and using ladders and other long tools, keep them at least 10 feet away from all overhead lines - including any lines from the power pole to your home. Basic Tools Required Two 7/16" open end wrenches or nut drivers Medium size flat blade screwdriver or 5/16" nut driver for the element clamps Tape measure Felt-tip marker Assembly Notes Note: DXE-P8A Penetrox A Anti-Oxidant should be used between all antenna element sections. Penetrox is an electrical joint compound to affect a substantial electrical connection between metal parts such as telescoping aluminum tubing or other antenna pieces. It ensures high conductivity at all voltage levels by displacing moisture and preventing corrosion or oxidation. Note: UMI-81343 Never-Seez or DXE-NSBT8 Anti-Seize should be used on all clamps, bolts and stainless steel threaded hardware to prevent galling and to ensure proper tightening. -7- Chapter 3 - Common Starting Information Installation Sequence Site Selection Mounting Pipe Concrete or no concrete - That is THE question Coaxial Cable to Mounting Pipe 8 9 9 10 11 Installation Sequence 1. Site Selection 2. Installing a Mounting Pipe 3. Run Coax from Radio to Mounting Pipe 4. Install the Radial Plate and Radial System 5. Install the Tilt Base Assembly 6. Mount the BTV base to the Tilt Base Site Selection 7. Antenna Assembly 8. Mating the BTV antenna to the base section 9. Walk the antenna up to normal position 10. Tuning 11. Add optional DX Engineering Add-On Kits for 12, 17 and 60 meters and make adjustments Hole for Mounting Pipe Concrete & Level Trench for Coax Gravel to keep weeds away Radial Wires Installed Antenna Installed Rocks added for good looks Coax to Base Install Radial Plate Tilt Base & VFCC Trench Filled and new grass seeded Shack end - Ground Rod and PolyPhaser protection 17 Meter Add-On-Kit Tuned and on the air! K3EMB's Hustler 6-BTV installation - Total installation time: 3 days (your time may vary) -8- Site Selection Install your new vertical antenna a minimum of 20 feet away from buildings, wires, metal fences, downspouts and gutters. Centering a vertical antenna in an open area is the best option. Installing the antenna near a wooden fence or on a wood post is okay as long as there is no metal within 20 feet of the antenna. Installing the antenna on a metal mounting pipe or a wooden post that is set in concrete is okay. Since the radial system wires create the efficient ground return for RF currents, direct earth grounding of the support post or a ground rod is not required at the antenna. Select a mounting location clear from power lines, structures and other antennas by a minimum of 40 feet (30 + 10 foot safety rule). Consider overhead power lines, utility cables and wires. The further away the vertical is mounted from local noise sources or other metallic objects, which can re-radiate noise and affect the tuning, radiation pattern and SWR, the better. Determine the direction you want the antenna to pivot and make sure there is adequate clearance (at least 30 feet). Mounting Pipe The mounting support may be a galvanized metal pipe or thick wall steel tube from 1 inch to 1-3/4 inches outside diameter (OD) when using just the Hustler bracket, and 1 inch to 2 inches OD when using the DXE-TB-3P Tilt Base. A thick-walled steel pipe with a minimum thickness of 1/8" (1/4" preferred) should be used. The standard 1-1/2" galvanized water pipe (with its 1.9" OD) is just fine for this application and can usually be found at your local home building supply store. A 4 to 6 inch wood post can also be used. Use a thick-walled galvanized steel mounting pipe approximately 6 feet long. This will allow approximately 4 feet to be below ground and 20-23 inches above ground. The height of the mounting pipe above ground level of 20-23 inches will allow you to do either a basic installation, or an enhanced installation by adding the DX Engineering optional items described in this detailed manual. In some cases ham operators have done a basic installation, and then added the DX Engineering optional items at a later date to enhance their operation. Thus, the length of mounting pipe above ground is 20 to 23 inches. For permanent mounting, use a post-hole digger to make the hole deep enough to accommodate approximately 4 feet of pipe and a couple inches of gravel at the bottom for drainage. Set the pipe on the gravel, use the pre-mix concrete to fill around the pipe, adding water and mixing as you fill (or mix the concrete first, depending on the type you purchase), then pour the concrete in the hole. Fill the hole until the concrete is level with the ground around it. Use a level as you fill the hole to be sure the pipe is vertically straight. Allow to set overnight. -9- Your location, landscape and ground conditions may require different mounting solutions in order to have the steel mounting pipe and the vertical antenna in a secure position. You may also attach the Tilt Base to a 4 to 6 inch wooden post at the location you intend to use the antenna, making sure the unit is securely mounted. Using a cyclone fence is not recommended for a vertical antenna support or being used as a radial system. Poor RF connections and the presence of high levels of noise that are inherent on metal fences make them an undesirable mounting location for any HF vertical antenna. Note: Steel, rather than aluminum, is much more suitable for mounting in concrete. Aluminum will quickly corrode due to incompatibility with the materials used to make concrete. Concrete or No Concrete – That is THE Question The original Hustler BTV installation manuals call for the ground mounting pipe to be driven into the earth with the specific wording “Do not use concrete. Do not dig a hole and bury the mast. It must be driven in.” The reason for this recommendation is so that installations with few or no radials will be able to make use of the direct contact between the mounting pipe and the earth to collect and distribute antenna currents. Unfortunately, the soil and a steel pipe usually does not provide efficient RF conduction. Therefore, the use of many ground radial wires are recommended for all quarter-wave ground mounted HF antenna, to improve efficiency and performance dramatically. Also, a driven or pounded pipe may be used on any ground-mounted vertical antenna installation, regardless of the number of radials used. DX Engineering recommends using a concrete base, as shown on page 9, when a high performance installation with many radials is planned. The reasons that a concrete base is recommended: 1. It is easier to make sure that the mounting pipe is vertical when it is braced for installation with concrete. Pounded pipes can develop a lean or hit a rock while being driven into the ground, which could result in a leaning antenna. 2. A steel pipe or tube in concrete will last much longer than in soil, especially in certain types of soil that will corrode steel more quickly. 3. Concrete is not an insulator for a steel pipe, as the hardened but moist concrete is a good conductor from the steel to the soil for grounding purposes. 4. A ground surface wire radial system offers far more efficient means to collect and distribute surface RF currents than a single pipe in the soil, so a pipe in concrete is okay when using many radials. - 10 - Coaxial Cable to Mounting Pipe The coaxial cable should be routed from your radio room to the base of the antenna system and be buried below the radial system you will be installing. PVC Conduit pipe may be used to house the coaxial cable. Bury the cable 4" to 12" below ground level. Chapter 4 - Some Really Good Information Get the Best Performance From Your New Quarter-Wave Vertical Antenna Some Brief Words on Ground Mounting, Elevated Mounting, and Radial Wires How to Put Radial Wires Down Without Digging Radial System Considerations 11 12 13 14 Get the Best Performance From Your New Quarter-Wave Vertical Antenna To be certain to get optimum performance from this vertical design, please assemble and install your new antenna according to these DX Engineering Assembly and High Performance Installation Instructions. These instructions are intended to replace those originally supplied by the manufacturer. The Hustler BTV series of antennas is manufactured by New-Tronics Antenna Corporation, Mineral Wells, Texas. By following these instructions you will be able to take advantage of all of the performance that your Hustler HF Multi-Band Vertical has to offer. Here are a few facts about the HF quarter-wave vertical antenna: For best results, plan for a ground-mount installation with many radials. Engineers and Amateurs “in-the-know” install a complete ground radial wire system to significantly improve quarter-wave vertical antenna performance for transmitting and receiving. Use copper wire. Do not use grids, mesh fence material or steel which are known to be poor performers especially for the long term. Mounting this antenna without radials results in average to below average performance and only local or medium range contacts. Due to RF ground losses, a vertical installation with no radials or only a few radials will have drastically reduced efficiency. On those installations, even though a wider frequency range of low SWR may result, that is a very poor trade-off for an antenna system that offers performance. - 11 - Any HF vertical mounted a few to many feet above ground with only a few radials suffers virtually the same ground losses as a ground mounted vertical with a few radials. This manual shows you how to plan and install ground radials for better antenna performance and gratifying operational results in almost any situation. Height is not a requirement for HF Verticals. Unlike horizontally oriented antennas, ground mounted vertical antennas used for HF sky wave communications only require a radial system for performance. If an HF quarter-wave vertical antenna is elevated, then it requires resonant, quarter wavelength, tuned radials to be efficient and functional. Safer groundmounted installations can produce results far superior to elevated HF verticals with a few radials. For low-angle performance, a horizontal antenna requires height, and if it is directional, may not be able to be rotated, or it requires a tower and rotator. In comparison, an omnidirectional HF vertical installed with many radials offers an excellent performance-to-cost value. Some Brief Words on Ground Mounting, Elevated Mounting, and Radial Wires Ground Mounting There are multiple ways to install a Hustler BTV antenna. The most efficient way is to ground mount the antenna, keeping clear of any metal objects and using a good ground radial system. Ground mounting your quarter-wave vertical antenna will produce significantly improved long range results when your installation includes a good ground-level radial wire system. Seven decades of experiments show that ground mounting with many radials is your best choice. Safety is another important consideration when comparing ground mounting to roof-top or elevated mounting of your quarter-wave vertical. The DX Engineering Tilt Base offers a safer and easier ground mounted installation. One person can walk-up and tilt-down the antenna for adjustments without a ladder. The new, more versatile Tilt Base models are also helpful when high winds are expected. Order the Tilt Base model DXE-TB-3P for your Hustler BTV. Elevated Mounting You may also elevate the Hustler BTV antenna. However, when elevating the antenna the radial system becomes more difficult to deploy in that you need specific length radials that must also be elevated, running symmetrically away from the feedpoint. In some situations, an elevated or roof-mounted vertical installation is the only option. Resonancetuned radials must do the job of collecting RF currents. Imagine all of the quarter-wave resonant length wires attached to the base of the antenna, spreading radially (away from the base of the vertical in all directions). For best DX performance, these radials should slope down from the elevate vertical at a 45 degree angle. You can connect the ends of the long radials to support poles or trees. Use the same care as you would for a dipole antenna, keeping the ends insulated and clear of any metal. We recommend four resonant radials per band to enhance low angle radiation. More information on planning and installing the elevated quarter-wave vertical appears later in Chapter 9. - 12 - Radial Wires Radials: Probably THE most important item, for not only the Hustler BTV, but any ground mounted quarter-wave vertical antenna system are the radial wires. Lack of radial wires causes a serious compromise to performance. Will the antenna work without radial wires? In most cases, yes - BUT - it will work at a much lower efficiency in both transmit and receive. Some hams who tried the 'no radial' method and later added a good radial system were very surprised in the difference it made with enhanced transmit efficiency and the ability to receive many more weak signals. The importance of a good radial system cannot be stressed enough. Radials are easy to install and the following section outlines the easiest and most efficient way of installing radial wires that will withstand a powered grass mower and provide your antenna with the best possible radial system. How To Put Radial Wires Down Without Digging The best time to do this is early spring but it can be done other times, as well. I have even done it in the fall and had good success. The idea behind this is to get the grass of your lawn to grow over the radials and protect them from the mower. First, mow the grass pretty short in the areas where you will be laying the radials down. Notice, I didn't say "scalp" it. Just lower the mower until the grass is about 1 inch long after cutting. Readjust the height of the mower back to normal and put it away. Next, connect the radials to the Radial Plate with wire terminal ends (which you can get at DX Engineering along with the radial wire) and stretch them out while arraying them evenly around the antenna. Some AM broadcast engineers tell us that the radials should be as long as you can make them up to about 1/2 wavelength. If you can only do 1/4 wave or 1/8 wave in certain directions then do that and don’t worry about it. You will be surprised how much better your vertical will work. After you install 20 to 40 radials and see how much better your antenna performs you will have an urge to put in more of them. Don’t resist. More really is better. Starting from the antenna end of the radials, and about every 3-4 feet, hold the wire down with a Steel or Biodegradable Radial Wire Anchor Pin while pulling the radial out from the antenna to keep it taut. Push it in as far as possible to get the wire as close to the grass roots as possible. I typically use a rubber mallet to drive it home. If the radial wire is sticking up any place due to - 13 - uneven ground or the wire is loose just put another staple there. The idea is to get all parts of the wire down as close as possible to the ground so that the grass can grow over it. When you finish the last radial, your job is done. Mother Nature will do the rest. If you have done this in the early spring, the grass will grow up, surround the wire and pull it down firmly along its full length. If you do it in the fall after the grass has stopped growing, it will happen the next spring. This will be done so completely that in a few weeks you will have to actively look for the radials to see them. Your mower will miss them completely, too; but you and your contacts will hear them right away! 73, Paul, NO8D Note: Radial Wires shown above have Red insulation so they would show up in the photographs. DX Engineering Radial Wire has a relaxed Black PVC insulation. Radial System Considerations The performance of any quarter-wave vertical antenna, multi-band or single band, is completely dependent upon the quality of its radial system. A few local or medium range contacts may be possible using a minimal installation without radials. However, you will get more consistent results and much better performance with a complete radial system. The radial system required depends on whether it is for a ground-mounted or a roof-mounted vertical and on the number of radials you can install. Many amateurs enjoy excellent quarter-wave vertical performance with only 20 to 30 radials. On ground-mounted quarter-wave verticals, the length of the radial wires is not critical. They can be as short as one-eighth wavelength, but one-quarter wavelength radials on the lowest band of operation are typical. Long lasting and high-efficiency radial wire connections are easy to make using the stainless steel DX Engineering DXE-RADP-3 Radial Plate. Use the radial plate for a simple and neat way to install as many ground radial wires as you wish. Install 30 to 60 radials for higher performance using one or more DX Engineering radial wire kits. The relaxed black PVC insulated 14 gauge stranded copper wire in our Radial Wire Kits is easy to handle and will last far longer than bare wire or wire mesh. Why is such an extensive array of radial wires necessary? Simply put, it is the best way to increase your signal! The entire radial system must collect and carry currents equal to those flowing in the vertical section of the antenna. The ground-mounted vertical antenna needs many radial wires to prevent your RF power from being absorbed by the "lossy" ground. Even if your radials cannot run - 14 - in all directions, you still get improved signals and prevent ground losses by installing as many symmetrically spaced radials as you can. You may use wires of any convenient length. Just run your radials in as many directions as you can, straight away from the antenna base taking care not to zig-zag, bunch or cross over other radial wires. Radial by definition run in all directions, NOT parallel, NOT zig-zags, NOT crossing over each other. Run your radial wires in a spoke pattern. Install your coaxial cable under the radials, at least a few inches in the ground, to minimize coupling between the radials and the coaxial cable shield. Additional decoupling the feedline can be effectively accomplished using a DX Engineering current choke instead of coiled coaxial cable, to reduce RF feedback, RFI. To avoid damage from radial installation and for proper RF decoupling, the coaxial cable should be buried several inches under the radial system. Performance of the antenna is directly proportional to the number and length of radials. Many short radials are better than a few long radials. The stainless steel DX Engineering DXERADP-3 Radial Plate makes it easy to attach long-lasting radial wire connections. You don’t have to dig! Radial wires disappear under the grass when installed with DX Engineering steel or biodegradable anchor pins. DO NOT bother to cut ground radials to resonant lengths because they are detuned by the ground. It is best to install many radials that are all the same length or lengths that fill a small irregular space. Radial wires should run in all directions straight from the base feedpoint of the antenna. Ground radials cannot be bunched together for any length. If your radials cannot cover 360 degrees, that is okay. The antenna performs nearly the same with an equal number of radials squeezed into directions that cover smaller arcs. Plan to install at least 20 radials using DX Engineering Radial Wire Kits. However, improved performance is accomplished using 30 to 60 radial wires. - 15 - Examples of properly installed radials using the optional DX Engineering DXE-RADP-3 Radial Plate K7CIE N8DOD N5RMM W0ZSP - 16 - Chapter 5 - Basic BTV Assembly Assembling Vertical Aluminum Antenna Sections & Element Clamps Hustler 4-BTV - Package Contents & Assembly Hustler 5-BTV - Package Contents & Assembly Six Blade Spider for the 4-BTV and 5-BTV only Three Blade Spider for the 5-BTV only 80 Meter Resonator and Whip Installation for the 5-BTV and 6-BTV Hustler 6-BTV - Package Contents & Assembly Hustler Base Assembly Mating the Vertical Sections to the Base Section Installing Radials & Feedline on the Hustler Base Coax RF Choke Basic Tuning 17 19 21 23 23 23 24 26 27 28 29 29 Assembling Vertical Aluminum Antenna Sections & Element Clamps Note: DXE-P8A -Penetrox A Anti-Oxidant should be used between all antenna element sections. Penetrox is an electrical joint compound to affect a substantial electrical connection between metal parts such as telescoping aluminum tubing or other antenna pieces. It ensures high conductivity at all voltage levels by displacing moisture and preventing corrosion or oxidation When assembling any telescoping aluminum tubing sections you should take the following steps: 1. Make sure the edges are smooth and not sharp. Deburring may be necessary, since burrs and shavings can occur on seams as well as edges. All surfaces need to be completely smooth to allow easy assembly of tubing sections. Caution Aluminum tubing edges can be very sharp. Take precautions to ensure you do not get accidentally cut. The raised particles and shavings that appear when the aluminum tubing is machined are referred to as burrs, and the process by which they are removed is known as deburring. Deburring is a finishing method used in manufacturing. Aluminum tubing is machine cut on both ends and machine slit as needed. Although Hustler manufactured aluminum tubing is deburred, you should further assure that there are no ragged edges or protrusions. Use the DXE-22166 Slim Grip Deburring Tool, or the DXE-22600 Deburring Tool with Extending Handle and Extra Blades for this operation. 2. Clean the inside of the aluminum tubing to clear out any dirt or foreign material that would cause the aluminum tubing sections to bind during assembly. Do not use any type of oil or general lubricant between the aluminum tubing sections. Oils or general lubricants can cause poor electrical connections for radio frequencies. - 17 - 3. Clean the outside of the aluminum tubing to clear any dirt or foreign material that would cause the clamps to malfunction during assembly. 4. The use of DXE-P8A Penetrox A is highly recommended. Penetrox A is an electrical joint compound which effects a substantial electrical connection between metal parts such as telescoping aluminum tubing or other antenna pieces. Using Penetrox A assures high conductivity at all voltage levels by displacing moisture and preventing corrosion or oxidation. 5. When assembling the aluminum tubing sections, ensure the area is clear of grass, dirt or other foreign material that could cause problems during assembly of the closely fitted telescoping sections. Assemble the vertical sections in an area that is flat and has sufficient room for the length of the antenna during assembly. Assembly is easier if the tubing sections are pre-marked. A dark color felt-tip marker works well. Locate the hardware pack containing the element clamps. Refer to the following 4-BTV, 5-BTV or 6-BTV assembly instructions, depending on your antenna, for element clamps, tubing and trap placement. Slide all the clamps over each section before putting them together. You can lightly tighten the clamps just below the slits in each section to hold them until needed. Align the clamp screws on each section to face the same direction. At final assembly, body of the clamp should be positioned between the slits in the tubes and 1/8" from the edge of each tube as shown to the right. Making sure dirt or grass does not adhere to the sections to be joined. The body of the element clamp is positioned between the slits and tighten securely. The following charts show the suggested starting measurements for the 4/5-BTV and 6-BTV antennas. Note the charts show different measurements for various installation methods. 4-BTV and 5-BTV Approximate Starting Dimensions Type of Installation On a roof with 4 ft. pipe and radials On metal tower w/radials dropped 45º Ground Mounted - No Radials Ground Mounted with Radials A1 2-1/8" 2" 0" 0" A2 2-1/8" 2" 0" 2" B1 2" 2" 1/2" 0" B2 2" 2" 1/2" 2" C1 1-7/8" 1-1/8" 1-1/16" 0" C2 1-7/8" 1-1/8" 1-1/16" 1-1/2" D 61-1/8" 61-1/8" 62-1/8" 62-1/8" 6-BTV Approximate Starting Dimensions Type of Installation On a roof with 4 ft. pipe and radials Ground Mounted - No Radials Ground Mounted with Radials A1 A2 B1 B2 C1 C2 D1 D2 E 2-1/8" 2-1/8" 2" 2" 1-7/8" 1-7/8" 1-1/2" 1-1/2" 1" 0" 0" 1-1/2" 1-1/2" 1-1/16" 1-1/16" 2" 2" 2" 0" 2" 0" 2" 0" 1-1/2" 0" 2" 1-1/2" - 18 - 4-BTV Package Contents 1 1 1 2 1 1 1 6 Part Number 4098-1 4190 4087-1 4087-2 4090-1 4090-2 4090-3 5481 1 4198 7 2 4 1 1 1 7 4 1 1 6 2 7 1 3152-4 3488-6 2491-5 3609-5 2194-15 2382-1 2832-31 2832-32 4513 4514 3162-9 2233-41 2381-16 6099 Qty 2 8 2 2 Description Bracket Assembly - Assembled Top Tube Section - 56" Lower Tube Section - 72" Intermediate Tube Section - 20" Ten Meter Trap - Orange Fifteen Meter Trap - Red Twenty Meter Trap - Green Spider Tubes Accessory Kit Consisting of the following: IN PLASTIC BAG Clamp, #12, Stainless Steel U-Bolts 1/4" Split Lock Washers Spider Hub 6-32 x 3/4" long Screw 10-32 Hex Nut, Stainless Steel 6-32 Hex Nut, Stainless Steel 1/4-20 x 7/32" thick Nut Terminal Lug - 1/4" hole Terminal Lug - #10 hole 6-32 x 5/8" Flat Head Screw 1/2" OD x 3/16" ID Washer #6 Lock Washer, Stainless Steel Danger Label IN PLASTIC BAG FOR RADIAL MOUNTING 2700-7 1/4-20 x 1-1/2" long Hex Head Bolt 2233-16 5/8" OD x 1/4" ID Washers 2491-5 1/4" Lock Washer 2832-32 1/4-20 x 7/32" Thick Nut - 19 - Assembly of the 4-BTV Antenna Vertical Sections Assemble the 4-BTV as shown in these pictures. The dimensions between the aluminum sections and the traps are shown in the chart below. The six bladed spider is mounted just above the 20 Meter trap. When completed, go to Page 27. - 20 - 5-BTV Package Contents 1 1 1 2 1 1 1 6 1 1 Part Number 4098-1 4190 4087-1 4087-2 4090-1 4090-2 4090-3 5481 RM-80S 4457-1 1 4198 7 2 4 1 1 1 7 4 1 1 6 2 7 1 3152-4 3488-6 2491-5 3609-5 2194-15 2382-1 2832-31 2832-32 4513 4514 3162-9 2233-41 2381-16 6099 Qty 2 8 2 2 Description Bracket Assembly - Assembled Top Tube Section - 56" Lower Tube Section - 72" Intermediate Tube Section - 20" Ten Meter Trap - Orange Fifteen Meter Trap - Red Twenty Meter Trap - Green Spider Tubes Eighty Meter Resonator w/Whip Three Blade Spider Accessory Kit Consisting of the following: IN PLASTIC BAG Clamp, #12, Stainless Steel U-Bolts 1/4" Split Lock Washers Spider Hub 6-32 x 3/4" long Screw 10-32 Hex Nut, Stainless Steel 6-32 Hex Nut, Stainless Steel 1/4-20 x 7/32" thick Nut Terminal Lug - 1/4" hole Terminal Lug - #10 hole 6-32 x 5/8" Flat Head Screw 1/2" OD x 3/16" ID Washer #6 Lock Washer, Stainless Steel Danger Label IN PLASTIC BAG FOR RADIAL MOUNTING 2700-7 1/4-20 x 1-1/2" long Hex Head Bolt 2233-16 5/8" OD x 1/4" ID Washers 2491-5 1/4" Lock Washer 2832-32 1/4-20 x 7/32" Thick Nut - 21 - Assembly of the 5-BTV Antenna Vertical Sections Assemble the 5-BTV as shown in these two pictures. The dimensions between the aluminum sections and the traps are shown in the chart below. The six bladed spider is mounted just above the 20 Meter trap. The three blade spider is mounted just below the 80 Meter resonator. When completed, go to Page 27. - 22 - Six Blade Spider for the 4-BTV and 5-BTV only Assemble the 6 bladed spider using the parts shown. This spider is used on both the 4-BTV and 5BTV antennas. The spider mounts on the antenna just above the 20 meter trap. Three Blade Spider for the 5-BTV only Prepare the three bladed spider for the 5-BTV. Carefully bend the three blades as shown. The spider mounts just below the 80 meter resonator. 80 Meter Resonator and Whip Installation for the 5-BTV and 6-BTV Using the supplied Allen Wrench, loosen the two Allen set screws far enough to allow insertion of the whip antenna about 4" beyond the set screws as shown below. Snug the Allen set screws in place to hold the whip in place. During tuning, you will be making adjustments to this length. Install the Hustler 80 RM Resonator to the top of the 5-BTV or 6-BTV in the threaded rod that is protruding from the top tube. The whip will be trimmed for the desired frequency during the tuning. If you desire to have two frequencies that are far apart (CW -vs- SSB), you may want to have two whips One whip cut for the lower frequency in the CW area of the band, and another whip cut for the higher end in the SSB area of the band (Part Number HSR-49-04-80S from DX Engineering). Tuning of the 80 Meter resonator will be covered in the Chapter 7 of this manual. - 23 - 6-BTV Package Contents 1 1 2 1 1 1 1 1 1 1 1 Part Number 4087-1 4087-11 4087-2 4090-1 4090-2 4090-3 4090-4 4098-1 4190-1 RM-80S 6747 Lower Tube Section - 72" Intermediate Tube Section - 24" Intermediate Tube Section - 20" Ten Meter Trap - Orange Fifteen Meter Trap - Red Twenty Meter Trap - Green Thirty Meter Trap - Blue Bracket Assembly - Assembled Top Tube Section - 36" Eighty Meter Resonator w/Whip Hardware Kit Consisting of the following: 1 2 7 1 4 7 4 9 6 2 1 1 1 1 2194-15 2233-41 2381-16 2382-1 2491-5 2832-31 2832-32 3152-8 3162-9 3488-6 3609-5 4513 4514 6099 IN PLASTIC BAG 6-32 x 3/4" long Screw 1/2" OD x 3/16" ID Washer #6 Lock Washer, Stainless Steel 10-32 Hex Nut, Stainless Steel 1/4" Split Lock Washers 6-32 Hex Nut, Stainless Steel 1/4-20 x 7/32" thick Nut Clamp, #12, Stainless Steel 6-32 x 5/8" Flat Head Screw U-Bolts Spider Hub Terminal Lug - 1/4" hole Terminal Lug - #10 hole Danger Label Qty 8 1 2 2 2 Description IN PLASTIC BAG FOR RADIAL MOUNTING 2233-16 5/8" OD x 1/4" ID Washers 2381-10 #10 External Tooth Lock Washer 2491-5 1/4" Split Lock Washer 2700-7 1/4-20 x 1-1/2" long Hex Head Bolt 2832-32 1/4-20 x 7/32" Thick Nut - 24 - Assembly of the 6-BTV Antenna Vertical Sections Assemble the 6-BTV as shown in these two pictures. The dimensions between the aluminum sections and the traps are shown in the chart below. - 25 - Hustler Base Assembly The Hustler Base Assembly (HSR-4098-1) is pre-assembled from the factory. The following diagram shows all the parts, including the parts that are used for basic mounting on a 1 inch to 1-3/4 inch OD mounting pipe using the included U-Bolts from New-Tronics. - 26 - Mating the Vertical Sections to the Base Section CAUTION: Attempting final assembly without proper precaution can be dangerous. You should have someone help you steady the vertical antenna sections during mating with the base section. Slip the completed antenna sections onto the base section as shown below. Set A1 dimension to the required spacing as shown in the charts below. Tighten the element clamp. 4-BTV and 5-BTV Approximate Starting Dimensions Type of Installation A1 On a roof with 4 ft. pipe and radials 2-1/8" On metal tower w/radials dropped 45º 2" Ground Mounted - No Radials 0" Ground Mounted with Radials 0" 6-BTV Approximate Starting Dimensions Type of Installation A1 On a roof with 4 ft. pipe and radials 2-1/8" Ground Mounted - No Radials 0" Ground Mounted with Radials 0" (BTV base shown mounted to the optional DX Engineering Tilt Base) - 27 - Installing Radials & Feedline on the Hustler Base If you are connecting the radial wires directly to the antenna base, use the following drawing showing the hardware required. This diagram also shows connecting the feedline direct to the Hustler base using the supplied lugs for coax connections. For radial wires, the better alternative is to use an optional DXE-RADP-3 DX Engineering Radial Plate. Additionally, the feedline can be connected using other methods using DX Engineering custom made feedline options as shown in Chapter 6. - 28 - Coax RF Choke Hustler recommends a wound coax type of choke to help prevent RF feedback into the radio room. The following diagram shows the coax cable choke system which offers modest performance on some bands. The better alternative is the optional DX Engineering DXE-VFCC-H05-A Vertical Feedline Current Choke which is specifically engineered and manufactured to help eliminate RF feedback from a resonant vertical antenna. More information on the VFCC can be found in Chapter 6. Basic Tuning In a few basic installations adjustment of the antenna to obtain the lowest SWR may not be necessary. However, a broad, low SWR over an entire band or all bands is an indication of poor efficiency. If at all possible, the addition of radials will improve performance as detailed in Chapters 4 and 6. For ground mounted installations the length of radials is not critical and they cannot be used to change the tuning. Elevated system radials are resonant and they need to be pruned to lengths for the bands that are used. Slight adjustments of SWR minimums can be made by shortening or lengthening the starting dimensions between the antenna tubing sections and the traps in performance installations. These adjustments may not provide enough changes and you will have to proceed with Trap Calibration for additional tuning instructions in Chapter 7. Do NOT cut the antenna tubing. - 29 - Chapter 6 - DX Engineering Enhanced Antenna Systems Special Hustler BTV Packages Available from DX Engineering Radial Plate to Mounting Pipe Attaching Ground Radial Wires to the Radial Plate Tilt Base Mounting Plate to Mounting Pipe BTV Antenna Base Section to Tilt Base Testing the Tilt Base Alternate Feedpoint Connections The DXE-VFCC-H05-A Vertical Feedline Current Choke 30 32 33 34 34 35 36 37 Special Hustler BTV Packages Available from DX Engineering Hustler 4-BTV Package - High Performance HF Vertical System - DXE-HSR-4BTV-P For a high performance HF ground mounted vertical system, the DX Engineering Hustler 4-BTV Package provides 40/20/15/10 meter band coverage. Hustler 5-BTV Package - High Performance HF Vertical System - DXE-HSR-5BTV-P For a high performance HF ground mounted vertical system, the DX Engineering Hustler 5-BTV Package provides 80-75/40/20/15/10 meter band coverage. Hustler 6-BTV Package - High Performance HF Vertical System - DXE-HSR-6BTV-P For a high performance HF ground mounted vertical system, the DX Engineering Hustler 6-BTV Package provides 80-75/40/30/20/15/10 meter band coverage. Economical Antenna Installation Packages! o Dramatically improved transmit and receive signals o Best pattern and excellent RF connections o Safe and easy tuning using our patented Tilt Base so one person can walk the antenna up or down o Performance boosting, organized radial wire attachment system o Easy handling 14 gauge insulated radial wire, ring terminal crimp lugs and lawn staples The DX Engineering Hustler BTV Package includes the essentials of a high performance antenna system: (1) HSR-BTV – Hustler Multi-Band Trap Vertical Antenna (1) DXE-TB-3P - Tilt Base for Hustler BTV Antennas (1) DXE-RADP-3 - Radial Plate, Stainless Steel & 20 Sets of SS Attachment Hardware (1) DXE-AOK-DCF - Direct Coax Feed SO-239 for Hustler BTV Verticals (1) DXE-8UDU002 – Low Loss RG-8/U Coax Cable PL-259s, 2 ft., DCF to Bulkhead (1) DXE-363-SST - Bulkhead Fitting, SO-239 Socket, Silver Plating, Teflon Insulation (1) DXE-RADW-500K - Bulk Radial Wire Kit, 500 ft. Wire, 20 Ring Terminals, 100 Lawn Staples (3) DXE-SSVC-2P – Stainless Steel V-Clamp, 1 to 2 inch OD for Radial Plate and Tilt Base - 30 - The installation and tuning is breeze with the Tilt Base. Your radial wire attachment is made easier with the Radial Plate mounted slightly above ground. The Bulk Radial Wire kit allows you to cut your symmetrically spaced radials to fill your space. Your radial wires do not need to be resonant lengths on the ground, and if they cannot run away from the antenna in all directions, that is okay! The antenna performs virtually the same as when radials are run in all directions. Many radials, even if they are short, are better than few long ones. Both accessories are attached to your antenna mounting pipe or tube with the adjustable Stainless Steel V-Clamps. Items required that are not included in the DX Engineering BTV Package: (1) 1-1/4 or 1-1/2 inch ID schedule 40 galvanized steel pipe, min. 4 feet long, to mount Tilt Base and Radial Plate. The mounting pipe must be between 1 and 2 inches outside diameter (OD) (1) UMI-81343 - Anti-Seize, 1 oz. Squeeze Tube, for Stainless Hardware (1) DXE-P8A - Penetrox A Anti-Oxidant - 8 oz. Squeeze Bottle, for aluminum tubing (1) SUM-900031 - Automatic Wire Stripper/Crimper/Cutter, 24-10 Gauge “I wish I would have ordered” - Suggested items for a better installation: (1) DXE-AOK-12M - 12m Add-On Kit for the Hustler BTV Series Vertical (1) DXE-AOK-17M - 17m Add-On Kit for the Hustler BTV Series Vertical (1) DXE-AOK-60M - 60m Add-On Kit for the Hustler BTV Series Vertical (1) DXE-AOK-80M - 80m Add-On Kit for the Hustler 4-BTV Vertical (2) DXE-AOK-TB1193 - Wing Nut No-tools Tilt Base Add-on Kit (pack of 2) – for easy BTV tilting (1) DX Engineering Custom RG-213/U Cable Assembly – RG-213/U Coax, PL-259 Connectors at each end – Call to order your length, 26 feet up to 500 feet (1) MFJ-259B Antenna Analyzer for precise antenna tuning PolyPhaser Coaxial Cable Lightning Protectors Contact DX Engineering Customer Support for ordering or installation assistance. (330) 572-3200 Contact DX Engineering to receive your copy of the latest catalog of quality DX Engineering products! Better yet - visit the DX Engineering website at: http://www.DXEngineering.com - 31 - Optional Radial Plate to Mounting Pipe Install the optional DXE-RADP-3 Radial Plate on the 2" OD customer supplied mounting pipe using one optional DXE-SSVC-2P Stainless Steel V-Clamp as shown in the drawing below. Mount the Radial Plate so you have approximately 1" of space between the bottom of the plate and the ground level. This will allow easy access to install the radial wire hardware. The DXE-RADP-3 Radial Plate comes with 20 sets of stainless steel hardware for mounting the radial wires. Mount the plate as shown in relation to how the Tilt Base is mounted. (For reference, there is a picture of a completed BTV base, with optional Tilt Base, Radial Plate and VFCC shown below). DXE-RADP-3 Radial Plate Installation The picture to the right shows the Hustler BTV base, DXE-TB-3P Tilt Base DXE-RADP-3 Radial Plate DXE-VFCC-H05-A Vertical Feedline Choke DX Engineering Radial Wires - 32 - Attaching Ground Radial Wires to the optional Radial Plate Using the 20 sets of supplied 1/4" stainless steel hardware (Bolt, Flat Washer, Star Washer, Split Washer, Nut) connect the optional ground radial wires to the DXE-RADP-3 Radial Plate as shown in the drawing below. Additional hardware kits are available (DXE-RADP-1HWK) that contain 20 sets of Radial Plate Hardware. At a minimum, 20 radials, each 20 feet long, should be used with the Hustler BTV antenna. DXERADW Radial Wire, a 14 gauge stranded copper with a black relaxed PVC insulation wire, is suggested for the best results. Better results are obtained with 30 to 60 radials, each 32 feet long. The wire radials should placed as symmetrically as possible straight from the feedpoint around the vertical antenna and spaced evenly, regardless of how many radials are used. Do not cross, zig-zag or bunch any radial wires as this nullifies their effectiveness. If you have limited space, put in as many straight radials as you can. The radials must be connected to the shield of your feedline. The DXE-RADP-3 Stainless Steel Radial Plate is an ideal optional item which provides an excellent system for attaching radial wires to your vertical antenna system feedpoint. Radial wires can be laid on the roots of the grass using DXE-STPL Radial Wire Anchor Pins to hold them down. Using enough staples will ensure the wires will not be snagged by mowers, people, or animals. As described earlier, the grass will quickly overgrow the radials and it will be virtually impossible to see them. There are optional DX Engineering Radial Wire Kits available. DXE-RADW-500K/BD contains a 500 foot spool of 14 gauge copper stranded wire with black PVC insulation, 20 Terminal Lugs and 100 Steel or Biodegradable Lawn Staples. The DXE-RADW-1000K/BD Radial Wire Kit contains a 1,000 foot spool of 14 gauge copper stranded wire with black PVC insulation, 40 Terminal Lugs and 200 Steel or Biodegradable Lawn Staples. RADW-20RT, -32RT or -65RT contain 20 each radial wires with 1/4" terminal attached. These kits come in 20 Ft, 32 Ft, or 65 Ft lengths. Depending on the number of radial wires used, space them out evenly around the Radial Plate. The Radial Plate will accommodate up to 60 radial wires (60 laser drilled holes), or up to 120 radials if doubled up. Radial Wire Pattern Radial Wire Hardware Installation - 33 - Tilt Base Mounting Plate to Mounting Pipe Install the Tilt Base to the 2" mounting pipe using two DXE-SSVC-2P Stainless Steel V-Clamps allowing approximately 7" clearance between the bottom of the tilt base plate, to the top surface of the DXE-RADP-3 Radial Plate as shown to the right. Make sure the Tilt Base and optional DXERADP-3 Radial Plate are oriented correctly for the direction you wish to tilt the antenna. See page 35 which shows the tilt action. Tighten the clamps evenly so the length of the exposed threads is approximately equal. Any clamp should be tightened evenly from side-toside with an equal amount of thread above each nut. BTV Antenna Base Section to the optional Tilt Base Using the new hardware included with DXE-TB-3P Tilt Base, install the four hex head bolts, four flat washers, four split washers and four hex nuts in the BTV Base Section as shown to the right. Place the BTV Lower Base Section into the holes of the mounted Tilt Base and loosely install the Tilt Base mounting hardware shown to the right. Leave the flange nuts and Nyloc nuts slightly loose. Using a wrench or nut driver, securely tighten the two Nyloc Nuts at the bottom of the Tilt Base. Then loosen them one-half turn each. This will allow proper movement of the Tilt Base while raising or lowering the antenna. It is not necessary to tighten these nuts more securely unless further tilt operation is no longer required. They should not be loosened more than one-half turn at any time. - 34 - Testing the Tilt Base Test the tilt function to ensure proper clearances. Standing in front of the Tilt Base, lift the antenna base section, slide it to the right, and let it down slightly until the lower outside bolt is resting in the pivot point. Then slowly tilt as shown in the picture below. Make sure when you are tilting the antenna to lift, slide to the right, and then tilt. Be careful to keep the pivot bolt resting in the pivot point. Reverse the process when raising the antenna. It is important to note that the lower, outside bolt becomes the pivot point while raising or lowering the antenna. This pivot bolt MUST be retained in the pivot point. It seems natural to push the antenna toward the Tilt Base while raising. Push up while raising, but not toward the base since this could cause the pivot bolt to lift out of the slot and allow the mechanism to bind up and bend the lower bolts. The Tilt Base is not made to support the whole antenna by itself when tilted. When the antenna is tilted over, ensure you have some sort of table, stand, or saw horse to set the antenna on to aid in supporting the weight. When the antenna is in the upright position, ensure the mounting hardware (flange nuts and Nyloc nuts) are tightened. Tilt Action Note: A pair of sawhorses or ladders should be used to support the vertical sections during assembly with the tilt-base and whenever the vertical is tilted down. Do not allow the Tilt Base to support the entire weight of the antenna when horizontal. - 35 - Alternate Optional Feedpoint Connections The DXE-AOK-DCF Direct Coax Feed assembly by DX Engineering for the Hustler BTV series antennas allows direct connection from a coaxial cable with a PL-259 connector. Features Laser Cut Stainless Steel Bracket and Stainless Steel Hardware High Quality SO-239, Teflon insulation, 14 gage copper insulated wire link with weather sealed connections pre-installed Provides a positive coaxial connection to the antenna system, rated at 1500+ watts Can be positioned in three configurations Custom Manufactured for the Hustler BTV series antennas Allows easy removal of coaxial cable for maintenance Depending on your antenna configuration, you may install the DXE-AOK-DCF in one of three ways. The direction of the SO-239 will depend on your particular installation set up. Ensure the direction chosen allows the coaxial cable to be properly connected. When the DXE-TB-3P Tilt Base for Hustler BTV Antennas is being used, allow clearance for the coaxial cable when tilting. Three Mounting Possibilities Upright Position Tilted Position Suggested orientation using Tilt Plate & Radial Plate Radial Plate, Tilt Base & Coaxial Cable are optional The instructions included with the DXE-AOK-DCF SO-239 Add On Kit contains detailed installation instructions. You will also need the DXE-8UDU002 24 Inch RG-8 Foam Coax Cable Assembly or DXE-CBC-8XU2 24 Inch RG-8X Foam, Belden 9258, Coax Cable Assembly and a DXE-363-SST Bulkhead Fitting, SO-239 Socket, Silver Plating, Teflon® Insulation to connect to the Radial Plate. - 36 - A second method that may be used is the connection of a pigtail from the feedline connection on the Hustler BTV base section to the Radial Plate using a DXE-8X19-RT 19" Pigtail for the Hustler BTV Base to PL-259 along with a DXE-363-SST Bulkhead Fitting, SO-239 Socket, Silver Plating, Teflon® Insulation to connect to the Radial Plate. This cable makes connecting the Hustler BTV antennas to 50 Ohm coax easy! Utilize this pigtail to convert the Hustler BTV base connections to a PL-259 connector. Then, use a DXE-363-SST bulkhead connector to mate the pigtail to your feedline. Done! The pigtail and bulkhead connector are ideal for use with the DXE-RADP-3 radial plate. This pigtail is not required if you order the optional DXE-VFCC-H05-A Vertical Feedline Current Choke for connection to the base of the Hustler BTV series antenna. It is also not required if you use the DXE-AOK-DCF SO-239 add-on kit for direct connection of your coaxial cable feedline to the BTV antenna. A third way of making feedline connections to the Hustler BTV antennas is the use of an optional Feedline Current Choke. In cases where you have RFI in the shack, the DXE-VFCC-H05-A DXE Engineering Vertical Feedline Current Choke may be the answer. The VFCC stops unwanted RF from using your coaxial cable and either a radial or a radiating antenna. Refer to the manual that comes with the DXE-VFCC-H05-A Vertical Feedline Current Choke for basic assembly of insulated shelf, bracket and VFCC mounting on insulated shelf. The Insulated shelf and mounting bracket are installed on the mounting pipe approximately 1/4" above the Radial Plate using one optional DXE-SSVC-2P V-Clamp as shown below. - 37 - Using the two tinned copper braids supplied with the optional DXE-VFCC-H05-A Vertical Feedline Choke, connect them as shown in the VFCC manual as well as being shown below to the Radial Plate and the antenna feedpoint. Make sure the proper braid is connected to the feedpoint (refer to the VFCC manual for details). Ensure the tinned copper braid is not shorting out and the tilt action works correctly. - 38 - Chapter 7 - Tuning Understanding Trap Calibration Hustler Traps Hustler Trap Calibration - Resonance Adjustment Procedure Tuning the 80 Meter Resonator Whip for the 5-BTV and 6-BTV 39 40 42 43 Understanding Trap Calibration The Hustler warranty states that adjustment of the traps will void the warranty. As described in this manual, trap adjustment is usually required. When you purchased your Hustler BTV from DX Engineering, your warranty is safe. Trap calibration adjustment will NOT void the warranty of a Hustler antenna purchased from DX Engineering. The antenna traps will not be harmed by performing this tuning procedure. Note: For the purposes of these instructions the term “resonance” or “resonant frequency” is defined as the point of lowest SWR and may be used interchangeably. A high efficiency quarter-wave vertical requires a good radial system. Installations with few or no radials are inefficient due to high ground losses. These losses are the reason that verticals with no radials or few radials seem to exhibit a great SWR curve, which is a sure sign of an inefficient vertical antenna. Therefore, removal of radials to achieve a lower SWR, or a broader SWR curve, is not a tuning solution. DO NOT attempt to tune the vertical antenna by changing radials in any way. After Installing a Good Radial System, the Hustler 4-, 5- and 6-Band Trap Vertical antennas, as supplied by the manufacturer, will normally resonate at frequencies much lower than desired, and especially when installed on very good soil, saltwater or a metal roof. Readjusting antenna resonance is easy. The traps were made to be adjustable so that retuning the vertical for inband resonance is not difficult. The trap sleeve position adjustment may be done the same as on other parts of the antenna. You can loosen the stainless element clamp, make a trap sleeve adjustment and tighten the clamp. Note that a slight movement of the trap sleeve will produce a rapid change in the frequency of lowest SWR. Follow the procedure described below carefully to make large frequency adjustments to any Hustler BTV HF antenna. Never Cut the Aluminum Tubing - You cannot properly adjust the frequency of the Hustler BTV antenna by cutting the traps or by cutting the aluminum tubing above or below the traps. The right tool for the job - An antenna analyzer such as the MFJ-259B is the best tool to use for adjusting any antenna to the target frequency if it is connected directly to the feedpoint. Since that is never convenient, use a six foot piece of 50Ω coaxial cable between the antenna and the analyzer and tune for minimum SWR. Your body can affect the tuning if you are too close to the antenna. If the coaxial cable length is too long, the analyzer SWR measurements may be incorrect. When adjusting antennas, your primary goal is to move the low SWR point to your - 39 - target frequency. [Perfect analyzer impedance readings near 50 Ω resistance and X=0 or ± j0 reactance are not realistic. The frequency where the lowest SWR occurs will likely result in analyzer readings that are not perfect.] If you only have an SWR or power meter use it at the antenna. Use your transceiver or analyzer and plot a chart of SWR measurements at several frequencies across the range below and above your target frequency, repeating after every antenna adjustment. Starting at a low frequency, record SWR measurements at regular increments higher in frequency to determine where the lowest SWR occurs. When making antenna adjustments, DO NOT watch a certain frequency hoping for a minimum SWR to appear. Over-adjustment could cause you to miss the “dip” as it passes your target frequency. It is better practice to take enough readings in order to follow the minimum SWR point as you make adjustments so you can achieve low SWR at your target frequency. Make sure you adjust the antenna traps to frequencies that are going to be used, not simply in the middle of the band. Hustler Traps The manufacturer sets the traps to specific dimensions. Since you are optimizing the antenna system using a good radial system, adjustments will have to be made. For reference, the photo below shows the traps as they come from the manufacturer. You should mark spot where the trap lower tube meets the trap sleeve with a felt tip marker. This will help in case you have to go back to the initial manufacturer's settings. [Note: The dimensions shown may vary due to manufacturing assembly tolerances.] In this tuning procedure we'll be talking about loosening the trap cover, loosening the band clamp and adjusting the trap sleeve. The picture to the left shows these parts. The manufacturer puts a silicone sealant inside the black plastic trap covers. Loosen the band clamp and twist the trap sleeve while holding the black trap cover will loosen it. The silicone that was put in there can be removed so the black trap cover and trap sleeve can be repositioned. Resealing the trap cover may not be necessary, as it grips the trap top tube tightly and the trap sleeve has slits at the bottom for moisture to escape. If - 40 - you choose to use silicone sealer, be certain it is non-acetic (without a vinegar smell) and it does not contain metal (UMI-82180). You must adjust each trap with the antenna completely assembled – traps cannot be adjusted before assembly. It is not necessary to remove each trap from the larger tubing below it, or measure it, in order to make the trap sleeve adjustment to tune the antenna. The lettered dimensions charted below are only starting points and will normally be changed for fine tuning. 4-BTV 5-BTV 6-BTV - 41 - Hustler Trap Calibration - Resonance Adjustment Procedure Tune all Hustler BTVs starting with the 10 meter trap, because any adjustment done there affects the rest of the antenna, regardless of the number of bands it has. 1. Slightly loosen the band clamp at the bottom of the trap sleeve, NOT the clamp on the larger tube below. 2. Loosen the trap cover. 3. Adjust the trap sleeve position on the trap bottom tube. Typical adjustment is to move the trap sleeve downward on the trap lower tube about 1/4 to 1/2 inch reducing the A2 dimension below the 10 meter trap for a shift of +500 kHz. 4. Firmly tighten the band clamp. 5. Reposition the trap cover. 6. Raise the antenna, re-test to find the new frequency the SWR dip. 7. Readjust (repeat steps 1-6) to move the SWR dip to the desired frequency. After you adjust one trap, check all bands before repeating steps 1 though 7 for the other traps in order (15M then 20M then 30M depending on BTV model). It is not necessary and counter-productive to readjust the spacing (A2, B2, C2 or D2) to the original chart dimension after a trap sleeve adjustment. In some cases, you may need to increase these spaces between the trap sleeves and the antenna sections to allow enough spacing to complete recalibration. Note: Like other antenna adjustments, trap adjustments are not permanent and can be restored easily. You marked the position of the trap sleeve on the trap lower tube before you started, so returning to the starting point will be simple. Do not worry if you cannot tune the antenna to the lowest possible SWR of 1.0:1 at your frequency of choice. A minimum SWR of 1.4:1 to 1.6:1 is acceptable for HF operations, representing a minor RF power reflection of only 3 to 5%. Your new high efficiency antenna system is now properly installed and tuned and will reward you with years of service. In some cases if you are still low in the resonant frequency, you may have to adjust A1, B1, C1, D1, E1 in small increments depending on which band(s)is/ are effected. If you do make these adjustments, trap calibration may also require some further adjustments. - 42 - Tuning the 80 Meter Resonator Whip for the 5-BTV and 6-BTV An antenna analyzer is the best way to adjust the resonant frequency of an antenna. The MFJ-259B Antenna Analyzer is an ideal piece of equipment for tuning a Hustler BTV antenna. Measurements should be made at the antenna using a short (5 or 6 ft.) piece of 50Ω coax between the antenna and the analyzer. If you are too close to the antenna your presence can affect the tuning, if you are too far, the coax length may act as a radial and resonate. Taking readings close to the antenna also eliminates the possibility of a long or marginal feedline influencing the tuning or causing erratic readings. You should tune the antenna for low SWR rather than resonance (X=0) although they are often close or at the same point. Normally, the SWR goes down somewhat and the bandwidth increases once the feedline is reconnected and you measure the SWR at the operating position. The whip must be trimmed for the frequency desired. The chart below shows good starting points. Using the MFJ-259B analyzer will aid in getting the desired resonance. Make small adjustments to the whip length and verify you are going in the proper direction. Use the old adage "Measure twice, cut once". If you desire to use two frequencies that are far apart (CW -vs- SSB), you may want to have two whips. One whip cut for the lower frequency in the CW area of the band, and another whip cut for the higher end in the SSB area of the band. (Part Number HSR-49-04-80S from DX Engineering) Changing the whip is made easier when using the DX Engineering Tilt Base. DIMENSIONS INDICA TED A RE A PPROXIMA TE FREQ UEN CY ( M Hz) 4 .0 0 0 3 .9 5 0 3 .9 0 0 3 .8 5 0 3 .8 0 0 3 .7 5 0 3 .7 2 5 3 .7 0 0 3 .6 5 0 3 .6 0 0 3 .5 5 0 3 .5 0 0 Exposed Tip Rod Length 18” 1 9 -5 / 8 ” 21” 2 2 -1 / 2 ” 2 4 -1 / 8 ” 2 5 -5 / 8 ” 2 6 -1 / 2 ” 2 7 -1 / 4 ” 29” 3 0 -5 / 8 ” 33” 3 4 -5 / 8 Your Final Length The above dimensions are the exposed tip rod length. See illustration. The DXE-VMN-1 Vertical Antenna Matching Network is designed for use on 160, 80 and 40 meter quarter-wave verticals and with the Hustler 5 and 6-BTV. In some vertical antenna installations with excellent radial systems, achieving the best SWR on the lower bands may be difficult without some means of adjusting the impedance. The DXE-VMN-1 allows easy adjustment for lowest SWR. The DXEVMN-1 Vertical Antenna Matching Network will aid in tuning the customer selected portion of the 80 meter band to the minimum SWR without affecting operation on the other, higher frequency bands. - 43 - Chapter 8 - Guying the Hustler BTV Antenna System 44 Guying the Hustler BTV Antenna System Most verticals need at least one set of three or four guy ropes to survive moderate to high winds. If you roof mount, you will need two sets of guys, one set near the middle and another high on the vertical. Tie the rope around the antenna just above one of the band clamps. Ultraviolet resistant Dacron/polyester rope is the best choice, such as model SYN-DBR-94. Several other sizes and lengths are also available from DX Engineering. Gentle stabilization is what’s required, not a strong anchoring like a tower would need. For ground mounted vertical antennas of any brand, DX Engineering offers guying kits that include the rope and ground anchors (DXEGUY100, 200, 400 or 1000-KIT). Some vertical antenna manufacturers indicate their antennas do not need guying. During times of high winds or ice loading, some of these verticals may sustain damage or fail altogether. With the small amount of effort needed to install a four point guying system, the risk hardly seems worth taking. A four-point guying scheme provides the best mechanical advantage to prevent wind stress, regardless of direction. When using an optional Tilt Base, a four point guying system is recommended because just one of the guy ropes has to be loosened when you tilt the vertical down. The remaining guys help stabilize the vertical in three directions when being raised. The DX Engineering Vertical Guying Kits have been designed to be used with ground mounted vertical antenna systems. The guying kits are ideal for fixed or portable installations. Typical BTV Guying Schemes 5-BTV 6-BTV - 44 - Chapter 9 - Reference Information Elevated Mounting of the Hustler BTV Antenna The Quarter-Wave Vertical on a Metal Roof What Trap Do I Have? Hustler BTV Replacement Parts Diagram Weatherproofing Coaxial Cable Connections Lightning Protection - For Any Installation Hustler BTV Specifications 45 46 48 49 50 50 51 Elevated Mounting of the Hustler BTV In some situations, an elevated or roof-mounted vertical installation is the only option. Elevated installations are more difficult. In all but certain metal roof elevated installations, resonance-tuned radials must do the job of collecting RF currents. Imagine all of the quarterwave resonant length wires attached to the base of the antenna, spreading radially (away from the base of the vertical in all directions). For best DX performance, these radials should slope down from the vertical at a 45 degree angle. You can connect the ends of the long radials to support poles or trees. Use the same care as you would for a dipole antenna, keeping the ends insulated and clear of any metal. We recommend four resonant radials per band to enhance low angle radiation. If you must elevate your antenna, Pre-Cut Radial Wire Sets are also available from DX Engineering. An antenna analyzer such as the MFJ-259B or an SWR meter is used to make resonant, elevated radials. For the Hustler BTV series and most other quarter-wave vertical antennas, it is best to start with the highest band, usually 10 meters. Determine the frequency within the 10 meter band where you want the vertical to resonate. Construct two radials, as if you were making a dipole, to resonate on that frequency. Next, make two more radials the same length. Then, connect all four to the base of the vertical or the Radial Plate. Fan them out symmetrically from the antenna. Using the information in Chapter 7, tune the 10 meter section of the vertical for the lowest SWR on the same frequency as your radials. Repeat this procedure for the remainder of the bands your antenna covers, going from the highest frequency band to the lowest frequency band. In an elevated vertical installation, do not ground the radials, the mast, or the vertical mount. Grounding them will probably detune your resonant radial system! Be careful - The vertical will be high above the ground, be aware of any overhead power lines that may touch the vertical antenna or radial wires. The vertical should be at least its own height plus 10 feet away from any wires or obstacles so if it falls, it cannot come in contact with electrical power lines (remember the 10 foot safety rule). Contact with power lines can be fatal! Proper guying of your elevated vertical requires planning. Find good guying anchor points before installing your antenna. - 45 - The Quarter-Wave Vertical on a Metal Roof Over the years, many Amateur Radio operators have successfully used a metal roof as the ground plane or radial system for their quarter-wave HF vertical antenna. This is possible with a metal roof on a home, barn, garage, carport, RV, porch and metal sheds or awnings, and even on commercial buildings. The actual height of the metal roof above ground is not especially important for an HF quarter-wave vertical antenna. In order to take advantage of a metal roof as a ground plane, you cannot elevate a quarter-wave vertical high above a metal roof. The key is that the antenna feedpoint, which is usually at the mounting bracket, should be the same physical level as the metal roof to offer the best ground plane effect. The feedpoint of the vertical should not be any more than 4 to 8 inches above the roof, even if the mechanical mounting would allow for a higher installation. In other words, raising a quarter-wave vertical antenna many feet above the metal roof does more harm than good with regard to impedance matching and tuning. Mounting the HF quarter-wave antenna at the top of a tall mast, without a feedpoint level radial system, does not function electrically, and is mechanically very difficult. If you must use a tripod for mechanical mounting reasons, use one that is as short as possible. With a tripod mount, you must use a basic wire radial system that emanates from that slightly elevated feedpoint and drapes down over the metal roof to make use of the coupling effect described below. You cannot make a direct connection of the coax shield to the metal, due to the distance of the feedpoint above the metal. There are two ways that a quarter-wave vertical can be installed on a metal roof or large metal awning as a ground plane. The potentially less efficient installation uses direct grounding of the coax shield and antenna bracket to the metal roof. This might work well for transceiving, and would probably "appear" to work well due to excellent receiving results. However, you may find that you aren't easily heard. This would be an indication that the sections of your metal roof are not well bonded. Remember, we are trying to provide the same low impedance RF current collection and distribution as a ground mounted system of 30, or more, straight copper wire radials that are about one-quarter wavelength long. Just because the metal panels of a metal roof are connected with a bunch of screws or nails, and even when a multi-meter shows DC continuity between the panels, does not mean that you have a good radial system for RF. You can try it and believe that it is working great, but you may not really know how efficient the directly connected metal roof is working for you. Measured at the antenna, a frequency range of over 400 kHz under a 2:1 SWR across and beyond the 40 meter band (7.0 to 7.4 MHz) would be a general indication of radial system or ground plane inefficiency, depending upon the size of the vertical. Conversely, a very efficient ground plane will narrow the SWR bandwidth of a vertical, as narrow as 150 kHz on the 40 meter band on the BTV series antennas. The preferred installation for your quarter-wave vertical using a metal roof or large awning as your ground plane is to connect the coaxial cable shield to several (6 to 16) insulated radial wires that are placed on, under, or are draped out over the metal roof. The radials must be attached to the antenna feedpoint, never at the bottom of a tall mast or tripod. Capacitive and inductive coupling between the radial wires and the metal roof accomplishes the collection of the RF currents. The number of - 46 - these "coupling radials" that you need will vary from one installation to another, but you may need fewer than would be required for a high performance elevated mount or ground mount where there is no metal roof. They may be resonant lengths, unless space is a concern. Many short radials may get the job done for the lower frequency bands, too. In this installation, the antenna mounting bracket, the coax shield, and the radial system may need to be kept insulated from the mast and metal roof, to allow the coupling effect to work properly. Actually connecting the metal roof to the radial system may work better for your installation. This is another example of the fun of HF; where changing a simple electrical antenna connection may dramatically improve your antenna system performance. Ideally, a quarter-wave vertical is physically mounted in the center of a metal roof ground plane. This would provide the best omni-directional low angle radiation pattern. However, mounting a structurally sound vertical antenna at the center of a roof is not always possible. It is true that mounting the vertical at one end of the roof will affect the omni-directional pattern. However, the signal reduction of a few dB in the direction away from the metal roof, or any very good radial system, will not prevent you from enjoying the low angle pattern and resulting DXing benefits of quarter-wave vertical! Consider the DX Engineering Vertical Feedline Current Choke kit model DXE-VFCC-H05-A, to make up for deficiencies in the metal "ground plane" or radial system. This choke and its properly mounted insulated shelf kit isolates the feedline, balances currents on the system for maximum signals, and offers the additional advantages of reduced noise and RFI/TVI. You can expect your large area metal ground plane or radial system to make a quarter-wave vertical resonate especially low in frequency and exhibit an impedance below 50 ohms at the feedpoint. IF that happens on your system, congratulations! You are the proud owner of a highly efficient quarter-wave vertical antenna system! Now, adjusting the antenna for minimum SWR at the desired frequency and re-matching the feedpoint to the feedline may require some additional adjustments, as discussed in the Tuning the Hustler section of this manual, including the addition and use of a simple Vertical Matching Network, model DXE-VMN-1. DXE-VMN-1 - 47 - What Trap Do I Have? In some cases the trap you have may not be easily identified. During manufacturing, New-Tronics applies a colored label to the trap sleeve, just below the trap cover. 10M = Orange, 15M = Red, 20M = Green and 30M is Blue. If your trap label is missing, you will have to open up the trap and count the turns of wire on the internal coil. You can re-assemble the trap according to the dimensions in Chapter 7. - 48 - Hustler BTV Replacement Parts Diagram - 49 - Weatherproofing Coaxial Cable Connections After firmly attaching your existing coaxial cable, the PL-259 and SO-239 should be weatherproofed using DXE-3M2155 rubber splicing tape which is a conformable self-fusing rubber electrical insulating tape. For outdoor use, the rubber splicing tape should be protected from UV deterioration with an overwrap of TRM-06133 for all weather applications. Peel back the protective covering. Tightly wrap the DXE-3M2155. When wrapping, stretch the rubber splicing tape up to twice its normal length. Wrap tightly around the coaxial cable and connectors. Overlap each wind of the tape by about 50%. Use the TRM-06133 as an overwrap to give the assembly UV protection. Cover the DXE-3M2155 splicing tape completely. Lightning Protection - For Any Installation Proper lightning protection and grounding is a prudent investment for any Amateur Radio antenna installation. DX Engineering offers general grounding information, specific examples with available components and PolyPhaser® protectors for safe and worry-free antenna installations. - 50 - Antenna Specifications Copyright © New-Tronics Antenna Corporation - 225 Van Story St. - Mineral Wells, Texas 76067 Re-printed with permission - 51 - Copyright © New-Tronics Antenna Corporation - 225 Van Story St. - Mineral Wells, Texas 76067 Re-printed with permission - 52 - Copyright © New-Tronics Antenna Corporation - 225 Van Story St. - Mineral Wells, Texas 76067 Re-printed with permission - 53 - Chapter 10 - Additional Operating Bands Adding Additional Operating Bands to your Hustler BTV Antenna 54 Adding Additional Operating Bands to your Hustler BTV Antenna DX Engineering makes "Add-On-Kits" that can expand the use of your Hustler BTV antenna allowing you to be active on more HF bands! DXE-AOK-60M Add-On-Kit 60M for the Hustler BTV Series Verticals The DX Engineering DXE-AOK-60M kit adds 60 meter coverage to the Hustler BTV series of vertical antennas without giving up any existing band coverage. This kit will operate across the entire 60M band with an SWR of 1.5:1 or less. The kit includes the 60 meter resonator and new capacitive compensator. No disassembly of the existing antenna is required, simply add this kit, make some minimal tuning adjustments and you're on the air with an additional band. The BTV will retain full performance on all bands. Power Rating: 400 Watts PEP - see FCC 60 meter Rules Bandwidth: Covers the Entire 60M band with a SWR of 1.5:1 or less DXE-AOK-17M Add-On-Kit 17M for the Hustler BTV Series Verticals The patented* DX Engineering DXE-AOK-17M kit adds 17 meter coverage to the Hustler BTV series of vertical antennas without giving up any existing band coverage. This kit will operate across the entire 17M band with an SWR of 1.5:1 or less. No disassembly of the existing antenna is required, simply bolt this kit over the 10M trap, make some minimal tuning adjustments and you're on the air with an additional band. *US Patent No. 7,554,500 Power Rating: 850 Watts PEP Bandwidth: Covers the Entire 17M band with a SWR of 1.5:1 or less DXE-AOK-12M Add-On-Kit 12M for the Hustler BTV Series Verticals The patent pending DX Engineering DXE-AOK-12M kit adds 12 meter coverage to the Hustler BTV series of vertical antennas without giving up any existing band coverage. This kit will operate across the entire 12M band with an SWR of 1.5:1 or less. No disassembly of the existing antenna is required, simply bolt this kit on your BTV, make some minimal tuning adjustments and you're on the air with an additional band. Power Rating: 800 Watts PEP Bandwidth: Covers the Entire 12M band with a SWR of 1.5:1 or less DXE-AOK-80M Add-On-Kit 80M for the Hustler 4-BTV Verticals The DX Engineering DXE-AOK-80M kit adds 80 meter coverage to the Hustler 4-BTV vertical antenna without giving up any existing band coverage. This kit is tunable to operate across a small segment of the 75/80M band with an SWR of 1.5:1 or less. Larger frequency excursions are easily made by lowering the antenna and adjusting the length of the top rod. A DXE-TB-3P Tilt Base for Hustler BTV Antennas makes this a simple job. A special DX Engineering instruction manual aids assembly and tuning for a perfect installation. A good SWR meter or Antenna Analyzer will allow you to check the overall performance of the antenna while making final adjustments. No disassembly of the existing antenna is required, simply add this kit to the top of the existing installation, make some minimal tuning adjustments and you're on the air with an additional band. - 54 - Chapter 11 - Recommended Accessory Items For Assembly For Quick Tilt Action For Tuning 55 55 56 Recommended Accessory Items For Assembly UMI-81343, UMI-81464, DXE-NSBT8, DXE-NMBT8 - Never-Seez & Anti-Seize An Anti-seize compound MUST be used on any Stainless Steel nuts, bolts, clamps or other hardware to prevent galling and thread seizure. Any of these products can be used for this purpose. *UMI-81343 *UMI-81464 *DXE-NSBT8 *DXE-NMBT8 Anti-Seize, 1 oz. Squeeze Tube Anti-Seize, 8.5 oz. Aerosol Can Never-Seez, 8 oz. Brush Top Never-Seez, 8 oz. Brush Top, Marine Grade * These products are limited to domestic UPS Ground shipping only DXE-P8A Penetrox A - Use Penetrox A electrical joint compound to affect a substantial electrical connection between metal parts such as telescoping aluminum tubing or other antenna pieces. Assures high conductivity at all voltage levels by displacing moisture and preventing corrosion or oxidation. For Aluminum to Aluminum, Aluminum to Copper or bare conductors. 8 oz. squeeze bottle * This product is limited to domestic UPS Ground shipping only For Quick Tilt Action DXE-AOK-TB1193 - Wing Nut No-tools Tilt Base Add-on Kit (pack of 2) Wing nut knobs for tool-less quick release of the DX Engineering DXE-TB-3P or DXE-TB-4P Tilt Base handy for lowering the antenna for tuning or daily stealth operation. Simply remove the existing hex nuts and thread on the wing nuts. The old hardware stores on the tilt base for future use. Purchase two sets to also allow tightening of the lower mounting hardware without tools - and for extended periods of upright installation and use. - 55 - For Tuning MFJ HF/VHF Antenna/SWR/RF Analyzer w/ LCD, Counter & Meters - MFJ-259B The MFJ-259B RF analyzer is a compact battery powered RF impedance analyzer. This unit combines four basic circuits; a 1.8-170 MHz variable frequency oscillator, a frequency counter, a 50 ohm RF bridge, and an eight-bit micro-controller. This unit makes a wide variety of useful antenna or impedance measurements, including coaxial cable loss and distance to an open or short. Primarily designed for analyzing 50 ohm antenna and transmission line systems, the MFJ-259B also measures RF impedances between a few ohms and several hundred ohms. It also functions as a signal source and frequency counter. The frequency range of impedance measurement is 1.8 to 170 MHz, in six overlapping bands. Requires 10 AA size batteries for portable operation (not furnished). MFJ 12 VDC 500 mA AC Adapter w/ 2.1 mm Plug - MFJ-1312D The MFJ-1312D is a 12 Vdc 500 ma AC Adapter with a 2.1 mm jack. MFJ Carrying Pouch w/ Window for MFJ-209/MFJ-249/MFJ-259B - MFJ-29C Tote your MFJ-259B anywhere with this genuine MFJ custom carrying case. Has back pocket with security cover for carrying dip coils adaptors and accessories. Made of special foam-filled fabric, the MFJ-29C cushions blow, deflects scrapes, and protects knobs, meters and displays from harm. Has a clear protective window for frequency display and cutouts for knobs and connectors -- use your MFJ SWR Analyzer without taking it out of your case. Additional Accessories for your Hustler BTV 56 Additional Accessories for Your Hustler BTV DX Engineering is proud to offer a comprehensive set of products specifically designed for an easy, safe and productive quarter-wave HF vertical antenna installation. We are certain that you will be pleased with your operating results from your properly planned and DX Engineering equipped Hustler BTV antenna project. DXE-TB-3P - Tilt Base for Hustler BTV Antennas With a DX Engineering Tilt Base, operators can raise or lower their BTV vertical in seconds while leaving the base plate securely attached to the mounting pipe or post. One person can service the antenna - no more climbing ladders or removing brackets. Easily make repairs, tune your vertical or lay your antenna down before bad weather hits. Precision cut from 3/16 in. 304 Stainless Steel, this Tilt Base is virtually indestructible. Conveniently mounts to the same pipe or post that you use for the antenna and radial plate. For STEEL pipe from 1" to 2" OD the new all-Stainless Steel SSVC-2P is the recommended clamp. No other hardware is required because the Hustler BTV series base section attaches directly to the Tilt Base. - 56 - DXE-RADP-3 - Radial Plate, Stainless Steel w/20 sets Radial Attach Hardware, up to 3" pipe Unique enough to be covered by two US Patents, the DX Engineering Radial Plate is meant for those of you that have or are building a quarter wave vertical antenna and who want an easy, neat and effective way to connect those essential radial wires and the coax to your vertical antenna for the lowest takeoff angle and strongest signals. Stainless steel construction assures that your signal won't disappear like a disintegrating aluminum radial plate. This plate will work perfectly with most commercially available vertical antennas such as the Hustler BTV series (4-BTV thru the 6-BTV), the SteppIR (BiggIR or SmallIR) or one of your own construction. Radial Plate is made of 304 Stainless Steel, .125 inch thick, 12" x 12" outside dimensions. The use of an anti-seize compound such as Never-Seez must be used with any Stainless Steel hardware to prevent galling. DXE-SSVC-2P - Stainless Steel V-Clamp for 1 to 2 inch steel pipe This V-Clamp is made in one size that fits Steel tubing or pipe from 1 to 2'' OD as used in antenna construction. The supplied V-bolt is long enough to attach tubing to thick plates and is made with anti-corrosive properties. The special Stainless Steel saddle has serrated teeth will clamp to the pipe securely by biting into the surface. For this reason, it is not recommended for softer aluminum tubing or pipe. Ideal for fastening a radial plate and antenna mounting to a steel pipe. V-Bolt thread dimensions: 5/16"-18 x 2.0" Used to clamp 1 to 2'' (OD) steel tubing or pipe Designed for attachment to round steel support members V-bolt and saddle made from high-strength 18-8* stainless steel *The use of an anti-seize compound is HIGHLY recommended to achieve proper torque and prevent galling. DXE-RADW - 500K or 1000K Bulk Radial Wire Kits and Components To achieve optimal performance with a ground-mounted vertical, install as many radials as possible. These bulk radial wire kits use insulated wire that is UV resistant, hard to see and lays down easily, unlike the wire that is commonly available at the big box stores. It will last much longer in contact with soil than bare wire. The DXE-RADW- 500K or 1000K kit provide everything you will need to build the perfect radial system! 500/1000 ft. spool of 14 AWG, stranded copper wire with vinyl insulation 20/40 lugs 100/200 radial wire anchor pins - Eliminating the need to bury your radials! Build up to 20/40 radials, 25 feet long DXE-RADW-500K Bulk Radial Wire Kit, 500 ft. Spool of Wire, 20 Lugs, 100 Staples DXE-RADW-1000K Bulk Radial Wire Kit, 1000 ft. Spool of Wire, 40 Lugs, 200 Staples DXE-RADW-500KBD or 1000KBD - Bulk Radial Wire Kits and Components To achieve optimal performance with a ground-mounted vertical, install as many radials as possible. These bulk radial wire kit use insulated wire that is UV resistant, hard to see and lays down easily, unlike the wire that is commonly available at the big box stores. It will last much longer in contact with soil than bare wire. The biodegradable anchors allow easy installation of radial wires, and will degrade and disappear in a year or so when they are no longer needed. The DXE-RADW-500 or 1000KBD kit provide everything you will need to build the perfect radial system! 500/1000 ft. spool of 14 AWG, stranded copper wire with vinyl insulation 20/40 lugs 100/200 biodegradable radial wire anchor pins- Eliminating the need to bury your radials! Build up to 20/40 radials, 25 feet long DXE-RADW-500KBD DXE-RADW-1000KBD Bulk Radial Wire Kit, 500 ft. Spool of Wire, 20 Lugs, 100 Biodegradable Staples Bulk Radial Wire Kit, 1000 ft. Spool of Wire, 40 Lugs, 200 Biodegradable Staples DXE-STPL - Radial Wire Anchor Pins, 100/pack - No need to bury your radials! DX Engineering Radial Wire Anchor Pins are perfect for fastening radials below the grass line to eliminate the risk of damaging your radials during lawn maintenance. 100 count - 6'' Pins 11-Gauge DXE-STPL-100P Radial Wire Anchor Pins, 100/pack DXE-STPL-300P Radial Wire Anchor Pins, 300/pack - 57 - DXE-STPL-100BD - Radial Wire Staple, Biodegradable, 3", 100 pack DX Engineering DXE-STPL-100BD is a 100-pack of 3” biodegradable anchors that are produced from recycled PLA (Polylactide Resin). Depending on the weather conditions, they will degrade in about a year. They are easily installed and will hold radial wires in place until lawn roots overtake them - and then disappear. Ecologically friendly! DXE-RADW-20RT/-32RT/-65RT Pre-Assembled, Radial Wire, w/ crimped 1/4" ring Terminals, 20 Pack The DXE-RADW Radial Wire Kits include the highest quality 14 gauge stranded copper wire with a relaxed black PVC insulation for easy installation of your radial system. They allow fast and easy installation of your radial ground system, and permit you to mix and match different length to fit the available space. The stranded wire and relaxed insulation mean that the wire will lay flat as you place it on the ground - easy to install! The twenty pre-cut radial wires include 1/4" ring terminals professionally crimped on one end for quick and easy attachment to the radial plate. These Radial Wire Kits are designed for users of vertical antenna systems which have the need for a high quality radial system for optimum antenna performance. The 1/4" ring terminals are machine crimped for maximum grip. Soldering is not required for strength, but is recommended if installed in corrosive environments such as salt spray. Packed 20 Radial Wires per package 14 gage, stranded copper wire Black relaxed PVC insulation 1/4" Ring Terminal professionally crimped on each Radial Wire 3 lengths to choose from: 20 Ft (-20RT), 32 Ft (-32RT), 65 Ft (-65RT) DXE-RADW-20RT DXE-RADW-32RT DXE-RADW-65RT Package of 20 each 20 Ft Radials with 1/4" Ring Terminals crimped in place Package of 20 each 32 Ft Radials with 1/4" Ring Terminals crimped in place Package of 20 each 65 Ft Radials with 1/4" Ring Terminals crimped in place DXE-225RT-20 - Ring terminal 16-14 Wire Gauge, 1/4" hole/20-pk This is a set of 20 ring terminals for AWG #14 to 16 wire with a clearance hole for a 1/4" bolt. These are the same crimp terminals supplied with the DXE Radial Wire Kits for #14 Radial and Antenna Wire. DXE-RADP-1HWK - Radial Plate Wire Attachment Hardware Kit - Stainless Steel 20 Sets of ALL Stainless Steel Radial Hardware for use with the DX Engineering Stainless Steel Radial Plate. (20) 1/4'' Bolts - (20) 1/4'' Nuts - (20) 1/4'' Flat Washers - (20) 1/4'' Split Washers - (20) 1/4'' Star Washers SUM-900031 - Automatic Wire Stripper/Crimper/Cutter, 24-10 Ga. Our wire stripper uses a spring-loaded design to make quick work of wires ranging from 24 to 10 gauge. Just insert the wire, squeeze the handle, and listen for the click. That’s the sound of another perfect wire stripping job performed in about 2 seconds - a fraction of the time it takes your pocket knife to do the same job. An adjustable wire length guide helps you make uniform strips, and a built-in wire cutter and crimper helps you complete your wiring job. Spring-loaded design Strips wires ranging from 24 to 10 gauge built-in wire cutter and crimper DXE-RADW-1K - Pre-Cut Radial Wire Set for 10, 15, and 20M. Includes 1/4 in. Ring Terminals For elevated feed verticals, use these pre-cut resonant radial wire sets for optimal performance on 10, 15, and 20M. Allows construction of four 1/4 wavelength resonant radial wires for each band. Includes 12 ring terminals for 1/4'' bolts and 12 wires precut to correct length. Wire is 14 AWG stranded copper with vinyl insulation. Radial wire lengths per band: 10M: 8 ft., 9 in. 15M: 11 ft., 9 in. 20M: 17 ft., 6 in. For ground-mounted verticals, use one of our bulk radial wire kits. DXE-RADW-40MK - Pre-Cut Radial Wire Set for 40M. Includes 1/4 in. Ring Terminals For elevated feed verticals, use this pre-cut resonant radial wire set for optimal performance on 40 meters. Allows construction of four 1/4 wavelength resonant radial wires. Includes 12 ring terminals for 1/4'' bolts and 4 wires precut to 35 ft. Wire is 14 AWG stranded copper with vinyl insulation. For ground-mounted verticals, use one of our bulk radial wire kits - 58 - DXE-RADW-80MK - Pre-Cut Radial Wire Set for 80M. Includes 1/4 in. Ring Terminals For elevated feed verticals, use this pre-cut resonant radial wire set for optimal performance on 80 meters. Allows construction of four 1/4 wavelength resonant radial wires. Includes 12 ring terminals for 1/4'' bolts and 4 wires precut to 70 ft., 3 in. Wire is 14 AWG stranded copper with vinyl insulation. For ground-mounted verticals, use one of our bulk radial wire kits DXE-3M2155 - 3M Temflex™ 2155 Rubber Splicing Tape. Conformable self-fusing rubber electrical insulating tape. It is designed for low voltage electrical insulating and moisture sealing applications. For outdoor use, it should be protected from UV deterioration with an overwrap of DXE-33PLUS TRM-06133 - Scotch® Super 33+. Highly conformable super stretchy tape for all weather applications. This tape provides flexibility and easy handling for all around performance. It also combines PVC backing with excellent electrical insulating properties to provide primary electrical insulation for splices up to 600V and protective jacketing. Both tape products are available from DX Engineering. DXE-8UDU002 24 Inch DX Engineering RG-8 Foam, Coax Cable Assembly This DX Engineering cable assembly uses high quality RG-8 coaxial cable and includes Silver/Teflon PL-259 (UHF) connectors installed at each end. The coaxial cable features a flexible 11 gauge stranded copper center, foam polyethylene dielectric, 97% coverage bare copper shield and a PVC jacket. Connectors are soldered rather than crimped and an adhesive lined shrink tubing provides weather protection. DXE-CBC-8XU2 24 Inch RG-8X Foam, Belden 9258, Coax Cable Assembly This DX Engineering cable assembly uses high quality Belden 92584/RG-8X coaxial cable and includes Silver/Teflon PL-259 (UHF) connectors installed at each end. The coaxial cable features a flexible 16 gauge stranded copper center, foam polyethylene dielectric, 95% coverage bare copper shield and a PVC jacket. Connectors are soldered rather than crimped and an adhesive lined shrink tubing provides weather protection. Vertical Antenna Guying Kits 4/5/6-BTVs & other Verticals Live in an area that experiences high gusts of wind? Take a look at our BTV Guying Kits to safe guard your station, work and hard earned money. DXE-GUY100-KIT DXE-GUY200-KIT DXE-GUY400-KIT DXE-GUY1000-KIT Guying Kit for Hustler 4-BTV & other Verticals Not Exceeding 30 ft. Guying Kit for Hustler 5/6-BTV & other Verticals Not Exceeding 30 ft. Guying Kit for DX Engineering & other Verticals exceeding 30 ft. Guying Kit for DX Engineering Vertical Antennas and Masts Vertical Antenna Base Matching Network - DXE-VMN-1 The DXE-VMN-1 Vertical Antenna Matching Network is custom designed for use with the Hustler 5- and 6-BTV and other base-fed quarter wave vertical antenna systems. In some vertical antenna installations with excellent radial systems, achieving the best SWR on 80 meters may be difficult without some means of adjusting reactance. The VMN-1 allows easy adjustment for lowest SWR. The DXEVMN-1 Vertical Antenna Matching Network will aid in tuning the customer selected portion of the 80 meter band to the minimum SWR without affecting operation on the other, higher frequency bands. The #12 AWG coil wire is tin-nickel plated for corrosion resistance, ease of soldering and long term reliability. The Vertical Matching Network may be installed between ground and the feedpoint of any quarter wave base-fed vertical antenna - including mobile antennas. - 59 - Technical Support and Warranty 60 Technical Support If you have questions about DX Engineering products, or if you experience difficulties during the installation, contact DX Engineering at (330) 572-3200. You can also e-mail us at: [email protected] Warranty New-Tronics Antenna Corporation Limited Warranty New-Tronics Antenna Corp. warrants its products to be free of defects in material and workmanship and extends this warranty under intended use and normal service conditions to the original owner for a period of one year from the date of purchase. This warranty does not apply to any product that has been repaired or altered in any manner and is void for any damage due to accident, neglect, unreasonable use, improper installation, or any other cause not arising out of defects in material or workmanship. The obligations of New-Tronics Antenna Corporation are limited to repairing or replacing, at its option, any product or part that is returned to the factory; all transportation charges prepaid, accompanied by proof of purchase, and upon examination revels to have been defective within the warranty period stated above. New-Tronics Antenna Corp. does not assume nor is any person authorized to assume for it, any obligations other that that herein stated. Any implied warranties, including but not limited to fitness for a particular purpose, is limited in duration for the above one year period. New-Tronics Antenna Corp. shall not be liable under this warranty, or any implied warranty, for loss of use of the product or for other consequential loss or damage incurred by the purchaser. Some states do not allow the exclusion or limitation of implied warranties of consequential damages and so the above exclusions or limitations may not apply in those states. This warranty gives you special rights and you may have other rights that vary from state to state. Copyright © New-Tronics Antenna Corporation - 225 Van Story St. - Mineral Wells, Texas 76067 Re-printed with permission DX Engineering Warranty All products manufactured by DX Engineering are warranted to be free from defects in material and workmanship for a period of one (1) year from date of shipment. DX Engineering’s sole obligation under these warranties shall be to issue credit, repair or replace any item or part thereof which is proved to be other than as warranted; no allowance shall be made for any labor charges of Buyer for replacement of parts, adjustment or repairs, or any other work, unless such charges are authorized in advance by DX Engineering. If DX Engineering’s products are claimed to be defective in material or workmanship, DX Engineering shall, upon prompt notice thereof, issue shipping instructions for return to DX Engineering (transportation-charges prepaid by Buyer). Every such claim for breach of these warranties shall be deemed to be waived by Buyer unless made in writing. The above warranties shall not extend to any products or parts thereof which have been subjected to any misuse or neglect, damaged by accident, rendered defective by reason of improper installation, damaged from severe weather including floods, or abnormal environmental conditions such as prolonged exposure to corrosives or power surges, or by the performance of repairs or alterations outside of our plant, and shall not apply to any goods or parts thereof furnished by Buyer or acquired from others at Buyer’s specifications. In addition, DX Engineering’s warranties do not extend to other equipment and parts manufactured by others except to the extent of the original manufacturer’s warranty to DX Engineering. The obligations under the foregoing warranties are limited to the precise terms thereof. These warranties provide exclusive remedies, expressly in lieu of all other remedies including claims for special or consequential damages. SELLER NEITHER MAKES NOR ASSUMES ANY OTHER WARRANTY WHATSOEVER, WHETHER EXPRESS, STATUTORY, OR IMPLIED, INCLUDING WARRANTIES OF MERCHANTABILITY AND FITNESS, AND NO PERSON IS AUTHORIZED TO ASSUME FOR DX ENGINEERING ANY OBLIGATION OR LIABILITY NOT STRICTLY IN ACCORDANCE WITH THE FOREGOING. ©DX Engineering 2012 DX Engineering®, DXE®, DX Engineering, Inc.®, Hot Rodz™, Maxi-Core™, THUNDERBOLT™, Antenna Designer™, Yagi Mechanical™, and Gorilla Grip® Stainless Steel Boom Clamps, are trademarks of PDS Electronics, Inc. No license to use or reproduce any of these trademarks or other trademarks is given or implied. All other brands and product names are the trademarks of their respective owners. Specifications subject to change without notice. - 60 -
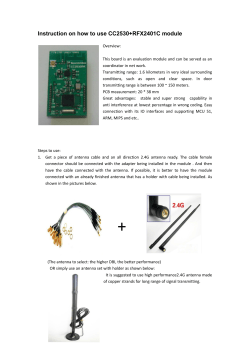
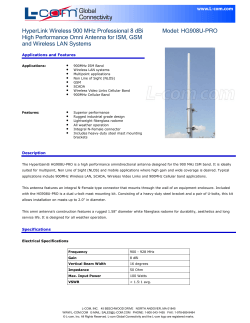


© Copyright 2026