
HOW TO USE EBAY: TURBOLISTER + IMAGESHACK (a handy guide)
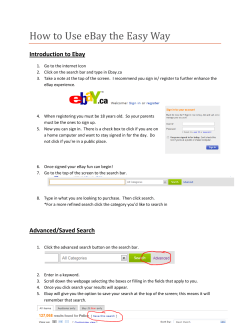
HOW TO USE EBAY: TURBOLISTER + IMAGESHACK (a handy guide) USING TURBOLISTER TO CREATE A LISTING 1. After opening the program and signing in, click on the “NEW” button. 2. A small dropdown menu will appear. Click on “Create New Item.” 3. A window will open up containing a new item template as shown below. PARTS OF THE NEW ITEM TEMPLATE (the ones you need): A: D: E: B: C: F: A: Title – Enter item title here. Characters are limited, so it’s important to be concise. This should contain: 1. What the item is 2. The amount, if more than one (such as lot or pair) 3. A maker and/or model number (if applicable) 4. A date or era (ex. 60s) 5. A color or size (if applicable). This MAY also contain (if space): 1. A qualifier such as NEW, MIB, or Vintage 2. Any extra descriptive or key words you think might help the item sell. Don’t be afraid to use (legible) abbr. (ex. Lg.), numbers (2), or punctuation (-). B: Category – Click the “Select” button at the end of the bar to open this widow: This window will have every eBay category listed in alphabetical order with a little [+] marker by it. Clicking on the [+] opens up a list of subcategories (many of which also have a little [+] by them). The trick is to keep going until you have a category with no little [+] by it. That will be your item category. If you do not know which category will be best for your item, the best thing to do is search for it on eBay to find similar items. Check which categories these items are listed in – this information will be listed on the side of the page of your search. Generally, list the item in the category where which it tends to appear most often. Also, pay attention to if items listed in one category sell better than the same items in a different category. FOR EXAMPLE: Say I wanted to sell a beer patch. First, I type the words “beer patch” into the search bar on eBay’s main page. When I look on the sidebar of the results page (left side of the page), I see that beer patches are most often listed under the heading “Collectibles” and the subheading “Breweriana, Beer.” If I click on the subcategory, I find further information on subsubcategories; beer patches appear to be listed most often in the sub-subcategory “patches” (go figure). In TurboLister, I would scroll down and click the [+] by “Collectibles,” then the [+] by “Breweriana, Beer,” then click “Patches.” Then I would click “Done.” Note – You cannot click “Done” until you are on a category without a [+]. ITEM SPECIFICS – “WHAT DO I DO?”: Most eBay items now have the ability for you to add “item specifics.” This is done by clicking the “Next” button in the “Category” window before you finish. Many of these item specifics are user-created and therefore stupid and unnecessary. Most of the items we sell do not need them, but if you are unsure, ask me! The following instances are times when you will always need to use item specifics: Clothing (for size, color, style, etc.) Books, DVDs, CDs Dishes or Silverware Coins C: Description - This is the area for your item description. I recommend clicking on the “Description Builder” bar above the box that appears in this window. It will take you to a Microsoft Word-style editor that is easier to navigate and more flexible with what you can enter. See the instructions for the “Description Builder” below. D: Start price – Dirt cheap E: Reserve price – OPTIONAL F: Shipping options – This is where you enter all the shipping info. TurboLister has a very straightforward form for entering shipping method options and costs. I won’t discuss it in this tutorial. USING TURBOLISTER TO WRITE A DESCRIPTION When writing a description in TurboLister, always use the Description Builder (discussed above in letter “C”). PARTS OF THE DESCRIPTION BUILDER A: B:1 2 3 4 C: D: E: A: View Tabs – These tabs allow you to view the description you are creating in the window below three different ways: 1. Design View – This is the default window and the one you will usually use 2. HTML View – Allows you to view the “code” that makes up your description; you will only use this when adding pictures from imageshack. 3. Preview – This tab gives you an approximate view of what your listing will look like on eBay. It isn’t the most accurate view, but it is useful for making sure any links work right. B: Editing Toolbar – This bar looks a lot like the bar at the top of a Microsoft Word document and contains many of the same buttons, including bold, underline, italic, and spellcheck. Some buttons of note are: 1. Font Select – This works just like the font select list in Microsoft Word, except there are very few choices. “Arial” is what our auctions usually appear in (it’s very pleasant), but it is not the default. You will need to change the text to “Arial” before you start typing. Trust me, it just works better. 2. Bullets and Numbers – These buttons work just like those in Microsoft Word. They help make organized lists, with a new bullet or number starting each time you hit the “enter” key (for a line break). This is very handy for organizing a listing when you have multiple items with a separate description for each. It does not matter whether you use numbers or bullets. 3. Cut/Copy/Paste – Very handy for taking things from one place and putting them in another. Also, you can always highlight a section of text and right click on it to do the same things. 4. Insert Hyperlink – This button has a little blue globe and a chain on it. This is the button you will use when you want to insert a link to a webpage in your listing. You only need this when linking to a list of our “similar/additional” items. More on this later. C: Description Window – This is where you enter all the text of your description. The way you type your description here (including all spaces and line breaks) is exactly how it will appear on eBay. More on writing a description later. D: Picture Area – Clicking on the first of these little boxes will let you insert a picture into your listing. This is the one free picture eBay gives you; if you use this area to add more than one picture, it will cost extra to list the item. More on adding pictures later. E: “Save” Button – Remember to click this button when you are done with your listing in order to save all of your work. Also, you can click this if you want to leave a listing and come back and work on it later. If for any reason you can’t see the words on the buttons, “Save” is always the one on the right. WRITING A DESCRIPTION These are the only two things you need to know to make a good description: 1. Follow the same formula every time. 2. Describe everything you can think of. Now, you could mess around and try to figure out a good formula for writing a description. Or you could just follow the one I have perfected over the last four years. (I suggest the second option.) The following is my step-by-step formula for writing a good description STEP 1. What is it? The first part of the description should contain basic information about the item. What it is, size, color, maker, year/era, markings, etc. Whatever you can say about what this item looks like is important. Usually, this will be pretty short, as there isn’t ever a huge amount to say about things. For example, this is the first part of my description for the American Girl doll we sold: “You are bidding on an American Girl Doll from the "Just Like You" line. This doll has a medium (light tan/tan) skin tone, dark brown eyes, and long, textured black hair. Vinyl head, arms, and legs; soft, huggable body. She is marked "Pleasant Company" on the back of her neck. This doll wears her original outfit which consists of black stretch pants, a colorful striped turtleneck tee, and a bright fleece-like button-up overshirt. There are six mini stick-on "Grin Pins" on her overshirt. She also wears a pair of black velour slip-on shoes and a pair of magenta panties.” It doesn’t look like much, but it tells you everything about the doll you might need to know. Sometimes, if you have more than one item in a listing that you would like to describe, you might want to describe the items generally first, including how many you have. This description may be short or long, depending on how much the items have in common). Then, you can move on to describe each one individually (this is where bullets might come in handy). For example, here is part of the description I used for a lot of dip pens we sold: You are bidding on a lot of five (5) vintage dip pens and one (1) vintage bladder pen. There are three wood, three plastic. All but one have a nib in them. Below is a list of all pens included in this lot: Wood: Eagle (2) - Plain tan wood. Both marked "1040 Eagle Pencil Co. New York. One has no nib. 7" + Nib marked: "Mark Ferth / Chilled Steel / 4 / Made in U.S.A." Dixon's - Black with reddish-brown grip area. Marked "U.S.A. Dixon's No 3033-R." 6.25" + Nib is difficult to remove (rusty); cannot read markings. Plastic: American Pencil Co. - Green with reddish-brown grip area. Marked "American Pencil Co. New York U.S.A. *1159." 7" + Nib marked: "Restebrook & Co. / Bank Pen / Made in U.S.A. / 14" Unmarked - Black, contoured shape. 5.75" + Nib marked: "Sengbush / Stainless Steel / Fine Oval / 8" Note I tried to group each by a similar “type” (plastic, wood, etc.). If you have items that can be grouped like this (such as jewelry), it can make your description writing a bit easier (it’s one less word you have to put in every description!). If you have a lot that has a large amount of items (20+), you may just want to discuss the items generally, with a few highlights (in other words, say what is special about this lot). I have used this in the past for things like buttons and greeting cards. For example, this is the description I used for the lot of vintage Christmas cards we sold: You are bidding on a huge lot of vintage Christmas cards. There are over 90 cards in this lot. Dates of these cards range anywhere from the 1940s through the 1970s. Many cards have special features such as: ribbons, fabric, glitter, plastic decorations, foil, etc. There are also some postcard-type greeting cards in this lot; they are a single stiff piece with printing only on the front and a trademark on the back. Everything we sell is a little different, so you won’t always be looking at the same things to describe every time. Just think about what you would like to know about this item if you were buying it. And if you forget something, don’t worry! Some friendly eBay user will remind you by asking a stupid question about it. STEP 2. Condition The next most important thing for your description is to describe the condition of the item. Usually, it is best to try to sum this up in a general word before moving on to specifics. The following is a list of the words I use, from best-to-worst: New/Mint, Excellent, Very Good, Good, Fair Also, feel free to make “ranges” with these words, if one doesn’t seem to fit well. For example: Good-to-very good, fair-to-good (you can reverse these, too) I have pretty loose standards for this scale. Obviously, new things are new. Excellent things may not be new, but they either have no flaws or very insignificant ones. Very Good usually has a couple tiny flaws. Good has some minor-to-moderate flaws, but overall it’s not too bad. Fair has some major flaws, but the item is still intact and worth collecting/keeping. Anything below “fair” is for the garage sale, unless it’s something really, really, really special (like the magic set). Use your best judgment to determine where something fits. When in doubt, I usually use the word “good,” because it’s just vague enough that most people can’t argue with it. After you’ve made a general statement, such as “This item is in good condition,” you should describe any and all flaws, marks, scuffs, dirt, tears, loose threads, nicks, chips, cracks, bumps, paint wear, creases, tears, missing pieces, et cetera. If there is anything wrong with it, describe it in detail: where it is, how big it is, etc. If the item has been used (such as clothes, toys, etc.), please note this, too. Check and double-check to make sure you don’t leave anything out, no matter how minor, lest someone get it and complain about it. This does not mean your description of the condition has to be a mile long; it just needs to be detailed and exact. For example, here is a description of the condition of the Grand Canyon souvenir bowl we sold: This souvenir bowl is in good condition. There is some light crazing in the hollow, radiating out from the center. One or two tiny wear spots on the gold trim. There is some label/sticker residue on the underside that can be removed; could also use a gentle surface cleaning. Front design is intact and bright. Note this is not very long, but it details every flaw present. Also note two things: 1. If the flaw can be fixed by someone with patience or skill (this usually means cleaning), note it as such. 2. Say something good about the condition, too! If a dish has a few flaws, but is not chipped or cracked, or if a book has a stained cover but all of its pages, say so. Most items we have are free from major flaws, so it is nice to make note of that once you’ve finished describing all the major ones (just to make people feel good). For example, this is from the duck box we sold: This box is in good condition. The rim has some light wear. For some reason, the lid does not always sit properly on the box, resulting in a slight gap near the back. Stray spot of black paint on the tail. Probably could use a gentle surface cleaning. Free from chips, cracks, or major damage When describing the condition of multiple items, there are two approaches. The first approach: If your items are all in a similar condition, with similar flaws/wear, simply give a general condition description for all of them. If one or two have an additional or notable flaw, you can point that out in a brief sentence; simply state that “[this one item] has [this notable flaw].” For example, here is a description of a lot of five transit tokens we sold: All tokens were used and are in good-to-very good condition. There is some white staining/tarnish on the Cedar Rapids and Key System tokens. The unknown token has some wear to the number. The second approach: If your items all have different, specific sets of flaws or wear, it is best to describe each one separately, using the methods discussed above. For example, this is the description from the Mary Poppins dolls we sold: All of these dolls has been played with and show general wear as a result, but are intact and free from major damage. These have been in storage for a while and may need a gentle surface cleaning. The specific condition of each doll is as follows: Mary - Fair-to-Good. Her hair is a bit thin; it may have been cut (I cannot tell). Her felt hat is worn with several small holes; the elastic strap is detached, but will be included (in case the buyer wants to fix it). There is a small dent in the front of one of her shoes. Left arm is a bit loose. Light wear to eyebrows. Jane - Fair-to-Good. Hair may have been cut (I cannot tell). Her hair is currently braided and tied of with an old rubber band; this rubber band is rotting/stiff and will need to be very carefully removed. Dress has some light stains, probably washable. Michael - Good. Hair appears a bit thin in one spot. Some light stains on outfit, most noticeable on white collar. If you have a lot with a large number of items (20+), a very general description will suffice. This usually contains a range of conditions; an example of some of the more common flaws; and a statement about most common condition of the items in the lot (for example, are most “good”? are most free from damage?). Here is an example from a lot of buttons we sold: Most of these buttons are in good-to-very good condition. A few have stones missing. There may be a couple with tiny chips or nicks. Most are free from major flaws with minimal wear. If you like, you can sum up the item with a sentence or two after you have finished describing it. This sort of lets the potential buyer know you are done with the description and reminds them of some good points of the item. For example, here is a “summary” sentence from a lot of stamps we sold: This is a fantastic huge lot for any collector, especially the beginner. Lots of great stamps to sort through and organize! Once again, think about what you would like to know if you were buying this item. Include all of the information that you like to see when you look at others’ auctions and make you want to buy the item. STEP 3. Additional pictures See the separate imageshack tutorial for adding additional pictures to a listing. STEP 4. The Fine Print At the end of the listing, after your pictures and imageshack link, is where all the business information goes: shipping, insurance, etc. Luckily, I have a standard set of text that serves as “fine print” for the end of every auction. It is in the Word Document entitled “1ebay” on page two under “Auction Info.” This is all the info you need to put in an average auction. If your auction is for an item requiring insurance, there are two different lines of text in the “1ebay” document under the heading “Insurance.” The top line is for an item with flat rate shipping (such as First Class Mail). The bottom line is for an item with a calculated price. You may have to edit them depending on the specific information for the auction. If you are selling similar items, this is a good place to add a link to them in order to create more visibility and sales. Usually, I insert this text at the top of the fine print (just below the pictures): I have several other _____________ up for auction, so please check them out! I will happily combine shipping on multiple wins! Then, I put a link in the text to our other items so other people can find them easily. This is done in the Description Builder. Just follow these steps: B: C: A: 1. Highlight the text you would like to use as the link; I usually use “so please check them out!” (labeled “A” above). 2. Click the “Insert Hyperlink” button on the toolbar. It has a blue globe with a chain on it; it is to the right of the cut/copy/paste buttons (labeled “B” above). 3. A small window will pop up with two bars. The top bar will have your chosen text in it. The bottom bar, with the word “ADDRESS” by it, is where you put the address of the website you want to link to. In this case, you want to link to a list of all our items. This is the address you will use: http://search.ebay.com/_W0QQsassZunpinkflamingos68 Copy and paste that line into the “ADDRESS” box (labeled “C” above) and press “INSERT.” The text you selected should be underlined and a different color. Secret: After you do this once, you can save the line of text with the link and copy/paste it in your listing, because the address with our items never changes. I actually have the line of text for you in the “1ebay” document under the heading “MISC” on page two. Feel free to copy it from there if you like. But I thought it was good to teach you anyway. USING TURBOLISTER TO ADD A PICTURE TO YOUR LISTING eBay gives everyone one free picture for each listing. Always use this picture; it’s free! Also, this is the picture eBay uses for your Gallery Picture, which is now also free (and will be included automatically). You can add this picture in the Description Builder by following these simple steps. Scroll down to learn how to add a picture to the listing! B: C: A: 1. Use the small squares on the right side of the screen that say “Click Here to Insert a Picture.” Click on the first square in the top row (labeled “A” above). It will open a window very similar to the one you see when uploading pictures to imageshack. 2. The EBAY folder should already be open. If not, you can get there through the “My Documents” and “My Pictures” folders. Find your picture in the elongated box on the left side (labeled “B” above) using the scrollbar. 3. When you find the picture you want, click on it. The picture should be highlighted with a blue square; it should also show up in the big box on the right half of the window. Then, click the “INSERT” button in the lower right corner of the window (labeled “C” above). And you are finished! At this point, you are probably finished with your description as well. Click the “SAVE” button in the lower right corner to save your work and exit the Description Builder.


© Copyright 2026