
How To Get Massive Traffic and Leads Using eBay
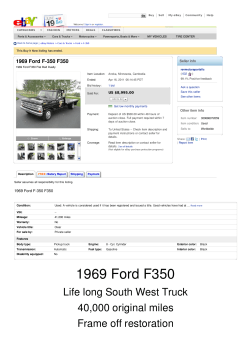
How To Get Massive Traffic and
Leads Using eBay
The Fully Compliant Way To Get Great Traffic From the #1
Auction Site – Without Selling An Item!
By
Jack Sinclair
Visit http://www.PreLaunchClub.com
for more great traffic and promotion tips
Legal Disclaimer and Limitation of Liability
IN NO EVENT WILL THE AUTHORBE LIABLE FOR (I) ANY INCIDENTAL, CONSEQUENTIAL, OR INDIRECT DAMAGES
(INCLUDING, BUT NOT LIMITED TO, DAMAGES FOR LOSS OF PROFITS, BUSINESS INTERRUPTION, LOSS OF
PROGRAMS OR INFORMATION, AND THE LIKE) ARISING OUT OF THE USE OF OR INABILITY TO USE THE SERVICE, OR
ANY INFORMATION, OR TRANSACTIONS PROVIDED ON THE SERVICE, OR DOWNLOADED FROM THE SERVICE, OR
ANY DELAY OF SUCH INFORMATION OR SERVICE. EVEN IF THE AUTHOROR ITS AUTHORIZED REPRESENTATIVES
HAVE BEEN ADVISED OF THE POSSIBILITY OF SUCH DAMAGES, OR (II) ANY CLAIM ATTRIBUTABLE TO ERRORS,
OMISSIONS, OR OTHER INACCURACIES IN THE SERVICE AND/OR MATERIALS OR INFORMATION DOWNLOADED
THROUGH THE SERVICE. BECAUSE SOME STATES DO NOT ALLOW THE EXCLUSION OR LIMITATION OF LIABILITY FOR
CONSEQUENTIAL OR INCIDENTAL DAMAGES, THE ABOVE LIMITATION MAY NOT APPLY TO YOU. IN SUCH STATES,
THE AUTHORLIABILITY IS LIMITED TO THE GREATEST EXTENT PERMITTED BY LAW.
The author makes no representations whatsoever about any other web site which you may access through this report or which
may link to this report. When you access another website, please understand that it is independent from the author, and that the
author has no control over the content on that web site. In addition, a link to other websites does not mean that the author
endorses or accepts any responsibility for the content, or the use, of such web site.
Let’s get straight to the point – here’s the short report showing you how you can
get thousands of visitors looking at your offer, and visiting your site – all of them
targeted and ready to buy.
1. Login to your eBay Account
It’s easy to do, but if you don’t have an account at eBay, go to
http://www.ebay.com and get one.
2. Click SELL
We are going to list an item in a very special way, so when you click SELL, if you
see this screen, we’ll need to switch to the classic mode:
Click the link that says “List using the original Sell Your Item form”.
If you are in the old format, you’ll see the following screen, which is where you
want to be:
If you see this, you are in the right spot! Click “Sell Your Item” to continue.
3. Choose “Create an Ad Format listing”
After you click “Sell Your Item” in the old format, you will see 3 choices:
We want to choose the last item – “Create an Ad Format listing”.
Click Continue…
4. Choose Your Product Category
Next, you need to pick the category to place your ad. For most information
products, that would be Everything Else->Information Products->How-To-Guides,
or Everything Else->Information Products->Other
Choose your category, then click the continue button.
5. Describe Your Product/Service
This really isn’t so hard, because you are running an ad, you can usually take the
information right off the site or product you are promoting.
The important thing is to know which keywords your target market will use to
search, and to put these keywords in the title and subtitle of the listing.
As always, you can use Overture, WordTracker, or Keyword Elite to find the most
popular search terms for your item.
You’ll see the Item Description box here…so be sure to go to the thing you are
promoting, and pull ad copy from it, and paste it into the description box.
As an example, I am promoting a site here for product launches so I go to the
site, and copy the text that I want to use, and then right-click and choose “View
Source”, or “View Selection Source” (if you use Firefox).
This will bring up a window with lots of HTML code in it.
If you have the “View Selection” option, just the html you want will be selected. If
not, you’ll need to select the text you want and copy it, then go back to your eBay
item description and paste it in (click in the item description box, and press
CTRL+V or use the menu item Edit->Paste).
You can use the “Preview” button to bring up a pop-up window that shows you
what the ad will look like.
Below is a picture of what my ad will look like with the code I pasted into the
description box:
I don’t want the member’s login link, so I’ll go back to the description, look for the
piece of code starting with <a href, and remove everything between it and the
</a>, then preview again to make sure it looks good.
Next, I’ll need to add my link to the ad. With this format, eBay is happy to let you
put as many links as you like in the listing!
Since it is an affiliate link I want to use, I better cloak it in some way…the easiest
way is to use a TinyURL redirect, as shown below.
I then copy the link generated by TinyURL (where the arrow is pointing) so I can
put it in the item description. I like to have things centered, so I put the code
<center><a href=”http://tinyurl.com/2yvpab”>Click Here To Learn
More</a></center>
in the ad listing, as shown below.
Ok, so far so good.
The next step is to preview everything and make sure it looks good.
6. Optional: Add A Helpful Video
This is the most powerful way to build rapport with your visitors. You simply do a
screen capture and do a short 1-3 minute tour of the product or service, and
describe it’s benefits and why it is so useful.
Now, everyone knows Camtasia – http://www.techsmith.com is the king of
making videos from your computer screen, but there is a very inexpensive
alternative that works very well, over at
http://www.hypertracker.com/go/templar/camstudiopro/ ($29 at the time of this
report’s creation).
Simply capture a video and describe the product/service, and save it as an AVI
or MOV file (Flash doesn’t work for what we will be doing next).
7. Video – Step 2
The next step, after making the video, is to publish it.
I find google video is fantastic – free, and works like a charm.
Simply login to your google account (create one if you don’t have one yet), and
visit http://video.google.com and click on “Upload Video”, then fill in the fields as
shown below.
Make sure your video is public and in English. Agree to the terms (what else can
you do?), and click the Upload Video button.
It will take several minutes for the video to upload, and be approved, but it’s well
worth the time. Get yourself a beverage while you are waiting.
Once your video is uploaded and approved, click on the “View Live” link to watch
your video online.
If it works properly, go over to the right side of the screen where it says “EmailBlog-Post To MySpace” and click that link.
Then right below, you’ll see a link to “Embed HTML” – click this link.
You’ll see some code pop up, like the stuff shown below – highlight it all and
copy it.
Here’s what it should look like:
Next, go back to the eBay item description, and find a place near the bottom of
your description, and paste this code into the description box, like you see below.
Notice that I put some of those <center> … </center> tags around the google
code – that makes the video centered on the screen.
Preview your description again, and make sure the video displays properly and
plays.
Notice how the video and the link look perfect together – you want the link to be
right below the video to get the highest click through rate.
Once you are happy with your preview, click the Continue button to get to the
next screen.
8. Choose Your Price, Duration, and Pictures
On the next screen, we need to pick the display price. Visitors will be unable to
buy this item using this method, but try to set the price to be whatever your item
will eventually sell for. If it’s a free signup site with an OTO up-sell, you can
choose a low price of $0.01 to $0.99.
For the duration, you can pick 30, 60 or 90 days, and as expected, the longer the
duration, the more you will pay.
With a 30 day duration and good keywords and descriptions, I usually get about
10,000 to 15,000 viewers, and around 2,000-4,000 website visitors.
Remember, these are buyers with cash in hand, and pre-sold with your
description and video, so these website visitors convert extremely well.
You will also need to add a picture to your listing, and I find the best place is to
visit the sales page and grab one of their images – simply right click on the image
and save it to the desktop, and then upload it to eBay. For example, I used the
image below:
Right-click to save the image to the desktop, then browse and add it to the eBay
listing.
Another important thing to do is to add the “ProPack” to your auction. This gives
highlights to your auction, which skyrockets the attention and visitors you’ll get.
For $29.95, it’s a fantastic bargain!
Be sure you choose “ProPack” to get great exposure.
9. Review Your Listing
Finally, you want to review everything – the ad, the category, the description,
everything, and make sure everything looks good.
If you put a video in the listing, it should show up here. Remember, videos can
increase your website visitors by 200% or more.
Once you have everything as you like it, scroll to the bottom of the page and click
the “Submit Listing” button.
Your listing will go live in seconds, and soon, you’ll be indexed in the eBay
listings, and start getting a lot of people with cash in hand, looking at your offer!
10.
What To Expect
What you experience really depends on everything you did. With some great keywords,
and a good looking listing with lots of benefits, and a descriptive video, I’ve seen visitorto-website clicks as high as 35%, and with 10,000 visitors per month, that’s quite a bit of
activity.
I’ve also seen signups on free-to-join sites go through the roof with this technique, so if
you have some of those, try this powerful eBay technique and see what happens.
11.
Summary + Feedback
So, did you enjoy this report?
If you have feedback or would like to provide suggestions, feel free to contact me.
Email me at this address with feedback, or to get the latest version of this report and
updates for life: mailto:[email protected]
Cheers,
Jack Sinclair


© Copyright 2026