
Prepared by Dr. JuliaGrace Jester Spring 2010 Last updated 3/13/2010
Prepared by Dr. JuliaGrace Jester
Spring 2010
Last updated 3/13/2010
Slides created by Dr. JuliaGrace Jester
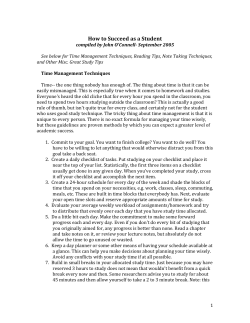
Step 1: Read ahead
Reading before we cover the material in class
allows you to
reinforce what you read
make notes of questions you need answered in class
process your memory of the material more deeply
Remember: The more times you familiarize
yourself with the material (while reading, while
listening in class, while taking notes, while
working on assignments) and the more ways you
work with it (look at it, write it down, say it aloud,
listen to the teacher say it, come up with your own
examples) the better you will remember it.
Last updated 3/13/2010
Slides created by Dr. JuliaGrace Jester
Step 2: Prepare study materials
as you go
A- Take notes in your own words as you read
Using your own words requires you to engage more
deeply with the material as you have to understand it
not merely copy it.
Saves you from having to reread all the chapters before
the exam, a daunting task when there are 6 or 7 on an
exam.
This takes more time as you read but saves you time
when studying and helps you do better on the exam (as
long as you put enough in your notes: see sample of
note-taking at end of presentation)
Last updated 3/13/2010
Slides created by Dr. JuliaGrace Jester
Step 2: Prepare study materials
as you go
B- make any study materials you find helpful while you
read
It saves you time later
Flashcards
Semantic maps
Visual representation
Last updated 3/13/2010
Slides created by Dr. JuliaGrace Jester
Step 2: Prepare study materials
as you go
Flash cards
Put the Term on one side
Put Definition on back (in own words, not copied from
book- helps with comprehension)
Include an example of your own when possible
When using the cards make sure you write down what
you think the definition is on scrap paper before flipping
it over (if you’re wrong take the time to write out the
correct answer)
The “Oh I know that flip” without making yourself answer
doesn’t actually aid memory
Last updated 3/13/2010
Slides created by Dr. JuliaGrace Jester
Step 2: Prepare study materials
as you go
Semantic maps Linking words and concepts together visually
Last updated 3/13/2010
Slides created by Dr. JuliaGrace Jester
Step 2: Prepare study materials
as you go
Visual representation
Charts, graphs, drawings, anything to help you visually
Last updated 3/13/2010
Slides created by Dr. JuliaGrace Jester
Step 3: Use the available resources
There are a lot of resources available for you to study
from and use for every exam, such as:
A- Your textbook
read and take notes on everything
use the glossary at the back (you knew they were there
right?)
use the appendices if your book has them
read all the little asides in the book
if you only read the textbound paragraphs you are missing a lot
of information
read all boxes- they go in depth on specific topics
make sure you understand all tables and figures
Last updated 3/13/2010
Slides created by Dr. JuliaGrace Jester
Step 3: Use the available resources
B- Supplemental websites- Most, if not all, books
nowadays come with supplemental websites which can
include summaries, quizzes, activities, and other
studying help. Now with some books this access may
have an extra cost, but in an increasing number they
are free.
{NOTE: if your course has one post the link here}
Last updated 3/13/2010
Slides created by Dr. JuliaGrace Jester
Step 3: Use the available resources
C- Use your homework. It is not busy work assigned by teachers
to take up your time; it serves a number of useful purposes.
allows you to find out you don’t understand something before the
exam.
useful tools to study from as they often apply and summarize
concepts that might be on the exams.
bolster your grade in the class in a way that allows you more time
and resources than in an exam.
And hey, whenever it is possible or reasonable (when there’s 1
correct answer for questions, for instance) I’ll make answer keys to
the assignments available for you so you can check your answers
and make sure you’re studying the right information.
{NOTE: if you don’t make answer keys available drop the last bullet}
Last updated 3/13/2010
Slides created by Dr. JuliaGrace Jester
Step 3: Use the available resources
D- Handouts. These
give examples
clarify concepts
give alternate phrasing
often point out key things for you to study.
they are often ways to test yourself as well
Last updated 3/13/2010
Slides created by Dr. JuliaGrace Jester
Step 3: Use the available resources
E- PowerPoints.
In our class I make the PowerPoint available prior to class
DON’T recopy the slides word for word
Instead print it out in a form that leaves you room to take notes
DO:
Include examples
Add definitions
Include things that are reminders for you from your life (i.e. Ah,
my uncle did that when he…)
Add questions to things you are unclear about- you can reread
that section or ask the teacher for clarification
{Note: if you do not make the PowerPoint available adjust this, but
keep the emphasis on not copying word for word}
Last updated 3/13/2010
Slides created by Dr. JuliaGrace Jester
Step 3: Use the available resources
F- People
If you are unclear on a topic talk to the teacher.
Ask for clarification during class.
Get together and study with classmates.
Have a friend or partner quiz you on concepts.
Last updated 3/13/2010
Slides created by Dr. JuliaGrace Jester
Step 4: Plan ahead for study time
Don’t underestimate how much time you need.
Need time for each chapter, to review each of your
resources, to test yourself once you’ve studied, to go back
and restudy things you are still unclear about
Plan in lots of little time periods for reading and
studying.
If you study for too long at once you
may have trouble paying attention to what you are reviewing
may not be able to recall everything you review
It’s nearly impossible to cram 6 or 7 chapters in one
night and have any hope of remembering it, so start
studying a few days earlier than you think you should.
Last updated 3/13/2010
Slides created by Dr. JuliaGrace Jester
And Lastly, Step 5…..
Be positive
You can do this
Don’t focus on too much at once, that can be overwhelming
Don’t give up if you don’t do well at first, there are always ways to do
better
Do extra credit [Note remove if not offered in your class]
Study differently next time. It’s not about time entirely, you can study for
20 hours and still do poorly if you are not using your time in the best way.
For more info see the “Six Hour D” at:
http://www.psychwww.com/discuss/chap00/6hourd.htm
Talk to me- This is a general guide for studying but you are all individuals
and almost every teacher is willing to give individual time to someone
who needs it
Don’t wait until the end of the term to seek help if you need it, get it now.
Last updated 3/13/2010
Slides created by Dr. JuliaGrace Jester
Appendix- Note-taking
Chapter 5 excerpt pages 125-126 (Berger: The developing person…7th Ed)
Exactly how rapidly does growth typically occur? We saw in Chapter 4 that at birth the
average infant weighs 7½ pounds (3,400 grams) and measures about 20 inches (51
centimeters). This means that the typical newborn weighs less than a gallon of milk
and is about as long as the distance from a man’s elbow to the tips of his fingers.
Infants typically double their birthweight by the fourth month and triple it by their
first birthday. Physical growth slows in the second year, but it is still rapid. By 24
months most children weigh almost 30 pounds (13½ kilograms) and are between 32
and 36 inches (81—91 centimeters) tall. This means that typical 2-year-olds are
already half their adult height. They are also about 15 to 20 percent of their adult
weight, four times as heavy as at birth. (See Appendix A)
Each of the above numbers is a norm, an average or standard for a particular
population. Norms must be carefully interpreted. The “particular population” for
the norms above is a representative sample of North American infants, who may be
unlike representative samples of infants from other regions of the world. To
understand norms, you also need to understand percentiles. A child who is average
is at the 50th percentile, a number that is midway between 0 and 100, with half of
the children above it and half below it.
Percentiles allow a child’s growth to be compared not only with that of other children
but also with his or her own prior development. Pediatricians and nurses notice all
children whose growth is far from the norms, but they pay closer attention to the
ranking: A drop in percentile means that something might be wrong.
Last updated 3/13/2010
Slides created by Dr. JuliaGrace Jester
Appendix- Note-taking
My notes on the excerpt
In US: Average at Birth: 7.5lbs, 20inches Average at 2 years: 30lbs, 3236 in (1/2 adult height)
In US: 2X birth weight at 4 months, 3X by 1 year, 4X by 2year
Growth not linear- it continues but slows after year 1
Norms are averages for a particular population (like average in US or
average in Uganda)
Percentiles- where the kid is compared to the norm 80th percentile
above norm, 20th below norm, 50th is norm
Comparing a child not just to a norm but to their own previous
percentile helps us look for problems/changes in that particular kid
(Go from 80th to 40th- may be sick, malnourished)
Hey look: I turned 4 paragraphs and 21 lines into 6 bulleted
notes, I didn’t lose any useful information, and when I study I
don’t have to go back and reread the whole thing.
Last updated 3/13/2010
Slides created by Dr. JuliaGrace Jester


© Copyright 2026