
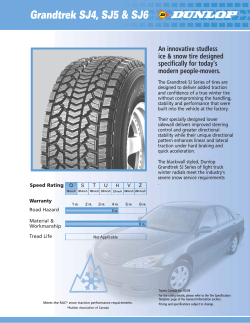
WHEEL MANUAL 1
WHEEL MANUAL
1
Contents:
Lifetime Crash Replacement
4
Five-year No Hassle Warranty
4
®
The ENVE Process
5
®
ENVE Wheelsets Include
7
Safety7
Spoke Tension Recommendations
8
Recommended Tire Size
9
ENVE Grey Brake Pad Installation
10
ENVE Valve Extender Installation – Road Only
11
ENVE Clincher Tire Installation
15
ENVE Tubular Tire Installation 17
Mountain Tubeless Kit and Tire Installation 20
Wheel Installation
24
Pre-Ride Inspection
26
General Care and Maintenance
26
Welcome to the ENVE® family and
our Product Guarantee.
Register your product at:
www. enve.com/warranty-registration.aspx
Lifetime Crash Replacement:
ENVE® Composites designs and manufactures
products that will confidently survive the rigors of
competition and riding at the highest levels. We also
understand that unintentional accidents happen more
often than any of us would like. There are pot holes,
that rider who “took me out”, distracted drivers, debris,
animals, weather, and many other ways to crash or
damage your bicycle. It may also be that you have put
a ridiculous amount of CX miles in the sand and mud
and actually wore out an ENVE product. While this
hasn’t happened… yet, should something happen not
covered by warranty, we want to keep you riding your
ENVE products with as little pain to the pocket book as
possible. Toward that goal, we offer a LIFETIME Crash
Replacement Policy to the original owner.
Five-year No Hassle Warranty:
ENVE® Composites warrants all products to be free
from defects in materials or workmanship for a period
of FIVE YEARS from the original purchase date, (receipt
required). This warranty is non-transferable and valid
to the original purchaser of the product only.
Claims under this warranty must be made through
the retailer where the original purchase of your ENVE
product was made. Proof of purchase is required.
Congratulations on the purchase of your “Handmade in
the USA” ENVE wheelset!
ENVE, by our definition, is the burning desire to get to
or create the perfect solution. Every product that bears
the ENVE name is the result of this passion. Each rim,
wheel, and component is designed with form, function,
and beauty in mind. It is Our Culture, it is Our Goal, and
it will always be Our Way.
®
The ENVE Process
In designing ENVE wheels, our engineers set out to
produce the strongest, fastest, stiffest, lightest and
most reliable wheels on the planet. Through materials,
tooling and finite processes, our engineers focus on
designing features into each wheel that address the
traditional weaknesses of carbon rims and ultimately
result in a wheel that is strong enough to train on and
light enough to race on.
Molded Spoke Holes and Valve Stem Hole – ENVE
Composites’ patented process of molding in spoke
holes is one example of how ENVE builds stronger rims. Because carbon fiber structures get their strength
from continuous, unbroken fibers, ENVE routes the
fibers around the hole which increases the strength of
each spoke hole. This technique pays large dividends
in the final product by allowing for a lighter spoke face
in the rim without compromising strength. Because of
this process, our spoke holes are capable of resisting
higher spoke tensions which greatly reduces the risk
of spoke pull-through during wheelbuild and on the
road. Molded spoke holes also improve the quality of
the wheelbuild itself. Because the fibers around the
spoke face of the rim are 100% intact, spoke tension is
distributed more uniformly around the rim. This makes
it easier to build a wheel with even tensions, as well as
produce a higher quality wheelbuild that will require
less maintenance down the road.
Along with molding in the actual spoke hole, ENVE rims
also feature molded-in, conical, nipple seats on the
inside of each rim. Carbon rims due to their stiffness,
5
have been notorious for fatiguing spokes prematurely. The molded-in nipple seat allows the mating nipple
design to articulate and align with the exit angle of the
spoke. This ensures that the spoke will not be bound
against the spoke hole or bent; greatly reducing the
possibility of premature spoke breakage.
Textured Brake Track – While carbon wheels have
outperformed alloy rims on almost every metric for
years now, it is generally believed that braking performance has not been one of them. Judging by the
feedback received from ENVE customers, the days of
alloy braking surface dominance over carbon are coming to an end. ENVE has met the challenge of creating
carbon rims with excellent braking characteristics by
implementing thoughtful features that equate to real
world performance. The most visible of these features
is the engineered brake tracks featured on each ENVE
Composites road rim. The texture designed into ENVE’s
brake tracks is actually part of the structure of the rim
and not a coating. This ensures that each rim’s braking
performance will remain unchanged over the life of
the rim.
Removable Bladders – It is rare to find a composite
cycling component that is devoid of the internal bladder
materials that were used in the molding and manufacturing process. These bladder materials are generally
adhered to the inside surface of handlebars, stems,
seatposts, and often rims. This bladder material not
only adds unwanted weight, but in the case of a rim, it
can make for a very difficult and compromised wheelbuild. Through proprietary materials and processes,
ENVE uses a removable bladder system with all the
rims. This process, while not inexpensive or simple,
ensures that our products are light and provide for the
best wheelbuild possible.
®
ENVE Wheelsets Include:
Mountain Wheels (M50, M60, M70 and M90)
Road Wheels (25, 45, 65, and Smart ENVE System)
•
1 x Lightweight Tubeless Kit, 1 x Roll Tape (M50)
•
ENVE Titanium Quick Release Skewers (SES Road
Wheels)
•
1 x Standard Tubeless Kit, 1 x Roll Tape (M60, M70
and M90)
•
ENVE Chromoly Quick Release Skewers (Classic
Road Wheels)
•
2 x UST Valve Stems w/ Removable Core
•
4 x ENVE Grey Brake Pads
•
2 x ENVE Valve Extenders (Installation Instruction
on page 13 )
-39mm - for 45 and SES 3.4 Models
-55mm - for 65 and SES 6.7 Models
-95mm - for SES 8.9
•
SAFETY
To ensure that you maximize the service life of your
wheels and that your experience with ENVE is the best,
please read and follow these instructions in
their entirety.
2 x 700c ENVE Rim Strip (Clinchers Only)
7
Rider Longevity Note:
Before You Ride:
Recommended Tire Size
Riding a bicycle is inherently dangerous and exposes
the rider to many hazards including the unavoidable
risk of personal injury or death. We strongly suggest
that if you are not a highly skilled bicycle mechanic
with professional tools that you leave all installation
and service to an ENVE authorized dealer, or another
reputable bicycle shop.
•
Check that your tires are sized properly. ENVE recommends the following tire sizes:
Check that your axles, dropouts, and quick
release mechanisms are clean and free of dirt or
other debris.
Ensure that your quick releases or thru-axle wheel
retention devices are secured properly. If you are
unsure whether your quick release or axle is installed
correctly, please consult your dealer.
•
21mm
22mm
23mm
24mm
25mm
28mm
32mm
35mm
40mm
Road 25, 45, 65
SES 3.4, 6.7, 8.9
1.9”
Check spokes for tension or damage.
2.0”
2.1”
2.2”
2.25”
2.3”
2.35”
2.4”
2.5”
2.6”
2.7”
M50
Spoke Tension Recommendations
Front Rim
Brake
Front Disc
Brake Side
M60
Front Disc
Non-Brake
Side
Rear Drive
Side
Rear NonDrive Side
M70
M90
Rim Brake
Rim
100-110 kgf
N/A
N/A
120-140kgf
80-140kgf
Disc Brake
Rim
N/A
120-140kgf
80-140kgf
120-140kgf
80-140kgf
= recommended
= not recommended
If you locate any loose or damaged spokes, contact your ENVE authorized dealer to have your wheels serviced.
9
For example, ENVE recommends the minimum
pressure for a 150lb (68kg) rider be:
Maximum Recommended
Tire Pressure
Tire Size
PSI
BAR
Min. Recommended Tire Pressure
PSI
BAR
Mountain Clincher
2.0”
60
3.4
Road Tire
90
6.5
Mountain Clincher
2.25”
55
3.1
Cyclocross Tire
35
2.5
Mountain Clincher
2.5”
45
2.8
Mountain Tire
20
1.75
All ENVE rims come with a Maximum Pressure recommendation for the specific rim that you have purchased.
Never exceed ENVE’s maximum pressure rating or the
Max Pressure printed on the tire.
Maximum Recommended
Tire Pressure
Tire Size
Road Clincher
21-28mm
125
8.6
Road/Mountain Tubular
21-28mm
N/A*
N/A*
1.75”v
70
4.8
Mountain Clincher
PSI
*Refer to tire manufacturers pressure rating.
•
BAR
•
Make sure that your brakes are connected and
functioning properly. This includes checking the
alignment of your pads to ensure they match the
braking surface of the rim for road/cx wheels and
ensuring that your pads contact the rotor and are
not showing excessive signs of wear on a disc
brake set up.
Install or ask your local dealer to install your
ENVE Composites supplied brake pads. These
pads have been optimized to provide you with
the best braking performance available. ENVE
requires the use of these pads in order for ENVE’s
Five Year Warranty to take effect. Replacement
pads may be purchased from your local dealer or
www.ENVE.com.
Replace your pads at the beginning of each season
OR if:
•
They show signs of uneven wear.
•
They become contaminated. Contaminants
include but are not limited to sand, mud, and alloy
particles from use with alloy rims.
Tech Note: Check your brake pads regularly to ensure
that there are no contaminants that will damage your
full-carbon braking surface. Keep pads and rim clean at
all times to avoid pad glazing and loss of braking power.
ENVE designs, tests, and qualifies wheels for very specific purposes. Subjecting your wheels to disciplines
other than what they were designed for is unwise and
may result in wheel failure, personal injury, or death.
Suggested Rim Application Guide -Road Wheels:
CX
Road
Tri
TT
Track
25
45
65
SES 3.4
SES 6.7
SES 8.9
Mountain Wheels:
XC
Marathon
Trail
AM
Enduro
Park
DH
M50
M60
M70
M90
= recommended
= not recommended
11
ENVE Grey Brake Pad Installation
Tools Required:
-2mm Allen Wrench (in some cases a 2.5mm Allen
wrench is needed)
-Needle Nose Pliers (optional)
If your pads slide out towards the front of the bike
then the brake pad carriers were installed incorrectly.
Reverse the direction of the pad carriers so the pads can
only be removed when pushed or pulled towards the back
of the bike frame. If you are not confident that you can
complete this installation properly, please visit your local
bike shop for assistance.
Warranty is void if you don’t use ENVE brake pads!
2.
3.
4.
5.
Installation of Campagnolo Style Grey Brake Pad
1.
Installation of Shimano/SRAM Style Grey Brake Pad
1.
Place your bike in a bike stand so that you can remove the wheels and still work on your frame. This
isn’t necessary, but makes the job easier.
Using the 2mm Allen wrench, remove the retention
screws from all four pad carriers. Set the screws
aside in a safe place where you won’t lose or
drop them.
Slide pads out towards the rear of the bicycle. If you
cannot accomplish this using your fingers, feel free
to use needle nose pliers.
Install each pad to the proper corresponding carrier. Each pad is labeled “Left” or “Right” and has
an arrow indicating the forward direction in which
the pad should be oriented.
Replace each retention screw and tighten according
to manufacturer specifications.
2.
Place your bike in a bike stand so that you can remove the wheels and still work on your frame. This
isn’t necessary, but makes the job easier.
In 2011 Campagnolo fitted all their brake pad carriers with a retention clip which is not present on
3.
4.
models prior to 2011. To remove your pads lift the
retention tab and pull the pad out towards the back
of the bike until the depression in the pad clears the
retention tab, and proceed to completely remove
the brake pad.
Install each pad to the proper corresponding carrier. Each pad is labeled “Left” or “Right” and has
an arrow indicating the forward direction in which
the pad should be oriented.
Ensure that the retention clip has seated into the
depression in the brake pad.
3.
4.
5.
6.
Using a 5mm open end wrench, or needle nose
pliers; remove the valve core from the stem of the
tire or tube.
In place of the valve core, thread in your ENVE Valve
Extender until finger tight, and then tighten the
extender an additional quarter to half turn with your
tool of choice.
Replace stock valve core into opposite end of the
ENVE Valve Extender.
Repeat on other tire or tube.
ENVE Valve Extender Installation – Road Only
Tools Required:
-5mm Open End Wrench or Needle Nose Pliers
1.
2.
NOTE: Install the valve extenders before installing
your tires.
Locate the valve stem of your tire. (Use presta style
valve stems only!)
13
NOTE: With all ENVE Road Tubulars you will receive the
following length extenders:
Rim
Valve Extender
25
N/A
35
39mm
45
39mm
60
55mm
65
55mm
70
55mm
85
95mm
95
95mm
NOTE: For ENVE Road Clinchers we recommend
purchasing inner-tubes with valve lengths that will accommodate the depth of your wheel. See chart below:
ENVE Clincher Tire Installation
Below is a basic guide to mounting clincher tires on your
new ENVE carbon clincher rims.
Installing Rim Strip
Rim Depth
Inner-Tube Valve Stem Length
25
32mm
35
48mm
45
60mm
60
80mm
65
80mm
70
80mm
85
32mm + Extender
95
32mm + Extender
NOTE: Only use ENVE supplied rim strips. Use of Velox©
or similar thick cloth tape is not recommended as it will
make tire installation more difficult.
1.
Locate the valve stem hole in the rim and align
it with the hole punched in your ENVE supplied
rim strip.
2.
With ENVE logo facing up, stretch the rim strip over
the rim.
3.
Check the entire circumference of the rim to make
sure that the rim strip is centered; that there are no
creases or folds; and that all the spoke holes are
covered.
Installing Tires
1.
Determine the recommended rotational direction
as suggested by the tire manufacturer. Not all tires
are directional but an arrow will generally be present on the sidewall of the tire to indicate the proper
rotational direction.
2.
Using only your hands, mount one side of the tire
bead onto the rim aligning the tire’s logo with the
rim’s valve stem hole.
3.
Inflate your inner-tube just until it takes shape.
4.
Install the tube’s valve stem into the rim’s valve
stem hole, and proceed by seating the tube in
between the rim and tire. Be careful not to twist or
fold the tube.
5.
Install the other tire bead onto the rim using caution not to pinch the tube between the rim and
tire bead.
NOTE: ENVE does not recommend the use of tire levers
to install or remove your tires. However, we understand
that there are moments when the use of a tire lever is
necessary. When using a tire lever, only use PLASTIC
levers, and be careful not to pinch your inner-tube during
the install.
15
Tech Note: If it is difficult to fully install the second side
of the tire bead, check that the tube around the area of
the valve stem is not pinched under the tire bead. If it is,
push the valve stem in towards the tire about 1 cm and
then try mounting the bead again.
1.
Inflate the tire to a low pressure and ensure that
both tire beads are properly seated and that no tube
is sticking out. Correct as necessary.
2.
Inflate the tire to full pressure. When you spin the
wheel the tire should not hop or wander side
to side.
stalled cleanly and quickly in the comfort of your living
room.
ENVE Tubular Tire Installation
•
Truing Stand to hold wheel
Gluing tubular tires is not for everyone, and requires
2-3 days to do a proper mount. We highly recommend
that an experienced bicycle technician with gluing
experience mount your tubulars. It is also completely
acceptable to use a tape system such as Tufo© Extreme
tape to mount your tubular tires. We have had a great
experience using the Tufo© system and it can be in-
•
Rags
•
Alcohol or Acetone (Acetone is safe to use on the
rims, but it will damage the decals.)
•
Acid Brush or Similar
•
Latex Gloves
•
Floor Pump
Below is a basic guide to mounting tubular tires on
your new ENVE carbon tubular rims. Always refer to
the glue manufacturer’s instructions as processes may
vary.
•
Abrasive pad (Scotch Brite) or 120 Grit Sandpaper
•
Glue or Tape of your choice
Before you Glue or Tape:
Time Required – 15 Minutes
1.
Note: When removing tubular tires from an ENVE
rim, remove slowy and with care. Quick and careless
removal may damage the rim.
Tools Required:
2.
Install the valve extenders provided with your
ENVE rims on your tire.If you are going to install
sealant in your tubular tire, now is the time
to do so.
Prepare the rim by cleaning the tire bed of the rim
using either the 120 grit or finer sand paper or
the abrasive pad. Starting at the valve hole, work
your way around the entire tire bed surface of the
rim. Apply acetone to a rag and clean surface of
the tire bed until no sanding residue appears on
your rag.
NOTE: Acetone will damage your decals.
The day before you intend to glue or tape your rims,
install your tires on the rim to pre-stretch them and
ensure proper fit. Once installed, inflate them to within
10-20 psi of the rated max pressure.
Tech Note: This is a good opportunity to get used to
installing the tire on the rim. Practice this several times
before glue comes into the picture. Once you have glue
on the rim and tire, you will only get one chance!
We recommend a minimum 12 hour stretch time, but
refer to the tire manufacturer’s instructions for specific
recommendations.
Gluing and Taping
Taping Tubular Tires:
Time Required – 15 Minutes
If you are taping your rims simply follow the instructions given by the tape manufacturer.
Not all tubular tires are compatible with tape. Be sure
to verify compatibility of the tape and tire with both
manufacturers before installation.
17
Gluing Tubular Tires:
•
Time Required – Generally 72 hrs before you can ride
Step 1
Total Time Required – 12 Hours
•
Place your wheel in the truing stand.
•
Inflate your tires just until the tire twists and the
base tape faces outward.
•
Put on your latex gloves and open the glue container or tube.
•
Grab your brush and apply a light and even coat of
glue to both the rim and the tire. Be sure to apply
the glue across the entire surface of the rim’s tire
bed and tire’s base tape. Be careful to not get
glue inside the spoke holes of the rim.
•
Set rims and tires aside for drying in a dust free,
well ventilated area.
Refer to the glue manufacturer’s instructions for
proper drying times.
Step 2 – After the glue has dried according to the
manufacturer’s recommendation, repeat Step 1.
•
Hold the rim between your feet on the floor, on a
clean, non-slip surface.
•
Put the valve stem through the rim’s valve stem
hole. Press down firmly.
•
Grab the tire to the left and right of the valve stem
and work the tire onto the rim working down
toward the floor.
•
When you get to the floor pick up the wheel and
slide the remaining tire onto the rim using your
thumbs.
Step 3 – Repeat Step 2 plus…
Total Time Required – 12 Hours
•
•
•
After applying your third and final coat of glue to
both the rim and tire, you are ready to mount the
tire to the rim. You should let the rim and tire sit
for a few minutes before mounting the tire.
Tech Note: Some will recommend that the third
and final coat be applied only to the rim. Refer to
the glue manufacturer’s instructions to ensure
you obtain the best adhesion possible.
Deflate the tire and remove the rim from the
truing stand.
•
Quickly check that the tire is centered on the rim.
•
Inflate the tire just enough so that it takes shape
and check to see that an equal amount of base
tape is showing on both sides around the rim.
•
Inflate the tire to 50 psi (3.4 bar) and place it in
your truing stand. Spin the tire slowly and make
sure that the tire is not wandering from side to
side. If it is, deflate the tire slightly and move it
over until the tire is completely centered on the
rim showing equal amounts of base tape on both
sides of the rim. Repeat this step as necessary.
•
Inflate tire to recommended pressure.
•
Clean any excess glue from the rim and brake
track using your rag and acetone.
•
Allow 24 hours for glue to dry.
Before you ride
•
After 24 hours, check both your front and rear
wheels to ensure that the tires are adhered properly. To do this, grab the tire with both hands and
with moderate force try to roll the tire off the rim.
If it holds you are ready to ride!
19
Mountain Tubeless Kit and Tire Installation
Installation of ENVE Tubeless Kit
Tools Required
•
Thorougly clean the inner rim channel with acetone
or alcohol to completely clean the carbon surface.
•
Begin applying tape to the rim tire bed where the
tape covers one spoke hole past the valve stem hole.
From there, tape towards the valve stem hole.
•
Apply with a generous amount of tension to ensure
that the tape conforms to the lower rim channel.
Avoid using direct pressure and use of bare hands to
not damage the tape.
•
ENVE Tubeless Kit (2 Valve Extenders, 1 roll
of tape)
•
Scissors
•
Floor Pump
•
Plastic Tire Lever (optional)
•
Tire Sealant
•
Alcohol or Acetone
Tech Note: Subtle rotations of the wrist back and forth will
conform the tape sufficiently to the rim.
•
Rag
•
Rim Preparation:
•
Wipe clean the tire bed of the rim using your rag
and acetone to ensure that the surface is free of
grease and debris.
Continue past the starting point and finish with a 2-3
inch (5-8cm) overlap. The overlap should cross over
the valve stem hole.
Tech Note: The reinforcement found 180° from the valve
stem hole on the rim should be completely covered by tape.
•
Press the valve stem through the tape at the valve
stem hole after closing the valve core and firmly seat
the stem in position until it conforms to the shape of
the rim channel. Install the valve stem lock-ring with
the rubber O-ring between rim and lock-ring. Tighten as firmly as you can with only your bare hands.
•
Place the tire and fill with air until tire bead pops
loudly. This conforms the tape to rim bed completely.
Then decompress the tire and insert latex sealant
either through the valve stem or by opening the tire
bead and directly into the tire. Then refill the tire
with air.
contact ENVE Customer Service 877-358-2869.
1.
Determine the recommended rotational direction
as suggested by the tire manufacturer. Not all
tires are directional but an arrow will generally be
present on the sidewall of the tire to indicate the
proper rotational direction.
2.
Using only your hands, mount one side of the tire
bead onto the rim aligning the tire’s logo with the
rim’s valve stem hole.
3.
Mount the opposite tire bead, starting opposite
the valve stem and working down both sides of the
rim towards the valve stem. Leave enough tire
bead (generally 5-8 inches) exposed so that you
can install your tire sealant of choice.
Installing the Tire
Tech Note: ENVE Composites mountain rims are
designed around tubeless standards and for maximum
tubeless performance we recommend using UST certified tires. Most tires labeled Tubeless Ready will work
equally as well, but are not guaranteed to follow the
strict dimensional requirements of UST. The use of
Non-UST or Non-Tubeless Ready tires may require the
use of more than one layer of tape and possibly an air
compressor.
If you have questions related to tire choice please
Tech Note: Latex based sealants are safe to use in
ENVE mountain wheels. However, there are many tire
manufacturers that do not permit the use of sealant
with their tires. Check with the tire manufacturer if you
are unsure whether your tires are sealant approved.
21
4.
Install sealant, and rotate the wheel so that the
sealant is opposite of the open tire bead.
5.
Insert the remaining portion of tire bead into the
rim. This will definitely require two hands and
some muscle.
6.
Inflate the tire to lock the beads into the rim. You
will hear and feel them snap into place.
7.
Verify that the bead is fully seated by checking
that the bead seat indicator line is equally displayed above the rim edge around the entire rim.
If not, deflate and retry.
Tech Note: Never exceed maximum pressure rating
of the rim while attempting to seat the tire bead. Use
soapy water as a lubricant on beads that don’t want to
seat.
8.
Inflate tire to riding pressure (see chart on page 10).
1.
Deflate the tire.
2.
Opposite the valve stem, push one bead of the
tire into the center channel of the rim and then
remove the bead. You will most likely need to use
a plastic tire lever, but before you do make sure
the bead is completely loose and resting in the
center channel.
3.
Repeat for opposite bead.
Issue
Issue
Causes
Possible Solutions
Tire not
seating
Tire Diameter
is to large or
loose
Add second layer
of tape: Use an air
compressor (do not
exceed ENVE’s max
rated PSI); Purchase
a UST or Tubeless
Ready tire.
Tire seats
but leaks
air
Causes
Possible Solutions
Issue
Causes
Possible Solutions
Tire diameter
is too small
Apply soapy water to
bead and reinflate
until tire seats (do not
exceed ENVE’s max
rated PSI)
Tire seats
but leaks
air
Tape not
installed
properly
Folds in tire
from packaging
Inflate tire with a tube
in it
and let it sit in a warm
room for 30 minutes.
This will
remove packaging
creases from the tire.
Remove tire and
inspect tape for
wrinkles, bubbles, or
folds. Ensure that you
have a 2-3” (6-8cm)
overlap at the valve
hole.
Clean the rim with
acetone or rubbing
alcohol and reapply
tape.
Valve stem not
seated inside
rim
Press down firmly
on valve stem until it
sets flush with the rim
channel.
If rim isn’t
cleaned properly tape may
not adhere to
rim and may
migrate
Tire Bead
Damaged/
Worn
Time for new tires.
Removing the Tire
23
Wheel Installation
Front Wheel
Installation of the Quick Release
1.
Check that brake quick release and wheel quick
release are in the open position.
2.
Install the front wheel into the fork dropouts so
that the axles are fully seated leaving no gap between the top of the dropout and top of the axle.
ENVE Quick Release skewers should only be used with
forks that feature secondary retention tabs on the dropouts to prevent accidental wheel loss. ENVE does not
recommend the removal of these retention tabs.
1.
Unthread the adjusting nut from the end of the
quick release skewer and remove the tension
spring.
2.
Insert the quick release skewer through the hub
axle from the non-drive side on the rear and nondisk side on the front.
3.
Re-install the tension spring with the smaller
diameter of spring facing inward.
4.
Thread the adjusting nut a few turns back on to
the skewer.
6.
Tech Note: Locate the arrow indicating the proper
rotational direction of your tire (hopefully you did this
when you mounted your tires), and then make sure
that the FRONT quick release skewer lever is on the
non-drive side of a road bike and non-disc side of your
mountain bike.
7.
3.
4.
5.
Upon fully closing the quick release lever it should
leave a very clear impression in the palm of your
hand. If it does not then your quick release is
not tight enough. Loosen the quick release,
tighten the adjusting nut a quarter to a half turn
and retighten the lever until proper tightness is
achieved.
Lever should be positioned behind the fork leg.
4.
Install the rear wheel into the frame dropouts
so that the axles are fully seated leaving no gap
between the top of the dropout and top of the axle.
Tech Note: Locate the arrow indicating the proper
rotational direction of your tire (hopefully you did this
when you mounted your tires), and then make sure that
the rear quick release skewer lever is on the non-drive
side of your bike.
Rear Wheel
5.
Close the quick release half way.
1.
Check that brake quick release and wheel quick
release are in the
open position.
6.
Tighten the adjusting nut until it contacts the
dropout.
7.
Close the quick release half way.
2.
Close the lever. At half way closed you should feel
tension, but still be able to close it fully.
Tighten the adjusting nut until it contacts the
dropout.
Shift the rear derailleur into the highest (smallest) gear.
8.
3.
Pull back and down on the rear derailleur to open
the chain and install the cassette between upper
and lower sections of chain. Align the cassette so
that the chain rests on the smallest cog.
Upon fully closing the quick release lever it should
leave a very clear impression in the palm of your
hand. If it does not then your quick release is
not tight enough. Loosen the quick release,
tighten the adjusting nut a quarter to a half turn
Close the lever. At 90 degrees to the fork you
should feel tension, but still be able to close
it fully.
25
and retighten the lever until proper tightness is
achieved.
9.
For safety the lever should be positioned between
the seat stay and chain stay.
consult your local ENVE dealer or a professional
bike mechanic.
3.
Pre-Ride Inspection
1.
2.
Close the brake caliper quick release mechanisms and check that your brakes are functioning
properly. For a mountain bike with disc brakes,
spin your wheels to ensure that your rotors are
not rubbing and that the brakes are working
properly.
Make sure that both your front and rear wheels
are centered in the fork and frame. If they are
not you will need to loosen the quick release and
re-seat the axle in the dropout. Double check that
the quick release retention springs are installed
correctly (smaller end facing inward). If after several attempts you are unable to center the wheel,
Preferably with your bike in a stand or by picking
up the rear end of the bike, shift through the
gears to ensure that the shifting system is working properly and that the wheel spins true.
•
Inspect your wheelset regularly for proper spoke
tension, vertical and lateral true, bearing play,
and bearing smoothness. Service related to any
of the above issues should be performed by a
professional bike mechanic.
•
Once a year, inspect the inside or your rim using a
flashlight to check for nipple corrosion.
•
If any damage or questionable wear is discovered
while inspecting your rim, contact ENVE Customer
Service (888-358-2869) for assistance before your
next ride.
General Care and Maintenance
•
To clean your full carbon ENVE rim you may use
soap and water.
•
Store you wheels in a dry location.
•
Store your wheels away from direct sunlight.
Extended exposure may cause discoloration of rim
over time.
•
To remove tubular glue or adhesive from the rim
you may use alcohol or acetone.
NOTE: If using Acetone, avoid contact with the decals as
this will damage them.
Rev. A
27
®
ENVE Composites , LLC I Ogden, UT 84404, USA


© Copyright 2026