
Lab Manual to Accompany Food Science: An Ecological Approach
Lab Manual to Accompany
Food Science: An Ecological Approach
(with additional international recipes for cultural competency)
Sari Edelstein, PhD, RD
Department of Nutrition
Simmons College
Boston, Massachusetts
1
© Jones & Bartlett Learning, LLC. NOT FOR SALE OR DISTRIBUTION.
World Headquarters
Jones & Bartlett Learning
5 Wall Street
Burlington, MA 01803
978-443-5000
[email protected]
www.jblearning.com
Jones & Bartlett Learning books and products are available through most bookstores and online booksellers. To
contact Jones & Bartlett Learning directly, call 800-832-0034, fax 978-443-8000, or visit our website,
www.jblearning.com.
Substantial discounts on bulk quantities of Jones & Bartlett Learning publications are available to corporations,
professional associations, and other qualified organizations. For details and specific discount information, contact
the special sales department at Jones & Bartlett Learning via the above contact information or send an email to
[email protected].
Copyright © 2014 by Jones & Bartlett Learning, LLC, an Ascend Learning Company
All rights reserved. No part of the material protected by this copyright may be reproduced or utilized in any form,
electronic or mechanical, including photocopying, recording, or by any information storage and retrieval system,
without written permission from the copyright owner.
Lab Manual to Accompany Food Science: An Ecological Approach is an independent publication and has not been
authorized, sponsored, or otherwise approved by the owners of the trademarks or service marks referenced in this
product.
The authors, editor, and publisher have made every effort to provide accurate information. However, they are not
responsible for errors, omissions, or for any outcomes related to the use of the contents of this book and take no
responsibility for the use of the products and procedures described. Treatments and side effects described in this
book may not be applicable to all people; likewise, some people may require a dose or experience a side effect that
is not described herein. Drugs and medical devices are discussed that may have limited availability controlled by the
Food and Drug Administration (FDA) for use only in a research study or clinical trial. Research, clinical practice,
and government regulations often change the accepted standard in this field. When consideration is being given to
use of any drug in the clinical setting, the health care provider or reader is responsible for determining FDA status of
the drug, reading the package insert, and reviewing prescribing information for the most up-to-date
recommendations on dose, precautions, and contraindications, and determining the appropriate usage for the
product. This is especially important in the case of drugs that are new or seldom used.
Production Credits
Publisher: William Brottmiller
Associate Acquisitions Editor: Megan R. Turner
Editorial Assistant: Agnes Burt
Production Editor: Jessica Steele Newfell
Senior Marketing Manager: Jennifer Stiles
VP, Manufacturing and Inventory Control: Therese Connell
Cover Design: Scott Moden
Rights & Photo Research Associate: Amy Rathburn
Cover Image: © Nixx Photography/ShutterStock, Inc.
ISBN 978-1-4496-9101-1
8851
17 16 15 14 13
10 9 8 7 6 5 4 3 2 1
2
© Jones & Bartlett Learning, LLC. NOT FOR SALE OR DISTRIBUTION.
CONTENTS
Directions for the Student
Lab Safety
Bloodborne Pathogen Standards
8
9
11
Sensory Lab
Lab 1: Sensory Evaluation
13
Meat and Meat Substitutes Labs
Lab 2: Sensory and Objective Comparisons of Ground Meat Patties
Lab 3: Texturized Vegetable Protein Patties, Soy Cubes, and Legumes
Lab 4: How to Cut-up a Whole Chicken and Prepare a Healthy Product
Lab 5: How to Prepare a Whole Fish and Cook the Fillets
Lab 6: Sushi
21
24
29
32
36
Milk and Dairy Substitutes Labs
Lab 7: Milk Alternatives for Lactose Intolerance
Lab 8: Homemade Ricotta Cheese
Lab 9: Ice Cream Variations
Lab 10: Linespread Testing
41
46
50
54
Egg and Egg Replacement Labs
Lab 11: Egg Foams: Soufflés
Lab 12: Egg Replacement in Bakery Items
Lab 13: Egg Quality and Storage
60
64
68
Fruit and Vegetable Labs
Lab 14: Vegetable Pigments, Browning, and Nutrient Loss
Lab 15: Organic Versus Conventional Fruits and Vegetables
Lab 16: Osmosis and Enzymatic Browning
73
78
82
Grains, Flour, Cereals, and Pasta Labs
Lab 17: Pasta with Flour Variations
Lab 18: Gluten-Free Pasta
Lab 19: Starch Thickeners
Lab 20: Cooked Cereals: Gelatinization
87
92
97
101
Yeast and Quick Breads/Cakes Labs
Lab 21: Pie Pastry
Lab 22: The Role of Acid in Angel Food Cake
Lab 23: Manipulation of Ingredients in Baked Goods
105
109
113
Fats and Oils Labs
Lab 24: Smoke Points of Edible Fats
Lab 25: Salad Dressings: Permanent and Temporary Emulsions
119
123
3
© Jones & Bartlett Learning, LLC. NOT FOR SALE OR DISTRIBUTION.
Lab 26: Fat Replacement in Bakery Items
127
Sugar and Sugar Substitutes Labs
Lab 27: Sugar Content of Soft Drinks
Lab 28: Sugar Substitutes in Sponge Cake
Lab 29: Caramel Candy
132
135
139
Beverage Labs
Lab 30: Make Your Own Sports Drinks
Lab 31: Coffee and Tea: Sensory Evaluation
Lab 32: Effect of Caffeine on Blood Pressure, Heart Rate, and Reaction Time
Lab 33: Comparison of Macronurtients and Micronutrients in Oral Supplements
144
148
153
160
Culturally Competent Recipes (may be used to adjunct the above labs)
America, Southeastern
Cornbread
166
China
Chinese Chicken Soup
166
Cajun Creole
Catfish Sauce Piquant
167
Vegetarian
Special K® Roast
Lentil Stew
Garbanzo-Oat Burger Patties
Creamy Fettuccini
Tofu-Spinach Lasagna
167
168
168
169
169
Judaism
Matzo Balls
Blintz Soufflé
Breakfast Blintzes Casserole
Potato Latkes
Apple Matza Kugel
Knishes
170
170
170
171
171
172
Sweden
Köttbullar (Swedish Meatballs)
Jordgubbstårta (Swedish Strawberry Cake)
Cod with Mashed Potatoes
Swedish Rye Bread
172
173
174
175
4
© Jones & Bartlett Learning, LLC. NOT FOR SALE OR DISTRIBUTION.
Hungary
Cherry Soup (Meggy Leves)
Goulash (Gulyás)
Soft Dumplings (Galuska)
Cucumber Salad (Uborka Sálata)
175
176
177
177
Greece
White Bean Soup (Fasolada)
Baked Chicken and Potatoes (Kotopoulou Lemonato sto Fourno me Patates)
178
178
France
Crème Caramel
Soupe au Pistou
179
179
Netherlands
Snert (Pea Soup)
Stamppot Rode Kool (Mashed Potatoes, Red Cabbage, and Applesauce)
180
180
Great Britain
Welsh Rarebit
Cottage Pie
Scones
181
181
182
Korea
Seasoned Spinach (Shigumchi Namul)
183
Japan
Temarizushi (Vinegared Rice and Fish Balls)
183
India
Sambar
184
Far East
Afghaniaash (Bean Soup)
Bangladeshi Doi Mach (Fish Dish)
184
185
Jamaica
Rice and Peas
Curry Chicken
Jerk Chicken
186
186
187
Guatemala
Enchiladas
Jocón
188
188
5
© Jones & Bartlett Learning, LLC. NOT FOR SALE OR DISTRIBUTION.
Haiti
Rice with Black Mushrooms
189
Costa Rica
Gallo Pinto (Speckled Rooster)
190
Sudan
Chicken Stew (Damaat Dijaj)
Falafel (Taamya)
190
191
Rwanda
Igisafuriva (Chicken Dish)
Isombe (Vegetarian)
191
192
Nigeria
Jollof Rice
Fried Rice
192
192
Turkey
Lentil Balls
Stuffed Grape Leaves (Sarma or Dolma)
193
193
Assyria
Dolma Makhlot (Stuffed Mixed Vegetable Dolma)
Dolma Darpe (Stuffed Grape-Leaf Dolma)
Dolma Kalama (Stuffed Cabbage Dolma)
194
195
196
Indonesia
Nasi Tumpeng (Vegetarian)
Sambel (Vegetarian)
197
197
Australia
Balsamic Bean Salad with Grilled Fish Fillets
Spinach Salad with Avocado, Sautéed Apples, and Toasted Macadamia Nuts
198
198
Argentina
Tortilla
Empanada Dough and Filling
199
200
Brazil
Pão de Queijo (Egg Dish)
201
Persia
Shirin Pollo (Sweet Rice with Orange, Raisins, and Almonds)
Adas Pollo (Rice with Dates and Lentils)
201
202
6
© Jones & Bartlett Learning, LLC. NOT FOR SALE OR DISTRIBUTION.
Lebanon
Hommus Bi Tahini
Tabouleh
Fish Tarator (Fish Baked with Tahini)
Chick Peas and Eggplant
Spinach Pies
203
203
203
204
204
Resources
Sample Sensory Sheets
Linespread Test Sheet
Weights and Measures
Scoops and Can Sizes
Contributors
207
209
210
211
212
7
© Jones & Bartlett Learning, LLC. NOT FOR SALE OR DISTRIBUTION.
DIRECTIONS FOR THE STUDENT
You, the student, are embarking on a journey through food science. This lab manual will help
you learn the principles of food science that have been discussed in the classroom and/or are
noteworthy additional experiments that complement your study.
Each lab has the headings listed below. Some of the contents under each heading will be for you
to fill out and some will be provided. Please read the description of each and add them to your
laboratory report accordingly. Please alert your instructor if you have a food allergy.
OBJECTIVE: Each lab will provide the student with an objective.
LAB INFORMATION: Background notes are provided for the student.
METHODS AND MATERIALS: Ingredients and directions for the lab are listed.
REVIEW OF LITERATURE AND DISCUSSION: The student will add this information.
RESULTS: Students will post the data and results from the lab.
CONCLUSION: Students will summarize their lab findings.
REFERENCES: The APA style, as shown below, requires each reference to be numbered and
superscripted (e.g., 1,2) in the review of literature/discussion section.
Book
1.
Leakey, R., & Lewin, R. (2012). Origins reconsidered: In search of what makes us
human. New York: Doubleday.
Journal Article
2.
Marx, J. L. (2012). Ape language controversy flares up. Science, 207(2), 130–33.
Newspaper/Magazine
3.
Hulse, C., & Cooper, H. (2011, August 1). Obama hails plan to cut trillions. The New
York Times, pp. A1, A10.
4.
Smith, P. (2006, June 15). Ambition: Why some people succeed more than others. Time,
166, 48–52.
Internet Site
5.
World Health Organization. Twenty Questions on Genetically Modified Foods. Available
at: http://www.who.int/foodsafety/publications/biotech/20questions/en/index.html.
Accessed August 15, 2010.
OPTIONAL: Make your own food label from your lab final recipe: www.nutritiondata.com.
8
© Jones & Bartlett Learning, LLC. NOT FOR SALE OR DISTRIBUTION.
LAB SAFETY
Due to the wide range of labs students may perform, this manual cannot cover every safety
hazard. It is the responsibility of the individual instructor to form needed policies, procedures,
and oversight for lab safety.
Personal Safety
Eye protection. When chemicals are to be handled, chemical splash goggles meeting the OSHAapproved ANSI Z87.1 standard (imprinted on the goggle) for impact and splash protection must
be worn over the eyes at all times. Contact lenses should not be worn in laboratories. When food
is being cooked over the stove, goggles or eyeglasses may be worn to prevent liquid splashes to
the eye area.
Clothing. Clothing must be worn that covers the entire leg, from the waist to the ankle, and that
covers the torso from the waist to the neck. Shoulders must be completely covered, and sleeves
must be worn that cover the arm from the shoulder to at least halfway to the elbow. The wearing
of lab coats and aprons is encouraged; however, the wearing of a lab coat or apron cannot be
substituted for the wearing of proper clothing. Loose clothing that might come into contact with
hot liquids or chemicals or get caught in apparatus or machinery must be avoided.
Footwear. Shoes must be worn at all times in the laboratory. The foot must be completely
covered. Open-toed or backless shoes and sandals are unacceptable. Uppers made of woven
material should not be worn.
Hair. Hair coverings must be worn at all times.
Gloves. Gloves should be worn when handling food and chemicals and discarded after use.
Fume hoods. Whenever an experiment is likely to produce vapors that might exceed the
permissible exposure limit for any chemical involved, the experiment must be confined to an
operating fume hood.
Material Safety Data Sheets (MSDS). Laboratories must have MSDS for all chemicals used in
that laboratory available at all times. Laboratory personnel should read and understand the
MSDS for any chemical before using it for the first time.
Training. All personnel working in laboratories are required to know laboratory safety
principles. Students will be trained in class by the instructor prior to entering the lab.
Accidents. All accidents, injuries, and hazardous situations occurring in the laboratory must be
reported to the appropriate department and other supervisory personnel within the institution.
9
© Jones & Bartlett Learning, LLC. NOT FOR SALE OR DISTRIBUTION.
Chemical Safety
Storage
a.
All laboratories must have a complete, accurate, and up-to-date inventory of all the
chemicals in the lab.
b.
Keep chemicals in dated containers appropriate for them, preferably the same container
in which they were received.
c.
Chemical containers must be clearly and accurately labeled.
d.
Liquid chemicals must be stored below eye level.
e.
Incompatible chemicals must be stored separately from each other, following published
guidelines.
f.
Chemicals must be arranged for storage according to reactivity.
g.
Flammables and corrosives should be stored in cabinets designed to hold them.
h.
All chemicals should be returned to storage when not in actual use.
i.
Chemicals must not be kept for long times in storage. Any chemical not in active use
must be removed from storage and disposed of as waste.
Transfer and Transportation
All pipetting must be done with a bulb or pump, never by mouth.
Disposal
Chemical waste must be stored in the immediate vicinity of the related work process. Chemical
waste may not be moved to a different room or work area for storage. Chemicals that are
incompatible must be segregated. This waste should be red-bagged and disposed of based on
institutional policy.
Equipment
Emergency equipment. Know the location and use of all safety equipment (fire extinguisher
and first aid kit) and the exits from the laboratory. Students should be trained to use them in
addition to Stop, Drop, and Roll.
Spill kit. Every laboratory must have a spill kit available. Its location must be clearly marked
and available to all personnel. The kit must contain sufficient types and amounts of materials to
enable personnel to clean up a spill of the largest-size container of any chemical in the lab.
First aid kit. Every laboratory must have a first aid kit available. Its location must be clearly
marked and available to all workers. The kit must be inspected periodically, and its contents
replenished as needed.
Refrigerators. Any refrigerator used to store flammable chemicals must be rated as suitable for
storage of such materials.
Electrical equipment. Motor-driven electrical equipment cannot be used where flammables are
present unless equipped with a nonsparking induction motor. Hot plates, unless designed as
explosion-proof, cannot be used in conjunction with flammables. Equipment with frayed cords or
other damage must be taken out of service until repaired.
10
© Jones & Bartlett Learning, LLC. NOT FOR SALE OR DISTRIBUTION.
BLOODBORNE PATHOGEN STANDARDS
None of the labs in this lab manual involve the handling of blood or bodily fluids. The following
information is presented to inform participants of standards by the Occupational Safety and
Health Administration (OSHA) for handling blood and bodily fluids.
Bloodborne pathogens are microorganisms in human blood that can cause disease in humans.
These pathogens include, but are not limited to, the hepatitis B virus (HBV) and the human
immunodeficiency virus (HIV), which causes AIDS. As a nutrition student, you will participate
in care-giving activities and therefore may be exposed to HBV, AIDS, and other infectious
and/or communicable diseases. To reduce your risk of exposure, follow the guidelines detailed
below.
All students are expected to follow universal precautions to prevent direct contact with blood.
All blood is considered to be potentially infected. A nurse should be available when blood will
be handled, and all research used from blood draws should be cleared in advance with the
Institutional Review Board.
The universal precautions are as follows:
1.
All students and the nurse will be expected to wash their hands with soap and water
before and after exposure to blood and after removal of contaminated gloves or other
personal protective equipment (PPE).
2.
All nutrition students will use disposable latex gloves when handling blood and bloodtesting supplies.
3.
Needles and other contaminated “sharps” will be discarded as soon as feasible in
appropriately labeled, closable, puncture-resistant, leak-proof containers. Glucose strips
will be discarded in “red bags,” which denote biological hazard risk.
4.
Work surfaces will be disinfected after use.
11
© Jones & Bartlett Learning, LLC. NOT FOR SALE OR DISTRIBUTION.
Sensory Lab
12
© Jones & Bartlett Learning, LLC. NOT FOR SALE OR DISTRIBUTION.
Lab 1
Sensory Evaluation
OBJECTIVES
• Describe the appearance, taste, flavor, and texture of various food samples by using the
human senses, specifically:
1.
Identify a taste and a flavor.
2.
Conduct a paired-comparison test and participate as a sensory panelist.
3.
Conduct a triangle test and participate as a sensory panelist.
4.
Conduct a duo-trio test and participate as a sensory panelist.
5.
Conduct a ranking test and participate as a sensory panelist.
LAB INFORMATION
Sensory evaluation is a scientific testing method for accurate measurement of human responses
as perceived by the five senses. Because sensory evaluation provides valuable information for
consumer reaction toward a food product, it is often applied in many situations in food research
and development. It can be used for new product development, quality control, process change,
storage stability, selection of a new supplier, recipe modification, panelist training, and
correlation with objective test data. The specific sensory characteristics that will be evaluated in
this lab include appearance, taste, flavor, and texture. Flavor is the combined sense of taste,
aroma, and mouthfeel.
MATERIALS AND METHODS
Part A: Identification of Food Samples with Descriptive Terms
Ingredients and Equipment
Bite-size samples of a breadstick, a gummy-bear, a tortilla chip, a marshmallow, and an
American cheese slice
1 Tbsp. of tapioca pudding (other foods may be substituted)
3 oz. sample cups or plates
Methods
Evaluate the appearance, taste, flavor, and texture of each food sample using the following
descriptive terms. Record your answers in Table 1.
Appearance: pale, burnt, rounded, pebbled, curdled, light brown, dark brown, transparent,
opaque, dull, shiny, glossy, dry, smooth, rough, grainy, fizzy
Taste: sweet, salty, sour, bitter
Flavor: peppery, astringent, spicy, minty, eggy, fatty, rancid, metallic, nutty, fruity, soapy,
floury, pungent, puckery, flowery, stale, pasty, musky, astringent, tangy, sharp
Texture: adhesive, cohesive, chewy, hard, tender, dense, crispy, brittle, smooth, firm, viscous,
gummy, gritty, springy, pasty, rubbery, tough, flaky, mealy, rough, crackly, crusty, limp, creamy
13
© Jones & Bartlett Learning, LLC. NOT FOR SALE OR DISTRIBUTION.
Table 1. Evaluation of Food Samples Using Descriptive Terms
Food Sample
Appearance
Taste
Flavor
Texture
Part B: Identification of Flavor and Taste
Ingredients
2 flavored jellybeans (e.g., jalapeno and buttered popcorn or other flavored jelly beans)
2 oz. sample cups
Methods
1.
Pinch your nose and put a jelly bean in your mouth. Chew the jellybean with your nose
still pinched. Record the intensity of the jellybean’s sweetness.
2.
Now release your nose and notice the change in these sensations. What is the flavor of
the jellybean?
3.
Record the flavor of the jelly bean in Table 2 and evaluate the intensity of the flavor.
4.
Repeat these steps for the second jellybean.
Table 2. Jelly Bean Test Score Sheet
First sample
Sample code: _______
Jellybean Sweetness:
__________________________________________________
1
2
3
4
5
6
7
8
9
Strong
Weak
Jellybean Flavor:
__________________________________________________
1
2
3
4
5
6
7
8
9
Strong
Weak
14
© Jones & Bartlett Learning, LLC. NOT FOR SALE OR DISTRIBUTION.
Second sample
Sample code: _______
Jellybean Sweetness:
__________________________________________________
1
2
3
4
5
6
7
8
9
Strong
Weak
Jellybean Flavor:
__________________________________________________
1
2
3
4
5
6
7
8
9
Strong
Weak
Part C: Paired Comparison Test
The paired comparison test is a test of difference in which a specific characteristic is designated.
The panelist is asked to test the two samples presented to identify the sample with the greater
amount of the characteristic being measured. The subject has a 50% chance of being right by
chance alone in paired comparison testing.
Ingredients and Equipment
Two similar beverage products coded with three-digit random numbers (1 fl oz.)
2 oz. sample cups
Drinking water, napkins
Methods
1.
Taste the samples. Rinse your mouth with water between samples and wait for 30
seconds before you taste next sample.
2.
Determine which sample has a greater intensity in sweetness.
3.
Write down the code of the sweeter sample on Table 3.
Table 3. Paired Comparison Test Score Sheet
Sample code: ___________
Sample code: ___________
Which sample is sweeter? ___________
Part D. Triangle Test
All three samples are presented simultaneously. The panelist is served three coded products and
15
© Jones & Bartlett Learning, LLC. NOT FOR SALE OR DISTRIBUTION.
is asked to indicate which one is odd. Two samples are alike and one is different in the triangle
test; however, the difference in this method of presentation reduces the chance of guessing the
right answer to 33.3% (1 in 3).
Ingredients and Equipment
Two identical food or beverage samples coded with three-digit random numbers
One similar food or beverage sample coded with three-digit random number
2 oz. sample cups
Drinking water, napkins
Methods
1.
Taste each of the three coded samples from left to right. Rinse your mouth with water
between samples and wait for 30 seconds before you taste next sample.
2.
Identify which sample differs from the other two in Table 4.
3.
Count the total number of panelists who correctly identified the odd sample in the class.
Table 4. Triangle Test Score Sheet
Please taste the samples from left to right. Two samples are same and
one is different. Circle the number of the sample that is different.
Sample codes: _______
_______
_______
Part E. Duo-Trio Test
The duo-trio test is another test of difference. In this test, the reference sample is presented first.
It is followed by two other samples, one of which is the same as the reference. The panelist is
requested to identify which of the last two samples is the same or different from the reference.
There is a 50% chance of being right by chance alone in a duo-trio test.
Ingredients and Equipment
Two identical food samples: one is coded as a reference and the other is coded with a three-digit
random number
One similar food sample coded with a three-digit random number
2 oz. sample cups
Drinking water, napkins
Methods
1.
Place the reference in back and the two samples in front.
2.
Taste the reference first and then the two samples, from left to right. Rinse your mouth
with water between samples and wait for 30 seconds before you taste next sample.
3.
Identify which sample is the same as the reference in Table 5.
4.
Count the actual number of panelists who correctly matched the sample to the reference
in the class.
16
© Jones & Bartlett Learning, LLC. NOT FOR SALE OR DISTRIBUTION.
Table 5. Duo-Trio Test Score Sheet
Taste the samples from left to right. The left-hand sample is the reference. Circle the
number of the sample that matches the reference. If no difference is apparent between
the two unknown samples, you must guess.
Reference
Sample code: _______
Sample code: _______
Part F. Ranking Test
A ranking test is a difference test in which more than two samples are simultaneously presented
and the panelists rank the samples according to the intensity of the particular characteristics
being evaluated. The sample with the greatest intensity is ranked as number 1.
Ingredients and Equipment
1/4 slice of three types of cheese coded with three-digit random numbers
2 oz. sample cups
Water crackers and napkins
Methods
1.
Taste each of the three coded samples from left to right. Eat a bite-sized water cracker to
cleanse your mouth between samples and wait for 30 seconds before you taste the next
sample.
2.
Rank the three samples in descending order of preference in Table 6. No ties are allowed
in the ranking. The most preferred sample is ranked as 1.
Table 6. Ranking Test Score Sheet
Taste each of the coded samples in the set in the sequence presented, from the left to right.
Please cleanse your mouth with a bite-sized water cracker between samples and wait for
30 seconds before you taste the next sample. Rank the three samples in descending order
of preference. You may re-taste any of the samples while ranking the samples according
to preference. No ties are allowed in the ranking. Remember that the most preferred
sample should be ranked as 1.
Sample code: (1) _______
Sample code: (2) _______
Sample code: (3) _______
17
© Jones & Bartlett Learning, LLC. NOT FOR SALE OR DISTRIBUTION.
REVIEW OF LITERATURE AND DISCUSSION
18
© Jones & Bartlett Learning, LLC. NOT FOR SALE OR DISTRIBUTION.
CONCLUSION
REFERENCES
19
© Jones & Bartlett Learning, LLC. NOT FOR SALE OR DISTRIBUTION.
Meat and Meat Substitutes Labs
20
© Jones & Bartlett Learning, LLC. NOT FOR SALE OR DISTRIBUTION.
Lab 2
Sensory and Objective Comparisons of Ground Meat Patties
OBJECTIVES
• To determine preferences for ground meat patty types
• To objectively measure differences among ground meat patties
LAB INFORMATION
The main component of meat, and what most people desire when they consume meat, is the
actual muscle tissue. Muscle tissue is made up of roughly 75% water, 18% protein, 4–10% fat
(depending on the animal and the cut), and minimal carbohydrate. Besides the muscle tissue,
other components of meat cuts include bone, including bone marrow; connective tissue; and fat.
Because most consumers select their meat based on the cut's muscle tissue, it is important to
understand how muscle tissue is constructed. Most of the muscle tissue is actually composed of
water. Upon heating, the meat will shrink in size. This is partially due to the fact that the water in
the muscle tissue evaporates. Shrinkage is also the result of actions of the muscle proteins.
MATERIALS AND METHODS
Ingredients and Equipment
Several varieties of ground meat products (e.g., turkey, chicken, beef, lamb, pork with and
different percentages of fat)
Baking sheet
Scales
Meat thermometer
Procedure
1.
Preheat oven to 350°F (176°C).
2.
Obtain 90 grams of each variety of ground meat.
3.
Form all portions into patties of approximately equal dimensions (diameter and
thickness).
4.
Arrange the patties on parchment paper on baking sheets.
5.
Insert a meat thermometer into the center of mass of one of the patties and place this
patty near the front of the baking sheet so that you can read the thermometer when
looking into the oven.
6.
Bake the patties until an internal temperature of 165°F (74°C) is achieved for 15 seconds.
7.
Weigh each cooked patty and determine cooking loss by using the following equation:
[(Raw weight – cooked weight) ÷ raw weight] × 100 = percent cooking loss
8.
Report cooking loss as mean percentage ± standard deviation.
9.
Code and serve the hot samples to your group for tasting. Use Table 1 to record the score
for each sample.
10.
Calculate the average sensory scores and report it as the mean.
21
© Jones & Bartlett Learning, LLC. NOT FOR SALE OR DISTRIBUTION.
RESULTS
Score each meat for tenderness, flavor, aftertaste, and overall acceptability using a 9-point
hedonic scale:
1 = like extremely
2 = like very much
3 = like moderately
4 = like slightly
5 = neither like nor dislike
6 = dislike slightly
7 = dislike moderately
8 = dislike very much
9 = dislike extremely
Table 1. Comparison of Meats After Cooking
Meat
Tenderness
Aftertaste
Flavor
Variety
Overall
Acceptability
22
© Jones & Bartlett Learning, LLC. NOT FOR SALE OR DISTRIBUTION.
Cooking
Loss
REVIEW OF LITERATURE AND DISCUSSION
23
© Jones & Bartlett Learning, LLC. NOT FOR SALE OR DISTRIBUTION.
CONCLUSIONS
REFERENCES
24
© Jones & Bartlett Learning, LLC. NOT FOR SALE OR DISTRIBUTION.
Lab 3
Texturized Vegetable Protein Patties, Soy Cubes, and Legumes
OBJECTIVES
• To determine preferences for different types of meat substitutes
• To objectively measure nutritional differences among types of meat substitutes
LAB INFORMATION
Due to personal preference, health issues, and food and environmental concerns, many people
have turned to using meat alternatives. Soy-based alternatives, particularly textured soy
proteins (TSPs), are commonly marketed to consumers who avoid eating animal-based
products. When making TSPs (also known as textured vegetable protein, or TVP), soy flour or
soybeans are defatted and their proteins isolated. The protein-rich concentrate produced by this
process is then dehydrated. The final product is shelf-stable for nearly 12 months when stored in
an airtight container.
Nutritionally, TSPs are an excellent meat alterative due to their high protein content. By weight,
TSPs are at least 50% protein, and the proteins found in TSPs are complete proteins because they
contain all of the amino acids not able to be synthesized in the human body.
MATERIALS AND METHODS
Ingredients
Texturized vegetable protein (available from Bob’s Red Mill)
Flour
Olive oil
Extra firm tofu
Bread crumbs or Shake-n-Bake
Legumes (any type)
Vegetables (any type)
Methods
To make TVP patties:
1.
Boil 1/2 cup water and add 1/2 cup TVP and the cut up vegetable of your choice.
25
© Jones & Bartlett Learning, LLC. NOT FOR SALE OR DISTRIBUTION.
2.
After all the water is absorbed, set the mixture aside to cool.
3.
Mix in 1 1/2 Tbsp flour.
4.
Form a patty and cook it in a small amount of olive oil until done.
To make soy cubes:
1.
Slice extra-firm tofu into 1 1/2-inch cubes.
2.
Coat the cubes with bread crumbs or Shake-n-Bake.
3.
Place the coated cubes on a foil-lined cookie sheet and bake at 350°F (177°C) for 10 to
15 minutes.
To make legumes:
1.
Soak dried legumes in a bowl overnight or use canned legumes.
2.
Drain soaked legumes. (Not needed for canned product.)
3.
Cook until tender in water (about 1 hour and 30 minutes). (Not needed if canned
product.)
RESULTS
See Table 1 and score each item for flavor, texture, aftertaste, and overall acceptability using a 9point hedonic scale:
1 = like extremely
2 = like very much
3 = like moderately
4 = like slightly
5 = neither like nor dislike
6 = dislike slightly
7 = dislike moderately
8 = dislike very much
9 = dislike extremely
Table 1. Comparison of Meat Substitutes After Cooking
Meat
Texture Aftertaste
Flavor
Overall
Substitute
Acceptability
Calories/Protein/Fat
(from package label or
food table)
26
© Jones & Bartlett Learning, LLC. NOT FOR SALE OR DISTRIBUTION.
REVIEW OF LITERATURE AND DISCUSSION
27
© Jones & Bartlett Learning, LLC. NOT FOR SALE OR DISTRIBUTION.
CONCLUSION
REFERENCES
28
© Jones & Bartlett Learning, LLC. NOT FOR SALE OR DISTRIBUTION.
Lab 4
How to Cut-up a Whole Chicken and Prepare a Healthy Product
OBJECTIVE
• To participate in cutting up a whole chicken and removing excess fat to make a healthier
final product
LAB INFORMATION
The type and style of poultry must be selected before preparation. Types of poultry include fresh,
frozen, canned, dehydrated, and sliced. The degree of processing makes poultry available as
dressed, ready-to-cook, convenience cuts, such as boneless, skinless breasts or thighs, and
processed forms, such as chicken nuggets or sausage. Age is the determining factor for choice of
cooking method. Young birds, such as broiler/fryers, are naturally tender and may be prepared
by either moist or dry cooking methods. Older poultry has tougher flesh and should be cooked
using moist heat or roasted at low temperatures to tenderize the meat. All poultry must be cooked
to an internal temperature of 165°F (74°C) to destroy harmful microorganisms.
MATERIALS AND METHODS
Ingredients
1 whole chicken
1/2 cup milk
1 cup of high-fiber cereal or whole wheat flour
1/2 cup butter, melted
Methods
1.
Preheat oven to 375°F (190°C). Lightly grease a baking dish.
2.
Cut up the chicken.
3.
Skin the chicken pieces.
4.
Pour the milk into a medium bowl. Dip each chicken piece into the milk, then roll it in
the whole wheat flour to coat. Arrange the chicken in the prepared baking dish.
5.
Bake until the chicken is no longer pink and the juices run clear.
RESULTS
Score for flavor, texture, aftertaste, and overall acceptability using a 9-point hedonic scale:
1 = like extremely
2 = like very much
3 = like moderately
4 = like slightly
5 = neither like nor dislike
6 = dislike slightly
7 = dislike moderately
8 = dislike very much
9 = dislike extremely
29
© Jones & Bartlett Learning, LLC. NOT FOR SALE OR DISTRIBUTION.
Chicken
Texture Aftertaste
Flavor
Overall
Acceptability
Calories/Protein/Fat
(research on a food table)
REVIEW OF LITERATURE AND DISCUSSION
30
© Jones & Bartlett Learning, LLC. NOT FOR SALE OR DISTRIBUTION.
CONCLUSION
REFERENCES
31
© Jones & Bartlett Learning, LLC. NOT FOR SALE OR DISTRIBUTION.
Lab 5
How to Prepare a Whole Fish and Cook the Fillets
OBJECTIVE
• To participate in deboning and dressing a whole fish
LAB INFORMATION
Fish has less collagen than other meats, and its chemical structure is different from that of animal
or bird connective tissue. The amount of hydroxyproline, an amino acid, is lower in fish, which
denatures more easily when cooked. Prolonged cooking or cooking at high temperatures will
overcook the fish, creating stringy, dry flesh that falls apart. Fat content is the major determinant
of moist or dry heat cooking methods. Fatty fish can be baked, broiled, poached, or steamed to
maximize its firm texture and stronger flavor. The more delicate muscle structure of lean fish and
its mild flavor benefit from frying, broiling, poaching, and steaming. Fish is done when it just
flakes when touched and has reached 145°F (63°C).
MATERIALS AND METHODS
Ingredients and Equipment
1 whole fish
1/2 cup milk
1 cup of high-fiber cereal or whole wheat flour
1/2 cup butter, melted
Sharp, thin-blade knife
Sharp, flat-blade knife
Cutting board
Methods
1.
Preheat oven to 375°F (190°C). Lightly grease a baking dish.
2.
Place the fish on the cutting board with the back of the fish toward you. Use a sharp knife to cut
through the back of the head to the backbone while putting pressure on the knife as you work
down the backbone to the tail.
3.
4.
5.
Using small strokes with the knife, lift the fillet from the rib cage.
Turn the fish over and repeat steps 2 and 3 on the other side.
Using a flat-bladed knife, slice a bit of the skin away from the fillet and cut a hole in the
loosened skin to fit your finger through.
With your finger, hold the skin through the finger hole and pull the skin away from the
fillet, using the knife to hold the fillet down. Hold the knife at a 45-degree angle and feel
for any bones. Pull the bones out of the fillets.
Eventually, the fish should be cut all the way through. and you can spread the fillets out
for the left and the right side. Remove all the bones and organs from the fillets.
Remove the head and tail.
Turn the fillets over and scrape of the scales with the flat-bladed knife.
Pour the milk into a medium bowl. Dip each fish fillet into the milk and then roll it in the
6.
7.
8.
9.
10.
32
© Jones & Bartlett Learning, LLC. NOT FOR SALE OR DISTRIBUTION.
11.
whole wheat flour to coat. Arrange the fillets in the prepared baking dish.
Bake until the fillets flake when touched and the internal temperature is at least 145°F
(63°C).
RESULTS
Score for flavor, texture, aftertaste, and overall acceptability using a 9-point hedonic scale:
1 = like extremely
2 = like very much
3 = like moderately
4 = like slightly
5 = neither like nor dislike
6 = dislike slightly
7 = dislike moderately
8 = dislike very much
9 = dislike extremely
Fish
Fillets
Texture
Aftertaste
Flavor
Overall
Acceptability
Calories/Protein/Fat
(research on a food table)
33
© Jones & Bartlett Learning, LLC. NOT FOR SALE OR DISTRIBUTION.
REVIEW OF LITERATURE AND DISCUSSION
34
© Jones & Bartlett Learning, LLC. NOT FOR SALE OR DISTRIBUTION.
CONCLUSION
REFERENCES
35
© Jones & Bartlett Learning, LLC. NOT FOR SALE OR DISTRIBUTION.
Lab 6
Sushi
Nori Roll
Finger or California Rolls
OBJECTIVE
• To prepare sushi and learn about sushi-grade fish that has been deemed safe for raw
consumption
LAB INFORMATION
Sushi-grade fish, or sashimi, refers to cooked or raw fish that has been sliced extremely thin. In
the case of raw sashimi, special handling prevents bacterial contamination. Fish that is to be used
for sashimi are killed instantly and the brain tissue removed to prevent lactic acid production in
the fish flesh. Sushi is intended to be eaten with a vinegar or brine-like dip to kill any bacteria
that are present. Patrons of sushi need to be especially careful in purchasing authentic sashimi
and preparing it using the most sanitary methods possible.
MATERIALS AND METHODS
Ingredients
Sheets of sushi nori (seaweed)
Sashimi-grade fish (e.g., salmon, squid, shrimp, tuna, mackerel, octopus, tuna, yellowtail and
scallop) or smoked salmon (purchased as lox), which is a safe and more economical choice
compared to sashimi
Select any of the following ingredients; other foods may be added based on individual
preference:
•
Protein: Extra-firm tofu, cooked egg, cooked crab/deveined shrimp, turkey, chicken, or
red meat
•
Rice: Short-grain white or brown rice
•
Vegetables: Cucumbers, scallions, lettuce, avocado, tomato, spinach leaves, mushrooms,
peppers
•
Fruits: Melon, citrus sections, apple, grapes
•
Other ingredients: wasabi, soy sauce, rice vinegar, cream cheese, sugar, salt
•
Dip: Wasabi or soy sauce
36
© Jones & Bartlett Learning, LLC. NOT FOR SALE OR DISTRIBUTION.
Methods
Rice preparation:
1.
In a saucepan, over medium heat combine 3 cups of uncooked rice, 3 Tbsp. of rice
vinegar, 2 Tbsp. sugar, and 2 tsp. salt. When the sugar melts into the mixture, turn off the
burner and let the rice soften and cool.
2.
Rinse the rice with cold water in a colander and drain off the liquid. Place the rice in a
bowl and add 3 Tbsp. of rice vinegar. Mix by folding over with a spatula.
3.
Place the nori sheets over aluminum foil on a baking sheet. Pour the rice onto the nori
sheets and press the rice into a thin, uniform layer.
Sushi preparation:
1.
Cut up any of the desired ingredients into small pieces or strips.
2.
Spread the strips and small pieces of fish over the rice mixture to make a thin, firm
second layer.
3.
If making finger or California rolls, begin rolling the nori sheets in one continuous roll,
similar to rolling up a rug. Cut the roll in 1- to 2-inch sections for your finished product.
See the picture at the beginning of the lab.
4.
If making nori fans, cut through to the nori seaweed sheet to make squares the size of
your hand. Take each square and roll to make a cone that has one small end and one large
end. See the picture at the beginning of the lab.
5.
Use the dip if desired when eating the sushi.
RESULTS
Score for flavor, texture, aftertaste, and overall acceptability using a 9-point hedonic scale:
1 = like extremely
2 = like very much
3 = like moderately
4 = like slightly
5 = neither like nor dislike
6 = dislike slightly
7 = dislike moderately
8 = dislike very much
9 = dislike extremely
Sensory
Objective
Sushi Type:
________________
Sushi Type:
________________
Sushi Type:
________________
Overall taste
Acidity
Astringency
Predominant
flavor
37
© Jones & Bartlett Learning, LLC. NOT FOR SALE OR DISTRIBUTION.
REVIEW OF LITERATURE AND DISCUSSION
38
© Jones & Bartlett Learning, LLC. NOT FOR SALE OR DISTRIBUTION.
CONCLUSION
REFERENCES
39
© Jones & Bartlett Learning, LLC. NOT FOR SALE OR DISTRIBUTION.
Milk and Dairy Substitutes Labs
40
© Jones & Bartlett Learning, LLC. NOT FOR SALE OR DISTRIBUTION.
Lab 7
Milk Alternatives for Lactose Intolerance
OBJECTIVE
• To develop a nutritious and fortified pudding product for persons with lactose sensitivity
or intolerance
LAB INFORMATION
Lactose intolerance is the inability, or insufficient ability, to digest lactose, a sugar found in milk
and milk products. Lactose intolerance is caused by a deficiency of the enzyme lactase, which is
produced by the cells lining the small intestine. Fortunately, milk alternatives are available.
Consumers have the choice of purchasing rice, soy, almond, and coconut milks, all of which
have fortified (and many flavored) options. Silk soymilk and Rice Dream rice milk undergo UHT
(ultra-high temperature) pasteurization to ensure that they are free of harmful microorganisms.
Silk soymilk uses all-natural evaporated cane juice, (unrefined sugar) as its sweetener. Rice milk
is unsweetened, but has a slight sweet taste due to the breakdown of the rice chains. Soy provides
naturally occurring omega-3 essential fatty acids. Soymilk can also be a source of calcium,
offering 45% of the daily recommendation per 8-ounce serving. Tricalcium phosphate is the
calcium source in rice milk; 30% of the daily recommendation of calcium can be consumed in an
8 oz. serving.
In this lab, three different products will be used to determine whether it can be used to produce
an acceptable pudding product: 1% cow’s milk, soy milk, and plain rice milk. See Table 1 for
nutritional information. Note that 1% milk will be used instead of whole-fat milk because its
consistency is similar to that of rice and soymilk and it has similar nutritional benefits, including
being low in fat and calories.
MATERIALS AND METHODS
Ingredients
3 packages of chocolate instant pudding (label should not have a milk ingredient)
3 packages of vanilla instant pudding (label should not have a milk ingredient)
1% cow’s milk
41
© Jones & Bartlett Learning, LLC. NOT FOR SALE OR DISTRIBUTION.
Fortified soy milk (plain)
Fortified rice milk (plain)
Methods
1.
Before starting, label each dish as soy milk, rice milk, or cow’s milk so you do not
become confused as to which pudding has been mixed with which liquid. The different
products will not change the color of the final pudding product.
2.
Pour each dry pudding mix into a separate bowl. Add 1 cup of each milk (1%, soy, and
rice milk) into the labeled dishes. Note that there will be six bowls total: chocolate
pudding made with cow’s milk, soy milk, and rice milk and vanilla pudding made with
cow’s milk, soy milk, and rice milk.
3.
Whisk each product until smooth and creamy, about 5 minutes. Note that some finished
pudding products may not become smooth or creamy and may appear thin and chunky no
matter how long they are stirred. Stir for the complete 5 minutes to ensure that the
product is given a chance to gelatinize.
4.
Have participants taste and give feedback as to which product they prefer and reasons
why. Inform participants of the milk product, soy product, and rice product in case of any
allergies.
RESULTS
Using Table 1 and the Nutrition Facts panel of the pudding product, total the nutrients in each
final pudding and compare them.
Table 1. Nutritional Values for Cow’s Milk, Rice Milk, and Soy Milk
Nutritional Information
1% Milk (Cow)
Plain Rice Milk
Plain Soy Milk
Serving size
8 oz.
8 oz.
8 oz.
Calories
110
120
90
Calories from fat
20
20
30
Total fat
2.5 g
2.5 g
3.5 g
Saturated fat
1.5 g
0g
0.5 g
Trans fat
0g
0g
0g
Polyunsaturated
n/a
0.5 g
2g
Monounsaturated
n/a
1.5 g
1g
Cholesterol
15 mg
0 mg
0 mg
Sodium
125 mg
100 mg
120 mg
Total carbohydrate
13 g
23 g
8g
Dietary fiber
0g
0g
1g
Sugar
12 g
10 g
6g
Protein
8g
1g
6g
Vitamin A
10%
10%
10%
Calcium
30%
30%
45%
Vitamin D
25%
25%
30%
Phosphorus
n/a
15%
n/a
Vitamin C
10%
0%
0%
Iron
0
4%
6%
B12
n/a
25%
50%
42
© Jones & Bartlett Learning, LLC. NOT FOR SALE OR DISTRIBUTION.
Ingredients in each milk product:
• 1% cow’s milk: Low-fat milk, ascorbic acid (vitamin C), vitamin A palmitate, vitamin
D2 .
• Plain rice milk: Filtered water, organic brown rice (partially milled), organic expeller
pressed safflower and/or canola oil, tricalcium phosphate, sea salt, vitamin A palmitate,
vitamin D2, vitamin B12.
• Plain soy milk: (Filtered Water, Whole Soybeans), all natural evaporated cane juice,
calcium carbonate, sea salt, natural flavors, carrageenan, vitamin A palmitate, vitamin D2,
riboflavin (B2), vitamin B12.
Score each product using a 9-point hedonic scale:
1 = like extremely
2 = like very much
3 = like moderately
4 = like slightly
5 = neither like nor dislike
6 = dislike slightly
7 = dislike moderately
8 = dislike very much
9 = dislike extremely
Table 2. Pudding Results
Sensory
Objective
Overall taste
Chocolate/
1% Milk
Vanilla/
1% Milk
Chocolate/
Rice Milk
Vanilla/
Rice Milk
Chocolate/
Soy Milk
Taste described
Acidity
Astringency
Solid texture
Liquid
consistency
Predominant
flavor
43
© Jones & Bartlett Learning, LLC. NOT FOR SALE OR DISTRIBUTION.
Vanilla/
Soy Milk
REVIEW OF LITERATURE AND DISCUSSION
44
© Jones & Bartlett Learning, LLC. NOT FOR SALE OR DISTRIBUTION.
CONCLUSION
REFERENCES
45
© Jones & Bartlett Learning, LLC. NOT FOR SALE OR DISTRIBUTION.
Lab 8
Homemade Ricotta Cheese
OBJECTIVE
• To observe the effects of different types of acids and milk products on the flavor of
ricotta cheese
LAB INFORMATION
Cheese can be categorized as unripened (or fresh) or ripened cheese. There are four categories of
ripened cheeses: soft, semisoft, firm, and hard. Although the different varieties of cheese differ in
flavor, aroma, age, and shape, they are all produced similarly. Most cheese begins as milk
(typically sheep, goat, or cow). The milk protein, called casein, is then coagulated by the addition
of an enzyme or acid. As the milk coagulates, it separates into solid curds and liquid whey. After
draining off the whey, the curds can be made into fresh cheese or pressed into different shapes
and aged, depending on the variety. The most popular fresh cheeses include cottage, cream, pot,
and ricotta.
MATERIALS AND METHODS
Ingredients and Equipment
1 gallon whole milk
1 gallon 2% milk
1 gallon UHT milk
Other types of milk, as desired
2 Tbsp. white vinegar (acid)
2 tsp. cream of tartar (acid)
2 Tbsp. lemon juice (acid)
Muslin cloth
Gram scale
Methods
1.
For each type of milk, pour three 2-cup samples and label each with the type of milk and
the type of acid (vinegar, cream of tartar, or lemon juice) to be added.
2.
Add each type of acid to each type of milk. Stir the acid in slowly. Continue to stir the
46
© Jones & Bartlett Learning, LLC. NOT FOR SALE OR DISTRIBUTION.
3.
4.
5.
mixture slowly for 2 minutes and then let it sit for 8 more minutes.
Each sample should have produced curds. Pour each sample through a muslin cloth that
has been draped and secured over a colander.
After the liquid has drained away, rinse the curds with tap water.
Weigh and then taste each curd sample.
RESULTS
Table 1. Cheese from Different Milk–Acid Combinations
White Vinegar
Cream of Tartar
(weight and taste)
(weight and taste)
Whole milk
2% milk
UHT Milk
Other: ________
Other: ________
47
© Jones & Bartlett Learning, LLC. NOT FOR SALE OR DISTRIBUTION.
Lemon Juice
(weight and taste)
REVIEW OF LITERATURE AND DISCUSSION
48
© Jones & Bartlett Learning, LLC. NOT FOR SALE OR DISTRIBUTION.
CONCLUSIONS
REFERENCES
49
© Jones & Bartlett Learning, LLC. NOT FOR SALE OR DISTRIBUTION.
Lab 9
Ice Cream Variations
OBJECTIVE
• To demonstrate the conversion of liquid to solid ice crystals by making ice cream
LAB INFORMATION
Ice cream is made by combining various dairy products. It typically includes cream mixed with
fresh, condensed, or dry milk; a sweetening agent (honey, corn syrup, or sugar); and sometimes
solid additions, such as chocolate pieces, fruit, or nuts. According to FDA guidelines, plain ice
cream (without solids) must contain at least 10% milk fat, whereas ice cream with solid additions
must contain a minimum of 8% milk fat. Many commercial brands contain stabilizers to help
create a creamier texture and a fuller mouthfeel and to help slow melting. Ice milk is made using
the same method to make ice cream except that it contains less milk fat and milk solids. This
results in a product that is lower in fat and calories with a lighter, less creamy texture.
MATERIALS AND METHODS
Ingredients for Each Batch
1 1/2 cups whole milk
1 1/8 cups granulated sugar
3 cups heavy cream
1 1/2 Tbsp. pure vanilla extract
Additives, such as sprinkles or flavoring
Variations can be made by substituting milk and cream with lower-fat milk or soy, rice, or
almond milk. Yogurt and half-and-half can also be used.
Methods (or follow the directions on your ice cream maker)
1.
In a medium mixing bowl, use a hand mixer on low speed to combine the milk and
granulated sugar until the sugar is dissolved, about 1 to 2 minutes.
2.
Stir in the heavy cream and vanilla. Turn the machine on. Pour the mixture into the
freezer bowl and let it mix until thickened, about 20 to 25 minutes. The ice cream will
have a soft, creamy texture. If a firmer consistency is desired, transfer the ice cream to an
50
© Jones & Bartlett Learning, LLC. NOT FOR SALE OR DISTRIBUTION.
3.
airtight container and place it in the freezer for about 2 hours.
Remove from freezer about 15 minutes before serving.
RESULTS
Score each product using a 9-point hedonic scale:
1 = like extremely
2 = like very much
3 = like moderately
4 = like slightly
5 = neither like nor dislike
6 = dislike slightly
7 = dislike moderately
8 = dislike very much
9 = dislike extremely
Table 1. Ice Cream Variations
Milk Product or
Cream Product or
Substitution
Substitution
Additional
Ingredient (e.g.,
chocolate sprinkles)
51
© Jones & Bartlett Learning, LLC. NOT FOR SALE OR DISTRIBUTION.
Sensory Rating
REVIEW OF LITERATURE AND DISCUSSION
52
© Jones & Bartlett Learning, LLC. NOT FOR SALE OR DISTRIBUTION.
CONCLUSIONS
REFERENCES
53
© Jones & Bartlett Learning, LLC. NOT FOR SALE OR DISTRIBUTION.
Lab 10
Linespread Testing
OBJECTIVE
• To evaluate viscosity through the use of a linespread test
LAB INFORMATION
Viscosity is a desirable physical property in many foods that contributes to texture and
mouthfeel. In this lab, you will explore the impact of the ratio of flour to milk on the consistency
of a white sauce and/or pudding.
MATERIALS AND METHODS
Ingredients
Flour
Butter
Salt
Milk
Granulated sugar
Cornstarch
Whole milk/1% milk
Vanilla extract
Equipment
Whisk
Spatula
Measuring cups
Linespread diagram (see Resources at the end of this student workbook)
2-inch cylindrical cup
Methods
White sauce:
1.
Melt 2 Tbsp. of butter in a small pot on low heat.
2.
Add 2 Tbsp. of flour and 1/2 tsp. salt. Blend to form a mixture.
3.
Slowly stir in 1 cup of milk, blending well. Keep stirring with a whisk until the sauce
54
© Jones & Bartlett Learning, LLC. NOT FOR SALE OR DISTRIBUTION.
thickens.
4.
Once thick, continue to stir for 2 minutes.
5.
Allow to cool to roughly 120°F (49°C) for the linespread test.
6.
Put a plastic covering over the linespread diagram found in the Resources section of this
manual.
7.
Place a hollow cylinder (try a cookie cutter) over the center of the linespread diagram and
fill it with the white sauce (the control). Lift the cylinder and allow the sauce to spread
for 30 seconds.
8.
Take two readings of the number points that are listed throughout the circumference of
the circles. Record these values in Table 1. Average the two values.
9.
Make second variation of the white sauce with only 1 Tbsp. instead of 2 Tbsp. of flour.
10.
Allow to cool, and repeat two linespread tests. Record the values in Table 1.
11.
Make a third variation of the white sauce, with 3 Tbsp. instead of 2 Tbsp. of flour.
12.
Allow to cool, and repeat two linespread tests. Record the values in Table 1.
13.
Make a fourth variation of the white sauce, with 4 Tbsp. instead of 2 Tbsp. of flour.
14.
Allow to cool, and repeat two linespread tests. Record the values in Table 1.
Vanilla pudding:
1.
Mix 1/3 cup granulated sugar, 3 Tbsp. cornstarch, and 1/8 tsp. salt in a small pot.
2.
Gradually stir in 2 cups of 1% milk. Cook over medium heat, whisking continuously.
3.
Bring to full boil briefly for 1 minute and then remove the pudding from the heat source.
4.
Stir in 1 Tbsp. of butter and 1 Tbsp. of vanilla extract and then let chill.
5.
Put a plastic covering over the linespread diagram found in the Resources section of this
lab manual.
6.
Place the hollow cylinder (try a cookie cutter) over the center of the linespread diagram
and fill it with the control pudding. Lift the cylinder and allow the sauce to spread for 30
seconds.
7.
Take two readings of the number points that are listed throughout the circumference of
the circles. Record the readings in Table 2. Average the two readings.
8.
Make the second variation of the pudding. Use only 2 Tbsp. of cornstarch instead of 3
Tbsp.
9.
Allow the pudding to cool. Conduct two linespread tests. Record the values in Table 2
and find the average.
10.
Make the third variation of the pudding. Use 4 Tbsp. of cornstarch instead of 3 Tbsp.
11.
Allow the pudding to cool. Conduct two linespread tests. Record the values in Table 2
and find the average.
12.
Make the fourth variation of the pudding. Use 5 Tbsp. of cornstarch instead of 3 Tbsp.
13.
Allow the pudding to cool. Conduct two linespread tests. Record the values in Table 2
and find the average.
RESULTS
In your description of the appearance of each product in Tables 1 and 2, indicate if the sample
was thick or thin, smooth, clear, gel-like, soft, gritty, spongy, or grainy. Also note whether it
holds its shape and whether it shows syneresis, or retrogradation.
55
© Jones & Bartlett Learning, LLC. NOT FOR SALE OR DISTRIBUTION.
Table 1. White Sauce
Linespread
Control
Value and
(2 Tbsp. flour)
Description
Test 1
Sample 1
(1 Tbsp. flour)
Sample 2
(3 Tbsp. flour)
Sample 3
(4 Tbsp. flour)
Sample 1
(2 Tbsp.
cornstarch)
Sample 2
(4 Tbsp.
cornstarch)
Sample 3
(5 Tbsp.
cornstarch)
Test 2
Average
Table 2. Pudding
Linespread
Value and
Description
Test 1
Control
(3 Tbsp.
cornstarch)
Test 2
Average
56
© Jones & Bartlett Learning, LLC. NOT FOR SALE OR DISTRIBUTION.
REVIEW OF LITERATURE AND DISCUSSION
57
© Jones & Bartlett Learning, LLC. NOT FOR SALE OR DISTRIBUTION.
CONCLUSIONS
REFERENCES
58
© Jones & Bartlett Learning, LLC. NOT FOR SALE OR DISTRIBUTION.
Egg and Egg Replacement Labs
59
© Jones & Bartlett Learning, LLC. NOT FOR SALE OR DISTRIBUTION.
Lab 11
Egg Foams: Soufflés
OBJECTIVE
• To become familiar with making egg foam in order to create a soufflé
LAB INFORMATION
The traditional soufflé consists of a sauce blended with beaten egg yolks and leavened by stiffly
beaten egg whites. Many types of soufflé are possible, including ones that include cheese,
seafood, or vegetables. These types are typically served hot. Dessert soufflés have sugar and
other ingredients, such as chocolate or fruit. Dessert soufflés are often served cold or frozen.
The process of making an egg foam involves trapping air into egg whites as they are beaten with
a whisk to yield a light, airy mixture. Ovalbumin (the major protein in the white) is easily
denatured by both heat and mechanical action. The whisking of air into the egg whites denatures
the proteins, causing them to coagulate. This causes the foam to stiffen and the air bubbles to
stabilize.
The foam should be transferred carefully into a greased ovenproof soufflé dish. A soufflé dish
has a special design. Its straight sides and circular shape facilitate the soufflé's rising. The soufflé
dish is placed into a larger bowl of water that steams when it gets hot.
There are four stages of egg white foam:
1.
Foamy: Foam is unstable and has a large air-cell volume. It is transparent, and the
bubbles coalesce if the beating is halted. Cream of tartar (an acid) is added at this stage to
coagulate the proteins around the air cells.
2.
Soft rounded peaks: The air cells subdivide in size and are whiter. The volume of the
foam increases. Sugar is added at this stage.
3.
Stiff pointed peaks: The foam has many small air cells. The volume of the foam
increases. Egg protein coagulates around the small air cells. At this point, the foam is
ready for most food applications and can be used for hard meringue.
4.
Dry peak foam: The foam is now brittle and inelastic. The foam loses volume as the air
cells break and the proteins become denatured. Water escapes that foam, and it takes on a
flocculated, overcoagulated, and curdled appearance.
60
© Jones & Bartlett Learning, LLC. NOT FOR SALE OR DISTRIBUTION.
MATERIALS AND METHODS
Ingredients
2 Tbsp. all-purpose flour
1/4 tsp. salt
2/3 cup milk
1 Tbsp. butter
1/4 cup shredded cheddar cheese or 1/4 cup chopped vegetables of your choice
2 large eggs, white and yolks separated
Low-fat variations: Substitute low-fat cheese or vegetables, low-fat butter, and skim milk
Methods
1.
Preheat the oven to 350°F (177°C) or plan on placing the prepared soufflé in the
microwave for 3 minutes.
2.
Blend flour and salt together in a sauce pan. Add cold milk gradually and stir until the
flour is evenly dispersed.
3.
Place on the sauce over heat and bring to a quick boil with constant stirring. Boil for 1
minute, until the sauce is thick. Remove the sauce from heat.
4.
Add butter and shredded cheese to the hot sauce. Stir until the cheese has melted.
5.
Add the unbeaten egg yolks to the sauce. Stir until blended.
6.
Beat the egg whites until they begin to form stiff peaks. Record your “before baking”
observations in Table 1.
7.
Combine the sauce and the beaten egg whites in a bowl. Fold the mixture with a spatula
until all the ingredients are blended.
8.
Lightly butter the bottom of a small baking dish. Pour in the soufflé mixture. Set the dish
in a pan of warm water. Note that water should be same depth as the soufflé in the baking
dish.
9.
Place the soufflé in the preheated oven and bake until a knife inserted in the center comes
out clean. If a microwave is used, microwave the soufflé for 3 minutes.
10.
Record your observations of the finished soufflé in Table 1.
RESULTS
Table 1. Foam Formation Before and After Baking
Appearance
Texture
Before
baking
Volume
After baking
61
© Jones & Bartlett Learning, LLC. NOT FOR SALE OR DISTRIBUTION.
Tenderness
REVIEW OF LITERATURE AND DISCUSSION
62
© Jones & Bartlett Learning, LLC. NOT FOR SALE OR DISTRIBUTION.
CONCLUSION
REFERENCES
63
© Jones & Bartlett Learning, LLC. NOT FOR SALE OR DISTRIBUTION.
Lab 12
Egg Replacement in Bakery Items
OBJECTIVE
• To evaluate the use of egg replacers in recipes and understand their properties,
substitution amounts, and affect on bakery items
LAB INFORMATION
In bakery items, eggs impart their unique ability to foam, emulsify, and coagulate when exposed
to heat. Because of these properties, eggs play an enormous role in producing the flavor and
texture of the final product. It can be a challenge to find a comparable alternative/substitute.
MATERIALS AND METHODS
Ingredients for Each Batch
1/8 cup butter
1/4 cup egg substitute
2 eggs
1/6 cup milk
1 cup sugar
1/2 tsp. vanilla
1/2 cup cake flour
1/2 tsp. baking powder
Equipment
Muffin tins
Muffin/cupcake papers
Methods
1.
Preheat the oven to 350°F (177°C).
2.
Each student group will make both the experimental recipe (with egg replacers) and the
control recipe (with eggs).
3.
Sift together the flour, salt, and baking powder and set the mixture aside.
4.
Use an electric mixer to combine the shortening, sugar, and vanilla
5.
Add either the egg replacer or the eggs to the wet mixture (shortening, sugar, vanilla) and
64
© Jones & Bartlett Learning, LLC. NOT FOR SALE OR DISTRIBUTION.
6.
7.
8.
9.
beat for 1 minute after each addition.
Add half the flour mixture and half the milk and beat at medium speed for 1 minute. The
last portion of the flour and liquid is added and blended together for 30 seconds at
medium speed and then for 3 more minutes at high speed.
Pour equal portions of the batter into the paper cupcake holders. Make sure each cupcake
holder is labeled as either “control” or “experiment.”
Repeat the above steps to make the other batter (egg or egg replacer).
Bake for 25 minutes at 350°F (177°C). After baking, cool for 5 minutes before removing
from the cake pan. Compare the samples and record your observations in Table 1.
RESULTS
Score each product using a 9-point hedonic scale:
1 = like extremely
2 = like very much
3 = like moderately
4 = like slightly
5 = neither like nor dislike
6 = dislike slightly
7 = dislike moderately
8 = dislike very much
9 = dislike extremely
Table 1. Comparison of Baked Good with Egg Replacer vs. Eggs
Appearance
Texture
Volume
Tenderness
Baked good
with egg
replacer
Baked good
with eggs
65
© Jones & Bartlett Learning, LLC. NOT FOR SALE OR DISTRIBUTION.
Flavor
REVIEW OF LITERATURE AND DISCUSSION
66
© Jones & Bartlett Learning, LLC. NOT FOR SALE OR DISTRIBUTION.
CONCLUSION
REFERENCES
67
© Jones & Bartlett Learning, LLC. NOT FOR SALE OR DISTRIBUTION.
Lab 13
Egg Quality and Storage
OBJECTIVE
• To assess the physical condition of a raw egg based on storage conditions and age
LAB INFORMATION
The grade assigned to an egg is based on the quality of the egg’s interior, overall appearance, and
the condition of the shell. Eggs of any quality grade may differ in weight or size:
• U.S. Grade AA eggs have thick and firm whites when cracked. The yolks are high, round,
and practically free from defects. They have clean, unbroken shells. Choose Grade AA
and Grade A eggs for frying and poaching, where appearance is important.
• U.S. Grade A eggs have the same characteristics as Grade AA eggs except that the whites
are “reasonably” firm. This is the quality most often sold in stores.
• U.S. Grade B eggs have thinner whites. When cracked, the yolks will appear wider and
flatter than those of eggs of higher grades. The shells must be unbroken, but they may
show slight stains. This quality is seldom found in retail stores; they are usually used to
make liquid, frozen, and dried egg products.
METHODS AND MATERIALS
1.
Take a dozen eggs. Divide the eggs into three groups of four eggs each. Store them as
follows for 1 week:
• Group 1: Room temperature, 68–72°F (20–22°C)
• Group 2: Between 38–42°F (3–6°C)
• Group 3: Between 50–54°F (10–12°C)
2.
At the end of the week, test each egg as follows:
a.
Test the eggs in their shell for quality by placing them in a bowl of water. Create a
table to record the number of eggs from each group that float or sink. For those
that sink, measure how far the egg sinks into the bowl.
b.
Crack the eggs and measure the diameter of the albumin of each egg. Average the
diameter for each egg group. Create a chart that compares the average diameter of
the eggs stored at different temperatures.
c.
Use the test results to validate which temperature maintained the quality of the
eggs.
68
© Jones & Bartlett Learning, LLC. NOT FOR SALE OR DISTRIBUTION.
3.
Test the quality of a cake based on the storage temperature used for the eggs. Use the
cake recipe from Lab 12 and make it three ways with a new half-dozen of eggs:
a.
Batch 1: Use the group 1 eggs.
b.
Batch 2: use the group 2 eggs.
c.
Batch 3: Use the group 3 eggs.
d.
Assess the crumb texture, lightness, and overall quality of each cake. Record your
observations in Table 1.
RESULTS
Score each product using a 9-point hedonic scale:
1 = like extremely
2 = like very much
3 = like moderately
4 = like slightly
5 = neither like nor dislike
6 = dislike slightly
7 = dislike moderately
8 = dislike very much
9 = dislike extremely
Table 1. Impact of Egg Storage Temperature on Baked Goods
Appearance
Texture
Volume
Tenderness
Group 1
Group 2
Group 3
69
© Jones & Bartlett Learning, LLC. NOT FOR SALE OR DISTRIBUTION.
Flavor
REVIEW OF LITERATURE AND DISCUSSION
70
© Jones & Bartlett Learning, LLC. NOT FOR SALE OR DISTRIBUTION.
CONCLUSION
REFERENCES
71
© Jones & Bartlett Learning, LLC. NOT FOR SALE OR DISTRIBUTION.
Fruit and Vegetable Labs
72
© Jones & Bartlett Learning, LLC. NOT FOR SALE OR DISTRIBUTION.
Lab 14
Vegetable Pigments, Browning, and Nutrient Loss
OBJECTIVE
• To determine the effect of cooking techniques, the addition of acids and bases, and
variable cooking times on pigment changes and nutrient loss
LAB INFORMATION
Pigments that occur naturally in fruits and vegetables include chlorophylls, carotenoids,
betalains, and the flavonoids, which consist of anthocyanins and anthoxanthins. The chlorophylls
are green pigments. The carotenoids are yellow and orange pigments (sometimes pink or red).
The betalains are purplish-red and sometimes yellow pigments. The anthocyanins are red, purple,
and blue pigments, and the anthoxanthins are creamy white or colorless.
MATERIALS AND METHODS
Ingredients
1 lb. fresh green vegetable of your choice and a small frozen package of the same vegetable
1 lb. fresh red vegetable of your choice and a small frozen package of the same vegetable
1 lb. fresh orange vegetable of your choice and a small frozen package of the same vegetable
1 lb. fresh white vegetable of your choice and a small frozen package of the same vegetable
1 oz. cream of tartar powder per preparation
1 oz. baking soda per preparation
Equipment
2 qt. pans
Vegetable steamer
Methods
1.
Trim vegetables into bite sized pieces.
2.
You will prepare each vegetable—green, red, orange, and white—in six different ways:
a.
Boil the fresh vegetable for 15 minutes with 1 oz. of cream of tartar. (For each
boiling treatment, use 1 qt. of water.)
73
© Jones & Bartlett Learning, LLC. NOT FOR SALE OR DISTRIBUTION.
b.
c.
d.
3.
Boil the fresh vegetable for 15 minutes with 1 oz. of baking soda.
Boil the fresh vegetable for 15 minutes in just water.
Boil the fresh vegetable for 30 minutes. Use two pots; cover one and keep
the other uncovered.
e.
Microwave the frozen vegetable on high for 3 minutes.
f.
Steam the fresh vegetable for 6 to 7 minutes.
Record your observations in the corresponding tables in the Results section.
RESULTS
Green Vegetable/Pigment
Treatment
Color, Texture, and Flavor
________ with cream of tartar 15 min. boil
________ with baking soda
15 min. boil
________ with plain water
15 min. boil
________ with plain water
30 min. boil
uncovered
30 min. boil
covered
________ steamed
6–7 min.
________ microwaved
3 min. high
Red Vegetable/Pigment
Treatment
Color, Texture, and Flavor
________ with cream of tartar 15 min. boil
________ with baking soda
15 min. boil
________ with plain water
15 min. boil
________ with plain water
30 min. boil
uncovered
30 min. boil
covered
74
© Jones & Bartlett Learning, LLC. NOT FOR SALE OR DISTRIBUTION.
________steamed
6–7 min.
________ microwaved
3 min. high
Orange Vegetable/Pigment
Treatment
Color, Texture, and Flavor
________ with cream of tartar 15 min. boil
________ with baking soda
15 min. boil
________ with plain water
15 min. boil
________ with plain water
30 min. boil
uncovered
30 min. boil
covered
________steamed
6–7 min.
________ microwaved
3 min. high
White Vegetable/Pigment
Treatment
Color, Texture, and Flavor
________ with cream of tartar 15 min. boil
________ with baking soda
15 min. boil
________ with plain water
15 min. boil
________ with plain water
30 min. boil
uncovered
30 min. boil
covered
75
© Jones & Bartlett Learning, LLC. NOT FOR SALE OR DISTRIBUTION.
________ steamed
6–7 min.
________ microwaved
3 min. high
REVIEW OF LITERATURE AND DISCUSSION
76
© Jones & Bartlett Learning, LLC. NOT FOR SALE OR DISTRIBUTION.
CONCLUSIONS
REFERENCES
77
© Jones & Bartlett Learning, LLC. NOT FOR SALE OR DISTRIBUTION.
Lab 15
Organic Versus Conventional Fruits and Vegetables
OBJECTIVE
• To determine differences between organic and conventional fruits and vegetables
LAB INFORMATION
Organic foods were defined by the 1990 Farm Bill. This law states that organic farmers may not
use most conventional pesticides. The only substances that can be used on organic crops are
those specified by the National Organic Standards Board, which reviews all chemicals and
pesticides. Only foods that have been certified as 95% organic or more are allowed to boast the
USDA Organic Seal. Foods containing 70–95% organic ingredients can claim that they have
been made with organic ingredients.
Organic foods are one of the fastest growing trends in the United States today. Despite the higher
prices for organically grown foods, consumers have been quick to follow this nutritional trend.
Organic farming originally came to the United States from Europe in the early 1900s.
MATERIALS AND METHODS
Ingredients
3 lbs. organic carrots
3 lbs. conventional carrots
6 organic apples
6 conventional apples
Equipment
Paper plates
Knives
Vegetable peeler
Pot with cover
Plastic gloves
78
© Jones & Bartlett Learning, LLC. NOT FOR SALE OR DISTRIBUTION.
Methods
1.
Peel and slice a conventional carrot and an organic carrot. Conduct a taste test comparing
the raw organic and the raw conventional carrot. Judge each on a scale from 1 to 7 (7
being the best) on its appearance, consistency/texture, tenderness, flavor, and overall
eating quality. Record your results in Table 1.
2.
Boil water on the stove and cook part of both carrots. Conduct a taste test comparing the
cooked organic and the cooked conventional carrot. Judge each food on a scale from 1 to
7 (7 being the best) on its appearance, consistency/texture, tenderness, flavor, and overall
eating quality. Record your results in Table 1.
3.
Slice an organic apple and a conventional apple. Conduct a taste test comparing the raw
organic and the raw conventional apple. Judge each on a scale from 1 to 7 (7 being the
best) on its appearance, consistency/texture, tenderness, flavor, and overall eating quality.
Record your results in Table 1.
RESULTS
Table 1. Organic vs. Conventional
Food
Appearance
Consistency/
Texture
Tenderness
Flavor
Organic raw
carrot
Conventional
raw carrot
Organic
cooked carrot
Conventional
cooked carrot
Organic apple
Conventional
apple
79
© Jones & Bartlett Learning, LLC. NOT FOR SALE OR DISTRIBUTION.
Overall
Quality
REVIEW OF LITERATURE AND DISCUSSION
80
© Jones & Bartlett Learning, LLC. NOT FOR SALE OR DISTRIBUTION.
CONCLUSION
REFERENCES
81
© Jones & Bartlett Learning, LLC. NOT FOR SALE OR DISTRIBUTION.
Lab 16
Osmosis and Enzymatic Browning
OBJECTIVES
• To study the characteristics of different types cooked apples
• To see how sugar affects the cell structure of fruits
• To observe enzymatic browning and determine if acid limits browning in fruit
LAB INFORMATION
Although all apples are the same type of fruit, each apple tastes, looks, and feels completely
different from another. Some are bitter, whereas others are sweet. Some apples are better for
cooking than others. Many fruits tend to turn brown immediately after peeling when they are in
the presence of oxygen due to enzymatic activity. In this lab, you’ll sample different varieties of
apple and determine if the addition of acids can inhibit enzymatic browning.
MATERIALS AND METHODS
Ingredients
6 different types of apples (e.g., Gala, McIntosh, Fuji, Red Delicious, Granny Smith, Braeburn,
etc.)
1/2 cup lemon juice
1/2 cup pineapple juice
1/2 cup papaya juice
Ascorbic acid (crushed vitamin C pills)
1 oz. cream of tartar
1 1/3 cup and 2 2/3 cups sugar
Methods
1.
Slice the apples, keeping them separated by variety.
2.
Taste each type of apple. Observe its texture, flavor, color, and appearance. Record your
findings in Table 1.
3.
Pour or sprinkle 1 tsp. each of lemon juice, papaya juice, and cream of tartar on one slice
of each apple type and let it sit for 20 minutes.
4.
Compare the apple slices with and without lemon juice, papaya juice, and cream of tartar.
82
© Jones & Bartlett Learning, LLC. NOT FOR SALE OR DISTRIBUTION.
5.
a.
b.
Record your observations in Table 2.
Make cobbled apples.
Get two saucepans. Boil 2 cups of water in each. Dissolve 1 1/3 cups of sugar into one
pan and 2 2/3 cups of sugar into the other. Once the sugar has dissolved, add a few
unused apple slices of each apple type and heat for 30 minutes.
Taste the apples and record your observations in Table 3.
RESULTS
Score each apple sample on a 5-point scale where 1= least preferred and 5 = most preferred.
Table 1. Apple Taste Test
Variety
Color and
Appearance
Gala
Texture and
Tenderness
Flavor
McIntosh
Fuji
Red Delicious
Granny Smith
Braeburn
Table 2. Enzymatic Browning and Various Acid Treatments
Variety
Control
Lemon
Papaya
Juice
Juice
Gala
Cream of Tartar
McIntosh
Fuji
Red Delicious
Granny Smith
Braeburn
83
© Jones & Bartlett Learning, LLC. NOT FOR SALE OR DISTRIBUTION.
Table 3. Cobbled Apples: Comparison of Sugar Solutions
Variety
1 1/3 Cup Sugar Solution
2 2/3 Cup Sugar Solution
Gala
McIntosh
Fuji
Red Delicious
Granny Smith
Braeburn
REVIEW OF LITERATURE AND DISCUSSION
84
© Jones & Bartlett Learning, LLC. NOT FOR SALE OR DISTRIBUTION.
CONCLUSION
REFERENCES
85
© Jones & Bartlett Learning, LLC. NOT FOR SALE OR DISTRIBUTION.
Grains, Flour, Cereals, and Pasta Labs
86
© Jones & Bartlett Learning, LLC. NOT FOR SALE OR DISTRIBUTION.
Lab 17
Pasta with Flour Variations
OBJECTIVE
• To assess the quality of pastas made from different types of flour
LAB INFORMATION
The most important factor for producing high-quality pasta is the use of durum wheat, which is
higher in protein than other varieties of wheat. Durum wheat is milled into coarse particles
known as semolina or semolina flour. It is possible to make pasta with other types of milled
wheat, but they are considered lower in quality. Durum wheat contains carotenoid pigments,
which gives it the characteristic yellow or amber color. In commercial pasta production, the
alimentary paste is mixed with about 100 parts semolina to 30 parts water.
Hundreds of different types of pastas are available in a vast array of shapes and sizes, including
long-cut, short-cut, solid, hollow, large, small, and numerous specialty pastas. Pasta should be
added to boiling water and stirred to separate the pieces of pasta. It should be cooked in boiling
water for several minutes until al dente, tender yet firm and resistant when bitten into. Fresh
pasta cooks very fast and reaches the al dente stage in less than 1 minute.
MATERIALS AND METHODS
Ingredients
2 lbs. semolina flour
1 lb. all-purpose flour
1 lb. whole wheat flour
1 lb. rye flour
1 lb. potato flour
1 lb. rice flour
5 extra large eggs for each pasta recipe
1 Tbsp. olive oil for each pasta recipe
Equipment
Mixer with dough hook attachment (or you may knead by hand)
87
© Jones & Bartlett Learning, LLC. NOT FOR SALE OR DISTRIBUTION.
Pasta maker (or you may cut pasta shapes by hand)
Methods
Basic Pasta Dough (makes 1 pound)
Ingredients
1/2 cup of semolina flour
3 1/2 cups of any other flour of choice from the ingredient list
5 extra large eggs
1 Tbsp. olive or vegetable oil
3–4 Tbsp. water, as needed
Mixing Instructions
1.
Mound 3 1/2 cups of the flour of your choice and 1/2 cup of semolina flour (or 4 cups
total of semolina flour if you are only using semolina in the recipe) in the center of a
mixing bowl.
2.
Make a well in the middle of the flour and add the eggs and olive oil.
3.
Using a fork, beat together the eggs and oil and begin to incorporate the flour, starting
with the inner portion of the well.
4.
When the flour is mixed about half way, attach the dough hook to the mixer and mix on
the lowest speed until the flour is mostly mixed in and the dough looks formed. If you
prefer, you can also keep mixing the dough mound by hand until the dough looks formed.
5.
Add water as needed to make the dough come together.
6.
Transfer the dough onto a lightly floured countertop or cutting board and knead for 6
more minutes. The dough should be elastic and a little sticky.
7.
Wrap the dough in plastic, and allow it to rest for 30 minutes at room temperature.
Rolling Instructions
Roll out sections of the dough on a floured countertop or cutting board until the dough is 1/8 to
1/4 inch thick. Cut pasta shapes as desired (bowties, noodles, etc.).
Pasta Machine Instructions
1.
Use the instructions that came with the machine or follow the steps provided here.
2.
Set the flat roller to #1 and roll a small piece of dough through the flat rollers. After each
rolling, fold the pasta in half, flouring the middle when necessary. Repeat five to six
times until the dough takes a regular shape.
3.
Pass the dough only once more through the flat rollers as per the pasta machine
instruction booklet.
4.
Flour your dough and pass through the finer cutters (for angel hair).
Cooking Instructions
1.
Drop the fresh pasta into salted, oiled water at a rolling boil and cook for 3 to 4 minutes.
88
© Jones & Bartlett Learning, LLC. NOT FOR SALE OR DISTRIBUTION.
2.
Remove carefully with a slotted spoon.
After the pasta as cooled slightly, taste the pasta and record your observations in Table 1.
Record your observations for each type of pasta that you make.
Variations
Spinach pasta: Drain frozen spinach and squeeze the leaves as dry as possible. Puree the spinach
with a food processor. With a fork, combine the spinach with the pasta ingredients. Knead and
roll out the dough.
Tomato pasta: Stir about 1/4 cup tomato puree into the pasta dough. Knead and roll out the
dough.
RESULTS
Table 1. Pastas Using Different Types of Flour
Flour Type
Texture
Taste
Mouthfeel
89
© Jones & Bartlett Learning, LLC. NOT FOR SALE OR DISTRIBUTION.
REVIEW OF LITERATURE AND DISCUSSION
90
© Jones & Bartlett Learning, LLC. NOT FOR SALE OR DISTRIBUTION.
CONCLUSION
REFERENCES
91
© Jones & Bartlett Learning, LLC. NOT FOR SALE OR DISTRIBUTION.
Lab 18
Gluten-Free Pasta
OBJECTIVE
• To evaluate the effects of removing gluten from a typically glutinous pasta product
LAB INFORMATION
In making fresh pasta, proper gluten development is needed in order to create smooth and elastic
dough that will yield a snappy, yet soft, chew in the finished product. The Italians call this al
dente, meaning “to the tooth,” which describes the perfect texture and mouthfeel of pasta. Proper
gluten development is the focus in properly executed fresh pastas, because it provides structure
and textural integrity.
Gluten is formed when water interacts with a wheat product, such as semolina flour, activating
glutenin and gliadin. These two molecules are responsible for the elastic nature of flour-based
doughs, building a matrix of strands with strong bonds. The more the dough is manipulated, the
more gluten that is developed, providing more elasticity. The higher the concentration of the
protein in the wheat-based dough, the more gluten that can be developed.
A person with gluten intolerance will often forgo consumption of breads and pastas, because
both rely on gluten for structural and textural integrity. Wheat flour can be replaced by a number
of other starches, such as flours made from tapioca, sweet rice, quinoa, taro root, and potato.
With the right combination of ingredients, gluten-free products can be made that have a similar
taste and mouthfeel as those made from traditional wheat flour. The only problem is that adding
water to these flours does not change anything other the strength and saturation of the resulting
paste. No gluten will be formed in the absence of wheat flour.
To provide the structure and snap akin to traditional wheat pasta, gluten-free products often use
vegetable gums to provide stability. Fermented simple sugars, such as those from corn, are
vegetable gums, and these can be powdered and added to foods. One particular vegetable gum,
xanthan gum, is added to foods to help emulsify and thicken mixtures that would ordinarily rely
on glutinous ingredients to achieve their final consistency. Xanthan gum used in conjunction
with a blend of nonwheat flours allows for the consistency of the mixture to be manipulated and
eaten just like fresh wheat pasta. Egg serves the same purpose in gluten-free dough, imparting
texture, flavor, and richness to the dough. Oil is often added to provide a smooth texture to the
92
© Jones & Bartlett Learning, LLC. NOT FOR SALE OR DISTRIBUTION.
gluten-free dough and help it stay together.
MATERIALS AND METHODS
Ingredients
1/2 cup tapioca or sweet rice flour
1/3 cup potato starch
1/2 cup cornstarch
1/3 cup brown rice flour
1/2 tsp. salt
2 Tbsp. xanthan gum
2 Tbsp. canola oil
4 eggs
Variations: Select one of the following to add to the above flour mixture.
2 Tbsp. cranberry flour
2 Tbsp. mesquite flour
1/2 cup pumpkin puree to replace 2 of the eggs
Methods
1.
Put the dry ingredients into the larger bowl, adding variations if you want. Whisk to
blend well.
2.
Make a well in the middle.
3.
Crack the eggs into the smaller bowl. Lightly beat the eggs and oil together.
4.
Pour the liquids into the well. Using a fork, begin incorporating the dry ingredients into
the wet ingredients.
5.
As soon as the dough comes together, begin kneading for 2 minutes to form a smooth
ball.
6.
Lightly dust a counter with cornstarch. Cut the dough into eight pieces and roll the pasta
out.
7.
Use a pasta machine to flatten the dough. Start by flattening the piece of pasta dough in
your hands and then feed it through the machine. Begin on the widest opening of the
machine.
8.
Fold the dough up in thirds. Lightly dust with cornstarch if the dough is tacky. Flatten
with the rolling pin or by using your fingertips to press and flatten the dough and roll
through the same width.
9.
Fold the dough into thirds and repeat the process another six times. Now decrease the
thickness and roll through each thickness twice until the desired thickness is achieved.
Rolling Instructions
Roll out sections of the dough on a floured countertop or cutting board until the dough is 1/8- to
1/4-inch thick. Cut pasta shapes as desired (bowties, noodles, etc.).
Pasta Machine Instructions (Use the instructions that came with the machine or follow the
directions listed below.)
1.
Set the flat roller to #1 and roll a small piece of dough through the flat rollers. After each
rolling, fold the dough in half, flouring the middle when necessary. Repeat five to six
93
© Jones & Bartlett Learning, LLC. NOT FOR SALE OR DISTRIBUTION.
2.
3.
times until dough takes a regular shape.
Pass the dough only once more through the flat rollers as per the pasta machine
instruction booklet.
Flour your dough and pass through the finer cutters (for angel hair).
Cooking Instructions
Bring a large pot of water to a boil. Add salt. Drop the pasta into the boiling water and cook until
al dente. Fresh pasta cooks quickly, depending upon its thickness. When the pasta is done, drain
it and then rinse under hot water. Toss the pasta with a little extra-virgin olive oil. Use
immediately or cool and refrigerate for later use.
RESULTS
Fill in the sensory evaluation information in Table 1with descriptive words.
Table 1. Sensory Evaluation Sheet for Fresh Gluten-Free Pasta
Pasta Type Consistency Mouthfeel Aftertaste Appearance
94
© Jones & Bartlett Learning, LLC. NOT FOR SALE OR DISTRIBUTION.
Smell
Taste
REVIEW OF LITERATURE AND DISCUSSION
95
© Jones & Bartlett Learning, LLC. NOT FOR SALE OR DISTRIBUTION.
CONCLUSION
REFERENCES
96
© Jones & Bartlett Learning, LLC. NOT FOR SALE OR DISTRIBUTION.
Lab 19
Starch Thickeners
OBJECTIVES
• To evaluate a commercially available thickener for use in dysphasia and/or pureed diets
• To prepare a complete meal of modified foods and make it appealing
LAB INFORMATION
Dysphasia is a disorder manifested through difficulty swallowing. The strategy for feeding
individuals with dysphasia has been to create thickened juices and foods with modified texture.
Undernutrition is common among institutionalized individuals who are served unappealing
pureed meals. With the appropriate use of commercial thickeners, improved food consumption
may occur. In addition, the use of food molds and various other tools to shape modified foods
can add to their visual appeal.
MATERIALS AND METHODS
Equipment
Blender
Pastry bags and tips
Thick n’ Easy by Hormel or Thick It by Milani (or other commercial starch thickener)
Ingredients (for each student group)
1 qt. apple juice
8 oz. canned green beans, drained
1/2 lb. ground turkey, cooked and drained
1 cup mashed potatoes
1 can peaches, drained
Ice cream or sherbet
Methods
1.
To make thickened apple juice, follow the package directions on the thickener product
97
© Jones & Bartlett Learning, LLC. NOT FOR SALE OR DISTRIBUTION.
2.
3.
4.
used. If no directions are found, add 1 to 2 Tbsp. of thickener to 4 oz. of apple juice for a
nectar consistency. For a honey consistency, add 2 to 3 Tbsp. of thickener to 4 oz. apple
juice. For a pudding consistency, add 3 to 4 Tbsp. of thickener to 4 oz. apple juice.
For solid foods, blend the food in a blender until it has a pureed consistency. Strain out
any cellulose, lignin, or other nonpureed substances. Use the package directions on the
thickener to achieve the desired consistency. If no directions exist for the specific foods
used, add 1 to 2 Tbsp. of thickener until a pudding-like consistency is achieved.
Spoon the thickened food into molds (gelatin molds work well), or cut out shapes with
cookie cutters. In addition, spoon thickened food into a pastry bag and decorate the plate
and molded food (mashed potatoes work well). Spoon thickened peaches over ice cream
or sherbet.
Rate the food items and record your scores in Table 1.
RESULTS
Rate the food items using a 5-point scale:
1 = dislike extremely
2 = dislike somewhat
3 = neither like nor dislike
4 = like somewhat
5 = like extremely
Table 1. Evaluation of Thickened Food Items
Food
Mixing Consistency Stability
Ability
(Texture)
Aftertaste
Appearance
98
© Jones & Bartlett Learning, LLC. NOT FOR SALE OR DISTRIBUTION.
Smell
Taste
REVIEW OF LITERATURE AND DISCUSSION
99
© Jones & Bartlett Learning, LLC. NOT FOR SALE OR DISTRIBUTION.
CONCLUSIONS
REFERENCES
100
© Jones & Bartlett Learning, LLC. NOT FOR SALE OR DISTRIBUTION.
Lab 20
Cooked Cereals: Gelatinization
OBJECTIVES
• To study starch gelatinization and dextrinization
• To observe the differences between types of hot cereals
LAB INFORMATION
Starch is insoluble in cold water. When starch granules are mixed with water, a suspension is
formed whereby the starch granules are suspended in the liquid. If left undisturbed, the starch
will fall out of the suspension and settle at the bottom of the container. When heat is applied to
the starch and water suspension, the granules swell with water at a temperature range
characteristic of the particular starch. Cornstarch granules swell at 144–162°F (62–72°C), wheat
starch granules swell at 136–147°F (58–64°C), and potato starch granules swell at 138–154°F
(59–68°C). As heating continues, the suspension becomes thicker, the viscosity of the mixture
increases, and the mixture becomes more translucent. The process of heating starch in water or
any water-based liquid to swell the starch granules in order to thicken and increase the viscosity
of the mixture is called gelatinization.
MATERIALS AND METHODS
Ingredients and Materials
Oatmeal, grits, cream of wheat, and cream of rice (both varieties of each: slow-cooking and
instant)
Microwave oven (optional)
Scale
Methods
1.
Add water to each hot cereal and cook and/or microwave as directed on the package.
Describe the appearance of each item in Table 1.
2.
Overcook each type of hot cereal by doubling the recommended cooking time. Describe
the appearance of each item in Table 1.
RESULTS
Table 1. Appearance and Texture of Hot Cereals
Cereal
Appearance
Slow-cooked cereal
Texture
Instant cereal
Overcooked slow-cooked cereal
Overcooked instant cereal
101
© Jones & Bartlett Learning, LLC. NOT FOR SALE OR DISTRIBUTION.
REVIEW OF LITERATURE AND DISCUSSION
102
© Jones & Bartlett Learning, LLC. NOT FOR SALE OR DISTRIBUTION.
CONCLUSIONS
REFERENCES
103
© Jones & Bartlett Learning, LLC. NOT FOR SALE OR DISTRIBUTION.
Yeast and Quick Breads/Cakes Labs
104
© Jones & Bartlett Learning, LLC. NOT FOR SALE OR DISTRIBUTION.
Lab 21
Pie Pastry
OBJECTIVES
• To assess the impact of different types of fats on pastry crust
• To assess the impact of different amounts of fat, flour, or liquid on pastry crust
• To evaluate pie crust on a sensory scale for overall eating quality and acceptability
LAB INFORMATION
Pie crusts serve as the base for a wide variety of both sweet and savory food products. The
making of a successful pie crust depends on the use of a specific proportion of ingredients. It also
requires proper mixing and baking methods. Even the smallest variations can greatly affect the
final baked pie crust.
MATERIALS AND METHODS
Ingredients
The type of fat and the amount, the mixing method, the amount of liquid and flour, and the
extent to which the dough is mixed or manipulated will differ for each pastry product. See Table
1 for the ingredients and methods for each type of pastry dough.
Table 1. Ingredients for Each Pastry Product
Recipe
Control Group
Fat Change
Group
Liquid Change
Group
Flour (all
purpose)
1 1/2 cups
1 1/2 cups
1 1/2 cups
Mixing
Change
Group
1 1/2 cups
Sugar
2 tsp.
2 tsp.
2 tsp.
2 tsp.
Salt
1 tsp.
1 tsp.
1 tsp.
1 tsp.
Fat
1/2 cup vegetable
oil
1/2 cup solid
butter
1/2 cup
vegetable oil
1/2 cup
vegetable oil
Whole milk
2 Tbsp.
2 Tbsp.
1/2 cup
2 Tbsp.
105
© Jones & Bartlett Learning, LLC. NOT FOR SALE OR DISTRIBUTION.
Mixing
directions
Gently stir with a
wooden spoon until
the ingredients are
combined (1
minute).
Gently stir with a
wooden spoon
until the
ingredients are
combined (1
minute).
Gently stir with a Whisk
wooden spoon
harshly for 4
until the
minutes.
ingredients are
combined (1
minute).
Methods
1.
Preheat the oven to 400°F (204°C).
2.
Place all the ingredients into a bowl and stir based on the instructions provided in Table
1.
3.
Dump the mixture into a pie plate and spread with a fork, piercing holes in the bottom of
the dough.
4.
Bake for 15 minutes or until lightly browned.
RESULTS
Score for tenderness, flavor, aftertaste, and overall acceptability using a 9-point hedonic scale:
1 = like extremely
2 = like very much
3 = like moderately
4 = like slightly
5 = neither like nor dislike
6 = dislike slightly
7 = dislike moderately
8 = dislike very much
9 = dislike extremely
Table 2. Comparison of Pie Crusts
Pie Crust Tenderness
Aftertaste
Variety
Flavor
Overall Acceptability
106
© Jones & Bartlett Learning, LLC. NOT FOR SALE OR DISTRIBUTION.
REVIEW OF LITERATURE AND DISCUSSION
107
© Jones & Bartlett Learning, LLC. NOT FOR SALE OR DISTRIBUTION.
CONCLUSION
REFERENCES
108
© Jones & Bartlett Learning, LLC. NOT FOR SALE OR DISTRIBUTION.
Lab 22
The Role of Acid in Angel Food Cake
OBJECTIVE
• To evaluate the role of cream of tartar in angel food cake
LAB INFORMATION
The role of an acid (cream of tartar in this case) in a baked good is to stabilize the egg whites,
allowing them to form high, stiff peaks. Without cream of tartar, the volume and texture of the
cake is affected, as well other attributes.
MATERIALS AND METHODS
Ingredients for Each Batch
1 cup cake flour
3/4 cup sugar
2 Tbsp. sugar
12 large egg whites
1 1/2 tsp. cream of tartar
1/4 tsp. salt
3/4 cup sugar
1 1/2 tsp. vanilla
1/2 tsp. almond extract
Methods
1.
You will make two cakes. One with cream of tartar and one without.
2.
Do not grease the pan. Line the pan with wax or parchment paper by cutting out the shape
of the pan.
3.
Preheat the oven to 375°F (190°C).
4.
Sift the cake flour and 3/4 cup + 2 Tbsp. sugar and set aside.
5.
Combine the extracts in a small bowl and set aside.
6.
Beat the egg whites, cream of tartar, and salt until it forms peaks. When making the
variation without the acid, leave out the cream of tartar.
7.
Add the other 3/4 cup of sugar slowly, beat on high until stiff peaks form.
109
© Jones & Bartlett Learning, LLC. NOT FOR SALE OR DISTRIBUTION.
8.
9.
10.
11.
12.
Beating on low, add the flour mixture and extracts slowly.
Spoon the batter into an angel food cake pan.
Move a knife through batter to remove air pockets.
Bake 30 to 35 minutes or until the top springs back when touched lightly.
Invert the pan onto a plate and turn over when cool.
RESULTS
1.
When cool, cut a slice from each cake. Measure the standing height (in mm or cm) of
each slice. Record this measurement in Table 1.
2.
Observe the crust color of each cake. Use the following crust color scale to evaluate the
crust of each cake. Record this value in Table 1.
1
Light Brown
3.
2
3
Medium Brown
4
5
Dark Brown
Evaluate the tenderness, flavor, and overall acceptability of each cake. Record your
answers in Table 1.
Table 1. Angel Food Cake Comparison
Angel
Height
Crust
Tenderness
Food
Brownness
Cake
(use scale)
With
cream of
tartar
Flavor
Overall
Acceptability
Without
cream of
tartar
110
© Jones & Bartlett Learning, LLC. NOT FOR SALE OR DISTRIBUTION.
REVIEW OF LITERATURE AND DISCUSSION
111
© Jones & Bartlett Learning, LLC. NOT FOR SALE OR DISTRIBUTION.
CONCLUSIONS
REFERENCES
112
© Jones & Bartlett Learning, LLC. NOT FOR SALE OR DISTRIBUTION.
Lab 23
Manipulation of Ingredients in Baked Goods
OBJECTIVE
• To assess the function of each ingredient in a baked good
LAB INFORMATION
Table 1. Functions of Ingredients in Baked Goods
Purpose
Too Much
Yeast
Rise.
Low rise; CO2 escapes,
gluten becomes weak.
Flour
Dry ingredient with protein Low rise; gluten
content; gluten becomes
network too tight.
available with proper
hydration.
Mixing, Incorporation of air,
Low rise; breaks gluten
kneadin development of gluten, and linkages.
g
distribution of ingredients.
Liquid
Hydration. Also aids in
Low rise;
gelatinization and gluten
dilutes/tenderizes
development.
gluten.
Milk
Hydration. Source of fat,
Low rise; if not scalded,
sugar, and protein.
nontender product
Sometimes scalded and
results.
cooked to destroy enzymes
for tender, richer bread.
Egg
Hydration. Source of fat and Low rise; too much
protein. Fat makes tender,
protein structure.
richer bread. Protein gives
structure.
Sugar
Attracts and holds water.
Low rise;
Acts as food source for
overproduction of yeast
yeast. Enables browning.
due to too much food.
Fat
Tenderizes because air gets Low rise; oversoftens
between fat globules.
gluten network
(rubbery), weakens
gluten structure.
Salt
Firming effect
Low rise; overcontrol of
yeast.
Too Little
Low rise; little CO2
production.
Low rise; not enough
protein for gluten
development.
Low rise; less air
incorporated, more open
gluten; uneven.
Low rise; poor gluten
development because flour
not hydrated.
Nontender bread due to
lack of liquid, fat, and
protein.
Nontender (lack of fat);
sometimes flaky (wanted
in a croissant).
Low rise; too tight due to
lack of food source for
yeast.
Low rise; tough, no
tenderizing.
Open, coarse texture;
negative impact on yeast.
MATERIALS AND METHODS
Each group will make a control for one or both of the recipes below and one to six variations by
113
© Jones & Bartlett Learning, LLC. NOT FOR SALE OR DISTRIBUTION.
cutting either the fat, sugar, yeast, liquid, salt, egg, or rising time in half.
Cake Recipe
Ingredients
1/8 cup butter
1/3 cup sugar
1/4 tsp. vanilla
1 egg
1/2 cup cake flour
1/2 tsp. baking powder
1/8 tsp. salt
1/6 cup milk
Methods
1.
Preheat oven to 350°F (177°C).
2.
Grease only the bottom of the cupcake pan and insert waxed paper to fit the bottom of
each cup.
3.
Stir together the flour, salt, sugar, and baking powder.
4.
Place the butter and vanilla in a bowl. Set the electric mixer at medium speed. Cream
until the mass is light and fluffy. The total creaming time may be as long as 5 to 7
minutes.
5.
Add the beaten egg in two portions. Beat for 1 minute after each addition.
6.
Add half the flour mixture and half the milk. Beat at medium speed for 1 minute. Add the
last portion of flour and liquid. Blend for 30 seconds at medium speed. Beat for 3 more
minutes at high speed.
7.
Beat and push each batter into its designated spot in the cupcake pan.
8.
Bake at 350°F (177°C) for approximately 25 minutes.
9.
Cool for at least 5 minutes before removing the cake from the pan.
Yeast Bread Recipe
Ingredients
2 1/4 cup all-purpose flour
1 pkg. (.25 oz.) active dry yeast
1 tsp. salt
2 Tbsp. sugar
2 Tbsp. butter
1 beaten egg
1 cup hot water
114
© Jones & Bartlett Learning, LLC. NOT FOR SALE OR DISTRIBUTION.
Methods
1.
Preheat the oven to 425°F (218°C).
2.
Grease a muffin tin.
3.
Mix together butter, sugar, and hot water. Allow to cool.
4.
Add yeast, salt, egg, and flour. Mix.
5.
Set aside until dough doubles in size.
6.
Push the dough into the muffin tin and allow dough to double again.
7.
Bake for 10 minutes.
RESULTS
Score for tenderness, rise, texture, and overall acceptability:
1
2
3
Most unlike control
4
Table 1. Comparison of Baked Goods After Recipe Change
Ingredient Change or Tenderness
Rise
Texture
Control
5
Most like control
Overall
Acceptability
115
© Jones & Bartlett Learning, LLC. NOT FOR SALE OR DISTRIBUTION.
REVIEW OF LITERATURE AND DISCUSSION
116
© Jones & Bartlett Learning, LLC. NOT FOR SALE OR DISTRIBUTION.
CONCLUSIONS
REFERENCES
117
© Jones & Bartlett Learning, LLC. NOT FOR SALE OR DISTRIBUTION.
Fats and Oils Labs
118
© Jones & Bartlett Learning, LLC. NOT FOR SALE OR DISTRIBUTION.
Lab 24
Smoke Points of Edible Fats
OBJECTIVES
• To determine the smoke point of different fats
LAB INFORMATION
Fats are used in prepared foods to give textural quality (e.g., body, mouthfeel). They also are
used as a medium for transferring heat when frying foods. In baked goods they are used for
shortening, tenderizing, and leavening. They also are used in making emulsions.
MATERIALS AND METHODS
Ingredients
1 cup butter
1 cup shortening
1 cup lard
1 cup olive oil
1 cup peanut oil
1 cup canola oil
Equipment
Graduated cylinders
Thermometers
Metal measuring cups
Frying pans
Ring stands with clamps
Stopwatch
Methods
1.
Place measured quantities of each fat (1 cup) into a clean, dry metal can from which the
label has been removed.
2.
Securely position the cans with clamps on the electric burners of a range. For each can, a
ring stand and clamp can be used to position a thermometer so that the bulb is immersed
in the fat but above the bottom of the can.
3.
Heat the fat until it begins to smoke.
4.
Record the temperature when the smoke is rising in a steady fashion.
5.
Turn off the heat and allow the fat to cool undisturbed.
119
© Jones & Bartlett Learning, LLC. NOT FOR SALE OR DISTRIBUTION.
RESULTS
Fat/Oil
Smoke Point (°C or °F)
Observations
Butter
Canola oil
Lard
Olive oil
Peanut oil
Shortening
120
© Jones & Bartlett Learning, LLC. NOT FOR SALE OR DISTRIBUTION.
REVIEW OF LITERATURE AND DISCUSSION
121
© Jones & Bartlett Learning, LLC. NOT FOR SALE OR DISTRIBUTION.
CONCLUSION
REFERENCES
122
© Jones & Bartlett Learning, LLC. NOT FOR SALE OR DISTRIBUTION.
Lab 25
Salad Dressings: Permanent and Temporary Emulsions
OBJECTIVE
• To prepare different kinds of salad dressings to understand emulsions
LAB INFORMATION
An emulsion is a mixture of two immiscible (unblendable) substances. One substance (the
dispersed phase) is dispersed in the other (the continuous phase). Examples of emulsions include
butter, margarine, and mayonnaise. In butter and margarine, a continuous lipid phase surrounds
droplets of water (water-in-oil emulsion). Emulsions are part of a more general class of twophase systems of matter called colloids. Although the terms colloid and emulsion are sometimes
used interchangeably, the word emulsion tends to imply that both the dispersed and the
continuous phases are liquids.
MATERIALS AND METHODS
Honey and Oil Dressing
Ingredients and Methods
1/4 cup lemon juice
1/4 cup honey
1/4 cup olive oil
Mix all ingredients in a container with a tight-fitting lid. Shake the contents together until
thoroughly combined. Chill and serve over salad.
Vinegar and Oil Dressing
Ingredients and Methods
1/4 cup olive oil
1/4 cup red wine vinegar
Mix all ingredients in a container with a tight-fitting lid. Shake the contents together until
thoroughly combined. Chill and serve over salad.
123
© Jones & Bartlett Learning, LLC. NOT FOR SALE OR DISTRIBUTION.
Homemade French Dressing
Ingredients and Methods
1/4 cup olive oil
1/4 cup red wine vinegar
1/4 cup tomato sauce
1/4 cup sugar
Mix all ingredients in a bowl with a hand beater until thoroughly combined. Chill and serve over
salad.
Homemade Mayonnaise
Ingredients and Methods
2 eggs
1 cup olive oil
2 Tbsp. salt
1/4 cup lemon juice
Mix all ingredients in a bowl except the oil with a hand beater until thoroughly combined.
Slowly add the oil and continue to beat until the product has whipped peaks. Chill and serve over
salad.
Store-Bought Mayonnaise
Ingredients and Methods
Chill the mayonnaise and serve over salad.
RESULTS
Evaluate each of the products using a 7-point scale:
1 = very poor
2 = poor
3 = fair
4 = medium
5 = good
6 = very good
7 = excellent
Table 1. Evaluation of Dressings
Quality Characteristic Honey and
Lemon Oil
Appearance
Consistency or texture
Flavor
Overall eating quality
Type of emulsion?
(permanent or
temporary)
French
Dressing
Homemade
Mayonnaise
Store-Bought
Mayonnaise
124
© Jones & Bartlett Learning, LLC. NOT FOR SALE OR DISTRIBUTION.
Vinegar and
Oil Dressing
REVIEW OF LITERATURE AND DISCUSSION
125
© Jones & Bartlett Learning, LLC. NOT FOR SALE OR DISTRIBUTION.
CONCLUSION
REFERENCES
126
© Jones & Bartlett Learning, LLC. NOT FOR SALE OR DISTRIBUTION.
Lab 26
Fat Replacement in Bakery Items
OBJECTIVE
• To evaluate the use of different types of fat and/or oil in recipes
LAB INFORMATION
In bakery items, fat tenderizes the product to produce a soft, moist crumb. When the tenderizing
factor is manipulated, baked goods can be too soft or too tough. Both situations result in a low
rise.
MATERIALS AND METHODS
Ingredients
1/8 cup butter (control group)
1/8 cup lard (group 1)
1/8 cup vegetable oil (group 2)
1/8 cup shortening (i.e., Crisco) (group 3)
1/4 cup Lighter Bake (by Sunsweet) (group 4)
Ingredients for Each Batch
2 eggs
1/6 cup milk
1 cup sugar
1/2 tsp. vanilla
1/2 cup flour, cake
1/2 tsp. baking powder
Equipment
Muffin tins
Muffin/cupcake papers
Methods
1.
Preheat the oven to 350°F (177°C).
2.
Each group will make a control cupcake and one variation, as follows.
Control: 1/8 cup butter
Group 1: 1/8 cup lard
127
© Jones & Bartlett Learning, LLC. NOT FOR SALE OR DISTRIBUTION.
3.
4.
5.
6.
7.
8.
9.
Group 2: 1/8 cup vegetable oil
Group 3: 1/8 cup shortening (i.e., Crisco)
Group 4: 1/4 cup Lighter Bake (by Sunsweet) (group 4)
Group 5: No fat.
Sift together the flour, salt, and baking powder. Set the dry mix aside.
Use an electric mixer to combine the designated fat, sugar, and vanilla.
Add the eggs to the fat and vanilla and beat for 1 minute after each addition.
Add half the flour mixture and half the milk. Beat at medium speed for 1 minute.
Add the last portion of the flour and liquid. Blend for 30 seconds at medium speed and
then beat for 3 more minutes at high speed.
Divide the batter into equal portions and pour into the paper cupcake holder. Make sure
to label the cupcake holder with the group number or as the control.
Bake for 25 minutes at 350°F (177°C). After baking, cool for 5 minutes before removing
from the cupcake pan. Compare the samples and record the results in Table 1.
RESULTS
Table 1. Comparison of Baked Products with Different Fats
Evaluate each of the following using a 9-point hedonic scale:
1 = like extremely
2 = like very much
3 = like moderately
4 = like slightly
5 = neither like nor dislike
6 = dislike slightly
7 = dislike moderately
8 = dislike very much
9 = dislike extremely
Appearance
Texture
Volume
Tenderness
Control: Butter
Group 1: Lard
Group 2: Vegetable oil
Group 3: Shortening
Group 4: Lighter bake
Group 5: No added fat
128
© Jones & Bartlett Learning, LLC. NOT FOR SALE OR DISTRIBUTION.
Flavor
REVIEW OF LITERATURE AND DISCUSSION
129
© Jones & Bartlett Learning, LLC. NOT FOR SALE OR DISTRIBUTION.
CONCLUSION
REFERENCES
130
© Jones & Bartlett Learning, LLC. NOT FOR SALE OR DISTRIBUTION.
Sugar and Sugar Substitutes Labs
131
© Jones & Bartlett Learning, LLC. NOT FOR SALE OR DISTRIBUTION.
Lab 27
Sugar Content of Soft Drinks
OBJECTIVES
• To determine the amount of sugar in various popular soft drinks
• To test the accuracy of the Nutrition Facts panel with regard to the sugar content of soft
drinks
LAB INFORMATION
Soft drinks are often sweetened with high fructose corn syrup, which is 55% fructose and 45%
glucose. Obesity is often blamed on excessive sugar consumption. One theory is that the added
calories that are responsible for weight gain are associated with high sugar intake. Others suggest
that high fructose corn syrup disturbs the process of cellular metabolism.
MATERIALS AND METHODS
Materials
5 different varieties of regular soft drinks (do not use diet or sugar-free soda)
5 small or medium saucepans
Spoons for stirring
Small kitchen scale (able to measure in grams)
Methods
1.
Pour a can of soda into the saucepan.
2.
Heat the soda to a boil.
3.
Continue boiling until all the liquid has evaporated.
4.
Once the liquid has evaporated completely, a sticky syrup should remain.
5.
Transfer the syrup to a scale. Measure its weight in grams. Record this weight in Table 1.
6.
Find the grams of sugar on the soda’s Nutrition Facts panel. Record this weight in Table
1.
7.
Repeat this procedure for each soft drink variety.
RESULTS
Soda Variety
Weight (g) of Syrup
Weight (g) of Sugar on
Nutrition Facts Panel
132
© Jones & Bartlett Learning, LLC. NOT FOR SALE OR DISTRIBUTION.
REVIEW OF LITERATURE AND DISCUSSION
133
© Jones & Bartlett Learning, LLC. NOT FOR SALE OR DISTRIBUTION.
CONCLUSION
REFERENCES
134
© Jones & Bartlett Learning, LLC. NOT FOR SALE OR DISTRIBUTION.
Lab 28
Sugar Substitutes in Sponge Cake
OBJECTIVES
• To create a high-quality baked product (a sponge cake muffin) using a sugar substitute
• To reduce the calorie content of a baked product through the use of sugar substitutes
LAB INFORMATION
Sugar substitutes can be part of an overall strategy to reduce the calories consumed in the
American diet. Polyols, a type of monosaccharide, are a common sugar substitute. They are
commonly used in chewing gums and other products for added sweetness. Polyols vary in
sweetness compared to sugar, but yield less energy than sugar because they are not fully
absorbed in the intestine.
MATERIALS AND METHODS
Ingredients for Each Batch
1/4 tsp. vanilla
1/2 egg
1/2 cup cake flour
1/2 tsp. baking powder
1/8 tsp. salt
1/6 cup milk
Read the substitution equivalent for sugar on each sugar-substitute package. Determine how
much you should use if you needed to replace 1/2 cup of sugar.
Recipe 1: Use 100% sweetener substitute of your choice: Splenda (sucralose), Equal (aspartame),
or Sweet N Low (saccharin). This will replace the 1/2 cup of sugar in the recipe.
Recipe 2: Use 50% of the sweetener substitute of your choice and 1/4 cup sugar.
Recipe 3: Use 75% of the sweetener substitute of your choice and 1/8 cup sugar.
Recipe 4: Use 0% of the sweetener substitute of your choice and 1/2 cup of sugar.
Methods
1.
Preheat the oven to 350°F (177°C).
2.
Measure out the polyol and sugar needed for each variation for a total of four cupcakes
per polyol type.
3.
Line the cupcake pan with cupcake liners. Label each liner based on the polyol type: “All
135
© Jones & Bartlett Learning, LLC. NOT FOR SALE OR DISTRIBUTION.
4.
5.
6.
7.
8.
9.
10.
11.
12.
13.
14.
15.
Polyol,” “1/2 Polyol,” “1/3 Polyol,” and “1/4 Polyol.”
Sift together the flour, baking powder, and salt. Set the dry mix aside.
Place the shortening and vanilla into a bowl. Mix at medium speed until well blended.
Add the beaten egg in two portions. Beat for 1 minute after each addition.
Add half the flour mixture and half the milk. Beat at medium speed for 1 minute.
Add the remaining flour and milk. Blend for 30 seconds at medium speed, and then for 3
more minutes at high speed.
Weigh the batter on a scale. Divide the mass by 4.
Split the batter into four separate bowls. Add the polyol and sugar in the quantities listed
in the recipe for the four variations.
Place each batter into its respective cupcake liner in the pan.
Bake at 350°F (177°C) for 25 minutes.
Cool for at least 5 minutes prior to removing the cakes from the cupcake pan.
Cut each cupcake in half. Measure its height. Record the appearance, crumb, and other
observations for each polyol variation in Table 1.
Determine the number of calories in each polyol variation. Record the calories in Table 1.
RESULTS
Score each sensory characteristic using a 7-point scale:
7 = excellent
6 = very good
5 = good
4 = medium
3 = fair
2 = poor
1 = very good
Table 1. Evaluation of Polyol Baked Goods
Sensory
100%
50%
Characteristic
Polyol
Polyol
Appearance
33.3%
Polyol
25%
Polyol
Consistency/texture
Tenderness
Flavor
Overall quality
Rise (height in cm)
Energy (calories)
136
© Jones & Bartlett Learning, LLC. NOT FOR SALE OR DISTRIBUTION.
Control
(all sugar)
REVIEW OF LITERATURE AND DISCUSSION
137
© Jones & Bartlett Learning, LLC. NOT FOR SALE OR DISTRIBUTION.
CONCLUSION
REFERENCES
138
© Jones & Bartlett Learning, LLC. NOT FOR SALE OR DISTRIBUTION.
Lab 29
Caramel Candy
OBJECTIVE
• To explore differences between types of candy
• To describe the texture and browning of caramel
LAB INFORMATION
Candies produced from the manipulation of boiled sugar solutions are classified as either
crystalline or amorphous. Crystalline candies are soft, smooth, and creamy. Their sugar crystals
are so tiny that they cannot be felt by the tongue. Fudge, panache, divinity, and creams are all
types of crystalline candies. In contrast, noncrystalline (amorphous) candies are, as their name
implies, without form. Amorphous candies have a higher concentration of sugar than crystalline
candies. Their syrups are so viscous that sugar crystals cannot form. They come in a variety of
forms, such as chewy caramels or hard brittles.
MATERIALS AND METHODS
Ingredients
1 cup heavy cream
1 cup sugar
1/2 cup corn syrup
1/4 tsp. salt
4 Tbsp. butter
1/2 tsp. vanilla
Variations: Add nuts or chocolate.
Equipment
Candy thermometer
Methods
1.
Grease a 10-inch square pan or line one with waxed paper.
2.
Put all ingredients except the butter and vanilla into a saucepan.
3.
Stir with a wooden spoon over a medium heat until the sugar melts.
4.
Add the butter and stir until it melts.
139
© Jones & Bartlett Learning, LLC. NOT FOR SALE OR DISTRIBUTION.
5.
6.
7.
8.
Place the candy thermometer into the saucepan and bring the heat up until it reads 250°F
(121°C) without stirring.
Add the vanilla. When the mixture firms up, remove it from the heat and pour it into the
10-inch pan.
Allow the mixture to cool and harden.
Cut the caramel into squares (1 inch is the standard size for caramel).
RESULTS
How does the corn
syrup prevent the
crystallization of the
candy?
Based on the use of
cream and sugar, what
type of browning
occurs in this candy?
How does stirring
prevent the formation
of a grainy texture?
Is this type of candy
amorphous or
crystalline? Explain.
140
© Jones & Bartlett Learning, LLC. NOT FOR SALE OR DISTRIBUTION.
REVIEW OF LITERATURE AND DISCUSSION
141
© Jones & Bartlett Learning, LLC. NOT FOR SALE OR DISTRIBUTION.
CONCLUSIONS
REFERENCES
142
© Jones & Bartlett Learning, LLC. NOT FOR SALE OR DISTRIBUTION.
Beverage Labs
143
© Jones & Bartlett Learning, LLC. NOT FOR SALE OR DISTRIBUTION.
Lab 30
Make Your Own Sports Drink
OBJECTIVE
• To make a homemade sports drinks
• To evaluate the nutritional content of sports drinks
LAB INFORMATION
Sports drinks have been used for the last several decades as a means to restore glycogen stores
and replace fluid, sodium, and potassium lost in sweat during prolonged, intense exercise.
Consumption of carbohydrates, fluids, and electrolytes may help delay the onset of fatigue by
providing the body with an alternate glucose supply, which spares muscle glycogen.
METHODS AND MATERIALS
Ingredients
5 lbs. sugar
2 shakers of potassium (salt substitute)
1 cup salt
Water
Food coloring kit
Milligram scale
Several commercial sport drinks (e.g., Gatorade and PowerAde)
Methods
1.
Select one of the commercial sports drinks. Mix sugar, sodium, and potassium with 12
oz. water according to your conversion calculations, which are based on the amounts of
sugar, sodium, potassium, and water listed on the label of the commercial sports drink.
Record these values in Table 1.
2.
Add 2 drops of any color food coloring.
3.
Sample the homemade sports drink and rank its taste on scale of 1 to 5 where 1 = like and
5 = dislike.
4.
Select another commercial sports drink and repeat.
144
© Jones & Bartlett Learning, LLC. NOT FOR SALE OR DISTRIBUTION.
RESULTS
Table 1. Comparison of Homemade Sports Drinks
Sports Drink
Sugar
Sodium
Potassium
Replicated
Water
145
© Jones & Bartlett Learning, LLC. NOT FOR SALE OR DISTRIBUTION.
Taste (on a
scale of 1 to 5)
REVIEW OF LITERATURE AND DISCUSSION
146
© Jones & Bartlett Learning, LLC. NOT FOR SALE OR DISTRIBUTION.
CONCLUSIONS
REFERENCES
147
© Jones & Bartlett Learning, LLC. NOT FOR SALE OR DISTRIBUTION.
Lab 31
Coffee and Tea: Sensory Evaluation
OBJECTIVES
• To perform a sensory evaluation of different coffees and teas
• To describe the nutritional composition of coffee and tea
LAB INFORMATION
Coffee and tea are enjoyed around the world. Each contains compounds that are associated with
potential health benefits. Coffee contains more than 1,000 different compounds. One class of
phytonutrients of interest in coffee is phenolic acids. Chlorogenic acids, caffeine, and diterpenes
are other important bioactive compounds in coffee. Chlorogenic acids are a family of esters that
are formed between quinic acid and trans-cinnamic acids (both of which are dietary phenols).
Tea also is composed of a wide variety of compounds, including phytonutrients called
polyphenols. Polyphenols, specifically catechins, are thought to be responsible for the beneficial
health effects of tea. White and green tea have high concentrations of the phytonutrients
epicatechin (EC), epigallocatechin (EGC), epicatechin gallate (ECG), and epigallocatechin
gallate (EGCG). Oolong and black teas are good sources of theaflavins and thearubigins, which
are complex polyphenols.
MATERIALS AND METHODS
Ingredients
Several brands of caffeinated tea
Several brands of decaffeinated tea
Several brands of caffeinated coffee, brew and instant
Several brands of decaffeinated coffee, brew and instant
Equipment
Coffee maker
Methods
1.
In Table 1, record the beverage, the caffeine content, any phytonutrients that may be
present, any possible health benefits, and any potential health warnings. This information
148
© Jones & Bartlett Learning, LLC. NOT FOR SALE OR DISTRIBUTION.
2.
may be found on the packaging or in outside resources.
Perform a sensory evaluation. Record your scores in Table 2.
RESULTS
Table 1. Caffeine Content, Phytonutrient Content, and Health Effects of Teas and Coffees
Beverage
Caffeine (mg) Phytonutrients
Health Benefits
Health Warnings
Table 2. Tea and Coffee Sensory Sheet
Evaluate each of the following based on a 5-point scale:
1 = unacceptable
2 = marginal
3 = fair, 4 = good
5 = excellent
Product
Dry
Wet
Acidity
Flavor/
Fragrance
Aroma
Depth
Aftertaste
149
© Jones & Bartlett Learning, LLC. NOT FOR SALE OR DISTRIBUTION.
Total Score
150
© Jones & Bartlett Learning, LLC. NOT FOR SALE OR DISTRIBUTION.
REVIEW OF LITERATURE AND DISCUSSION
151
© Jones & Bartlett Learning, LLC. NOT FOR SALE OR DISTRIBUTION.
CONCLUSIONS
REFERENCES
152
© Jones & Bartlett Learning, LLC. NOT FOR SALE OR DISTRIBUTION.
Lab 32
Effect of Caffeine on Blood Pressure, Heart Rate, and Reaction
Time
OBJECTIVE
• To observe the effect of caffeine on blood pressure, heart rate, and reaction time
LAB INFORMATION
Caffeine is a natural stimulant that elicits a number of physiological and psychological effects in
the body. Its stimulating properties result from interactions with the nervous, respiratory, and
circulatory systems. Approximately 90% of adults in North America consume a caffeinated
product each day (average intake = 168 mg/day), and 80% of the world population consumes
caffeine on a daily basis. Caffeine is a complex molecule containing more than 1,000 different
compounds, including carbohydrates, lipids, nitrogenous compounds, vitamins, minerals,
alkaloids, and phenolic compounds. It can be found in many common foods and beverages,
including coffee, tea, soft drinks, chocolate, medications, and dietary supplements. Table 1
provides a list of common caffeine-containing items and the doses they deliver. For example, an
8 oz. cup of coffee contains approximately 133 mg of caffeine, but may contain anywhere from
102 to 200 mg.
After caffeine is consumed, it is absorbed rapidly and distributed throughout the body, reaching
its highest concentration within 30 to 40 minutes. Caffeine is eliminated from the body within 6
to 12 hours; however, elimination time is longer for pregnant women and shorter for smokers.
Caffeine has been shown to have beneficial effects on sports performance, particularly in
endurance-related activities. Caffeine may enhance endurance by stimulating fatty acid release.
Performance benefits attributed to caffeine include physical endurance, reduction of fatigue, and
enhanced mental alertness and concentration. Despite the potential benefits, habitual caffeine
consumption is also known to cause dependency and adverse reactions, even at low doses.
Symptoms may include tachycardia, palpitations, insomnia, restlessness, nervousness, tremor,
headache, abdominal pain, nausea, vomiting, diarrhea, and diuresis. The ingestion of 15–30 mg
of caffeine per kg of body weight has resulted in significant toxicity; however, moderate
consumption equivalent to 3 to 4 cups of coffee per day may be good for health.
Hypertension due to caffeine consumption is a controversial topic. It has been established that
153
© Jones & Bartlett Learning, LLC. NOT FOR SALE OR DISTRIBUTION.
short-term consumption of high doses of caffeine raises blood pressure in both normotensive and
hypertensive individuals. A 200–250 mg dose of caffeine (equivalent to 2 to 3 cups of coffee)
has been found to increase systolic blood pressure by 3–14 mm Hg and to increase diastolic
blood pressure by 4–13 mg Hg in normotensive individuals. Although coffee intake slightly
increases blood pressure, studies have found that there is no association between the incidence of
hypertension in the general population and that sensitivity to caffeine varies among individuals.
Table 1. Caffeine Content of Beverages, Foods, and Over-the-Counter Drugs
Caffeine Source
Average Caffeine
Range (mg)
Content (mg)
Beverages
Coffee
Brewed, drip method (8 oz.)
133
90–200
Instant (8 oz.)
93
27–173
Decaffeinated, brewed or instant (8 oz.)
5
3–12
Espresso (single 1 oz. shot)
40
30–90
Decaf espresso (single 1 oz. shot)
4
—
Latte (16 oz.)
150
—
Cappuccino (12 oz.)
75
—
Starbucks Grande Reg Coffee (16 oz.)
320
—
Starbucks Caramel Frappuccino (16 oz.)
100
—
Starbucks Mocha Frappuccino Chilled
75
—
Coffee Drink (9.5 oz. bottle)
Dunkin Donuts Reg Coffee (16 oz.)
206
—
Dunkin Donuts Iced Coffee (16 oz.)
70
—
Dunkin Donuts Coffee Coolatta (16 oz.)
16
—
Tea (8 oz.)
Black
86
23–110
Oolong
37
12–55
Green
30
8–60
White
10
6–25
Iced, brewed
35
9–50
Iced, Snapple, flavored (16 oz.)
42
—
Iced, Arizona, black (16 oz.)
32
—
Iced, Nestea (12 oz.)
26
—
Colas and Soft Drinks (12 oz.)
Regular Coca-Cola
45
30–46
Regular Pepsi
37
30–46
Diet Cola
47
2–58
Dr. Pepper
41
—
Mountain Dew
55
—
Sprite, 7-up, Fresca, Sunkist, Root Beer
0
—
Jolt
72
—
Energy Drinks
Red Bull (8.3 oz.)
80
—
154
© Jones & Bartlett Learning, LLC. NOT FOR SALE OR DISTRIBUTION.
Monster (16 oz.)
Rockstar (8 oz.)
5 Hour Energy (2 oz.)
NOS (16 oz.)
Amp (8.4 oz.)
Full Throttle (16 oz.)
Foods
Chocolate
Hot cocoa (5 oz.)
Chocolate milk (8 oz.)
Milk chocolate (1 oz.)
Dark chocolate (1 oz.)
Chocolate syrup (2 T.)
Haagen-Dazs Coffee Ice-Cream (1 cup)
Dannon Coffee Yogurt
Over-the-Counter Drugs
Cold Remedies (Standard Dose)
Dristan
Triaminicin, Coryban-D
Pain Relievers (Standard Dose)
Excedrin
Midol, Anacin
Aspirin, plain (any brand)
Stimulants
NoDoz, Vivarin, Caffedrin
Weight-Control Aids (daily dose)
Prolamine
Dexatrim, Dietac
160
80
138
260
74
144
—
—
—
—
—
—
5
8
6
20
5.4
58
45
2–20
—
1–15
5–35
—
—
—
0
30
—
—
130
64
0
—
—
—
200
100–200
280
200
—
—
MATERIALS AND METHODS
Equipment
Instant coffee (calibrate dry amount to provide 200 mg caffeine per 6 oz. liquid coffee)
Blood pressure cuff
Reaction timer
Methods
1.
Sit quietly in your seat for a few minutes. Take a resting heart rate after you relax and
quiet yourself by placing two fingers either on the inside of wrist or on the side of the
neck just under the bend of the jawbone. Move your fingers until you feel a pulse. Once
you have located your pulse, use a watch to count off 15 seconds. Count how many times
you feel your pulse during that 15-second interval and multiply that by four to calculate
beats per minute. Record your resting heart rate in the Results section. Alternative: some
automated blood pressure measuring devices will also record heart rate.
2.
Have a resting blood pressure measurement taken while sitting. Use an automated blood
155
© Jones & Bartlett Learning, LLC. NOT FOR SALE OR DISTRIBUTION.
3.
4.
5.
6.
7.
8.
pressure measuring device or have a trained individual take it manually. Record your
resting blood pressure in the Results section.
Measure your reaction time using the reaction timer. Have a partner press on the small
pad of the reaction timer to trigger the light signal. As soon as you observe the light
signal, hit the large pad in response and record the time indicated on the machine. Follow
this procedure two or three times until you feel comfortable with it. Repeat this procedure
three more times and record each time using the 1/100 of a second setting. Record these
values and calculate the mean of the three trials in the Results section.
Repeat step 3 but use the sound signal setting.
Drink two 6-ounce cups of coffee (200 mg of caffeine) within a 10-minute period.
Record the amount of coffee you consumed in Results section. Determine the amount of
caffeine consumed.
Alternative: Other oral delivery forms of caffeinate may be substituted for coffee,
including over-the-counter caffeine tablets, which are generally available in 200 mg
doses. Other caffeinated drinks, including some soft drinks, contain high doses of
caffeine. If caffeinated candy products and gums are used, they may need to be special
ordered in advance.
Forty-five minutes after consuming the caffeine, measure your reaction time again using
the procedure in steps 3 and 4.
Determine your heart rate and blood pressure as you did in steps 1 and 2. Record these
measurements in Results section.
Once everyone has completed the lab, fill in the group data table (see Table 2).
RESULTS
1.
2.
3.
4.
5.
6.
7.
8.
Precaffeine heart rate: __________ beats per minute
Precaffeine blood pressure: __________ mm Hg
Reaction time before caffeine (to the closest hundredth of a second):
Light Signal
Sound Signal
Trial 1: __________
Trial 1: __________
Trial 2: __________
Trial 2: __________
Trial 3: __________
Trial 3: __________
Mean: __________
Mean: __________
Caffeine delivery system used (coffee, tablet, candy/gum, soft drink, energy drink):
_____________________________________
Dose of caffeine consumed: ______________
Reaction time after caffeine consumption (to the closest hundredth of a second):
Light Signal
Sound Signal
Trial 1: __________
Trial 1: __________
Trial 2: __________
Trial 2: __________
Trial 3: __________
Trial 3: __________
Mean: __________
Mean: __________
Postcaffeine heart rate: __________ beats per minute
Postcaffeine blood pressure: __________ mm/Hg
156
© Jones & Bartlett Learning, LLC. NOT FOR SALE OR DISTRIBUTION.
Table 2. Group Data Table
Student
Usual
BP
BP
HR
HR
Average
Average
Caffeine
Before
After
Before
After
Light
Light
Intake:
Caffeine Caffeine Caffeine Caffeine
Signal
Signal
Light,
Reaction
Reaction
Moderate,
Before
After
or Heavy*
Caffeine
Caffeine
1
2
3
4
5
6
7
8
9
10
11
12
13
14
15
16
17
18
19
20
Group mean
* Heavy = 3–4 cups or more/day; Moderate = 1–2 cups/day; Light = some, but not daily
157
Average
Sound
Signal
Reaction
Before
Caffeine
Average
Sound
Signal
Reaction
After
Caffeine
© Jones & Bartlett Learning, LLC. NOT FOR SALE OR DISTRIBUTION.
DISCUSSION AND REVIEW OF LITERATURE QUESTIONS
1.
How did you classify your usual level of caffeine consumption, heavy, moderate, or
light? Do you think your regular daily caffeine intake affected your reaction time in
today’s lab? Did students within the class appear to have different reactions to caffeine
based on their usual intake?
2.
What was the effect of caffeine consumption on your heart rate and blood pressure? Is
this what you expected?
3.
What was the effect of caffeine on heart rate and blood pressure on the class as a whole?
Is this what you expected?
4.
Discuss how caffeine affected your reaction to sound and light. Is this what you
expected?
5.
What was the effect of caffeine on light and sound reaction times on the class as a whole?
Is this what you expected?
6.
Find out more about caffeine by doing an online search. Explain how caffeine causes its
effects in the body, including mention of its effect on adenosine receptors in the brain and
body.
158
© Jones & Bartlett Learning, LLC. NOT FOR SALE OR DISTRIBUTION.
7.
List the pros and cons of caffeine ingestion, including mention of the side effects of
excessive caffeine intake.
8.
Does caffeine affect one’s fluid status? If so, how does fluid status (how hydrated you
are) affect blood pressure and heart rate, especially during exercise/physical activity?
9.
In general, do you think the dosage of caffeine makes a difference on reaction time? If so,
please describe how so and in what direction.
10.
What were the strengths of this experiment’s design and execution?
11.
What were the limitations of this experiment’s design and execution?
159
© Jones & Bartlett Learning, LLC. NOT FOR SALE OR DISTRIBUTION.
Lab 33
Comparison of Macronutrients and Micronutrients in Oral
Supplements
OBJECTIVE
• To compare the taste of different oral formulary supplements
• To evaluate the nutrient content of oral formulary supplements
LAB INFORMATION
As future dietetic professionals, you may be in a position to offer a client a formulary
supplement beverage. These beverages are meant to fortify the diet.
MATERIALS AND METHODS
Ingredients
Oral supplements of your choice: Ensure, Ensure Plus, Carnation Instant Breakfast, Jevity,
Glucerna, Boost, Boost Glucose Control and flavor variations of these (vanilla, chocolate and
strawberry
Methods
1.
Prepare samples of each supplement.
2.
Taste each supplement, making sure to clean the palate with a sip of water between
tastings.
3.
Complete the sensory evaluation chart in Table 1. Use descriptive words to describe each
sensory component.
4.
Fill in Table 2 to compare the nutrient composition of the supplements.
RESULTS
Table 1. Sensory Evaluation Chart
Product
Consistency
Smell
Aftertaste
Appearance
160
© Jones & Bartlett Learning, LLC. NOT FOR SALE OR DISTRIBUTION.
Taste
Table 2. Oral Supplement Nutrient Composition Comparison Chart
Oral Supplement
Oral Supplement
20 year
Nutrient
Nutrient
old male
Composition
Composition
DRI
(compare only
(compare only
those nutrients on those nutrients on
the label)
the label)
Calories
2,400–
3,000
(sedentaryactive)
Calories from fat
20–30%
Total fat
< 80 g
Saturated fat
< 20 g
Trans fats
0
Polyunsaturated fat
Monounsaturated fat
Cholesterol
< 300 mg
Sodium
1,500 mg
Potassium
4,700 mg
Total carbohydrates
270–390 g
Dietary fiber
38 g
Sugars
Proteins
56 g
Vitamin A
900 µg
Vitamin C
90 mg
Calcium
1,000 mg
Iron
8 mg
Vitamin D
5 µg
Vitamin E
15 mg
Vitamin K
120 µg
Thiamin
1.2 mg
Riboflavin
1.3 mg
Niacin
16 mg
Vitamin B6
1.3 mg
Folate
400 µg
Vitamin B12
2.4µg
Pantothenic Acid
5 mg
Phosphorous
700 mg
Iodine
150 µg
Magnesium
400 mg
Zinc
11 mg
Selenium
55 µg
Copper
900 µg
Manganese
2.3 mg
161
© Jones & Bartlett Learning, LLC. NOT FOR SALE OR DISTRIBUTION.
Difference
+ or -
Chromium
Molybdenum
Chloride
Choline
35 µg
45 µg
550 mg
162
© Jones & Bartlett Learning, LLC. NOT FOR SALE OR DISTRIBUTION.
REVIEW OF LITERATURE AND DISCUSSION
163
© Jones & Bartlett Learning, LLC. NOT FOR SALE OR DISTRIBUTION.
CONCLUSIONS
REFERENCES
164
© Jones & Bartlett Learning, LLC. NOT FOR SALE OR DISTRIBUTION.
Culturally Competent Recipes
165
© Jones & Bartlett Learning, LLC. NOT FOR SALE OR DISTRIBUTION.
America, Southeastern
Courtesy of Lynn Thomas, DrPH, RD, CNSD
Cornbread
Ingredients
1 1/2 cups cornmeal (white or yellow)
3/4 cup flour
1 1/2 tsp. baking powder
1 1/2 tsp. salt
2 or 3 Tbsp. sugar
1 3/4 cups buttermilk
1 egg (beaten)
2 Tbsp. oil
Cooking Instructions
Mix together. Bake at 425°F (218°C) for 20 to 25 minutes in a greased skillet.
Chinese
Courtesy of Gary S. Chong, PhD, and Katherine L. Fernald, MS, RD, LDN
Chinese Chicken Soup
Ingredients
1 package wood ears (mok yee) 1 oz.
10 to 12 pieces Chinese dried mushrooms
3 to 4 lbs. young skinless chicken
8 oz. ginger (peeled and sliced in 1/4" pieces)
3 Tbsp. liquor (whiskey)
8 to 10 pieces red dried dates
2 1/2 qt. water
1 Tbsp. Hawaiian or rock salt
Cooking Instructions
Soak wood ears until soft. Rinse, dry, and discard hard parts, and then cut into bite-size pieces
and set aside. Cut chicken into 2-inch chunks and set aside. Soak dried mushrooms until soft.
Rinse, dry, cut off, and discard stems. Cut mushrooms into bite-sized pieces and set aside. In a
large pot, stir fry the ginger and chicken in 1 tsp. of oil on high heat for 5 to 10 minutes, or until
lightly brown. Add water to cover chicken and bring to boil. Add dried dates, wood ears,
mushrooms, liquor, and Hawaiian salt (to taste, about 1 Tbsp.). Bring back to boil, then reduce
heat to medium and cook for 10 minutes. Reduce heat and simmer for 45 minutes. or more until
chicken is tender. Serve hot.
Serves 8–10 adults.
166
© Jones & Bartlett Learning, LLC. NOT FOR SALE OR DISTRIBUTION.
Cajun Creole
Courtesy of Colette G. Leistner, PhD, RD, and Simone Camel, MS, RD
Catfish Sauce Piquant (Cajun Creole)
Ingredients
2 lb. catfish fillets
1/4 cup canola oil
2 cups chopped celery
2 cups chopped onion
1 cup chopped green pepper
Salt and pepper to taste
1 bay leaf
2 cloves minced garlic
1 can (14.5 oz.) diced tomatoes
2 cups water
4 thin slices lemon
1/2 cup chopped parsley
1/2 cup chopped green onion
Cooking Instructions
Cut fillets into eight pieces. Sauté celery, onion, green pepper, and garlic in oil until vegetables
are tender. Add diced and crushed tomatoes, salt, pepper, bay leaf, and water. Simmer 20 to 30
minutes over low heat. Add catfish and cook 10 minutes. Add lemon, parsley, and green onion,
and cook until fish flakes easily with a fork. Remove bay leaf and lemon slices. Serve over rice.
Vegetarian
Courtesy of Carolyn King, RD
Special K Roast
Ingredients
6 cups Special K cereal, coarsely crushed
2 lbs. firm tofu, drained
1 1/2 tsp. garlic salt
2 tsp. onion powder
3/4 cup chopped walnuts
1/2 tsp. garlic powder
3/4 cup soy mayonnaise
1 Tbsp. vegetarian beef- or chicken-style seasoning
1 large onion, chopped and sautéed
Cooking Instructions
Combine in blender 1 lb. tofu, mayonnaise, garlic salt, onion powder, and garlic powder; blend
smooth. In a large bowl, mash remaining 1 lb. tofu with beef/chicken-style seasoning. Add
sautéed onion and walnuts and blended mixture and crushed cereal. Mix thoroughly. Bake
167
© Jones & Bartlett Learning, LLC. NOT FOR SALE OR DISTRIBUTION.
uncovered in a 13 × 9 inch pan (prepared with cooking spray) at 350°F (177°C) until golden
brown, about 1 hour. Serve roast warm with gravy or cold in a sandwich.
Lentil Stew
Ingredients
1 lb. brown lentils
1 cup pearl barley
3 large carrots, diced
3 large ribs of celery, diced
1 can (6 oz.) tomato paste
5–6 cups vegetable broth
1 tsp. oregano
Fresh chopped cilantro for garnish
1 large bell pepper, diced
1 large onion, diced
3 cloves garlic, minced
1 can (28-oz.) fire-roasted tomatoes
1/4 cup soy sauce
1 tsp. cumin
2 bay leaves
1/4 cup nutritional yeast flakes (optional)
Cooking Instructions
Sauté onions and garlic. Add remaining vegetables, oregano, cumin, lentils, barley, and broth/
Bring to a boil and simmer covered until barley and lentils are tender (about 45 to 60 minutes).
Then add canned tomatoes, tomato paste, nutritional yeast flakes, and soy sauce; simmer another
15 to 30 min. Add more or less liquid depending on desired thickness. Add salt to taste.
Garbanzo–Oat Burger Patties
Ingredients
3 cups quick oats
1 1/2 cups water
2 onions, quartered
1 tsp. sage
1 can (15-oz.) garbanzo beans, rinsed and drained
3 cups walnuts
3/4 cup soy milk
3 Tbsp. soy sauce
2 tsp. salt
Cooking Instructions
Blend all ingredients (except oats) in a blender until smooth. Pour mixture over oats and mix
well. Let set 30 minutes or overnight, covered. Using the back of a spatula and butter knife, form
patties onto a cookie sheet prepared with cooking spray. Bake at 350° (177°C) on the lowest rack
168
© Jones & Bartlett Learning, LLC. NOT FOR SALE OR DISTRIBUTION.
in the oven for 20 minutes, then flip and bake another 15 to 20 minutes. Serve as a burger or
topped with creamy mushroom sauce/gravy. Patties can be frozen to be used as needed. Recipe
makes 24 large patties.
Creamy Fettuccini
Ingredients
8 oz. whole wheat fettuccini noodles
4 cloves garlic, minced
1 tsp. dried basil
1 box (12.5 oz.) silken tofu
1 large bunch of kale or spinach
1 tsp. salt
1 tsp. onion powder
2 Tbsp. flour
2 cups plain soy or rice milk
1/3 cup fresh parsley, chopped
Cooking Instructions
Cook noodles in salted water until tender, then drain. Sauté chopped kale/spinach and garlic in a
little olive oil or water for about 2 minutes. Add salt, basil, onion powder, and parsley. Blend
tofu, milk, and flour in blender and pour into spinach/kale mixture. Cook 2 minutes more. Toss
with noodles and garnish with diced pimentos, if desired. This dish is also good cold.
Tofu–Spinach Lasagna
Ingredients
1 box whole wheat lasagna noodles
1 lb. firm tofu, drained and pressed between paper towel to remove excess moisture
10 oz. frozen chopped spinach, thawed and squeezed to remove excess moisture
3/4 tsp. garlic salt
2 tsp. onion powder
2 cups spaghetti sauce
1/2 tsp. garlic powder
3/4 cup cashew–pimento sauce
1/3 cup TVP (optional)
Cooking Instructions
Cook lasagna noodles according to package directions and set aside. Combine spaghetti sauce
and TVP, set aside. Add garlic salt, garlic powder, and onion powder to tofu in a large bowl and
mash well using a potato masher. Add spinach and 1/2 to 3/4 cups cashew–pimento sauce; mix
well. Layer in a 13 × 9 inch pan: 1 cup spaghetti sauce mixture, lasagna noodles, tofu–spinach
mixture, lasagna noodles, tofu–spinach mixture, lasagna noodles, then remaining spaghetti sauce
mixture. Bake at 350° (177°C) for 45 minutes. Drizzle the top with more cashew–pimento sauce
and sprinkle with dried basil. Bake another 10 minutes. Delicious reheated the next day.
169
© Jones & Bartlett Learning, LLC. NOT FOR SALE OR DISTRIBUTION.
Judaism
Courtesy of Sari Edelstein, PhD, RD
Matzo Balls
Ingredients
6 eggs
1 1/2 tsp. baking powder
1 1/2 cups Matzo meal
Cooking Instructions
Combine all ingredients. Form into walnut-size balls. Place in boiling water. Boil for 30 to 40
minutes. Yields 20 balls.
Blintz Soufflé
Ingredients
12 blintzes
1/4 lb. margarine
1 1/2 cups sour cream
4 eggs (beaten)
1 tsp. salt
1/4 cup sugar
1/2 cup orange juice (optional)
1 tsp. vanilla extract
Cooking Instructions
1.
Melt margarine in a glass dish.
2.
Mix sour cream, eggs, salt, sugar, vanilla extract and orange juice.
3.
Add margarine and mix well.
4.
Pour mixture over blintzes in glass baking dish.
5.
Bake for 45 to 55 minutes until brown at 350°F (177°C).
Breakfast Blintzes Casserole
Ingredients
2 Tbsp. unsalted butter
1 package (6) frozen blintzes
3 eggs
1 cup sour cream (divided use)
1/3 cup sugar
1/4 cup orange juice
1/2 teaspoon vanilla extract
1/4 tsp. salt
1 Tbsp. sugar mixed with 2 tsp. cinnamon
2 cups fresh blueberries, strawberries, raspberries (one type or a mixture)
170
© Jones & Bartlett Learning, LLC. NOT FOR SALE OR DISTRIBUTION.
Cooking Instructions
1.
Preheat oven to 350°F (177°C).
2.
Place butter in a small baking dish (one that will hold blintzes snuggly) and set in the
oven until melted.
3.
Roll the frozen blintzes in the butter, then arrange in a single layer in the baking dish.
4.
In a mixing bowl, beat the eggs well. Add 1/2 cup sour cream, sugar, orange juice, vanilla
and salt, and whisk until smooth.
5.
Pour the mixture over the blintzes.
6.
Sprinkle with cinnamon-sugar and bake until set, about 40 minutes.
7.
To serve, cut into squares. Sprinkle each portion with berries and a spoonful of the
remaining sour cream.
Yields 4 servings.
Potato Latkes
Ingredients
2 cups raw potatoes (peeled and coarsely grated or shredded)
2 eggs
1/8 tsp. baking powder
1 1/2 tsp. salt
1 Tbsp. flour, bread crumbs, or matzo meal
Pepper to taste (optional)
Grated onion to taste (optional)
Oil or chicken fat for frying
Cooking Instructions
1.
Soak potatoes several hours in enough water to cover (this keeps them from turning
dark).
2.
Drain water. Grate or shred, then drain well, pressing the water out of the potatoes.
3.
Add other ingredients and the eggs; beat well. A little pepper and grated onion are
optional.
4.
Drop by spoonfuls in a well-greased skillet. Fry until crispy. Drain on paper towels.
Apple Matza Kugel
Ingredients
3 matza (regular)
2 eggs (separated)
1/2 cups sugar
1/4 tsp. salt
1/4 tsp. cinnamon
1/4 cup raisins
3 Tbsp. shortening (oil)
3 tart apples (Granny Smith; sliced thin)
Grated rind lemon or orange
1/4 cup chopped nuts
171
© Jones & Bartlett Learning, LLC. NOT FOR SALE OR DISTRIBUTION.
Cooking Instructions
1.
Soak matza and drain.
2.
Beat yolks (lightly).
3.
Add salt, sugar, cinnamon.
4.
Break matza and combine with above.
5.
Fold in stiffly beaten egg whites.
6.
Add raisins.
7.
Grease pan. Place half of the mixture in first.
8.
Layer apples on top. Sprinkle nuts and rind.
9.
Cover with remaining mixture.
10.
Bake for 45 minutes at 350°F (177°C).
Yields 6 portions.
Knishes
Ingredients
Potatoes (boiled)
Onions (sliced, peeled, and browned)
2 1/2 cups flour (sifted)
1 tsp. baking powder
1/2 tsp. salt
2 eggs
1/2 cup oil
4 Tbsp. cold water
Cooking Instructions
1.
Mix flour, baking powder, and salt in a bowl. Make a well in the middle.
2.
Stir in eggs, oil, and water.
3.
Work well with hand into the dough.
4.
Knead on a lightly floured board until dough is smooth.
5.
Divide dough into two parts. Roll out as thin as possible. Brush lightly with oil.
6.
Spread filling across one end and roll up like a jelly roll.
7.
Cut into half-inch slices. Place on greased baking sheets, cut side down.
8.
Dress tops with one beaten egg for glaze. Knishes may be frozen and baked later.
9.
Bake for 45 minutes until golden at 375°F (190°C).
Sweden
Courtesy of Sharon Palmer, RD
Köttbullar (Swedish Meatballs)
Ingredients
For meatballs:
1 lb. lean ground beef
1/2 cup fine breadcrumbs
1/3 cup milk
172
© Jones & Bartlett Learning, LLC. NOT FOR SALE OR DISTRIBUTION.
1 small onion, diced finely
1 egg
1/2 tsp. salt
1/2 tsp. black pepper
Nonstick cooking spray
For sauce:
2 Tbsp. margarine or butter
2 Tbsp. flour
1 cup half and half
1 cup milk
1 cube beef bullion
1/2 tsp. salt
1/2 tsp. black pepper
1 tsp. soy sauce
1 tsp. jelly
Lingonberry preserves
Cooking Instructions
1.
In large mixing bowl, add ground beef, breadcrumbs, milk, diced onion, egg, salt, and
pepper. Combine mixture well with wooden spoon.
2.
Knead mixture an additional few minutes with hands to thoroughly mix ingredients.
Shape into small meatballs (1–1.5 inches in diameter).
3.
Heat a large skillet over medium heat and spray with nonstick cooking spray. Place
meatballs on skillet, covering the entire surface. Monitor the cooking process closely,
turning the meatballs when one side is cooked and browned.
4.
When the meatballs are cooked and browned evenly on all sides, remove to a serving pan
and repeat the process to cook all meatballs.
5.
To prepare sauce, in a clean skillet melt 2 Tbsp. margarine or butter.
6.
Stir in flour to make a roux. Gradually add the half and half and heat over medium-low
heat.
7.
Stir in milk and beef bouillon cube, stirring until beef bouillon is dissolved. Mix in salt,
pepper, soy sauce, and jelly. Stir with a whisk until all ingredients are dissolved and
sauce is thick and bubbly.
8.
Serve meatballs immediately with sauce and lingonberry preserves as desired.
Yields 6 servings
Jordgubbtårta (Swedish Strawberry Cake)
Ingredients
4 Tbsp. butter
1 1/4 cups sifted cake flour
1 1/2 tsp. baking powder
2 large eggs
3/4 cup sugar
1/2 cup milk
1 tsp. vanilla extract
173
© Jones & Bartlett Learning, LLC. NOT FOR SALE OR DISTRIBUTION.
8 oz. heavy whipping cream
2 cups fresh strawberries, cleaned
1/3 cups strawberry jam
Cooking Instructions
1.
Preheat oven to 350°F (177°C). Grease and flour a 9-inch springform pan and set aside.
2.
Melt the butter and cool slightly.
3.
Mix the cake flour and baking powder together and set aside.
4.
Beat the eggs and sugar together for several minutes until light and foamy.
5.
Add milk, vanilla, and cooled, melted butter. Beat for an additional minute. Add the dry
ingredients and beat for an additional minute. Pour the batter into the prepared pan.
6.
Bake for about 30 minutes until a toothpick inserted in center comes out smoothly. Cool
for 5 minutes, remove from pan, and continue to cool completely on a rack.
7.
Whip the heavy cream until soft peaks form.
8.
Clean, drain, and slice half of the strawberries, reserving half of the cleaned berries for
decoration.
9.
With a bread knife, slice the cake in half horizontally to form two thin equal layers. Place
the first half on a cake plate. Spread strawberry jam over the top of the bottom half.
Cover with a layer of whipped cream and sliced strawberries. Place the top cake layer.
Frost the top and sides of the cake with an ample amount of whipped cream. Decorate the
top with whole strawberries. Chill until serving time.
Yields 12 servings
Cod with Mashed Potatoes
Ingredients
4 cod fillets (4 oz. each)
1 clove garlic, minced
1/4 tsp. black pepper
1 bunch fresh dill, chopped
1/2 cup nonfat milk
1 Tbsp. margarine spread
1/4 tsp. black pepper
1 Tbsp. margarine spread
1 cup milk
1/8 tsp. black pepper
1 tsp. lemon juice
1 Tbsp. flour
Cooking Instructions
1.
Preheat oven to 375°F (190°C). Place cod fillets in the bottom of a small casserole dish.
2.
Sprinkle with minced garlic, 1/4 tsp. black pepper, and 3/4 of the fresh dill (reserve the
remaining dill for later).
3.
Place casserole in oven at 375°F (190°C) and cook about 10 to 15 minutes until cod
fillets are tender.
4.
Mash cooked cubed potatoes with 1 Tbsp. margarine spread, 1/2 cup nonfat milk, and 1/4
174
© Jones & Bartlett Learning, LLC. NOT FOR SALE OR DISTRIBUTION.
tsp. black pepper until smooth and creamy.
5.
Prepare lemon white sauce by melting 1 Tbsp. margarine spread in a saucepan and
stirring in pepper and lemon juice.
6.
Whisk flour in 1 cup milk and add to saucepan, cooking over medium and stirring until
blended and thickened.
7.
When cod fillets are tender, remove casserole dish from oven and cover with mashed
potatoes, covering entire surface with potatoes.
8.
Make a shallow indentation running vertically along the mashed potatoes, to create a
channel. Pour lemon sauce in this channel so that it fills it and pour slightly over the
mashed potatoes.
9.
Sprinkle over remaining fresh dill and return to oven for an additional 15 minutes until
mashed potatoes are slightly golden on top.
Yields 4 servings: 1 cod fillet, 1/2 cup mashed potatoes, and 1/4 cup lemon white sauce each.
Swedish Rye Bread
Ingredients
1 cup rye flour
1 1/2 cup bread flour
1 1/2 tsp. yeast
1/2 tsp. grated orange peel
2 tsp. caraway seeds
1/2 tsp. salt
1 Tbsp. margarine
1/4 cup honey
7/8 cup lukewarm water
Cooking Instructions
1.
If using a bread machine, place all the ingredients in the container and set the cycle for a
normal loaf of bread. If using the traditional method of bread making, stir flours, yeast,
orange peel, caraway seeds, and salt in a large mixing bowl.
2.
Add margarine, honey, and lukewarm water, and stir until well combined. Cover and let
rise for 2 hours.
3.
Punch down and knead for 10 minutes on a floured surface.
4.
Transfer to loaf pan and let rise for 45 minutes before baking at 350°F (177°C) for
approximately 45 to 55 minutes until done.
Yields 1 loaf (20 slices)
Hungary
Courtesy of Mary Louise Kranyak, PhD, MBA, RD
Cherry Soup (Meggy Leves [medge le-vesh])
Ingredients
2 cups water
1 lb. sweetened frozen sour cherries
175
© Jones & Bartlett Learning, LLC. NOT FOR SALE OR DISTRIBUTION.
1/8 tsp. salt
1/4 cup cold water
2 Tbsp. flour
1 to 2 egg yolks, slightly beaten
1/2 cup sour cream
Cooking Instructions
1.
In a 2-qt. saucepan with a tight-fitting lid, bring water to a boil.
2.
Add salt and cherries; break frozen blocks apart with fork. Bring to a boil again.
3.
Cover saucepan and simmer 10 minutes.
4.
Put cold water into an 8-oz. container with a tight-fitting lid and sprinkle in flour; cover
tightly and shake until mixture is well blended.
5.
Slowly pour flour–water mixture into cherry mixture, stirring constantly. Bring to a boil
and cook for 4 minutes.
6.
Remove from heat. Vigorously stir about 1/3 cup hot soup gradually into egg yolk.
Immediately blend into hot soup. Stir constantly and cook over low heat for 3 minutes.
(Do not overcook or allow soup to boil.)
7.
Remove from heat immediately. Stirring vigorously, gradually add about 1 cup of hot
soup to sour cream. Immediately blend into remaining soup.
8.
Cover the soup and cool slightly; chill in refrigerator.
Yields 3–4 servings.
Goulash (Gulyás [gū-yahsh])
Ingredients
1 1/2 lbs. boneless pot roast beef
3 cups prepared beef broth
4 slices bacon, diced
1 large onion, chopped
1 Tbsp. paprika
1/4 tsp. freshly ground pepper
1 small green pepper, chopped
1/2 cup cold water*
1/4 cup water*
Cooking Instructions
1.
Cut beef into 1.5-inch pieces and set aside.
2.
Place bacon into 3-qt. sauce pot; cook slowly, stirring frequently until bacon is lightly
browned.
3.
With a slotted spoon, remove bacon from sauce pot to a small bowl and set aside.
4.
Add chopped onion to the bacon fat in the sauce pot and cook over medium heat until
onion is transparent, stirring occasionally.
5.
With a slotted spoon, remove onion from sauce pot and place in the bowl containing
bacon; set aside.
6.
Add meat to bacon fat; stir occasionally to slowly brown on all sides.
7.
Sprinkle evenly over meat a mixture of the paprika and pepper. Stir in the bacon–onion
176
© Jones & Bartlett Learning, LLC. NOT FOR SALE OR DISTRIBUTION.
mixture and the green pepper. Slowly pour in the beef broth and bring to a boil.
8.
Reduce heat, cover sauce pot, and simmer for 2 hours, or until meat is tender when
pierced with a fork.
9.
Remove meat with slotted spoon to hot serving dish.
* If desired, thicken cooking liquid as follows: Put cold water into a 1-pt. container with a tightfitting lid and sprinkle in flour; cover tightly and shake until mixture is well blended. Slowly
pour half the mixture into the sauce pot, stirring constantly. Bring to a boil. Gradually add
enough of the remaining flour–water mixture for the desired consistency. Bring to a boil after
each addition. After the final addition, cook 3 to 5 minutes longer. Serve immediately.
Soft Dumplings (Galuska [gah-lūsh-kah])
Ingredients
3 qt. water
1 tsp. salt
2 1/3 cups sifted flour
1/2 tsp. salt
1 egg slightly beaten
1 cup water
2 Tbsp. melted butter or margarine
Cooking Instructions
1.
Bring water and salt to a boil in a 4-qt. saucepan.
2.
Sift together flour and salt. In a separate bowl, beat egg and water together. Gradually
add flour mixture to egg mixture, and stir until smooth. The batter should be thick (not
pourable) and break from a spoon.
3.
Begin dropping the batter into the boiling water as follows: Hold the bowl of batter on an
angle slightly above the pot of boiling water. Dip a small spoon into the boiling water.
Dip the edge of the spoon into the batter at the edge of the bowl and scrape about 0.5–
1 tsp. of batter into the water. Repeat, each time dipping the spoon into the boiling water,
until there is one layer of dumplings in the pot. Do not crowd the pot.
4.
After noodles rise to the surface, boil gently for 5 to 8 minutes, or until soft, depending
on the size of the dumplings.
5.
Remove dumplings from water using a slotted spoon and place in a bowl. Repeat process
until all dough is used.
6.
Toss dumplings with butter or margarine.
Cucumber Salad (Uborka Sálata [ū-bor-ka sha-lah-ta])
Ingredients
3 medium-sized cucumbers
1 tsp. salt
1/4 cup white vinegar
1/2 cup water
1 tsp. sugar
Fresh or dried dill (optional)
177
© Jones & Bartlett Learning, LLC. NOT FOR SALE OR DISTRIBUTION.
Sour cream (optional)
Cooking Instructions
1.
Wash and peel cucumbers. Slice them half-inch thick and place in a bowl. Mix lightly
with salt and set cucumbers aside for 1 hour.
2.
Mix vinegar, water, and sugar together, adjusting vinegar and sugar to taste, and set
aside.
3.
With clean hands, squeeze the liquid from cucumber slices, a few at a time, and put into a
clean bowl; discard liquid.
4.
Pour the vinegar mixture over the cucumbers and toss lightly together. If desired, sprinkle
dill on top and mix in.
5.
Chill for at least 1 hour. If desired, top each serving with a dollop of sour cream.
Greece
Courtesy of Elizabeth Metallinos-Katsaras, PhD, RD
White Bean Soup (Fasolada)
Ingredients
1 lb. dry great northern beans
2 medium dry onions, chopped finely
4 medium carrots, halved and sliced
1 1/2 cups chopped celery
1/2 cup extra virgin olive oil
1/2 cup tomato sauce or 3 Tbsp. tomato paste
Salt and pepper to taste
Cooking Instructions
1.
Soak the beans overnight in a large pot. Drain the beans and add about 8 cups of water.
Bring to boil and simmer for about 30 minutes.
2.
Add onions, carrots, and celery. Cook for another 25 minutes, then add olive oil, tomato
sauce or paste, and simmer for another 20 minutes or until beans and vegetables are
tender.
Baked Chicken and Potatoes (Kotopoulou Lemonato sto Fourno me Patates)
Ingredients
1 whole chicken, washed
6 medium russet potatoes
4–6 garlic cloves
3/4 cups olive oil
2 tsp. oregano
Juice of 2 lemons
Cooking Instructions
1.
Wash chicken and put it in a large roasting pan.
178
© Jones & Bartlett Learning, LLC. NOT FOR SALE OR DISTRIBUTION.
2.
3.
4.
5.
6.
Mix 1 tsp. oregano, 1/4 cup olive oil, and 2 chopped garlic cloves.
Rub chicken inside and out with the mixture, then set aside.
Peel potatoes and cut into quarters or eighths (if you prefer smaller potatoes). Mix with
remaining oil, oregano, and garlic cloves.
Pour entire mixture into roasting pan next to chicken.
Bake at 375°F (190°C) for 1.5 hours or until chicken and potatoes are browned.
France
Courtesy of Martine I. Scannavino, DHSc, RD, LDN
Crème Caramel
Ingredients
1/2 cup of sugar (for the caramel)
1/3 cup of sugar
1 cup milk
1 cup heavy cream
3 whole eggs
2 egg yolks
1 Tbsp. cognac
Cooking Instructions
1.
Preheat the oven to 325°F (163°C).
2.
In a small heavy-bottom sauce pan, melt the 1/2 cup of sugar until it becomes a golden
rich caramel color.
3.
Pour a thin layer of caramel into the bottom of six ovenproof ramekins and allow to cool
completely.
4.
In a large bowl stir together the 1/3 cup of sugar, milk, heavy cream, eggs, egg yolks, and
cognac. Strain through a fine sieve and fill ramekins to within 0.25 inch of the top.
5.
Bake the crème caramels in a water bath for 30 to 40 minutes. Allow to cool completely,
then chill for at least 1 hour.
6.
To serve, loosen the crème caramel by running a thin knife around the inside of the
ramekin, and invert on a dessert plate.
Soupe au Pistou
Cooking Instructions
1.
Parboil dry beans for 30 minutes. Cut green beans into 1-inch pieces.
2.
Peel and dice the potatoes, onions, carrots, and turnips. Dice the zucchini and the leeks.
3.
Heat 1 Tbsp. of olive oil in a large heavy bottom sauté pan.
4.
Add the onions and cook over a medium flame for 5 minutes, add the potatoes, leeks,
carrots, and a pinch of sage, and sauté for 5 more minutes.
5.
Bring a large pot of water to a boil (about 3 qt.). Add the sautéed vegetables and the
remaining vegetables and bay leaf. Simmer uncovered for 40 minutes.
6.
Check seasoning and continue cooking over low heat for 1 hour.
7.
For the pistou, rinse and dry basil and cut into chiffinade. Peel and crush the garlic
179
© Jones & Bartlett Learning, LLC. NOT FOR SALE OR DISTRIBUTION.
8.
cloves. Grate the cheese. Place the basil, cheese, and garlic in a food processor, pulse to
chop fine. With the machine running pour in the olive oil and continue to blend till
smooth.
Serve soup garnished with pistou and shredded Romano cheese.
Netherlands
Courtesy of Jeannette van der Velde, MPH, MSc
Snert (Pea Soup)
Ingredients
6 cups water
3 cups dried split green peas, rinsed
1 smoked ham hock
2 potatoes, peeled and cubed
1–2 leeks, thinly sliced
1 small onion, thinly sliced
3–4 celery stalks, sliced
1 tsp. nutmeg
1 Tbsp. lemon juice
Salt and pepper
Cooking Instructions
1.
Bring the water to a boil in a large heavy pot and add the peas and ham hock.
2.
When the water reboils, reduce heat and simmer for 2 hours, stirring occasionally.
3.
Add the potatoes, leeks, onion, celery stalks, nutmeg, and lemon juice. Simmer for
30 minutes, stirring occasionally.
4.
Remove and cut the ham hock, then return it to the pot. Simmer for 10 minutes.
5.
Serve with dark pumpernickel or rye bread.
Stamppot Rode Kool (Mashed Potatoes, Red Cabbage, and Applesauce)
Ingredients
8–10 large potatoes, peeled and diced
Salt and pepper
4 Tbsp. butter
4 breakfast sausages
1 medium red cabbage, grated or very thinly sliced
2 Tbsp. red wine vinegar
2 tsp. brown sugar
1 bay leaf
1 whole clove
1 cup applesauce
Dash of ground cloves
180
© Jones & Bartlett Learning, LLC. NOT FOR SALE OR DISTRIBUTION.
Cooking Instructions
1.
Cook potatoes in water with salt until fully cooked (about 20 minutes), then drain.
2.
Fry the cabbage in 2 Tbsp. butter, stirring constantly for about 5 minutes.
3.
Fry sausages in 2 Tbsp. butter for 5 minutes, add 1/3 cup water, vinegar, sugar, bay leaf,
and clove to sausages, and cook for 20 minutes.
4.
Mash the potatoes with the applesauce.
5.
Stir red cabbage through mashed potatoes, add salt and pepper to taste.
6.
Garnish with ground cloves. Slice cooked sausages and arrange around mashed potatoes.
Great Britain
Courtesy of Rachel Hayes, MPH, RD
Welsh Rarebit
Ingredients
4 thick slices of bread, crusts removed
2 Tbsp. butter, melted
2 cups grated cheddar cheese
1 tsp. mustard powder
Few drops Worcestershire sauce
4 Tbsp. brown ale, beer, or milk
Cooking Instructions
1.
Preheat the broiler. Toast the bread until golden-brown, then place in a shallow baking
dish (in a single layer). Keep warm.
2.
Stir the cheese, mustard powder, and Worcestershire sauce into the melted butter, then
slowly pour in the ale (or beer or milk) in a steady stream.
3.
Stir the cheese mixture until very well blended.
4.
Spoon the cheese mixture onto the toast then place under the broiler until bubbly and
golden.
5.
Serve immediately.
Yields 4 servings
Cottage Pie
Ingredients
2 Tbsp. butter, divided
1 onion, diced
1 carrot, finely chopped
1 clove garlic, crushed
1 lb. lean ground beef
1 1/4 cup water
1 Tbsp. all-purpose flour
1 bay leaf
2 tsp. Worcestershire sauce
1 Tbsp. tomato paste
181
© Jones & Bartlett Learning, LLC. NOT FOR SALE OR DISTRIBUTION.
1 1/2 lb potatoes, peeled and boiled
3 Tbsp. milk
Salt and pepper to taste
Cooking Instructions
1.
Heat 1 Tbsp. butter in a skillet.
2.
Add the onion, carrot, and garlic; cook on medium heat until lightly browned.
3.
Stir the beef into the skillet mixture and cook until browned.
4.
Blend a few spoonfuls of the water with the flour; stir this flour–paste mixture into the
pan.
5.
Stir in the remaining water and simmer for 15 minutes, stirring occasionally.
6.
Add the bay leaf, Worcestershire sauce, and tomato paste; cover and cook on low heat for
1 hour, stirring occasionally. (If necessary, uncover the pan during the last few minutes of
cooking to allow any excess water to evaporate.)
7.
Preheat the oven to 375°F (190°C).
8.
Mash the potatoes with the remaining 1 Tbsp. of butter and the milk.
9.
Spoon the meat mixture into a nonstick baking dish.
10.
Cover the meat with an even layer of the mashed potatoes. Bake for 35 minutes, or until
golden brown.
11.
Place the dish under the broiler for 3 minutes if an extra-crispy top is desired. Add salt
and pepper to taste.
Yields 4 servings
Scones
Ingredients
2 cups all-purpose flour
1 1/2 tsp. cream of tartar
1 tsp. baking soda
1/2 tsp. salt
2 Tbsp. granulated sugar
1/4 cup cold butter
1/4 cup milk
1 large egg
Cooking Instructions
1.
Preheat oven to 425°F (218°C).
2.
Grease a baking sheet (or line with wax paper).
3.
Blend flour, cream of tartar, baking soda, salt, and sugar; cut in butter until the mixture
resembles fine breadcrumbs.
4.
In a separate bowl, whisk milk and egg together; stir into flour mixture until it forms a
soft dough.
5.
On a floured surface, roll dough into 0.5- to 0.75-inch thickness. Cut into rounds with a
floured 2-inch biscuit/cookie cutter; carefully transfer onto baking sheet with a spatula.
6.
Bake scones approximately 10 minutes, or until just golden-brown; transfer to a rack to
cool.
182
© Jones & Bartlett Learning, LLC. NOT FOR SALE OR DISTRIBUTION.
7.
Serve scones warm or at room temperature with butter and/or jam.
Yields 10 scones
Korea
Courtesy of Melissa Ip, BS
Seasoned Spinach (Shigumchi Namul)
Ingredients
1 lb. fresh spinach
1 Tbsp. sesame oil
1 garlic clove, minced
Salt
1 tsp. toasted sesame seeds
Cooking Instructions
1.
Wash and trim the spinach. Dunk the spinach quickly in boiling water. Squeeze out all
water from the spinach.
2.
Heat the sesame oil and garlic in a skillet for 1 to 2 minutes. Stir-fry the spinach. Remove
from heat. Toss spinach and sesame seeds in a bowl. Add salt.
Japan
Courtesy of Joseph M. Carlin, MS, MA, RD, LDN, FADA
Temarizushi (Vinegared Rice and Fish Balls)
Ingredients
3 oz. white meat fish fillet cut crosswise in thin strips
1 Tbsp. salt or MSG
1/4 tsp. black sesame seeds
1 1/2 Tbsp. rice vinegar
1 tsp. sugar
1/4 cup sticky rice
Cooking Instructions
1.
Cook fish with MSG or salt and marinate for 3 to 6 hours in the refrigerator.
2.
Toast the sesame seeds in a heated pan for 2 to 3 minutes and set aside.
3.
Mix vinegar, sugar, and 3 Tbsp. cold water in a mixing bowl.
4.
Dip sliced fish into vinegar-sugar mixture and lay out on a cheesecloth.
5.
Place 1 tsp. of sticky rice onto the fillet strips and fold the fillet strips over, enclosing the
rice inside. Wrap each fillet–rice mixture in a piece of cheesecloth and form a ball.
6.
Unwrap the cheesecloth and roll the ball in sesame seeds.
183
© Jones & Bartlett Learning, LLC. NOT FOR SALE OR DISTRIBUTION.
India
Courtesy of Sudha Raj, PhD, RD
Sambar
Ingredients
1/2 cup red gram dal (lentil)
2 cups water
1 small lemon-sized ball of tamarind
1 cup sliced vegetables (e.g., eggplant, radish, okra, red peppers)
Salt to taste
1 tsp. turmeric
3 tsp. sambar powder
1 Tbsp. curry leaves
For tempering:
2 Tbsp. oil
1 tsp. mustard seeds
A pinch of asafetida
1/2 tsp. fenugreek seeds
1 red chili
Cooking Instructions
1.
Wash, drain dal, and cook in a pressure cooker.
2.
Soak tamarind in hot water for 15 minutes, then strain pulp.
3.
Heat oil in a saucepan. Add mustard seeds, asafoetida, red chilies, fenugreek seeds, and
curry leaves.
4.
When mustard seeds splutter, add chopped vegetables and sauté for a couple of minutes.
5.
Add tamarind pulp, turmeric, water enough to cover the vegetables, and sambar powder.
Cover and cook until vegetables are tender.
6.
Add cooked dal and cook the gravy for 5 minutes. If sambar needs to be thickened, make
a paste with 1 Tbsp. rice flour and 2 Tbsp. water, and add to the mixture.
7.
Serve hot with rice or as an accompaniment to idlis, dosa, or vadais.
Far East
Courtesy of Zaheer Ali Kirmani, PhD, RD
Afghaniaash (Soup)
Ingredients
1 package ramen noodles (spicy chicken)
1 medium onion, thinly sliced
1 tsp. salt
1/2 cup vegetable oil
1 Tbsp. tomato paste
2–3 roma tomatoes
1 can red kidney beans
1 can garbanzo beans
184
© Jones & Bartlett Learning, LLC. NOT FOR SALE OR DISTRIBUTION.
16 oz. mung beans (presoaked or half cooked in a pressure cooker for 5 minutes)
1 Tbsp. dry dill weed
Cooking Instructions
1.
Add oil to stock pot and warm at high heat.
2.
Add onions and fry until golden brown.
3.
Lower heat to medium-high and add tomatoes, salt, and tomato paste until a thick sauce
has formed.
4.
Add 2 cups of water, kidney beans, garbanzo beans, mung beans, and seasoning packet
from ramen noodle mix. Bring to a boil.
5.
Add ramen noodles and cook until noodles are tender. Do not stir frequently.
6.
Once noodles are tender, sprinkle with dill weed and serve.
Bangladeshi Doi Mach
Ingredients
1.5 lbs. carp or similar fish, descaled and cleaned
4 oz. mustard oil or any other cooking oil
4 cloves
4 green cardamoms
2-inch piece cinnamon
2 bay leaves
1-inch piece of ginger root
1 small bulb garlic
2 tsp. turmeric powder
1 tsp. red chili powder
4 oz. yogurt
Salt and sugar to taste
A few green chili peppers
2 tsp. clarified butter (ghee)
Cooking Instructions
1.
Clean and wash the fish pieces thoroughly, and cut them into squares or rectangles of 4inch dimension. Wipe them dry.
2.
Smear 1 tsp. turmeric and a little salt on the pieces. Put them aside.
3.
Grind the onion, garlic, and ginger until it turns into a smooth paste. Put it aside.
4.
Beat the sour curds/yogurt with half a cup of water until smooth. Put it aside.
5.
Heat oil to lightly smoking. Lightly fry the fish pieces and put aside.
6.
In the heated oil add the cloves, cardamom, and cinnamon.
7.
Add the ground paste of onion, garlic, and ginger.
8.
Fry lightly until the spices are browned.
9.
Mix the remaining 1 tsp. of turmeric powder and the red chili powder with 3 tsp. of water
and add to the frying paste. Fry again. Stir to prevent the spices from sticking to the pan.
10.
Add to this the beaten sour curds. Stir the mixture and add one more cup of water. Add
salt to taste and 1 tsp. of sugar (or less, if you prefer).
11.
Add the green chilies and cook a while until the excess water begins to dry and the gravy
185
© Jones & Bartlett Learning, LLC. NOT FOR SALE OR DISTRIBUTION.
12.
comes to a boil.
Gently add the fried fish pieces and let the mixture cook on high heat until the oil
separates and floats on top. Before removing it from the fire, add the clarified butter.
Jamaica
Courtesy of Goulda A. Downer, PhD, RD, LN, CNS, and Denise Bailey, M.Ed
Rice and Peas
Ingredients
14-oz. can red kidney beans (drained)
2 cups rice
1 clove garlic, chopped
1 small onion, chopped
1/2 cup coconut milk
1 tsp. ground pimento seed
1/2 tsp. salt
1 sprig fresh thyme, chopped
1 stalk scallion (green onion)
1 whole Scotch bonnet pepper
1 1/2 cups water
Cooking Instructions
1.
Drain the liquid from beans and rinse.
2.
Add coconut milk and all seasonings, and let it come to a boil.
3.
Add rice and stir. Add enough water so that it covers the rice and beans, and cover tightly
for 25 to 30 minutes or until liquid is absorbed and the rice is cooked. (Dry peas can be
used; soak overnight.)
Curry Chicken
Ingredients
8 pieces chicken (skinless breast, drumstick)
1/4 cup vinegar
1 medium white potato, diced
1 cup water
2 Tbsp. olive oil
Seasoning mixture:
2 tsp. curry powder
1 tsp. thyme, crushed
1 stalk scallion, chopped
1 tsp. black pepper, ground
1 Tbsp. Scotch bonnet pepper, chopped
1 large onion, chopped
8 cloves garlic, crushed
1 Tbsp. ginger, grated
186
© Jones & Bartlett Learning, LLC. NOT FOR SALE OR DISTRIBUTION.
1 1/2 tsp. salt
Cooking Instructions
1.
Wash chicken with vinegar and pat dry. Rub chicken with seasoning mixture.
2.
Marinate for at least 2 hours in the refrigerator.
3.
Heat oil in skillet over medium flame. Add chicken and sauté.
4.
Add water and allow chicken to cook over medium flame for 30 minutes, turning
occasionally.
5.
Add diced potatoes and cook for an additional 20 to 30 minutes or until meat is tender.
6.
Serve over a bed of rice and peas (or, for an authentic Jamaican meal, serve with boiled
bananas, fried plantains, and a fresh green salad).
Jerk Chicken
Ingredients
8 pieces chicken, skinless (breast, drumstick)
1/2 tsp. cinnamon, ground
2 tsp. allspice, ground
2 tsp. black pepper, ground
1 Tbsp. hot pepper, chopped
1 tsp. hot pepper, crushed, dried
2 tsp. oregano, crushed
1 Tbsp. basil, dried
2 tsp. thyme, crushed
2 tsp. salt
6 cloves garlic, finely chopped
1/4 cup vinegar
1 cup onion, puréed or finely chopped
3 Tbsp. brown sugar
3 Tbsp. soy sauce (low sodium)
Cooking Instructions
1.
Wash chicken with vinegar and pat dry.
2.
Preheat oven to 350°F (177°C) and add all ingredients.
3.
Rub seasoning over chicken. Marinate in the refrigerator for 4 hours or more.
4.
Evenly space chicken on nonstick or lightly greased baking pan.
5.
Cover with aluminum foil and bake 30 minutes.
6.
Remove foil, turn chicken, and continue baking for an additional 30 to 40 minutes or
until the meat can be easily pulled away from the bone with a fork. (Breasts may require
more cooking time than drumsticks.)
187
© Jones & Bartlett Learning, LLC. NOT FOR SALE OR DISTRIBUTION.
Guatemala
Courtesy of Hugo Melgar-Quinonez, MD, PhD
Enchiladas
Ingredients
1 lb. beef or pork
1/2 cup carrots, cooked, finely chopped
1 cup red beets, cooked, finely chopped
1/2 cup green beans, cooked, chopped
1/2 cup peas, cooked
2 onions, finely chopped
4 garlic cloves, finely chopped
1/4 cup vinegar
1/4 tsp. thyme, ground
1/4 tsp. oregano, ground
3 bay leaves
1 can tomato paste/sauce
10 leaves lettuce
10 tostada shells
2 hard-boiled eggs, thinly sliced
1/4 cup parsley, finely chopped
1/2 cup hard white cheese, grated
1/2 tsp. salt
1/2 tsp. pepper
Cooking Instructions
1.
For the curtido salad, 2 to 3 hours before serving mix in a bowl the carrots, red beets,
green beans peas, chopped onion, and 2 garlic cloves.
2.
Add vinegar, thyme, oregano, and 2 bay leaves. Season with salt and pepper, and put
mixture in the refrigerator.
3.
Cook the meat with salt. Once cooked, chop the meat and sauté with 1/2 chopped onion
and 1 garlic clove.
4.
Sauté the tomato sauce with chopped garlic and remaining bay leaf, and season with salt.
5.
Put a lettuce leaf on each shell. On top, place 1 Tbsp. meat and 2–3 Tbsp. curtido salad.
6.
Garnish with 2 tsp. tomato sauce, 1/4 tsp. finely chopped parsley, 1/2 tsp. grated cheese,
and one slice of hard-boiled egg.
Yields 10 servings
Jocón
Ingredients
3 lbs. chicken, pork, or beef, cut into pieces
2 onions, 1 finely chopped
4 garlic cloves, 2 finely chopped
2 corn tortillas, soaked in water
188
© Jones & Bartlett Learning, LLC. NOT FOR SALE OR DISTRIBUTION.
10 tomatillos
1/2 cup cilantro, finely chopped
1/2 cup scallions, finely chopped
1 green bell pepper, finely chopped
2 Serrano peppers, finely chopped
2 bay leaves
1/2 tsp. salt
1/2 tsp. pepper
Cooking Instructions
1.
Cook the meat in water with 1 onion and 2 garlic cloves, then add salt. Once cooked,
remove the meat and set aside.
2.
Using the broth, cook the remaining onion and garlic gloves, cilantro, scallions, and bell
and Serrano peppers. Once cooked, add the soaked tortillas and blend into a smooth
sauce.
3.
Add the cooked meat to the sauce. Add pepper and bay leaves, and simmer for about
20 minutes on a medium-low flame. Season with salt, if desired.
Yields 6–8 servings
Haiti
Courtesy of Jennifer Miller RD, CNSD
Rice with Black Mushrooms
Creole Name: Diri ak Djon-Djon
French Name: Riz aux Djon-Djon
Ingredients
2 cups djon-djon mushrooms or European dried mushrooms
2 Tbsp. vegetable or olive oil
3 garlic cloves, crushed and minced
1 small onion, chopped
1 shallot, sliced
2 cups long-grain rice, rinsed with cold water
2 tsp. salt
4 cloves
1 (12 oz.) can cooked lima beans
1 Tbsp. tritri (a type of dried fish)
1 or 2 sprigs thyme
1 green Scotch bonnet pepper
Cooking Instructions
1.
In a small saucepan, soak mushrooms in 4 cups of water for 10 minutes.
2.
Boil mushrooms on low heat for 10 minutes. Strain the mushrooms, reserving the liquid.
3.
Add oil to cast-iron pot on medium heat. Stir in garlic, onion, and shallot for 2 minutes.
Add rice and stir for 3 minutes.
4.
Add mushroom water, salt, cloves, cooked lima beans, and tritri. Bring to a boil until
189
© Jones & Bartlett Learning, LLC. NOT FOR SALE OR DISTRIBUTION.
5.
6.
7.
water evaporates.
Lower heat, stir rice, and place the whole Scotch bonnet pepper and thyme on top of the
rice.
Cover and cook for 20 minutes.
Remove hot pepper and thyme. Stir before serving.
Costa Rica
Courtesy of Katherine L. Cason, PhD, RD, Marta Eugenia Gamboa-Acuna, BS, and Yenory
Hernandez Garbanzo, BS
Gallo Pinto (Speckled Rooster)
Gallo pinto is garnished with sour cream, either on top or on the side. You can also eat it with
scrambled or over-easy eggs.
Ingredients
1 can (approximately 2 cups) black or pinto beans
2 cups cooked white rice
1 small onion, chopped
1/4 cup red bell pepper, chopped
1/4 cup cilantro, chopped
1 tsp. minced garlic
2 Tbsp. Salsa Lizano (or Worcestershire sauce)
1/2 Tbsp. canola oil (or olive oil)
Salt to taste
Cooking Instructions
1.
Sauté the onions and bell pepper in the oil.
2.
Once the onions and peppers are cooked, add the garlic.
3.
Let the mixture cook until almost soft and then add the beans, and cook for another
2 minutes.
4.
Add the rice, cilantro, and sauce, and cook for about 2 minutes more.
Yields 2–3 servings
Sudan
Courtesy of Ahlam Badreldin Ibrahim Al Shikieri, PhD
Chicken Stew (Damaat Dijaj)
Ingredients
1 kg chicken (leg, wings, breast)
2 1/3 cups red onion, chopped
0.7 cups oil (peanut or cottonseed)
3 Tbsp. tomato paste
1 1/2 cups tomato juice
Spices, garlic, salt
190
© Jones & Bartlett Learning, LLC. NOT FOR SALE OR DISTRIBUTION.
Cooking Instructions
1.
Add oil to an empty saucepan and place over heat.
2.
Add onion and stir until golden brown.
3.
Add meat and water.
4.
When meat is cooked (tender), add tomato paste and the remaining ingredients.
Falafel (Taamya)
Ingredients
1.8 cups chickpeas (soaked in water overnight)
1 cup oil (peanut or cottonseed)
Salt
Baking powder
Garlic
Spices (cumin, coriander, black pepper, and/or others)
Water (small amount)
Cooking Instructions
1.
Mash the chickpeas until soft.
2.
Add spices, baking powder, and water, then mix. Shape into small balls.
3.
Deep fry the balls in oil; turn until both sides are light brown.
Rwanda
Courtesy of Margaret Udahogora, MS, RD, and Colette Janson-Sand, PhD, RD, LD
Igisafuriva [Ee-GEE-Sah-Foo-REE-Vah]
Ingredients
1 chicken, cut into pieces
1 lb. plantains
4 Tbsp. vegetable oil
1 large onion, thinly sliced
4 large tomatoes, diced and mashed
3 Tbsp. tomato paste
4 stalks of celery, cut into thin rounds
1 1/2 tsp. salt
1 hot pepper
Cooking Instructions
1.
Fry chicken in oil until browned and cooked through.
2.
Remove and add sliced plantains.
3.
Cook until slightly golden.
4.
Remove and add onion.
5.
When golden brown, add remaining ingredients.
6.
Return chicken and plantains to the pot. Simmer for 15 to 20 minutes to blend flavors.
191
© Jones & Bartlett Learning, LLC. NOT FOR SALE OR DISTRIBUTION.
Isombe [Ee-SOHM-Bee]
Ingredients
2–3 bunches cassava leaves, washed and chopped (kale or spinach can be used if cassava leaves
are not available)
1 large onion, chopped
3 small eggplants, cut into chunks
1–2 green peppers, sliced
2 Tbsp. oil
3–4 Tbsp. peanut butter
Cooking Instructions
1.
Boil greens until tender.
2.
Add onions, eggplant, and green peppers. Cook for 10 to 12 minutes.
3.
Add oil and peanut butter. Simmer for 10 to 15 minutes, stirring occasionally.
Nigeria
Courtesy of Titilayo O. Ologhobo, BS, MPH Candidate, and Jeffery I. Harris, DrPH, MPH, RD,
LDN
Jollof Rice
Ingredients
2 cups rice
Tomatoes
Canned tomato paste
Onion
Dry peppers
Beef or chicken broth
Bouillon cubes and water
Cooking Instructions
1.
Rinse rice and add it to 4 cups of water and place over heat for 10 to 15 minutes.
2.
If using fresh tomatoes, peppers, and onions, mix them together, or use canned tomato
sauce. Add the tomato mixture or canned sauce, and the tomato paste, to the rice. (If
canned tomato sauce is used, add some diced onions before adding the whole mixture to
the rice.)
3.
Add enough water or beef/chicken broth to allow the rice to be completely cooked.
4.
Add salt and spices to taste.
Fried Rice
Ingredients
Rice
Vegetables (carrots, onions, peas, green pepper, sweet corn)
Diced beef, liver, or shrimp
192
© Jones & Bartlett Learning, LLC. NOT FOR SALE OR DISTRIBUTION.
Bouillon cubes
Cooking Instructions
1.
Parboil the rice and set it aside.
2.
Stir-fry the vegetables with the diced meat or shrimp, and season it to taste.
3.
Add stir-fried mixture to parboiled rice and mix.
4.
Cook until the rice is fully cooked.
Turkey
Courtesy of Hülya Yüksel, PhD
Lentil Balls
Ingredients
1 cup red lentils
1 cup bulgur
3 cups water
2 large onions
1/2 cup tomato paste
1 lemon
Parsley, chopped
Lettuce
Cumin to taste
Salt and pepper to taste
Red peppers to taste, crushed
Mint leaves
Cooking Instructions
1.
Cook red lentils in 3 cups of water.
2.
Turn off stove and add the bulgur. Mix well and let it sit for an hour.
3.
In a separate pan, sauté the chopped onions in olive oil, then add the tomato paste.
4.
Add this to the lentil–bulgur mix.
5.
Add spices, chopped parsley, and lemon juice. Mix everything well.
6.
Make the lentil balls. Serve with lettuce. (Lentil balls can be wrapped in lettuce while
eating.)
Stuffed Grape Leaves (Sarma or Dolma)
Ingredients
1 lb. grape leaves
2 onions
2 puréed tomatoes or tomato paste
1/2 cup parsley
Dill
1 cup rice
1 cup bulgur
193
© Jones & Bartlett Learning, LLC. NOT FOR SALE OR DISTRIBUTION.
1 tsp. cumin
1 lemon juice
1/2 tsp. black pepper
5 Tbsp. olive oil
1 tsp. mint, crushed
1 Tbsp. black currants
1 Tbsp. pine nuts
Cooking Instructions
1.
Chop onions, parsley, and dill, and cook onions until golden.
2.
Add puréed tomatoes, washed rice, bulgur, and 3 Tbsp. olive oil, and let it cook for
5 minutes.
3.
Add the parsley and dill, spices, pine nuts, and black currants.
4.
In a separate pan, boil water and soak the grape leaves in the boiled water.
5.
When the leaves are soft, drain the water and remove stems.
6.
Place leaves shiny side down and have the mixture ready.
Stuffing and Wrapping:
1.
Put about 1 tsp. of mixture toward the bottom of the leaf.
2.
Fold in sides and roll upward firmly. Do not roll too tightly. (The rice expands during
cooking and may tear the leaf.)
3.
Repeat with remaining leaves and mixture.
Assyria
Courtesy of Arezoo Rojhani, PhD, RD
Dolma Makhlot (Stuffed Mixed Vegetable Dolma)
Ingredients
Vegetables:
5 tomatoes (firm)
5 bell peppers
2–3 quince or Granny Smith apples (medium size)
5 zucchini (medium size), cut in half
5 Italian eggplants or 2–3 medium-sized eggplants, peeled and cut in half
1 lemon, thinly sliced
2–3 hot banana peppers
Stuffing:
2 bunches parsley, chopped
2 bunches leek, chopped
1/2 Tbsp. basil, crushed and dried
1 1/2 lbs. tender beef cubes
1 cup rice
2 bunches coriander, chopped
1 Tbsp. salt (or to taste)
1/3 to 1/2 cup cooking oil (depending on taste)
2 Tbsp. of Assyrian spice mix (mixture of turmeric, black pepper, nutmeg, and curry powder)
194
© Jones & Bartlett Learning, LLC. NOT FOR SALE OR DISTRIBUTION.
Cooking Instructions
1.
Add about 2 cups of water to beef and cook until tender.
2.
Shred the cooked beef into small bits and mix with the rest of the stuffing ingredients.
3.
Hollow out the inside of the vegetables. Keep the hollowed material and mix with the
stuffing ingredients.
4.
Place the stuffing ingredients in a large frying pan.
5.
Add oil and sauté about 10 minutes or until mixture become tender. Stuff each vegetable
with the stuffing.
7.
Arrange the stuffed vegetables in a medium-depth pan.
8.
Place lemon slices on top of the vegetables. Cook over medium heat for about 30 to
45 minutes ensuring that the vegetables are cooked but not overly done and soggy. Cover
the pan with heavy foil (optional).
9.
Preheat oven to 350° (177°C) and bake for 45 minutes.
Yields 7–8 servings
Dolma Darpe (Stuffed Grape-Leaf Dolma)
Ingredients
2 jars pickled grape leaves
Stuffing:
2 bunches parsley, chopped
2 bunches leek, chopped
1 bunch dill, chopped
1 1/2 lbs. tender beef cubes
1 cup rice
2 bunches coriander, chopped
1 Tbsp. salt (or to taste)
1/2 cup cooking oil (depending on taste)
1/2 Tbsp. black pepper
2 Tbsp. Assyrian spice mix (mixture of turmeric, black pepper, nutmeg, and curry powder)
2–4 garlic cloves, chopped
Dressing:
2–3 cups yogurt
2–4 garlic cloves (optional), chopped
Additional Optional Dressing Sauce:
6 Tbsp. tomato paste
1 large onion, thinly sliced
2–3 Tbsp. cooking oil
2 Tbsp. water
Cooking Instructions
1.
Add about 2 cups of water to beef and cook until tender.
2.
Shred the cooked beef into small bits and mix with the rest of the stuffing ingredients.
3.
Place stuffing ingredients in a large frying pan, add 1/4 cup of oil, and sauté about
10 minutes or until they become tender.
4.
While preparing the stuffing, soak the grape leaves in a large amount of water in a plastic
195
© Jones & Bartlett Learning, LLC. NOT FOR SALE OR DISTRIBUTION.
tub to get rid of excess salt, and then rinse thoroughly with water.
5.
Place 1–2 tsp. of stuffing in the center of each grape leaf. Fold toward center point, end
first, each side, and then stem end in a square shape, or alternatively, roll the leaves like a
cylinder.
6.
Place two to three layers of the grape leaves at the bottom of the pan. Layer the stuffed
grape leaves neatly in the pot. Pour the remainder of the oil (1/4 cup) over the top.
7.
Cook over medium heat for about 30 to 45 minutes ensuring that the stuffed grape leaves
are cooked but not overly done and soggy. Cover the pan with heavy foil (optional).
8.
Preheat oven to 350°F (177°C) and bake for 45 minutes.
Yields 8–10 servings
To Prepare the Optional Dressing Sauce:
1.
Pour 2–3 Tbsp. cooking oil in a small frying pan and add the onion. Sauté the onion until
it becomes slightly tender.
2.
Add tomato paste and water and mix, and sauté until onions are golden brown.
3.
When serving, add the yogurt on top of the stuffed grape leaves.
4.
Add the garlic and tomato/onion dressing (optional).
Dolma Kalama (Stuffed Cabbage Dolma)
Ingredients
Vegetables:
1 head cabbage
Stuffing:
2 bunches parsley, chopped
2 bunches leek, chopped
1/2 crushed basil, dried
1 1/2 lbs. tender beef cubes
1 cup rice
2 bunches coriander, chopped
1 Tbsp. salt (or to taste)
1/2 cup cooking oil
2 Tbsp. (or to taste) Assyrian spice mix (mixture of turmeric, black pepper, nutmeg, and curry
powder)
Juice of 2 lemons
Sauce:
6 Tbsp. tomato paste
2–4 Tbsp. water
1 cup dried prunes (optional)
Cooking Instructions
1.
Add about 2 cups of water to beef and cook until tender.
2.
Shred the cooked beef into small bits and mix with the rest of the stuffing ingredients.
3.
Place stuffing ingredients in a large frying pan, add 1/4 cup of oil, and sauté about
10 minutes or until it becomes tender.
4.
Core the cabbage. Pour boiling water over cabbage leaves and cook for about 5 minutes.
Make sure that the cabbage leaves are soft but not overcooked.
196
© Jones & Bartlett Learning, LLC. NOT FOR SALE OR DISTRIBUTION.
5.
6.
Break the leaves apart and cut each in half.
Place 1–2 tsp. of stuffing in the center of each cabbage leaf and fold it either into a
triangular shape or simply roll it up to cover stuffing.
7.
Layer the stuffed cabbage leaves neatly in a large casserole pan or roaster.
8.
Add a few dried prunes to each layer (optional).
9.
Mix the tomato paste and water and pour on top of each layer of stuffed cabbage leaves.
10.
Cook over medium heat for about 30 to 45 minutes, ensuring that the stuffed cabbage
leaves are cooked but not overdone and soggy. Cover the pan with heavy foil (optional).
11.
Preheat oven to 350°F (177°C) and bake for 45 minutes.
Yields 8–10 servings
Indonesia
Courtesy of Marta Sovyanhadi, Dr. PH, RD, LD/N
Nasi Tumpeng
Ingredients
1 cup coconut milk
3 cups water
4 cups enriched rice, long grain
1/4 cup turmeric powder
1 small bunch lemon grass
6 bay leaves
Salt to taste
Cooking Instructions
1.
Boil all ingredients together until the liquid is evaporated.
2.
Transfer to steamer and cook until rice is done.
3.
Mold it into a cone shape.
4.
Garnish with sliced cucumber and tomato, scrambled eggs, sambel tempeh, and perkerdel
dipped in sambel.
Yields 8–12 servings
Sambel
Ingredients
1 Tbsp. red fresh chili, ground
10 small cloves of garlic, sautéed
1 whole fresh onion
1 small tomato, chopped
1 Tbsp. lemon juice
4 g fresh ginger
1/4 tsp. pepper, ground
1 tsp. palm sugar
Salt to taste
197
© Jones & Bartlett Learning, LLC. NOT FOR SALE OR DISTRIBUTION.
Cooking Instructions
1.
Place all ingredients in a saucer-shaped granite grinding stone and grind with the granite
pestle until smooth.
2.
Serve the fresh sambel in the granite saucer.
Yields 8–12 servings
Australia
Courtesy of Rebecca J. Scritchfield, MA, RD
Balsamic Bean Salad with Grilled Fish Fillets
Ingredients
1 Tbsp. olive oil
1 tsp. ginger (fresh or ground)
2 cloves garlic, chopped
1/2 tsp. cumin, ground
1/2 tsp. chili powder, ground
5 small fish fillets
Balsamic Bean Salad:
Canned beans (chickpeas, black beans, or black-eyed peas)
1/2 medium English cucumber, seeded, diced
1 large tomato, chopped coarsely
1/2 onion, chopped
2 tsp. balsamic vinegar
2 tsp. olive oil
1 Tbsp. each of mint and parsley, chopped
Pepper
Cooking Instructions
1.
In a flat dish combine oil, ginger, garlic, chili powder, and cumin.
2.
Add fish and refrigerate. Prepare balsamic bean salad.
3.
In a bowl, mix together beans, cucumber, tomato, and onion.
4.
Add vinegar, olive oil, herbs, and pepper. Toss to coat well.
5.
Chill salad while grilling fish fillets.
6.
Preheat chargrill pan, and grill or barbecue until hot.
7.
Remove fish from dish and cook each fillet for 4 minutes each side or until cooked
through. (When cooked, the fish flakes when tested with a fork.) Serve immediately.
Yields 5 servings
Spinach Salad with Avocado Sautéed, Apples, and Toasted Macadamia Nuts
Ingredients
2 crisp green apples, peeled, halved and cut into quarters
1 tsp. macadamia nut oil
1 large bunch baby spinach leaves, washed and dried
1 avocado, chopped
198
© Jones & Bartlett Learning, LLC. NOT FOR SALE OR DISTRIBUTION.
2 Tbsp. roasted macadamias, chopped coarsely
Shaved parmesan cheese
Salad Dressing:
2 Tbsp. macadamia nut oil
4 Tbsp. apple cider vinegar
Sea salt and pepper to taste
1 tsp. chives, chopped (optional)
Pinch of sugar to taste
Cooking Instructions
1.
Make the dressing by combining all ingredients.
2.
Sauté the apple wedges with the macadamia nut oil until golden.
3.
Pile the spinach leaves onto serving plates and top with sautéed apple, avocado,
macadamias, and parmesan cheese.
4.
Drizzle over the dressing and serve immediately.
Yields 2 servings
Argentina
Courtesy of Beth Klos, BS
Tortilla
Ingredients
Oil (any kind)
1 medium-sized potato
2–3 eggs
1/2–1 onion
Salt to taste
Cooking Instructions
1.
For the finished tortilla to retain its shape and contents, choose a frying pan to which eggs
will not stick.
2.
Peel and cut the potato into small cubes, and chop the onion into small pieces.
3.
In a separate bowl, mix the eggs together. Put enough oil in the pan to coat the bottom,
and cook the potato and onion on high heat.
4.
When the potatoes and onions are cooked, add the eggs.
5.
Lower the temperature and cook 5 minutes more or until the eggs are thoroughly cooked.
6.
Turn it over onto a cutting board or another clean surface, and then place it back in the
frying pan or another pan for serving.
Variations: Top with cheese or oregano. Add other ingredients such sausage, peas, or any others
that would go well with an omelet.
199
© Jones & Bartlett Learning, LLC. NOT FOR SALE OR DISTRIBUTION.
Empanada Dough and Filling
Ingredients
Dough for Empanadas:
2 1/4 lbs. flour
14 oz. warm, melted lard
1–1 1/2 cups lukewarm water
1 tsp. salt
1 Tbsp. of paprika
Empanada Filling:
1 lb. sirloin tips (finely ground)
1 lb. scallions (quantity to taste), finely chopped
1 red sweet pepper, finely chopped
2 tomatoes without the seeds, peeled, chopped
1 Tbsp. paprika
1 tsp. cumin
1 Tbsp. oregano
Salt to taste
1 olive per empanada
1 Tbsp. raisins (if desired)
2 hard-boiled eggs, thoroughly chilled (if desired)
Cooking Instructions
Empanada Dough:
1.
On a counter or cutting board, place the flour in the shape of a wreath, and put the
paprika and lukewarm lard in the middle.
2.
In a separate bowl, combine the salt and lukewarm water, then mix everything together,
kneading well for 15 minutes until it is very smooth.
3.
Leave it covered with a dishcloth for 20 minutes.
4.
Roll it out with a rolling pin until it is about a half inch thick.
5.
Cut it into medallions, sufficient to hold a few ounces of filling.
Variation: Use regular bread dough.
Empanada Filling:
1.
Put a splash of oil in a saucepan and add the scallions, sweet red pepper, and tomatoes.
Cook on low heat until they are tender.
2.
Add the meat and stir until it is browned.
3.
Remove it from the heat and add the raisins (if desired). Let the resulting mixture cool
completely.
4.
Add hard-boiled eggs.
5.
Place this mixture on one side of a dough medallion and add one olive. Fold over and roll
the edges together. Bake in a hot oven (350°F, 177°C) for 10 to 12 minutes or until
golden brown. (If both the mixture and the hard-boiled eggs are not thoroughly cooled
when combined, the egg will not hold its shape. Note that empanadas can also be deepfried.)
Yields 24 empanadas
200
© Jones & Bartlett Learning, LLC. NOT FOR SALE OR DISTRIBUTION.
Brazil
Courtesy of Emily J. Burritt MS, RD, CNSC
Pão de Queijo
Ingredients
1/3 cup vegetable oil
1/2 cup water
1/3 cup milk
1 tsp. salt
2 cups cassava flour (tapioca flour)
3/4 cup queijo minas (parmesan cheese)
2 eggs, beaten
Cooking Instructions
1.
Preheat oven to 375°F (190°C).
2.
Pour oil, water, milk, and salt into a large saucepan, and bring to a boil.
3.
Remove from heat immediately upon boiling.
4.
Stir in tapioca flour until smooth. Stir the cheese and egg until well combined. Allow the
dough to set for 15 to 30 minutes.
5.
Make small rounded balls (about 2–3 Tbsp. dough) and place them onto an ungreased
baking sheet.
6.
Bake balls until puffy and the tops are lightly browned (about 15 to 20 minutes). Serve
warm.
Persia
Courtesy of Jeannette van der Velde, MPH, MSc
Shirin Pollo (Chicken, Sweet Rice with Orange, Raisins, and Almonds)
Ingredients
2 cups basmati or long-grain rice, soaked and rinsed
1.5 lbs. boneless chicken, cut into pieces
2 large onions, thinly sliced
4 Tbsp. olive oil
2 Tbsp. butter
1/4 cup sliced almonds, soaked in water for 1 hour
1/4 cup sliced pistachios, soaked in water for 1 hour
1/4 cup raisins
1/4 cup orange peel (soak in cold water for 1 hour, drain, and repeat)
2 Tbsp. sugar
1 tsp. saffron
Salt and pepper
Cooking Instructions
1.
Fry onions in 2 Tbsp. of olive oil until golden brown.
201
© Jones & Bartlett Learning, LLC. NOT FOR SALE OR DISTRIBUTION.
2.
3.
Add chicken and fry until browned.
Add 1 cup of hot water, salt, and pepper, and cook over medium heat for 20 minutes,
adding more hot water if necessary. (Some water should remain in the pan after
20 minutes.)
4.
Melt sugar in 1 cup of water and bring to a boil.
5.
Add remaining 2 Tbsp. of olive oil, add saffron, mix well, and set aside.
Preparing the Rice:
1.
Pour 3 cups of water in a large nonstick pan and bring to a boil.
2.
Add rice and salt, and continue boiling until rice slightly softens.
3.
Pour rice into a colander and wash it with lukewarm water.
Layering the Rice:
1.
Add 1/2 cup of hot water in a pot and add a layer of rice (about 1/3 inch).
2.
Spread chicken pieces over the rice and cover with a layer of rice.
3.
Spread half of almonds, orange peel, and pistachios over rice and cover with remaining
rice.
4.
Pour sugar and saffron mixture over rice.
5.
Cover and cook over low heat for about 30 minutes.
6.
Add remaining almonds, orange peel, and pistachios.
7.
Mix well and serve.
Adas Pollo (Rice with Dates and Lentils)
Ingredients
3/4 cup lentils, washed and drained
2 cups basmati or long-grain rice, soaked and rinsed
1 lb. ground beef or lamb, cubed
2 large onions, thinly sliced
3/4 cup pitted dates, washed
1/4 cup raisins, washed
1 tsp. saffron, dissolved into 1/3 cup hot water
Salt and pepper
Cooking Instructions
1.
Pour 3 cups of water in a large nonstick pan and bring to a boil.
2.
Add rice and salt, and continue boiling until rice slightly softens.
3.
Pour rice into a colander and wash it with lukewarm water.
4.
Bring 2–3 cups of water to a boil, add lentils, and cook for 15 to 20 minutes until tender.
5.
Fry onions in olive oil until golden.
6.
Add ground beef or lamb, salt and black pepper, and fry over medium heat for about
10 minutes.
7.
Add 1 cup of hot water and cook until water is mostly absorbed.
Layering the Rice:
1.
Pour 1/2 cup of water and 1 Tbsp. of olive oil into a nonstick pot.
2.
Add half of the semicooked rice.
3.
Spread meat, lentil, raisins, dates, and raisins over rice.
4.
Add remaining rice and cook over low heat for about 20 minutes.
202
© Jones & Bartlett Learning, LLC. NOT FOR SALE OR DISTRIBUTION.
5.
Pour saffron water over rice. Mix well and serve.
Lebanon
Courtesy of Susan J. Massad, HSD, RD
Hommus Bi Tahini
Ingredients
1 can (16-oz.) of chickpeas
3 Tbsp. tahini
1 clove fresh garlic, crushed
1 tsp. salt
Juice of 1 lemon
Paprika
3 sprigs parsley
Cooking Instructions
1.
Drain half of liquid from can of chickpeas.
2.
Blend chickpeas and remainder of liquid in food processor or blender.
3.
Add tahini, garlic, lemon juice, and salt.
4.
Blend until smooth, pour into serving platter, and garnish with parsley and paprika.
5.
Pour some olive oil on top (if desired). The mixture can be stored up to 1 week in a
tightly covered container.
Yields 6–8 servings
Tabouleh
Ingredients
2 bunches parsley, washed, drained, and finely chopped
1 bunch fresh spearmint, washed, drained, and finely chopped
2 tomatoes, seeded and finely chopped
1 bunch scallions, washed and finely chopped
1/2 cup bulgur (fine cracked wheat), soaked in water for at least 30 minutes and squeezed dry
1 tsp. salt
Juice of 2 lemons or 4 Tbsp. lemon juice
4 Tbsp. olive oil
Cooking Instructions
1.
In a deep bowl, combine all ingredients and toss together.
2.
Serve with Syrian bread or leaves of romaine lettuce.
Yields 10–12 servings
Fish Tarator (Fish Baked with Tahini)
Ingredients
2 lbs. white fish
203
© Jones & Bartlett Learning, LLC. NOT FOR SALE OR DISTRIBUTION.
Salt to taste
1 cup water
3 Tbsp. olive oil
Juice of 2 1/2 lemons
1 cup tahini
1 cup walnuts, chopped
2 onions, sliced
2 cloves garlic, crushed
Cooking Instructions
1.
Mix water, 2 Tbsp. olive oil, and juice of 1 lemon.
2.
Spread over fish in baking dish.
3.
Bake covered at 325°F (163°C) for 20 minutes.
4.
Sauté the walnuts and onions in the remainder of the olive oil.
5.
Blend tahini, remainder of lemon juice, and salt.
6.
Spread tahini mixture over the fish, and then spread the onion-and-walnut mixture over it.
Serve either warm or cold.
Chick Peas and Eggplant
Ingredients
1 large onion, diced
1/4 cup oil
1 large eggplant, peeled and cubed
1 can chickpeas, drained
1 can (18 oz.) tomato sauce
Salt and pepper to taste
Cooking Instructions
1.
In a large saucepan, fry onions in oil until golden.
2.
Add chickpeas, eggplant, and tomato sauce, and stir for about 3 to 4 minutes.
3.
Add salt and pepper and cook over low heat for 25 minutes.
Yields 6 servings
Spinach Pies
Ingredients
Basic Dough:
1 pkg. dry yeast or 1 yeast cake
2/3 cups warm water
8 cups flour
1 tsp. salt
1/4 cup olive oil
Cooking Instructions
1.
Dissolve yeast in 1/2 cup of warm water.
204
© Jones & Bartlett Learning, LLC. NOT FOR SALE OR DISTRIBUTION.
2.
3.
4.
Place flour and salt in large bowl; add yeast, remaining water, and oil.
Knead until dough is smooth and pulls away from sides of bowl.
Cover with towel and let rise in warm place for 2 hours until doubled in size.
Filling:
2 lbs. fresh spinach, chopped
1 bunch green onions (scallions), chopped
1/4 cup olive oil
3/4 cup lemon juice
Salt, pepper, and allspice to taste
Cooking Instructions
1.
Wash greens and drain well.
2.
Combine all ingredients and mix thoroughly.
3.
Cut pieces of dough into the size of an egg, cover, and let sit for 35 minutes.
4.
Roll out each dough ball into flat circles and place about 2 Tbsp. of the filling in center of
circle.
5.
Bring sides together to form a triangle and pinch tightly.
6.
Place in oiled pan and brush with oil.
7.
Bake at 400°F (204°C) for about 20 minutes or until golden brown.
205
© Jones & Bartlett Learning, LLC. NOT FOR SALE OR DISTRIBUTION.
Resources
Sample Sensory Sheets
Linespread Test Sheet
Weights and Measures
Scoops and Can Sizes
206
© Jones & Bartlett Learning, LLC. NOT FOR SALE OR DISTRIBUTION.
Sensory Sheet
Item: ________________
Serving Size: ______________
OVERALL TASTE:
like extremely
like somewhat
neither like nor dislike
somewhat dislike
strongly dislike
DESCRIBE:
sweet
Sour
salty
bitter
other: ___________
ACIDITY:
mild
Average
strong
overwhelming
ASTRINGENCY:
mild
average
strong
overwhelming
SOLIDS TEXTURE:
soft
smooth
creamy
crisp
hard
other: ___________
LIQUID CONSISTENCY:
thin
gelatinous
nectar
thick
other: ___________
PREDOMINANT FLAVOR: ______________________
207
© Jones & Bartlett Learning, LLC. NOT FOR SALE OR DISTRIBUTION.
Sensory Sheet
Score the number that best reflects the taster’s opinion:
1 = not liked all at
2 = disliked somewhat
3 = neutral
4 = liked somewhat
5 = much liked
Product
Description
1
2
3
4
5
6
7
8
9
10
11
12
13
14
15
16
17
18
19
20
Appearance
Taste
Texture
Record Other Comments
208
© Jones & Bartlett Learning, LLC. NOT FOR SALE OR DISTRIBUTION.
Linespread Test Sheet
209
© Jones & Bartlett Learning, LLC. NOT FOR SALE OR DISTRIBUTION.
Weights, Measures, Metric Conversions, and Can and Scoop Sizes
Weight Conversions
1 gram
1,000,000 micrograms
1 gram
1,000 milligrams
1 kilogram
1,000 grams
1 kilogram
2.2 pounds
1 microgram
0.001 milligrams
1 milligram
1,000 micrograms
1 ounce
28.35 grams
1 pound
16 ounces
1 pound
454 grams
Volume Conversions
1 cup
1 cup
1 cup
1 cup
1 fluid ounce
1 fluid ounce
1 fluid ounce
1 gallon
1 gallon
1 gallon
1 gallon
1 gallon
1 jigger
1 liter
1 liter
1 liter
1 milliliter
1 pint
1 pint
1 quart
1 quart
1 quart
1 quart
1 tablespoon
1 tablespoon
1 tablespoon
1 tablespoon
1/2 pint
16 tablespoons
236.59 milliliters
8 fluid ounces
1/8 cup
2 tablespoons
29.6 milliliter
128 fluid ounces
16 cups
3.79 liters
4 quarts
8 pints
3 tablespoons
0.85 Imperial gallon
1.06 quart
1,000 milliliters
0.03 fluid ounce
16 fluid ounces
2 cups
2 pints
32 fluid ounces
4 cups
946.36 milliliters
1/16 cup
1/2 fluid ounce
14.79 milliliters
3 teaspoons
210
© Jones & Bartlett Learning, LLC. NOT FOR SALE OR DISTRIBUTION.
1 teaspoon
1 teaspoon
1 teaspoon
1 teaspoon
1/3 cup
1/3 cup
1/3 tablespoon
4.93 milliliter
60 drops
Approximately 5 grams dry weight
16 teaspoons
5 tablespoon + 1 teaspoons
Length Conversions
1 centimeter
1 centimeter
1 foot
1 inch
1 meter
0.01 meter
0.394 inches
12 inches
2.54 centimeters
39.37 inches
Can Equivalents
Can Size
2
2.5
3
10
211
303
Buffet
Ounces
19–20 ounces
29 ounces
48 ounces
98–108 ounces
12 ounces
14.5–16 ounces
8 ounces
Scoop Equivalents
Scoop Size
6
8
10
12
16
20
24
30
40
Amount
2/3 cup
1/2 cup
2/5 cup
1/3 cup
1/4 cup
3 1/5 tablespoons
2 2/3 tablespoons
2 1/5 tablespoons
1 3/5 tablespoons
Note: The scoop number indicates the number of scoops it takes to make 1 quart.
211
© Jones & Bartlett Learning, LLC. NOT FOR SALE OR DISTRIBUTION.
Contributors
The Effect of Caffeine on Blood Pressure, Heart Rate, and Reaction Time (Contributed by Lisa
Brown and Ilisa Palmer)
Gluten-Free Pasta (Contributed by Rebekah Angoff and Rebecca Riley)
Milk Alternatives for Lactose Intolerance (Contributed by Hope Patterson)
Sensory Evaluation (Contributed by Sungeun Choi)
Sugar Content in Various Soft Drinks (Contributed by Joan Hupfer)
Culturally Competent Recipes (Contributed by chapter authors of S. Edelstein, Food, Cuisine,
and Cultural Competency. Sudbury, MA: Jones & Bartlett Learning; 2011)
Thanks to Colleen Lynch for her assistance is the manuscript preparation.
212
© Jones & Bartlett Learning, LLC. NOT FOR SALE OR DISTRIBUTION.
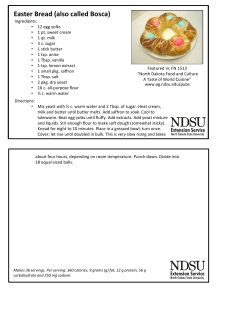


© Copyright 2026