
Document 81866
Copyright © 2009 by Peter Reinhart
Photographs copyright © 2009 by Leo Gong
All rights reserved.
Published in the United States by Ten Speed Press, an imprint of the Crown Publishing
Group, a division of Random House, Inc., New York.
www.crownpublishing.com
www.tenspeed.com
Ten Speed Press and the Ten Speed Press colophon are registered trademarks of Random
House, Inc.
Library of Congress Cataloging-in-Publication Data
Reinhart, Peter.
Peter Reinhart’s artisan breads every day / Peter Reinhart; photography by Leo Gong.
p. cm.
Summary: “Master baker and innovator Peter Reinhart’s answer to the artisan-bread-in-notime revolution, with time-saving techniques for making extraordinary loaves with speed and
ease”—Provided by publisher.
1. Bread. 2. Quick and easy cookery. I. Title. II. Title: Artisan breads every day.
TX769.R4175 2009
641.8'15—dc22
2009021119
eISBN: 978-1-607-74086-5
v3.1
CONTENTS
Cover
Title Page
Copyright
Introduction: Where We Are and How We Got Here
1. Baking Basics
2. Sourdough and Wild Yeast Fundamentals
3. French Breads and Sourdough Hearth Breads
4. Enriched Breads
5. Rich Breads
Epilogue: What’s Next for the Artisan Movement?
Resources
Baker’s Percentage Formulas
Index
Acknowledgments
For better or worse (and probably to your great relief), I am not
going to rehash the extensive history of bread. It’s a ne story and
one worth reading, but authors like H. E. Jacobs have done that well
(see the Resources section). Besides, I’ve already given a synopsis of
the six-thousand-year history in both Crust and Crumb and Peter
Reinhart’s Whole Grain Breads. I believe what readers of this book
really want to learn is how to make world-class breads quickly and
easily. To accomplish this, we need only look at the discoveries and
breakthroughs of recent years.
So here’s a quick recap: The three waves that led to improved
bread in the United States can be identi ed as the whole grain wave,
the traditional wave, and the neo-traditional wave. The whole grain
movement of the late 1960s was part of the counterculture era, in
which white our (and white sugar) symbolized industrialization and
mainstream thinking, while whole grains became the symbol of a
healthful, holistic way of life that had fallen by the wayside. During
this period, organic foods were rst promoted as an alternative to
highly processed foods grown with chemical fertilizers and pesticides,
ushering in what we now call the green movement. This whole grain
wave introduced my generation to an alternative way of relating to
food, but it took a few more years for dietary habits to change
dramatically. Part of the problem was that most of the whole grain
breads of that era, while nutritionally superior, weren’t particularly
delicious (or even palatable), so they came to be labeled “health
food” breads, not fit for general consumption.
The 1970s and 1980s saw the emergence of the traditional wave,
characterized by a culinary renaissance in which European chefs and
bakers came to our shores. Likewise many Americans who exerted
considerable culinary in uence traveled abroad to experience the
great food traditions of other cultures.
The third movement, the neo-traditional wave, grew from the
second movement as regional cuisine in the United States became the
local and domestic expression of traditional European and Asian
in uences. Bakeries applied classic techniques to create distinctly
American breads and pastries. At my bakery, Brother Juniper’s, we
applied slow fermentation processes to create breads using
ingredients that would match well with the foods of the Sonoma
County wine region or pay tribute to various other regional cuisines.
These three waves converged in the 1990s to create what is now
known as the artisan bread movement. Meanwhile, many bread
experts published books that shared their emerging and ever-evolving
knowledge with home bakers, who were also growing in number.
Bread machines helped fuel this trend, taking some of the
intimidation out of the process. But more valuable, I think, was that
Americans had nally experienced higher-quality breads, via
restaurants and local bakeries, and they wanted to be able to
replicate these breads at home. (This was also true of citizens around
the world who were rediscovering their own country’s bread
heritage.) Every new book seemed to add yet another missing piece
of the puzzle, and Internet discussion groups became abuzz with
home bakers sharing their victory stories or asking for advice. Slow
rise and slow food became a metaphor for better bread—and a
better, more satisfying life in general. This era saw the inception of
the Bread Bakers Guild of America and the international Slow Food
movement, followed soon thereafter by the establishment of the
Whole Grains Council and many other organizations promoting
healthier, tastier, safer foods. The concept of a green lifestyle and
cuisine nally spilled over into mainstream thinking, and, ironically,
the best-selling bread book of recent times promised (and delivered!)
artisan-quality breads faster rather than slower. The circle had closed.
Recently, I was asked to speak at a professional bakers convention
on the subject of making artisan bread quickly and easily. My rst
reaction was that this seemed like an oxymoron. Artisanal methods
aren’t supposed to be easy; otherwise, everyone would already be
aren’t supposed to be easy; otherwise, everyone would already be
using them. But upon re ection, I realized that this is already
happening in the industry due to modern technological
breakthroughs. Refrigeration didn’t exist a hundred years ago, when
bakers relied upon pre-ferments to extend fermentation time. Twenty
years ago, we didn’t have sensitive manufacturing equipment that
could handle wet, sticky dough without damaging it. Only recently
have American bakers grasped the biological and chemical processes
of transformation that occur during bread making, the journey from
wheat to eat, though there are certainly always new mysteries waiting
to be unraveled. So perhaps it isn’t an oxymoron at all, and given the
new methods developed by other bakers and authors, and the public
interest in new, streamlined methods, the time seems right for a fresh
synthesis of all of the techniques that arose in the quest for the
perfect loaf and loaves.
The past few years have seen the publication of a number of bread
books that o er original methods for simplifying the bread making
process. Yet during the same period, a few excellent books have
appeared that reveal the advanced methods of true artisan bakers
from around the world. We want it all: great bread, but fast and easy.
Yes, it does seem like a contradiction since the premise of artisan
bread is long, slow fermentation. Despite the often complex
descriptions of methodology, bread making actually isn’t all that
di cult, so achieving the “easy” part is, well, easy. The “fast” part is
where the challenge comes in.
Baking is primarily about the balancing act between time,
temperature, and ingredients. Everything else is connected to this. In
my previous books, I have taken readers on a journey in search of all
of the workable variations on this theme of time, temperature, and
ingredients. My goal in this book is to further synthesize that
knowledge and apply it in a new way to create a system of baking
that anyone can understand and perform.
In the following pages, I’ll explain a variety of options for
everything from pre-ferments to mixing methods to fermentation. In
some situations, it’s clear that a certain approach is preferable to
achieve the desired results. While I de nitely love exploring all of the
options, you need to decide what works for you when it comes to
options, you need to decide what works for you when it comes to
balancing time with temperature and ingredients. What I intend to do
in this book is funnel some of the newer baking methods and ideas
through the structure of classic techniques and proven wisdom to
broaden your sense of the options available to you. With each recipe
in this book, I’ll give a brief explanation of the thinking behind the
method I’ve chosen. In some instances, I may present optional
methods that require more e ort or time in exchange for even better
results. Many of the breads will follow the general method of a
master formula, but not all of them will. Some of the formulas and
techniques will seem familiar, while others may seem entirely new
and perhaps unusual.
Chapter 1 explores the various methods chosen for this book, why I
chose them, and what kind of results you can expect. It also includes
instructions for shaping, mixing, and baking that will be useful
throughout the book. Chapter 2 o ers some fundamentals on
working with sourdough and wild yeast. Chapters 3 through 5 apply
the methods in chapters 1 and 2 to a broad range of recipes. While
this book does contain some familiar recipes from my previous
books, you’ll also notice that I’ve included baked goods I’ve never
written about before, such as Danish and croissant dough, rich co ee
cake babka, and new holiday breads and crackers. Finally, in the
epilogue, I’ll take a look at what the artisan movement means to me.
Before moving on, though, I think it’s important to remember that
all of this growing interest isn’t just a uniquely American bread
revolution; it’s occurring throughout the world, even a ecting longheld French and German baking traditions and also re ected in the
more recent Asian fascination with bread. The journey of discovery
never seems to end. Though we’ve learned much about baking during
the past twenty years, one of the most important lessons is that not
only are there many paths to follow as we explore the realm of bread
baking, but that new, unexpected trails continue to be uncovered
every day. Forging one of these new paths is the task at hand—a path
of fast and easy artisan bread baking. To locate it, we must look for
ways to balance time, temperature, and ingredients that, somehow
and against all odds, are not only easy and not only artisanal, but also
fast. As you’ll see in the following pages, accomplishing this means
fast. As you’ll see in the following pages, accomplishing this means
finding new ways to manipulate time.
CHAPTER 1
Baking Basics
breakthrough for U.S. bakers during the past twenty years was
understanding of the relationship between time, temperature,
Theaandnewbigingredients.
Long, slow fermentation was rst understood as
simply a technique that made better bread. Later in the evolution of
bread baking, we began to understand the actual science behind the
various techniques. In brief, this science comes down to biochemical
and biological activities that release trapped avors. The activities are
brought about by enzymes in both the our and the yeast, and by
microorganisms (bacteria as well as yeast) that create acids, alcohol,
and gases. That’s actually all of the information we need in order to set
out on a lifetime pursuit of applications and variations, though many
books have gone much deeper in explaining dough science and are
worth reading. In fact, artisan bread baking could arguably be reduced
to the following axioms:
* Use the best ingredients, including unbleached rather than
bleached flour.
* Use only as much yeast as necessary to get the job done. Slower
fermentation is better than faster fermentation.
* Mix the dough only as long as needed to get the job done to
prevent oxidizing the flour, which bleaches the flour and reduces
aromas and flavor.
* Use higher rather than lower hydration levels. More water equals
better oven spring and thus bigger holes and better flavor.
* When shaping loaves, handle the dough gently in order to
preserve the gases developed during the earlier fermentation
cycle.
* Bake in well-insulated ovens at the appropriate temperatures. For
crusty hearth breads, hotter and faster is better than cooler, slower
crusty hearth breads, hotter and faster is better than cooler, slower
baking.
* For hearth breads, large, irregular holes in the crumb of the loaf
are preferable to medium, even-size holes. Larger holes allow the
heat to penetrate more quickly to the center of the loaf, reducing
baking time and preserving more moistness to create a thinner,
crackly crust. Larger holes also indicate a better, gentler shaping
technique.
Almost all of the bread books of the past twenty years speak to these
points, and understanding them sets any baker well on the way to
better breads. However, we are about to step beyond the boundaries of
artisan orthodoxy and add some unconventional steps.
EXPLORING NEW METHODS AND TECHNIQUES
The use of old dough or pre-fermented sponges was developed by
traditional bakers as a way of slowing down fermentation and,
essentially, buying the dough more time to release its avor (a result of
starch molecules releasing some of their sugar and saccharide chains, as
well as the formation of acids due to fermentation by yeast and
bacteria). Some of these pre-ferments are wet and batterlike, while
others are dry and rm; some are made with commercial yeast, while
others use naturally occurring wild yeast (sourdough starters); some
have salt, and some don’t. What they all have in common is the idea of
adding older, slowly fermented dough to young, freshly made dough to
instantly age it so that greater avor can be developed in less time. This
is an example of the manipulation of time by the manipulation of
ingredients.
Another way of manipulating time is by using more or less yeast, or
warmer or cooler fermentation temperatures. One of the main functions
of yeast is to raise, or leaven, the dough through biological
fermentation, releasing carbon dioxide that gets trapped in the dough,
pushing it up like a balloon. Both the amount of yeast and the
temperature at which the dough ferments have a huge impact on the
time it takes to raise the loaf. Typically, a di erence of 17°F (about
time it takes to raise the loaf. Typically, a di erence of 17°F (about
10°C) will e ectively double (or halve, depending on which direction
you go) the rate of fermentation. Thus, dough that doubles in size in 2
hours at 70°F (21°C) will take 1 hour to double at 87°F (31°C) and 4
hours at 53°F (12°C). This doesn’t apply to dough that’s cooler than
40°F (4°C), where yeast goes somewhat dormant, or hotter than 139°F
(59°C), where yeast dies.
Again, armed with just this much information, all sorts of
permutations and manipulations of time become possible. Bakers from
earlier baking traditions have come up with numerous variations in
order to create distinctive regional breads, and within a speci c
tradition there may be numerous ways to achieve similar results.
Another lesson has been that in using this knowledge to produce
more bread in less time by, say, increasing the yeast or boosting the
fermentation temperature, we may get fully risen loaves faster, but
often at the expense of avor because the ingredients, especially the
grain, haven’t been given su cient time to release their sugars and
achieve their full potential. So the baker’s mission, as I tell my students
on their rst day in my baking classes, is to learn how to draw out the
full potential avor trapped in the grain. I explain that the way to
accomplish this is by understanding the e ects of time and temperature
on the ingredients.
All of this is a prelude to explaining the choice of methods used to
make the breads in this book, many of which may seem to violate some
of the axioms above. For instance, if the dough has been given su cient
time to ferment at a very cool temperature, it may be possible to
increase the amount of yeast to boost leavening power and shorten
rising time without sacri cing fermentation avor. And because certain
ingredients may dominate the subtle avors that arise during long
fermentation, extended fermentation time might not improve the avor
of the bread, even if the dough is held at very cool temperatures. In
these instances, there’s no advantage to long, delayed fermentation, but
there may be ways to delay the fermentation anyway, in order to make
the baker’s work easier and faster on the actual day of baking.
The wild card in all of this, and the aspect of the craft that couldn’t
be anticipated by bakers of earlier centuries, is the invention of
be anticipated by bakers of earlier centuries, is the invention of
refrigeration. Controlling temperature is a very powerful method of
controlling time and fermentation, and it has a huge impact on the
ability of the baker to evoke the full potential of avor from the grain.
The baking community has only recently begun to explore the
rami cations and options of this factor in the triangle of time,
temperature, and ingredients, but this exploration has already led to a
number of new baking techniques using refrigerated dough. This new
method of delayed fermentation creates wonderful products, even from
home ovens of less-than-stellar quality.
A NEW UNDERSTANDING OF DOUGH
I gured out the new methods for the doughs in this book by
experimenting and testing old methods and conventional baking
wisdom against new theories. For example, when I rst read the
instructions for the master hearth bread recipe in a recently published
book, I immediately assumed, based on my understanding of dough
science, that it contained way too much yeast to work as promised.
How could it possibly last in the refrigerator for even one day without
overfermenting while the yeast gobbled up all of the released sugar?
How could it possibly create a tasty, moist, and creamy loaf (what some
describe as the custard-like quality found in great breads)? Yet, when I
made the recipe, it worked and didn’t overferment. Sure, I saw areas
where the recipe could be tweaked and improved upon, but this didn’t
diminish my astonishment at how greatly it exceeded my expectations.
Although I have yet to nd a scienti c, chemical, or biological reason to
explain why it works, the results forced me to reconsider all of the
premises I once held sacrosanct. While certain scienti c principles
govern baking, one rule supersedes all others: the avor rule; that is,
flavor rules! In other words, if it works, don’t knock it.
Some of the doughs for the recipes in this book are, by design, wet
and sticky, and therefore tricky to work with. But this is one of the
reasons the dough springs back to life so easily and well during the
nal proo ng stage, creating fairly large, irregular holes in the crumb.
You will also nd options for whole grain substitutions in many of
these formulas. As a general rule, you need to increase the liquid by
these formulas. As a general rule, you need to increase the liquid by
about 1 tablespoon (0.5 oz / 14 g) for every 2 ounces (56.5 g) of whole
grain our you substitute in place of white our. But even here, brands
vary; you’ll have to feel your way into it using the visual and tactile
cues in the instructions as your guide. I’ve also included a selection of
breads designed speci cally as whole grain loaves, so in those instances
you won’t have to guess at adjustments.
I am indebted to the authors of other baking books using similar
methods and have learned something from each. Still, there’s always
room for improvement. In these recipes, I’ve attempted to address and
overcome some of the concerns I had after studying other techniques,
especially to minimize overfermentation and unnecessary steps. I hope
you’ll find these recipes to be truly easy and consistently delicious.
What do you mean when you say the dough should be tacky but not
sticky?
For some of the breads, especially rustic breads, the dough needs to be
sticky to achieve a large hole structure. Sticky means that the dough
sticks to a dry nger when you poke the dough. However, for the
majority of the recipes in this book, tacky dough is the goal. Tacky
dough behaves sort of like a Post-it note, sticking to a surface but
peeling o easily. If you poke the dough with a dry nger, it should
stick for a second but then peel o as you remove your nger. If the
instructions call for very tacky dough, that means it borders on being
sticky, so if a little dough sticks to your nger but most peels o , that’s
perfect. Once the dough chills in the refrigerator, it may seem less tacky
or sticky because the our and other ingredients have absorbed more of
the moisture.
Streamlining Baking: No Pre-ferments
Unlike the recipes in my other books, many of which required a
poolish or other pre-ferment (usually made with cool water and
fermented for many hours, chilled or not), many of the doughs in this
book are made with warm water to encourage immediate yeast activity,
and then refrigerated and fermented slowly. In some of these recipes,
the dough is fermented a short while at room temperature and then
goes into the refrigerator for cold fermentation overnight, or longer. In
many of the recipes, the dough goes into the refrigerator immediately
after the mixing stage; this way the dough doesn’t develop too much
alcohol or lose its ability to create a rich, golden brown crust. My most
well-known bagel formula, published in The Bread Baker’s Apprentice,
used a poolish sponge as part of its method. The version in this book
doesn’t, making these some of the easiest bagels you’ll ever make, yet
the results are almost identical because of the overnight method.
In some instances, though, a sourdough starter (levain, or a wild yeast
type of pre-ferment) is added to create a sourdough bread. Sometimes
you’ll have the option of using only natural, wild yeast levain or a
combination of both levain and commercial yeast. Both are legitimate
methods, each resulting in a di erent avor pro le. Instructions for
making a wild yeast starter from scratch.
Laminated dough, such as that used to make croissants and Danish
pastries, is made using a cold, overnight method to improve avor and
oven performance. When using the method described in this book,
there’s no need for a pre-ferment, since the refrigerator does all of the
work of manipulating time to achieve the full potential of avor and
texture.
Because rich breads, such as babka, brioche, and holiday breads, are
loaded with fats and sugars that slow down fermentation, they require a
much higher amount of yeast than lean hearth breads. Again, the
balancing act between time, temperature, and ingredients is what
determines the method. These rich doughs generally don’t bene t from
the addition of a pre-ferment, but I do o er the option of adding a
sourdough starter to intensify the avor and increase shelf life and
moistness.
Some of the recipes include optional methods and leave some of the
choices up to you. For example, there are many options o ered in the
bagel recipe: They can be shaped either on the day of mixing or on the
day they’re baked. There are two methods of shaping. Half of my recipe
testers preferred one and half preferred the other. Try them both and
see which works best for you. This was also the case regarding the
poaching liquid: Some testers preferred using malt syrup in the liquid
and some didn’t. When it comes to bagels, one of those categories of
bread where many strong opinions abound, I decided it was better to
lay out all of the options and let you choose for yourself, especially
since there was no clear consensus or de nitive winner during recipe
testing. All of the options worked, and each had fans.
Is there a difference in performance between this method and methods
that use a wet poolish or sponge?
Yes and no. In the hands of a master, yes, the acidity levels and
leavening power of various pre-ferment methods can be slightly
di erent. But if we distance ourselves from any loyalties to particular
methods, we can see that the function of each of these pre-ferments is
relatively the same: to produce a better-tasting loaf by evoking the full
avor potential trapped in the grain. While my previous books made
extensive use of all of these types of pre-ferments, the recipes in this
book use only one pre-ferment, sourdough starter, and even that in only
a few of the recipes. Why? Because with the overnight method, the
dough becomes its own pre-ferment through long, slow fermentation in
the refrigerator.
Overnight Fermentation
In this book, I take advantage of a number of factors that aren’t
always available to commercial bakeries: refrigeration, small batches,
and high hydration. For the most part, bakeries don’t have enough
room to hold large batches of dough overnight, so they use sponges or
other pre-ferments to build avor. But home bakers can, so most of the
recipes in this book call for making a complete, single-mix dough, then
using the refrigerator to retard the fermentation process. This gives
enzymes and microorganisms ample time to work on the molecules in
the dough and develop the flavor.
Once the dough is mixed, in most cases it’s quickly retarded to slow
down activity of the yeast. One of the di erences between this method
and those I’ve used in previous books is that the recipes often call for
lukewarm water (about 95°F or 35°C) rather than water at room
temperature. This allows the yeast a chance to wake up and begin
fermenting the dough as it cools down, until the yeast eventually goes
dormant when the temperature of the dough falls below 40°F (4°C). A
lot of the avor transformation in the dough takes place during the
dormant stage, because the starch enzymes are still at work even while
the yeast goes to sleep.
The batch sizes of the recipes in this book are large enough to make
multiple loaves. This is ideal, as the unbaked dough can be held in the
refrigerator for a number of days, so you only need to mix one batch to
have freshly baked bread several times. Of course, if you prefer to work
with smaller or larger batches, that’s ne; just keep all of the
ingredients in the same proportions.
Are there advantages to using a combination of pre-ferment techniques
to achieve a better loaf, such as both poolish and biga, or poolish and
sourdough? And what about soakers?
Sometimes yes and sometimes no, but it’s hard to answer this until we
factor in the third point on the triangle: time. When you really think
about it, long, cold, delayed fermentation turns bread dough into its
own pâte fermentée. In many instances, in fact, it may be redundant
and not at all enhancing to add a pre-ferment to an overnight dough
that undergoes delayed fermentation. Using a soaker, in which coarse
grain is soaked overnight to induce enzyme activity and soften the
grain, is an excellent method and perfectly appropriate in some recipes,
but with the overnight cold fermentation in these recipes, this too is
redundant because the dough serves as its own soaker, as well as its
own pre-ferment. (That said, a few of the multigrain recipes still need
and make good use of soakers.)
Can cold fermentation recipes be improved upon?
Yes, there’s room for improvement, and this is where baking science
can help. Applying the axiom of using only as much yeast as it takes to
get the job done, hearth bread recipes (as well as many other yeasted
breads in this book) either call for less yeast or shorten the rst
fermentation time in order to produce a dough that retains more of its
natural residual sugars (released by the starches via enzyme activity).
The result is a richer, browner crust and sweeter flavor.
A New Way to Work with Yeast
Another breakthrough method in this book is that of hydrating instant
yeast, often using lukewarm water. Hydrating instant yeast in warm
water is something I wouldn’t have embraced previously, but I’ve
discovered that waking up the yeast in lukewarm water allows it to
ferment more e ectively during the cooldown phase in the refrigerator.
It also makes it possible to put the dough in the refrigerator as soon as
it’s mixed rather than having to wait for it to rise. The warmer dough
and activated yeast have plenty of time to rise as the dough cools, so
the dough is ready to use right from the refrigerator, without the wakeup time required in many of the other bread recipes I’ve developed.
Many brands of instant yeast are available to home bakers, under
brand names such as Rapid Rise, Instant Rise, Perfect Rise, or Bread
Machine Yeast. I’ve always liked instant yeast because it doesn’t require
hydrating in warm water (active dry yeast, on the other hand, must
always be hydrated rst). But for many of the recipes in this book, the
yeast performs even better if hydrated in advance. Another bene t of
this method is that it’s the same whether you use instant or active dry
yeast, though it’s best to increase the amount by 25 percent if you use
active dry yeast. (This is because 25 percent of the yeast cells are killed
during the processing of active dry yeast, while instant yeast is at almost
100 percent potency.) Fresh yeast is wonderful if you can get it—and if
it’s really fresh, as it only has a shelf life of 2 to 3 weeks. If substituting
fresh yeast for the instant yeast, use about 3 times as much by weight to
equal the leavening power of instant yeast. Fresh yeast should also be
hydrated in water.
TOOLS: WHAT YOU’LL NEED TO GET STARTED
I strongly advise getting two tools if you don’t already have them: a
plastic bowl scraper (which is very inexpensive) and a metal pastry
scraper (also called a bench blade, or bencher). I use these more than
any other tools. An instant-read thermometer is also helpful in taking
some of the guesswork out of the baking process. Parchment paper or
silicone baking mats are also very useful, as are mixing bowls,
measuring spoons, and measuring cups.
Mixers and food processors are useful but not essential. All of the
recipes in this book can be made by hand, though a mixer will make
the job easier. In many instances, I suggest nishing the mixing by hand
even if you have an electric mixer because it’s the best way to
determine if the dough needs any adjustment with our or water (and,
frankly, because it feels so good—kneading by hand is the most
therapeutic part of bread making, in my view). The brand of mixer is
up to you, as all of them work to accomplish the three goals of mixing:
even distribution of ingredients, activation of the leaven, and
even distribution of ingredients, activation of the leaven, and
development of the gluten. Hands are also tools and can do the same,
but a mixer is especially nice for larger batches. You can also mix using
a food processor; just be sure to use pulses, not long processing cycles,
which overheat and overwork the ingredients.
Other tools that are useful but not absolutely essential include a
baking stone for hearth breads, razor blades or slicing blades (lame in
French) or a serrated knife for scoring the dough, a timer, whisks,
cooling racks, and sheet pans as well as loaf pans. You might eventually
want to purchase proo ng cloths (couches in French) and baskets
(bannetons or brot forms). But don’t wait until you have these to start,
as they can be approximated using tea towels, mixing bowls, and the
like. Cloches (ceramic baking domes) are fun to use and make
exceptional bread, but I haven’t included instructions for using them. If
you’d like to give one a try, you’ll nd plenty of information on baking
with cloches on the Internet. Some of therecipe testers reported making
improvised cloches by using metal mixing bowls or roasting pans—
creative substitutions are definitely encouraged!
I often suggest misting dough with vegetable oil spray, such as Pam
or other brands, simply to make it easier to remove any plastic wrap
used to prevent the surface of the dough from drying out. But a pastry
brush and vegetable oil also work well, as do pump misters, which are
now commonly available at cookware stores.
Finally, I highly recommend obtaining a small, digital kitchen scale.
They have become fairly inexpensive and are much more accurate than
spring scales or using volume measures. Most scales now also o er
weights in both ounces and grams, which is very helpful, as grams are
more precise. (The weights in this book have been rounded to the
nearest measurable unit.) However, the recipes do include volume
measurements if you don’t have a scale; just be aware that they aren’t as
accurate as weighing, since everyone scoops and packs ingredients
di erently, and because the density of ingredients may vary. For this
reason, if you do use volume measures, be especially attentive to the
visual and tactile cues I’ve provided so that you can gauge how the
dough should feel and make any necessary adjustments.
Common Questions about Ingredients
What about substitutes for milk, eggs, and honey?
You can always use soy milk or rice milk in place of cow’s milk;
egg replacers in place of eggs; and agave nectar (from the same
cactus used to make tequila—it’s delicious) or sugar in place of
honey. You can use low-fat milk to replace whole milk, and yogurt
to replace buttermilk, though you may need to thin it with a little
milk. Another option for replacing whole milk is dry milk solids
(DMS), using 1 part DMS to 8 parts water (by weight).
Why is unbleached our preferable to bleached, and are there
particular brands or types of flour that are better?
Unbleached our retains the natural carotenoid pigments that
occur in the endosperm of the wheat berry and give the our its
yellowish tint. Carotenoids also provide aroma and avor to the
our and give the bread a more natural look. In rare cases,
bleached our is preferred (for example, for pie dough and
biscuits) because it doesn’t absorb butter as well, which helps
create a more aky, tender product. Other than in these cases, I
always prefer unbleached flour.
As for brands, I don’t have a favorite and have found that all of the
U.S. brands of our work well in these recipes, though some do
absorb more water than others (the age of the our is also a
factor). The protein level varies from brand to brand, even among
those labeled “all-purpose” or “bread” our, so you may have to
adjust the amount of water or our accordingly. All of the recipes
give cues about how the dough should look or feel and advise
adjusting accordingly, rather than feeling bound by the amount in
the ingredient list. Be aware that European our is often di erent
from American our and usually requires about 3 to 5 percent less
hydration.
Can I reduce the salt and how much should I use if I don’t have table or
kosher salt?
Salt is tricky because there are so many kinds, and their density
varies. If you weigh your ingredients, it doesn’t matter what kind
you use; the ratio of salt to our, by weight, will be correct. After
all, an ounce of kosher salt is still an ounce of salt, even though it’s
made of much bigger akes. But whereas 1 ounce of table salt
equals about 4 teaspoons, 1 ounce of kosher salt equals about 6½
teaspoons. To complicate matters further, di erent brands of
kosher salt can have di erent ake weights. Morton’s kosher salt
(in two varieties) doesn’t weigh the same as Red Diamond kosher
salt. In this book, I’ll give teaspoon or tablespoon amounts for both
table grind and coarse kosher salt (based on Red Diamond, not
Morton’s). If you use Morton’s coarse kosher salt, it’s about the
same as Red Diamond, but if you use standard Morton’s kosher salt,
in which the grains are only slightly bigger than table salt, split the
difference between the two salt measurements given.
As for cutting back on salt, yes it is possible to do so; however, the
bread won’t taste as good. Another concern is that the yeast will
have more leeway to ferment at will. (Salt is a yeast inhibitor,
which is a good thing in breads.) So, if you cut the salt by, say, 10
percent, then also cut back on the yeast by the same amount. I’m
not recommending this, because I like the breads with the amount
of salt listed in the recipes, but I do understand that many people
need to limit their salt intake. So as long as you’re willing to
sacri ce some of the avor, you can make these breads with less
salt.
BASIC TECHNIQUES
I’ve adapted and re ned various baking techniques over the course of
creating the recipes for this book. The new stretch and fold step, very
popular now with professional artisan bakers, is probably the most
exciting addition, but all of the other basic techniques outlined below
are important for creating high-quality breads with the methods in this
book.
Stretch and Fold
Stretch and fold is a method that makes it possible to use minimal
mixing times even with doughs with high hydration. Some of the
recipes suggest using this method to strengthen the dough and make it
more buoyant. It isn’t always required but if time permits, this will
generally improve the performance of most of the breads in this book.
The key to the stretch and fold method is understanding that
stretching out the dough and then folding it over itself helps organize
the gluten network in much the same way as mixing does. Before using
the gluten network in much the same way as mixing does. Before using
the stretch and fold technique, you must mix the dough until the gluten
has formed. (If you need a refresher: Gluten forms as a result of the
bonding of the proteins glutenin and gliadin, which are present in the
endosperm of certain grains, primarily wheat and rye.) One stretch and
fold is like mixing for another minute, yet it takes only a few seconds.
As you use this technique, you’ll immediately feel the dough strengthen,
becoming a soft, supple ball. I have seen dough with over 90 percent
hydration come together under the skilled hands of bakers using the
stretch and fold method. In other books and recipes, you may see this
technique referred to as turning and folding the dough.
STRETCH AND FOLD: BOWL TECHNIQUE
To stretch and fold the dough in the bowl, with wet or oiled hands, reach under one end of the dough and stretch
it out, then fold it back onto the top of the dough. Do this from the other end, and then from each side. Then flip
the entire mass of dough over and tuck it into a ball. It should be significantly firmer than it was before you did
the stretch and fold, though still very soft and fragile. Cover the bowl (not the dough) with plastic wrap and let it
sit for 10 minutes, then repeat the stretch and fold process. Once again, cover the bowl and let the dough sit at
room temperature for 10 minutes, then repeat the stretch and fold process twice more. The entire process should
be completed in less than 40 minutes.
STRETCH AND FOLD: WORK SURFACE TECHNIQUE
To stretch and fold the dough on the work surface, lightly oil the work surface and place the dough on it. With wet
or oiled hands, reach under the front end of the dough and stretch it out, then fold it back onto the top of the
dough. Do this from the back end and then from each side. Then flip the entire mass of dough over and tuck it
into a ball. The dough should be significantly firmer, though still very soft and fragile. Place the dough back in the
bowl, cover, and let it sit at room temperature for 10 minutes. Repeat the stretch and fold process, then return the
dough to the bowl again, cover, and let it sit at room temperature for 10 minutes more. Do this twice more. The
entire process should be completed in less than 40 minutes.
Shaping
After the dough rises overnight, you’ll need to shape it before letting
it rise, or proof, at room temperature. Boules, bâtards, and baguettes
are examples of the most common freestanding loaves you can shape,
or you can choose to bake sandwich loaves, pizza, or rolls.
Transfer the dough to the work surface and dust with flour.
BOULES (BALLS)
The boule is the fundamental shape from which many other shapes
can be made. The whole process of giving loaves this shape is oriented
toward creating tight surface tension, which allows the loaf to rise up
and not just out; the tight skin causes the dough to retain its cylindrical
shape rather than spreading and attening. That’s why the key step in
making boules is to press rmly on the bottom crease to tighten the
surface. This can be done in a number of ways, but the most common is
to use either the edge of your hand or your thumbs to pinch the crease
closed and exert pressure on the surface. If you look at the photographs
with this understanding, with minimal practice you should become
proficient.
To shape a boule, gently pat the risen dough into a rectangle, then
bring all four corners together in the center. Squeeze the corners to seal
them and tighten the skin of the dough to create surface tension. Use
them and tighten the skin of the dough to create surface tension. Use
your hands to rotate the dough on the counter and make a tight, round
ball. Flour a proo ng basket (or line a baking sheet with parchment),
then dust it with flour, semolina, or cornmeal. Transfer the dough to the
prepared proo ng basket, seam side up, or place it on the prepared
pan, seam side down, to proof.
For a lean dough boule, bring all of the corners together and squeeze to tighten the skin of the dough.
BÂTARDS (TORPEDOS)
A bâtard (literally, “bastard”) is a torpedo-shaped loaf 6 to 12 inches
in length. Aside from being a viable and popular shape in its own right,
delivering a nice balance of both crust and crumb, it’s also a good
intermediate shape for making other forms. For example, rather than
making a boule as a preliminary step in forming a baguette or
sandwich loaf, I prefer to make a bâtard so that I’m already part of the
way to the nal shape. This way, less e ort is required to nish the
extension after a short resting period.
To shape a classic bâtard, gently pat the risen dough into a thick
rectangle. Fold the bottom half to the center and press with your
ngertips to hold the dough in place and seal the seam. Fold the top
half to the center, and once again press with your ngertips to seal the
seam. Roll the top half of the dough over the seam to create a new
seam on the bottom of the loaf. Pinch the new seam closed with your
seam on the bottom of the loaf. Pinch the new seam closed with your
ngertips or the edge of your hand to create surface tension on the
outer skin, making a tight loaf. Gently rock the loaf back and forth to
extend it to the desired length, typically 6 to 12 inches. To create a
torpedo shape, taper the loaf slightly at each end with increased hand
pressure while rocking the loaf. Transfer the shaped loaf to a oured
proofing cloth or an oiled pan, seam side down, cover, and proof.
For lean dough and other wet dough bâtards, press firmly on the bottom crease to exert pressure on the surface.
BAGUETTES
The baguette is the shape made famous in Paris and is thus the
ultimate city bread (as opposed to so-called country loaves, which are
more round or oblong). The length varies from region to region, but for
home bakers the determining factor is oven size. So even if you’re able
to make a perfect baguette shape as long as 3 feet, it’s likely that your
oven won’t be able to handle it. For this reason, the instructions that
follow are for 10-ounce (283 g) baguettes designed for home ovens and
baking stones. Using a basic baguette shape, you can also create épis,
which have a zigzag shape resembling a stalk of wheat. Since this is
done just prior to baking, see under Scoring, for instructions on shaping
épis.
To shape a baguette, start by making a bâtard, then let it rest for 5 to
10 minutes. Repeat the same folding process: bottom to center, top to
center, and pinch to create a seam. Seal the new seam with your
ngers, thumbs, or the heel of your hand. It should create a tight surface
tension. Then, with the seam side underneath, gently rock the loaf back
and forth, with your hands moving out toward both ends and increasing
the pressure at the ends to slightly taper the loaf. Repeat this rocking as
needed until the baguette is the length of the baking sheet or baking
stone. Transfer the shaped baguette to a oured proo ng cloth or pan,
cover, and proof.
SANDWICH LOAVES
To shape a sandwich loaf, atten the dough into a 5 by 8-inch
rectangle. Working from the 5-inch side of the dough, roll up the length
of the dough. Pinch the nal seam closed using your ngertips or the
back edge of your hand. Gently rock the loaf to even it out. Don’t taper
the ends; keep the top surface of the loaf even. Place the loaf in a
greased pan, seam side down, cover, and proof.
PIZZA DOUGH
To shape pizza dough, press the ball of dough into a at disk using
your ngertips, then use oured hands and knuckles to gently stretch
the dough into a wider disk. Work from the edges only, not from the
center of the dough. Let the dough rest when it becomes too resistant,
then continue stretching with oured hands and knuckles, again from
the edges, not the center, until you have a 9- to 12-inch disk. Place the
shaped dough on a oured or parchment-lined peel or back of a sheet
shaped dough on a oured or parchment-lined peel or back of a sheet
pan. Patch any holes in the dough so the sauce and other toppings don’t
go through the dough. Add toppings as you like, then slide the pizza
into the oven onto a preheated baking stone or the back of a preheated
sheet pan. If using parchment, slide the pizza into the oven with the
parchment, then remove the parchment after about 5 minutes of
baking.
ROLLS
For round dinner rolls (also called silver dollar rolls): Place a 2-ounce
(56.5 g) piece of dough on the work surface, cup your hand around it,
then rapidly rotate the dough in a circular motion, as if trying to push it
through the work surface. If need be, wipe the work surface with a
damp towel to create traction to help you round the dough into a tight,
smooth ball. Transfer the rolls to a parchment-lined baking sheet, cover,
and proof. For pull-apart rolls, assemble any number of rounded dinner
rolls on a parchment-lined pan, just touching, so they’ll rise into one
another. After they bake, the rolls will easily pull apart.
For knotted rolls: Roll 2 ounces (56.5 g) of dough into a strand about
10 inches long. Tie it into a loose single loop knot, leaving enough
dough (about 2 inches at each end) to wrap around the strand one
more time. Bring one end around and down through the center and the
other end around and up through the center, so that a nub of dough
pokes through the center on both the top and the underside of the roll.
Transfer the rolls, nicest side up, to a parchment-lined baking sheet,
cover, and proof.
Proofing
After the cold dough is shaped, it usually needs anywhere from 1 to
12 hours (as in the case of panettone) at room temperature to rise. This
is called proofing, because it proves that the dough is still alive.
Slow rising is better, but sometimes a little prodding is okay. The
main reason we can accelerate the proo ng stage without harming the
avor in these recipes is because all of the avor development already
took place during the cold fermentation stage in the refrigerator. You
can accelerate the rising process by placing the dough in a warm place,
such as an oven with only the lightbulb on, an oven that has been
briefly warmed and then turned off, or a gas oven with a pilot light. But
if the dough warms up too quickly, the yeast ferments at a wildly
uncontrollable pace. This can easily overferment the dough and ruin
both the flavor and the color of the bread.
The safest way to accelerate the proo ng is to use a warm oven but
only for a short period of time—just long enough to take the chill o
the dough without warming it. This is especially true of rich doughs
made with butter, such as babka or croissants. The melting point of
butter is between 80°F and 90°F (26°C and 32°C). If the dough gets
warmer than this, the butter can separate out and ruin the dough.
The following are three common forms for proofing shaped dough:
BANNETONS
Bannetons are baskets used to provide structure for dough as it
proofs. These bentwood baskets are much sturdier than wicker, but they
are costly and, as with many other professional baking tools, can be
improvised at home for far less money. With just a few basic items,
spray oil being one of them, you can approximate many of the
processes used in bakeries.
In this case, if you don’t have professional bannetons, you can
improvise with stainless steel or glass mixing bowls or wicker baskets.
The size of the bowl depends on the size of the loaf, but since most of
the formulas in this book are for 1- or 1½-pound (454 g or 680 g)
loaves, the bowls need not be big. As a rule of thumb, the bowl needs
to be twice as large as the piece of dough going into it to accommodate
the rise.
Line a stainless steel or glass mixing bowl with a smooth, lint-free
cloth napkin, scrap of fabric, or towel. Mist the fabric with spray oil,
then lightly dust it with our. Place the loaf in the bowl, seam side up,
and mist the top with spray oil. Cover with aps of the fabric or a
separate cloth.
When the dough has fully risen, uncover the top surface, gently invert
the bowl onto a peel or the back of a sheet pan dusted with semolina,
our, or cornmeal. Carefully peel o the fabric, then proceed with
scoring and baking.
COUCHES
The same type of improvisation can be used for couches (literally,
“bed”), the linen proo ng cloths many bakeries use for freestanding
loaves. If you don’t want to buy actual heavy-duty couches, you can use
a white tablecloth, preferably one that you no longer use for company!
To prevent sticking, lightly mist the surface with spray oil and dust the
cloth with our before transferring your loaves onto the cloth, with
about 3 inches between them. Once the loaves are on the cloth, bunch
up the fabric between the loaves to make walls to support the dough,
then cover with more cloth or plastic wrap. Proo ng cloth is especially
helpful with soft dough because the bunched-up walls prevent the
dough from spreading sideways or flattening.
SHEET PANS
In truth, many of the doughs raised on cloth usually will do perfectly
ne on a sheet pan lined with parchment paper, misted with spray oil,
and dusted with cornmeal, semolina, or our. You can loosely cover
loaves on sheet pans with plastic wrap, or slip the entire pan into a
food-grade plastic bag. Food-grade plastic bags, which are usually clear
or translucent, are designed to store food without leaching any
petrochemicals into it.
To use a sheet pan as a pizza peel, cover it with parchment paper so
that the pizza will slide o easily; you will not need to our the
parchment or the back of the pan, but mist the parchment with spray
oil in case you need to slide or move the dough after it touches down
on the parchment.
Scoring
The purpose of scoring bread before baking is to release some of the
trapped gas, which can make tunnels or caverns in the bread. This also
promotes proper oven spring and creates an attractive nished look, so
the cuts are both functional and aesthetic. Most of the time, cuts are
made just prior to baking, after the surface has dried out a bit, but
occasionally they’re made earlier.
The most characteristic cuts are those associated with baguettes and
other hearth-style European breads. They are best made with a razorsharp blade, such as a razor or what the French call a lame, which is a
double-edged blade on a stick. The cut is made with just the tip of the
blade to avoid dragging the back part of the blade through the dough,
as this would rip it rather than slit it. I often tell my students to say the
word slit when they make the cut to emphasize an action like slitting
open an envelope over any other notion of cutting. The cut shouldn’t go
straight down but rather be on an angle, so that it’s almost parallel to
the surface of the bread. This will encourage a separation between the
crust side of the cut and the rest of the loaf, resulting in what is called
an ear. As the loaf bakes, it will spring up in the oven, releasing some
of the trapped gas through the cut areas, as they are weakest, causing
the loaf to open into what’s known as the bloom.
If you prefer to use a sharp serrated knife or another type of blade,
remember to let the knife do the work. That is, resist the urge to press
down on the dough. Instead, let the knife bite into the dough and then
gently slide it through, letting the weight and sharpness of the knife do
the cutting, rather than any downward pressure on your part. This will
slit the bread more cleanly, allowing it to pucker open rather than
collapse under the pressure of your hand.
To score loaves, wait until just prior to baking. If the loaves are in
proo ng baskets or bowls or on couches, gently transfer them onto a
oured peel or the back of a oured sheet pan. Using a razor blade,
lame, or serrated knife, score the loaf about ½ inch deep. If using a
razor blade, keep the back end up so it doesn’t drag through and tear
the dough. There are many pattern options when scoring, including a
square, a pound sign, an asterisk, a sunburst, or parallel lines for larger
loaves. These are just a couple of ideas to get you started.
To make épis (ordinary baguettes transformed into forms resembling
stalks of wheat), use scissors to make a series of cuts just prior to
baking. Starting about 2½ inches from one of the ends, cut down
through the top of the loaf and snip back toward the end at a 45-degree
angle, cutting almost all the way through the dough. Turn the cut piece
(the pointed end) to either the right or left, facing the point away from
(the pointed end) to either the right or left, facing the point away from
the loaf. Move down another 2½ inches and repeat, turning the next
piece in the opposite direction, until you reach the end of the loaf.
There are 2 methods for making fougasse, which makes a loaf look
like a ladder or a tree:
Method 1: Use a pastry blade to slit open a proofed baguette just
prior to baking it, then spread the baguette out flat.
Method 2: Flatten a proofed bâtard, then slit it with a knife in a
pattern of your choice, spreading the cuts open just prior to baking.
Hearth Baking
A number of the breads in this book are designed to be baked at high
temperatures, preferably on a hearth of some type. A baking stone is
the most popular version for home hearth baking, but not everyone has
one. In addition, a hearth surface, which is basically a thermal mass
designed to absorb heat and then radiate it back into the dough, isn’t
enough if you want to achieve bakery-quality products. You also need
steam to enhance oven spring and put a shiny, crackly crust on the
bread.
BAKING STONES
I prefer the thick, rectangular stones now available in most
houseware departments or kitchen supply stores. These stones retain
their heat longer than thin, round pizza stones. The unglazed quarry
tiles that many of us used before baking stones became widely available
tiles that many of us used before baking stones became widely available
are also good, though they tend to slide around and are more prone to
cracking when they get wet. If you’ve already out tted your oven with
tiles and are happy with them, feel free to continue using them.
If you don’t have a baking stone, it’s perfectly okay to bake on a
sheet pan. The oven spring may not be as great, but at Brother
Juniper’s Bakery I baked my French bread on sheet pans in a
convection oven for many years, and my customers loved it. Whatever
works!
CREATING STEAM
There are many ways to create a blast of steam, including water
misters and ice cubes on the oven oor, but my preferred method is to
use a steam pan, either a sheet pan with a 1-inch rim or, as one of my
recipe testers suggests, a lasagna pan with taller sides, or a cast-iron
frying pan. Shirley Corriher, whose book BakeWise is one of my
favorites, suggests putting stones in the steam pan to create more hot
surfaces on which water can be instantly transformed into steam.
Both the steam pan and the baking stone should be preheated for at
Both the steam pan and the baking stone should be preheated for at
least 45 minutes so that they’ll absorb enough heat. The location of the
stone and the pan depends on the style and size of the oven. It’s ne if
the steam pan is above the baking stone, but in my oven it works best
to place it on the shelf under the baking stone. Always use an oven mitt
or a hot pad and wear long sleeves when adding water to the hot steam
pan to prevent steam burns. It’s also advisable to cover oven windows
with a dry dish towel or rag to prevent backsplash from hitting the
window and cracking it—but remember to remove the towel before
closing the oven door! I use a watering can with a long spout when
pouring the water into the steam pan because it gives me a little
separation from the steam.
Why not use ice cubes? They do work and last longer than water, but
you only need steam for about 5 minutes; after that it has done its job
and it’s better to let the oven dry out. Too much moisture in the oven
after the steam phase delays caramelization of the crust, making it
thicker and chewier. But another reason why I eschew ice cubes is that
they drain heat from the oven. The caloric conversion for turning ice
into steam is much greater than that for turning hot water into steam.
Still, if you like the ice cube method, be my guest. Once again,
whatever works!
To prepare your oven for hearth baking, preheat the oven with a
baking stone and steam pan in place. Slide the shaped dough onto the
preheated baking stone, then lay a kitchen towel over the oven’s glass
window to protect it from any potential backsplash. Wearing an oven
mitt to prevent burns, pour about 1 cup of hot water into the preheated
steam pan. I like using a watering can because of the control and
distance the spout provides. Using a spray bottle such as a plant mister,
you can also spritz the oven walls a couple of times to create additional
steam.
BECOMING A BAKER
As you work with this book, you’ll nd that you need only a few basic
recipes to give you templates for any number of bread variations. As
with all of my books, one of my goals here is to empower you to think
like a baker, not just blindly follow a series of steps (though following
like a baker, not just blindly follow a series of steps (though following
steps is also essential). Many home bakers have already made that leap,
as witnessed by the stunning array of tips provided by the
approximately ve hundred recipe testers for this book. Quite a few of
their tips and improvements have found their way into these recipes. In
the pages that follow, you’ll nd a number of formulas representing
various bread categories (lean breads, soft enriched breads, rich breads
and holiday breads, laminated breads, sourdough, crackers, bagels, and
more), along with suggestions for variations. Once you’ve learned these
basic formulas, which are really templates for nearly every kind of
bread imaginable, you should be able to create countless versions on
your own.
I always encourage beginners to rst follow a recipe as written, but it
won’t take long for even a beginner to start thinking of what-if
possibilities, like “What if I substitute raspberry crème for cinnamon
and chocolate in the babka?” Or, “What if I put a baking stone on the
top and bottom shelf of my oven to make it perform more like a brick
oven?” (A brilliant idea, by the way.) My answer to these what-ifs is
almost always, “Give it a try!” In the end, the avor rule ( avor rules!)
will reveal if it works or not. In most instances, once you’ve made a
particular recipe three times, you will own it and begin to think of your
own tweaks and variations, at which point it will become your own
personal formula. Don’t wait for permission; trust your instincts and
you’ll soon be creating your own signature breads.
Remember, the basic methodology of this book is based on high
hydration, delayed fermentation (aka long, cold fermentation), and only
a short period of actual hands-on time. Are these recipes really fast and
easy? They are easy—indeed, very easy—but they only appear to be
fast. There’s a substantial amount of slow work that occurs while you
sleep; the fast part is the actual time you spend dealing with the dough.
In some cases, there will be times of waiting, but in many of these
recipes the waiting time for finished, delicious bread is minimal. As you
learn the shaping steps, which are probably the most challenging aspect
of this method, you’ll begin to feel that no bread is too di cult for you
to make (and rest assured that most of the shaping techniques take only
one or two attempts to master). I predict that in no time at all, you’ll
nd yourself on call for friends and family, baking for them again and
nd yourself on call for friends and family, baking for them again and
again, as did many of the recipe testers while working on the recipes in
this book. Now, on to the breads.
To shape a fendu (“split bread”), dust a bâtard with flour. Use a dowel, thin rolling pin, or a wooden drumstick to
press a crease down the center of the dough. Using the dowl, widen the crease to make a 1 inch wide flattened
area. Lightly dust the flat area with flour, then roll the halves back toward the center until they touch. Proof the
dough with the crease side down for about 30 minutes, then flip it over and continue proofing, split side up, until
read to bake.
CHAPTER 2
Sourdough and Wild Yeast Fundamentals
of the breads in this book require a natural starter, sometimes
as sourdough starter, in some cases with an option for also
Manyknown
including commercial yeast. By sourdough I mean wild yeast or
naturally leavened dough, as opposed to dough leavened with
commercial yeast. Wild yeast breads have a number of appealing
qualities, some related to avor, and others purely romantic or
philosophical. There’s something compelling about capturing wild
yeast and bacteria, then putting them to work to raise dough. It feels
very craftlike and close to the bone. The avor of these breads is often
superior to commercially yeasted breads because, from the get-go, they
require the use of a pre-ferment, called the starter. Since the starter has
to be fermented in advance, it functions as a avor enhancer, like other
types of pre-fermented dough. But unlike pre-ferments made with
commercial yeast, which have only a minimal leavening role, wild
yeast starters also carry all or much of the leavening responsibility.
There are a number of classic versions of sourdough, under various
names, that can be modi ed into many types of bread. Pain au levain,
for instance, is a classic French-style naturally leavened (wild yeast)
bread that’s usually made with a small percentage of whole wheat our
but can also be made with 100 percent whole wheat our or none at
all, or with a touch of rye. The 4.4-pound (2-kilo) country miche, made
famous by Max and Lionel Poilâne in Paris, is made with sifted whole
wheat our. Sifting removes some of the germ and bran, but not all of
it, so the bread is hearty but not overwhelmingly so. This can be
approximated at home by using about 60 percent whole wheat our
and 40 percent unbleached bread our. Traditional rye breads are often
made with wild yeast starter to acidify the dough, which yields a bettertasting and more digestible rye loaf. Because rye is low in gluten, rye
breads often include some high-gluten white our to compensate for
the lack of gluten. Many commercial rye breads are made using a mixed
method that incorporates both a wild yeast starter and a commercial
method that incorporates both a wild yeast starter and a commercial
yeast.
BUILDING YOUR STARTER
There are many ways to make a starter, some more e ective than
others. You’ll nd numerous systems online, along with loads of
information, misinformation, and folklore. Many people obsess over
their starters, coddling them like newborn infants, keeping them on a
regular feeding cycle, and fretting when the starter doesn’t bubble up
the way they think it should. Because there are many ways to create a
starter, let’s start by focusing on what a starter is and how it works.
The most common misperception about wild yeast or sourdough
starters is that the wild yeast is what causes the sour avor. Within the
dough, there’s an interesting microbial drama taking place. Wild yeast
is living side by side with various strains of bacteria, and it’s the
bacteria that cause the sour avors as they metabolize sugars and
convert them into lactic acid or acetic acid. Di erent strains of bacteria
create di erent avors and aromas, which explains why breads made in
di erent parts of the world may have di erent avors even if they’re
made using the same formula.
From a functional standpoint, the role of the yeast is to leaven and
slightly acidify the bread by producing carbon dioxide and ethyl
alcohol, while the role of the bacteria is to acidify and avor the dough
and, to a lesser degree, create some carbon dioxide. This can be viewed
as a symbiotic relationship, since the organisms harmoniously share the
same environment and food source, and each supplements the work of
the other.
In a best-case scenario, the acidifying work of the bacteria lowers the
pH of the dough su ciently to create an ideal environment for the
growth of the desired strains of wild yeast. Of all the mysteries of bread
making, this symbiotic relationship is perhaps the most fascinating. As
the pH lowers to more acidic levels, commercial yeast doesn’t survive,
but wild yeast does. It all gets very complex, but fortunately this
complexity manifests itself in the nal avor, as it also does in great
cheeses and fine wines.
If you feel intimidated by making or using a sourdough starter,
realize that it’s simply a medium in which the microorganisms can live
and grow in order to create their important by-products: alcohol,
carbon dioxide, and acids. The job of the baker is to build the starter to
a size that’s capable of raising the dough. Combining the delayed
fermentation method used in this book with the complexity that a wild
yeast starter brings to the dough allows us to create extremely tasty
dough with many layers of avor—or, as one of my students calls it,
“Bread to the max!”
First Stage: The Seed Culture
This starter comes together in two stages: rst, you’ll create the seed
culture, then you’ll convert it to a mother starter. In the rst stage, you
aren’t making the starter that actually goes into your dough; you’re
making a starter (the seed) that makes another starter (the mother),
from which you’ll make your final dough.
There are many ways to make a seed culture. The simplest is with
just our and water. This does work, but not always on a predictable
schedule. I’ve seen methods on the Internet calling for onion skins, wine
grapes, plums, potatoes, milk, buttermilk, and yogurt. These can all
serve as fuel for the microorganisms, and all of them also work for
making a seed culture. But ultimately, a starter (and bread itself) is
really about fermented our. So in this book the goal is to create the
conditions in which the appropriate organisms can grow and thrive so
that they can create great-tasting bread.
The following method produces a versatile starter that can be used to
make 100 percent sourdough breads as well as mixed-method breads
(breads leavened with a combination of wild yeast starter and
commercial yeast). However, if you already have a starter or used a
di erent method to make a starter, feel free to use it. The starter can be
made from whole wheat our, unbleached white bread our, or whole
rye our. (Rye bread fanatics tend to keep a rye-only starter, but in my
opinion a wheat starter works just as well in rye breads.) If you already
have a nished starter, whether whole grain or white, it can be used as
have a nished starter, whether whole grain or white, it can be used as
the mother starter for any of the formulas in this book, as directed in
the various recipes.
You may wonder about the inclusion of pineapple juice in the early
stages of making the seed starter. Pineapple juice neutralizes a dastardly
bacteria that can sabotage your starter (this bacteria, leuconostoc, has
been showing up more often in our and I have written about it
extensively on my blog (see Resources). If you’re the mad scientist type,
as so many bread baking enthusiasts are, feel free to experiment with
other acids, such as ascorbic acid or citric acid, as in orange juice or
lemon juice.
One nal word of advice: If your seed culture doesn’t respond in
exactly the way described, on the exact schedule predicted, just give it
more time. In most instances, the good microbial guys eventually
prevail, allowing the seed to thrive and fulfill its mission.
3½ tablespoons (1 oz / 28.5 g) whole wheat flour, whole rye flour,
or unbleached bread flour
¼ cup (2 oz / 56.5 g) unsweetened pineapple juice, filtered water,
or spring water
In a small nonreactive bowl or 2-cup glass measuring cup, stir the
our and juice together with a spoon or whisk to make a paste or
sponge with the consistency of thin pancake batter. Make sure all of the
our is hydrated. (Transfer the remaining juice into a clean jar and
refrigerate it; or just go ahead and drink it.) Cover the bowl with plastic
wrap and leave it at room temperature for 48 hours. Two to three
times each day, stir the seed culture for about 10 seconds with a wet
spoon or whisk to aerate it. There will be few or no bubbles (indicating
fermentation activity) during the rst 24 hours, but bubbles may begin
to appear within 48 hours.
3½ tablespoons (1 oz / 28.5 g) whole wheat flour, whole rye flour,
or unbleached bread flour
2 tablespoons (1 oz / 28.5 g) unsweetened pineapple juice, filtered
water, or spring water
All of the Phase 1 seed culture (3 oz / 85 g)
Add the new ingredients to the Phase 1 seed culture and stir with a
spoon or whisk to distribute and fully hydrate the new our. (The
liquid can be cold or at room temperature; it doesn’t matter.) Again,
cover with plastic wrap and leave at room temperature for 24 to 48
hours, stirring with a wet spoon or whisk to aerate two or three times
each day. There should be signs of fermentation (bubbling and growth)
during this period. When the culture becomes very bubbly or foamy,
continue to Phase 3. This phase could take anywhere from 1 to 4 days.
As long as you aerate the seed culture regularly, it will not spoil or
develop mold.
7 tablespoons (2 oz / 56.5 g) whole wheat flour, whole rye flour,
or unbleached bread flour
2 tablespoons (1 oz / 28.5 g) filtered or spring water
All of the Phase 2 seed culture (5 oz / 142 g)
Add the new ingredients to the now bubbling Phase 2 seed culture
and stir with a spoon or whisk as before, or knead by hand. (The seed
culture will be thicker because the the ratio of liquid to our has
decreased with each addition.) Place it in a larger bowl or measuring
cup, cover with plastic wrap, and leave at room temperature for 24 to
48 hours, aerating with a wet spoon or whisk (or knead with wet
hands) at least twice each day. Within 48 hours the culture should be
very bubbly and expanded. If not, wait another day or two, continuing
to aerate at least twice a day, until it becomes active and doubles in
size. (If the seed culture was active and bubbly prior to entering this
phase, it could become active and bubbly in this stage in less than 24
hours. If so, proceed to the next phase as soon as that happens.)
10½ tablespoons (3 oz / 85 g) whole wheat flour, whole rye flour,
or unbleached bread flour
2 tablespoons (1 oz / 28.5 g) filtered or spring water
½ cup (4 oz / 113 g) Phase 3 seed culture
Measure out ½ cup (4 oz / 113 g) of the Phase 3 culture and discard
or give away the remainder (or save it for a second starter or as a
backup). Add the new ingredients to the ½ cup Phase 3 culture and mix
to form a soft dough. Again, cover with plastic wrap and leave at room
temperature until the culture becomes active. It should swell and
double in size. It can take anywhere from 4 to 24 hours for the Phase 4
culture to become fully active. If there is still little sign of fermentation
after 24 hours, leave it at room temperature until it becomes very
active, continuing to aerate the culture at least twice daily. The seed
culture should register between 3.5 and 4.0 if tested with pH paper.
(Wipe a small dab on the paper and match the color against the guide.)
When the culture has grown and smells acidic (somewhat like apple
cider vinegar) or has a pH of 4.0 or lower, you can either proceed to
the next stage or place the seed culture in the refrigerator for up to 3
days.
Second Stage: the Mother Starter
Once you’ve established a seed culture, you need to convert it into a
mother starter. This is the starter you’ll keep in your refrigerator
perpetually and use to build your actual bread dough. To convert a
seed culture into a mother starter, you’ll use the seed culture to
inoculate a larger batch of our and water to make a rm piece of
starter with the consistency of bread dough. The seed culture is full of
starter with the consistency of bread dough. The seed culture is full of
wild yeast and bacteria, but its structure has been weakened by the
buildup of acids and the ongoing activity of enzymes breaking down
both protien and starch. To make the mother starter strong enough to
function in a nal dough, you’ll build it with three times as much our
as seed culture (by weight). This 3-to-1 process will give the mother
starter about the same feel as a final dough.
A little starter goes a long way, so the following instructions call for
you to discard half of your seed culture or give it away. (This is great if
you know another home baker who would like to avoid the work of
making a seed culture.) Or if you’d prefer to keep a larger mother
starter on hand, especially if you bake often or in large batches, you can
convert the entire seed culture into a mother starter by doubling the
weight of the new our and water. (Some bakers like to split the seed
culture into two mother starters, one wheat and one rye, but unless you
are making a lot of rye bread on a regular basis, I think this is
unnecessary.)
2¾ cups (12 oz / 340 g) whole wheat flour, whole rye flour, or
unbleached bread flour
1 cup plus 2 tablespoons (9 oz / 255 g) filtered or spring water (or
8 oz / 227 g if using white flour)
¾ cup (4 oz / 113 g) Phase 4 seed culture (approximately half)
Combine all of the ingredients in the bowl of an electric mixer with
the paddle attachment and mix on slow speed for 1 minute. Or,
combine all of the ingredients in a bowl and use a large spoon or your
hands to mix until the ingredients form a rough, slightly sticky ball.
Transfer the starter to a lightly oured work surface and knead for 2
minutes, until the starter is fairly smooth and all of the ingredients are
evenly distributed.
Place the mother starter in a clean, lightly oiled nonreactive bowl,
crock, or plastic container large enough to contain the starter after it
doubles in size. Cover loosely with plastic wrap or a lid (don’t tighten
the lid, as the carbon dioxide gas will need to escape). Leave the starter
out at room temperature for 4 to 8 hours (or longer if needed), until it
doubles in size; the timing will depend on the ambient temperature
and the potency of your seed culture. Once it’s doubled, the starter
should register 4.0 or less if tested with pH paper and have a pleasant
acidic aroma.
When the starter is fermented, degas it by kneading it for a few
seconds, then form it back into a ball, cover tightly, and refrigerate.
After a few hours in the refrigerator, vent any carbon dioxide buildup
by brie y opening the lid or plastic wrap. The mother starter is now
ready to use and will be good for up to 5 days. To use it after 5 days,
you must refresh all or part of the mother starter, as described below.
Refreshing the Mother Starter
Whenever the mother starter gets low, rebuild it (also called feeding
or refreshing it) using 4 ounces (113 g) of the old starter and repeating
the instructions above. You can even start with as little as 1 ounce (28.5
the instructions above. You can even start with as little as 1 ounce (28.5
g) of mother starter and rebuild it in increments over a number of
feedings, using the same ratios as for a 4-ounce (113 g) batch. For
example, after a few weeks in the refrigerator, the protein and starches
will break down, giving the starter a structure or consistency of potato
soup. This is okay; the microorganisms are still viable, though fairly
dormant (and maybe even a little drunk on the alcohol they’ve
produced, which rises to the top and looks like gray water).
To rebuild your mother starter, use 1 ounce (28.5 g) of mother starter
and add 3 ounces (85 g) of our and 2 to 2.25 ounces (56.5 to 64 g) of
water. This will produce about 6 ounces (170 g) of starter. You can
then build all or part of that into a larger piece using the same ratios:
100 percent our, 33.3 percent starter, and 66 to 75 percent water. So
for 6 ounces (170 g) of starter, use 18 ounces (510 g) our (6
multiplied by 3) and 12 to 13.5 ounces (340 to 383 g) water (18
multiplied by 66 percent or 75 percent—lower hydration for all white
our, higher hydration for all whole grain our). As you see, you can
build a small piece of starter into a large piece very quickly.
CHAPTER 3
French Breads and Sourdough Hearth
Breads
breads of all types—including all of the variations on
French bread and Italian bread, as well as certain types of whole
Hearth-style
grain bread—are made from lean dough. This name re ects that
there are few or no enrichments, such as fats or sugars, in the dough
(with exceptions here and there). Breads made from lean dough are
characterized by a hard crust and a toothsome texture, so much so that
in some books this category is referred to as hard dough. The hard crust
is caused by the gluten protein in the our, which hasn’t been
tenderized by mixing in shortening or fat.
This chapter focuses on lean dough breads based on the mixing and
fermentation process in the rst recipe, using a method that’s similar to
some of the no-knead recipes that have appeared in recent books. The
dough isn’t quite like traditional or classic French bread dough, but
you’ll nd that the modi cations in this recipe produce superior bread.
This will enable you to make French-style bread of fantastic quality
with very little work. For maximum ease and best results, be sure to
review the specific mixing, handling, and shaping skills illustrated.
MAKES 2 LARGE LOAVES, 4 TO 6 SMALLER LOAVES, OR UP TO 24 ROLLS
Because the methods in this book balance time, temperature, and
ingredients, you don’t need an array of pre-ferments to accomplish full
development of the avor and texture of the bread. Time does most of
the work through slow, cold overnight fermentation. This formula
di ers from similar approaches in other recent books by using less
yeast, giving the bread better avor and caramelization, or coloring, of
the crust. The dough will keep in the refrigerator for up to a week, but
after about 4 days the quality starts to decline. If you want to make a
full-size batch and save some of the unbaked dough for longer than a
week, place the dough in one or more lightly oiled freezer bags after
the initial overnight fermentation, seal tightly, and freeze. To thaw,
place the bag of dough in the refrigerator the day before you need it so
that it can thaw slowly, without overfermenting. This dough also makes
excellent pizza crust (see other variations and for shaping instructions).
5⅓ cups (24 oz / 680 g) unbleached bread flour
2 teaspoons (0.5 oz / 14 g) salt, or 1 tablespoon coarse kosher salt
2 teaspoons (0.22 oz / 6 g) instant yeast
2¼ cups (18 oz / 510 g) lukewarm water (about 95°F or 35°C)
DO AHEAD
Combine all of the ingredients in a mixing bowl. If using a mixer, use
the paddle attachment and mix on the lowest speed for 2 minutes. If
mixing by hand, use a large spoon and stir for 2 minutes, until well
blended. If the spoon gets too doughy, dip it in a bowl of warm water.
The dough should be very soft, sticky, coarse, and shaggy, but still
doughlike. Use a wet bowl scraper or spatula to transfer the dough to a
clean, lightly oiled bowl. Let the dough rest for 5 minutes.
To stretch and fold the dough in the bowl, with wet or oiled hands or
a wet bowl scraper, reach under the front end of the dough, stretch it
out, then fold it back onto the top of the dough. Do this from the back
end and then from each side, then ip the dough over and tuck it into a
ball. The dough should be signi cantly rmer, though still very soft and
fragile. Cover the bowl with plastic wrap and let the dough sit at room
temperature for 10 minutes. Repeat this stretch and fold process three
more times, completing all repetitions within 40 to 45 minutes. The
dough will be a little rmer than when rst mixed and the shaggy
texture will have smoothed out somewhat, but it will still spread out to
fill the bowl.
After the nal stretch and fold, return the dough to the lightly oiled
bowl, and immediately cover the bowl tightly and refrigerate overnight
or for up to 4 days. The dough will rise to about double, and possibly
triple, its original size within 4 to 12 hours in the refrigerator. (If you
plan to bake the dough in batches over di erent days, you can portion
the dough and place it into two or more oiled bowls at this stage.)
ON BAKING DAY
Remove the dough from the refrigerator about 2 hours before you
plan to bake. Rub the work surface with a few drops of olive or
vegetable oil, then use a wet bowl scraper or wet hands to transfer the
vegetable oil, then use a wet bowl scraper or wet hands to transfer the
dough to the work surface. Divide the dough in half (about 21 oz or
595 g each) for two large loaves; into 4 to 6 pieces for smaller loaves;
or into 18 to 24 pieces for rolls.
Line a sheet pan with parchment paper or a silicone mat, then mist it
lightly with spray oil or dust it with our, semolina, or cornmeal. (If
using a banneton or proo ng mold, mist it with spray oil, then dust it
with our.) Have a small bowl of bread our standing by. With oured
hands, gently pat the dough pieces into rectangles, then stretch it into
torpedos), boules, or loaves, or shape it into rolls. With oured hands,
gently lift the dough and place it seam side down on the prepared pan
(or seam side up in the proo ng mold). If air bubbles form, pinch the
surface to pop them. Mist the surface of the dough with spray oil and
cover loosely with plastic wrap or a towel.
Let the shaped dough sit, covered, at room temperature for 60
minutes. Then, remove the covering and let the dough proof for an
additional 60 minutes. The dough will spread slightly and the skin will
begin to dry out a bit.
About 45 minutes before baking, preheat the oven to 550°F (288°C)
or as high as it will go, and prepare the oven for hearth baking.
Just before baking, score the dough with a sharp serrated knife or
razor blade. The dough will have spread somewhat but should still
have its basic shape, and the shape should spring back in the oven. (If
using a banneton or proo ng mold, remove the dough from the basket
at this stage.) Transfer the dough to the oven, pour 1 cup of hot water
into the steam pan, then lower the oven temperature to 450°F (232°C),
or 425°F (218°C) for a convection oven.
Bake for 10 to 12 minutes, then rotate the pan and bake for another
10 to 15 minutes, until the crust is a rich golden brown and the internal
temperature is 200°F to 205°F (93°C to 94°C). For a crisper crust, turn
o the oven and leave the bread in for another 5 to 10 minutes before
removing (rolls will take less time). Cool the bread on a wire rack for
at least 1 hour before slicing or serving.
MAKES 2 LARGE LOAVES, 4 SMALL LOAVES, OR MANY ROLLS
This version of French bread is the simplest formula in the book. It uses
the cold fermentation technique, and the resulting dough actually holds
the shape and cuts of conventional French baguettes, bâtards, and
boules better than the lean dough, which is wetter. Because the dough
isn’t as wet, it’s especially important to handle it with a rm but light
touch. Too much pressure will squeeze out the gas trapped during the
overnight rise, resulting in small, even holes rather than the prized
large, irregular holes. I’ve also included a variation that makes
spectacular loaves with a distinctive blistered crust.
5⅓ cups (24 oz / 680 g) unbleached bread flour
2 teaspoons (0.5 oz / 14 g) salt, or 1 tablespoon coarse kosher salt
2¼ teaspoons (0.25 oz / 7 g) instant yeast
2 cups (16 oz / 454 g) lukewarm water (about 95°F or 35°C)
DO AHEAD
Combine all of the ingredients in a mixing bowl. If using a mixer, use
the paddle attachment and mix on the lowest speed for 1 minute. If
mixing by hand, use a large spoon and stir for 1 minute, until well
blended and smooth. If the spoon gets too doughy, dip it in a bowl of
warm water. The dough should form a coarse shaggy ball. Let it rest,
uncovered, for 5 minutes.
Switch to the dough hook and mix on medium-low speed for 2
minutes or knead by hand for about 2 minutes, adjusting with our or
water as needed. The dough should be smooth, supple, and tacky but
not sticky.
Whichever mixing method you use, knead the dough by hand on a
lightly oured work surface for about 1 minute more, then transfer it to
a clean, lightly oiled bowl. Cover the bowl with plastic wrap, then
immediately refrigerate overnight or for up to 4 days. If the dough feels
too wet and sticky, do not add more our; instead, stretch and fold it
one or more times at 10-minute intervals, before putting it in the
refrigerator. (If you plan to bake the dough in batches over di erent
days, you can portion the dough and place it into two or more oiled
bowls at this stage.)
On Baking Day
Remove the dough from the refrigerator about 2 hours before you
plan to bake. Gently transfer it to a lightly oured work surface, taking
care to degas it as little as possible. For baguettes and bâtards, divide
the cold dough into 10-ounce (283 g) pieces; for 1 pound boules, divide
the dough into 19-ounce (53 g) pieces; and for freestanding loaves, use
whatever size you prefer.
Form the dough into bâtards and/or baguettes (see pages 21 and 22)
or boules. Mist the top of the dough with spray oil, loosely cover with
plastic wrap, and proof at room temperature for about 1½ hours, until
increased to 1½ times its original size.
About 45 minutes before baking, preheat the oven to 550°F (288°C)
or as high as it will go, and prepare the oven for hearth baking.
Remove the plastic wrap from the dough 15 minutes prior to baking;
if using proofing molds, transfer the dough onto a floured peel.
Just prior to baking, score the dough ½ inch deep with a serrated
knife or razor. Transfer the dough to the oven, pour 1 cup of hot water
into the steam pan, then lower the oven temperature to 450°F (232°C).
Bake for 12 minutes, then rotate the pan and bake for another 15 to
25 minutes, until the crust is a rich golden brown, the loaves sound
hollow when thumped, and the internal temperature is about 200°F
(93°C) in the center. For a crisper crust, turn o the oven and leave the
bread in for another 5 minutes before removing.
Cool the bread on a wire rack for at least 45 minutes before slicing or
serving.
VARIATION
By simply varying the method so that the shaped loaves undergo cold
fermentation, rather than the freshly mixed bulk dough, you can create
a spectacular loaf with a distinctive blistered crust. After the dough is
mixed and placed in a clean, oiled bowl, let it rise at room temperature
for about 90 minutes, until doubled in size. Divide and shape as
described above, mist with spray oil, then cover the shaped dough
loosely with plastic wrap and refrigerate it overnight, away from
anything that might fall on it or restrict it from growing.
The next day, remove the dough from the refrigerator 1 hour before
baking. It should have grown to at least 1½ times its original size.
Prepare the oven for hearth baking. While the oven is heating, remove
the plastic wrap and let the dough sit uncovered for 10 minutes. Score
the dough while it’s still cold, then bake as described above.
MAKES 2 LARGE CIABATTA LOAVES, 3 SMALL CIABATTA LOAVES, OR 6 TO 8 MINI
BAGUETTES
I first introduced the concept of cold-fermented wet dough in The Bread
Baker’s Apprentice. While the idea isn’t new or original, it has
blossomed during the past few years into various no-knead, overnightrise permutations. I now prefer the version in this recipe because it
gives the best avor and also provides the most exibility for
scheduling. The refrigerator provides a 4-day window of baking
opportunity, and that’s hard to beat. The beauty of this dough, as others
have discovered, is that it can be used in so many ways: for focaccia,
ciabatta, mini baguettes, and more. (Because the method for shaping
this dough into focaccia is substantially di erent, it appears as a
separate recipe.) And even though it’s the most hydrated dough in this
book, it requires only minimal mixing to achieve the same gluten
strength as bakeries obtain by mixing continuously for 20 minutes, due
to the stretch and fold technique.
4½ cups (20 oz / 567 g) unbleached bread flour
1¾ teaspoons (0.4 oz / 11 g) salt, or 2½ teaspoons coarse kosher
salt
1¼ teaspoons (0.14 oz / 4 g) instant yeast
2 cups (16 oz / 454 g) chilled water (about 55°F or 13°C)
1 tablespoon (0.5 oz / 14 g) olive oil (for ciabatta only)
DO AHEAD
Combine the our, salt, yeast, and water in a mixing bowl. If using a
Combine the our, salt, yeast, and water in a mixing bowl. If using a
mixer, use the paddle attachment and mix on the lowest speed for 1
minute. If mixing by hand, use a large spoon and stir for about 1
minute, until well blended. The dough should be coarse and sticky. Let
the dough rest for 5 minutes to fully hydrate the flour.
If making ciabatta, drizzle the olive oil over the dough; if making
mini baguettes, omit the oil. Then mix on medium-low speed using the
paddle attachment, or by hand using a large, wet spoon or wet hands,
for 1 minute. The dough should become smoother but will still be very
soft, sticky, and wet. Use a wet bowl scraper or spatula to transfer the
dough to a clean, lightly oiled bowl. Cover the bowl with plastic wrap
and let the dough rest at room temperature for 10 minutes.
Transfer the dough to a lightly oiled work surface. With wet or oiled
hands, reach under the front end of the dough, stretch it out, then fold it
back onto the top of the dough. Do this from the back end and then
from each side, then ip the dough over and tuck it into a ball. The
dough should be signi cantly rmer, though still very soft and fragile.
Place the dough back in the bowl, cover, and let sit at room
temperature for 10 minutes. Repeat this process three more times,
completing all repetitions within 40 minutes. (You can also perform
the stretch and folds in the bowl.
After the nal stretch and fold, immediately cover the bowl tightly
and refrigerate overnight or for up to 4 days. The dough will rise,
possibly to double its original size, in the refrigerator. (If you plan to
bake the dough in batches over di erent days, you can portion the
dough and place it into two or more oiled bowls at this stage.)
To stretch and fold the dough on the work surface, lightly oil the surface and your hands, then transfer the dough
to the surface. Stretch one end of the dough out then fold it back over the top of the dough. Do this from all four
sides then place the dough back in the bowl and let sit for 10 minutes. Repeat this process three move times. You
will feel the dough become significantly firmer.
ON BAKING DAY
Remove the dough from the refrigerator about 1 hour before baking
for mini baguettes, and 3 hours in advance for ciabatta (or an hour
earlier if the dough hasn’t increased to 1½ times its original size in the
refrigerator overnight).
To make ciabatta, about 1 hour after taking the dough out of the
refrigerator, line the back of a sheet pan with parchment paper and
generously dust the entire surface with our. Use a wet or oiled bowl
scraper to transfer the dough to the work surface, taking care to handle
the dough as little as possible to avoid degassing it.
Dust the top surface of the dough with our and also our your
hands. Using your hands or a metal pastry scraper, gently coax and pat
the dough into a rough square measuring about 9 inches on each side,
still taking care to degas it as little as possible.
For small ciabatta, cut the dough into 3 even strips about 3 inches
wide and 9 inches long (the pieces will each weigh about 12 ounces or
340 grams). For larger ciabatta, cut the dough in half. With oured
hands, gently fold the dough in thirds, like folding a letter but without
applying any pressure. Gently roll the folded dough in the dusting our
to coat it, then lift the dough and place it on the parchment paper,
again rolling it in the dusting our on the parchment. Rest the dough
seam side down on the parchment and repeat with the other pieces of
dough.
Mist the tops of the dough pieces with spray oil and loosely cover the
pan with plastic wrap or a clean, lint-free towel. After 1 hour, gently
roll the pieces over so the seam side is up, lift and cradle each piece
with floured hands, and, working from the underside, gently coax it to a
length of 5 inches (for small ciabatta) to 7 inches (for large ciabatta).
Lay the pieces back on the parchment seam side up. Straighten the
sides of each piece with your hands or a pastry scraper so that they are
more rectangular than oblong, mist with spray oil again, then cover
loosely and proof for 1 hour more.
About 45 minutes before baking, preheat the oven to 550°F (288°C)
or as high as it will go, and prepare the oven for hearth baking.
Slide the dough, parchment and all, onto the stone; if you aren’t using
a baking stone, simply put the whole pan into the oven. Pour 1 cup of
hot water into the steam pan, then lower the oven temperature to
450°F (232°C).
Bake for 12 minutes, then rotate the pan and bake for 15 to 20
minutes more, until the crust is a rich brown (streaked with the dusting
flour). The bread should puff a little, and the crust should be hard when
tapped (it’ll soften as it cools). Cool on a wire rack for 45 minutes
before slicing.
To make mini baguettes, about 45 minutes before baking, preheat
the oven to 550°F (288°C), or as high as it will go, and prepare the
oven for hearth baking. After the dough has been out for 1 hour,
generously dust the entire surface of a wooden peel with our or line
the back of a sheet pan with parchment paper (you can either dust the
parchment with our or mist it with spray oil so that you can slide and
move the dough if need be). Use a wet or oiled bowl scraper to transfer
the dough from the bowl to the work surface, taking care to handle the
dough as little as possible to avoid degassing it.
Dust the top surface of the dough with our and also our your
hands. Using your hands or a metal pastry scraper, gently coax and pat
the dough into a rough square about 8 inches on each side, still taking
care to degas it as little as possible.
Cut o a slice of dough about 1½ inches wide and roll it into the
dusting our to lightly coat it and keep it from sticking to the
remainder of the dough. Working with oured hands and tools,
carefully transfer the slice to the prepared peel or parchment paper,
cradling it with both hands to keep it from stretching too much. You
can straighten it by spreading your hands underneath the dough as you
can straighten it by spreading your hands underneath the dough as you
lay it down; it should elongate slightly, to 9 to 10 inches.
Repeat with the rest of the dough, placing the pieces 1 inch apart,
until the peel or parchment is full. If you can’t t all of the pieces on
the peel or parchment, bake those that are ready before cutting the
remainder. It’s better to work in manageable batches than to try to cram
all of them in the oven, especially if your stone or oven won’t easily
hold all of them. Scoring the dough is an option, but because it risks
degassing the dough, I advise against it until you have made these a few
times.
Slide the mini baguettes onto the baking stone using short, quick
back-and-forth motions with the peel, or by sliding the parchment
paper onto the stone. Pour ½ cup of hot water into the steam pan, then
lower the oven temperature to 475°F (246°C).
Bake for 12 to 18 minutes total, rotating the pan as needed for even
browning. The crust should be a rich brown, the loaves should pu a
little, and the crust should be hard when tapped (the crust will soften
slightly as the bread cools).
Cool on a wire rack for at least 15 minutes.
VARIATION
For an interesting ciabatta texture and a nice design on the surface of
the bread, mix a small amount of coarse rye our or whole wheat our
in with the dusting flour.
MAKES 1 LARGE FOCACCIA OR UP TO 4 ROUNDS
Although this formula is exactly the same as the preceeding pain à
l’ancienne rustic bread recipe, the method is quite di erent. This
focaccia dough is also quite similar to the pizza doughs in this book, the
main difference being the amount of hydration. Focaccia is wetter, at 80
percent hydration, because it has the bene t of rising and baking in a
pan to provide structural support, whereas pizza dough is closer to 70
percent hydration so that it can be handled and stretched. In both cases,
the dough should be slightly sticky, not just tacky. Focaccia dough is so
wet that it’s best to use olive oil to handle it, whereas our works just
ne with pizza dough. You can also bake a smaller, round focaccia (see
photograph).
4½ cups (20 oz / 567 g) unbleached bread flour
1¾ teaspoons (0.4 oz / 11 g) salt, or 2½ teaspoons coarse kosher
salt
1¼ teaspoons (0.14 oz / 4 g) instant yeast
2 cups (16 oz / 454 g) chilled water (about 55°F or 13°C)
1 tablespoon (0.5 oz / 14 g) olive oil, plus more for the pan
DO AHEAD
Combine the our, salt, yeast, and water in a mixing bowl. If using a
mixer, use the paddle attachment and mix on the lowest speed for 1
minute. If mixing by hand, use a large spoon and stir for about 1
minute, until well blended. The dough should be coarse and wet. Let
the dough rest for 5 minutes to fully hydrate the flour.
Drizzle the olive oil over the dough, then resume mixing on mediumlow speed using the paddle attachment, or by hand using a large wet
spoon or wet hands, for 1 minute. The dough should become smoother
but will still be very soft, sticky, and wet. Use a wet bowl scraper or
spatula to transfer the dough to a clean, lightly oiled bowl. Cover the
bowl with plastic wrap and let the dough rest at room temperature for
10 minutes.
Transfer the dough to a lightly oiled work surface. With wet or oiled
hands, reach under the front end of the dough, stretch it out, then fold it
back onto the top of the dough. Do this from the back end and then
from each side, then ip the dough over and tuck it into a ball. The
dough should be signi cantly rmer, though still very soft and fragile.
Place the dough back in the bowl, cover, and let sit at room
temperature for 10 minutes. Repeat this entire process three more
times, completing all repetitions within 30 to 40 minutes. (You can also
do the stretch and folds in the bowl.
After the nal stretch and fold, return the dough to the oiled bowl
and immediately cover the bowl tightly and refrigerate overnight or for
up to 4 days, or pan it immediately (as described below).
To make 1 large focaccia, line a 12 by 16-inch sheet pan with
parchment paper or a silicone mat. Oil it generously, including the
sides, with about 2 tablespoons of olive oil, then transfer the dough to
the pan. Drizzle another tablespoon of oil over the top of the dough,
then use your ngertips to dimple the dough and spread it to cover
about half of the pan. Make sure the top of the dough is coated with
oil, then cover the pan (not the dough) tightly with plastic wrap and
immediately place the pan in the refrigerator overnight or for up to 4
days.
For round focaccia, cut out a piece of parchment paper to t inside
an 8- or 9-inch round pan. Oil both the parchment and the sides of the
pan with 1 tablespoon of olive oil, then transfer the dough to the pan.
For an 8-inch pan, use 8 ounces (227 g) of dough; for a 9-inch pan, use
12 ounces (340 g) of dough. Drizzle 1 teaspoon of olive oil over the top
of the dough, then use your ngertips to dimple the dough and spread
it as far as it will allow. Don’t force the dough when it starts to spring
back. Cover the pan (not the dough) tightly with plastic wrap and
immediately place the pan in the refrigerator overnight or for up to 4
days.
ON BAKING DAY
Remove the dough from the refrigerator about 2½ hours before you
plan to bake, and if you haven’t already panned it, follow the
instructions above to do so, spreading it to cover a portion of the pan.
Warm the oven for just a few minutes, then turn it o ; or, if you have
a gas oven with a pilot light, it’s warm enough without any heating.
Drizzle a small amount of olive oil on the surface of the dough and,
beginning in the center and working toward the sides, dimple the
dough with your ngertips to spread it over more of the pan. The
dough will start resisting and sliding back toward the center after a
minute of this; stop dimpling at that point. It should now be covering
70 to 80 percent of the pan. Cover the pan with plastic wrap and put it
in the warm oven (with the heat o !). For a gas oven with a pilot light,
leave the focaccia in for just 5 minutes. Otherwise, leave it in for about
8 minutes. (If you have plenty of time, you can simply let the dough
rest at room temperature for 30 minutes between dimplings, which will
require a total of about 4 hours prior to baking.)
After the focaccia has been out of the oven for 10 minutes, remove
the plastic wrap, drizzle another small amount of olive oil over the
dough, and dimple it again. This time it should cover about 90 percent
of the pan. Cover it again and return it to the warm oven for 5 minutes
in a gas oven with a pilot light or 10 to 20 minutes for any other type
of oven. On the third dimpling (if not the second), the dough should
evenly ll the entire pan. If it creeps in from the corners because of the
oil, don’t worry; it will ll the corners as it rises. Cover the pan with
plastic wrap and proof the dough in the slightly warm oven as before,
removing it after 5 to 10 minutes and completing the rise at room
temperature. It should be about 1 inch high in 1 to 11/2 hours (longer
if not using the oven).
Preheat the oven to 500°F (260°C). (You don’t need a baking stone,
but if you’d like to use one, allow 45 minutes for it to preheat.) Top
the focaccia with your choice of toppings (see topping ideas), but wait
until the end of the baking time to add any cheese.
Place the pan in the oven. For large focaccia, lower the oven
temperature to 450°F (232°C) and bake for 12 minutes. Rotate the pan
and bake for another 10 to 15 minutes, until the top of the dough is
golden brown. For round focaccia, keep the oven temperature at 500°F
(260°C) and bake for 10 to 12 minutes. If you use moist toppings, such
as fresh tomatoes or sauce, the focaccia will take longer to bake. To test
for doneness, use a metal spatula to lift the edge of the focaccia so you
can see the underside; it should be a mottled golden brown in spots,
not white all over. If you’re topping the focaccia with cheese, add it
when the focaccia appears to be done, then bake for another 2 to 4
minutes to melt the cheese.
When you remove the focaccia from the oven, run a pastry blade or
metal spatula along the sides of the pan to loosen the focaccia, then
carefully slide the focaccia, parchment and all, onto a wire rack. If any
olive oil remains in the pan, pour it over the top of the focaccia. Cool
for at least 10 minutes before serving.
MAKES 1 LARGE LOAF OR 2 SMALL LOAVES
Pain au levain, which is the French term for naturally leavened bread, is
generally considered to be the gold standard for wild yeast breads,
though opinions do vary widely—and are strongly held. People from
San Francisco, portland, New York, Boston, anywhere in Germany
(where it is called Sauerteig), and many other cities and regions may
dispute the superiority of the French version. In fact, there isn’t one
single version of pain au levain; it’s really a category of bread, usually
consisting primarily of white our, supplemented with a small amount
of whole wheat our, rye our, or a multigrain our. To complicate
matters further, some “authentic” French levains are made with allnatural starter, while others use a combination of starter and
commercial yeast (usually just a small amount). In this book, I use the
term pain au levain to indicate breads that are naturally leavened,
either with or without the addition of commercial yeast, using
anywhere from 5 to 20 percent whole grain flour.
In the process of developing the formulas for Peter Reinhart’s Whole
Grain Breads, I discovered a method of mixing natural starters with
commercial yeast that seems to work especially well for home baking
and small batches. By increasing the amount of starter and commercial
yeast in the nal dough, it’s possible to make breads with all of the
avor development of the great levains, but with a shortened proo ng
stage at the end. As with most of the breads in this book, the cold,
overnight fermentation method also extends the life of the dough to at
least 3 days, with avors that are even more developed on the third day
than on the rst. Although this unconventional recipe is unlike anything
you’ll nd in other books, it follows and ful lls the avor rule (that is,
flavor rules!).
As with the San Francisco sourdough, you can make this bread
leavened only with natural starter (the “purist” method), or you can add
instant yeast to the nal dough (the mixed method). If you want to use
the “purist” method and bake the bread on the same day as you mix the
dough, don’t refrigerate the nal dough; just let it rest at room
temperature for about 4 hours, or until it doubles in size. Then, shape
and proof it at room temperature for about 1½ to 2 hours, and bake as
described below.
SOURDOUGH STARTER
⅓ cup (2.5 oz / 71 g) mother starter, cold or at room temperature
1 cup plus 2 tablespoons (5 oz / 142 g) unbleached bread flour
⅔ cup (3 oz / 85 g) whole wheat flour
⅔ cup (5.35 oz / 151.5 g) water, at room temperature
DOUGH
All of the sourdough starter (16 oz / 458 g)
1 cup plus 6 tablespoons (11 oz / 312 g) lukewarm water (about
95°F or 35°C)
2¼ teaspoons (0.25 oz / 7 g) instant yeast (optional)
3½ cups (16 oz / 454 g) unbleached bread flour
2⅜ teaspoons (0.6 oz / 17 g) salt, or 3½ teaspoons coarse kosher
salt
DO AHEAD
To make the starter, combine all of the ingredients in a mixing bowl.
If using a mixer, use the paddle attachment and mix on the lowest
speed for 1 minute, then increase to medium speed for about 30
speed for 1 minute, then increase to medium speed for about 30
seconds. If mixing by hand, use a large spoon and stir for about 2
minutes, until well blended. The starter should feel doughlike and tacky
or slightly sticky; if not, stir in additional flour or water as needed.
Transfer the starter to a lightly oured work surface and knead for
about 30 seconds. Place it in a clean, lightly oiled bowl, cover the bowl
loosely, and leave at room temperature for 6 to 8 hours, until the
starter increases to about 1½ times its original size. If you plan to use
the starter the same day, allow 1 more hour of fermentation so that it
nearly doubles in size. Otherwise, put the starter in the refrigerator for
up to 3 days.
To make the dough, cut the starter into 10 to 12 pieces and put them
in a mixing bowl. Pour in the water, then add the yeast (unless you’re
making the “purist” version) and mix with the paddle attachment on
the lowest speed or by hand with a large spoon for about 1 minute to
soften the starter. Add the flour and salt.
Switch to the dough hook and mix on the lowest speed, or continue
mixing by hand, for 3 minutes, to form a coarse ball of dough that’s
very tacky and slightly warm. Let the dough rest for 5 minutes.
Resume mixing on medium-low speed for 3 minutes more or knead
by hand for 3 minutes, adding more our or water as needed to make a
soft, supple, and tacky but not sticky ball of dough.
Knead the dough by hand for a few seconds, then form it into a ball.
Let the dough sit uncovered for 10 minutes, then do a stretch and fold,
either on the work surface or in the bowl, reaching under the front end
of the dough, stretching it out, then folding it back onto the top of the
dough. Do this from the back end and then from each side, then ip the
dough over and tuck it into a ball. Cover the dough and let it rest for 10
minutes. Repeat this entire process two more times, completing all
repetitions within 30 minutes. Immediately form the dough into a ball,
place it in a clean, lightly oiled bowl large enough to contain the dough
when it doubles in size, and cover the bowl tightly.
If using the mixed method with instant yeast, refrigerate the dough
immediately. If making the “purist” version, without instant yeast, let
the dough sit at room temperature for 2 hours before refrigerating; it
won’t rise very much, but it should show signs of growth and continue
won’t rise very much, but it should show signs of growth and continue
to rise in the refrigerator. Either version will be ready to use the next
day and for up to 4 days. (If you plan to bake the dough in batches over
di erent days, you can portion the dough and place it into two or more
oiled bowls at this stage.)
ON BAKING DAY
For the “purist” version, remove the dough from the refrigerator
about 4 hours before you plan to bake; after 2 hours, shape it (see
chapter 1 for shaping and proo ng instructions), then let it proof for 2
hours before baking. For the mixed method, remove the dough from
the refrigerator 2 hours prior to baking and shape it right away.
Remove only the portion you wish to bake: 19 ounces (539 g) for a 1pound (454 g) loaf; 28 ounces (794 g) for a 1½-pound (680 g) loaf, and
so on. You can also bake the entire amount of dough as a large, 3pound (1.36 kg) miche (round country loaf) or as a large torpedo loaf.
Gently transfer it from the bowl to a lightly oured work surface, being
careful to degas it as little as possible. See chapter 1 for shaping and
proo ng instructions. The shaped dough won’t increase in size very
much, but it will begin to swell and grow. If it grows to 1½ times its
original size in less than 2 hours, move on to the scoring and baking
stage.
If using a baking stone, about 45 minutes before baking preheat the
oven to 500°F (260°C) and prepare the oven for hearth baking.
Otherwise, just preheat the oven to 500°F (260°C) about 20 minutes
before baking.
Just before baking, score the dough in whatever style of design you
prefer. Transfer the dough to the oven, pour 1 cup of hot water into the
steam pan, then lower the oven temperature to 450°F (232°C), or to
425°F (218°C) if baking a large miche.
Bake for 12 minutes, then rotate the pan and continue baking for 15
to 25 minutes, or longer, depending on the size of the loaf; a large
miche could take up to 75 minutes to bake. When fully baked, the crust
should have a rich, caramelized color; the loaf should sound hollow
when thumped on the bottom; and the internal temperature should be
when thumped on the bottom; and the internal temperature should be
about 200°F (90°C) in the center.
Cool on a wire rack for at least 1 hour before slicing or serving.
MAKES 2 LARGE LOAVES, 3 SMALLER LOAVES, OR MANY ROLLS
I’ve developed two ways to make San Francisco-style sourdough bread
using the overnight method. The “purist” method of making sourdough
breads uses no commercial yeast and produces a avor that’s tart,
acidic, and complex. The mixed method uses instant yeast to produce a
nished loaf more quickly; because of the reduced fermentation time, it
yields less acidity and sourness. Both versions are excellent. To use the
wild yeast starter, build and ripen your starter at least 1 day and not
more than 3 days prior to making the final dough.
Of course, if you don’t live in San Francisco, this won’t be true San
Francisco sourdough bread because it won’t contain a large
concentration of the microorganisms associated with the Bay Area,
especially the famous Lactobacillus sanfranciscensis (these organisms do
exist in sourdoughs everywhere, but not to the same extent as they do
in and around San Francisco). However, this style of sourdough, made
with all unbleached white bread our, has become so closely associated
with San Francisco that I call it San Francisco sourdough to distinguish
it from the French pain au levain, which contains a small amount of
whole grain our. That said, any number of pain au levain variations
can be made by simply substituting whole grain or other ours for
some of the white flour.
WILD YEAST STARTER
¼ cup (2 oz / 56.5 g) mother starter, cold or at room temperature
1¾ cups (8 oz / 227 g) unbleached bread flour
½ cup plus 2 tablespoons (5 oz / 142 g) water, at room
½ cup plus 2 tablespoons (5 oz / 142 g) water, at room
temperature
DOUGH
All of the wild yeast starter (15 oz / 425 g)
1¾ cups (14 oz / 397 g) lukewarm water (about 95°F or 35°C)
4½ cups (20 oz / 567 g) unbleached bread flour
2½ teaspoons (0.63 oz / 18 g) salt, or 3½ teaspoons coarse kosher
salt
2¼ teaspoons (0.25 oz / 7 g) instant yeast (optional)
DO AHEAD
To make the starter, combine all of the ingredients in a mixing bowl.
If using a mixer, use the paddle attachment and mix on the lowest
speed for 1 minute, then increase to medium speed for about 30
seconds. If mixing by hand, stir for about 2 minutes, until well blended.
The starter should feel doughlike and tacky or slightly sticky; if not, stir
in additional flour or water as needed.
Transfer the starter to a lightly oured work surface and knead for
about 30 seconds. Place it in a clean, lightly oiled bowl, cover the bowl
loosely, and leave at room temperature for 6 to 8 hours, until the
starter increases to about 1½ times its original size. If you plan to use
the starter the same day, allow 1 more hour of fermentation so that it
nearly doubles in size. Otherwise, put the starter in the refrigerator for
up to 3 days.
To make the dough, cut the starter into 10 to 12 pieces and put them
in a mixing bowl. Pour in the water and mix with the paddle
attachment on the lowest speed or with a large spoon for about 1
minute to soften the starter.
Add the our and salt, as well as the yeast (unless you’re making the
“purist” version). Switch to the dough hook and mix on the lowest
“purist” version). Switch to the dough hook and mix on the lowest
speed, or continue mixing by hand, for 2 minutes, to form a coarse ball
of dough that’s very tacky and slightly warm. Let the dough rest for 5
minutes.
Mix on medium-low speed or by hand for 4 minutes more, adding
our or water as needed to make a soft, supple, slightly sticky ball of
dough.
Transfer the dough to a lightly oured work surface and knead by
hand for 1 minute, then form it into a ball. Let the dough sit uncovered
for 10 minutes, then do a stretch and fold, either on the work surface or
in the bowl, reaching under the front end of the dough, stretching it out,
then folding it back onto the top of the dough. Do this from the back
end and then from each side, then ip the dough over and tuck it into a
ball. Cover the dough and let it rest for 10 minutes. Do another stretch
and fold, then immediately form the dough into a ball, place it in a
clean, lightly oiled bowl large enough to contain the dough when it
doubles in size, and cover the bowl.
If using the mixed method with instant yeast, refrigerate the dough
immediately. If making the “purist” version, without instant yeast, let
the dough sit at room temperature for 1½ to 2 hours before
refrigerating; it won’t rise very much, but it should show signs of
growth and continue to rise in the refrigerator. Either version will be
ready to use the next day and for up to 3 days. (If you plan to bake the
dough in batches over di erent days, you can portion the dough and
place it into two or more oiled bowls at this stage.)
ON BAKING DAY
For the “purist” version, remove the dough from the refrigerator
about 4 hours before you plan to bake; after 2 hours, shape it (see
instructions for lean bread), then let it proof for 2 hours before baking.
For the mixed method, remove the dough from the refrigerator 2 hours
prior to baking and shape it right away. Remove only the portion you
wish to bake: 19 ounces (539 g) for a 1-pound (454 g) loaf; 28 ounces
(794 g) for a 1½-pound (680 g) loaf, and so on. You can also bake the
entire amount of dough as a large, 3-pound (1.36 kg) miche (round
entire amount of dough as a large, 3-pound (1.36 kg) miche (round
country loaf) or as a large torpedo loaf. See chapter 1 for instructions.
Proof for 2 hours as a freestanding loaf, in oured proo ng baskets,
or on proo ng cloths. The dough should increase in size to 1½ times its
original size and be springy yet hold an indentation when pressed with
a finger. It may spread as it rises, but it will grow taller as it bakes.
If using a baking stone, about 45 minutes before baking preheat the
oven to 500°F (260°C) and prepare the oven for hearth baking.
Otherwise, just preheat the oven to 500°F (260°C) about 20 minutes
before baking.
Just before baking, score the dough with whatever style of design you
prefer. Transfer the dough to the oven, pour 1 cup of hot water into the
steam pan, then lower the oven temperature to 450°F (232°C), or to
425°F (218°C) if baking a large miche.
Bake for 12 minutes, then rotate the pan and continue baking for 15
to 35 minutes, or longer, depending on the size of the loaf; a large
miche could take up to 75 minutes to bake. When fully baked, the crust
should have a rich, caramelized color, the loaf should sound hollow
when thumped on the bottom, and the internal temperature should be
about 200°F (90°C) in the center. Cool on a wire rack for at least 1 hour
before slicing or serving.
VARIATIONS
For country-style pain au levain, you can substitute whole wheat
our or other whole grain ours for an equal amount of bread our (by
weight), in which case you’ll need to increase the water by about ½
tablespoon (0.25 oz / 7 g) for every 3½ tablespoons (1 oz / 28.5 g) of
whole grain our you use. A typical pain au levain would substitute 2
to 3 ounces (56.5 to 85 g) of whole grain our for an equal amount of
bread flour, but there really is no limit.
One of the best variations of this bread has crumbled blue cheese (or
chunks of any good melting cheese) and toasted nuts or seeds (walnuts
are highly recommended). Add nuts to the dough during the last minute
of mixing, using about 25 percent nuts to total our. Since the total
of mixing, using about 25 percent nuts to total our. Since the total
our in this recipe is about 34 ounces (964 g), counting the our in the
starter, about 8.5 ounces (241 g) of nuts would be just right. With the
cheese, you can add anywhere between 25 to 45 percent of the weight
of the our; so that would be 8.5 to 15.3 ounces (241 to 434 g). Fold
the cheese in by hand at the end of the mixing or roll it into the dough
during shaping (see the crusty cheese bread recipe).
MAKES 5 INDIVIDUAL PIZZAS
Pizzerias have long known the value of overnight, delayed
fermentation, and I’ve written about this extensively in American Pie:
My Search for the Perfect Pizza, as well as in other books. After teaching
hundreds of pizza and focaccia classes around the country and assessing
the relative bene ts of the many versions of pizza dough that I wrote
about in other books, I’m including and updating the most popular
versions here.
This recipe is a variation of the neo-Neapolitan dough I introduced in
Amercian Pie. I recommend making individual size pizzas, because the
heat in home ovens simply isn’t su cient to do a good job on larger
pizzas. This dough will keep for up to 4 days in the refrigerator or for
months in the freezer; just be sure to move it from the freezer to the
refrigerator the day before you need it, so it can thaw slowly, then treat
it like refrigerated dough. Both the sugar and the oil in this formula are
optional. If you leave them out, you have a Napoletana dough (though
not a true pizza Napoletana dough unless you use Italian “00” our,
which is softer and more extensible than American our and does not
require as much water). However, in my pizza classes across the
country, this version, which is similar to the dough used at some of the
top American pizzerias (such as Frank Pepe’s, Sally’s, Totonno’s, and
Lombardi’s), always gets the most votes for favorite.
5⅓ cups (24 oz / 680 g) unbleached bread flour
2 teaspoons (0.5 oz / 14 g) salt, or 1 tablespoon coarse kosher salt
1 teaspoon (0.11 oz / 3 g) instant yeast
2 tablespoons (1 oz / 28.5 g) sugar, or 1½ tablespoons honey or
agave nectar (optional)
2 cups plus 2 tablespoons (17 oz / 482 g) water, at room
temperature
2 tablespoons (1 oz / 28.5 g) olive oil (optional)
DO AHEAD
Combine all of the ingredients in a mixing bowl. If using a mixer, use
the paddle attachment and mix on the lowest speed for 1 minute. If
mixing by hand, use a large spoon and stir for about 1 minute, until
well blended. The dough should be coarse and slightly sticky. Let the
dough rest for 5 minutes to fully hydrate the flour.
Switch to the dough hook and mix on medium-low speed, or
continue mixing by hand, for 2 to 3 minutes, until the dough is
smoother but still soft, supple, and somewhere between tacky and
sticky.
Spread 1 teaspoon of olive oil on a work surface, then use a bowl
scraper to transfer the dough to the oiled surface. Rub your hands with
the oil on the work surface, then stretch and fold the dough one time,
reaching under the front end of the dough, stretching it out, then folding
it back onto the top of the dough. Do this from the back end and then
from each side, then ip the dough over and tuck it into a ball. Divide
the dough into 5 equal pieces, each weighing about 8 ounces (227 g).
Form each piece into a ball, then place each into a separate sandwichsize freezer bag misted with spray oil. (Or, if you have room in the
refrigerator, you can form the dough into tight balls and refrigerate
them on a pan, as described below.) Seal the bag and refrigerate
overnight or for up to 4 days, or in the freezer for several months.
ON BAKING DAY
About 90 minutes before you plan to bake the pizzas, place the
desired number of dough balls on a lightly oiled work surface. With
oiled hands, stretch and round each piece into a tight ball, then place
them on a pan that’s been lightly oiled (preferably with olive oil).
them on a pan that’s been lightly oiled (preferably with olive oil).
Loosely cover with plastic wrap and let rest at room temperature until
ready to bake.
About 1 hour before baking the pizzas, preheat the oven and a
baking stone as high as the oven will go. If you don’t have a pizza
stone, you can assemble the pizzas on baking sheets covered with
parchment paper and bake them on the pans. While the oven is
preheating, prepare your cheeses, sauce, and toppings.
When ready to assemble and bake, put about 1 cup (4.5 oz / 128 g)
of our in a bowl. Use some of it to dust the work surface, your hands,
and the peel, if you have one. Put one of the pizza dough balls in the
our to coat the bottom. Transfer to the work surface and gently tap it
down with your ngers to form a disk. Slide the backs of your hands
under the dough, then lift it and begin to rotate it, using your thumbs to
coax the edges of the dough into a larger circle (see see photographs of
this process). Don’t stretch the dough with the backs of your hands or
your knuckles, let your thumbs do all of the work; your hands and
knuckles merely provide a platform to support the dough. If the dough
starts to resist and shrink back, set it on the floured work surface and let
it rest for a minute or two. You can move on to another dough ball,
repeating the same gentle stretching. Continue working the dough and
resting it as need be until it is about 10 to 12 inches in diameter. It
should be thicker at the edges than in the center and the center should
be thin but not paper-thin. If the dough rips, you can try to patch it, or
you can form it back into a ball, move on to another dough ball, and
try again in 15 to 20 minutes.
When the crust is ready to be topped, place it on the oured peel.
Use our rather than cornmeal or semolina, as it doesn’t burn as
quickly in the oven. Top the pizza as desired, then slide it onto the
baking stone. If you aren’t using a baking stone, just put the panned
pizza in the oven.
Bake for about 4 minutes, then use the peel or a spatula to rotate the
pizza. It will take anywhere from 5 to 7 minutes for the pizza to fully
bake, depending on the oven (convection ovens bake faster). The edge
should pu up and be a deep golden brown, perhaps even slightly
charred.
Remove the pizza, garnish as desired, then let it cool for 1 minute
before slicing or serving.
MAKES 5 INDIVIDUAL PIZZAS
This recipe uses sourdough starter primarily as a avor enhancer rather
than for leavening. It adds a subtle complexity without drawing
attention to itself. However, if you prefer a more tart avor you can
omit the instant yeast and give the dough four hours of fermentation at
room temperature before dividing it into dough balls and refrigerating.
SOURDOUGH STARTER
2 tablespoons (1 oz / 28.5 g) mother starter, cold or at room
temperature
6 tablespoons (3 oz / 85 g) water, at room temperature
¾ cup plus 2 tablespoons (4 oz / 113 g) unbleached bread flour
DOUGH
All of the sourdough starter (8 oz / 226 g), cold or at room
temperature
1½ cups (12 oz / 340 g) lukewarm water (about 95°F or 35°C)
4 cups (18 oz / 510 g) unbleached bread flour
2 teaspoons (0.5 oz / 14 g) salt, or 1 tablespoon coarse kosher salt
1 teaspoon (0.11 oz / 3 g) instant yeast
2 tablespoons (1 oz / 28.5 g) sugar, or 1½ tablespoons honey or
agave nectar
2 tablespoons (1 oz / 28.5 g) olive oil
To make the starter, combine all of the ingredients and stir to
distribute the mother starter evenly; it should have the consistency of
wet dough. Place the starter in a clean, lightly oiled bowl, cover the
bowl with plastic wrap, and let it ferment for 6 to 8 hours at room
temperature. It will swell considerably and nearly double in size. It can
be used immediately or held for up to 4 days in the refrigerator.
To make the pizza dough, cut the starter into about 12 pieces. Pour
the lukewarm water into a mixing bowl, add the starter, and use your
hands to break up the starter and incorporate it with the water.
Pizza and Focaccia Toppings
Remember that pizza or focaccia is simply dough with something on
it, so feel free to experiment with flavorful toppings. Because focaccia is
thicker than pizza it often takes longer to bake, so some toppings are
better left o until the nal few minutes of baking, especially dry
cheeses such as parmesan (focaccia baked in round cake pans perform
more like pizzas, so they can be fully topped prior to going into the
oven). Some ingredients, like fresh pesto or aioli, are even better when
added after the pizza or focaccia has finished baking.
Most commercial pizza sauces work ne, but if you enjoy making
your own, which is quite easy and highly recommended, remember that
canned tomato products do not need to be heated up or cooked since
they will be cooked on the pizza or focaccia. Here are my favorite sauce
and herb oil recipes.
CRUSHED TOMATO SAUCE
MAKES 4 CUPS
1 can (28 oz / 794 g) crushed tomatoes
¼ teaspoon freshly ground black pepper
1 teaspoon dried basil or 2 tablespoons minced fresh basil
(optional)
1 teaspoon dried oregano or 1 tablespoon minced fresh oregano
(optional)
1 teaspoon granulated garlic powder, or 5 cloves fresh garlic,
minced or pressed
2 tablespoons red wine vinegar or freshly squeezed lemon juice,
or a combination
1 teaspoon salt, to taste
In a bowl, stir together all the ingredients, starting with ½ teaspoon
salt and adding more to taste. Store in a tightly covered container in the
refrigerator for up to 1 week.
Add the our, salt, yeast, sugar, and olive oil. If using a mixer, use the
paddle attachment and mix on the lowest speed for about 1 minute. If
mixing by hand, use a large spoon and stir for about 1 minute, until
well blended. The dough should be soft, coarse, and very tacky. Let the
dough rest for 5 minutes to fully hydrate the flour.
Switch to the dough hook and mix on medium-low speed, or
continue mixing by hand, for 3 minutes, until the dough is smoother,
soft, supple, and very tacky or slightly sticky.
Follow the instructions for shaping, topping, and baking.
HERB OIL
MAKES ABOUT 2 CUPS
2 cups olive oil
2 tablespoons dried basil
2 tablespoons dried parsley
1 tablespoon dried oregano
1 tablespoon fresh rosemary leaves
1 teaspoon dried thyme
2 tablespoons granulated garlic powder, or 10 cloves fresh garlic,
pressed and lightly sautéed in ½ cup of the olive oil
1 tablespoon kosher salt or coarse sea salt
¼ teaspoon freshly ground black pepper
1 teaspoon chile flakes (optional)
1 teaspoon sweet or hot paprika (optional)
In a bowl, whisk together all the ingredients. Let sit at room
temperature for 2 hours before using.
SPICY OIL
MAKES 1 CUP
1 cup olive oil
4 teaspoons sweet or hot paprika
4 teaspoons chile flakes
1 large clove garlic, peeled
¼ teaspoon salt (optional)
In a saucepan, combine the olive oil, paprika, chile akes, and garlic
and bring to a boil over medium heat. Reduce the heat to low and
simmer gently for 10 minutes. Remove from the heat and let cool for
30 minutes. Strain the oil into a jar, add the salt, and let cool
completely. Cover and store in the refrigerator for up to 2 weeks.
MAKES 2 TO 3 RUSTIC LOAVES OR 5 PIZZAS
The main di erence between the bread and pizza dough is the amount
of hydration and the amount of yeast; pizza dough has less water and
less yeast than the bread. This formula o ers both options, with the
amounts of water and yeast for pizza dough appearing after the
amounts for bread dough. The sugar and oil are optional, but highly
recommended to counteract the bitter tones of the whole wheat our
and to soften the bran.
2¼ cups (10 oz / 283 g) whole wheat flour
2¼ cups (10 oz / 283 g) unbleached bread flour
1¾ teaspoons (0.4 oz / 11 g) salt, or 2½ teaspoons coarse kosher
salt
1¼ teaspoons (0.14 oz / 4 g) instant yeast; for pizza, use 1
teaspoon (0.11 oz / 3 g)
2 tablespoons (1 oz / 28.5 g) sugar, or 1½ tablespoons honey or
agave nectar (optional)
2 cups (16 oz / 454 g) water; for pizza, use 1¾ cups plus 1
tablespoon (14.5 oz / 411 g)
2 tablespoons (1 oz / 28.5 g) olive oil (optional)
To make bread using this recipe, follow the instructions for pain à
l’ancienne, adding the sugar at the beginning of the process. To make
pizza dough, follow the instructions for neo-Neopolitan pizza dough,
again adding the sugar at the beginning.
VARIATIONS
Any whole wheat dough can be turned into a multigrain dough by
substituting any combination of our or meal from other grains for up
to 20 percent of the whole wheat our (by weight). Also, reduce the
water by 1 ounce (28.5 g). For instance, you could add a multigrain
cereal blend to replace an equal amount of whole wheat our. If you
use more than 20 percent alternate grains, there may not be enough
gluten to achieve the necessary structural strength. That said, some
people do enjoy experimenting with larger amounts. One solution is to
add vital wheat gluten to provide the extra structure. If you do this,
don’t use more than 2 percent (again, by weight) of the total amount of
flour, as it can have a negative impact on both flavor and texture.
MAKES 2 TO 3 RUSTIC LOAVES OR 5 PIZZAS
In this formula, the amounts of water and yeast for pizza dough appear
after the amounts for bread dough. Note that unlike in the 50% whole
grain version opposite, the sugar and oil aren’t optional; they’re
de nitely needed to counteract the bitter tones of the whole wheat
our and to soften the bran. If you’d like to make a multigrain version,
see the variation below.
5 ⅓ cups (24 oz / 680 g) whole wheat flour
2 teaspoons (0.5 oz / 14 g) salt, or 1 tablespoon coarse kosher salt
1¼ teaspoons (0.14 oz / 4 g) instant yeast; for pizza use 1
teaspoon (0.11 oz / 3 g)
3 tablespoons (1.5 oz / 43 g) sugar, or 2 tablespoons honey or
agave nectar
2⅓ cups (19 oz / 539 g) water; for pizza, use 2¼ cups (18 oz /
510 g)
3 tablespoons (1.5 oz / 43 g) olive oil
To make bread using this recipe, follow the instructions for pain à
l’ancienne, adding the sugar at the beginning of the process. To make
pizza dough, follow the instructions for neo-Neopolitan pizza dough,
again adding the sugar at the beginning of the process.
VARIATIONS
You can make a multigrain variation using 80 percent whole wheat
our and 20 percent (by weight) other whole grain ours in any
combination. Just be sure the total weight still adds up to 24 ounces
(680 g). Also, reduce the water by 1 ounce (28.5 g).
MAKES 6 TO 8 BAGELS
Let’s clear something up right away: New York City isn’t the only place
in the world to get decent, authentic bagels. The truth is, you can make
bagels that are just as good at home, no matter where you live. They’re
one of the simplest breads to make, requiring only our, water, salt,
yeast, and malt—and one secret ingredient: time (in the form of long,
slow, cold fermentation). Any decent bagel shop knows this and uses an
overnight method to stretch out the fermentation process, releasing all
sorts of subtle avors trapped in the our. While bagel shops often use
a type of high-protein our not available to home cooks to achieve that
distinctively chewy texture, regular, unbleached bread our can also do
the trick. The real key is to use a much lower percentage of water than
is used for baguettes and other European hearth breads, producing a
sti dough that can stand up to a dunking in boiling water before going
into the oven. More than any ingredient or other aspect of the method,
this boiling step is what defines the uniqueness of the bagel.
That said, bagels do usually feature one other distinctive ingredient:
barley malt. While this may seem like an exotic, hard-to- nd product,
it’s actually commonly available at most supermarkets, usually labeled
“barley malt syrup.” If you can’t nd it, simply substitute an equal
amount of honey. Your bagels might not have that malty avor, but
they’ll still be better than almost any bagel you can buy.
One nal note: If you like bagels but don’t want to set up the boiling
operation for just six of them, feel free to double the size of the batch
and bake enough to freeze for future use.
DOUGH
1 tablespoon (0.75 oz / 21 g) barley malt syrup, honey, or rice
1 tablespoon (0.75 oz / 21 g) barley malt syrup, honey, or rice
syrup, or 1 teaspoon (0.25 oz / 7 g) diastatic malt powder
1 teaspoon (0.11 oz / 3 g) instant yeast
1½ teaspoons (0.37 oz / 10.5 g) salt, or 2½ teaspoons coarse
kosher salt
1 cup plus 2 tablespoons (9 oz / 255 g) lukewarm water (about
95°F or 35°C)
3½ cups (16 oz / 454 g) unbleached bread flour
POACHING LIQUID
2 to 3 quarts (64 to 96 oz / 181 to 272 g) water
1½ tablespoons (1 oz / 28.5 g) barley malt syrup or honey
(optional)
1 tablespoon (0.5 oz / 14 g) baking soda
1 teaspoon (0.25 oz / 7 g) salt, or 1½ teaspoons coarse kosher salt
DO AHEAD
To make the dough, stir the malt syrup, yeast, and salt into the
lukewarm water. Place the our into a mixing bowl and pour in the
malt syrup mixture. If using a mixer, use the dough hook and mix on
the lowest speed for 3 minutes. If mixing by hand, use a large, sturdy
spoon and stir for about 3 minutes, until well blended. The dough
should form a stiff, coarse ball, and the flour should be fully hydrated; if
it isn’t, stir in a little more water. Let the dough rest for 5 minutes.
Resume mixing with the dough hook on the lowest speed for another
3 minutes or transfer to a very lightly oured work surface and knead
by hand for about 3 minutes to smooth out the dough and develop the
gluten. The dough should be sti yet supple, with a satiny, barely tacky
feel. If the dough seems too soft or overly tacky, mix or knead in a little
more flour.
Place the dough in a clean, lightly oiled bowl, cover the bowl tightly
with plastic wrap, and let the dough rise at room temperature for 1
hour.
When you’re ready to shape the bagels, prepare a sheet pan by lining
it with parchment paper or a silicone mat, then misting it with spray
oil or lightly coating it with oil. Divide the dough into 6 to 8 equal
pieces. (A typical bagel is about 4 ounces or 113 grams before baking,
but you can make them smaller. If you make more than 6 bagels, you
may need to prepare 2 sheet pans.) Form each piece into a loose ball
by rolling it on a clean, dry work surface with a cupped hand. (Don’t
use any our on the work surface. If the dough slides around and won’t
ball up, wipe the surface with a damp paper towel and try again; the
slight bit of moisture will provide enough traction for the dough to
form into a ball.) There are two methods to shape the balls into bagels.
The rst method is to poke a hole through the center of the ball to
create a donut shape. Holding the dough with both thumbs in the hole,
rotate the dough with your hands, gradually stretching it to create a
hole about 2 inches in diameter.
The second method, preferred by professional bagel makers, is to use
both hands (and a fair amount of pressure) to roll the ball into a rope
about 8 inches long on a clean, dry work surface. (Again, wipe the
surface with a damp towel, if necessary, to create su cient friction on
the work surface.) Taper the rope slightly at each end and moisten the
last inch or so of the ends. Place one end of the dough in the palm of
your hand and wrap the rope around your hand to complete the circle,
going between your thumb and fore nger and then all the way around.
The ends should overlap by about 2 inches. Squeeze the overlapping
ends together by closing your hand, then press the seam into the work
surface, rolling it back and forth a few times to seal. Remove the dough
from your hand, squeezing it to even out the thickness if need be and
creating a hole of about 2 inches in diameter.
Place each shaped bagel on the prepared sheet pan, then mist with
spray oil or brush with a light coating of oil. Cover the entire pan with
plastic wrap and refrigerate overnight or for up to 2 days. (You can also
proof the full piece of dough in the oiled bowl overnight and then
shape the bagels on baking day, 60 to 90 minutes before boiling and
baking them, or as soon as they pass the float test.)
ON BAKING DAY
Remove the bagels from the refrigerator 60 to 90 minutes before you
plan to bake them, and if you plan to top them with dried onion or
garlic, rehydrate those ingredients (see the variations). Immediately
check whether the bagels are ready for baking using the “ oat test”:
Place one of the bagels in a small bowl of cold water. If it sinks and
doesn’t oat back to the surface, shake it o , return it to the pan, and
wait for another 15 to 20 minutes, then test it again. When one bagel
passes the oat test, they’re all ready to be boiled. If they pass the oat
test before you are ready to boil and bake them, return them to the
refrigerator so they don’t overproof. About 30 minutes before baking,
preheat the oven to 500°F (260°C) and gather and prepare your
garnishes (seeds, onions, garlic, and so on).
To make the poaching liquid, ll a pot with 2 to 3 quarts (64 to 96
oz / 181 to 272 g) of water, making sure the water is at least 4 inches
deep. Cover, bring to a boil, then lower the heat to maintain at a
simmer. Stir in the malt syrup, baking soda, and salt.
Gently lower each bagel into the simmering poaching liquid, adding
as many as will comfortably t in the pot. They should all oat to the
surface within 15 seconds. After 1 minute, use a slotted spoon to turn
each bagel over. Poach for another 30 to 60 seconds, then use the
slotted spoon to transfer it back to the pan, domed side up. (It’s
important that the parchment paper be lightly oiled, or the paper will
glue itself to the dough as the bagels bake.) Sprinkle on a generous
amount of whatever toppings you like as soon as the bagels come out
of the water (except cinnamon sugar; see the variation for details).
Transfer the pan of bagels to the oven, then lower the oven heat to
450°F (232°C).
Bake for 8 minutes, then rotate the pan and check the underside of
the bagels. If they’re getting too dark, place another pan under the
baking sheet. (Doubling the pan will insulate the rst baking sheet.)
Bake for another 8 to 12 minutes, until the bagels are a golden brown.
Cool on a wire rack for at least 30 minutes before slicing or serving.
VARIATIONS
You can replace any amount of the bread our with an equal amount
of whole grain our (by weight), such as wheat or rye. If you do so,
increase the water in the dough by 1 tablespoon (0.5 oz / 14 g) for
every 2 ounces (56.5 g) of whole grain flour you substitute.
Top your bagels with any combination of the following garnishes:
poppy seeds, sesame seeds, coarse salt, or rehydrated dried onions or
garlic. (Soak dried onions or garlic in water to cover for at least 1 hour
before applying.) The toppings will stick even better if you rst brush
the top of each bagel with an egg white wash made by whisking 1 egg
white with 1 tablespoon (0.5 oz / 14 g) of water. If using coarse salt as
a garnish, remember that a little goes a long way.
For raisin bagels, mix in 1 ⅓ cups (8 oz / 227 g) of raisins during the
nal 2 minutes of mixing and, if you like cinnamon, stir ½ teaspoon
(0.14 oz / 4 g) of ground cinnamon into the our before you start
mixing. When the bagels come out of the oven, brush the tops with
melted butter and dip the top into a bed of cinnamon sugar to give it a
very tasty cinnamon crust. You can make cinnamon sugar by whisking 2
tablespoons (1.6 oz / 44 g) of ground cinnamon into ½ cup (4 oz / 113
g) of granulated sugar.
Clockwise from top: wild rice and onion bread; soft rye sandwich bread, shown marbled; many-seed bread;
struan
CHAPTER 4
Enriched Breads
breads are those made with moderate amounts of fat, sugar,
eggs, and dairy products. (In chapter 5, Rich Breads, the formulas
Enriched
contain much higher amounts of these enrichments.) These breads
are soft and slightly sweet and tend to be used for sandwich loaves and
soft rolls. Crackers and pretzels often fall into this category, as well, so
you’ll find recipes for them in this chapter, too.
You may wonder what these enrichments do to bread. Fats tenderize
the nal product and lock in moisture, which softens bread and extends
its shelf life. Fat also enhances flavor even when it has little or no flavor
of its own. Butter and olive oil, which do have delightful avors,
provide their own avors as a bonus. Sugars, including those in liquid
form, such as honey and syrups, also enhance softness and aid in
moisture retention. However, their sweetness is probably their most
important quality in bread—not just for avor, but also for color.
Caramelized sugar plays an important role in the browning of crust.
Eggs and dairy products provide avor, natural sugars, nutritional value
in the form of protein and minerals, and sometimes fat. So to a certain
extent, eggs and dairy products have functions similar to fat and sugar.
Egg yolks are high in lecithin, which functions as an emulsi er, and are
thus very useful in creaming ingredients together when making quick
breads and cakes. By binding fats and liquid together, lecithin helps
trap air to make lighter breads.
Armed with this background (knowledge of the functionality of
ingredients is an important tool for bakers), the following pages o er a
few of my favorite enriched bread products. Enjoy!
THREE 100% WHOLE GRAIN BREADS
One of the most encouraging recent dietary trends is a return to eating
more whole grain bread, and more whole grain products in general—
and for good reason. Whole grain breads are by far the most nutritious,
not only because of the ber and nutrients provided by the bran and
germ, but also because they’re digested more slowly, providing more
stable energy instead of a spike followed by a crash. White our, on the
other hand, is absorbed by the body much more rapidly.
In my previous book, Peter Reinhart’s Whole Grain Breads, I
introduced a method of mixing and fermenting dough that brought two
artisan techniques together in a new way. I called it the epoxy method
because every recipe uses two pre-doughs: one pre-femented, such as a
sourdough starter, and the other not fermented, such as a soaker or a
mash. The purpose of this method was to evoke the full potential of
avor trapped in the grain by using enzymes and fermentation to
develop the avor, then bringing the pieces together on the second day
in a nal mix. The goal was to create extremely healthful breads that
also tasted great.
For this book, I’ve modi ed the epoxy method to simplify it and use
the same overnight method employed in most of the recipes in this
book. After all, holding the dough overnight uses both parts of the
epoxy method: the pre-ferment and the soaker. However, in order to
retain enough leavening power in the yeast without adding a second
mix on the second day, as in the epoxy method, the dough must be
fairly wet and contain a higher percentage of yeast. The following three
formulas—one for enriched, soft sandwich-style bread and the other
two for lean, slightly enriched hearth bread—can be modi ed into
many variations by adding other grains, as detailed in the sidebar.
MAKES 2 LARGE LOAVES OR MANY ROLLS
This bread can be used for anything that you’d make with white bread,
including buns, rolls, and toast. You can use either traditional “red”
whole wheat our or the new “white” whole wheat that is lighter in
color and slightly less bitter. If you choose the honey or agave nectar
option in this recipe, you’ll need more our than if you use sugar,
probably an extra 3½ to 7 tablespoons (1 to 2 oz). Assess the texture as
you mix and adjust accordingly.
6¼ cups (28 oz / 794 g) whole wheat flour
2 teaspoons (0.5 oz / 14 g) salt, or 1 tablespoon coarse kosher salt
5 tablespoons (2.5 oz / 71 g) granulated or brown sugar, or 3½
tablespoons honey or agave nectar
1 egg (1.75 oz / 50 g)
¼ cup (2 oz / 56.5 g) vegetable oil
1¼ cups (10 oz / 283 g) lukewarm water (about 95°F or 35°C)
1¼ cups (10 oz / 283 g) lukewarm milk (any kind; at about 95°F
or 35°C)
1½ tablespoons (0.5 oz / 14 g) instant yeast
DO AHEAD
In a mixing bowl, whisk the our, salt, and sugar together (if using
honey or agave nectar, dissolve it in the lukewarm water instead). In a
honey or agave nectar, dissolve it in the lukewarm water instead). In a
separate bowl, whisk the egg and oil together. Separately, combine the
water and milk, then whisk in the yeast until dissolved.
Add the egg mixture and the water mixture to the dry ingredients. If
using a mixer, use the paddle attachment and mix on the lowest speed
for 1 minute. If mixing by hand, use a large spoon and stir for 1 about
minute. The dough should be wet and coarse. Let the dough rest for 5
minutes to fully hydrate the flour.
Switch to the dough hook and mix on medium-low speed, or
continue mixing by hand, for 2 minutes. The dough will rm up
slightly and become smoother. If it’s still very wet, add more our; if
it’s very stiff, add a little more water, 1 tablespoon at a time. The dough
should be very supple and slightly sticky. Continue to mix with the
dough hook on medium-low speed, or mix by hand for 4 minutes
more, increasing the speed to medium-high or stirring more vigorously
for the nal 20 seconds to develop and organize the gluten. The dough
will still be slightly sticky but will also feel stronger and more elastic.
Transfer the dough to a lightly oured work surface with a wet bowl
scraper and knead by hand for a nal few seconds, working in more
our or water as needed so that the dough is very supple and pliable
and slightly sticky; then form the dough into a ball. Do a stretch and
fold, either on the work surface or in the bowl, reaching under the front
end of the dough, stretching it out, then folding it back onto the top of
the dough. Do this from the back end and then from each side, then ip
the dough over and tuck it into a ball. Cover the dough and let it rest
for 10 minutes. Repeat this entire process two more times, completing
all repetitions within 30 minutes.
Place the dough in a clean, lightly oiled bowl large enough to hold
the dough when it doubles in size. Cover the bowl tightly with plastic
wrap, then immediately refrigerate overnight or for up to 4 days. (If
you plan to bake the dough in batches over di erent days, you can
portion the dough and place it into two or more oiled bowls at this
stage.)
ON BAKING DAY
Remove the dough from the refrigerator about 3 hours before you
plan to bake. Transfer the dough to a lightly oured work surface and
divide it into two equal pieces for loaves or small pieces for rolls, about
2 ounces each. Shape the dough into sandwich loaves, freestanding
loaves, or rolls. For sandwich loaves, place the dough in greased 4½ by
8½-inch loaf pans. For freestanding loaves or rolls, line a sheet pan
with parchment paper or a silicone mat and proof the dough on the
pan. Mist the dough with spray oil and cover loosely with plastic wrap,
then let the dough rise at room temperature for 2 to 3 hours, until
increased to about 1½ times its original size. In loaf pans, the dough
should dome about 1 inch above the rim.
About 15 minutes before baking, preheat the oven to 350°F (177°C).
If making rolls, brush the dough with egg wash prior to baking. (This
isn’t necessary for loaves.)
Bake loaves for 20 minutes, then rotate; rotate rolls after 10 minutes.
The total baking time is 40 to 55 minutes for loaves, and only about 20
minutes for rolls. The bread is done when the top and sides are a deep,
rich brown; the loaf sounds hollow when thumped on the bottom; and
the internal temperature is above 185°F (85°C) in the center.
Remove from the pans and cool for at least 20 minutes for rolls and
at least 1 hour for loaves before slicing or serving.
VARIATIONS
For a stronger, more elastic dough, add 2 tablespoons (0.5 oz / 14 g)
of vital wheat gluten (sometimes called pure wheat gluten). This will
create a lighter loaf with larger air pockets. Increase the water by ¼
cup (2 oz / 56.5 g).
You can also omit the milk and replace it with more water, but milk
makes the bread a little more tender and golden. Another option is to
substitute soy milk or rice milk.
You can easily make a multigrain version of this bread. As long as
you use whole wheat our for at least 80 percent of the total our,
there will be enough gluten to support the loaf. This means you can
there will be enough gluten to support the loaf. This means you can
replace up to 20 percent of the whole wheat our with an equal
amount of other grains (by weight), in a variety of forms, including rye
our, multigrain cereal blends, cornmeal, and aked or rolled grains
like oats or triticale akes. (If using akes, you can use them in aked
form or grind them into our in a seed grinder or blender.) You can
also use small-seeded “grains” like amaranth, chia seeds, millet, and
quinoa. Amaranth and chia are about the only grains that can go into a
loaf whole, without being rolled or ground into akes, meal, or our.
Slightly larger grains, like millet, quinoa, and corn grits, can also be left
whole if you like the crunch they provide. If you want to use larger
grains like rice, rye, barley, or wheat in their whole form, thoroughly
cook them rst, as they won’t hydrate in the dough and could crack a
tooth.
To win someone over from white bread to 100 percent whole grain
bread, it may help to have a transitional version that bridges the gap.
You can replace some of the whole wheat our in this recipe with an
equal amount of unbleached bread our (by weight) to make a lighter
loaf. Reduce the amount of water by about ½ tablespoon (0.25 oz or 6
g) for every 1 ounce (28.5 g) of bread flour you use.
Multigrain Variations
Replace up to 5.5 ounces (156 g) of the whole wheat our with
the same weight of any of the following ingredients, in any
combination:
* Whole rye flour, rye meal, rye flakes (whole or ground)
* Uncooked cornmeal or cooked grits or polenta
* Oatmeal flakes, whole or ground
* Amaranth
* Uncooked ground quinoa or cooked whole quinoa
* Whole or ground flaxseeds (no more than 1 ounce or 28.5 g)
* Cooked brown rice, bulgur, barley
MAKES 2 LOAVES
No bread is as good for us as one made completely from whole grains.
The challenge with 100 percent whole grain breads, though, is
achieving an open crumb and airy texture. The bran ber in the whole
grain our, while extremely bene cial in our diet, acts like little razors
in the dough, cutting the thin gluten strands. This makes it di cult for
the loaf to rise as high as white our loaves. The antidote is to use a
higher percentage of hydration, which counteracts some of the sti ness
caused by the bran, softening the ber and promoting additional oven
spring. The dough will seem very soft when it is rst mixed but will
gradually rm up as it ferments, as the ber slowly swells as it absorbs
the water. As more and more of us make the switch to whole grains,
this bread will become a valuable addition to your repertoire. For a
variety of options in making this bread, see Multigrain Variations,
where you’ll nd multigrain suggestions, guidelines for making
transitional breads with less than 100 percent whole grains, and more.
6¼ cups (28 oz / 794 g) whole wheat flour
2 teaspoons (0.5 oz / 14 g) salt, or 1 tablespoon coarse kosher salt
2 tablespoons (1 oz / 28.5 g) granulated sugar or brown sugar, or
1½ tablespoons honey or agave nectar
1 tablespoon (0.33 oz / 9 g) instant yeast
2¾ cups (22 oz / 624 g) lukewarm water (about 95°F or 35°C)
2 tablespoons (1 oz / 28.5 g) vegetable oil
DO AHEAD
In a mixing bowl, whisk the our, salt, and sugar together (if using
honey or agave nectar, dissolve it in the lukewarm water instead). Stir
the yeast into the lukewarm water, whisk to dissolve the yeast, then stir
in the oil.
Add the water mixture to the our mixture. If using a mixer, use the
paddle attachment and mix on the lowest speed for 1 minute. If mixing
by hand, use a large spoon and stir for about 1 minute. The dough
should be wet and coarse. Let the dough sit for 5 minutes to fully
hydrate the flour.
Switch to the dough hook and mix on medium-low speed, or
continue mixing by hand, for 2 minutes. The dough will rm up
slightly and become smoother. If it’s very sti , add a little more water,
1 teaspoon at a time. The dough should be very supple and slightly
sticky. Continue to mix with the dough hook on medium-low speed, or
to mix by hand, for 4 minutes more, increasing the speed to mediumhigh or stirring more vigorously for the nal 20 seconds to develop and
organize the gluten. The dough will still be slightly sticky but will also
feel stronger and more elastic.
Transfer the dough to a lightly oured work surface with a wet bowl
scraper. With wet or oiled hands, reach under one end of the dough,
stretch it out, then fold it back onto the top of the dough. Do this from
the back end and then from each side, then ip the dough over and
tuck it into a ball. The dough should be slightly rmer, though still very
soft and fragile. Place the dough in a clean, lightly oiled bowl, cover,
and let sit at room temperature for 10 minutes. Repeat this entire
process three more times, completing all repetitions within 40 minutes.
After the nal stretch and fold, immediately cover the bowl tightly
and refrigerate the dough overnight or for up to 4 days. The dough will
rise to about double, and possibly triple, its original size within 8 to 12
hours in the refrigerator. (If you plan to bake the dough in batches over
di erent days, you can portion the dough and place it into two or more
oiled bowls at this stage.)
ON BAKING DAY
Remove the dough from the refrigerator about 3 hours before you
plan to bake. Transfer the dough to a lightly oured work surface and
divide it into two equal pieces for loaves or small pieces for rolls.
Shape the cold dough into freestanding loaves or rolls. You can use
bannetons, couches, or the back of a sheet pan lined with parchment
paper to proof the bread. Mist the dough with spray oil and cover
loosely with plastic wrap, then let the dough rise at room temperature
for 2 to 3 hours, until increased to 1½ times its original size.
Preheat the oven to 500°F (260°C) and prepare it for hearth baking.
Uncover the dough 15 minutes before baking and score it with a sharp
serrated knife or razor blade (scoring rolls is optional).
Transfer the dough to the oven, pour 1 cup of hot water into the
steam pan, and lower the oven temperature to 425°F (218°C).
Bake loaves for 15 minutes, then rotate the pan; rotate rolls after 10
minutes. The total baking time is 35 to 45 minutes for loaves, and only
20 to 22 minutes for rolls. The bread is done when the top and sides
are a deep, rich brown; the loaf sounds hollow when thumped on the
bottom; and the internal temperature is above 195°F (91°C) in the
center. For a crisper crust, leave the bread in the oven for 5 to 10
minutes after you turn off the oven.
Cool on a wire rack for at least 20 minutes for rolls and 45 minutes
for loaves before slicing or serving.
MAKES 2 LOAVES
As with other sourdough recipes in this book, you have two options
with this recipe. For a “purist” version, omit the instant yeast from the
nal dough. For a mixed method, which will rise more quickly but lack
some of the sour avor, include the instant yeast. The optional oil helps
lubricate and soften the bran ber in whole grain bread. For a variety
of other options in making this bread, see Multigrain Variations, where
you’ll nd multigrain suggestions, guidelines for making transitional
breads with less than 100 percent whole grains, and more.
WHOLE WHEAT SOURDOUGH STARTER
¼ cup (2 oz / 56.5 g) mother starter, cold or at room temperature
1 ⅓ cups (6 oz / 170 g) whole wheat flour
½ cup plus 1 tablespoon (4.5 oz / 128 g) lukewarm water (about
95°F or 35°C)
DOUGH
All of the whole wheat sourdough starter (12.5 oz / 354 g)
1½ tablespoons (1 oz / 28.5 g) honey or agave nectar, or 2
tablespoons sugar
1½ cups (12 oz / 340 g) lukewarm water (about 95°F or 35°C)
2 tablespoons (1 oz / 28.5 g) vegetable oil (optional)
3½ cups (16 oz / 454 g) whole wheat flour
2 teaspoons (0.5 oz / 14 g) salt, or 1 tablespoon coarse kosher salt
1½ teaspoons (0.17 oz / 5 g) instant yeast (optional)
DO AHEAD
To make the starter, combine all of the ingredients in a mixing bowl.
If using a mixer, use the paddle attachment and mix on the lowest
speed for 1 minute, then increase to medium speed for about 30
seconds. If mixing by hand, stir for about 2 minutes, until well blended.
The starter should feel doughlike and tacky or slightly sticky; if not, stir
in additional flour or water as needed.
Transfer the starter to a lightly oured work surface and knead for
about 30 seconds. Place it in a clean, lightly oiled bowl, cover the bowl
loosely, and leave at room temperature for 6 to 8 hours, until the
starter increases to about 1½ times its original size. Use the starter
immediately to make the nal dough, or refrigerate overnight or for up
to 4 days.
To make the dough, cut the starter into 10 or 12 pieces and put them
in a mixing bowl. Dissolve the honey in the warm water (if using sugar
rather than honey, mix it in with the our and salt), then stir in the oil
and pour the mixture into the mixing bowl. Stir to soften the starter,
then add the our and salt, along with the instant yeast (unless making
the “purist” version). If using a mixer, use the paddle attachment and
mix on the lowest speed for 1 minute, or stir with a large spoon for
about 1 minute, to evenly distribute the ingredients and create a wet,
coarse dough. Let the dough sit for 5 minutes to fully hydrate the flour.
Switch to the dough hook and mix on medium-low speed, or
continue mixing by hand, for 2 minutes. The dough will rm up
slightly and become smoother. If it’s very sti , add a little more water,
1 teaspoon at a time. The dough should be very supple and slightly
1 teaspoon at a time. The dough should be very supple and slightly
sticky. Continue to mix with the dough hook on medium-low speed, or
mix by hand, for 4 minutes more, increasing the speed to medium-high
or kneading more vigorously for the nal 20 seconds to develop and
organize the gluten. The dough will still be slightly sticky but will also
feel stronger and more elastic.
Transfer the dough to a lightly oured work surface with a wet bowl
scraper. With wet or oiled hands, reach under one end of the dough,
stretch it out, then fold it back onto the top of the dough. Do this from
the back end and then from each side, then ip the dough over and
tuck it into a ball. The dough should be slightly rmer, though still very
soft and fragile. Place the dough in a clean, lightly oiled bowl, cover,
and let sit at room temperature for 10 minutes. Repeat this entire
process three more times, completing all repetitions within 40 minutes.
After the nal stretch and fold, immediately cover the bowl tightly
and refrigerate the dough overnight or for up to 4 days (for the “purist”
version, leave the dough out for 2 to 3 hours before refrigerating). The
dough will rise to about double, and possibly triple, its original size
within 8 to 12 hours in the refrigerator. (If you plan to bake the dough
in batches over di erent days, you can portion the dough and place it
into two or more oiled bowls at this stage.)
ON BAKING DAY
Remove the dough from the refrigerator about 3 hours before you
plan to bake (or 4 hours before for the “purist” version). Transfer the
dough to a lightly oured work surface and divide it into two equal
pieces for loaves or small pieces for rolls. Shape the dough as
freestanding loaves or rolls. You can use bannetons, couches, or the
back of a sheet pan lined with parchment paper to proof the bread.
Mist the dough with spray oil and cover loosely with plastic wrap, then
let the dough rise at room temperature for 2 to 3 hours (up to 4 hours
for the “purist” version), until increased to 1½ times its original size.
Preheat the oven to 500°F (260°C) and prepare it for hearth baking.
Uncover the dough 15 minutes before baking and score it with a sharp
serrated knife or razor blade (scoring rolls is optional).
Transfer the dough to the oven, pour 1 cup of hot water into the
steam pan, and lower the temperature to 425°F (218°C).
Bake the loaves for 15 minutes, then rotate the pan; rotate rolls after
10 minutes. The total baking time is 35 to 45 minutes for loaves, and
only 20 to 22 minutes for rolls. The bread is done when the top and
sides are a deep, rich brown; the loaf sounds hollow when thumped on
the bottom; and the internal temperature is above 195°F (91°C) in the
center. For a crisper crust, leave the bread in the oven for 5 to 10
minutes after you turn the off oven.
Cool on a wire rack for at least 20 minutes for rolls and 45 minutes
for loaves before slicing or serving.
MAKES 2 LOAVES OR MANY ROLLS
Every book I write has yet another variation of this soft, enriched
multigrain loaf, my all-time favorite bread. The name comes from
western Scotland, probably the town called Struanmoor, on the Isle of
Skye, and also from a Gaelic clan name that means “a convergence of
streams.” It was originally conceived of as a once-a-year harvest bread,
incorporating whatever grains and seeds were available from the
previous day’s harvest. Because the notion of a harvest bread o ers a
great deal of formula exibility, I’m always looking for ways to push
the struan envelope in search of better or easier versions.
This recipe is very similar to the version I originally made at my
bakery, Brother Juniper’s, and it was by far the most popular bread we
made. This time around, I’ve taken advantage of the overnight, cold
fermentation method to come up with a recipe that’s more exible,
particularly in regard to time options. This is the ultimate toasting
bread. There’s something about the combination of ingredients that
creates the perfect balance of avor and texture when toasted and
spread with butter, jam, or both. It also works beautifully as a sandwich
bread with llings like tuna salad, chicken salad, or egg salad. You can
reduce the amount of sugar or honey if you prefer, but I like the
sweetness of this bread and think the combination of brown sugar and
honey enhances the toasting qualities. Still, sweetness is a very personal
matter, so follow your heart and your palate.
5 cups (22.5 oz / 638 g) unbleached bread flour
¼ cup (1.5 oz / 42.5 g) coarse cornmeal (polenta grind)
¼ cup (1 oz / 28.5 g) rolled oats
3 tablespoons (0.75 oz / 21 g) wheat bran or oat bran
½ cup (2 oz / 56.5 g) cooked brown rice
¼ cup (2 oz / 56.5 g) brown sugar
2½ teaspoons (0.66 oz / 19 g) salt, or 3½ teaspoons coarse kosher
salt
2 tablespoons (0.66 oz / 19 g) instant yeast
1½ tablespoons (1 oz / 28.5 g) honey or agave nectar
1½ cups (12 oz / 340 g) lukewarm water (about 95°F or 35°C)
½ cup (4 oz / 113 g) lukewarm buttermilk, yogurt, or any other
milk (about 95°F or 35°C)
Poppy seeds or sesame seeds, for garnish (optional)
DO AHEAD
Combine the flour, cornmeal, oats, bran, rice, sugar, salt, yeast, honey,
water, and milk in a mixing bowl. If using a mixer, use the paddle
attachment and mix on the lowest speed for 2 minutes. If mixing by
hand, use a large spoon and stir for about 2 minutes. The dough will be
sticky, coarse, and shaggy. Let the dough rest for 5 minutes to fully
hydrate the flour.
Once again, mix on the slowest speed with the paddle attachment, or
by hand using a large spoon, for 2 minutes more to further develop the
dough. Add our as needed to keep the dough together, but it should
still be soft and very tacky or slightly sticky. (In the unlikely event that
the dough is too stiff, work in a little more water.)
Use a bowl scraper to transfer the dough to a lightly oured work
surface, then dust the top of the dough with our. Lightly knead the
dough for 2 to 3 minutes, adding more our as needed to prevent
sticking. The dough will still be soft and sticky but should hold together
to form a soft, supple ball. With wet or oiled hands, reach under one
end of the dough, stretch it out, then fold it back onto the top of the
dough. Do this from the back end and then from each side, then ip the
dough over and tuck it into a ball. The dough should be slightly rmer,
dough over and tuck it into a ball. The dough should be slightly rmer,
though still very soft and fragile. Place the dough in a clean, lightly
oiled bowl, cover, and let sit at room temperature for 10 minutes.
Repeat this entire process three more times, completing all repetitions
within 40 minutes.
After the nal stretch and fold, place the dough in a clean, lightly
oiled bowl, cover the bowl tightly with plastic wrap, and refrigerate
overnight or for up to 5 days. (If you plan to bake the dough in batches
over di erent days, you can portion the dough and place it into two or
more oiled bowls at this stage.)
ON BAKING DAY
Remove the dough from the refrigerator about 2 hours before you
plan to bake. Shape the cold dough into one or more sandwich loaves,
using 28 ounces (794 g) of dough for 4½ by 8-inch loaf pans and 36
ounces (1.02 kg) of dough for 5 by 9-inch pans; into freestanding loaves
of any size, which you can shape as bâtards, baguette, or boules; or into
rolls, using about 2 ounces (56.5 g) of dough per roll. When shaping,
use only as much our on the work surface as necessary to keep the
dough from sticking. For sandwich loaves, proof the dough in greased
loaf pans. For freestanding loaves and rolls, line a sheet pan with
parchment paper or a silicone mat and proof the dough on the pan.
Brush the top of the dough with water and sprinkle with poppy (or
sesame) seeds, then mist with spray oil and cover loosely with plastic
wrap. Let the dough rise at room temperature for 1½ to 2 hours, until
increased to about 1½ times its original size. In loaf pans, the dough
should dome at least 1 inch above the rim.
About 15 minutes before baking, preheat the oven to 350°F (177°C),
300°F (149°C) for a convection oven.
Bake the loaves for 20 minutes, then rotate the pan; rotate rolls after
10 minutes. The total baking time is 45 to 60 minutes for loaves, and
only 20 to 25 minutes for rolls. The bread is done when it has a rich
golden color, the loaf sounds hollow when thumped on the bottom,
and the internal temperature is above 185°F (85°C) in the center.
Cool for at least 20 minutes for rolls and 1 hour for large loaves
before slicing or serving.
VARIATIONS
You can substitute almost any cooked grain, such as bulgur, millet, or
quinoa, for the brown rice. Just don’t use white rice, as it tends to stand
out too much and draw attention to itself, and don’t use cooked grain
that’s more than 5 days old unless it’s been kept in the freezer. If you
don’t want to take the time to cook grains for this recipe, you can make
the bread without this ingredient, but don’t increase the amount of the
uncooked grains to compensate.
In place of the oats, cornmeal, and bran, you can use commercial
multigrain blends, such as ten-grain or twelve-grain cereal. Simply
replace the 3.25 ounces (92 g) combined weight of those grains with an
equal amount of any multigrain blend. Alternatively, you can replace
any one of those grains with an equal amount (by weight) of multigrain
blend.
If you want to make a sourdough version, add 4 ounces (113 g) of
mother starter to the recipe without making any other changes. Don’t
change the amount of instant yeast; yes, it is a lot of yeast, but it’s
necessary.
MAKES 2 LARGE LOAVES OR 4 SMALL LOAVES
This dough is distinctive because of its generous use of eggs, which give
it a beautiful golden color. This type of dough is most familiar as
challah, in a braided form as the table bread for the Jewish Sabbath
meal. But enriched egg breads have been made by bakers of many
cultures for centuries, and they aren’t always braided. If you like the
avor and texture of this bread, feel free to use it to make any number
of other baked goods, from dinner rolls to sweet cinnamon buns, and
even yeasted co ee cake and sweet or savory swirl breads, like babka
or cheese rolls. You can use either an egg white or a whole egg in the
egg wash. The whole egg will create a darker crust.
2¼ cups (18 oz / 510 g) lukewarm water (about 95°F or 35°C)
1½ tablespoons (0.5 oz / 14 g) instant yeast
8 to 10 egg yolks (6 oz / 170 g), depending on weight
5 tablespoons (2.5 oz / 71 g) vegetable oil
6 tablespoons (3 oz / 85 g) sugar, or 4½ tablespoons honey or
agave nectar
1 tablespoon (0.75 oz / 21 g) vanilla extract (optional)
7½ cups (34 oz / 964 g) unbleached bread flour
2½ teaspoons (0.66 oz / 19 g) salt, or 4 teaspoons coarse kosher
salt
1 egg white or whole egg, for egg wash
2 tablespoons water, for egg wash
2 tablespoons poppy seeds, sesame seeds, or a combination, for
garnish (optional)
DO AHEAD
Combine the water and yeast in a mixing bowl and stir with a whisk
to dissolve. Add the egg yolks, oil, sugar, and vanilla and whisk lightly
to break up the egg yolks, then add the our and salt. If using a mixer,
use the paddle attachment and mix on the lowest speed for 2 minutes.
If mixing by hand, use a large spoon and stir for about 2 minutes. The
dough should be coarse and shaggy. Let the dough rest for 5 minutes.
Switch to the dough hook and mix on medium-low speed, or
continue to mix by hand using a large, wet spoon, for 4 minutes.
Use a bowl scraper to transfer the dough to a lightly oured work
surface, then dust the top of the dough with our. Lightly knead for 1
to 2 minutes, adding more our as needed to prevent sticking. The
dough should be soft, supple, and tacky but not sticky. Form the dough
into a ball, place it in a clean, lightly oiled bowl, and cover the bowl
with plastic wrap. Immediately refrigerate the dough overnight or for
up to 4 days. It will double in size as it cools. (If you plan to bake the
dough in batches over di erent days, you can portion the dough and
place it into two or more oiled bowls at this stage.)
ON BAKING DAY
Remove the dough from the refrigerator about 2 hours and 10
minutes before you plan to bake. Transfer it to a lightly oured work
surface and cut it into the desired number of pieces to make strands for
braiding, making sure all of the pieces are the same weight. Flatten
each piece with your hand, then roll the pieces into a cigar or torpedo
shape. After doing this with each piece, return to the rst one and roll
it out into a rope 10 to 14 inches long. (The bigger the piece of dough,
the longer the rope.) Make sure each rope is the same length. See
opposite for braiding instructions. Once the loaves are braided, transfer
them to a sheet pan lined with parchment paper or a silicone mat.
Make an egg wash by combining the egg white (or a whole egg) and
the 2 tablespoons of water and whisking briskly until thoroughly
combined. Brush the entire visible surface of the loaves with the egg
wash, then refrigerate any remaining egg wash and let the loaves rise,
uncovered, at room temperature for about 1 hour; they won’t rise very
much during this time. Brush with the egg wash again, then sprinkle on
the optional seeds. A combination of poppy and sesame looks very
impressive. Let the loaves rise at room temperature for about 1 hour, or
until increased to about 1½ times their original size.
About 15 minutes before baking, preheat the oven to 350°F (177°C),
or 300°F (149°C) for a convection oven.
Bake for about 20 minutes, then rotate the pan and bake for another
15 to 30 minutes, until the loaves sound hollow when thumped on the
bottom and the internal temperature is about 190°F (88°C) in the
center. If you used a whole egg in the egg wash, the crust will get
darker than with an egg white wash; don’t be fooled into thinking the
bread is done until it passes the thump and temperature test. The crust
of the loaf will seem hard when it rst comes out of the oven, but it
will soften as it cools.
Cool on a wire rack for at least 45 minutes before slicing or serving.
VARIATIONS
If you want to use whole eggs instead of yolks in the dough, reduce
the water by 2 tablespoons (1 oz / 28.5 g) per egg. The yolks are the
key to the attractive color and also make a major contribution to the
soft texture because they add fat and lecithin, which tenderize the
bread. The whites add protein; while that’s a good thing, they also dry
out the bread. Also, feel free to add another tablespoon or so of honey
or sugar if you prefer a sweeter bread.
Braided Loaves
You can make braided breads with 2, 3, 4, 5, or 6 strands—or
more. The most important principle in braiding loaves is to be sure
each strand is the same weight and length. If you don’t have a
scale, estimate the size as closely as possible. Also keep in mind
that the position numbers refer to the actual position of the strands
on the counter, starting from your left, rather than to the particular
strands; in other words, the number of a given strand changes as it’s
moved during the braiding process. To form the strands, use the
same gentle rocking motion as for shaping baguettes. For all braids,
place the prettiest side up when you transfer to the baking sheet,
then cover and proof.
To shape a 2-braid loaf, lay 2 strands of equal weight and length
on the work surface, perpendicular to one another and crossed in
the center. Take both ends of the strand that’s underneath and cross
them over to the opposite sides. Cross the ends of the other strand
in the same way. Continue crossing and alternating until you get to
the ends of the strands, then pinch the tips together at each end to
seal off the ends. Lay the braid on its side.
To shape a 3-braid loaf, lay 3 equal strands side by side, parallel
to one another. Beginning in the middle of the loaf, overlap one of
the outside strands over the middle strand, then take the opposite
outside strand and cross it over the new middle strand. Continue
this pattern until you get to the ends of the strands, then pinch the
tips together to seal. Rotate the loaf so the unbraided side is facing
you, then repeat the pattern on that end.
To shape a 4-braid loaf, connect 4 strands of equal weight and
length at one end, spreading the other ends out with the tips facing
you. From the left, number the strands 1, 2, 3, 4. Follow this
pattern: 4 over 2, 1 over 3, and 2 over 3. Repeat until you get to
the ends of the strands, then pinch the tips together to seal.
To shape a 5-braid loaf, connect 5 strands of equal weight and
length at one end, spreading the other ends out with the tips facing
you. From the left, number the strands 1, 2, 3, 4, 5. Follow this
pattern: 1 over 3, 2 over 3, and 5 over 2. Repeat until you get to
the ends of the strands, then pinch the tips together to seal.
To shape a 6-braid loaf, connect 6 strands of equal weight and
length at one end, spreading the other ends out with the tips facing
you. From the left, number the strands 1 through 6 and bring
strand 6 over strand 1 to build up the end of the loaf. Strand 5 has
now become the new strand 6, and the old strand 6 is now strand
1. Now follow this pattern: 2 over 6, 1 over 3, 5 over 1, and 6 over
4. Repeat the pattern until you get to the ends of the strands, then
pinch the tips together to seal.
MAKES 10 SEVEN-INCH ROLLS OR 5 FOOT-LONG ROLLS
I get emails all the time asking for Philadelphia-style hoagie and
cheesesteak rolls. There is something about the cultural connection we
Philly folk have with these iconic sandwiches that makes many people
believe that Philadelphia’s Amoroso’s Baking Company is the only
place to nd a good hoagie roll, which is, of course, not true. The key
to this type of roll is a nice balance of texture and avor, somewhere
between lean dough and soft enriched dough, with just enough “chew”
to stand up to the llings without making it overly hard to eat the darn
thing. The overnight fermentation method is ideal for this because it
brings out maximum avor with very little hands-on time. The optional
barley malt syrup provides a nice undertone of avor that’s di cult to
identify and also helps with crust color. This dough also makes great
Kaiser rolls.
5⅓ cups (24 oz / 680 g) unbleached bread flour
2 teaspoons (0.5 oz / 14 g) salt, or 1 tablespoon coarse kosher salt
1 tablespoon (0.5 oz / 14 g) sugar
1½ teaspoons (0.5 oz / 14 g) barley malt syrup, or ¾ teaspoon
(0.17 oz / 5 g) diastatic malt powder (optional)
1 egg (1.75 oz / 50 g)
3 tablespoons (1.5 oz / 43 g) vegetable oil
1 cup (8 oz / 227 g) lukewarm water (about 95°F or 35°C)
½ cup plus 2 tablespoons (5 oz / 142 g) lukewarm milk (any
kind; at about 95°F or 35°C)
2¼ teaspoons (0.25 oz / 7 g) instant yeast
DO AHEAD
In a mixing bowl, whisk the our, salt, and sugar together. In a
separate bowl, whisk the malt syrup, egg, and oil together. Separately,
combine the water and milk, then whisk in the instant yeast until
dissolved.
Add the oil mixture and the water mixture to the dry ingredients. If
using a mixer, switch to the dough hook and mix on the lowest speed,
or continue mixing by hand, for 4 minutes to form a coarse ball of
dough. Let the dough rest for 5 minutes.
Mix for 2 minutes more on medium-low speed or by hand with a
spoon, adjusting with our or water as needed to form a smooth,
supple, and tacky but not sticky dough.
Transfer the dough to a lightly oured work surface and knead for 1
minute, working in more our or water as needed. Form the dough
into a ball.
Place the dough in a clean, lightly oiled bowl large enough to hold
the dough when it doubles in size. Cover the bowl tightly with plastic
wrap, then immediately put it in the refrigerator overnight or for up to
4 days. (If you plan to bake the dough in batches over di erent days,
you can portion the dough and place it into two or more oiled bowls at
this stage.)
ON BAKING DAY
Remove the dough from the refrigerator about 2 hours before you
plan to bake and transfer it to a lightly oured work surface. Divide the
cold dough into 4-ounce (113 g) pieces for 7-inch rolls or 8-ounce (227
g) pieces for foot-long rolls. Flatten each piece of dough with your
hand, then form it into a 4-inch torpedo shape, or a 7-inch torpedo
shape for foot-long rolls, much as you would a bâtard. Let each piece of
dough rest as you move on to the other pieces. When you return to the
rst torpedo, gently roll it back and forth to extend it out to about 7
inches, or 13 inches for a foot-long roll. The roll should have only a
very slight taper at the ends. Place the rolls on a sheet pan lined with
parchment paper or a silicone mat with about 2 inches between the
rolls (it may take 2 pans if you bake the entire batch). The rolls may
shrink back about 1 inch as you pan them. Mist the tops of the rolls
with spray oil, cover loosely with plastic wrap, then let the dough rise
at room temperature for about 1 hour.
Remove the plastic wrap from the rolls. Continue to proof the dough
for another 15 minutes, uncovered. The dough will rise only slightly—
not more than 1½ times its original size.
Use a sharp serrated knife or razor blade to cut a slit down the center
of each roll, about ¼ inch deep and about 3½ inches long (or 8 inches
for foot-long rolls). Let the dough proof for 15 minutes after you make
the cuts. Place a steam pan in the oven (a cast-iron frying pan or sheet
pan works just fine) and preheat the oven to 425°F (218°C).
Transfer the rolls to the oven, pour 1 cup of hot water into the steam
pan, then lower the oven temperature to 400°F (204°C).
Bake for 10 minutes, then rotate the pan and bake for another 10 to
20 minutes, until the rolls are a light golden brown and their internal
temperature is 190°F (88°C) in the center.
Cool on a wire rack for at least 1 hour before slicing or serving.
VARIATION
Feel free to substitute whole wheat our or other whole grain ours
for some of the bread our. If you do so, increase the water by about 1
tablespoon (0.5 oz / 14 g) for every 7 tablespoons (2 oz / 56.5 g) of
whole grain flour you substitute.
MAKES 2 LARGE LOAVES OR MANY ROLLS
I enjoy seeds in bread. They add all sorts of valuable nutrients, and they
just taste so good. This bread is similar to a classic German Mehrkorn
bread, loaded with seeds and just a touch of whole wheat our (though
you can certainly use more whole wheat if you like). I love to make
sandwiches with it, especially peanut butter and jelly, to toast it, or to
simply eat it by the slice. Take my word for it, it tastes really good.
Only the sun ower and pumpkin seeds need to be toasted; the
sesame and axseeds can go in without toasting. Natural sesame seeds,
which are light brown because they still have their hulls, are much
more appealing in this bread than white sesame seeds, which have had
the hulls polished o . If you’re feeling adventurous, you can use other
combinations of seeds. Try adding lightly toasted chopped walnuts or
pecans. Because the dough will sti en overnight in the refrigerator as
the seeds slowly absorb moisture, it’s important to have a very soft,
supple dough—even a tad sticky—before you put it away for the night.
5 cups (22.5 oz / 638 g) unbleached bread flour
⅔ cup (3 oz / 85 g) whole wheat or whole rye flour
½ cup (2 oz / 56.5 g) sesame seeds
⅓ cup (1 oz / 28.5 g) sunflower seeds, lightly toasted
⅓ cup (1 oz / 28.5 g) pumpkin seeds, lightly toasted
3 tablespoons (1 oz / 28.5 g) flaxseeds
2¼ teaspoons (0.6 oz / 17 g) salt, or 3½ teaspoons coarse kosher
salt
1½ tablespoons (0.5 oz / 14 g) instant yeast
3 tablespoons (2 oz / 56.5 g) honey or agave nectar, or ¼ cup
brown sugar
1½ cups (12 oz / 340 g) lukewarm water (about 95°F or 35°C)
¾ cup (6 oz / 170 g) lukewarm buttermilk, any other milk, or
yogurt (about 95°F or 35°C)
Sesame seeds or poppy seeds, for garnish (optional)
DO AHEAD
Combine the ours, seeds, salt, yeast, honey, water, and buttermilk in
a mixing bowl. If using a mixer, use the paddle attachment and mix on
the lowest speed for 2 minutes. If mixing by hand, stir with a large
spoon. The dough should be sticky, coarse, and shaggy. Let the dough
rest for 5 minutes.
Switch to the dough hook and mix on medium-low speed, or
continue mixing by hand, for 3 to 4 minutes, adding our only as
needed to keep the dough ball together, but making sure the dough
remains soft and very tacky or slightly sticky. (In the unlikely event that
the dough is too stiff, work in a little more water.)
Transfer the dough to a oured work surface. Lightly knead it by
hand for about 3 minutes, adding more our as needed to prevent
sticking. The dough will still be soft and slightly sticky but should hold
together to form a soft, supple ball.
Place the dough in a clean, lightly oiled bowl, cover the bowl tightly
with plastic wrap, and refrigerate overnight or for up to 4 days. (If you
plan to bake the dough in batches over di erent days, you can portion
the dough and place it into two or more oiled bowls at this stage.)
ON BAKING DAY
Remove the dough from the refrigerator about 2 hours before you
plan to bake. Shape the cold dough into one or more sandwich loaves,
using 28 ounces (794 g) of dough for 4½ by 8-inch loaf pans and 36
using 28 ounces (794 g) of dough for 4½ by 8-inch loaf pans and 36
ounces (1.02 kg) of dough for 5 by 9-inch pans; into freestanding loaves
of any size, which you can shape as bâtards, baguettes, or boules; or
into rolls, using about 2 ounces (56.5 g) of dough per roll. When
shaping, use only as much our on the work surface as necessary to
keep the dough from sticking. For sandwich loaves, proof the dough in
greased loaf pans. For freestanding loaves and rolls, line a sheet pan
with parchment paper or a silicone mat and proof the dough on the
pan.
Brush the top of the shaped dough with water and sprinkle with
sesame seeds or poppy seeds. (For a shinier crust and better sticking of
the seeds, you could brush with egg white wash instead of water. Mist
with spray oil and cover loosely with plastic wrap. Let the dough rise at
room temperature for 1½ to 2 hours, until increased to about 1½ times
its original size. In loaf pans, the dough should dome at least 1 inch
above the rim.
About 15 minutes before baking, preheat the oven to 350°F (177°C),
or 300°F (149°C) for a convection oven.
Bake loaves for 20 minutes, then rotate the pan; rotate rolls after 8
minutes. The total baking time is 45 to 55 minutes for loaves, and only
20 to 25 minutes for rolls. The bread is done when it has a rich golden
color, the loaf sounds hollow when thumped on the bottom, and the
internal temperature is above 185°F (85°C) in the center.
Cool on a wire rack for at least 20 minutes for rolls and 1 hour for
large loaves before slicing or serving.
MAKES 2 LARGE LOAVES OR MANY ROLLS
This type of dough is often referred to as milk dough, since the primary
enrichment is milk, whether whole, skim, buttermilk, or powdered. It
also contains a fair amount of sweetener and some form of fat or oil.
All of these enrichments serve to keep the bread soft and slightly sweet.
Because of the many enrichments, the dough has a larger percentage of
yeast than lean dough, so it’s especially important to put it into the
refrigerator right after it’s mixed to avoid overfermentation. If you use
honey or agave nectar instead of sugar, increase the amount of our by
3½ to 7 tablespoons (1 to 2 oz / 28.5 to 56.5 g). This dough makes
wonderful sandwich bread and can also be used to make many different
types of rolls, including hamburger and hot dog buns. See the variations
on Making Rolls for a variety of possibilities.
1 tablespoon (0.33 oz / 9 g) instant yeast
1¾ cups plus 2 tablespoons (15 oz / 425 g) lukewarm milk (any
kind; at about 95°F or 35°C)
6¼ cups (28 oz / 794 g) unbleached bread flour
2 teaspoons (0.5 oz / 14 g) salt, or 1 tablespoon coarse kosher salt
5½ tablespoons (2.75 oz / 78 g) sugar, or ¼ cup honey or agave
nectar
6 tablespoons (3 oz / 85 g) vegetable oil or melted unsalted
butter
1 egg (1.75 oz / 50 g)
DO AHEAD
Whisk the yeast into the lukewarm milk until dissolved. Set aside for
1 to 5 minutes.
Combine the our, salt, sugar, oil, and egg in a mixing bowl, then
pour in the milk mixture. If using a mixer, use the paddle attachment
and mix on the lowest speed for 2 minutes. If mixing by hand, use a
large spoon and stir for about 2 minutes. The dough should be coarse
and slightly sticky.
Switch to the dough hook and mix on medium-low speed for 4 to 5
minutes, or knead by hand on a lightly oured work surface for 4 to 5
minutes, until the dough is soft, supple, and tacky but not sticky.
Whichever mixing method you use, knead the dough by hand for 1
minute, then form it into a ball.
Making Rolls
You can use this dough to make any number of soft rolls (see shaping
instructions), such as silver dollars (about 1 ounce each), butter ake
(about 1½ to 2 ounces each), hot dog and hamburger buns (about 2½
to 3½ ounces each), and various knotted rolls (about 1½ ounces to 3
ounces each).
Soft rolls should be brushed with egg wash a few minutes before
baking. After applying the egg wash, you can garnish with poppy seeds
or sesame seeds if you like. The total baking time is 12 to 18 minutes,
depending on size, at 400°F (204°C).
To make butter ake rolls, roll the dough to a ¼ inch thick rectangle or
oval. Brush the surface of the dough with melted butter. Use a pizza
cutter to cut the dough into four even strips, then stack the strips neatly
on top of each other. Use a metal pastry scraper to cut the stacked
strips into 1 inch wide units (about 1½ to 2 ounces each). Place the
small stacks on their sides in an oiled mu n pan. Proof and bake
following the recipe.
Place the dough in a clean, lightly oiled bowl, cover the bowl tightly
with plastic wrap, and refrigerate overnight or for up to 4 days. (If you
plan to bake the dough in batches over di erent days, you can portion
the dough and place it into two or more oiled bowls at this stage.)
ON BAKING DAY
Remove the dough from the refrigerator about 2½ hours before you
Remove the dough from the refrigerator about 2½ hours before you
plan to bake and divide it in half; each piece should weigh about 25
ounces (709 g), which is perfect for 4½ by 8-inch pans. For a 5 by 9inch pan, use 28 to 32 ounces (794 to 907 g) of dough. Shape into
sandwich loaves, then place them in greased loaf pans to rise. (You can
also make a variety of different rolls using the guidelines on see Making
Rolls.) Mist the dough with spray oil and cover the pans loosely with
plastic wrap; then let the dough rise at room temperature for about 2½
hours, until it domes about 1 inch above the rims of the pans.
About 15 minutes before baking, preheat the oven to 350°F (177°C).
Bake for 20 minutes, then rotate the pans and bake for another 20 to
30 minutes. The bread is done when the top is golden brown, the sides
are rm and brown, the loaf sounds hollow when thumped on the
bottom, and the internal temperature is at least 185°F (85°C) in the
center.
Remove from the pans and cool on a wire rack for at least 1 hour
before slicing or serving.
MAKES 2 LARGE LOAVES, 3 SMALLER LOAVES, OR MANY ROLLS
There are many ways to make rye bread, and every bread lover has a
favorite version. But when push comes to shove, the style that sells the
most is soft sandwich rye. This version includes the optional use of
cocoa powder, which darkens the bread in the style of pumpernickel.
Other optional ingredients, whether caraway, minced dried onion, or
nigella seeds (also known as black onion seeds), transform this recipe
into various regional favorites. Adding orange oil or extract and anise
seeds, for example, turns it into a Swedish-style limpa rye bread.
You can use various types of rye flour in this recipe. The version most
commonly sold is the “white our” version of rye, with the bran and
germ sifted out. But if you look around, you should be able to nd
stone-ground, whole grain, or dark rye our, as well as pumpernickel
our. You could even use rye chops or rye meal, which are more
coarsely ground, resembling cracked wheat or steel-cut oats. The tradeo is that whole rye our is more healthful, while light rye yields a
softer, lighter loaf. The choice is yours. The molasses is an important
avor component in this bread, but feel free to reduce the amount or
replace it with sorghum syrup or golden sugar syrup. Just don’t use
blackstrap molasses, which is too strong; look for a product labeled
“old-fashioned,” “fancy,” or “unsulfured.”
SOUR RYE STARTER
¼ cup (2 oz / 56.5 g) mother starter, cold or at room temperature
1⅔ cups (7.5 oz / 213 g) rye flour
¾ cup (6 oz / 170 g) water, at room temperature
DOUGH
All of the sour rye starter (15.5 oz / 439.5 g)
1½ cups plus 3 tablespoons (13.5 oz / 383 g) lukewarm water
(about 95°F or 35°C)
1½ tablespoons (1 oz / 28.5 g) molasses
¼ cup (2 oz / 56.5 g) vegetable oil
2¼ teaspoons (0.25 oz / 7 g) instant yeast
5⅓ cups (24 oz / 680 g) unbleached bread flour
3 tablespoons (1 oz / 28.5 g) cocoa powder (optional)
2 ⅜ teaspoons (0.6 oz / 17 g) salt, or 3½ teaspoons coarse kosher
salt
1 tablespoon caraway seeds, nigella seeds, minced dried onion, or
anise seeds (optional)
¾ teaspoon (0.17 oz / 5 g) orange oil or 1 tablespoon (0.5 oz /
14 g) orange extract (optional)
1 egg white, for egg wash (optional)
1 tablespoon water, for egg wash (optional)
DO AHEAD
To make the starter, combine all of the ingredients in a mixing bowl.
If using a mixer, use the paddle attachment and mix on the lowest
speed for 1 minute, then increase to medium speed for about 30
seconds. If mixing by hand, stir for about 2 minutes, until well blended.
The starter should feel tacky or slightly sticky; if you use coarse rye
our, it will feel like modeling clay, and you may need to add another
2 tablespoons (1 oz / 28.5 g) of water to make it pliable.
Transfer the starter to a clean, lightly oiled bowl, cover the bowl
loosely, and leave it at room temperature for 6 to 8 hours, until the
loosely, and leave it at room temperature for 6 to 8 hours, until the
starter swells noticeably in size and develops a tangy aroma. If you plan
to use the starter the same day, allow 1 more hour of fermentation.
Otherwise, put the starter in the refrigerator for up to 4 days.
To make the dough, cut the starter into 10 to 12 pieces and put them
in a mixing bowl. Separately, combine the water, molasses, and
vegetable oil, then whisk in the yeast until dissolved. Let stand for 1
minute, then pour the mixture over the starter and mix with the paddle
attachment on the lowest speed or with a large spoon for about 1
minute to soften the starter.
Add the flour, cocoa powder, salt, and seeds and orange oil. Switch to
the dough hook and mix on the lowest speed, or continue mixing by
hand, for 4 minutes. If the dough rides up on the dough hook, stop the
mixer and scrape it back into the bowl. The dough should form a
coarse ball that’s soft, supple, and very tacky, verging on sticky. Let the
dough rest for 5 minutes.
Mix on medium-low speed or by hand for 2 minutes more, adding
our or water as needed to make a smooth, supple, tacky ball of
dough.
Transfer the dough to a lightly oured work surface and knead by
hand for about 20 seconds, working in any nal adjustments with our
or water, then form the dough into a ball.
Place the dough in a clean, lightly oiled bowl, cover the bowl with
plastic wrap, and immediately place it in the refrigerator overnight or
for up to 4 days. (If you plan to bake the dough in batches over
di erent days, you can portion the dough and place it into two or more
oiled bowls at this stage.) If baking the bread on the same day, leave
the dough at room temperature for 90 minutes to 2 hours, until it
doubles in size, and then proceed to shaping. The nal rising time, after
shaping, will be 60 to 90 minutes.
ON BAKING DAY
Remove the dough from the refrigerator about 3 hours before you
plan to bake. Shape the dough into one or more sandwich loaves, using
plan to bake. Shape the dough into one or more sandwich loaves, using
28 ounces (794 g) of dough for 4½ by 8-inch loaf pans and 36 ounces
(1.02 kg) of dough for 5 by 9-inch pans; or shape it into freestanding
loaves of any size, which you can shape as bâtards, baguettes, or boules.
For sandwich loaves, proof the dough in greased loaf pans. For
freestanding loaves, line a sheet pan with parchment paper or a
silicone mat and proof the dough on the pan. Mist the dough with
spray oil and cover loosely with plastic wrap, then let the dough rise at
room temperature for about 2½ to 3 hours, until increased to about 1½
times its original size. In loaf pans, the dough should dome at least 1
inch above the rim.
About 15 minutes before baking, preheat the oven to 350°F (177°C)
for sandwich loaves or 400°F (204°C) for freestanding loaves. If you’d
like to use an egg wash to make the crust more shiny, whisk the egg
white and water together, then brush the mixture over the tops of the
loaves. Scoring is optional and only recommended for freestanding
loaves. If you’d like to score them, do so just prior to baking, making 3
to 5 horizontal cuts across the top, about ½ inch deep.
Bake for 20 minutes, then rotate the pans and bake for another 20 to
35 minutes, depending on the size of the loaves. The total baking time
is 40 to 55 minutes for large sandwich loaves and 25 to 45 minutes for
freestanding loaves, depending on size. The bread is done when the
loaves sound hollow when thumped on the bottom and the internal
temperature is about 190°F (88°C).
Remove the loaves from the pans and cool on a wire rack for at least
1 hour before slicing or serving.
VARIATION
Like most bakery rye breads, this recipe calls for sourdough starter,
which actually contains all of the rye our. If you don’t have a mother
starter, you can replace the sour rye starter by adding all of the rye flour
from the starter instructions to the final dough, along with 6 to 7 ounces
(170 to 198 g) of buttermilk or yogurt to provide some acidic tang.
Multicolor Rye Loaves
To make marbled rye bread, make two batches of dough, one light
and one dark.
To shape marbled rye loaves, cut each dough into 12 even-size
pieces. Separate the pieces into 2 piles, with an equal number of
dark and light pieces in each. Form each of the piles into a solid
mass of dough by pressing them together. Shape each into a bâtard.
You can bake the loaves freestanding (which is what I recommend)
or in greased 4½ by 8½-inch loaf pans. For freestanding loaves,
transfer to parchment-lined baking sheets (1 per loaf). Cover and
proof.
For braided marbled rye, divide the light and dark doughs into 4
even-size pieces each. Roll each piece into a strand 10 to 12 inches
in length, thicker in the middle and slightly tapered toward the
ends. Braid 2 light and 2 dark pieces together using the 4-braid
method. You can bake the loaves freestanding (which is what I
recommend) or in greased 4½ by 8½-inch loaf pans. For
freestanding loaves, transfer to parchment-lined baking sheets (1
per loaf). Cover and proof.
For bull’s-eye loaves, divide the light and dark doughs into 4
even-size pieces each. Use a rolling pin to roll each piece into an
oblong about 5 inches wide and 8 inches long. Roll up a dark rye
piece and shape it into a bâtard about 8 inches long. Take a light
rye piece and wrap it around the bâtard, then seal the seam.
Repeat with the remaining dough to make 4 small loaves. Place the
loaves on 2 parchment-lined sheet pans, seam side down, then
cover and proof.
For spiral loaves, divide the light and dark doughs into 4 evensize pieces each. Use a rolling pin to roll each piece into an oblong
about 5 inches wide and 8 inches long. Take a light rye piece and
lay a dark rye piece on top, then add another light rye piece and
another dark rye piece. Roll this stack up and shape it into a
bâtard, and seal the seam. Repeat with the remaining dough to
make 2 loaves. Place the loaves on 2 parchment-lined sheet pans
or in 2 greased 4½ by 8½-inch loaf pans, seam side down, then
cover and proof.
MAKES 2 LARGE LOAVES OR MANY ROLLS
After struan, wild rice and onion bread was the most popular bread at
Brother Juniper’s Bakery, and a version of this recipe appears in my
rst book, Brother Juniper’s Bread Book. The recipe calls for wild rice,
but it can also be made with brown rice or a combination of wild and
brown rice, or any other cooked grain. At Brother Juniper’s, during the
holiday season we even added parsley, sage, rosemary, thyme, garlic
powder, and black pepper, which made for a wonderful bread for
stu ng turkey. Note that it only takes about ¼ cup of uncooked wild
rice to make 1 cup (6 oz, by weight) of cooked wild rice; still, if you’re
going to cook wild rice especially for this recipe, you might as well
make a bigger batch and freeze 1-cup packets for future use—or have it
with dinner!
This new version uses the overnight fermentation method. The yeast
is added directly to the bowl, not rehydrated with the warm water and
buttermilk. You can use either dried or fresh onions, and you can form
the loaves into any size or shape. Dried onions are about one-tenth the
weight of fresh onions and will absorb water from the dough, while
fresh onions will leach moisture back into the dough. If you use dried
onions, don’t rehydrate them before adding them to the dough, but do
be aware that you may have to add an extra 2 to 4 tablespoons (1 to 2
oz) of water while mixing.
6 cups (27 oz / 765 g) unbleached bread flour
2¼ teaspoons (0.6 oz / 17 g) salt, or 3½ teaspoons coarse kosher
salt
2 tablespoons (0.66 oz / 19 g) instant yeast
1 cup (6 oz / 170 g) cooked wild rice or another cooked grain
¼ cup (2 oz / 56.5 g) brown sugar
1½ cups (12 oz / 340 g) lukewarm water (about 95°F or 35°C)
½ cup (4 oz / 113 g) lukewarm buttermilk or any other milk
(about 95°F or 35°C)
¼ cup (1 oz / 28.5 g) minced or chopped dried onions, or 2 cups
(8 oz / 227 g) diced fresh onion (about 1 large onion)
1 tablespoon water, for egg wash (optional)
1 egg white, for egg wash (optional)
DO AHEAD
Combine all of the ingredients, except the egg wash, in a mixing
bowl. If using a mixer, use the paddle attachment and mix on the
lowest speed for 1 minute. If mixing by hand, use a large spoon and stir
for 1 minute. The dough should be sticky, coarse, and shaggy. Let the
dough rest for 5 minutes.
Switch to the dough hook and mix on medium-low speed, or
continue mixing by hand, for 4 minutes, adjusting with our or water
as needed to keep the dough ball together. The dough should be soft,
supple, and slightly sticky.
Transfer the dough to a lightly floured work surface. Knead the dough
for 2 to 3 minutes, adding more our as needed to prevent sticking.
The dough will still be soft and slightly sticky but will hold together to
form a soft, supple ball. Place the dough in a clean, lightly oiled bowl,
cover the bowl tightly with plastic wrap, and immediately refrigerate
overnight or for up to 4 days. (If you plan to bake the dough in batches
over di erent days, you can portion the dough and place it into two or
more oiled bowls at this stage.)
ON BAKING DAY
Remove the dough from the refrigerator about 2 hours before you
plan to bake. Shape the dough into one or more sandwich loaves, using
28 ounces (794 g) of dough for 4½ by 8-inch loaf pans and 36 ounces
(1.02 kg) of dough for 5 by 9-inch pans; into freestanding loaves of any
size, which you can shape as bâtards, baguettes), or boules; or into rolls,
using 2 ounces (56.5 g) of dough per roll. When shaping, use only as
much our as necessary to keep the dough from sticking. For sandwich
loaves, proof the dough in greased loaf pans. For freestanding loaves
and rolls, line a sheet pan with parchment paper or a silicone mat and
proof the dough on the pan.
Mist the top of the dough with spray oil and cover loosely with
plastic wrap. Let the dough rise at room temperature for 1½ to 2 hours,
until increased to about 1½ times its original size. In loaf pans, the
dough should dome at least 1 inch above the rim. If you’d like to make
the rolls more shiny, whisk the egg white and water together, brush the
tops of the rolls with the egg wash just before they’re ready to bake.
About 15 minutes before baking, preheat the oven to 350°F (177°C),
or 300°F (149°C) for a convection oven.
Bake the loaves for 10 to 15 minutes, then rotate the pan; rotate rolls
after 8 minutes. The total baking time is 45 to 55 minutes for loaves,
and only 20 to 25 minutes for rolls. The bread is done when it has a
rich golden color, the loaf sounds hollow when thumped on the
bottom, and the internal temperature is above 185°F (85°C) in the
center.
Cool on a wire rack for at least 20 minutes for rolls or 1 hour for
loaves before slicing.
SOFT AND CRUSTY CHEESE BREADS
Not everyone knows that before I was a bread baker I was a cheese
maker, and in both pursuits I’ve been fascinated by the transformational
aspect, in which a basic ingredient becomes something new and
wonderful—how wheat becomes bread, and milk becomes another
fascinating and mysterious foodstu . I never tire of cheese in any of its
hundreds (maybe thousands) of forms. And together, bread and cheese
always make a winning, almost magical combination that’s found in
many beloved forms throughout the world, including pizza, quesadillas,
focaccia, and grilled cheese sandwiches, not to mention cheese fondue.
There are a number of ways to incorporate cheese into bread, and I’ve
tried most of them. In my opinion, it’s a waste to add grated cheese to
dough and mix it in. While this does create a soft texture and a tastier
loaf, the subtle nuances of the cheese’s avor are completely eclipsed
by the dough, and the cheese seems to disappear. I prefer to roll cheese
in during the shaping stage.
The types of cheese that can be used are endless, though I do advise
against using dry, hard cheese exclusively, as it tends to disappear into
the bread and burn when exposed to the surface heat. Choose a good
melting cheese or use a mixture of soft melting cheeses and intense, dry
cheeses. As for wet cheeses like blue, feta, and brie, I say, why not? You
don’t always have to use expensive cheese, either; supermarket brand
Cheddar, Swiss, or Mozzarella will work just ne. The main rule of
thumb is to use enough cheese that it makes its presence known. If
you’re going to put cheese in bread, you don’t want it to disappear into
the background. Once you’ve learned how to incorporate cheese into
bread using the next two recipes, you can use the same technique with
many other recipes in this book, especially the basic lean bread and
some of the rich holiday breads. (Brioche with cured meat and cheese
baked into it is one of the wonders of the world.)
MAKES 2 LARGE LOAVES OR MANY ROLLS
You can use any kind of beer in this recipe, as both light and dark
brews add subtle flavors that will complement the cheese.
6¼ cups (28 oz / 794 g) unbleached bread flour
2 teaspoons (0.5 oz / 14 g) salt, or 1 tablespoon coarse kosher salt
5 tablespoons (2.25 oz / 64 g) granulated or brown sugar, or 3½
5 tablespoons (2.25 oz / 64 g) granulated or brown sugar, or 3½
tablespoons honey or agave nectar
1 cup (8 oz / 227 g) lukewarm water or beer (about 95°F or
35°C)
1 cup plus 2 tablespoons (9 oz / 255 g) lukewarm buttermilk or
any other milk (about 95°F or 35°C)
1½ tablespoons (0.5 oz / 14 g) instant yeast
¼ cup (2 oz / 56.5 g) melted unsalted butter or vegetable oil
1¾ cups (7 oz / 198 g) diced onion (about 1 medium onion) or 1
small bunch of fresh chives (1 oz / 28.5 g), minced (optional)
2½ cups (12 oz / 340 g) grated, shredded, or cubed cheese
DO AHEAD
In a mixing bowl, whisk the our, salt, and sugar together (if using
honey or agave nectar, dissolve it in the lukewarm water instead).
Separately, combine the water and buttermilk, whisk in the yeast until
dissolved, then pour the mixture and the melted butter into the dry
ingredients. If using a mixer, use the paddle attachment and mix on the
lowest speed for 2 minutes. If mixing by hand, use a large spoon and
stir for about 2 minutes. Let the dough rest for 5 minutes.
Switch to the dough hook and mix on medium-low speed, or
continue mixing by hand, for 3 minutes, adjusting with our or liquid
as needed. The dough should be soft, supple, and tacky but not sticky.
Add the onions and mix on the lowest speed or continue mixing by
hand for 1 minute, until the onions are evenly distributed.
Transfer the dough to a lightly oured work surface and knead for 1
or 2 minutes to make any nal adjustments, then form the dough into a
ball.
Place the dough in a clean, lightly oiled bowl, cover the bowl with
plastic wrap, and immediately refrigerate overnight or for up to 4 days.
(If you plan to bake the dough in batches over di erent days, you can
portion the dough and place it into two or more oiled bowls at this
portion the dough and place it into two or more oiled bowls at this
stage.) The dough should double in size in the refrigerator. If you want
to bake the bread the same day you mix the dough, don’t refrigerate the
nal dough; just let it rest at room temperature for 60 to 90 minutes,
until it doubles in size. Then proceed to shaping and baking as
described below.
ON BAKING DAY
Remove the dough from the refrigerator about 2 hours before you
plan to bake. Transfer the dough to a lightly oured work surface and
divide it into 2 equal pieces, each weighing about 2 pounds (907 g).
Dust each piece with our, then use a rolling pin to roll them into
rectangles about 8 inches wide and 12 inches high. Spread half of the
cheese over the surface of one rectangle and roll the dough up like a
rug, from the bottom to the top, to form a log. If any cheese falls out,
tuck it back in or save it for the second loaf. Seal the seam with your
ngertips. For a sandwich loaf, proof in a greased 4½ by 8-inch loaf
pan (or a 5 by 9-inch pan if using onions, which increase the volume of
the dough). For a freestanding bâtard or rolls, proof on a sheet pan
lined with parchment paper or a silicone mat. Another option is to cut
the log into 1½-inch slices to make spiral rolls; place spiral rolls about
1 inch apart in greased round pans or on a parchment-lined sheet pan.
Mist the shaped dough with spray oil and cover loosely with plastic
wrap, then let the dough rise at room temperature for about 90
minutes, until increased to about 1½ times its original size. In loaf pans,
the dough should dome about 1 inch above the rim.
About 15 minutes before baking, preheat the oven to 350°F (177°C),
or 300°F (149°C) for a convection oven. Because of the cheese, there
may be air pockets or tunnels in the risen dough that could cause it to
separate in the spirals (cubed cheese creates fewer air pockets than
grated or shredded cheese). To minimize this, poke through the top
crust in a few spots with a skewer or toothpick. The dough may fall a
bit, but it will recover in the oven.
Bake loaves for 20 minutes, then rotate the pans; rotate rolls after 10
minutes. The total baking time is about 50 minutes for loaves, and only
minutes. The total baking time is about 50 minutes for loaves, and only
20 to 25 minutes for rolls. The bread is done when it’s a deep golden
brown and the internal temperature is above 185°F (85°C) in the center.
Remove from the pans and cool on a wire rack for at least 15
minutes for rolls and about 1 hour for loaves before slicing or serving.
VARIATIONS
You can substitute potato water (leftover from boiling potatoes) for
the water or beer, which will make the dough even softer. The milk
provides some tenderness and color, but if you prefer a leaner bread
you can replace it with an equal amount of water or potato water.
Feel free to replace some of the bread our with an equivalent
amount (by weight) of whole wheat our or rye our. If you do so,
increase the amount of water by about 1 tablespoon (0.5 oz / 14 g) for
every 7 tablespoons (1 oz / 28.5 g) of whole grain flour you use.
If you would like to avoid the air pockets caused by the melting
cheese, you can knead cubed cheese into the dough after the overnight
rise, just before shaping, rather than rolling it up in the dough. This
will create little cheese bursts throughout the loaf instead of a spiral.
MAKES 2 LARGE LOAVES OR 3 SMALLER LOAVES
Because the cheese may bubble and run out of this bread while in the
oven, I advise baking the loaves on a parchment-lined sheet pan rather
than directly on a baking stone. Any cheese that does run out onto the
pan will be like a crispy little cheese snack, so it won’t go to waste.
SOURDOUGH STARTER
¼ cup (2 oz / 56.5 g) mother starter, cold or at room temperature
1 ⅓ cups (6 oz / 170 g) unbleached bread flour
½ cup (4 oz / 113 g) water
DOUGH
All of the sourdough starter (12 oz / 340 g)
1 cup (8 oz / 227 g) lukewarm water or potato water (about 95°F
or 35°C)
½ cup (4 oz / 113 g) lukewarm whole or low-fat milk (about
95°F or 35°C)
2¼ teaspoons (0.25 oz / 7 g) instant yeast
1½ tablespoons (1 oz / 28.5 g) honey or agave nectar
4½ cups (20 oz / 567 g) unbleached bread flour
2 teaspoons (0.5 oz / 14 g) salt, or 1 tablespoon coarse kosher salt
1¾ cups (7 oz / 198 g) diced onion (about 1 medium onion) or 1
small bunch of fresh chives (1 oz / 28.5 g), minced (optional)
2½ cups (12 oz / 340 g) grated, shredded, or cubed cheese
DO AHEAD
To make the starter, combine all of the ingredients in a mixing bowl.
If using a mixer, use the paddle attachment and mix on the lowest
speed for 1 minute, then increase to medium speed for about 30
seconds. If mixing by hand, stir for about 2 minutes, until well blended.
The starter should feel doughlike and tacky or slightly sticky; if not, stir
in additional flour or water as needed.
Transfer the starter to a lightly oured work surface and knead for
about 30 seconds. Place the starter in a clean, lightly oiled bowl, cover
the bowl loosely, and leave at room temperature for 6 to 8 hours, until
the starter increases to about 1½ times its original size. If you plan to
use the starter the same day, allow 1 more hour of fermentation so that
it nearly doubles in size. Otherwise, put the starter in the refrigerator
for up to 4 days.
To make the dough, chop the starter into 10 to 12 pieces and put
them in a mixing bowl. Separately, combine the water and milk, then
add the yeast and honey and whisk until dissolved. Pour the mixture
over the starter and stir to soften the starter.
Add the our and salt. If using a mixer, use the dough hook and mix
on the lowest speed for about 4 minutes. If mixing by hand, stir with a
large spoon for about 4 minutes. The dough should be soft, supple, and
tacky but not sticky. Let the dough rest for 5 minutes.
Mix with the dough hook on medium-low speed, or continue to mix
by hand, for another 3 minutes, adding our or liquid as needed to
maintain a soft, supple, and tacky but not sticky dough. Add the onions
and mix on the lowest speed or continue mixing by hand for another
minute, until the onions are evenly distributed.
Transfer the dough to a lightly oured work surface and knead for 1
or 2 minutes to make any nal adjustments, then form the dough into a
ball.
Place the dough in a clean, lightly oiled bowl, cover the bowl with
plastic wrap, and immediately refrigerate overnight or for up to 4 days.
(If you plan to bake the dough in batches over di erent days, you can
portion the dough and place it into two or more oiled bowls at this
stage.) The dough should double in size in the refrigerator. If you want
to bake the bread the same day you mix the dough, don’t refrigerate the
nal dough; just let it rest at room temperature for about 60 to 90
minutes, until it doubles in size. Then proceed to shaping and baking,
as described below.
ON BAKING DAY
Remove the dough from the refrigerator about 2 hours before you
plan to bake. Transfer the dough to a lightly oured work surface and
divide it into 2 equal pieces, each weighing about 2 pounds (907 g).
Dust each piece with our, then use your hands to gently press them
into rectangles 8 inches wide and 12 inches deep. Spread half of the
cheese over the surface of one rectangle and roll the dough up like a
rug, from the bottom to the top, to form a log. If any cheese falls out,
tuck it back in or save it for the second loaf. Seal the seam with your
ngertips. Shape the log into a bâtard or extend it into a baguette-style
loaf by gently rocking the loaf back and forth. Place the loaves on
parchment-lined sheet pans, mist with spray oil, and cover loosely with
plastic wrap. Let the dough rise at room temperature for 90 minutes to
2 hours, until the loaves begin to noticeably swell in size.
About 45 minutes before baking, preheat the oven to 450°F (232°C)
and prepare it for hearth baking. About 15 minutes before baking,
uncover the loaves and score them with a sharp serrated knife or razor
blade, making 2 or 3 diagonal cuts about ½ inch deep.
Transfer the dough to the oven, pour 1 cup of hot water into the
steam pan, and lower the oven temperature to 425°F (218°C).
Bake for 15 minutes, then rotate the pans and bake for another 15 to
25 minutes, until the loaves are a deep golden brown and have an
internal temperature above 195°F (91°C) in the center.
Remove from the pans and cool on a wire rack for about 1 hour
Remove from the pans and cool on a wire rack for about 1 hour
before slicing or serving.
VARIATION
If you would like to avoid the air pockets caused by the melting
cheese, you can knead cubed cheese into the dough after the overnight
rise, just before shaping, rather than rolling it up in the dough. This
will create little cheese bursts throughout the loaf instead of a spiral.
MAKES 8 TO 10 MUFFINS
Although store-bought English mu ns may look easy to make, they’re
tricky to do at home, especially if you want to get the spongelike nooks
and crannies that trap butter and jam and are the key to their
popularity. This version is a cross between a crumpet and a roll. On the
inside, it’s soft and custardy with lots of pockets, but the outside is
chewy and nicely caramelized. I took inspiration from a recipe I saw on
the wonderful e-group The Bread-Baker’s List (you can sign up at
www.bread-bakers.com). That recipe was sent in by Werner Gansz, who
clearly spent a lot of time thinking it through. Although this formula is
di erent from his, I thank him for getting me excited about English
mu ns all over again, and for his inventive method, from which I’ve
borrowed many ideas. Thanks also to recipe tester Lucille Johnston,
who made it her personal mission to perfect this recipe.
You’ll need crumpet rings or something similar to make these, as the
dough is thin and batterlike (it later sets up into a soft, sticky dough), so
it must be con ned by a form. The rings are readily available at
cookware stores, but you can also use the rims of quart-size canning
jars. They’re shorter than crumpet rings but still work quite well. You’ll
need to plan ahead in order to follow the process correctly. If you have
a at griddle pan or electric griddle, this is the ideal time to use it, as
making these mu ns is similar to making pancakes. You can also use a
large cast-iron or steel skillet. Other items you’ll also need on hand are
a metal spatula, and a ⅓-cup measure for portioning and pouring the
dough. Finally, you will need cornmeal to give the tops and bottoms of
the English muffins an authentic look.
2 teaspoons (0.5 oz / 14 g) honey
1 tablespoon (0.5 oz / 14 g) vegetable oil or olive oil
1½ cups (12 oz / 340 g) lukewarm whole or nonfat milk (about
95°F or 35°C)
2 ⅔ cups (12 oz / 340 g) unbleached bread flour
¾ teaspoon (0.19 oz / 5.5 g) salt, or 1¼ teaspoon coarse kosher
salt
2 teaspoons (0.22 oz / 6 g) instant yeast
¼ teaspoon (0.06 oz / 2 g) baking soda
3 tablespoons (1.5 oz / 43 g) warm water
Cornmeal, for dusting
DO AHEAD
Add the honey and oil to the milk and stir to dissolve the honey. In a
mixing bowl, whisk the our, salt, and yeast together, then pour in the
milk mixture. Whisk for 1 minute, until all of the ingredients are evenly
distributed and the our is hydrated. You should see gluten strands
forming as the wet sponge develops. Scrape down the bowl with a
spatula, then mix the batter for a few more seconds. Scrape down the
bowl again, then cover tightly with plastic wrap and immediately
refrigerate overnight or for up to 4 days. The batter will bubble and rise
as it cools down.
ON BAKING DAY
Remove the dough from the refrigerator about 2 hours before you
plan to bake the English mu ns. The dough will be much sti er but
still sticky and it will bubble as it comes to room temperature.
When you’re nearly ready to bake, dissolve the baking soda in the
warm water and gently fold it into the dough, just like folding egg
whites into cake batter, until it is fully absorbed. Let the dough rest for
5 to 10 minutes, until it starts bubbling again. Heat a at griddle pan or
cast-iron skillet over medium heat, or to 300°F (149°C) if using an
electric griddle.
Mist the griddle and the inside of the crumpet rings with spray oil,
then dust the inside of the rings with cornmeal. Cover the surface of the
pan with as many rings as it will hold, then dust the pan inside the
rings with more cornmeal. Lower the heat to medium-low, actually
closer to low than to medium; you’ll have to use trial-and-error on this
at first until you find the setting that works with your stove or griddle.
To bake, mist a ⅓-cup measuring cup with spray oil, ll it with
dough, and pour the dough into a ring, lling the ring about two-thirds
full; depending on the size of the ring, you may not need all of the
batter in the scoop to ll each ring, but for standard crumpet rings ⅓
cup of batter is about right. Fill all of the rings, then sprinkle cornmeal
over each muffin.
The dough will not spread immediately to ll the ring but will begin
to slowly rise and soon will ll and reach the top of the ring; it may or
may not bubble. Cook the mu ns for at least 12 minutes, or until the
bottoms are golden brown and crisp and the tops lose their wet look.
Then, ip the mu ns over, rings and all, and cook for 12 minutes
more. If it takes less than 12 minutes per side, your griddle setting is
probably too high and you’ll end up with undercooked muffins.
When both sides are golden brown and the dough is springy to the
touch, remove the mu ns from the pan. Cool them in their rings for
about 2 minutes, then pop them out.
Turn the mu ns on their edge to cool; this will help prevent sinking
and shrinking. Cool for at least 30 minutes before serving. After they
cool, you can split them with a fork to accentuate the interior nooks.
VARIATIONS
You can make a partial whole wheat version by using half bread
our and half whole wheat our. If you do so, increase the amount of
our and half whole wheat our. If you do so, increase the amount of
milk by ¼ cup (2 oz / 56.5 g).
You can also substitute 3½ teaspoons (0.75 oz / 21 g) of barley malt
syrup for the honey if you like.
MAKES 12 TO 17 PRETZELS
There are a number of ways to make pretzels, but I like this version,
especially when the pretzels are served with mustard. The baking
method is similar to making bagels, but not quite the same.
Traditionally, pretzels are dipped in pans of food-grade lye and water
to create the distinctive shiny, dark brown crust, but this kind of lye is
di cult to obtain and dangerous to have lying around the house, so I
suggest substituting a baking soda solution. However, if you can obtain
lye and are comfortable using it, follow the instructions on the package.
(To use lye crystals, combine 0.75 ounce or 21 grams of crystals with 2
cups of water and be sure to wear protective gloves and eyewear—you
can see why I prefer baking soda!)
4½ cups (20 oz / 567 g) unbleached bread flour
1¾ teaspoons (0.4 oz / 11 g) salt, or 2½ teaspoons coarse kosher
salt
1½ tablespoons (0.75 oz / 21 g) brown sugar
1 teaspoon (0.11 oz / 3 g) instant yeast
1½ cups (12 oz / 340 g) lukewarm water (about 95°F or 35°C)
2 tablespoons (1 oz / 28.5 g) vegetable oil or melted unsalted
butter
8 teaspoons (2 oz / 57 g) baking soda, for dipping
2 cups (16 oz / 454 g) warm water (about 100°F or 38°C), for
dipping
1 egg white, for dipping (optional)
Pretzel salt or coarse sea salt, for garnish
DO AHEAD
Combine the our, salt, and sugar in a mixing bowl. Whisk the yeast
into the lukewarm water until dissolved, then let it sit for 1 minute to
hydrate.
Pour the yeast mixture and the oil into the dry ingredients. If using a
mixer, use the paddle and mix on the lowest speed for 30 to 60
seconds. If mixing by hand, use a large spoon and stir for about 1
minute. A coarse ball of dough should form.
Switch to the dough hook and mix on the lowest speed, or continue
mixing by hand, for 2 minutes. The dough will become slightly
smoother. Let the dough rest for 5 minutes.
Continue to mix with the dough hook on medium-low speed, or mix
by hand, for 3 minutes, adjusting the water or our as needed to form a
smooth, rm, but slightly tacky ball of dough. If the dough is very tacky
or sticky, add more flour.
Transfer the dough to a lightly oured work surface and knead for 1
minute to make any nal adjustments. Form the dough into a ball and
place it in a clean, lightly oiled bowl. Cover the bowl tightly with
plastic wrap and immediately refrigerate overnight or for up to 4 days.
(If you plan to bake the dough in batches over di erent days, you can
(If you plan to bake the dough in batches over di erent days, you can
portion the dough and place it into two or more oiled bowls at this
stage.)
ON BAKING DAY
To make the dipping solution, stir the baking soda into the warm
water. Whisk in the optional egg white (this will add a little shine, but
it’s optional).
Preheat the oven to 400°F (204°C). Pour the baking soda solution into
a shallow bowl or small pan.
Remove the dough from the refrigerator and immediately divide it
into 2-ounce (56.5 g) pieces, or 3-ounce (85 g) pieces if you prefer
larger pretzels. Roll each piece into a rope about 17 inches long,
tapered at the last 3 inches of each end (if the rope shrinks back after
rolling, proceed to the next piece and return a few minutes later, after
the gluten has relaxed, and roll the rope again to the full length). Line a
sheet pan with parchment paper or a silicone mat. If parchment, mist it
with spray oil to prevent sticking. Form each piece of dough into a
pretzel shape then place it on the sheet pan.
As soon as the pan is lled, carefully dip each pretzel into the baking
soda solution to thoroughly coat it, then put it back on the pan.
Sprinkle on salt to taste, but be aware that a little goes a long way. (See
the variations below for other garnish suggestions.) Dip and pan all of
the pretzels.
Bake for about 8 minutes, then rotate the pan and bake for another 8
to 10 minutes, until the pretzels are a rich brown.
Transfer the pretzels to a wire rack and cool for at least 10 minutes
before serving.
VARIATIONS
You can substitute whole grain our for some of the bread our. If
you do so, add 1 tablespoon (0.5 oz / 14 g) of water to the nal dough
for every 7 tablespoons (2 oz / 56.5 g) of whole grain flour you use.
You can top these pretzels with many garnishes other than salt.
Sesame seeds are very popular, or try savory or spicy seasoning salts or
a sweet streusel topping. Another option is to scatter a good melting
cheese on the surface for the last 3 minutes of baking. Or, for a
decadent delight, drizzle them with chocolate glaze after they come out
of the oven and have cooled a bit. (You can use the lling for chocolate
croissants, or use the cinnamon sugar crumb.
Shaping Pretzels
Roll each piece of dough into a 17-inch-long rope.
Holding one end of the rope with each hand, cross the strands to
make a loop (similar to crossing your hands across your chest). Lay
the looped dough on the work surface so the bottom of the loop is
closest to you, then cross the strands once more to create an
additional twist. Rest the extra strands of the rope on the loop so a
small nub of dough overhangs slightly. It should now look like a
fairly tight pretzel.
Carefully dip each pretzel into the baking soda solution then
place on the pan.
MAKES 4 PANS OF CRACKERS
Okay, I’ll admit it: Although I’m known primarily as a bread guy, I’ve
been eating far more crackers than bread lately—probably always have,
actually, and it’s a safe bet that I always will. Sure, artisan bread is the
sexy sister, but a good cracker is the hardworking Cinderella of baked
goods, and I think it’s time to bestow the glass slipper. In fact, I have a
feeling that there are many other undeclared cracker freaks out there
just waiting for crackers to be validated as a signi cant player in the
exploding American culinary renaissance.
A quick look at supermarket shelves shows that the real growth for
both crackers and bread is occurring in the whole grain category. Even
iconic brands such as Ritz are coming forth with whole grain products.
I’ve spent nearly twenty years trying to convince folks to bake bread at
home, even tilting at windmills by trying to encourage them to make
100 percent whole grain breads at home, but I’ve encountered far less
resistance in urging that same audience to try making their own whole
grain crackers. Why the receptivity? It’s probably because crackers are
far easier and faster to make than bread (and the dough doesn’t even
need to be held overnight in the refrigerator).
But I also think there are deeper reasons. Crackers are so versatile,
and so easily substituted for chips and other guilt-laden snacks. Whole
grain crackers are the perfect, guilt-free snack. Not only do they have a
satisfying, toasty avor, they’re also loaded with dietary ber, which
helps lessen cravings for sweets and reduce mindless eating between
meals. When properly made, crackers have a long nish. Eat some now
and you’ll still be enjoying the lingering, earthy flavors in 30 minutes.
Crackers can be naturally leavened with yeast, like Armenian lavash;
be chemically leavened with baking powder or baking soda, like many
be chemically leavened with baking powder or baking soda, like many
commercial crackers; or be completely unleavened, like matzo or
Triscuits. They’re usually crisp and aky but don’t have to be. They can
be buttery (with real or fake butter), or lean and mean, like saltines and
other variations of water crackers. Whole grain crackers, regardless of
the leavening method, have one major factor going for them: ber, lots
and lots of fiber.
This cracker recipe is easy to make at home, even if you’ve never
baked a loaf of bread in your life. It’s a variation of one of the most
popular recipes from my previous book, Peter Reinhart’s Whole Grain
Breads, and is especially fun to make with kids. I’ve adjusted the recipe
so that these crackers, which are unlike any crackers you can buy, are
even more crisp than the original. I’m ready to start a home-baked
cracker revolution to match the bread revolution of the last fteen years
and hope I can enlist you in the cause.
¼ cup (1.5 oz / 42.5 g) sunflower seeds
¼ cup (1.5 oz / 42.5 g) pumpkin seeds
3 tablespoons (1 oz / 28.5 g) flaxseeds
6 tablespoons (2 oz / 56.5 g) sesame seeds
1¾ cups (8 oz / 227 g) rye flour
¼ teaspoon salt, or ⅓ teaspoon coarse kosher salt
2 tablespoons (1 oz / 28.5 g) vegetable oil
1 tablespoon (0.75 oz / 21 g) honey or agave nectar
¾ cup (6 oz / 170 g) water, at room temperature
Egg white wash or sweet wash
Garnishes (see variations, opposite)
DO AHEAD
Grind the sun ower and pumpkin seeds into a ne powder or our
in a blender or spice grinder. Blend in pulses and be careful not to
blend too long, or they’ll turn into seed butter. Separately, grind the
flaxseeds into a fine powder.
Combine the seed powders and the whole sesame seeds, rye our,
salt, vegetable oil, honey, and water in a mixing bowl. If using a mixer,
use the paddle attachment and mix on slow speed for 1 to 2 minutes. If
mixing by hand, use a large, sturdy spoon and stir for 1 or 2 minutes.
The dough should quickly form a rm ball and shouldn’t be sticky. Stir
in flour or water as needed to adjust the texture.
Transfer the dough to a lightly oured work surface and knead for
about 30 seconds to be sure all of the ingredients are evenly distributed
and that the dough holds together. It should be slightly tacky but not
sticky.
Preheat the oven to 300°F (149°C), or 275°F (135°C) for a convection
oven, and prepare 1 baking sheet for each quarter of the dough that
you plan to bake, lining them with parchment paper or a silicone mat.
You don’t need to oil the paper or liner.
Divide the dough into four equal pieces. (For any that you won’t be
baking right away, wrap them well, and refrigerate for up to 1 week or
freeze for up to 3 months; the avor actually improves after a day or
freeze for up to 3 months; the avor actually improves after a day or
two in the refrigerator.) Use a rolling pin to roll out one portion of the
dough on a oured work surface, frequently lifting the dough with a
metal pastry scraper or bowl scraper to be sure it isn’t sticking and
dusting with more our underneath if need be. You can also ip the
dough over and continue rolling with the bottom side up. The goal is to
roll it to about inch in thickness. If the dough resists, gently set it
aside and begin rolling out another piece, or let it rest for about 2
minutes. When you return to it, it will roll more easily.
FINISHING THE DOUGH AND BAKING
Brush the surface of the dough with an even coating of whichever
wash you prefer, then sprinkle the surface with whatever garnishes you
like (see the variations below).
Use a pizza cutter to cut the rolled dough into rectangles, diamonds,
or other shapes. You can also use a small biscuit cutter dipped in our
to make round crackers, but this takes longer, and then you have
leftover dough. The crackers need not all be the same size. Transfer the
crackers to the prepared pan. They can be nearly touching, as they
won’t spread or rise.
If making more than one pan of crackers, you can bake them all at
once. Place the pans on di erent shelves and bake for 10 minutes, then
rotate the pans and bake for another 10 minutes. Rotate the pans once
more and continue baking until they’re done—typically 25 to 30
minutes altogether, but it depends on how thin you roll them and on
your oven. The crackers are done when they have a rich golden brown
color and are fairly dry and crisp. Leave them on the pans to cool so
they’ll crisp up even more. To get a little more browning on the
crackers, increase the heat to 325°F (163°C) after they’ve dried
su ciently to be crisp (20 to 25 minutes). If they don’t snap cleanly
after they cool, return the pan to a hot oven for a few more minutes
until they dry sufficiently to snap when broken.
Cool for at least 15 minutes before serving. Once thoroughly cooled,
the crackers can be stored in an airtight container at room temperature
for about 8 days, or in a ziplock bag in the freezer indefinitely.
VARIATIONS
Sesame seeds and poppy seeds are the best garnishing seeds because
they’re light, and because their avor isn’t so strong that they’ll
overpower the taste of the cracker, as something like cumin or anise
seeds would. Flaxseeds are a little too hard to chew, especially when
baked on top of crackers, but some people do like them as a garnish.
Other savory garnishes include garlic salt, lemon pepper, and other
common spice blends and rubs. You can make wonderful toppings by
combining herbs and oil, such as herbes de Provence covered with just
enough oil to make a paste. In this case, don’t use a glaze; simply brush
the oil on the cracker dough just prior to baking. Flavored herb and
garlic oils can also be brushed onto the crackers as soon as they come
out of the oven, to shine them up and add avor. If you try this, return
the crackers to the oven for 5 minutes more to set the glaze.
This recipe uses rye our for a unique avor, but you can substitute
either regular whole wheat our or the newly popular white whole
wheat our, which is a lighter color and has a slightly sweeter, less
bitter avor than traditional red wheat. You can also use all-purpose
our if you prefer a lighter cracker, and reduce the water by 1
tablespoon for every 2 ounces of white flour that you substitute.
Garnishing Washes
To make the garnishes stick to the dough, you need either an egg
white wash for savory crackers or a sweet wash for seeds or a
sweet garnish. To make the egg wash, whisk 1 egg white with 2
tablespoons of water. To make the sweet wash, whisk 1 tablespoon
of honey or agave nectar with 3 tablespoons of water.
MAKES 4 PANS OF CRACKERS
This recipe makes a home-baked cracker similar to the famous,
wonderfully buttery tasting Ritz brand crackers. Recipe tester Pamela
Schmidt, who worked long and hard on this one, determined that a
little garlic powder in the dough made these taste even more like Ritz
crackers. I don’t know if Ritz actually puts garlic powder in their
version, but it does add a nice avor, so I’m going with Pamela on this
one.
1¼ cups (5.5 oz / 156 g) all-purpose flour
1 cup (4.5 oz / 128 g) cake flour
1 teaspoon (0.25 oz / 7 g) salt, or 1½ teaspoons coarse kosher salt
1 tablespoon (0.5 oz / 14 g) sugar
¾ teaspoon (0.18 oz / 5.25 g) baking powder
½ teaspoon (0.13 oz / 3.5 g) garlic powder
10 tablespoons (5 oz / 142 g) melted unsalted butter or vegetable
oil, plus 4 tablespoons (2 oz / 57 g) melted unsalted butter for
garnishing (optional)
1 egg (1.75 oz / 50 g)
6 tablespoons (3 oz / 85 g) cold milk (any kind)
Egg wash
DO AHEAD
Combine all of the ingredients, except the optional butter for
Combine all of the ingredients, except the optional butter for
garnishing and the egg wash, in a mixing bowl. If using a mixer, mix
with the paddle attachment on low speed for 1 minute. If mixing by
hand, use a large, sturdy spoon and mix for 1 minute. The dough
should form a rm ball and shouldn’t be sticky. Stir in our or water as
needed to adjust the texture.
Transfer the dough to a lightly oured work surface and knead for
about 30 seconds to be sure all of the ingredients are evenly distributed
and that the dough holds together. It should be slightly tacky but not
sticky.
Preheat the oven to 400°F (204°C), or 350°F (175°C) for a convection
oven, and line 2 baking sheets with parchment paper or a silicone mat.
You don’t need to oil the paper or liner.
Use a rolling pin to roll out the dough on the oured work surface,
frequently lifting the dough with a metal pastry scraper or bowl scraper
to be sure it isn’t sticking and dusting with more our underneath if
need be. You can also ip the dough over and continue rolling with the
bottom side up. The goal is to roll it to about ⅛ inch in thickness. Use
a fork or dough docker (a roller device with studs) and poke holes all
over the surface of the dough. Brush the surface of the dough with an
even coating of the egg wash and sprinkle with fine salt.
FINISHING THE DOUGH AND BAKING
Use a small biscuit cutter (a crimped cutter is preferred but not
required) dipped in our to make round crackers. Place the crackers
about ½ inch apart on one of the prepared pans. Gather any scrap
dough and repeat the rolling out, egg wash, and garnishing process
until all the dough is formed into crackers. (You can also cut the dough
with a pizza cutter into rectangles or diamonds, if you prefer.)
If making more than one pan of crackers, you can bake them all at
once. Place the pans on di erent shelves and bake for 8 minutes, then
rotate the pans and bake for another 8 to 12 minutes, or until the
crackers are rm and lightly golden. Remove the pans from the oven
and brush the hot crackers with the melted butter, if garnishing.
Immediately, turn o the oven, then return the pans to the hot oven for
Immediately, turn o the oven, then return the pans to the hot oven for
3 to 5 minutes. Remove the pans from the oven and let the crackers
cool on the pan. The crackers are done when they have a rich golden
brown color and are fairly dry and crisp. If they don’t snap cleanly after
they cool, return the pan to a hot oven for a few more minutes until
they dry sufficiently to snap when broken.
CHAPTER 5
Rich Breads
breads are the privileged cousins of enriched breads, as they are
higher in fat and, sometimes, sugar. Butter is the fat of choice,
Richmuch
here, though other fats will work, including vegetable oil. These
breads are usually made for special occasions, as they require careful
attention at almost every stage: mixing, shaping, and baking. Rich
breads are generally de ned as having at least 10 percent fat and/or
sweetener (in ratio to the our), but are often much richer than that.
The abundance of enrichments helps to create a tender, buttery texture
and mouthfeel, as well as to impart a deep and abiding sense of
satisfaction.
MAKES ABOUT 24 CINNAMON BUNS
The simple, sweet enriched dough for these cinnamon buns is very
versatile. It can also be used to make to make everything from sticky
buns and co ee crumb cake to fruit- lled thumbprint pastries. Even
though this dough doesn’t contain eggs, it can still make all of these
products, and more, but with less work and fewer calories than some of
the richer recipes that follow. I wouldn’t exactly call this health food,
but anything made with this dough is de nitely comfort food to the
max!
I’ve suggested chopped walnuts or pecans, but feel free to experiment
with other nuts. I’ve given you the option of either a cream cheese
frosting or a fondant glaze, both of which are delicious and commonly
used in pastry shops. The corn syrup in the fondant glaze is optional,
but using it will make the glaze smoother. Using milk, rather than
water, in the fondant will also make it creamier and softer.
ALL-PURPOSE SWEET DOUGH
6¼ cups (28 oz / 794 g) unbleached all-purpose flour
2 teaspoons (0.5 oz / 14 g) salt, or 1 tablespoon coarse kosher salt
6 tablespoons (3 oz / 85 g) sugar
5 teaspoons (0.55 oz / 15.5 g) instant yeast
2 cups plus 2 tablespoons (17 oz / 482 g) lukewarm whole or
low-fat milk (about 95°F or 35°C)
½ cup (4 oz / 113 g) vegetable oil or melted unsalted butter
Zest of ½ lemon, or 1 tablespoon lemon extract, or ½ teaspoon
Zest of ½ lemon, or 1 tablespoon lemon extract, or ½ teaspoon
lemon oil (optional)
TOPPING
3 tablespoons (1.5 oz / 43 g) ground cinnamon
¾ cup (6 oz / 170 g) sugar
Melted butter or vegetable oil, for brushing
1 cup (6 oz / 170 g) raisins, or to taste (optional)
1 cup (5 oz / 142 g) chopped walnuts or pecans, or to taste
(optional)
DO AHEAD
To make the dough, combine the our, salt, and sugar in a mixing
bowl. Whisk the yeast into the milk until dissolved, then pour the
mixture into the dry ingredients, along with the oil and lemon zest. If
using a mixer, use the paddle attachment and mix on the lowest speed
for 30 seconds to 1 minute. If mixing by hand, use a large spoon and
stir for about 1 minute. The dough should form a soft, coarse ball.
Switch to the dough hook and mix on medium-low speed, or
continue mixing by hand, for 4 minutes, adding our or milk as needed
to create a smooth, soft, slightly sticky ball of dough.
Increase the speed to medium and mix for 2 minutes more or
continue stirring for about 2 minutes more, until the dough is very soft,
supple, and tacky but not sticky.
Transfer the dough to a lightly oured work surface and knead for 1
minute, then form it into a ball.
Place the dough in a clean, lightly oiled bowl large enough to hold
the dough when it doubles in size. Cover the bowl tightly with plastic
wrap, and refrigerate overnight or for up to 4 days.
ON BAKING DAY
Remove the dough from the refrigerator about 3 hours before you
plan to bake. Divide the dough in half and form each piece into a ball.
Cover each ball with a bowl or plastic wrap and let rest for 20 minutes.
On a oured work surface, roll each ball of dough into a 12 by 15inch rectangle, rolling from the center to the corners and then rolling
out to the sides. If the dough starts to resist or shrink back, let it rest for
1 minute, then continue rolling. The dough should be between ¼ and
½ inch thick.
Make cinnamon sugar by whisking the cinnamon into the sugar.
Brush the surface of the dough with melted butter, then sprinkle the
cinnamon sugar over the surface, leaving a ¼-inch border. Sprinkle the
raisins, chopped nuts, or both over the surface if you like, to taste. Roll
up the dough like a rug, rolling from the bottom to the top, to form a
tight log.
Cut the log into 1-inch-thick slices and place them on a sheet pan or
two round cake pans lined with parchment paper or a silicone mat,
placing the rolls about 1½ inches apart; they should touch each other
once they rise. Mist the tops with spray oil and cover loosely with
plastic wrap, then let rise at room temperature for about 2 hours, until
the dough swells noticeably and the buns begin to expand into each
the dough swells noticeably and the buns begin to expand into each
other.
About 15 minutes before baking, preheat the oven to 350°F (177°C).
Bake for 10 minutes, then rotate the pan and bake for another 5 to
15 minutes, until the buns are a rich golden brown. Meanwhile, make
whichever topping you prefer.
Once the buns are glazed, enjoy!
CREAM CHEESE FROSTING
4 ounces (113 g) cream cheese
¼ cup (2 oz / 56.5 g) melted unsalted butter
1 cup (3 oz / 85 g) confectioners’ sugar, sifted
1 teaspoon (0.25 oz / 7 g) vanilla extract
¼ teaspoon (0.25 oz / 7 g) lemon or orange extract, or 1
teaspoon (0.25 oz / 7 g) lemon juice or orange liqueur
Pinch of salt
Combine the cream cheese, butter, and sugar in a mixing bowl. If
using a mixer, use the paddle attachment and mix on the lowest speed
for 2 minutes. If mixing by hand, stir vigorously for 2 to 4 minutes. The
ingredients should be evenly incorporated and smooth. Add the vanilla,
lemon extract, and salt and mix on medium speed, or continue mixing
by hand, for about 1 minute, until the ingredients form a smooth paste.
Increase the speed to medium-high or stir more vigorously for about 20
seconds to u up the glaze. Once the buns have cooled for 5 minutes,
use an o set spatula or a table knife to spread on however much glaze
you’d like. Stored in an airtight container in the refrigerator; any unused
you’d like. Stored in an airtight container in the refrigerator; any unused
glaze will keep for up to 2 weeks.
WHITE FONDANT GLAZE
4 cups (12 oz / 340 g) confectioners’ sugar, sifted
2 tablespoons (1.5 oz / 43 g) light corn syrup (optional)
1 teaspoon (0.25 oz / 7 g) vanilla, lemon, or orange extract, or 1
tablespoon (0.75 oz / 21 g) orange juice concentrate (optional)
½ to ¾ cup (4 to 6 ounces / 113 to 170 g) milk or water
Stir the sugar, corn syrup, and vanilla together. Gradually whisk in
the milk, adding just enough to make a thick but creamy glaze about
the same thickness as pancake batter, adjusting with more liquid or
sugar as needed. The thickness of the glaze is up to you; the sti er it is,
the better it will hold its design; the thinner it is, the more easily it will
spread. Ideally, you should be able to drizzle a slow steady stream o
the end of a spoon or other utensil to create designs that will rm up
when the buns cool. Glaze the buns after they’ve cooled for about 5
minutes.
MAKES 24 STICKY BUNS
For sticky buns, be sure to use pans with at least 2-inch-high walls, as
the slurry will bubble and foam while baking and could over ow a pan
with a shallow rim. Place the pans on a sheet pan to catch any glaze
that does bubble over. I’ve given you three options for the sweet slurry
in the bottom of the pan. Each is delicious, so you’ll just have to give
them all a try and see which you prefer. Thanks to recipe tester Jim
Lee for the delicious creamy caramel slurry recipe, a classic cream and
sugar version, which is very easy to make. His caramel is di erent in
texture and color from Susan’s (my wife’s no-longer-secret recipe!),
which is made from a sugar and butter combination, but both result in
serious childhood ashbacks. If you use the honey almond slurry, yet
another wonderful glaze, it would be a good idea to use slivered or
coarsely chopped almonds if you sprinkle nuts over the dough before
rolling it up. Whichever version you use, the uncooked slurry should
cover the bottom of the pan to a thickness of about ¼ inch.
1 recipe all-purpose sweet dough
3 tablespoons (1.5 oz / 42 g) ground cinnamon
¾ cup (6 oz / 170 g) sugar
Melted butter or vegetable oil, for brushing
1 cup (6 oz / 170 g) raisins, or to taste (optional)
1 cup (5 oz / 142 g) chopped walnuts or pecans, or to taste
(optional)
Prepare the all-purpose sweet dough.
ON BAKING DAY
Remove the sweet dough from the refrigerator about 3 hours before
you plan to bake. Divide it in half and form each piece into a ball.
Cover each ball with a bowl or plastic wrap and let rest for 20 minutes.
On a oured work surface, roll each ball of dough into a 12 by 15inch rectangle, rolling from the center to the corners and then rolling
out to the sides. If the dough starts to resist or shrink back, let it rest for
1 minute, then continue rolling. The dough should be between ¼ and
½ inch thick.
Make cinnamon sugar by whisking the cinnamon into the sugar.
Brush the surface of the dough with melted butter, then sprinkle the
cinnamon sugar over the surface, leaving a ¼-inch border. Sprinkle the
raisins, chopped nuts, or both over the surface if you like. Roll up the
dough like a rug, rolling from the bottom to the top to form a tight log.
Make one of the slurries.
Fill the bottom of two 8- or 9-inch round pans or one 12-inch square
pan with ¼ inch of one of the slurries. Store any excess slurry in the
refrigerator, where it will keep for at least 2 weeks. Sprinkle chopped
nuts over the slurry if you like; although this is optional, it’s highly
advised for flavor.
Cut the log into 1-inch slices and place them on the slurry with the
nicest side down, leaving about 1 inch of space between the buns. Mist
with spray oil and cover loosely with plastic wrap, then let rise at room
temperature for about 2 hours, until the dough swells noticeably and
the buns begin to expand into each other.
About 15 minutes before baking, put the oven rack in a low position
(so the slurry gets plenty of bottom heat) and preheat the oven to 350°F
(177°C).
Bake for 20 to 25 minutes, rotating the pans as needed for an even
bake. The slurry will melt, bubble, and caramelize, and the visible
dough will be a dark golden brown. Lift one of the buns with a metal
spatula or a pair of tongs to check the underside of the dough, which
should be a light caramel brown, not white. The sugar slurry should
turn a rich amber or golden brown, and all of the sugar should have
melted to become caramel. (If it is still grainy and not amber, continue
baking; you can put a tent of aluminum foil over the buns to protect
them from getting too dark while the slurry finishes caramelizing.)
Remove the pans from the oven and let the buns cool for 2 to 3
minutes in the pans so the caramel begins to rm up. Place a platter or
pan over the top of the baking pan. It should be large enough to cover
the baking pan and hold all of the buns. Wearing oven mitts or using
hot pads, ip the entire assemblage over to release the buns and
caramel onto the platter. Be careful, the glaze will still be very hot at
this point. Use a rubber spatula to scrape any remaining glaze from the
pan and drizzle it over the tops of the buns.
Cool for at least 15 minutes before serving.
VARIATIONS
A nice addition is to sprinkle about ½ cup (3 oz / 85 g) of raisins,
dried cranberries, or other dried fruit over the slurry before placing the
rolls in the pan. If using larger dried fruits, such as dried apricots, chop
them into small bits first.
You can also bake the buns in greased mu n tins. Put ¼ inch of
slurry in each cup, sprinkle in nuts or dried fruit as you wish, then press
in a slice of the rolled dough. You’ll probably need to slice the log
thinner than 1 inch so that the spirals ll the mu n cups half full.
Proof and bake as directed above.
CREAMY CARAMEL SLURRY
½ cup (4 oz / 113 g) granulated sugar
½ cup (4 oz / 113 g) light brown sugar
½ cup (4 oz / 113 g) heavy or whipping cream
1 tablespoon (0.5 oz / 14 g) unsalted butter, melted or at room
temperature
1 tablespoon (0.75 oz / 21 g) light corn syrup
Combine all of the ingredients in a mixing bowl. If using a mixer, use
the paddle attachment and mix on medium speed for 1 to 2 minutes. If
mixing by hand, stir vigorously with a large spoon for about 2 minutes.
The mixture should be smooth and homogeneous.
HONEY ALMOND SLURRY
1 cup (12 oz / 340 g) honey
1 cup (8 oz / 227 g) unsalted butter, melted or at room
temperature
¼ teaspoon salt, or ⅜ teaspoon coarse kosher salt
1 teaspoon (0.25 oz / 7 g) almond extract
Combine all of the ingredients in a mixing bowl. If using a mixer, use
the paddle attachment and mix on medium-high speed for about 2
minutes. If mixing by hand, stir vigorously with a large spoon for about
minutes. If mixing by hand, stir vigorously with a large spoon for about
2 minutes. The mixture should be smooth and homogeneous.
SUSAN’S STICKY BUN SLURRY
½ cup (4 oz / 113 g) granulated sugar
½ cup (4 oz / 113 g) light brown sugar
½ cup (4 oz / 113 g) unsalted butter, melted or at room
temperature
2 tablespoons (1.5 oz / 43 g) light corn syrup
¼ teaspoon salt, or ⅜ teaspoon coarse kosher salt
½ teaspoon (0.13 oz / 3.5 g) lemon or orange extract (optional)
Combine the sugars and butter in a mixing bowl. If using a mixer, use
the paddle attachment and mix on medium speed for 2 minutes. If
mixing by hand, stir vigorously with a large spoon for 2 minutes. The
ingredients should be smooth and evenly blended. Add the corn syrup,
salt, and lemon extract and mix with the paddle attachment on medium
speed, or continue mixing vigorously by hand, for about 2 minutes.
Increase to medium-high speed or stir even more vigorously for 1 or 2
minutes, until the slurry is fluffy.
MAKES ONE 12 BY 16-INCH COFFEE CAKE OR THREE 9-INCH ROUND COFFEE CAKES
1 recipe all-purpose sweet dough
CRUMB TOPPING
1 cup (4.5 oz / 128 g) all-purpose flour
1 cup (8 oz / 113 g) light brown sugar
⅛ teaspoon salt
¼ teaspoon ground cinnamon
⅛ teaspoon of one other spice such as nutmeg, allspice, cloves,
cardamom, or ground ginger (optional)
½ cup (4 oz / 113 g) melted unsalted butter
DO AHEAD
Prepare the all-purpose sweet dough.
ON BAKING DAY
Remove the dough from the refrigerator about 2 hours before you
plan to bake. Prepare a 12 by 16-inch pan if baking all of the dough
(about 36 ounces, or 1.02 kg), or a 9-inch round pan if baking a smaller
amount (about 12 ounces, or 340 g), by lining with parchment paper or
a silicone mat, then generously greasing with vegetable oil or melted
butter. Dip your ngertips in a small dish of vegetable oil or melted
butter, then use your ngertips to dimple the dough and spread it to
butter, then use your ngertips to dimple the dough and spread it to
cover the sheet pan as fully and evenly as possible, much as you would
for pressing out focaccia. If the dough resists or starts to shrink back,
give it 20 minutes to rest, then dimple and spread it again. Each time
you dimple the dough, it should cover the pan more completely, but it
may take 3 pressings to spread it fully. Cover the pan loosely with
plastic wrap and let the dough rise at room temperature for about 2
hours, until doubled in size. It should rise to a height of 1 inch to 1½
inches.
To make the crumb topping, whisk the our, sugar, salt, cinnamon,
and other spice together, then pour in the melted butter. Stir with a
large spoon, then switch to mixing with your ngers to make streusellike crumbles. Cover the dough with the crumb topping.
About 15 minutes before baking, preheat the oven to 350°F (177°C).
Bake for 15 minutes, then rotate the pan and bake for another 10 to
20 minutes, until the crumb topping is golden brown and the dough
underneath is springy to the touch. The total baking time will vary
depending on the size of the pan, so watch the co ee cake closely
toward the end of the baking time.
Cool in the pan for 30 to 45 minutes before cutting into squares or
wedges and serving.
VARIATIONS
Consider adding chopped nuts, fresh or frozen fruit, or both to the
crumb topping. Choose whatever nuts or fruit you like; I recommend
blueberries, peaches, mango, or pineapple. (Cut larger fruits into small
chunks.)
Another option is to top the co ee cake with a drizzle of white
fondant glaze after it cools. Or, for a simple but popular garnish, dust
the top with confectioners’ sugar.
MAKES UP TO 36 ROLLS
Feel free to be creative with the llings for these delicious pastries,
which are similar to kolaches. I have suggested a couple of llings
below, which are also excellent for Danish, but you can also use storebought pie fillings.
1 recipe all-purpose sweet dough
1 recipe fruit filling or lemon curd, or 1 can commercial pie
filling
1 recipe white fondant glaze
DO AHEAD
Prepare the all-purpose sweet dough.
ON BAKING DAY
Preheat the oven to 375°F (191°C). Remove the dough from the
refrigerator and divide it into 1½-ounce pieces. Form each piece into a
tight round roll, then place the rolls on a parchment-lined sheet pan,
about 1½ inches apart. Mist the tops of the rolls with spray oil and
cover loosely with plastic wrap. Proof at room temperature for about 2
hours, until the rolls have increased to about 1½ times their original
size.
Dip your thumb in water, then use it to press a deep dimple into
each roll. Press almost to the bottom of the dough and rotate your
thumb to widen the dimple to about 1 inch across. The roll will spread
slightly. Fill the thumbprint with the lling of your choice, and feel free
to use a variety of fillings so that you’ll have an assortment of rolls.
Bake for 15 to 20 minutes, until a golden brown, rotating the pan as
necessary for even browning. As soon as the rolls come out of the oven,
brush them with the fondant glaze (which will melt) and let cool for 5
minutes. Then drizzle more glaze over the tops of the rolls while
they’re still slightly warm, to create decorative streaks.
Serve warm or cold.
MAKES 1 LARGE LOAF
Babka is a rich, yeasted cross between bread and co ee cake with an
equally rich Russian and Polish culinary heritage. The name is derived
from the Russian baba, which means grandmother, an appropriate
name for this wonderful comfort food. While it is mostly known as a
popular Jewish bread lled with some combination of chocolate,
cinnamon, almonds, even poppy seeds and sometimes topped with
streusel, it can also be lled with raisins or soaked with rum, as in baba
au rhum. The dough is rich enough that it can also be used for brioche
and kugelhopf. In American bakeries, babka is most often formed as a
twisted loaf with veins of the sweet lling running throughout, baked
either in a loaf pan or freestanding. However, the Israeli version,
known as kranz cake, uses a dramatic shaping technique that many of
my recipe testers found appealing.
This recipe is my favorite version, with both cinnamon and chocolate
in the lling. Of course, you can leave out the chocolate and make a
cinnamon sugar version, or leave out the cinnamon and make just a
chocolate version, but I say, why leave out either? It’s easier to grind
the chocolate chips or chunks if they’re frozen. After you grind them,
you can add the cinnamon and butter and continue to process them all
together. The streusel topping is also optional, but I highly recommend
using it on the freestanding versions.
2 tablespoons (0.66 oz / 19 g) instant yeast
¾ cup (6 oz / 170 g) lukewarm milk (any kind; at about 95°F or
35°C)
6 tablespoons (3 oz / 85 g) unsalted butter, melted or at room
temperature
6 tablespoons (3 oz / 85 g) sugar
1 teaspoon (0.25 oz / 7 g) vanilla extract
4 egg yolks (3 oz / 85 g)
3 ⅓ cups (15 oz / 425 g) unbleached all-purpose flour
1 teaspoon (0.25 oz / 7 g) salt, or 1½ teaspoons coarse kosher salt
1 egg, for egg wash (if using streusel topping)
1 tablespoon water, for egg wash (if using streusel topping)
FILLING
1½ cups (9 oz / 255 g) frozen semisweet dark chocolate chips or
chunks
1 teaspoon (0.25 oz / 7 g) ground cinnamon
¼ cup (2 oz / 56.5 g) cold unsalted butter
STREUSEL TOPPING (OPTIONAL)
¼ cup (2 oz / 56.5 g) cold unsalted butter
½ cup (2.25 oz / 64 g) all-purpose flour
½ cup (4 oz / 113 g) brown sugar
Pinch of salt
¼ teaspoon ground cinnamon (optional)
DO AHEAD
Whisk the yeast into the lukewarm milk until dissolved, then set it
aside for about 5 minutes before mixing it into the dough.
Cream the butter and sugar together until smooth. If using a mixer,
use the paddle attachment and mix on medium speed for 1 to 2
minutes. If mixing by hand, use a large wooden spoon and beat
vigorously for about 2 minutes. Add the vanilla to the egg yolks and
whisk lightly to break up the yolks, then add the yolks to the sugar
mixture in four portions, mixing until each is incorporated before
adding the next. Increase the mixer speed to medium-high or continue
mixing by hand for another 2 minutes, until the mixture is u y,
scraping down the sides of the bowl a couple of times during the
process.
Stop mixing and add the our and salt, then pour in the milk
mixture. Resume mixing at low speed, or continue to stir by hand, for 2
to 3 minutes, to make a soft, supple, tacky dough. If using a mixer and
the mixer begins to struggle, switch to the dough hook; if mixing by
hand, use a very sturdy spoon or your hands.
Transfer the dough to a oured work surface and knead by hand for
2 minutes more, adding more our as needed to make the dough
pliable. The dough should be a beautiful golden color and feel soft and
supple. Form the dough into a ball.
Place the dough in a clean, lightly oiled bowl, cover the bowl tightly
with plastic wrap, and leave at room temperature for about 2½ hours.
It will rise somewhat, but won’t double in size. If it rises signi cantly in
less time, you can move to the shaping step or place it in the
refrigerator overnight to be rolled out the next day.
FILLING AND BAKING
Prepare the lling while the dough is rising. Grind the chocolate in a
food processor until it’s nearly powdered; if you don’t have a food
processor, chop the chocolate as ne as possible with a knife or metal
pastry scraper. Add the cinnamon and pulse or stir a time or two to
incorporate. Cut the butter into 8 to 10 pieces, add it to the food
processor, and pulse until the butter is evenly dispersed into the
chocolate mixture; or cut the butter into the chocolate mixture with a
metal pastry scraper to make a streusel-like chocolate crumble.
Once the dough has risen, roll it into a 15 by 15-inch square on a
lightly oured surface. It should be between ¼ and ⅛ inch thick. As
you roll, frequently lift the dough with a metal pastry scraper or bowl
scraper and dust with more our underneath to prevent sticking.
Sprinkle the chocolate mixture over the dough, breaking up any
clumps, so the lling covers the surface of the dough evenly, leaving a
¼-inch border.
Roll up the dough like a jelly roll and place it seam side down on
the work surface. With rm but gentle pressure, rock the log back and
forth to extend its length until it is 18 to 24 inches long.
For a loaf shape, grease a 5 by 9-inch loaf pan. Carefully twist the log
from both ends without tearing it, just enough to accentuate the
chocolate spiral. Coil the log into a circular snail shape, then stand the
coil on its end so it’s perpendicular to the counter rather than lying at.
Press down on the coil to compress it into a loaf shape. Place it in the
greased loaf pan or on a parchment-lined sheet pan with the smoothest,
domed side up. For a co ee cake style of babka, grease a tube pan such
as a Bundt pan or kugelhopf mold with butter, vegetable oil, or spray
oil, making sure to grease the tube. Wrap the log around the tube and
press the dough into the pan to connect the ends of the log. (Or you can
use the Israeli kranz cake shaping method.)
Cover the tube or loaf pan loosely with plastic wrap and let the
dough rise at room temperature for 2 to 3 hours, until the babka lls
the pan or has increased to about 1½ times its original size. At this
point, you can proceed directly to baking or refrigerate the babka
overnight. If holding it overnight, remove the dough from the
refrigerator about 2 hours before you plan to bake it.
Preheat the oven to 350°F (177°C). Use a toothpick to poke a few
holes in the top of the babka to eliminate possible air pockets between
the layers of chocolate and dough.
While the oven preheats, make the streusel if you’d like to use it.
Combine all of the ingredients in a food processor and pulse to
combine, or cut the butter into small bits, then add the other
ingredients and stir or mix with your hands. The texture should
resemble cornmeal. If using streusel, brush the top of the babka with
egg wash, then scatter the streusel over the top.
Bake for 20 to 25 minutes, then rotate the pan and bake until the top
is a rich dark brown, the sides are a rich golden brown, the loaf sounds
hollow when thumped on the bottom, and the internal temperature is
about 185°F (85°C) in the center. The babka will begin to brown
quickly because of the sugar, but it won’t burn. The total baking time is
50 to 60 minutes for a loaf, and just 35 to 45 minutes for a tube pan.
The sides may feel soft because of air pockets in the spirals. The babka
will soften as it cools.
Cool for at least 90 minutes before serving. The babka is best served
at room temperature after the chocolate has had time to set.
VARIATIONS
You can use almond paste in place of the chocolate lling, or simply
add sliced almonds to the chocolate filling.
Another nice variation is adding 1½ cups (9 oz / 255 g) of golden
raisins, dried cherries, or dried cranberries and 1 teaspoon of orange
zest to the dough during the nal minute of mixing. For an added treat,
soak the dried fruit in ¾ cup (6 oz / 170 g) of rum or brandy overnight
before adding it to the dough, as you might for panettone or stollen.
An alternative method for preparing the lling is to barely melt the
chocolate, cinnamon, and butter in a double boiler or microwave, then
stir the ingredients together and form them into a pliable 16-inch
square on a sheet of parchment paper that has been misted with spray
oil. Cool this chocolate square in the refrigerator until it is rm. You
can transfer this sheet of chocolate directly on top of the babka dough
after you roll it out.
Kranz Cake Babka
You can prepare the chocolate lling by spreading the barelymelted mixture on a sheet of parchment paper or silicone baking
mat, then refrigerating it until firm.
Cover the rolled out dough with the chocolate (using either the
sheet method or the sprinkle method), then roll the dough into a
log. Using a metal pastry blade, cut the log down the middle
lengthwise. Cross one piece over the other, then continue to
crisscross the pieces in both directions to form a braid for more on
2-braid loaves).
RICH HOLIDAY BREADS
There are so many breads associated with festivals and holidays that
entire books, like Betsy Oppenneer’s Celebration Breads, have been
written on the subject. To do justice to these breads and remain true to
the story and symbolism of each one truly requires a speci c recipe for
each bread. However, since I’m exploring these breads in terms of their
dough category (rich holiday breads), I’ve created a general master
formula, based on the ratio of ingredients and enrichments, to produce
versions of many regional specialties. The acidity of the sourdough
starter adds both avor and textural qualities and also serves as a
natural preservative. The mixed method of fermentation di erentiates
this dough from versions typically used in these breads. The mixing
method is rather demanding, requiring gradual additions of the sugar,
and then gradual additions of the butter; this dough de nitely isn’t fast,
but it isn’t very difficult to make if you take your time.
This formula is quite versatile and can be used to make Italian
pandoro and panettone, as well as German (Dresden-style) stollen,
Greek Christmas or Easter bread, hot cross buns, and even brioche and a
variation of babka. The basic dough can be kept in the refrigerator for
up to 4 days before shaping and baking, but it’s best when panned on
the same day it’s mixed, after one long rise. Possibilities for the addition
of fruit, nuts, and llings are endless, as are the potential shaping
methods. The shapes shown here are a starting point; feel free to play
with them and try other shapes, both traditional and innovative.
Clockwise from top: tête, mini panettone, hot cross bun, stollen
MAKES 1 LARGE LOAF OR 2 OR MORE SMALL LOAVES
Panettone is the famous Christmas bread of Milan, though it is now
made and consumed year round. Pandoro, or “golden bread,” originated
in Verona and is traditionally baked in star-shaped molds, but
otherwise bears strong similarities to its more well-known Milanese
counterpart. Although this dough can be mixed by hand, it’s very hard
to do so because of the long mixing time required, so I recommend
using a stand mixer. (You could also use a food processor if you pulse,
rather than processing for extended periods.) At rst, the dough will be
more like a batter, but as you scrape down the mixing bowl, it will
eventually form a very supple, delicate dough that feels wonderful to
the touch. It can be formed into a ball or other bread shapes, but if you
squeeze too hard it will become loose and sticky again.
You may want to purchase paper or metal panettone or pandoro
molds, which are available at specialty cookware stores. Keep in mind
that smaller loaves bake more quickly and are softer and less crusty
than larger loaves. Mu n and popover pans, as well as small brioche
cups, make nice molds for mini loaves, as do small cans. You’ll end up
with a better loaf if you let the dough rise slowly at room temperature
rather than force the rise (for example, by placing the dough in a pilotlit oven, which is a tempting way to speed up the rising time for many
doughs). It may take up to 12 hours for the dough to rise and ll the
form, but it’s worth the wait. Warmer proo ng risks melting the butter
in the dough, so the nished product will have the structure of a
kugelhopf co ee cake—which isn’t bad, but it doesn’t have the unique
peelapart qualities of the slower-rising panettone or pandoro.
SOURDOUGH STARTER
3 tablespoons (1.5 oz / 42.5 g) mother starter, cold or at room
3 tablespoons (1.5 oz / 42.5 g) mother starter, cold or at room
temperature
1 ⅓ cups (6 oz / 170 g) unbleached bread flour
¼ cup plus 2 tablespoons (3 oz / 85 g) water, at room
temperature
DOUGH
All of the sourdough starter (9 oz / 255 g) 1
1 tablespoon (0.75 oz / 21 g) honey
¼ cup (2 oz / 56.5 g) lukewarm water (about 95°F or 35°C)
1 teaspoon (0.11 oz / 3 g) instant yeast
1 egg (1.75 oz / 50 g), at room temperature
3 egg yolks (2.25 oz / 65 g), at room temperature
1 tablespoon (0.5 oz / 14 g) vanilla extract
1 ⅔ cups (7.5 oz / 213 g) unbleached bread flour or high-gluten
flour
¾ teaspoon (0.21 oz / 4 g) salt, or 1¼ teaspoon coarse kosher salt
3 tablespoons (1.5 oz / 43 g) sugar
¾ cup (6 oz / 170 g) unsalted butter, at room temperature
1 ⅓ cups (8 oz / 227 g) dried or candied fruit (optional; see
variations)
DO AHEAD
To make the starter, combine all of the ingredients in a mixing bowl.
If using a mixer, use the paddle attachment and mix on the lowest
speed for 1 minute, then increase to medium speed for about 30
seconds. If mixing by hand, stir for about 2 minutes, until well blended.
The starter should feel doughlike and tacky or slightly sticky; if not, stir
The starter should feel doughlike and tacky or slightly sticky; if not, stir
in additional flour or water as needed.
Transfer the starter to a lightly oured work surface and knead for
about 30 seconds. Place the starter in a clean, lightly oiled bowl, cover
the bowl loosely, and leave at room temperature for 6 to 8 hours, until
the starter doubles in size or swells considerably. You can use it
immediately or put it in the refrigerator for up to 4 days.
To make the dough, cut the starter into 10 to 12 pieces and
put the pieces in a mixing bowl. Separately, stir the honey into the
lukewarm water until dissolved, then whisk in the instant yeast until
dissolved. Let the mixture sit for 1 minute, then pour it over the the
starter and stir to soften the starter.
Separately, whisk the egg, egg yolks, and vanilla together, then add to
the starter mixture and stir until evenly incorporated.
Add the our and salt. If using a mixer, use the paddle attachment
and mix on the lowest speed for 2 minutes. If mixing by hand, stir with
a large, sturdy spoon for about 2 minutes. The dough will be coarse,
wet, and batterlike; although it will be soft and sticky, it should hold
together. Use a wet bowl scraper or spatula to scrape the dough back
down into the bowl, if necessary.
Resume mixing on the lowest speed or by hand, gradually adding the
Resume mixing on the lowest speed or by hand, gradually adding the
sugar in ½-tablespoon increments; wait until each addition of sugar has
been thoroughly incorporated before adding the next. The dough
should now be smoother, though still very soft and sticky. Increase the
mixer speed to medium-low or stir by hand more vigorously and mix
for 5 minutes to develop the gluten, stopping a few times to scrape
down the sides of the bowl and the paddle or spoon.
Switch to the dough hook and mix on medium-low speed or continue
mixing by hand, gradually adding the butter in 1-tablespoon (0.5 oz /
14 g) increments; again, waiting until each addition is thoroughly
incorporated before adding the next piece. Scrape down the sides of the
bowl and the hook or spoon as needed. If using a mixer, you can
increase the speed to medium-high to incorporate the butter more
quickly. It should take about 5 minutes to work in all of the butter, and
at the end the dough should be shiny, soft, sticky if squeezed, and very
supple, with a nice pillowlike feel to it when formed into a ball.
Scrape the bowl down and mix on medium speed or by hand for 5
minutes more to fully develop the gluten; you should be able to pull
out long, taffylike strands of dough.
FINISHING THE DOUGH AND SHAPING
Add the dried fruit, then mix on the lowest speed with the dough
hook, or by hand, for 1 or 2 minutes to evenly distribute the fruit. If the
fruit was soaked overnight, drain o any excess liquid and fold the fruit
in by hand. In this case, you may need to add about 3½ tablespoons (1
oz / 28.5 g) of bread flour to compensate for the moisture in the fruit.
Use a wet bowl scraper or spatula to transfer the dough to a lightly
oured work surface, then dust the top of the dough with our. Firm
up the dough and form it into a smooth ball by stretching and folding it
up the dough and form it into a smooth ball by stretching and folding it
once.
Weigh out the desired size of pieces, form them into balls, and place
in oiled molds or pans. Depending on the type of bread you’re making,
the dough will either double or triple in size as it rises. If using a fullsize pandoro pan or panettone mold, you’ll need about 24 ounces (680
g) of dough, which will ll the mold one-third full. If using smaller
molds, including popover molds, use however much dough is required
to fill each mold one-third full.
Let the panettone rise for 12 hours. You can also refrigerate the
dough and bake it anytime during the next 4 days, but the rising time
will be quite long, closer to 14 hours.
BAKING
About 15 minutes before baking, preheat the oven to 350°F (177°C).
For loaves weighing more than 1½ pounds, preheat the oven to 325°F
(163°C).
The baking time will vary depending on the size of the panettone,
ranging from 30 minutes for smaller shapes to 45 minutes or longer for
large loaves. The panettone is done when it is a golden brown on all
sides, when the loaf sounds hollow when thumped on the bottom, and
when the internal temperature is about 185°F (85°C) in the center. It
should still feel slightly soft and tender if squeezed but will rm up as
it cools.
Cool in the pan for at least 5 minutes before removing; if baked in
paper panettone molds, it isn’t necessary to remove the paper. Large
panettone should be cooled upside down on a wire rack, and any form
of panettone should be cooled thoroughly before serving. Many bakers
insist that panettone needs at least 8 to 14 hours of cooling, but 3 hours
should be sufficient.
VARIATIONS
If using dried fruit, such as raisins, dried cranberries, or dried cherries,
If using dried fruit, such as raisins, dried cranberries, or dried cherries,
you can simply add them to the dough as directed, or soak them
overnight in rum, brandy, or liqueur, using 1 tablespoon (0.5 oz / 14 g)
of liqueur for every 3 tablespoons (1 oz/ 28.5 g) of fruit.
You can also make your own soaking syrup by bringing ½ cup (4 oz
/ 113 g) of sugar and ½ cup (4 oz / 113 g) of water to a boil to make a
simple syrup. When it cools, add 1 teaspoon (0.16 oz / 4.5 g) of orange
or lemon extract, and 1 teaspoon (0.16 oz / 4.5 g) of vanilla and 1
teaspoon (0.16 oz / 4.5 g) of almond extract (optional). Add the fruit to
the syrup and let it soak overnight. Another excellent option for
avoring the fruit is Fiori di Sicilia. This wonderfully aromatic and
delicious essence that combines vanilla and citrus is available from King
Arthur Flour and other suppliers of specialty ingredients.
If you soak the fruit using either of these methods, strain o the the
excess liquid, then fold the fruit into the dough by hand, along with
about 3½ tablespoons (1 oz / 28.5 g) of extra bread flour.
You can decorate the top of the baked panettone with white fondant
glaze, or any other glaze that you like.
This recipe makes exquisite brioche as well as holiday bread. For
brioche, simply omit the fruit. (See below for instructions on shaping
brioche à tête.) For an extra treat, top the brioche with streusel before
baking. Another option is to use the dough as a tartlet shell and ll it
with clafouti, a fruit-filled custard.
Making Brioche à Tête
To shape brioche à tête, roll one end of a small ball of dough
(typically 1½ to 2 ounces or 42.5 to 56.5 grams) into a cylindrical
cone. Poke a hole in the thick end, then slip the tip of the cone
through it so that a nub of dough pokes through to make a “head.”
Transfer the shaped dough to greased brioche molds.
MAKES 1 LARGE LOAF OR 2 OR MORE SMALL LOAVES
Although this is made from the same dough as the panettone, the nal
proo ng time is very di erent: none! Stollen’s origins are attributed to
Dresden, Germany, but it is made in many forms and variations
throughout Europe. The name refers to baby Jesus’ blanket and it is
lled with fruit to signify the gifts of the Magi. It can be folded and
formed into a crescent shape or simply rolled up into a log. It is usually
finished with a brushing of melted butter and heavily dusted with either
confectioners’ sugar or granulated sugar. My German friends like to age
their stollen for weeks before eating it, but I like it best as soon as it
cools—it never lasts more than a day, let alone weeks.
Almond paste is a sweet confection made with sugar and ground
bitter almonds; when avored with rose water or treated with other
avorings and food colors it is also known as marzipan. I nd it
amazingly delicious. It can easily be rolled into a cigar-shaped bead and
used as a center core for stollen; the amount is up to you but about 4
ounces (113 g) per small loaf is probably enough.
1 recipe panettone dough
2 cups (12 oz / 340 g) dried or candied fruit (optional; see the
variations)
2 cups sliced or slivered almonds, lightly toasted, or 8 ounces
(227 g) almond paste or marzipan (optional)
Melted butter, for brushing
Confectioners’ sugar or fine granulated sugar, for topping
MAKE THE DOUGH
Make the panettone dough.
FINISHING THE DOUGH AND SHAPING
Add the optional dried fruit to the dough, then mix on the lowest
speed with the hook, or by hand, for 1 or 2 minutes to evenly distribute
it. If the fruit was soaked overnight, drain o any excess liquid and fold
the fruit in by hand. In this case, you may need to add about 3½
tablespoons (1 oz / 28.5 g) or more of bread our to compensate for
the moisture in the fruit.
Use a wet bowl scraper or spatula to transfer the dough to a lightly
oured work surface, then dust the top of the dough with our. Use a
rolling pin or your hands to roll out or pat the dough into a 9 by 6-inch
rectangle, or divide the dough into two equal portions and roll them
into 7 by 5-inch rectangles for smaller loaves. Sprinkle the almonds
over the top or place the cigar-shaped bead of almond paste at the end
closest to you, then roll the dough up and shape it into a loaf, sealing
the crease by pinching the dough with the edge of your hand.
BAKING
Place the stollen on a parchment-lined sheet pan and put the pan in
a cold oven. Turn the oven to 350°F (177°C), or 300°F (149°C) for a
convection oven.
Bake for 25 minutes (as the oven comes to full temperature), then
rotate the pan and bake for another 25 to 35 minutes. The total baking
time will depend on the size of the loaf. The stollen is done when it is
rm to the touch, sounds hollow when thumped, and is a rich golden
brown. It should register 185°F (85°C) in the center. As soon as the
stollen comes out of the oven, brush the entire loaf with melted butter,
then dust it heavily with confectioners’ sugar or roll it in fine granulated
sugar to coat.
Cool thoroughly before serving. Many bakers insist that stollens need
at least 8 to 14 hours of cooling, but 3 hours should be sufficient.
Roll the stollen dough around the bead of almond paste.
MAKES 1 LARGE LOAF OR 2 OR MORE SMALL LOAVES
In Greece and Turkey, this bread is called Christopsomo or tsoureki
In Greece and Turkey, this bread is called Christopsomo or tsoureki
(also known as lambpropsomo during Easter). It di ers from stollen in
that it’s proofed before baking, but the proo ng time is shorter than for
panettone. Mastic gum, also called mastica, is an aromatic gum resin
derived from the bark of a Mediterranean shrub tree in the pistachio
family. It can be found at stores that specialize in Greek and Middle
Eastern ingredients. It adds a subtle and breath-freshening avor and
aroma (no surprise, it has long been used as a natural breath freshener).
1 recipe panettone dough
1 teaspoon (0.25 oz / 7 g) ground cinnamon
Pinch of ground nutmeg
Pinch of ground cloves
Pinch of ground allspice
1 teaspoon (0.25 oz / 7 g) mastic gum (optional)
½ cup (2 oz / 56.5 g) chopped toasted walnuts or almonds
1 cup (6 oz / 170 g) golden raisins or diced dried apricots, if
making Easter bread
1 cup (6 oz / 170 g) dried cranberries or any type of raisins, if
making Christmas bread
1 egg plus 1 tablespoon of water, for egg wash
Simple syrup (4 oz / 113 g water and 4 oz / 113 g sugar, brought
to a simmer), for glaze (optional)
MAKING THE DOUGH
Make the panettone dough, whisking the cinnamon, nutmeg, cloves,
allspice, and mastic gum into the our before adding the our to the
dough.
FINISHING THE DOUGH AND SHAPING
Add the nuts and the dried fruit appropriate to the bread you’re
making, then mix on the lowest speed with the paddle attachment, or
by hand, for 1 or 2 minutes to evenly distribute the fruit. If the fruit was
soaked overnight, drain o any excess liquid and fold the fruit in by
hand. In this case, you may need to add about 3½ tablespoons (1 oz /
28.5 g) of bread flour to compensate for the moisture in the fruit.
Use a wet bowl scraper or spatula to transfer the dough to a lightly
oured work surface, then dust the top of the dough with our. Firm
up and form the dough into a smooth ball by stretching and folding it
once.
For Easter bread, divide the dough into three equal pieces and form
them into a braid. Traditionally, three hard-boiled eggs, dyed red, are
nestled in the braids just before the Easter loaf is baked, but I prefer to
add them after the loaf comes out of the oven, so that they retain their
bright red color. For Christmas bread, set aside 4 ounces (113 g) of
dough, shape the remaining dough into a boule, and place it on a
parchment-lined baking sheet to proof. Divide the reserved dough into
two equal pieces, cover them in plastic wrap, and refrigerate. This
dough will later be rolled into ropes, which are used to form a cross on
top of the bread, alongside the boule.
Mist the shaped dough with spray oil and cover loosely, then let the
dough rise at room temperature for 90 minutes to 2 hours, until it
swells noticeably; the bread will rise further in the oven. You can also
refrigerate the dough and bake it anytime during the next 4 days, but
the rising time will be quite long.
For Christmas bread, roll out the reserved pieces of dough into two 8inch ropes, and lay them across the loaf to form a cross (apply the cross
to the loaf 30 minutes before baking). You can cut a slit 2 inches long
at each end of both ropes with a scissors to split them, and curl the
ends for a decorative rose cross. Then apply the egg wash. (If you apply
the egg wash rst, the cross will slide o .) Easter-style braided loaves
can also be egg washed just prior to baking, but this is optional.
BAKING
About 15 minutes before baking, preheat the oven to 325°F (163°C).
Bake for 25 minutes, then rotate the pan and bake for another 35
minutes. The loaf should be golden brown and have an internal
temperature of at least 185°F (85°C) in the center. For a shinier loaf,
brush the top with hot simple syrup or vegetable oil as soon as it comes
out of the oven.
Cool on the pan for at least 5 minutes, then transfer to a wire rack
and cool for at least 60 minutes before slicing or serving.
MAKES 24 BUNS
Hot cross buns are a traditional Good Friday bread, but they can be
made anytime (in Elizabethan England they could only be baked during
Easter week or during Christmas, but times have changed). There are, of
course, many similar commemorative breads throughout Europe, each
with their own twist. Currants and spices such as allspice, mace,
nutmeg, and cinnamon are commonly used in the English version. Much
folklore and many recipe variations for hot cross buns are available on
the Internet (and they’re worth reading), but I prefer the following
additions to the basic holiday bread recipe. However, feel free to use
your own favorite spice and fruit combinations, or simply bake the
buns without any additions, as the buns are wonderful with or without
the fruit, spices, and glazed cross.
1 recipe panettone dough
1¾ cups (8 oz / 227 g) currants or raisins (optional)
1 teaspoon (0.25 oz / 7 g) ground cinnamon (optional)
1 teaspoon (0.25 oz / 75 g) ground allspice (optional)
½ teaspoon (0.13 oz / 7 g) ground nutmeg or mace (optional)
1 egg plus 1 tablespoon water, for egg wash
White fondant glaze
MAKING THE DOUGH
Make the panettone dough as directed.
FINISHING THE DOUGH AND SHAPING
Add the dried fruit and spices to the dough, then mix on the lowest
speed with the dough hook, or by hand, for 1 or 2 minutes to evenly
distribute the fruit. If the fruit was soaked overnight, drain o any
excess liquid and fold the fruit in by hand. In this case, you may need to
add about 3½ tablespoons (1 oz / 28.5 g) of bread our to compensate
for the moisture in the fruit.
Use a wet bowl scraper or spatula to transfer the dough to a lightly
oured work surface, then dust the top of the dough with our. Divide
the dough into 2- or 3-ounce (56.5 to 85 g) portions. Shape each into a
round roll, and place on a parchment-lined baking sheet. Mist the
dough with spray oil, cover loosely with plastic wrap, and proof for
about 60 minutes, until the dough just begins to swell.
BAKING
About 15 minutes before baking, preheat the oven to 350°F (177°C).
Brush each bun with egg wash just before baking.
Bake for 10 minutes, then rotate the pan and bake for another 8 to
12 minutes. The total baking time will depend on the size of the buns.
The buns should be golden brown on all sides and sound hollow when
thumped on the bottom, and the internal temperature should be about
185°F (85°C) in the center. The buns will feel slightly soft and tender if
squeezed, but will firm up as they cool.
Cool the buns for about 15 minutes, then drizzle or pipe a cross of
fondant glaze on top of each bun. Cool for an additional 10 minutes
before serving.
MAKES 12 TO 18 BISCUITS, OR MORE FOR SMALL BISCUITS
I’ve set myself up by staking a claim to the best biscuits ever. But when
I made these biscuits, I was so astonished by their avor and texture
that I decided there couldn’t possibly be a more perfect biscuit—at least
not any that I’ve ever tasted. Be forewarned, a generous amount of
butter is a key ingredient here, so these biscuits are not for those who
are squeamish about fat! That said, if you nd these biscuits to be too
rich, feel free to use low-fat buttermilk instead of cream for the liquid.
Some people insist that only shortening has enough pure fat in it to
make a aky biscuit. While lard and shortening do contain 100 percent
fat to butter’s mere 85 percent, there’s nothing to match butter when it
comes to avor. Also, I nd that biscuits made with shortening
sometimes have a waxy aftertaste. If you insist on using shortening, chill
it for 1 hour before cutting it into the dough, and reduce the amount by
about 15 percent, to 7 tablespoons (3.5 oz / 99 g).
I have heard it said that there are two types of people in the world,
those who like tender biscuits and those who like aky biscuits. (I’m
usually in the aky camp.) In this recipe, I’ve replaced the traditional
buttermilk with cream, which essentially makes this both a cream
biscuit (and therefore tender) and a aky biscuit. If you wonder how I
arrived at this idea, it was one of those aha/duh moments, in this case
brought about because I had forgotten to buy buttermilk. Discovering
that I had some heavy cream on hand, I realized that there was no rule
prohibiting me from trying to bring the best of both worlds together.
I learned a new trick for incorporating the butter into the our from
a few of my excellent recipe testers: Freeze the butter, then use the
large holes on a cheese grater to grate it directly into the dry ingredients
(or use the grater attachment on a food processor, with the dry
(or use the grater attachment on a food processor, with the dry
ingredients in the bowl below). Not only does this method save time,
but it creates the perfect size butter pieces for the biscuits. You can use
this method when making pie dough too!
2 tablespoons (1 oz / 28.5 g) white vinegar, apple cider vinegar,
or lemon juice
1 cup (8 oz / 227 g) cold heavy cream
½ cup (4 oz / 113 g) cold unsalted butter
1 cup (4.5 oz / 128 g) all-purpose flour
¾ cup (3.5 oz / 99 g) pastry flour (if you do not have pastry flour,
use all-purpose flour)
1 tablespoon (0.5 oz / 14 g) sugar
2¼ teaspoons (0.5 oz / 14 g) baking powder
¼ teaspoon baking soda
½ teaspoon (0.13 oz / 3.5 g) salt, or ¾ teaspoon coarse kosher
salt
DO AHEAD
Stir the vinegar into the cream to acidify it, then refrigerate it to keep
it cold. Place the butter in the freezer, for at least 30 minutes, to harden.
Whisk the ours, sugar, baking powder, baking soda, and salt
together in a mixing bowl.
Place a cheese grater in or over the bowl of dry ingredients. Remove
the butter from the freezer, unwrap it, and grate it through the large
holes into the dry ingredients, tossing the butter threads in the our
mixture as you grate to distribute them. (An alternative method is to
place the butter on a cutting board, and dust it and the work surface
with our. Cut the butter into ¼-inch slices. Dust the slices with our,
stack a few of them up, and cut them into ¼-inch strips, then rotate the
stack a quarter turn and cut the strips into ¼-inch cubes. It’s okay if the
butter is smaller, such as pea-size. Toss the oured butter bits into the
dry ingredients and continue cutting all of the butter in the same
manner and adding it to the our mixture. You can see why I like the
grater method better.)
Use your ngertips to separate and distribute the butter pieces
evenly, breaking up any clumps but not working the butter so much
that it disappears or melts into the our. Add the cream mixture and
stir with a large spoon until all of the our is hydrated and the dough
stir with a large spoon until all of the our is hydrated and the dough
forms a coarse ball. Add a tiny bit more cream if necessary to bring the
dough together.
Transfer the dough to a generously oured work surface, then dust
the top of the dough with our. Working with oured hands, use your
palms to press the dough into a rectangle or square about ¾ inch thick.
Use a metal pastry scraper to lift the dough and dust more our
underneath. Dust the top of the dough with our as well, then roll it
out into a rectangle or square about ½ inch thick. Then, using the
pastry scraper to help lift the dough, fold it over on itself in three
sections as if folding a letter.
Rotate the dough 90 degrees, then once again lift the dough and dust
more our underneath. Dust the top with our as well, then once again
roll it out into a square or rectangle about ½ inch thick and fold into
thirds. Give the dough another quarter turn and repeat this procedure
again. Then, repeat one final time (four roll-outs in all).
After the fourth folding, dust under and on top of the dough one nal
time, then roll the dough out to just under ½ inch thick, in either a
rectangle (for triangle- or diamond-shaped biscuits) or an oval (for
round biscuits). Use just enough our to keep the dough from sticking
to the work surface.
Cut the biscuits with a oured metal pastry scraper or pizza cutter, or
with a oured biscuit cutter for rounds; a 2-inch biscuit cutter will yield
20 to 24 small biscuits. Transfer the biscuits to an ungreased sheet pan
(lined with parchment paper or a silicone mat if you like), placing
them about ½ inch apart.
Let the cut biscuits rest for 15 to 30 minutes before baking to relax
the gluten; this will create a more even rise (even better, if you have
room, place the pan of biscuits in the refrigerator to chill). If you’d like
to bake the biscuits later, see Make-Ahead Options.
TO BAKE
About 20 minutes before baking, preheat the oven to 500°F (260°C).
Transfer the biscuits to the oven and lower the oven temperature to
Transfer the biscuits to the oven and lower the oven temperature to
450°F (232°C), or 425°F (218°C) for a convection oven. Bake for 8
minutes, then rotate the pan and bake for another 6 to 10 minutes,
until both the tops and the bottoms of the biscuits are a rich golden
brown; the baking time will be shorter in a convection oven. The
biscuits should rise about 1½ times in height.
Place the pan on a wire rack, leaving the biscuits to cool on the hot
pan for at least 3 minutes before serving. The biscuits will stay warm
for about 20 minutes.
VARIATIONS
These biscuits are perfect without the addition of other ingredients,
but it can be fun to enhance them with sweet or savory avors. Here
are four variations. Feel free to create your own versions, using these as
examples.
To make cheese biscuits, grate 8 ounces (227 g) of Cheddar or any
medium-soft cheese you like, such as Gruyère, Gouda, or Provolone.
This will yield about 2 cups of cheese. Each time you fold the dough,
sprinkle one-fourth of the cheese over the surface before folding it. This
may look like a lot of cheese, but it will melt and almost disappear
into the biscuits when you bake them.
To make savory biscuits, layer caramelized onions into the biscuits
when you fold them. You’ll need to cook the onions well in advance,
because it’s important that they be cool when you layer them;
otherwise, they’ll cause the butter in the dough to melt, which will
damage the texture of the baked biscuit. To make the onions, slice 2
large white or yellow onions into thin strips. Sauté them over medium
heat in 1 tablespoon (0.5 oz / 14 g) of vegetable oil until very soft and
translucent. Add 2 tablespoons (1 oz / 28.5 g) of sugar and, optionally,
1 tablespoon (0.5 oz / 14 g) of balsamic vinegar, and continue cooking
and stirring until the pan juices thicken into a honeylike syrup and the
onions have the consistency of marmalade. This will take 15 to 20
minutes altogether.
Keys to a Successful Flaky Biscuit
* The single most important technique is to use very cold butter and
liquid. Some biscuit makers go so far as to chill the flour, but this
isn’t necessary if the butter and cream are cold. Using cold
ingredients ensures that the butter stays in bits and pieces, which
shortens the gluten strands (thus the term shortening, used to
describe all solid fats, including butter and margarine). Using bits
of cold butter creates weak points in the dough that flake off
when you take a bite.
* Work quickly to keep the dough cold, but don’t overwork the
dough. Gluten is what makes dough tough, and the more you mix
the dough, the more organized the gluten strands become. As a
general rule of thumb, mix only as long as needed to get the job
done. As every great biscuit maker will attest, it’s all in the touch.
* The folding technique described in the recipe is similar to the
lamination method known as blitz. It creates many thin layers of
dough and fat, causing the biscuits to puff up and open like an
accordion, creating maximum flakiness.
* The oven must be hot in order to trap the butter inside the biscuit
and increase the puffing quality. In a cooler oven, below 450°F
(232°C), some of the butter might run out onto the pan, so
preheat the oven to 500°F (260°C), then lower the heat to 450°F
(232°C) as soon as you put the biscuits in to bake. (If you preheat
the oven to 450°F (232°C), it will drop to below 400°F (204°C)
when you open the door.)
* Chilling the biscuits before baking them not only relaxes the
gluten, it also minimizes the amount of butter that may run out of
the biscuits as they bake.
To make other savory variations, read on. Seasoned biscuits make a
nice accompaniment to eggs, especially if made with fresh herbs. You
can use any combination of fresh basil, parsley, dill, chervil, cilantro, or
whatever herbs you like. Use about ¾ cup of fresh herbs, either minced
or cut into thin strips. Be careful when using strong herbs or spices,
such as rosemary, oregano, sage, anise, fennel, cumin, chili powder, and
the like, as they can easily overpower the biscuits. Use these stronger
seasonings in moderation and in combination with milder herbs like
parsley. Ground pepper is always an option; just ¼ teaspoon will
provide a surprisingly strong kick. Dried herbs will also work, but don’t
use more than ¼ cup; and again, use primarily mild herbs like parsley,
chervil, and basil.
To make sweet variations, keep in mind that there is very little
di erence between a biscuit and a scone, so consider sweet biscuits to
be aky, tender scones and try adding dried fruits such as currants,
raisins, cranberries, cherries, pineapple, apricots, or blueberries, as well
as candied ginger (in moderation). Cut larger dried fruit into small bits.
Add 1 cup (6 oz) of dried fruit (or more, if you like) in any
combination, when you add the cream. Just don’t use fresh fruit or
berries, as they would make the biscuits soggy and destroy the flakiness.
Make-Ahead Tips
The best way to make biscuits is to bake them 15 to 30 minutes
after the dough is cut, placed on the pan, and brie y chilled.
However, when this isn’t always practical, it’s better to bake the
biscuits when you plan to eat them rather than bake them in
advance and try to warm them up later. So here are three makeahead options:
Freeze: Cut and pan the biscuits but don’t bake them. Instead,
completely wrap the pan (under and around the pan) in plastic
wrap or use a food-grade plastic bag. If you wrap it well, you can
freeze the pan of unbaked biscuits for up to 1 month. Remove the
pan from the freezer at least 3 hours before you plan to bake the
biscuits so they can thaw. Don’t bake them while they’re still frozen
or they won’t rise or bake evenly. If freezer space is an issue, you
can also wrap individual biscuits in plastic wrap, stack them up,
and freeze them.
Refrigerate: Wrap the pan or individual biscuits as described
above, but instead of freezing, refrigerate them. This is especially
practical if you plan to bake the biscuits within 3 days. For even
baking, remove the biscuits from the refrigerator about 30 minutes
before baking to remove some of the chill.
Parbake: Bake the biscuits as described in the recipe, but only
until slightly golden on the tops and bottoms—4 to 5 minutes less
than the full baking time. Remove the pan from the oven and cool
the biscuits thoroughly before wrapping them individually or
wrapping the entire pan and freezing. When you want to nish
baking them, preheat the oven to 450°F (232°C) and place the
frozen biscuits on an ungreased baking sheet. Bake for 10 to 12
minutes, until the tops and bottoms of the biscuits are golden
brown. Cool for 5 minutes before serving; this allows the heat to
reach the center, warming but not drying out the biscuit.
MAKES 14 TO 24 CROISSANTS (DEPENDING ON SIZE)
The dough for croissants, Danish, and certain other pastries is made by
a method known as lamination, which involves folding layers of dough
and butter (or another fat) to create many thin layers that pu when
baked. Puff pastry, the classic unyeasted version of this dough, is used to
make many pastries. In this book, I’ll stick with a yeasted formula that
can be used to make both croissants and Danish pastry.
There are many versions of laminated dough and many systems of
rolling to create a speci c number of layers. The system I’m presenting
here certainly isn’t the only one that works, but I like it because it’s
easy and also incorporates overnight fermentation to create a superb
product. Feel free to modify it if you prefer more or fewer layers. The
most common error home bakers make when laminating is to apply
too much pressure to the dough, which breaks the paper-thin layers of
dough and fat. To help with this, the formula here creates a very soft,
pliable dough, and the method calls for a fair amount of dusting with
flour to prevent sticking.
There are two parts to the nal dough: the détrempe and the butter
block. The détrempe is the plain dough before the butter is rolled in.
The butter block is the fat that will be laminated between layers of
dough. There are many ways to incorporate the fat into the détrempe,
including spreading it by hand in dabs over the rolled-out dough, which
is sometimes called spotting. The method here is more systematic, using
a series of letter folds (in thirds) to produce 81 layers of dough and fat
—more than enough for a great accordion-style expansion of the layers
(one of the recipe testers called it a concertina e ect). Should you
decide to experiment and try making more layers, just keep in mind
that the layers are more vulnerable to rupturing as they get thinner,
that the layers are more vulnerable to rupturing as they get thinner,
which defeats the purpose of laminating. I always suggest getting good
at 81 layers before adding a fourth letter fold, which will increase the
number of layers to 243.
You can use either unbleached bread our or all-purpose our for
the dough. Bread our provides more structure, while all-purpose our,
being slightly softer, makes a more tender product.
Détrempe
4 ⅔ cups (21 oz / 595 g) unbleached bread or all-purpose flour
1¾ teaspoons (0.4 oz / 11 g) salt, or 2½ teaspoons coarse kosher
salt
¼ cup (2 oz / 56.5 g) sugar
1 tablespoon (0.33 oz / 9 g) instant yeast
¾ cup plus 2 tablespoons (7 oz / 198 g) cold whole or low-fat
milk
1 cup (8 oz / 227 g) cool water (about 65°F or 18°C)
2 tablespoons (1 oz / 28.5 g) unsalted butter, melted or at room
temperature
BUTTER BLOCK
1½ cups (12 oz / 340 g) cold unsalted butter
2 tablespoons (0.57 oz / 16 g) unbleached bread or all-purpose
flour
DO AHEAD
To make the détrempe, combine the our, salt, sugar, and yeast in a
mixing bowl and whisk to combine. Pour in the milk and water, then
add the butter. If using a mixer, use the paddle attachment and mix on
the lowest speed for 1 minute. If mixing by hand, use a large spoon and
stir for about 1 minute. The dough should be coarse, wet, and shaggy. If
it’s very wet, like a batter, add a little more our. If it’s rm like
regular bread dough or stiff, drizzle in a little more water.
Resume mixing with the paddle attachment on the lowest speed or
by hand for another 30 seconds, then increase the speed to mediumhigh or mix more vigorously for 10 to 15 seconds. The dough will
begin to smooth out but should be very soft, supple, and sticky, but not
batterlike. Add more our or water as needed, but mix only until the
dough has formed. It is important that it be very soft and pliable, and
somewhat sticky. If it’s dry to the touch, it needs more water.
Transfer the dough to a lightly oured work surface and, with oured
hands, form it into a ball. Place the dough in a clean, lightly oiled bowl,
and immediately refrigerate overnight or for up to 2 days.
ON BAKING DAY
Leave the détrempe in the refrigerator until you’re ready to assemble
Leave the détrempe in the refrigerator until you’re ready to assemble
the laminated dough, and make the butter block just prior to
incorporating it into the détrempe. Cut the cold butter into about 16
pieces and put the pieces in a mixing bowl along with the our. I
recommend using a mixer, as it’s so much easier. Use the paddle
attachment and mix on the lowest speed for about 1 minute to break
down the butter into smaller pieces. Stop the machine and scrape down
the bowl and paddle as needed, then mix again until the mixture is no
longer lumpy. Increase the speed to medium-high as the butter pieces
smooth out, and continue mixing until all of the lumps of butter are
gone and you have a smooth paste. (Though it’s harder, you can also do
this by hand by squeezing the butter and our for a few minutes until
you have a smooth paste. It should be cool to the touch, not warm. You
can also use a food processor, but be sure to use pulses rather than
running the processor continuously, or the butter may melt.)
Prepare a sheet of parchment paper, waxed paper, or a silicone mat
by misting it lightly with spray oil. Use a bowl scraper or spatula to
transfer the butter block into a pile in the center of the prepared
surface. Mist the top of the butter with spray oil, then cover it with
plastic wrap. Press down on the plastic wrap gently but rmly to
spread the butter into a 6-inch square (you can also use a rolling pin to
lightly tap and roll it into a square). If necessary, lift the plastic wrap
and use a metal pastry scraper or bowl scraper to trim o uneven
corners or sides, putting the trimmings in the center of the butter block
or using them to ll any gaps. The butter block should be about ½ inch
thick and smooth across the top, with nicely squared-o corners. If the
butter block has warmed up or seems to be melting due to friction or
hand warmth, place it in the refrigerator for a few minutes (parchment
and all).
To incorporate the butter block into the détrempe, clear enough
space on the work surface to roll out the dough (eventually) to a width
of about 32 inches. Make sure the surface is completely dry, then dust it
generously with bread our or all-purpose our. Transfer the détrempe
to the work surface and sprinkle more our over the top of the dough.
Use a rolling pin and, with gentle pressure, roll out the dough to a
rectangle about 12½ inches wide and 6½ inches long. Always begin by
rolling from the center to the four corners, and then roll to the four
sides to even it out. Check under the dough frequently, lifting it with a
metal pastry scraper to see if it needs more dusting our. (In addition
to preventing sticking, the our acts like ball bearings, allowing the
dough to extend more easily.) Square o the sides and corners of the
rectangle with the pastry scraper. The dough will be about ½ inch
thick, the same as the butter block.
Lift the parchment with the butter block and set it down atop the
dough on the left side to check the sizing. The butter should cover only
half of the dough, with just a ¼-inch border on the left, top, and
bottom. If it covers more than that, remove the butter block and roll out
the dough a little wider or taller, as needed. If there’s more than ½ inch
of dough around the border, shrink the dough by scooting in the edges
with the pastry blade or a sturdy ruler.
When the dough and butter are properly matched, remove the plastic
wrap and ip the butter block over onto the left half of the dough,
again with a border of about ¼ inch on the left, top, and bottom.
Carefully adjust it into place before removing the parchment. You may
need to use the pastry scraper to separate the parchment. If any butter
sticks to the parchment, scrape it o and apply it to the top of the
butter block, as evenly as possible. Lift the right half of the dough and
fold it over the butter block to envelop or sandwich the butter. Stretch
the dough along the top rim to seal the butter inside by pressing the
top rim of dough to the rim of the underside and pinching them
together to create a seal. You now have three layers—dough, butter,
dough.
To laminate the dough, lift the dough, one side at a time, and toss
more dusting our underneath it. If the dough sticks to the work
surface, use the pastry scraper to break the contact. Lightly dust the top
of the dough with our, then tap the rolling pin over the top of the
dough to work out any air bubbles and spread the butter evenly into all
four corners. Working from the center to the four corners and then to
the four sides, gently roll out the dough into a rectangle, dusting under
and on top of the dough with our as needed. Continue rolling until
you have a ½-inch-thick rectangle that’s about 16 inches wide and 9
inches long.
Square o the sides and the four corners, then fold the dough as if
folding a letter: Fold the right one-third of the dough to the left, and as
you lay it down, be sure to square it o so that the top and bottom
edges are perfectly aligned with the underlying dough. Then fold the
left one-third of the dough to the right in the same way. Use the rolling
pin to press out any air pockets so that the folds lay at, then gently
transfer the dough to a lightly oured sheet pan and cover loosely with
plastic wrap. Let the dough rest at room temperature for 15 to 20
minutes so the gluten can relax. If the butter seems very soft, you can
put the pan in the refrigerator for this resting period.
After the resting period, transfer the dough back to the oured work
surface with the open seam facing away from you and the closed side
facing you. Gently roll out the dough to a rectangle about 16 inches
facing you. Gently roll out the dough to a rectangle about 16 inches
wide by 9 inches long, then once again fold it in thirds. Gently transfer
the dough back to the oured sheet pan, cover loosely with plastic
wrap, and let the dough rest at room temperature (or in the refrigerator
if the butter seems very soft) for 20 minutes.
After the second resting period, once again transfer the dough to the
oured work surface, closed side facing you, and gently roll it out and
fold it as before. Gently transfer the dough back to the oured pan,
cover loosely with plastic wrap, and refrigerate for 20 minutes. You
have now completed three “turns” and have created 81 layers of dough
and butter.
For the nal roll-out and shaping, transfer the dough back to the
oured work surface and gently roll it out, rst from the center to the
corners and then out to the sides, until the dough is just under ¼ inch
thick and forms a rectangle 24 to 28 inches wide and 9 inches long. (If
you want to make small croissants or chocolate croissants, roll the
dough into a rectangle about 32 inches wide and only about 7 inches
long.) Be careful not to put too much downward pressure on the dough
as you roll it, or the thin layers could break, but you do need to be
somewhat rm, yet patient, as you roll. You may have to stop and dust
with our underneath the dough from time to time or give the dough a
short rest if it starts to resist or shrink back. Square o the sides and
four corners with the pastry scraper or a ruler.
Transfer the butter block to cover half of the dough.
Lift and fold the dough to envelop the butter and roll into a rectangle.
Fold the dough into thirds, letter-style.
SHAPING AND BAKING
To make crescent-shaped croissants, begin by cutting out triangles.
For full-size croissants, cut triangles about 9 inches long by 4 inches
wide at the base. (The 9-inch length of the rolled-out dough will shrink
to 8 inches as you cut.) Use a ruler or yardstick to measure and, starting
at the left side, place a small notch at 4-inch intervals along the bottom
edge of the dough with the pastry scraper or a knife. Repeat this along
the top edge, but mark the rst interval at 2 inches from the left end,
then continue measuring at 4-inch intervals from that point on. For
smaller croissants, roll the dough to only 7 inches long, which means it
smaller croissants, roll the dough to only 7 inches long, which means it
will be much wider, probably closer to 30 to 33 inches, and make the
notches at an interval of only 3 inches, instead of 4 inches.
Use a pizza cutter or a metal pastry scraper to cut a line from the left
bottom corner of the dough to the notch in from the left at the top, then
simply connect the marks to cut o the dough triangles. When all of the
pieces are cut and separated, cut a 1-inch notch into the bottom center
of the triangle base of each piece. Spread the bottom as wide as the
notch willallow to create winglike aps. Start with the aps and begin
rolling up the dough as if it were a rug. Gently pull out the top point
rolling up the dough as if it were a rug. Gently pull out the top point
(the nose) of the dough as you roll the bottom toward it, but be careful
not to squeeze the dough or the layers will break. Stretching the nose
will elongate the dough a bit as you roll it up. It should form in either
5 or 7 steps; if you only get 5 steps, you can give the aps at each end a
twist to create another set of steps if you like. Repeat with all of the
dough triangles. (If you have any leftover scraps, simply roll them up to
make mini croissants or coil them for Danish.)
Place the croissants about 1½ inches apart on a sheet pan lined with
parchment paper or a silicone mat, with the nose of each one
positioned underneath so that it’s anchored. As you pan each croissant,
give the end aps a slight curve inward, facing in the same direction as
the nose is pointing, forming a crescent shape. (If you don’t want to
bake all of the croissants at this time, place the extra croissants on a
pan or in individual freezer bags and chill or freeze them.) Cover
loosely with plastic wrap and proof at room temperature for 2½ to 3
hours. The croissants will rise slowly and swell noticeably in size, but
they won’t double.
About 20 minutes before baking, preheat the oven to 450°F (232°C).
Applying egg wash is an option at this point; some people like the
glossy finish it provides, but I don’t think it’s necessary.
Place the croissants in the oven and lower the oven temperature to
375°F (191°C). Bake for 15 minutes, then rotate the pans and bake for
an additional 15 to 20 minutes, until the croissants are a rich golden
brown on all sides, without any white sections in the visible layers. If
they seem to be baking unevenly or are getting too dark and have
streaks of light sections, lower the oven temperature to 325°F (162°C)
and extend the baking time as needed. The croissants should feel very
light when lifted and be flaky on the surface.
Allow the croissants to cool for at least 45 minutes before serving; an
hour is even better. If served while still hot, they’ll appear to be greasy
because the butter hasn’t yet firmed up and been fully absorbed into the
pastry.
VARIATIONS
One of the recipe testers accidentally left her melted butter for the
détrempe on the stove too long and it browned. She used it anyway and
reported that it added a wonderful avor to her nished products. So
consider using browned butter in your détrempe, but keep a watchful
eye on it. Such a small amount of butter can go from brown to black
very quickly.
Baking Frozen Croissants
To bake frozen croissants, remove the shaped croissants from the
freezer at least 3 hours before you plan to bake so they can thaw.
Don’t bake them while they’re still frozen or they won’t rise or
bake evenly. Once the croissants have thawed, follow the baking
instructions in the recipe.
MAKES 8 TO 10 CROISSANTS (DEPENDING ON SIZE)
You can purchase a product called chocolate batons (available at
specialty stores and online) that’s speci cally designed for rolling into
chocolate croissants. But, if you’d like to make your own batons from
scratch, here’s a recipe, followed by a method for shaping chocolate
croissants. You could also ll these croissants with almond paste, or try
savory llings, like ham and cheese, creamed spinach, or bacon
crumbles.
1 recipe laminated dough
FILLING
6 tablespoons (3 oz / 85 g) cold unsalted butter
2 cups (12 oz / 340 g) semisweet dark chocolate chips or chunks
GARNISH
1 egg, for egg wash
2 tablespoons water, for egg wash
Confectioners’ sugar, for garnish (optional)
DO AHEAD
Prepare the laminated dough up to the point of shaping and baking.
When you get to the nal rolling, roll into a rectangle measuring about
When you get to the nal rolling, roll into a rectangle measuring about
32 inches wide by 7 inches high.
SHAPING AND BAKING
To make the lling, melt the butter in a saucepan, then turn the heat
down as low as it will go, add the chocolate, and stir until the chocolate
is melted. (You can also melt the chocolate and butter together using a
double boiler or using a microwave in short bursts.) Pour the chocolate
mixture onto a sheet of parchment paper or a silicone mat and use a
spatula to spread it into a rectangle about ½ inch thick. Cool until the
chocolate is solid; you can put it in the refrigerator to speed this up.
Cut the rolled-out laminated dough into rectangles about 3½ inches
wide and 6 inches long (the 7-inch dough will shrink to 6 inches as you
cut it). Use a metal pastry scraper or pizza cutter to cut the cooled
chocolate into bars about 3 inches long and ½ inch wide. Lay one or
two bars across the bottom of each piece of dough, then roll the
croissants up into barrel shapes. Place the croissants on a parchmentlined sheet pan about 1½ inches apart, seam side down. Cover loosely
with plastic wrap and proof at room temperature for 2½ to 3 hours. (If
you don’t want to bake all of the croissants at this time, place the extra
croissants on a pan or in individual freezer bags and chill or freeze
them.) The croissants will rise slowly and swell noticeably in size, but
they won’t double.
About 20 minutes before baking, preheat the oven to 450°F (232°C).
Whisk the egg and water together, the gently brush the egg wash over
the croissants.
Place the croissants in the oven and immediately lower the
temperature to 375°F (191°C). Bake for 15 minutes, then rotate the pan
and bake for an additional 15 to 20 minutes, until the croissants are a
rich golden brown on all sides, without any white sections in the visible
layers. If they seem to be baking unevenly or are getting too dark and
have streaks of light sections, lower the oven temperature to 325°F
(162°C) and extend the baking time as needed. The croissants should
feel light when lifted and be flaky on the surface.
Cool for at least 1 hour before serving. If you like, you can garnish
Cool for at least 1 hour before serving. If you like, you can garnish
the croissants after they have cooled with a light dusting of
confectioners’ sugar tapped through a ne-mesh sieve, or remelt any
leftover chocolate filling and apply a squiggle of chocolate to the top.
MAKES 2 TO 4 DOZEN, DEPENDING ON THE SIZE
There are dozens of shapes for Danish pastry, far more than I have
room to demonstrate, but the shapes below are fundamental and fairly
easy to master. (For more shapes, I suggest going to the Web.) The rst
shape, called Schnecken (German for “snail”), is probably the most
common shape; with Schnecken, you have the option of applying
cinnamon sugar to the dough before cutting and shaping. The second
shape is a simple pinwheel that’s very pretty and popular for serving to
guests and on special occasions. I’ve provided a few recipes for llings,
but you can also use commercial pie llings (just don’t use regular fruit
preserves, jams, or jellies because they don’t contain starch and aren’t
oven stable, so they’ll melt out of the Danish). I’ve also provided
recipes for two glazes for nishing the Danish and recommend you use
both: a hot syrup glaze for shine and retaining freshness, and a simple
fondant glaze to accentuate the flavor and provide visual appeal.
1 recipe laminated dough
1 egg, for egg wash (optional)
2 tablespoons water, for egg wash (optional)
2 tablespoons (0.75 oz / 21 g) ground cinnamon, for cinnamon
sugar (optional)
½ cup (4 oz / 113 g) sugar, for cinnamon sugar (optional)
1 recipe white fondant glaze
HOT GLAZE
¾ cup (6 oz / 170 g) water
¾ cup (3 oz / 85 g) sugar
1 heaping tablespoon apricot preserves (optional)
½ lemon (optional)
DO AHEAD
Prepare the laminated dough up to the point of shaping and baking,
and roll out as you would for large croissants, into a rectangle
measuring about 24 inches wide by 9 inches long and just under ¼ inch
thick.
SHAPING
To make Schnecken, if you want to use cinnamon sugar, you’ll need
to apply an egg wash before cutting the dough. Whisk the egg and
water together, then gently brush it over the surface of the dough.
Separately, whisk the cinnamon into the sugar, then sprinkle the
Separately, whisk the cinnamon into the sugar, then sprinkle the
cinnamon sugar over the surface of the dough.
Use a straight edge, such as a sturdy ruler, to cut 1-inch-wide vertical
strips, so that you end up with about 24 strips, 8 to 9 inches long (the
dough will shrink slightly as you cut it). For large schnecken, use the
entire strip; for a mini version, cut each strip in half to make two 4-inch
strips. Lift each strip at both ends and twist in opposite directions to
form the strip into a springlike coil, then lay the strip on the work
surface and coil it in a circular fashion to make a snail shape. (For fullsize Schnecken, you can also coil them from both ends to form either an
S-shaped double snail or an eyeglass-shaped double snail, which allows
you to ll the schnecken with two llings.) Tuck the outer end of the
coil underneath to close off the circle.
Place the schnecken 1 inch apart on a parchment-lined sheet pan and
cover loosely with plastic wrap. Proof at room temperature for 2 to 2½
hours, until the dough has swelled noticeably.
To make pinwheels, cut the dough into approximately 3-inch squares
for large pin-wheels, or 2½-inch squares for smaller pinwheels.
Working with one piece at a time, use a metal pastry scraper to cut a
notch at each corner, cutting from the corner toward the center without
connecting the cuts; leave an uncut center about ½ inch wide to serve as
a platform for the lling. Take the same side of each corner and fold it
over to the center, pressing it into the uncut platform. When all 4
corners are folded, use your thumb to press the ends into each other
and seal them in the center of the pinwheel. Don’t worry if they come
apart during the proo ng stage; you can press and seal them again
before you add the filling.
Place the pinwheels about ½ inch apart on a parchment-lined sheet
pan and cover loosely with plastic wrap. Proof at room temperature for
2 to 2½ hours, until the pieces have swelled noticeably.
BAKING AND GLAZING
About 20 minutes before baking, preheat the oven to 450°F (232°C).
Fill the schnecken by using your thumb to make an indent in the center
of each coil large and deep enough to hold about 1 heaping teaspoon
of each coil large and deep enough to hold about 1 heaping teaspoon
of lling, then add whatever llings you like. Fill the pinwheels by
pressing the center with your thumb or nger to create a small pocket,
and place about 1 teaspoon of whatever llings you like into the
pocket.
For both Schnecken and pinwheels, make the fondant glaze while the
oven preheats.
Just before baking the Danish, prepare the hot glaze. Combine the
water and sugar in a saucepan and bring it to a boil; stir until the sugar
is dissolved, then lower the heat to maintain a gentle simmer while the
Danish bake. If you like, stir in the apricot preserves, or squeeze the
juice from the lemon into the saucepan, then add the entire lemon half.
As the syrup is heating up, place the pan of Danish into the oven and
lower the oven temperature to 400°F (204°C). Bake for 6 minutes, then
rotate the pan and bake for another 5 to 6 minutes, until a medium
golden brown.
As soon as the Danish come out of the oven, brush the hot syrup over
them, including over the lling. Let the Danish cool on the pan for
about 5 minutes, then drizzle streaks of the fondant glaze over them.
Let the glaze set up for about 3 to 5 minutes, then enjoy!
The cream cheese lling can be used by itself or underneath another
lling. Although any commercial canned pie lling will work just ne,
you can use the fruit lling recipe to make it from scratch. The lemon
curd can also be used on its own, or as a bed under other llings. Use
the cinnamon butter crumb lling by itself or sprinkle it on top of fruit
or cream cheese fillings prior to baking.
CREAM CHEESE FILLING
8 ounces (227 g) cream cheese
2 tablespoons (1 oz / 28.5 g) unsalted butter, at room
temperature or melted
6 tablespoons (3 oz / 85 g) sugar
1 egg (1.75 oz / 50 g)
1 teaspoon (0.25 oz / 7 g) vanilla or lemon extract
1¾ tablespoons (0.5 oz / 14 g) unbleached all-purpose flour or
unbleached bread flour
Pinch of salt
Combine all of the ingredients in a mixing bowl and cream them
together until smooth and slightly u y. If using a mixer, use the
paddle attachment and gradually increase the speed of the mixer to
high. If mixing this lling by hand, use a large, sturdy spoon and be
prepared to stir vigorously. The lling should be thick, creamy, and
custardlike; it will firm up when baked.
FRUIT FILLING
1 cup fresh or frozen blueberries, pitted cherries, sliced or diced
strawberries, or diced apricots, peaches, apples, or pears
¾ cup (6 oz / 170 g) cool water
2 tablespoons (1 oz / 28.5 g) sugar
Pinch of salt
1 tablespoon (0.25 oz / 7 g) cornstarch
If using diced apples or pears, poach them in boiling water for 1
minute, then drain. Whisk the water, sugar, salt, and cornstarch together
in a saucepan to make a slurry, then bring it to a boil over a medium
heat, stirring constantly. It should thicken by the time it comes to a boil.
heat, stirring constantly. It should thicken by the time it comes to a boil.
Remove it from the heat immediately, then stir in the fruit. Some fruits
will leach moisture into the slurry, so stir the lling a few times as it
cools.
LEMON CURD
6 tablespoons (3 oz / 85 g) lemon juice (fresh is better than
bottled)
½ cup (4 oz / 113 g) sugar
2 eggs (3.5 oz / 99 g), beaten
½ cup (4 oz / 113 g) unsalted butter, at room temperature, cut
into 4 pieces
Whisk the lemon juice, sugar, and eggs together in a double boiler
over simmering water, then stir continuously until the mixture begins to
thicken; this could take 10 to 15 minutes.
As soon as the mixture thickens, add the butter and stir until it melts.
Remove the lemon curd from the heat and continue to stir until the
butter is fully incorporated. If it’s lumpy, push it through a ne-mesh
sieve to smooth it out. Lay a piece of plastic wrap directly on the
surface of the curd and set it aside to cool.
CINNAMON BUTTER CRUMB FILLING
¼ cup (2 oz / 56.5 g) unsalted butter, at room temperature
1 cup (8 oz / 227 g) light brown sugar
1 teaspoon (0.25 oz / 7 g) ground cinnamon
1¾ tablespoons (0.5 oz / 14 g) unbleached all-purpose flour or
unbleached bread flour
Pinch of salt
This is hard to mix by hand, so I recommend using a mixer. Using the
paddle attachment, cream the butter and sugar together on mediumhigh speed until the butter disappears into the sugar. Add the
cinnamon, our, and salt and mix on low speed until all of the
ingredients are evenly distributed.
VARIATION
If you want richer, softer Danish dough, when making the détrempe,
replace 6 tablespoons (3 oz / 85 g) of the water with 2 eggs (3.5 oz /
99 g).
EPILOGUE
What’s Next for the Artisan Movement?
The growing artisan pizza renaissance that I predicted in 2004 in the
pages of American Pie: My Search for the Perfect Pizza is, happily, right
on schedule. My contention in American Pie was that pizza is arguably
the most popular food in the world, though not always under that
name. After all, pizza is simply dough with something on it, and there
are many products that t the description, from the numerous Italian
variations like focaccia, sciattiatta, s ngiuni, and even panini to Indian
stu ed naan bread, Mexican quesadillas and Central American pupusas,
or a simple grilled cheese sandwich—with each incarnation there is
something deeply satisfying, almost magical, about the combination of
dough and a topping. It doesn’t even have to be executed at the highest
level—witness the proliferation of frozen pizza products, which, no
matter how much they have improved, can never equal a freshly baked
pizza from a decent neighborhood pizzeria. Yet, they too are popular
and satisfying. I claimed then, and still believe, that there are only two
kinds of pizza: good and very good. And by very good, I mean
memorable. But, while there are now thousands of very good pizzerias,
there were only a handful back in ‘04 that produced memorable, lifechanging pizza (I cited Pizzeria Bianco in Phoenix, Arizona, as the
model, with owner Chris Bianco as the reluctant poster boy of this
nascent movement).
The current artisan pizza revolution is a wonderful example of our
growing hunger for food experiences that are not just good but
memorable. We long for experiences that establish new benchmarks in
our consciousness, that excite us and make us want to bring our friends
and family to share it with us, again and again. We’ve seen it happen
with bread, then the micro beer movement, and more recently with the
farmstead cheese movement. Artisanship manifests as the natural and
inevitable pendulum swing in a world that has been industrialized and
reduced to high-volume processes. Artisanship feeds not only a bodily
hunger but also a hunger in our souls, a yearning. This level of quality
—the memorable, benchmark kind—is a di cult concept to de ne, but
it’s easy to identify when it is encountered. And while it exists in but a
small percentage of the foods we consume, it has the power—even in
simple, humble peasant foods like bread or pizza—to excite us deeply
when we discover it. We will even go on quests in search of it. When I
arrive in a city and put out the word that I’m going on a pizza hunt, I
have no problem finding fellow pilgrims.
He didn’t say it boastfully, but rather with a sense of personal
satisfaction, with the inner peace that the ancient Greeks called
eudaemonia, meaning “to ourish.” That his years of practice were now
able to bring so much joy and satisfaction to a few friends sitting
around this table, or to the many tables within reach of his breads, was
for him, and for all of us that night, a eudaemonic event.
These are the moments that artisans live for, but I think all humans,
not just artisans, share the same yearning. Everyone eats bread in some
form or another and it never ceases to nourish both our bodies and our
imaginations. Perhaps this book—with the journey that it represents,
and the lineage of yearning for these artisan “moments” to which it
connects us—will serve in a small way as a link in your own quest for
that perfect, ine able loaf. For six thousand years bread has been made
and yet we are still discovering new ways to make it better. But making
the perfect loaf of bread is like searching for the Holy Grail; seemingly
attainable yet always just out of reach—or is it?
This book includes recipes for various pizza doughs that are based on
some of the remarkable products I’ve tasted around the country. Back
home in Charlotte, I recently even became a partner in a pizza
restaurant of my own, so as to share this experience with others. During
the past few years, many other fellow pizza lovers have done the same.
In Portland, Oregon alone I discovered four new artisan pizzerias that
did not exist when American Pie came out—and those are just the ones
I had time to visit in three short days!
On my latest round of pizza hunts, however, I had an experience that
reminded me of an even bigger picture, of the universal search for the
reminded me of an even bigger picture, of the universal search for the
indelible memory and of why I love writing books about food. It was a
dinner at a friend’s house that included a loaf of bread baked by Eric
Wol nger, who happens to be a baker at Tartine, one of the nest
bakery/pastry cafes in America. Eric is also a ne chef, and he cooked
us an exceptional dinner (a Portuguese seafood stew was the main
course; need I say more?). But I could not get enough of his bread, a
country French loaf sold at Tartine (though made in limited quantities).
I thought I’d tasted good-as-it-gets bread before, but this was a time
stopper. A slightly charred and smoky, crisp, aky crust surrounded a
creamy, custard-like crumb with just a hint of lactic tang. The rest of the
food, the company, and the great memories of that night are all pegged
to that loaf. It was yet another benchmark moment, and I realized yet
again how much I still have to learn about making bread—and how
much I can’t wait to get back to San Francisco to get my hands on
another one of those loaves.
I picked and probed Eric’s brain as much as I could to gure out how
he made his loaf and he had no problem sharing his method. He knew,
as every artisan does—whether it be Chris Bianco, the artisan pizza
poster boy, or Brian Spangler, who I only half jokingly refer to as the
next Chris Bianco, or any of the other great pizzaioli that I meet on my
never-ending pizza hunts—it isn’t the quality of the ingredients or the
recipe, though they are essential, that creates time-stopping, memorable
moments. It is the artisan’s commitment to the process—whether baker,
pizzaiolo, cheese maker, brewmeister, or candlestick maker. Chris
Bianco once told me that the secret to his pizzas was him, because he
could teach others all his tricks and techniques, but he could not teach
them to care as much as he cares.
After Eric told me about the pre-ferment and the starter, the
fermentation time, and the high hydration in his dough—pretty much
all I needed to know about how to make that country French loaf—he
added, “But none of that matters if you don’t know how to handle the
dough when it comes time to shape it. If you take it too early, it doesn’t
develop the right avor; if you take it too late, it doesn’t hold its shape.
But even if you take it at the perfect moment, you still have to form it
just so,” he held his hands like he was cradling a baby. “If you don’t
just so,” he held his hands like he was cradling a baby. “If you don’t
wrap it up just right, it won’t give you that great, crispy ‘ear’ and it
won’t bloom open properly. Not everyone who works with this dough
learns how to master it.”
My Recent Pizza Travels
During the months preceding the publication of this book, I had
the pleasure of traveling to a number of cities to experience some
of the best of the newest American pizzerias. Portland’s new artisan
pizzerias are all in the same corner of the city, but each serves
pizza so good, so di erent from the others, that each stop seemed
like an initiatory experience. Apizza Scholls uses medium
hydration dough and bakes its large (18-inch diameter) pizzas in a
standard Baker’s Pride pizza oven, not a wood- red forno. Brian
Spangler, the founder and head pizzaiolo and a former artisan
bread baker, cranks his oven up about 100 degrees hotter than
most other pizzerias that use the same oven and declares, “It’s not
about the source of the heat, it’s all about the BTUs.” His crust is
tender and crisp, with a great snap, smoky char spots, and yet a
moist, creamy interior. These attributes are hallmarks of artisan
pizza, especially when topped with house-made sausage or locally
grown and marinated goathorn peppers.
At Ken’s Artisan Pizza, Ken Forkish uses locally milled Oregon
our and bakes his wonderful, Neapolitan-inspired pizzas in a very
hot wood- red brick oven. He too makes his own fennel sausage
and cures his own pancetta. Tastebud, owned by Mark Doxtader,
just opened in a permanent location after attaining legendary status
at Portland farmer’s markets for Mark’s Montreal-style bagels and
rustic pizzas produced in a mobile wood- re oven on the market
site. Tastebud goes for a thicker crust, in the style of Nancy
Silverton’s groundbreaking Pizzeria Mozza in Los Angeles (another
place that didn’t exist when American Pie came out, where the
fennel sausage is garnished with a dusting of fennel pollen—now
that’s what I call artisan garnishing!). Nostrana, owned by wellknown Portland super-chef Cathy Whims, goes for a Naples-style
pizza with a thin crust and pu y edge, and intensely avorful
toppings (including, yes, house-cured bacon and locally grown
peppers), yet made with American (Oregon milled) our, not
Italian flour.
When I toured the san Francisco area a few days later I
discovered a similar Naples-style pizza in Larkspur (just over the
Golden Gate Bridge in Marin County) at Pizzeria Picco, a wonderful
companion to a full-menu restaurant simply called Picco that
shares the same space. Chef-owner Bruce Hill’s pizza vision is
much more a strict homage to the Napoletana method; he uses
Caputo “00” our and an exquisite bright red San Marzano tomato
sauce, and bakes his pizzas in a red-hot forno. Yet, his creations,
including the house-made sausage (of course!) as well as his nely
cut broccoli di ciccio and a wonderful baccala (salt cod) pizza, are
distinctly his own and not a Naples copycat.
Craig Stoll, the James Beard Award-winning chef-owner of
Restaurant Del na in San Francisco, now has two locations for his
wildly popular Pizzeria Del na. His palate for explosive avors is
similar to Bruce Hill’s at Picco and he too serves a baccala pizza,
yet his crust is dramatically di erent and, like Apizza Scholls in
Portland, is baked with a nice char in gas-fired ovens.
I was also very impressed with the crust and pizzas that came out
of the wood- red oven at Pizzaiolo, in Oakland, where chef-owner
Charlie Hallowell has realized his long-held vision, born while
working the pizza station at Chez Panisse Café under the
mentorship of Alice Waters. Five years earlier while attending a
pizza class I gave in Berkeley shortly after American Pie came out,
Charlie told me that he was going to pursue his dream. Again,
baccala was on the featured pizza—it was a big week for salt cod
in the Bay Area and I never tired of it. But I also ipped for the
super tender Monterey Bay squid and aioli pizza. Charlie proved
that dreams, when fueled by vision and passion, can come true.
The hour-long waits at all of these new spots re ect this fact: If
you build it, they will come. And I haven’t even mentioned other
wonderful places, like Coal re Pizza and Spacca Napoli, that I
encountered in Chicago, Pizza Rustica in Colorado Springs, Marc
Vetri’s Osteria in Philadelphia, or Una Pizza Napoletana in New
York City, plus about a dozen other places in Manhattan, Brooklyn,
and Queens that have recently opened to great acclaim: Roberta’s,
deep in the warehouse district of Bushwick, Brooklyn, as well as
Spunto, Co, Motorino, Franny’s, and San Marzano (NYC, as always,
is all in). The list goes on and on, and grows daily.
RESOURCES
There is an abundance of resources now readily available on the Internet, so I will not
attempt to create an exhaustive list here. Connecting with some of these links may even lead
to a whole new breadcrumb trail of resource material. Here are a few resources that I do
want to list as a starting point.
Serious bread bakers collect all the good bread books, many of which I’ve cited in my
previous books. The two most recent books that utilize delayed fermentation and produce
excellent results (in addition to the one you are holding in your hand) are: Kneadlessly
Simple, by Nancy Baggett (John Wiley & Sons, 2009), and Artisan Breads in Five Minutes a
Day, by Je Hertzberg and Zoë François (St. Martin’s Press, 2007). A new book by Jim
Lahey, the creator of what is often mistakenly called the New York Times No Knead Bread, is
due out soon, but I have not yet read it. However, knowing Jim, I’m sure it will be well
worth having. Each of these books o ers a di erent take on the delayed fermentation
method and I’m sure they won’t be the last books to probe the subject. I also highly
recommend the newest book by my good friend and JWU colleague, Ciril Hitz, called Baking
Artisan Pastries and Breads (for which I wrote the foreword). Although his recipes are not
speci cally built around the cold fermentation method, many of his techniques, llings, and
photos supplement the recipes in this book.
Shirley Corriher’s, BakeWise (Scribner, 2008), the follow-up to her food science classic
CookWise, covers all sorts of baking science questions, as does Emily Buehler’s wonderful
Bread Science: The Chemistry and Craft of Making Bread (Two Blue Books, 2006). I also
highly recommend the new edition of Six Thousand Years of Bread, by H. E. Jacob (Skyhorse
Publishing, 2007), for which I was invited to write the new foreword.
As for websites, blogs, and e-groups, three of the most useful for readers of this book are
the ones populated by some of our own testers. To see the hundreds of photos and new
variations of these recipes, created by our testers, go to: www.breadtechnique.com.gallery.
To participate in the conversations about the recipes, go to:
www.breadtechnique.com/Forum. For general information on how to register to be included
in this community of recipe testers go to: www.breadtechnique.com/recipetesters.html. If
you have any questions, contact the webmaster for these sites, at
[email protected].
Another site of note is my blog, www.peterreinhart.typepad.com, where I try to post at
least once a week on things of shared interest (and not just bread), my travel teaching
schedule, and also my latest new discoveries.
There are now many bread-focused websites and blogs, but one of my favorites is still
www.thefreshloaf.com, where bread-heads of all types generously share information under
the watchful eye of webmaster Floyd Mann. Also, www.bread-bakers.com, for one of the very
rst bread-centered email communities, where I still learn new things from the weekly
posting.
Just for fun, check out www.pinchmysalt.com/the-bba-challenge, where over 200 bakers
have made a commitment to bake every single formula from my earlier book, The Bread
Baker’s Apprentice (Ten Speed Press, 2001). If they survive that challenge, maybe they’ll
tackle the same task with this book. Meanwhile, they are documenting their progress with
photos and postings. By the way, I had nothing to do with setting this up but am thrilled and
honored that so many people have jumped in.
For dough shaping tutorials, at least until I can post my own (I’m working on it), try
www.thebackhomebakery.com/Tutorials.html. Of course, by now there are hundreds of
dough tutorials on YouTube, so if the photos and instructions in these pages don’t do the
trick, I encourage you to go to the web.
For those who are committed to increasing your intake of whole grains, which I hope we
are all doing, www.wholegrainscouncil.org is your gateway to all of the available
information. For sourdough fanatics, join Teresa Greenway and her group of correspondents
at www.northwestsourdough.com to share the passion.
There are hundreds of other sites, and more coming into existence everyday, but the above
links will lead you to them.
Finally, if you run into any problems or have questions about the breads in this book,
contact me at [email protected].
BAKER’S PERCENTAGE FORMULAS
The following formulas express the dough recipes from this book in what are known as
baker’s percentages, in which all of the ingredients are listed as a ratio against the total flour
in the recipe. The totals do not add up to 100 percent because they actually begin with our
as the 100 percent ingredient against which all other ingredients are compared. This system
allows experienced bakers to re-create any recipe in any batch size, even without speci c
weights and measures. A more detailed explanation of the baker’s percentage system is given
in my book, The Bread Baker’s Apprentice. You do not need to understand or use this system
to make the recipes in this book.
For recipes that use a starter, you will see three tables. One shows the ratios in the starter
itself; the second is the mixed dough (with the starter as a separate ingredient in ratio
against the our used in the nal dough); and the third is the complete dough formula
based on the total our and other ingredients in both the starter and the nal dough. This
third table shows the truest picture of the overall ingredient ratios, but some bakers prefer
to work with the first tables.
Index
A
Agave nectar
Almonds
Greek Christmas bread
Greek Easter bread
sticky buns
stollen
Apple filling
Apricots
filling
Greek Easter bread
Artisan bread movement
B
Baba au rhum,
Babka, chocolate cinnamon
Bagels
Baguettes
Baker’s percentage formulas Baking
axioms of
hearth
new methods for
tips for
Baking stones
Bannetons
Barley malt
Bâtards
Bench blades
Bianco, Chris
Biscuits
best ever
cheese
flaky
make-ahead tips for
savory variations of
sweet variations of
Blueberry filling
Boules
Bowl scrapers
Braided breads
Bread Bakers Guild of America
Brioche
à tête
Bull’s-eye loaves
Buns
cinnamon
hamburger
hot cross
hot dog
sticky
Butter flake rolls
C
Cake, coffee crumb
Caramel slurry, slurry
Challah
Cheese breads
biscuits
crusty
soft
tips for
Cheesesteak rolls
Cherry filling
Chocolate
cinnamon babka
croissants
Christmas bread, Greek
Christopsomo
Ciabatta
Cinnamon buns
Cinnamon butter crumb filling
Cloches
Coffee crumb cake
Corriher, Shirley
Couches
Crackers
crispy rye and seed
flaky, buttery
whole grain
Cranberries
Greek Christmas bread
Cream cheese
filling
frosting
Croissants
baking frozen
chocolate
detrempe and butter block for
Currants
hot cross buns
D
Danish pastry
Detrempe
Dough
all-purpose sweet
laminated (detrempe and butter block)
milk
panettone
pizza
proofing
scoring
shaping
stretch and fold method for
tacky vs. sticky
Doxtader, Mark
E
Easter bread, Greek
Eggs
substitutes for
wash
English muffins
Épis
Epoxy method
Equipment
F
Fats, role of
Fendue
Fermentation
Fillings
cinnamon butter crumb
cream cheese
fruit
lemon curd
Flaxseeds
crispy rye and seed crackers
many-seed bread
Flour
buying
unbleached vs. bleached
Focaccia
pain à l’ancienne
toppings for
Fondant glaze, white
Forkish, Ken
Fougasse
French bread
classic
country-style
Frosting, cream cheese
Fruit. See also individual fruits-filled thumbprint rolls
filling
Greek Christmas bread
Greek Easter bread
panettone
stollen
sweet biscuits
G
Gansz, Werner
Glazes
hot
white fondant
Greek Christmas bread
Greek Easter bread
H
Hallowell, Charlie
Hamburger buns
Hearth baking
Hill, Bruce
Hoagie rolls
Holiday breads. See also individual recipes
Honey
almond slurry
substitutes for
Hot cross buns
Hot dog buns
J
Jacobs, H. E.
K
Kaiser rolls
Kranz cake
I
Lambpropsomo
Lean bread
Lemon curd
Leuconostoc
Limpa rye bread
M
Many-seed bread
Mastic gum
Miche
Milk
dough
substitutes for
Mixers
Mother starter
Multigrain breads
pizza
rustic
sandwich
struan
N
Neo-Neopolitan pizza dough
O
Oils
herb
spicy
Onions
savory biscuits
and wild rice bread
Oppenneer, Betsy
P
Pain à l’ancienne
focaccia
rustic bread
Pain au levain
Panettone
Pastry scrapers
Peach filling
Pear filling
Pecans
cinnamon buns
sticky buns
Pineapple juice
Pinwheels
Pizza
artisan
toppings for
Pizza dough
multigrain
neo-Neopolitan
shaping
sourdough
whole grain
Poilâne, Max and Lionel
Poolish
Pre-ferments
Pretzels
shaping
soft
Proofing
Pumpkin seeds
crispy rye and seed crackers
many-seed bread
R
Raisins
bagels
cinnamon buns
Greek Christmas bread
Greek Easter bread
hot cross buns
panettone
sticky buns
Rice
and onion bread
struan
Rolls
butterflake
fruit-filled thumbprint
hoagie and cheesesteak
Kaiser
many-seed
rye
shaping
silver dollars
soft
soft cheese
struan
whole wheat
wild rice and onion
Rye breads
bull’s-eye
limpa
marbled
soft sandwich
spiral
Rye crackers, crispy seed and
Rye starter, sour
S
Salt
Sandwich loaves
multigrain
rye
shaping
soft
whole wheat
San Francisco sourdough bread
Sauce, crushed tomato
Schnecken
Scoring
Seed cultures
Sesame seeds
crispy rye and seed crackers
many-seed bread
Sheet pans
Silver dollars
Silverton, Nancy
Slow Food movement
Slurries
creamy caramel
honey almond
Susan’s sticky bun
Soakers
Sourdough breads. See also Starters
pain au levain
pizza
San Francisco
struan
whole wheat hearth
Spangler, Brian
Starters
building
mother
refreshing
rye
seed cultures for
whole wheat
Steam, creating
Sticky buns
Stoll, Craig
Stollen
Strawberry filling
Stretch and fold method
Streusel topping
Struan
Sugars, role of
Sunflower seeds
crispy rye and seed crackers
many-seed bread
Susan’s sticky bun slurry
Sweet wash
T
Thumbprint rolls, fruit-filled
Tomato sauce, crushed
Tools
Tsoureki
V
Vetri, Marc
W
Walnuts
cinnamon buns
Greek Christmas bread
Greek Easter bread
sticky buns
Waters, Alice
Whims, Cathy
White fondant glaze
Whole Grains Council
Whole wheat breads
everyday sandwich
hearth
pizza
rustic
sourdough hearth
Whole wheat sourdough starter
Wild rice and onion bread
Wolfinger, Eric
Y
Yeast
active dry
fresh
instant
rising time and
role of
wild
ACKNOWLEDGMENTS
This is the largest group of people I’ve ever had to thank. That’s because over 500 people
volunteered to test these recipes and they provided enormous help. But, before I list them
all, I rst need to thank the dynamic creative team from Ten Speed Press, including my
editor Melissa Moore, copyeditor Jasmine Star, proofreader Linda Bouchard, creative
director Nancy Austin, publicist and now managing editor Lisa Regul, and publisher Aaron
Wehner, who gets the credit for coming up with the idea for this book. Thanks also to my
talented photographer, Leo Gong, his wife Harumi (our hand model and prop stylist, among
her many other responsibilities), food stylist Karen Shinto, photo session baking assistants
Allen Cohn and Barry Shinto, and our photo session mascot, Samantha, the sweet dachshund
puppy who kept us all calm.
Also, thanks to Michael Kalanty and the California Culinary Academy for supplying us
with additional baking tools and supplies for the photos, and to the Raphael House for my
accommodations in San Francisco during the photo shoot, and to Alan and Katharine Cahn
in Portland, Oregon for hosting me and joining in on the Portland pizza hunts.
At home, many thanks to my wife Susan for her superhuman patience, and to my
colleagues and superiors at Johnson & Wales University for their support and exibility:
JWU Charlotte campus president, Arthur Gallagher, and chefs Wanda Cropper, Mark Allison,
Harry Peemoeller, and Karl Guggenmos; also, Laura Lucille Benoit, proofreader
extraordinaire.
A special round of thanks to a few recipe testers who performed over and above the call
of duty, including Mark Witt, who set up and hosts our Internet forum and gallery sites that
are now a permanent resource for all readers (see this page for details); Pamela Schmidt,
Lucille Johnston, and Betty Lee who took on the added challenge of extra testing and
development on speci c projects such as the holiday breads, English mu ns, and biscuits.
Also, Bruce Gunther, who convinced me to incorporate the stretch and fold method as part
of the methodology of this book; I did, and the results improved dramatically! Continual
thanks to Debra Wink, for her ongoing sourdough study and suggestions on how to harness
those wonderful yet mysterious microorganisms.
As you can see from the following list, there are many others who immersed themselves in
the task of helping to create this innovative method of bread making. Some stayed with the
project for the entire nine months of testing, while others came in during the middle or at
the end with fresh eyes. Believe me, you are all appreciated and you should know that I
never could have completed this book without your help and support. It has truly been a
collaborative e ort! (If I have inadvertently left anyone o this list, I apologize in advance—
I never thought there would be so many of you!)
Paul Aboud, Kasra Adjari, Dennis Allison, Ana Alonso, Brian Amos, Kasi Anderson,
Matthew Arney, Betsy Arnold, Deb Arsenault, Greg Askew, Elias Barajas, Nicholas Barengo,
Greg Baumann, Paul Bear, Matt Behm, Rick Behrens, Kevin Bell, Todd Bennett, Jane Benoit,
Laura Lucille Benoit, Dov Berger, Joe Bernardello, Stefan Bert, David Bishop, Hanna Bjonstad,
Mark Black, Barb Blackmore, Mary Blender, Anne Bloomer, Karen Blumberg, Emily
Blumenthal, Dan Bode, Ruth Boehler, Jennifer Bourassa, Jim Bradley, Marcia Branscom,
Benjamin Brenner, Stephanie Brim, Robert Bristow, Broc Brockway, Elizabeth Broderick,
Royal Brooks, Dan Brosemer, Jeanie Brown, Try, Nong, and Caterina Brown, Chris Bryan,
Claire Bucholz, Kathryn Bundy, Becky Burdashaw, Joseph Burgo, Samantha Butler, Jean
Buttimer, Myra Callahan, Jane M. Campbell, Patrick Campbell-Preston, Bryan Carmenti, Bill
Carrera, Vicki Carson, Elizabeth Carswell, Mary Cassidy, Sarah Chat eld, Laura Chan, Karen
Chen, Sophia Chen, Don Choate, Larry Clark, Carmen Clemons, Richard Clark, Isabelle
Cloutier, Jenny Cochran, Mark Cohen, Patti Colbourne, Darren Coleman, Matthew Col esh,
Sikway Condon, Mike Connolly, Jim Cook, Renee Cook, Margaret Cope, David Coppes, Robin
Cosby, Barbara Coughlin, Cecil Coupe, Lionel Crews, Amber Crowder, Allison Dale, Nicola
Dalheim, Deborah Dana, Chahira Daoud, Don Daugherty, Laurie Davidson, Nat Davidson, Jim
Davies, Krek Dayam, Simone DeKleermaeker, Dawn DeMeo, Patrick Dennis, Art Denys, Kathy
Destadio, Leandro DiLorenzo, Phyl Divine, Nancy DeVries, Eric Dickey, Brian Dodds, Caroline
Donnelly, Judy Donovan, Jim Doubler, Cindi DuMond, Tommi Dungan, Dawn Durham, Laura
Dutzi, HopeAllyson Dwiggins, Anita Dwyer, Roxanne, Eberle, Donna Eckert, Barbara Edwards,
Je Elder, Adam Elhardt, Tim Elliott, Harlow Emilie, Dawn Endico, Deb Estes, Aaron Fabun,
Allie Faden, Kevin Falcone, Kevin Farnsworth, Brad Feagins, Cheryl Sutton Fergusan,
Victoria Filippi, Paula Finestone, Julie Fiscko, Judy Fitz, Floyd Foess, Alice Forsell, Will
Fortin, Marie Fowler, Ryan Fowler, Susan Fox, Paul Friedman, Hans Fugal, Tom Garbacik,
Je erson Garn, Joann Gay, Brian Geiger, Julie Gerstemeier, Tom Giambra, Lara Gibb, Je
Gicklhorn, Stanley Ginsberg, Chris Glenn, Kathryn Gohl, Simon Goldbroch, Je Goldstein,
Ofelia Gonzalez, Shari Goodwin, Rosalyn Gorski, Jim Gray, Courtney Green, Kathy Green,
Richard Greenhaw, Joe Guiditta, David Gunderson, Thomas Gunn, Bruce Gunther, Michael
Gunter, Michelle Gusic.
Dan Haggarty, Lindsey Hair, Tyler Hall, Jutta Hanke, Karen Hanlon, G. Hanna, Eric Hanner,
Becky Hart, Tammy Hart, Jack Hattaway, Miriam Hawbaker, Brandi Headon, Frank Healy,
Marc Hedlund, Carol Heinen, Dulcey Heller, Natalie Heller, Dougal Hendry, Ellen Herman,
Hilary Hertzo , Jan Hickey, Kathy High, Beth Hinkle, Eric Hohenschuh, Clayton Holland,
Frances Holly, Justin Holmes, Kendra Holtz, Jennifer Honnell, Shayda Hoover, Elizabeth
Hopkins, Kimberley Horelik, J. Andrew Hubbard, Rick Hullinger. Nilda Incatasciato, Carol
Jackson, Sarah Jackson, Andrew Janjigian, Joanne Johnson, Jen Johnston, Lucille Johnston,
Raina Joines, Gretchen Jones, Stephen Jones, Tanna Jones, Vincent Jorgenson, Robin
Josephs, Stephen Judge, Richard Kairer, Canan Karatekin, Kristen Kasmire, Mary Kasprzak,
Shari Katz, Sandra Kavital, Jonathan Keane, Matthew Kerr, Christopher Kessinger, Michael
Kelly, Jess Kelly-Landes, Claire Kenney, Christopher Key, Jongjin Kim, John Kino, Sandra
Kisner, Logan Kistler, Tami Knight, Eric Kni en, Trish Kobialka, Zorra Kochtopf, Kristine
Konrad, Bob Koontz, Brett Kosinski, Tom Kovalcik, Carol Kowalski, Chris Kridakorn-Odbratt,
Malcolm Kronby, Ra Kruse, Dwayne Kryger, Charles Kutler, Celina Laaksonen, Suzanne
Lansford, David LaPuma, Cameron Larios, Natalie Lau, Kelly Lawless, Cameron Lawrence,
Wade Lawrence, Bonnie Leach, Bethany Lee, Betty Lee, Dorothy Lee, Gary Lee, Jee-Sun Lee,
Justin LeFebvre, Jonathan Le ert, Jacqueline Leung, Sarah Lenz, Melissa LeRay, Helen
LeVann, Elizabeth Lindsay, Caroline Lazuli, Adeline Lim, Noel Llopis, John Llyod-Jones, Jay
Lofstead, Bruce Lorenz, Ti any Low, Gary Lubb, Troy Lubbers, Ed Lyon, Annie MacDonald,
Dave MacKenzie, Rick, Mack, Kathleen Madsen, Sharon Maher, Hillie Mailhiot, Tony
Malerich, Kathleen Marcozzi, Gina Martin, Penny Martin, Vernon Mauery, Sheila Mayer,
Kurt McAdams, David McAtee, Chip McCarthy, Kelly McDonald, Sabine McElrath, Donna
McFarren, Rod McLean, Micha McNerney, Chris Meeusen, Paige Meier, Stephen Meier,
Claire Meneely, Arte Miastkowski, Bill Middeke, Theresa Miller, Greg Milliser, Lisa Mohen,
Kirsty Molnar, Kathy Moore, Derrick Moreno, Kim Morgan, Roxanne Morgan, Neil
Morganstern, Tori Mirkemo, Suzy Morris, Moss, Carl Mueller, Robert Mullins, Lindsay
Murphy, Clark Murray, Pat Muth, Renae Myers, Jonathan Nacht, Cassandra Nelson, J.R.
Nelson, Anja Neudert, Gina Newby, Steve Newell, Phan Ngauv, Laura Nicoletti, Naomi
Nishimura, Brian Nivens, Mike Nolen, Bill Nonnemacher, Kevin Noordhoek, Michelle Morris,
Jen Norton, G. Travis Norvell, Bob Nowacki, Wendy Nowell, Erin O’Brien, Renee O’Brien,
Todd O’Connor, Stephen Odaniell, Myra Orlen, Page Orlo , Sharon Palmer, Andy Parker,
Thomas Passin, Laurel Pavesi, Liz Pearson, Marcella Peek, Mandy Peltier, Charles Perry,
Michael Peterson, Tina Petok, Emily Phillips, Gail Phillips, Nichole Phillips, Summer Plum,
John Plummer, Peter Plummer, Sarah Pokorski, Jessica Polito, Tatiana Popov, Ruth Porter,
Barbara Potter, William Powell, Sarah Pratt, Carolyn Price, Deena Prichep, Sherane Prish,
Allyson Quibbel, Carla Quinn, Deborah Racine, Michael Ramirez, James Randall, Shannon
Rause, Linda Rawson, Evelyn Mae Raymond.
Matthew Ream, Gale Reeves, Sarah Reichers-Krippner, Stephanie Reinhardt, Libby Reiser,
Jim Richards, Chuck Robinson, Mike Rodgers, Elaine Rosen eld, Tamar Rudavsky, Laurel
Ruma, Eric Rusch, Oliver Rutherford, Peter Ryan, Ryan Sandler, Brian Sands, Corrine
Sandusky, Katrina Sarson, Heather Scharbach, Kathleen Scarvie, Eva Schatz, Chrissie
Schicktanz, David Schi rin, Kimberley Schlinke, Lisa Schlunegar, Pamela Schmidt, Chaya
Schneider, Jack Scholko , Avi Schwartz, Cora Sedlacek, Stephanie Severson, Tom Shaefges,
Laura Shaw, Nolan Shaw, Je Shields, Beth Sheresh, Lisa Sherman, Mike Shimpock, Adam
Shopis, Boaz Shuval, Ryan Simmons, Mike Simpson, Ken Siskind, Sharon Skoglund, Joseph
Sloan, Shalisa Smith, Jill Smith-Mott, Nick Smolinske, Arlene Spike, Jaya Srikrishnan, Steve
Stanley, Chantal Stark, Anna Stefos, Anita Stebbing, Karen Stewart, Holly Stockley, Esther
Stokes, Lynee Stokes, Linda Stoodley, Pam Stowe, Rachel Strange, Ryan Street, Peter
Strzebniok, Alison Sue, Betty Sullivan, Jia Sung, Brian Surowiec, Devlyn Swenson, Joseph
Szabo, Laura Tabacca, Laura Tanner, Anastasia Tapsieva, James Tatlow, Lewis Skip Taylor,
Susan Tenney, Patty-Leigh Theilmann, Stephanie Thomas, Linnea Thomasen, Carolyn
Thompson, Mary Tinkham, Matthew Todd, Chuck Toporek, Nathaniel Towery, Robert Traino,
August Trometer, Gabriel Trout, Laura Troyer, Candy Tsiao, Zach Tuttle, Celeste Uzee, Jan
Willem VanEck, Renee VanHoy, Jason Venkiteswan, Michael Vilalbo, Lisa Volker, Christina
Wagenet, Marla Walker, Stewart Walton, Beverly Wang, Gail Wang, Kevin Wang, Lucinda
Ward, Doug Washington, Andrew Weber, Lois Wegfahrt, Paul Weeks, Jenny West, Ulrike
Westphal, Donna Whitlinger, Mike Wiacek, Rynda Wilk, Jim Wilkinson-Ray, Lori Willingham,
Jim Wills, Jean Withnell, Mark Witt, Carla Wolf, Wee Wong, Matthew Wood, Denise
Woodward, Steve Wozencroft, Kelly Wright, Kate Wrightson, Lucille Yackoski, Rita Yaezel,
Mike Yetter, Shuang Yang, Berta York, Andrew Zajac, Vladimir Zelevinsky, Michael Zemyan,
Adam Zerwick, Michael Zhuravel.
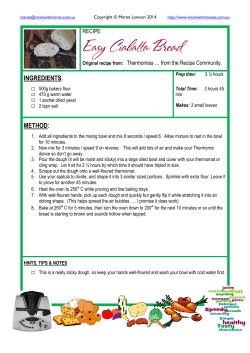
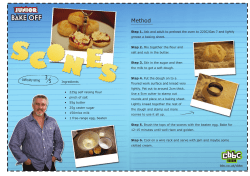
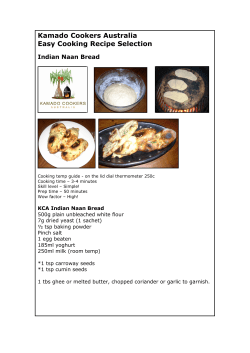


© Copyright 2026