
5 Shape, Silhouette, Style: Focus on Design Development Chapter Objectives
5
Shape, Silhouette, Style: Focus
on Design Development
Chapter Objectives
1. Examine the impact of design features on the performance and cost of
the garment.
2. Understand the various ways of shaping garments to the human body,
including the impact of fabric grain and the role of underlying fabrics
and supporting devices in garments.
3. Present a vocabulary of style names, including garment silhouettes and
variations in design features such as lengths, waistlines, necklines, collars, sleeves, cuffs, pockets, and decorative details.
Shape, silhouette, and style—these words capture
the essence of apparel design. Decisions about shape,
silhouette, and style guide the design development
process. Designers and merchandisers give careful
consideration to these fundamentals for even the
most basic garments.
This chapter explains how flat, two-dimensional
(2-D) fabrics are shaped and transformed into garments that fit three-dimensional (3-D) human
bodies. This chapter also presents a menu of silhou-
ettes and style options important for developing a
professional vocabulary.
GARMENT SHAPE
Shaping a garment enables it to fit the wearer and
achieve a desired silhouette and style or look. The
skillful use of fabric grain, thoughtfully chosen
shaping methods, and underlying fabrics and
113
Ready-To-Wear Apparel Analysis, Third Edition, by Patty Brown and Janett Rice. Copyright © 2001 by Prentice Hall, an imprint of Pearson Education, Inc.
114
CHAPTER 5
Cut End
Selvage
Selvage
as
e
ru
Bi
T
Lengthwise Grain
Bias
supporting devices that help a garment retain its
shape often distinguish a high-quality garment from
one of lesser quality. Attention to shape and support
is important in all garments but especially in tailored
clothing.
Tailored garments are carefully structured and detailed, for example, the classic business suit; they are
often closely fitted and made of woven fabrics.
Shaping methods, underlying fabrics, and supporting
devices are critical to the aesthetic appearance of the
garment; they affect the garment’s functional performance as well, including fit, comfort, appearance retention, and durability.
Bia
s
Role of Fabric Grain
A major consideration in garment quality is the orientation of the fabric’s grain. Just as furniture makers
observe and use the grain of wood to create a desired
effect, garment manufacturers use the grain in fabric
to its best advantage. Grain is the orientation of the
yarns that make up the fabric. Two sets of yarns interlaced at right angles to one another make up a
quality woven fabric. Knit fabric has one continuous
yarn instead of two sets of yarns. For this reason, knit
fabrics do not technically have a grain, but most of
the directional rules still apply in their use.
The appropriate handling of fabric grain affects the
aesthetic and functional quality of the finished garment. Attention to grain is important throughout
construction but is most critical during cutting. If cut
incorrectly, trueness of grain cannot be restored to
the garment.
Lengthwise Grain. The lengthwise grain or warp
runs parallel to the selvages, the woven edges of the
fabric (Figure 5–1). It consists of yarns that are held
taut by the loom during weaving. Therefore, the
lengthwise yarns are the strongest to withstand the
tension of the weaving process. Lengthwise yarns
tend to be stable, less apt to stretch or shrink, and
more apt to hang straight than crosswise yarns.
Designers plan most major pattern pieces to be cut
with the length of the pattern piece parallel to the
lengthwise grain. The lengthwise grain is then perpendicular to the floor when the garment is being
worn.
In a few cases it is preferable to cut pieces on the
lengthwise grain (with the warp), to intentionally
have this grain run around the body instead of up
and down. For example, waistbands require stability
around the waist and should be cut so the lengthwise
grain goes around the body. Collars, cuffs, and other
minor pattern pieces may be cut this way for the
same reason.
Crosswise Grain
Cut End
Figure 5–1 Lengthwise and crosswise grains, bias, and
true bias.
Crosswise Grain. The crosswise grain, fill, filling,
or weft of the fabric consists of the yarns woven over
and under the lengthwise yarns. The crosswise grain
runs at a 90-degree angle to the lengthwise grain and
the selvages (Figure 5–1). The crosswise grain is less
strong and has a slight stretch. Because designers
place most major pattern pieces with their length
running perpendicular to the crosswise grain of the
fabric, this creates a softer look and provides comfort
to the wearer.
If the producer cuts major pattern pieces on the
crosswise grain, with the length of the pattern piece
running in the same direction as the crosswise grain,
the effect on the hang of the finished garment might
be imperceptible depending on the fabric. But crosswise layouts are generally less desirable than lengthwise layouts because of the more stable and stronger
lengthwise yarns.
Sometimes major pattern pieces are cut on the
crosswise grain (with the fill) to maximize fabric
usage or to create special effects. For example, on
border print fabrics (with the design along one selvage edge), if a dress design calls for the border print
to run around the hem, the skirt is cut on the crosswise grain. Generally these styles are not close fitting;
adding fullness compensates for the otherwise stiff
look of the garment when cut in the crosswise
direction.
SHAPE, SILHOUETTE, STYLE: FOCUS ON DESIGN DEVELOPMENT
Figure 5–2 Correct positions of fabric
grain on (a) female and (b) male bodies.
Straight-of-Grain. Straight-of-grain includes both
the lengthwise and crosswise grains because they
follow the straight yarns of the fabric. Unless there
are design reasons for doing otherwise, marker
makers place pattern pieces in the lengthwise direction, or straight-of-grain, of the fabric. Figure 5–2
shows the commonly accepted placement of grainlines on the human body for a basic garment. The
lengthwise grain runs straight down the body at the
center front and center back. The crosswise grain is
perpendicular to the lengthwise grain at bust/chest
and hip levels. For sleeves, the lengthwise grain runs
straight down the center of the arm from shoulder to
elbow. The crosswise grain is perpendicular to the
lengthwise grain at bust/chest level. Straight-of-grain
edges create seams with minimal stretch; for example, angled pants pockets gape less if the facing
edge is cut on the straight-of-grain, to stabilize the
bias-grain pocket edge.
To create various effects, a designer alters the position of the pattern in relation to the grainline to intentionally change the way the garment hangs.
Figure 5–3 Different drapes of skirts
cut on various grains: (a) lengthwise grain
at center front, (b) lengthwise grain in
center of each gore, and (c) lengthwise
grain at side seam.
(a)
Pattern pieces cut on the lengthwise grain, crosswise,
bias, or true bias create various results. Figure 5–3 illustrates how a skirt appears with the lengthwise
grain placed at center front, side front, and side seam
of the skirt.
In cut panels or finished garments, it may be difficult to distinguish between the lengthwise and crosswise grains unless you are familiar with the fabric.
However, a close examination of the fabric usually reveals more warp yarns per square inch than fill yarns.
(This does not hold true for all types of fabric, but is
generally true.) Also, remember that if a woven fabric
is stretched, the length generally stretches less than
the width.
Bias and True Bias. The bias and true bias of a
fabric are considered directions of the fabric rather
than grain. Technically, any direction of the fabric
that is not the lengthwise grain or crosswise grain
may be referred to as bias. The true bias direction is
at a 45-degree angle to the lengthwise and crosswise
grains of woven fabrics. Usually when a garment is
(b)
(c)
115
116
CHAPTER 5
Try a Real-Life Scenario 5-1: Planning Grain/Nap
The designer of a jacket is planning to use a rich velvet fabric with a shiny nap (for more information on using
napped fabrics, see Chapter 4). The jacket has two fitted front panels, one loose back panel, long sleeves, and a
notched collar. The designer wishes to have front panels, back panel and sleeves cut with the nap in one direction and the collar cut with the nap in another direction. The costing engineer thinks the jacket will be too
expensive if the nap has to run in both directions.
Considerations:
• What makes the cost so high when the nap runs in both directions?
• Would the design details be lost if the nap direction is all the same?
• What other ideas would produce the same design effect at a lower cost?
“cut on the bias,” it refers to the true bias (Figure
5–1). The true bias of a woven fabric has several interesting features. (The bias direction on knit fabrics
does not share these characteristics.) True bias is the
most stretchy part of a woven fabric because its
stretch is impeded by few yarn interlacings.
Garments or pieces of garments cut on the true bias
drape and roll beautifully and hang close to the body,
emphasizing contours.
For these reasons, many high-fashion designers
include bias cuts in their creations, especially for
evening wear. Full skirts cut on the true bias can be
flattering to the wearer and elegant. Bows, neckties,
cowl necklines, and jacket and coat under-collars utilize the graceful drape and roll of the true bias. The
stretch and roll of true bias makes it ideal as binding
for curved as well as straight edges. Bias cuts are not
frequently used in low-price apparel lines. A bias
layout wastes considerably more fabric than a
straight-of-grain layout for the same garment (Figure
5–4), sometimes as much as about 50% more. Also,
bias-cut garments are difficult to sew because they
tend to stretch out of shape during construction.
A garment cut on the bias is easily identified upon
close examination. The fabric’s straight-of-grain lies
on the diagonal, oriented at a 45-degree angle to the
center front of the garment. Do not confuse the bias
with the appearance of a twill weave fabric like
denim. Examine a pair of denim twill jeans that are
cut on the straight-of-grain, and notice that the diagonal ridges of the denim fabric result from its twill
weave, not from being cut on the bias.
Garments Cut Off-Grain. Garments with proper
grain alignment hang straight and maintain their
shape in use. A close examination of the position of
the warp and fill yarns of the fabric reveals the accuracy with which the garment was cut. Garments cut
moderately off-grain do not hang straight and often
affect comfort as they tend to pull toward the direction of lengthwise grain position. Garments cut extremely off-grain have a noticeably crooked hang.
Evidence of the misuse of fabric grain includes
twisted pant legs, twisted torsos, twisted sleeves, uneven hems, undesirable sagging and wrinkling in
fitted garments, and pleats that fall open.
When making the marker, some manufacturers
allow slight tilting of the pattern pieces (usually not
more than 3%) to increase material utilization. How
far off-grain the pieces may be cut depends on the
type of fabric and the tolerances established for it.
For low-price garments, several inches off-grain may
be allowed. Off-grain fabrics also cause finished garments to have off-grain panels (see Chapter 7). Grain
(a)
(b)
Figure 5–4 (a) Bias layout is less fabric-efficient than
(b) straight-of-grain layout.
SHAPE, SILHOUETTE, STYLE: FOCUS ON DESIGN DEVELOPMENT
distortions and their effect on garment appearance
are relative. Thus garments cut slightly off-grain or
from slightly off-grain fabrics may be acceptable if the
problem is imperceptible in the final garment.
However, manufacturers of quality clothing strive to
produce “grain perfect” garments.
Shaping Methods
All garments contain shaping methods (darts or dart
equivalents) that control the way the garment fits the
contours of the body. The methods used to shape the
garment and the location and amount of added
shaping affect the garment’s fit and style. Tailored garments and other apparel that fit closely to body contours are noted for the shape created by these
methods, but even “shapeless” garments have their
shape because of a choice of shaping methods. In
low-cost garments, pattern engineers may have to
change or eliminate shaping methods to meet pricing
requirements. Pattern pieces might have to be designed slightly smaller or with straighter edges than
pattern pieces in more expensive apparel. These
changes often result in better material utilization and
slightly lower sewing costs. However, the omission of
shaping methods detracts from the design and ultimate fit of the garment. Again, balance comes into
play. What price are the shaping features worth to the
consumer?
A basic fitted garment is derived from a basic
block or sloper pattern. Manufacturers have a basic
block for each classification of apparel that they produce, for example, pants or jackets. Figure 5–5
shows the basic blocks for a woman’s dress and a
man’s suit. The designer uses shaping methods to
make changes in the basic block to produce style
variations. Figures 5–19, 5–20, 5–21, 5–22, 5–23,
and 5–25 later in this chapter illustrate a number of
styles, all originating from a basic block, with varying
amounts of fullness added and controlled in different
locations through various shaping methods. For
more information about how shaping methods are
used to create different clothing styles, see this
chapter’s section on styles.
Darts. A dart is a triangular fold stitched to shape
the flat fabric to specific curves of the body. Notice
the triangular darts in the basic blocks in Figure 5–5.
Darts introduce shape into the garment, enabling a
two-dimensional fabric to become a three-dimensional garment that fits a three-dimensional body.
Darts serve as a basic shaping method for apparel.
They enable the garment to fit the body smoothly.
However, a garment with darts does not usually fit as
wide a range of sizes as do garments containing other
shaping methods. Darts have relatively high labor
costs but low fabric costs compared to other shaping
methods.
Darts are almost always stitched inside the garment so that the triangular fold of the dart appears inside the garment. Occasionally, for style reasons, decorative darts are stitched so that the folded triangle
appears on the outside of the garment.
Single-Pointed Darts. Most darts are single-pointed
darts (Figures 5–6a and b). Designers use singlepointed darts vertically at the back neck or back
shoulders of jackets; at the waistline of bodices,
skirts, pants, and dresses; and horizontally at elbows
and at the bustline of women’s clothing. However, a
dart can originate from any seam and occur at any
angle so long as it points toward the fullest part of its
assigned body curve. For example, French darts are
diagonal bust darts that originate low in the side
seams directed toward the bust curve (Figure 5–6c).
Double-Pointed Darts. Double-pointed darts or
contour darts look like two single-pointed darts
joined at the wide ends to form one continuous dart
(Figure 5–6d). Designers use double-pointed darts
vertically at the waistline of jackets and dresses.
Double-pointed darts nip the garment in at the waist
while releasing fullness above and below it to fit the
bust/chest and hip areas.
Size of Darts. Narrow darts fit small body curves
and wide darts fit large body curves. Each dart adds
to labor costs, so in low-price garments one dart is
often used per body curve where two or more narrow
darts might yield smoother-fitting results. However, a
single dart has the offsetting advantage of being less
visually distracting than multiple darts. The wider
the dart angle, the more angular the shape produced
at the point. The more tapered the stitching near the
pointed end, the more rounded the curve produced
in the garment.
Dart Equivalents. Shaping can be accomplished by
darts or by dart equivalents or dart substitutes.
Dart equivalents substitute for darts by incorporating
shape into the garment in a variety of ways. Dart substitutes include the following: shaped seams (including gores and yokes), style fullness (including released darts, added fullness, ease, gathers, shirring,
smocking, elastic, and drawstrings), and other dart
substitutes (including stretch fabrics, bias-cut pieces,
pleats, tucks, godets, gussets, full-fashioned knits,
and lacing).
All ready-to-wear garments contain shaping methods—either darts or dart equivalents. Darts or dart
equivalents are required wherever the fabric of the
garment fits a body curve. The bust, abdomen,
117
118
CHAPTER 5
Back
Skirt Back
Pants Back
Bodice Back
Jacket Back
Sleeve
Sleeve
Bodice Front
Jacket Front
Front
Skirt Front
Back
Front
Pants Front
(a)
(b)
Figure 5–5 Basic blocks for (a) woman’s dress and (b) man’s suit.
buttocks, shoulder blades, and elbows are curves requiring shaping methods. For example, for a good fit
in tailored jackets, a shoulder dart or dart equivalent
is needed in the back shoulder seam of the garment
to smoothly fit the shoulder blade area to the body.
The absence of a shoulder dart or dart equivalent
causes wrinkles to emanate from the neckline or armhole because fabric is pulled from these areas to accommodate the curve of the shoulder blades. In
better jackets, ease may be substituted in the
shoulder seam for the shoulder dart, yielding a
smooth fit in the shoulder area. (See the section on
Ease later in this chapter.) In better shirts, a shaped
seam joining the yoke to the body of the shirt serves
as a shoulder dart substitute. When the shoulder
darts or their substitutes are omitted, the area does
not fit smoothly. For some garments, darts are completely released to fit body curves, although the fit is
SHAPE, SILHOUETTE, STYLE: FOCUS ON DESIGN DEVELOPMENT
gether. Figure 5–7 illustrates dart shapes incorporated in some shaped seams; fitted side seams,
shoulder seams, fitted waistline seams, and set-insleeve armhole seams are examples of dart-substitute
seams. Princess seams, which incorporate the bust
and waist darts in fitted womenswear, are also dartsubstitute seams. They add shape to the garment and
enhance fit but cost more to cut and sew than other
types of seams. Another example is better women’s
panties, which sometimes feature a center back seam
to fit the buttocks better than ordinary panties. Yoke
seams and gore seams often serve as dart substitutes.
(a)
(b)
Yokes. Yokes are horizontal divisions within a garment; they are usually small, flat panels of fabric at
the shoulder, waist, or midriff. When seamed to the
garment, some yokes help the garment fit the body
curve in the area near the seam (Figure 5–8). The
yoke seam serves as a dart equivalent by incorporating the dart shape into the seam. Yokes called
Bodice Front
Skirt
Back
Skirt
Front
Bodice
Back
(a)
(c)
(b)
(d)
Figure 5–6 Darts: (a) stitched, tapering at the point,
inside the garment, (b) single-pointed, (c) French, and
(d) double-pointed.
Bodice
Front
Bodice
Back
Bodice
Back
Sleeve
not smooth. (See the section on Released Darts later
in this chapter.)
The design of the garment helps determine which
shaping methods are used. For example, loose styles
are suited to the use of gathers or added fullness;
close-fitting styles often feature darts or stretch fabrics. The fabric and price line of the garment also influence the choice of shaping methods. Because the
female figure is naturally more curvy than the male
figure, women’s clothing features more shaping
methods than men’s clothing. In some cases, designers include shaping methods not for fit, but for
comfort or aesthetic reasons.
Shaped Seams. Not all seams are dart substitutes;
many join flat fabric panels without imparting
any shape. But shaped seams are a common dart
equivalent, especially in close-fitting garments. Dartsubstitute seams perform the same function as darts
by shaping fabric panels where they are joined to-
Bodice
Front
(c)
(d)
Dress
Center Front
Right
Side
Front
Left
Side
Front
(e)
(f)
Figure 5–7 Shaded areas show dart-substitute effect
of seams: (a) skirt side seam, (b) bodice side seam,
(c) shoulder seam, (d) armscye (armhole) seam, (e) princess
line dress, and (f) princess seams.
119
120
CHAPTER 5
Fullness. Garments may fit the body simply by allowing enough fullness in the fabric. Fullness may be
the result of releasing darts or of adding extra fullness. This added style fullness may be controlled
by ease, gathers, shirring, smocking, elastic, or
drawstrings.
(a)
(b)
(c)
Figure 5–8 (a) Split yoke/riser in pants, (b) midriff yoke,
and (c) back shoulder yoke in shirt (dotted line indicates
seam placement for split yoke).
risers often substitute for darts at pants and skirt
waistlines. Midriff yokes fit the garment close to the
body below the bust. Yokes are frequently used in the
backs of shirts and blouses to fit the garment through
the shoulder blade area. They are also used in the
fronts of shirts, as in Western-style yokes. In
menswear these yokes are merely decorative features
that provide no shaping, but in womenswear they
often incorporate pleats or shirring to allow for a
better fit through the bust area.
Split yokes feature a seam at the center back of
the yoke. Split yokes (risers) in the backs of women’s
jeans can improve fit considerably. In custom-made
shirts, a split yoke represents better fit because the
center back seam is shaped to fit the individual. In
ready-to-wear shirts, a split yoke serves no practical
purpose, but manufacturers sometimes use them as a
tool to create an impression of custom-made quality
or to achieve better fabric utilization when planning
the marker.
Gores. Gores are vertical divisions within a garment, usually tapered panels seamed together to add
shape to a garment. They serve as dart equivalents by
incorporating the dart shape in the seams. Skirts are
frequently gored (Figure 5–9). Two-gore skirts contain two panels, four-gore skirts contain four panels,
and so on. The more gores, the higher the labor costs;
however, the use of several small gores often achieves
higher material utilization than a few large gores.
Gores are not always dart substitutes. Sometimes
manufacturers add gores to narrow fabrics in order to
widen them for cutting out garments with large
pieces, for example, circular skirts.
Released Darts. Sometimes fullness is achieved by releasing (not stitching) darts; released darts result in
a straight silhouette rather than a fitted garment. A
released dart allows the fabric to cover the intended
body curve without fitting the fabric closely to the
curve.
It is a common practice to release darts in today’s
ready-to-wear because of the popularity of loosefitting clothing; darts are usually released in combination with the addition of extra style fullness to the
area. Releasing darts reduces cost. However, it lowers
quality to release the darts in close-fitting, tailored
clothing unless the dart is substituted for by another
shaping method
Style Fullness. Extra fullness, or style fullness, can be
added to a garment, so that the additional fabric
covers the body curves (Figure 5–10). When loose
clothing styles are popular, extra style fullness is the
most common dart substitute. Extra style fullness allows the garment to fit a wider range of sizes than
many other shaping methods. Fabric panels are cut
larger to introduce additional style fullness to the gar-
(a)
(b)
(c)
(d)
Figure 5–9 (a) Four-gore skirt, (b) six-gore skirt,
(c) eight-gore skirt, and (d) skirt with godets.
SHAPE, SILHOUETTE, STYLE: FOCUS ON DESIGN DEVELOPMENT
a
b
(a)
(b)
Figure 5–10 Gathers: (a) as dart equivalent, and (b) with
extra style fullness.
ment, adding significantly to the fabric costs of the
garment. The extra fabric is eased, gathered, elasticized, pulled up with a drawstring, pleated, tucked,
shirred, smocked, or left uncontrolled. Although it
affects fit, extra style fullness usually is added for
style reasons. (See section on Silhouette and Style
later in this chapter.)
Ease. Ease is imperceptible fullness that is incorporated on one side of a seam and stitched in place
(Figure 5–11). Designers use easing to join two fabric
edges of slightly different lengths, easing the longer
edge to fit the shorter edge. Easing aids the setting of
fitted sleeves, sewing garments to waistbands, and
sewing seams such as princess seams together, where
the edges to be joined are not identical in length.
Easing releases about the same amount of fullness as
a dart for an area where the body curve is slight. For
example, easing is used as a dart substitute at the
elbow of fitted sleeves. Ease often substitutes for the
back shoulder dart in tailored jackets. In low-quality
garments, neither a dart nor ease is used at the
shoulder, causing poor fit in the shoulder blade area.
Easing requires the same amount of fabric and less
labor than sewing a dart but is seldom used in massproduced garments.
Gathers. Gathering is the drawing together of a series
of small folds of fabric called gathers. The gathers are
controlled and stitched in place. Gathers provide visible fullness. Operators join two fabric edges of different lengths by gathering the longer edge to fit the
shorter edge. Gathers serve as a dart substitute or to
control added style fullness. The more style fullness
added, the fuller the gathers (Figure 5–11). If very
little style fullness is added, the gathers may look
skimpy. Full gathers require two-and-one-half to
c
Figure 5–11 Set-in sleeves: (a) eased into armscye,
(b) slightly gathered, and (c) fully gathered.
three times as much fabric as a flat, ungathered panel.
Full gathers are usually confined to high-price lines
because of the added fabric costs. Less full gathers require only one-and-one-half to two times as much
fabric as a flat panel. They may result in strainedlooking gathers where the fabric releases minimal
fullness over a large body curve. Lightweight fabrics
must be much more fully gathered than heavier fabrics for a generous appearance, requiring more fabric.
Gathers in bloused areas, such as puffed sleeves, require additional fabric length as well as width to
avoid a pulled and taut lengthwise appearance.
Gathers can take the place of darts in fitting the
garment to the body. For example, gathers at the front
neckline of women’s dresses provide fullness over the
bust. Gathers in women’s swimsuits at the side seams
near the hips and/or along the leg openings provide
fit and coverage for the buttocks.
Gathers provide a soft, feminine look. They are
more attractive in lightweight fabrics than in heavy
fabrics. Gathers do not distort geometrically patterned fabrics, such as plaids, the way darts do.
Smocking. Smocking uses decorative stitches to hold
the fabric in even, accordion-like pleats (Figure
5–12a). While mainly decorative, smocking may
121
122
CHAPTER 5
serve as a dart substitute. Smocking is popular in the
chest area of infants’ and girls’ clothing; it gives
slightly and enables the garment to “grow” with the
child. Smocking is used occasionally in womenswear.
Most smocking is done by machine. Smocking done
by hand, found in high-price imported infantwear
and childrenswear, is time-consuming and costly.
Shirring. Shirring incorporates parallel rows of
gathers made in the body of the garment. Some
people in the industry use the term shirring as a synonym for gathering. Shirring made with elastic thread
stretches and helps shape the garment to the body
(Figure 5–12b). Shirring may be done throughout
the garment, as in a woman’s tube top, or in a limited
area, as at the bustline of a woman’s swimsuit. Some
shirring is strictly decorative and provides no
shaping.
Elastic. Elastic serves as a dart substitute by drawing
up the longer fabric of the garment to the shorter
length of the elastic. Thus elastic applications often
resemble gathering. The biggest advantage of elastic
in ready-to-wear is its stretch. However, even though
elastic stretches to fit a wider range of sizes than other
shaping methods, that range has a limit; too-loose
elastic does not hold the garment in place properly
and too-tight elastic is uncomfortable for the wearer.
Elastic serves as a closure because it allows the garment to stretch for dressing and undressing but
draws up to fit closely when the garment is worn. A
disadvantage of elastic is that it may lose its ability to
recover from stretch over time and need replacing for
the garment to remain wearable.
Applied elastic is stitched directly onto the garment to add shape where desired. (Examples are
shown in Chapter 11, Figures 11–24 and 11–25.)
Elastic is often used at the waistline of garments, at
(a)
(b)
necklines, at the lower edges of sleeves and pant legs,
and anywhere a gathered look and close fit are desired. It is especially suited for casual garments and
childrenswear, and less suited to tailored garments.
Applied elastic is usually found inside the garment.
However, elastic is sometimes applied on the outside
of the garment, mainly in sportswear or underwear.
When elastic is applied on the outside of the garment, it is usually colorful or otherwise decorative,
such as stretch lace in lingerie.
Casings are tunnels of fabric through which
elastic or a drawstring is threaded to provide shape to
the garment. (Examples appear in Chapter 11,
Figures 11–25 and 11–26.) Although bulkier, casings
are generally more comfortable to wear than applied
elastic because fabric rather than elastic contacts the
skin. Care must be taken to prevent the elastic from
twisting inside the casing. Casings generally add
more cost to the garment than applied elastic because of the additional fabric and construction steps
required.
When elastic is attached at a specific distance from
a garment edge, the fabric that extends beyond the
elastic forms a ruffle when the elastic relaxes. This
ruffle is called a header. (See Chapter 11, Figure
11–26.)
Drawstrings. Drawstrings are narrow tubes, cords,
or strips of fabric inserted into casings in place of or
in addition to elastic (see Chapter 11, Figure 11–26.)
They are pulled up and tied to shape the garment to
the body. The drawstring controls garment fullness,
pulling it up to fit or letting it out for dressing and
undressing. Drawstrings are commonly used at the
waist of sweatpants, windbreaker jackets, and men’s
swim trunks; they are also used to fit hood openings
around the face. Remember that drawstrings are not
appropriate for use on the hoods of infants’ and children’s garments, where they pose a potential strangling and choking hazard.
Miscellaneous Dart Substitutes. Besides darts,
seams, and fullness, garments may get their shape
from stretch fabrics, bias-cut pieces, pleats, tucks,
gussets, godets, full-fashioned knits, or lacing.
Figure 5–12 (a) Smocking and (b) shirring.
Stretch Fabrics. Stretch fabrics stretch over body
curves to help the garment fit. Fabrics that stretch
only slightly may require the use of additional
shaping methods; high-stretch fabrics need no additional shaping methods beyond the ability to stretch
to the shape of the body. Therefore, no extra fabric or
labor costs are required. Stretch fabrics allow the garment to fit a wider range of people than most other
shaping methods. For example, most swimwear and
dancewear fits closely through its ability to stretch to
SHAPE, SILHOUETTE, STYLE: FOCUS ON DESIGN DEVELOPMENT
the size and shape of the wearer and to accommodate
movement by stretching. Bias-cut pieces function like
stretch fabrics by providing close fit but stretching
over body curves and “giving” when the wearer
moves.
Pleats and Tucks. Pleats are decorative, unstitched
folds of fabric that often serve as dart substitutes, creating shape and releasing fullness. Trouser pleats are
a good example of pleats that are dart substitutes. Not
all pleats incorporate shape into a garment; many are
merely decorative. Tucks are stitched folds of fabric
that are usually ornamental. They occasionally serve
as dart substitutes, as when used to shape the garment at the waist. For more information about tucks
and pleats, see the sections on Tucks and Pleats later
in this chapter.
Gussets. Gussets are pieces of fabric set into a seam
or seam intersection to provide body-conforming
shape and fullness in a garment (Figure 5–13). Most
gussets are triangular or diamond-shaped, although
some dancers’ costumes feature circular gussets to
provide mobility. Gussets are used in the underarm
seams of garments with kimono sleeves and in the
crotch seams of sweatpants and in infants’ and toddlers’ clothes to make room for diapers. Karate pants
and shirts feature huge gussets that provide freedom
of movement for kicking and punching. High-quality
gloves have gussets between the fingers for improved
finger mobility. Gussets reduce strain and wrinkling,
making the garment comfortable to wear and prolonging its life.
A good-quality gusset has sharp, even points; a
poorly set gusset puckers or develops holes at the
points. Gussets add to cost because of the extra fabric
and skilled labor required.
Figure 5–13 Gusset in underarm area.
Godets. Godets are triangular fabric pieces set into a
seam or slash, usually at the hem of the garment
(Figure 5–9d). Godets produce decorative fullness;
they are mainly used in skirts but sometimes are used
to cause pant or jacket hems to flare. A well-made
godet has a sharp point and does not develop holes at
the point.
Full-Fashioned Knits. Full-fashioned knits are a sign of
quality shaping. Full-fashioned marks represent increases or decreases in the number of stitches in a
knitted garment section, a result of shaping the
piece. Each part of a full-fashioned knit garment is
knitted to the desired size and shape, not cut from a
large piece of fabric. The shaped pieces are sewn together for an accurately sized and shaped garment
that maintains its shape and does not twist. But fullfashioned knitwear is slower and more costly to produce than are garments cut from knit fabrics. And it
requires a longer lead time because the style of the
garment must be determined before the knitting
process begins. Sometimes manufacturers of garments cut from knit fabrics use stitches or fusing to
create mock full-fashioned marks, which look similar but contain none of the real advantages of genuine full-fashioned marks. To identify full-fashioned
garments, notice the increase or decrease in the
number of stitches in genuine full-fashioned marks
at shaped seams, for example, at the armscye seam of
sweaters (Figure 5–14).
Lacing. Lacing operates on a principle similar to
drawstrings. Cords or ties are threaded through eyelets, grommets, or buttonholes in the garment as in
the lacing of a shoe. The lacing is pulled to shape and
fit the garment and tied to fasten the opening.
Figure 5–14 Full-fashioned marks at sweater armscye.
123
124
CHAPTER 5
Supporting the Shape
The shape of a garment is enhanced and preserved by
underlying fabrics including interfacing, lining, underlining, and interlining. Other supporting methods
may also be used to achieve or maintain the desired
shape.
Underlying Fabrics. Most garments made from
woven fabrics contain one or more underlying fabrics. (For more information on underlying fabrics,
see Chapter 8.) Although not visible from the outside
of the garment, these materials help maintain the garment’s shape and/or lend it other qualities such as
durability and warmth. Eliminating underlying fabrics to reduce costs results in limp garments that do
not maintain their original shape; the garments tend
to wrinkle and stretch out of shape.
The main, outer fabric from which a garment is
made is called the body, fashion, or shell fabric.
Underlying fabrics or supporting fabrics are inside
the garment; they lend support to the garment and
help maintain its shape. The four types of underlying
fabrics include (1) interfacing, (2) lining, (3) interlining, and (4) underlining. These terms are used
consistently throughout this text and are defined in
this chapter. However, they are used loosely, sometimes interchangeably, in the apparel industry. For
example, the terms interlining and lining are commonly used to refer to what is (technically) interfacing. And underlining (technically) is commonly
called lining.
The presence of supporting fabrics in a garment is
usually a sign of quality. Few consumers make a purchase decision based on the underlying fabrics of a
garment, but ultimate satisfaction with the aesthetic
and functional performance of any garment is affected by its supporting fabrics. The choice of underlying fabrics depends on the design, fabric, and end
(a)
(b)
use of the garment. Waistbands that roll, collars and
lapels that bubble, and knees, elbows, seats, and
pockets that bag can be avoided if the manufacturer
carefully selects and correctly applies supporting fabrics. However, the addition of underlying fabrics to a
garment increases production costs in terms of both
materials and labor.
Interfacing. Interfacing is a supporting fabric used
in almost all garments. Interfacing lends body, shape,
and reinforcement to limited areas. Collars, collar
bands, cuffs, buttons and buttonholes, pockets,
waistbands, and other small design details are usually
interfaced. In tailored coats and jackets, the shoulders and lapels are interfaced; in better coats and
jackets, the designer or patternmaker also interfaces
the armholes, patch pockets, sleeve hems, garment
hem, and sometimes the entire garment front (Figure
5–15).
Interfacing is usually hidden between the garment
and its facing, which explains the name “interfacing”
(Figure 5–16). Rub the garment between thumb and
fingers or separate the fabric plies to determine if
there is interfacing enclosed between two plies; if
fusible interfacing is used, one fabric ply will feel significantly stiffer than the other.
Lining. Lining is nearly a replica of the garment,
constructed of lightweight fabric and sewn inside the
garment with seam allowances reversed to provide a
finished inside appearance. A lining
1. covers the garment’s seam allowances, making the
inside attractive when the garment is taken off
2. makes seam finishes minimal or unnecessary, because seam allowances are not exposed
3. makes the garment more comfortable to wear. The
lining fabric acts as a buffer between the wearer’s
skin and the garment body fabric, seam allowances, and other inner construction details of
Figure 5–15 Shaded areas should be
interfaced in (a) shirt and (b) jacket.
SHAPE, SILHOUETTE, STYLE: FOCUS ON DESIGN DEVELOPMENT
a
b
Figure 5–17 Partial lining in summer weight jacket. Note
ease pleat at center back of lining and booked seams.
Figure 5–16 Blouses (a) with and (b) without interfacing
at center front to support buttons and buttonholes.
4.
5.
6.
7.
8.
the garment, especially important when the garment is made of a rough or scratchy fabric.
aids the wearer in slipping the garment on and off
extends the life of the garment by absorbing some
of the stress, strain, and abrasion of wear
provides extra body, shape, and support, making
the garment look smoother and less apt to
wrinkle. The lining helps to prevent the garment
from stretching out of shape, especially in stress
areas such as elbows or knees.
provides opacity, an advantage for garments with
sheer body fabrics
can provide extra warmth, which may or may not
be an advantage, depending on the weather
In general, garments with full linings are considered higher quality than those without. A fully lined
garment requires nearly twice as much fabric and
labor as an unlined garment, which increases manufacturing costs significantly. Manufacturers use partial linings in some garments; a partial lining extends
only through the areas that require shaping and reinforcement rather than throughout the entire garment.
Partial linings are common from the shoulder to the
chest (called a 3/8 lining) in the back of tailored
jackets and from the waist to below the knees in
slacks (Figure 5–17). Although partial linings cost
less than full linings, they do not lower quality if they
extend through the necessary areas. In fact, a partial
lining may be more desirable than a full lining in
clothing such as summer suits and sports jackets, because partial linings are cooler to wear and lighter in
weight than full ones. High-quality men’s jackets
with a 3/8 lining usually have booked seams (see
Chapter 10) and otherwise impeccable inner construction. Occasionally, partially lined garments are
of higher quality than similar, fully lined garments, if
the patternmaker used the lining in the fully lined
garment to compensate for a low-quality fashion
fabric and poor inner construction.
Figure 5–18 Inside of an underlined dress.
125
126
CHAPTER 5
PANTS
Knickers
Straight
Leg
Bell Bottoms
Baggies
Gauchos
Palazzo
SKIRTS
Straight
A-line
Trumpet
Gathered/Dirndl
Flared
Peg Top
Circular
TOPS
Blouson
Shell
Camisole
Tank/Muscle
Cropped/
Bare Midriff
Peasant
Vest
Smock
Figure 5–19 Examples of garment styles: pants, skirts, tops, jackets, and dresses.
Detachable linings are installed so they can be
zipped or buttoned in and out of garments, for example, all-weather coats and jackets. They make garments versatile for wearing in different kinds of
weather but add significantly to cost because the
main garment inner construction must be finished to
withstand being worn without the lining and a
method for attachment must be included.
Single garment pieces such as pockets, yokes, or
bibs may be lined for added strength or support. Or
a small piece of lining may be used in areas subject to
abrasion, such as the inner thigh area of pants. This
not only protects the fashion fabric from abrasion but
improves the wearer’s comfort, especially if the garment is made of a scratchy fabric.
Underlining. Underlining involves lining each
major piece of the garment individually. Underlining
a garment is less costly than lining it because underlining requires extra fabric but little additional labor
(except in cutting). Underlining performs many, but
not all, of the functions of lining. Like lining, an
SHAPE, SILHOUETTE, STYLE: FOCUS ON DESIGN DEVELOPMENT
JACKETS
Bolero
Double
Breasted
Chanel
Cardigan
Blazer/
Single Breasted
Spencer
Battle
Trent/
Trapeze
Shirtwaist
Safari
DRESSES
Shift/
Chemise/
Sack
Sheath
Figure 5–19 Continued
underlining provides body, strength, and support to
the garment, making it look smooth and preventing it
from sagging or stretching. In fact, underlining provides even greater support and body than lining since
each piece of the garment is individually supported.
Underlining provides opacity, preventing sheer or
translucent fabrics from being seen through. Limp,
unstable fabrics often require underlining, especially
in stress areas or for construction details that demand
extra body.
In some instances, underlining is preferable to
lining. Underlining, unlike lining, prevents the seam
allowances and other construction details from
showing through to the outside of garments made of
sheer or translucent fabrics such as lace. Therefore,
underlinings, rather than linings, are often used in
wedding and other formal gowns made of these fabrics. Underlinings are also used in areas prone to
stretching, such as seats, knees, and elbows, where
they are superior to linings in preventing stretch.
Remember, an underlined garment has all seam allowances and other construction details exposed on
the inside, whereas in a lined garment, inside details
are covered by the lining (Figure 5–18).
Compared to lining, some disadvantages of underlining are that it
1. does not protect the skin from irritation by seam
allowances of the garment body fabric
2. does not make the garment more attractive on the
inside
3. does not make the garment easy to slip on and off
4. does not prevent seam allowances from raveling
Interlining. An insulative interlining is applied
strictly for additional warmth; these interlinings may
incidentally add support and shape by their presence. Designers include interlinings in cold-weather
clothing such as coats and jackets. Any material inserted for warmth between the garment body fabric
and the lining constitutes an interlining. Interlining
materials trap air, providing insulation from the cold.
A garment’s interlining cannot be seen unless the
lining is lifted. Interlinings increase both material and
labor costs.
127
128
CHAPTER 5
Supporting Devices. Supporting devices are incorporated into garments to achieve or maintain the desired shape. Examples of devices that may support
the shape of the garment and provide the fashioncorrect silhouette include belts (although these may
be strictly decorative), shoulder pads, chest pieces,
sleeve heads, bridles and other seam stays, collar
stays, bra cups, boning, hoops, bustles, horsehair
braid, and weights. All add to material and labor
costs. See Chapter 8 for definitions and more information about choosing these supporting devices.
SILHOUETTE AND STYLE
The silhouette and style of a garment are important
aspects of quality because of their strong relationship
to aesthetic performance. Whether or not a style exhibits the design principles of balance, proportion,
rhythm, emphasis, and unity affects its acceptance.
Balance refers to the distribution of visual weight,
both horizontally and vertically, within the garment.
Proportion refers to how well individual garment
parts relate to the whole garment. Rhythm occurs
when the garment possesses a feeling of directional
movement, often achieved through repetition of
some design element. Emphasis requires the garment to have a clear focal point. And unity defines
how well all parts of the design work together thematically. Current fashion trends, personal preferences, and end use also affect the evaluation of aesthetics. Though the aesthetic evaluation of garment
style is beyond the scope of this text, an introduction
to the design features that are used to create styles is
presented. (For more information, see Related Resources: Design and Style at the end of the text.) A
good vocabulary of style terms is necessary in all
phases of apparel analysis because it enables accurate communication. The ability to use correct terminology is also important in designing, writing
specifications and promotions, and selling apparel
products.
The silhouette of a garment is its outline or shape.
The style of a garment or garment part results from
its silhouette and other identifying characteristics. “A
particular style of garment usually refers to the cut of
its structural lines in a manner that has become recognized, accepted and named” (Davis, 1996). Details
added to the garment also help differentiate styles. In
general, however, the color, fabric, and other details
may change, but the style remains the same as long as
its identifying style elements do not change. The key
to identifying a style is knowing what characteristics
make it unique. A style is different from “in style,”
which suggests “currently fashionable.”
Along with changes in fashions, style names tend
to evolve over time; as a style loses favor, its name is
dropped from common usage. When the style returns
to popularity, whether it happens years, decades, or
even centuries later, it often receives a new name. The
popularity of various names for the same style
changes as fashions change, with newer terms taking
preference over more standard terms. Therefore, always be alert to multiple names for the same style and to
changes in and additions to your style vocabulary. A few
styles are illustrated in this chapter to provide an introduction to style names. However, to develop a
comprehensive style vocabulary, refer to Related
Resources: Design and Style at the end of the text.
Garment Silhouettes
Basic, fitted garments are illustrated in Figure 5–5.
Varying the silhouette of a garment yields different
styles. Silhouette is determined by the amount and
location of fullness in the garment and the methods
for controlling the fullness. (See sections on Shaping
Methods earlier in this chapter.) The silhouette of a
garment can take many forms. Figure 5–19 illustrates
a few silhouettes for pants, skirts, tops, jackets, and
dresses, and the associated style names.
Garment Lengths
Historically, garment lengths have been a vital indicator of the current fashion and the popular silhouette. The terms for garments of various lengths are illustrated in Figure 5–20. Beyond the longest length,
skirts extend into trains that drag on the floor when
the wearer walks. Wedding dresses may feature
chapel length or the longer cathedral length trains.
Edge Treatment Styles
For information on hem styles as well as other garment edge treatments such as facings, bindings, and
bands, see Chapter 10. Plackets to finish openings on
waistlines, sleeves, necklines, and pant legs are also
discussed in Chapter 10.
Waistlines
Where the waistline of a garment is located in relation to the wearer’s waist has a significant effect on
the silhouette and style of the garment. Most waistlines fall at or near the wearer’s natural waistline
(Figure 5–21). Menswear waistlines typically fall at or
near the natural waistline. Womenswear waistlines
are much more variable and tend to rise and fall with
fashion changes. Dropped waistlines fall between the
SHAPE, SILHOUETTE, STYLE: FOCUS ON DESIGN DEVELOPMENT
SKIRTS
Bikini
Micro Mini
Mini
Short
Rehearsal
Jamaica/Jams
Bermuda
Above Knee
Deck
Knee
Below Knee
Pedal Pushers/
Clam Diggers
Toreador
Midcalf
Figure 5–20 Skirt and
pant lengths.
Midi
Maxi
Ankle
Floor
Capri
SHORTS
(Above Knee)
SLACKS
(Below Knee)
Classic
waist and hips. In hip huggers, the waistline falls at
hip level. (The term hip huggers applies to bottoms
only.) High-rise waistlines occur slightly above the
natural waistline. Empire waistlines occur under
the bustline. (The term empire applies to female
clothing only.) Current fashions help determine the
level of the waistline.
Figure 5–21 illustrates a few common waistline
styles. Waistlines within the body of the garment, as
in a dress, can be fitted to the body by darts or dart
substitutes such as pleats, seams, or elastic.
Waistlines at garment edges may also be banded,
faced, or finished by other edge treatment methods.
(For more information, see Chapters 11 and 12.)
Necklines
Ready-to-wear apparel features a variety of neckline
shapes and finishes. The neckline edge is cut into the
desired shape, and the raw edge of the neckline is finished by any edge treatment such as facing, binding,
or banding. Figure 5–22 illustrates a few common
neckline styles.
Collars
A collar, or any band applied to the garment neckline, is mainly decorative, although it is sometimes
functional in keeping the neck warm or dry or protecting it from the sun. A collar increases the cost of a
Empire
High
Natural
Dropped
Hip Hugger
Figure 5–21 (a) Waistline levels, (b)
straight waistband, (c) contour waistband,
(d) waistline seam, (e) faced waistline
(dotted line represents facing inside the
garment), (f) and (g) elasticized casings at
garment edges, and (h) elasticized casing
within body of garment.
(a)
(b)
(c)
(d)
(e)
(f)
(g)
(h)
129
130
CHAPTER 5
Plain/
Jewel
Sweetheart
Keyhole
Bateau/
Boat
“V”
Scoop
Crew
Halter
Gathered
Décolletage
Cowl
Bib
Queen Anne
Bow
Henley
Tab
garment because it requires additional fabric and
labor. (For more information, see Chapter 12.)
There are three basic collar types: (1) flat, (2)
standing, and (3) rolled (either full-roll or partialroll). The shape of the collar’s inner edge or neckline
edge determines the collar type. The shape of a
collar’s outer edge determines its style. Figure 5–23
illustrates a few common collar styles.
A flat collar lies flat or nearly flat against the garment all around the wearer’s neck. If the inner edge of
the collar is shaped in a concave curve, matching the
neckline edge, the result is a flat collar, for example, a
sailor collar. Flat collars are used mainly on womenswear and childrenswear, rarely on menswear.
A standing collar is a band extending straight up
from the neckline edge and standing up around the
neck. If the inner edge of the collar is fairly straight,
the result is a standing collar, for instance, a mandarin collar. A cowl is actually a standing collar cut
high above the neckline so that it falls into folds.
A rolled collar is a band of fabric that rolls fully or
partially around the neck. A full-roll collar rolls all
the way around the neck; a partial-roll collar rolls at
the back of the neck and lies flat or nearly flat at the
front of the neck. Full-roll collars, such as turtlenecks, have a fairly straight inner edge. They are like
a standing collar, except that a full-roll collar is cut
wider and folded down. The part of the collar that
Figure 5–22 Examples of neckline
styles.
stands up next to the neck forms the collar stand, and
the portion that is folded over forms the collar fall
(Figure 5–24). If the inner edge of the collar is a concave curve somewhere between a straight line and the
shape of the neckline, the result is a partial-roll collar,
for instance, a convertible collar. The more concave
the inner curve, the less the collar rolls. In a partialroll collar, the fold at the back of the collar gradually
tapers toward center front, where the collar lies flat or
nearly flat.
The standard collar on a man’s dress shirt is a mixture of two types; it consists of a standing collar with
a full-roll collar inserted and sewn into the upper
edge of the neckband to create the collar fall. Shirt
collars are costly because of the extra labor and materials required; they are essentially the construction of
two collars in one. However, the production of shirt
collars is completely or partially automated so they
can be accurately produced at a moderate cost.
Sleeves
A sleeve is a covering for the arm that is attached at
or near the armhole, or armscye, area of the garment.
Sleeves are functional in providing modesty, warmth,
or protection but are equally important for their contribution to the style of the garment; they are an important feature of the garment silhouette. They
SHAPE, SILHOUETTE, STYLE: FOCUS ON DESIGN DEVELOPMENT
(Unbuttoned)
Convertible
Stand Up
Pointed Shirt
(unbuttoned)
Polo/Tab
Shawl
has seam at
center back
Edwardian
Ascot
Peter Pan
Mandarin
Turtleneck
Portrait
Puritan
Jabot
Chelsea
Back View
Cowl
Sailor
Figure 5–23 Examples of collar styles.
should be designed and constructed to flatter the garment and the wearer. (For more information, see
Chapter 12.)
A sleeveless garment has no sleeves to finish its
armhole edges. Consequently, the armholes of a
Fall
Stand
Roll
Line
Gorge
Line
Lapel
Figure 5–24 Parts of a classic, notched collar and lapels.
Wing
Peaked Lapels
sleeveless garment must be treated to finish the raw
edges, usually by facing or binding.
All sleeve styles fall into one of three main types:
(1) set-in sleeves, (2) raglan sleeves, and (3) kimono
sleeves. Figure 5–25 illustrates some sleeve styles;
variations in sleeve length are also illustrated. Set-in
sleeves are the most common type. A set-in sleeve resembles a tube hanging from the armhole. Kimono
sleeves are cut as one with the body of the garment.
A raglan sleeve is recognizable by its characteristic
diagonal seam, which runs from the underarm to the
neckline of the garment. The diagonal seam attaches
the tapered sleeve panel to the body of the garment
(see Figure 7–10 in Chapter 7). Raglan sleeves provide greater comfort and more reaching room than
other sleeve types. They are a good choice for active
sportswear and in clothing for people in wheelchairs
or on crutches, who require great range and freedom
of arm movement. Because they do not restrain
movement, raglan sleeves are also suitable in clothing
for elderly people or others with limited mobility.
Gussets in the underarm area of kimono sleeves can
also add freedom of arm movement. Dolman sleeves
are non-set-in sleeves cut deep under the arm, creating fullness under the arm and through the bust-
131
132
CHAPTER 5
Cutaway
Sleeveless
Basic Armscye
Dropped Shoulder
Cap
Short
Above Elbow
Elbow
Bracelet or 3/4
Puffed
7/8
Wrist
Set-In
Melon/
Balloon
Bell
Petal
Draped
Long
Sleeve Lengths
(fitted sleeve illustrated)
Two-Piece/
Tailored
(Back View)
Kimono
Bishop
Leg o’
Mutton
Angel
Shirt
Raglan
Figure 5–25 Sleeve lengths and styles.
line. They may be cut without an armscye seam, like
kimono sleeves, or with a square-cut vertical seam to
the shoulders, more closely resembling a raglan.
Cuffs
Cuffs are the banded or turned-back finishes at the
lower edges of sleeve and pant legs. Crisp, well-made
cuffs contribute to the overall appearance of a garment’s quality.
Most cuffs are a band of fabric applied to the lower
edge of a sleeve that extends or lengthens the sleeve
as it finishes the lower edge. They control the fullness
of the sleeve to fit the wrist, or the arm in the case of
short sleeves. Cuffs may be decorative and of various
widths and shapes. Wide cuffs and complex cuff
shapes add to costs. On basic garments, the repetitive
cuffing operation may be automated. This enables the
manufacturer to achieve uniform results at a moderate cost. (For more information, see Chapter 12.)
Open-band cuffs have an opening so the wearer
can fit the cuff band over the hand and then fasten it
to fit snugly. Open-band cuffs include the following
types:
1. Barrel cuff or shirt cuff, the most common type;
it is a straight, open-band cuff style. Long-sleeved
shirts and blouses usually feature barrel cuffs. The
barrel cuff laps and buttons at the wrist. (Examples are shown in Chapter 10, Figures 10–34,
10–35, 10–36, and 10–37.)
2. Convertible cuff, an open band that fastens with
layers superimposed to resemble a French cuff.
3. French cuff or double-cuff, the most formal style
of open-band cuff (Figure 5–26). The French cuff
is constructed like the barrel cuff but twice as
Figure 5–26 Monogrammed French cuff.
SHAPE, SILHOUETTE, STYLE: FOCUS ON DESIGN DEVELOPMENT
wide. Then the cuff is folded back on itself so the
cuff is doubled. The opening edges are superimposed rather than lapped and fastened with cuff
links or studs through the buttonhole in each
layer. French cuffs require considerably more
fabric and more labor than barrel cuffs. Because of
their high production costs, French cuffs are
mainly found in high-priced apparel and are most
suitable to somewhat formal styles. For example,
they are not used on button-down, oxford cloth
shirts but on dressier shirts of fine broadcloth and
on women’s dresses.
A closed-band cuff is an unbroken ring of fabric
large enough to fit over the arm. Closed-band cuffs
are inexpensive. Turned-back cuffs on sleeves and
cuffed pants are formed by turning back or rolling up
the lower portion of the sleeve or pant leg.
Pockets
A pocket is a small pouch or bag sewn onto or into a
garment and used to carry small items. Concealed
pockets are strictly functional. Nonfunctional, “fake”
pockets used to complement a garment’s design are
strictly decorative. However, most pockets are both
functional and decorative. Functional pockets include special-purpose pockets, such as watch
pockets in jeans, ruler pockets in carpenter’s pants,
game pockets in hunting clothes, ticket pockets in
men’s suit jackets, key pockets in jogging shorts, and
hidden money pockets in travel clothing. These
pockets are shaped, sized, and reinforced according
to their special purposes.
For a pocket to be functional, it must be positioned at a convenient level and angle (for example,
pockets in work uniforms). Pockets should be wide
and deep enough to accommodate hands and/or
items they are intended to hold. Pockets designed
and placed to complement the garment design and to
flatter the wearer contribute to aesthetics. If a garment features pockets on each side, pockets should
be identical and level with one another. If the garment is made of a fabric with a pattern (e.g., plaid or
stripe), a matched pocket reflects attention to quality
but adds cost (see Chapter 4).
Pockets usually contribute to consumer satisfaction. Pockets are very important in work clothing and
active sportswear, and children are especially fond of
pockets in their clothing. Pockets may not seem vital
at the time of purchase, but later the wearer may wish
for a pocket when he or she needs a place to put
hands, glasses, wallet, or keys. Pockets are sometimes
left out of garments if they show through the garment
or cause a ridge on the outside of it. However, the
main reason for leaving pockets out of a garment is to
reduce its price.
The cost of a pocket depends on its complexity,
size, and the fabric used. Pockets often feature decorative trims, stitchings, or other details. These decorative touches add to the cost of the pocket. The addition of pockets must be balanced with cost.
Because they require additional materials and labor,
pockets add to the overall cost of a garment.
Manufacturers can justify the cost of pockets if
they are important to consumer satisfaction. There
are three main types of pockets: (1) patch, (2) inseam, and (3) slashed. (For more information, see
Chapter 11.)
Patch pockets or applied pockets are pieces of
fabric attached, like a patch, to the outside of the garment. (An example is shown in Chapter 9, Figure
9–17.) Patch pockets tend to look more casual than
other pocket types. Manufacturers routinely use
them on the backs of jeans and the fronts of shirts
and jackets, but patch pockets can be placed on
sleeves, pant legs, or anywhere else. Patch pockets
come in many shapes and sizes. Choosing and positioning them is very important because they have a
great effect on the visual impression of the garment
on the wearer. For example, large patch pockets at
hip level draw attention to the wearer’s hip size.
In-seam pockets are set into a seam of the garment, usually the side seams of skirts, pants, coats,
and dresses. The pocket may be concealed or exposed. Concealed in-seam pockets are hidden in the
seam of the garment. Exposed in-seam pockets are usually set into the side seam and waistline seam of the
garment; they have a diagonal or curved opening
edge offset from the side seam. Manufacturers use exposed in-seam pockets on the front hip of jeans (see
Figure 5–31 later in this chapter) and men’s pants
(see Chapter 12, Figure 12–8), where they are often
referred to as quarter pockets. Some women’s skirts
and pants also feature exposed front-hip pockets.
Some jeans contain a watch pocket, a little patch
pocket on the facing of an exposed in-seam pocket.
Slashed pockets are finished slits within the body
of the garment, for example, on tailored jackets and
on the back of men’s dress pants. Slashed pockets are
the most difficult pockets to construct. If made manually, precision is often low. In most cases today,
slashed pockets are produced entirely by automation.
Since automation became widespread, the overall
consistency and quality of slashed pockets has vastly
improved and the cost has become lower. But because of the complexity, slashed pockets remain more
costly than other pocket types. The more pieces used
to construct the pocket, the higher the fabric and
133
134
CHAPTER 5
a
a
b
b
c
Figure 5–27 Pockets: (a) flap with no pocket, (b) flap on
single welt, and (c) double welt.
c
labor costs. Nonfunctional, fake slashed pockets,
with no opening, are found in low-price garments.
Most slashed pockets are welt pockets (Figures 5–27
and 5–28). A single-welt pocket has a single lip usually no more than about 1⁄2 inch wide. A double-welt
or double-besom pocket has two lips usually no
more than about 1⁄4 inch wide each.
Flap pockets have a flap of fabric above the
pocket. The flap extends down over the pocket
opening. For patch pockets, the flap is sewn on above
the pocket. (Examples are shown in Chapter 4,
Figure 4–12 and Chapter 10, Figure 10–28.) For inseam pockets, the flap is sewn at the opening edge.
For welt pockets, the pocket flap is placed above the
single lips or between the double lips of the pocket.
The breast pocket of many tailored jackets provide an
example of an upturned-flap pocket, a flap that extends up (not down like a regular flap).
Decorative Details Integral to the Garment
Some decorative details are constructed as part of the
garment. For example, fabric may be raveled out at
the edge to form a fringe called self-fringe. In highquality garments, a row of stitches just above the
fringe prevents further raveling. Leather or vinyl may
be slashed at frequent intervals to form self-fringe.
Decorative details that are integral to the garment in-
Figure 5–28 Pockets: (a) upturned flap with piping,
(b) upturned flap, and (c) single welt.
clude tucks, pleats, creases, ruffles, bows, and tabs.
Many details constructed as part of the garment are
functional as well as decorative. For example, tucks,
pleats, gathers, style fullness, shirring, smocking,
seams such as gores and yokes, and darts decorate
the garment as they help shape it.
Most decorative details integral to the garment are
made with specialized sewing machine attachments.
Thus many operations that once required extensive
skilled labor are now automated. (For more information, see Chapters 11 and 12.)
Tucks. A tuck is a stitched fold of fabric (Figure
5–29). The fold lies flat against the garment, but it
can be lifted. Tucks can be made vertically, horizontally, and diagonally on a garment. Most tucks are
stitched on the outside of the garment so the folds of
fabric show on the outside.
Tucks require extra fabric and labor. If a designer
uses numerous tucks in a garment, considerable
fabric and labor are required. For example, a garment
with tucks all the way across the front may require
SHAPE, SILHOUETTE, STYLE: FOCUS ON DESIGN DEVELOPMENT
(a)
(b)
(c)
(e)
5. spaced tucks, a series of tucks that occur at regular
intervals
6. blind tucks, a series of tucks that meet, each one
covering the stitches of the one preceding it
7. scalloped tucks or shell tucks, which feature decorative stitching at the edges that draw the tuck into a
shell shape (similar to the shell hem in Chapter
10, Figure 10–26)
8. crossed tucks, two sets of tucks made perpendicular
to one another
9. corded tucks, which have a cord inserted in the fold
of the tuck to give a three-dimensional effect
Pleats. A pleat is a fold of fabric folded back upon
itself so the pleat is comprised of three layers (Figure
5–30). The top fold of the pleat hides the back fold;
the pleat can be spread open to see the back fold.
Pleats are not stitched to the garment throughout
their length as are tucks, although occasionally pleats
are partially stitched down at the upper edge to
flatten them and hold them in place. Pleats can be
pressed or unpressed throughout their length for different effects. Soft, rolled pleats are appropriate in
soft fabrics. Sharp, pressed pleats must be made in a
crisp fabric for the proper effect. Fabrics that can be
heat set have the ability to maintain the creases of
pleats. Pleats in other fabrics may be edgestitched
along the folds for a crisp, well-defined look. Pleats
hang vertically on the garment, secured at an upper
edge; they cannot be made horizontally or diagonally.
Pleat types include these:
(d)
(f)
(g)
Figure 5–29 Tucks: (a) spaced, (b) blind, (c) pin, (d) shell,
(e) crossed, (f) released, and (g) inverted.
three times as much fabric as a garment with a plain
front. Tucks also require skilled labor to carefully
space and stitch unless tucking folders or pretucked
fabrics are used.
Besides the plain tuck, there are a number of variations, including these:
1. inverted tucks, stitched on the inside of the garment
so the folds of fabric are not visible on the outside
of the garment
2. released tucks, which are partially stitched, releasing fullness and introducing ease into the garment (see Chapter 6)
3. dart-tucks or open-ended darts, similar to released
tucks. They are tapered like darts and the tips are
left unstitched. Dart-tucks shape the garment,
serving as a dart substitute.
4. pin tucks, narrow and closely spaced tucks, such as
those in tuxedo shirts
1. knife pleat, the basic folded pleat; all pleats are
variations of this pleat. (See Figure 5–31 later in
this chapter.)
2. box pleats, two knife pleats folded away from one
another. (See Chapter 12, Figure 12–2.)
3. inverted pleats, two knife pleats folded toward one
another. Note the relationship between box and
inverted pleats; when either occurs in a series, between every two box pleats an inverted pleat is
created and vice versa.
Knife pleats, box pleats, and inverted pleats may
be used singly, in small groups (cluster pleats), or all
the way around a garment. They are also used as a
basis for the following:
1. kick pleat, a pleat at the hem of a skirt to give room
to walk and sit; it may be a decorative feature as
well
2. vent, an opening at the back hem of jackets, which
allows the garment to expand for walking and sitting comfort
3. gibson pleat or flange, a pleat at the intersection of
the shoulder and the armhole that releases fullness
in the front and/or back of the garment
135
136
CHAPTER 5
(a)
(b)
(c)
(d)
(e)
(f)
(g)
(h)
Figure 5–30 Pleats: (a) knife, (b) edgestitched knife, (c) partially stitched knife, (d) box, (e) inverted, (f) accordion,
(g) edgestitched box, and (h) partially stitched box.
4. accordion pleats, repeated, evenly spaced, open
knife pleats
5. sunburst pleats, smaller at the waist and larger as
they near the hem. Accordion and sunburst pleats
are used in skirts.
6. crystal pleats, extremely narrow accordion pleats
used in formal gowns and some ruffle trims
7. cartridge pleats, also called gauging, accordion
pleats drawn closed with rows of running stitches
so that they resemble bold, even gathers. They are
used in choir, academic, and clerical robes and in
high-price garments.
Considerable labor is required to accurately space
and press some pleat styles. Others, when made
using specially designed work aids, require very little
labor. When an entire fabric or garment requires
pleating, the job is usually sent to a contractor that
specializes in pleating. The cost difference between
pleated styles depends upon the depth of the pleats.
Shallow pleats require little fabric and are used in
low-cost garments (Figure 5–31). Deep pleats require
as much as three times the fabric needed for an unpleated garment. Full-depth pleats, with the back
fold as wide as the front fold, look the same as
shallow pleats when the wearer stands still but provide more attractive fullness when the wearer moves.
They also provide plenty of sitting and moving ease.
However, deep pleats are confined to high-price garments because of the cost.
Creases. Creases pressed in pant legs are a decorative feature that adds a crisp look to the garment and
slims the appearance of the wearer. Front creases start
at the hem and end somewhere between the crotch
level and the waist. Back creases extend from the hem
to the crotch level. Fabrics that can be heat set maintain a sharp crease. In fabrics that cannot be heat set,
stitching along the crease helps maintain a sharp
crease line; this is done mainly in children’s garments.
Ruffles. Ruffles or flounces are decorative gathered, or pleated strips of fabric. Full ruffles are usually two-and-one-half times or more the length of the
area to which they are gathered. They require more
fabric than skimpy ruffles, which may be as little as
one-and-one-half times the length of the area to
which they are gathered. Full ruffles are found in
a
b
Figure 5–31 Pleats: (a) deep, and (b) shallow.
SHAPE, SILHOUETTE, STYLE: FOCUS ON DESIGN DEVELOPMENT
a
b
Figure 5–32 (a) Double-layer ruffle, and
(b) single-layer, hemmed ruffle.
high-quality garments. Soft, sheer, and lightweight
fabrics need to be fuller than other fabrics to avoid a
skimpy appearance. Ruffles should be even in width.
Bias-cut ruffles drape more gracefully than ruffles
cut on the straight-of-grain. However, bias-cut ruffles
are costly because of the amount of fabric required
and because seaming the bias pieces together is timeconsuming.
Ruffles are made by hemming the long edge of a
single ply of fabric to make a single-layer ruffle, or by
folding a piece of fabric in half lengthwise to make a
double-layer ruffle (Figure 5–32). Double-layer ruffles require twice as much fabric as single-layer ruffles; however, double-layer ruffles require less labor
because they do not require hemming. Most ruffles in
low- and moderate-price lines are single-layer ruffles.
Single-layer ruffles have less body than double-layer
ruffles and are less attractive if the fabric has a right
and wrong side and if the hem shows. However,
although double layers are considered a mark of
quality in many cases, they cause more bulk than
single-layer ruffles and are not suitable for all
applications.
Shaped ruffles are cut in a circle and straightened
for sewing to the garment. This causes an attractive
ripple at the outer, unsewn edge but they remain
smooth where they are seamed to the garment
(Figure 5–33). A shaped or gathered ruffle at the
waistline is a peplum; peplums are a decorative style
feature used in womenswear. Wide, successive rows
of ruffles are called tiers.
Bows. A bow is a ribbon or fabric strip tied into a
decorative knot with loops and streamers. Long, full
bows require extra material, making them costly.
Fabric bows cut on the bias tie and drape gracefully,
but bias-cut bows are costly because they require
extra material. Bows are either (1) an extension of the
garment structure or (2) constructed separately and
then tacked, glued, or pinned in place. Ribbon bows
tend to ravel and become bedraggled when laundered; in such cases, the bows should be removable
for laundering.
Tabs. A tab is a fabric strip that, when combined
with a button, buckle, or d-rings serves as a functional closure as well as a decorative detail. (For examples, see Chapter 8, Figure 8–9.) Tabs are frequently seen at the wrist of the sleeves of all-weather
coats. They are also used on pockets, necklines, back
vents, and elsewhere as the design demands.
Epaulets are tabs at the shoulders, often used on military uniforms, safari outfits, and trench coats.
Although epaulets usually serve no function in
normal consumer use, they may serve to keep
shoulder bag or camera straps from slipping off the
shoulder (e.g., safari shirts). Some tabs help shape
the garment to the wearer, for example, buckled tabs
on the back of vests.
(a)
(b)
Figure 5–33 (a) Shaped shoulder ruffles and shaped
ruffle peplum at waist, and (b) gathered shoulder ruffles
and gathered ruffle peplum at waist.
137
138
CHAPTER 5
Functional Design Considerations
Garments must be planned for more than merely a
pleasing aesthetic appearance. Not only must a garment possess an attractive style, but it must also function according to its intended use. For example, certain types of clothing, such as lingerie, active
sportswear, and occupational clothing, lend themselves to functional details that help fulfill their special purpose.
Some groups of consumers require special details
in the clothing they wear. Special markets include
childrenswear, maternity wear, clothing for mature
figures, and clothing for the physically challenged
(for more information on sizing and fit for these markets, see Chapter 6). The people that make up these
special markets require clothing with details that
make garments more functional and well-suited to
their purpose.
Attention to the technical aspects of garment design are as critical to a garment’s success as the garment’s aesthetic appearance. A great design is wasted
if the wearer cannot put it on or move comfortably in
it. Every design must be given a “reality check.” If it is
a special-purpose design such as a horseback riding
outfit or a ballerina’s costume, it must be worn during
that activity. The same principle applies to apparel
worn by people in everyday life. It must be tried on
and worn by a human being.
Of course, all apparel designs must be planned to
accommodate the wearer’s usual movements. Can a
person walk, bend, reach, and/or sit in it? Can a
person sleep comfortably in sleepwear? Swim in
swimwear? Run in athletic wear?
Equally important is to plan for how the wearer
will put on and take off the garment. Does it go over
the head? The hips? Are garment openings large
enough to accommodate these processes?
The apparel must also be refurbished easily. Can it
be washed? Must it be dry-cleaned? Is the refurbishing appropriate for the use of the item? All of
these considerations complement and make possible
a fine design.
Lingerie. Panties made of synthetic fibers usually
feature a cotton crotch. This is a quality feature because of the absorbency of cotton, making the garment comfortable to wear.
Some bra and slip straps are made from elastomeric materials, which stretch with the wearer’s
movements for comfort. However, stretch straps may
lose their elasticity over time, making the garment
unwearable. A stretch strap that is also adjustable
may be tightened if it loses its elasticity. Adjustable
straps contain a mechanism for loosening and tightening, enabling them to fit a variety of figures.
High-quality slips are sometimes constructed with
shadow panels. A shadow panel is an extra layer of
fabric at the center of the slip for modesty; it prevents
the silhouette of the legs from showing through
translucent fabrics. Shadow panels increase production costs.
Active Sportswear. Active sportswear often features functional details. The following are just a few
of the many functional details that increase the usefulness of active sportswear.
1. Reflective tape or designs on jogging or biking
clothing worn at night make the wearer visible to
vehicles.
2. Slits or laps at the side seams of jogging shorts
allow freedom of movement for running.
Try a Real-Life Scenario 5-2: Functional Design
A prominent retailer of large women’s clothing has repeatedly experienced high customer returns on a particularly attractive style of slacks. The slacks sell well and appear to fit well when tried on in the dressing room but
are frequently returned to the store after the customer wears them once. The customers report that the slacks
are uncomfortable when they are in a sitting position. The slacks pull down excessively in the back and are
tight through the front crotch.
Considerations:
•
•
•
•
•
Should the retailer discontinue carrying the slacks?
Should the retailer pass the cost of the returns on to the manufacturer?
Should the retailer help the manufacturer redesign the slacks?
Should the slacks be sold at a discounted price?
Should the retailer refuse to buy from the vendor in the future?
SHAPE, SILHOUETTE, STYLE: FOCUS ON DESIGN DEVELOPMENT
3. Mesh-fabric vents in the underarm area of football
jerseys allow perspiration to evaporate.
4. Grommets (reinforced holes) in the pockets of
swim trunks help water drain away and prevent
pockets from ballooning out.
5. Rubber buttons on rugby shirts prevent contact
bruises that result from hard plastic buttons.
6. Pads in biking shorts cushion the buttocks from
the bicycle seat.
7. Pads in the chest area of hunting vests help absorb
the impact from the “kickback” of the gun being
shot.
8. Zippers at the hems of ski pants and warm-up suits
help the wearer put them on and take them off
over ski boots and bulky athletic shoes.
9. Trigger fingers on mittens provide greater grasping
dexterity.
Occupational Clothing. Occupational clothing for
workers doing a particular job contains many practical features that protect the wearer, provide convenience and comfort, or improve the ease of care or
serviceability of the garment. For example, hammer
loops on carpenter’s pants provide a place for hanging
tools. Employees in a fabric store may wear aprons
with reinforced pockets for scissors. Industrial workers
require protective clothing. Police require bulletproof
vests. Many companies embroider workers’ names on
their uniforms to help customers identify them.
Other functional details of occupational clothing relate to fabric characteristics. For example, soldiers require camouflage prints; firefighters need fireproof
clothing; surgeons wear gowns that have antibacterial, static-free, and low-linting characteristics. An indepth coverage of occupational clothing is outside
the realm of our discussion of ready-to-wear; to learn
more, refer to Watkins (1984).
Childrenswear. Infants’ clothing must help babies
maintain constant body temperature because their
natural body “thermostat” is not yet fully developed.
Functional details in infants’ and toddlers’ clothing
are the snap crotches and inseams; the snaps make diapering more convenient. The safety of details on
clothing for these age groups is another major consideration. Buttons and snaps on infant and toddler
clothing should be securely attached; if closures
come off, the baby may swallow them. On infantswear, do not use drawstrings and avoid elastic
around the neck or anywhere that a danger of strangulation exists. Also, materials used to make clothing
for children size 2 and under must be nontoxic.
Sleepwear should be tight-fitting to avoid catching
fire; loose-fitting sleepwear in sizes larger than
9 months must meet federal flammability standards.
For comfort, fabric for young children’s clothing
should be soft, lightweight, absorbent, flexible, extensible, and easy to launder.
Parents appreciate design features that accommodate a child’s growth. Examples include deep hems,
raglan or kimono sleeves, generous armholes for setin sleeves, dresses with undefined waistlines, separates rather than one-piece outfits, long tails on shirts
and blouses, stretch fabrics, sleeve cuffs that roll
down (pant leg cuffs that roll down can trip the
child), elasticized waistlines or waistlines with adjustable closures, and adjustable shoulder straps/
suspenders. Horizontal growth tucks at the hem or
waist of children’s garments can be let out when the
child grows. The main cost of growth tucks is the
extra fabric required. Growth tucks are used to a limited extent in high-price line childrenswear. Because
the garment has often faded more than the tucked
area by the time the growth tucks are released, their
value is questionable.
Self-help features that assist the child in dressing
independently include conveniently placed, easy-tomanipulate closures and large, stretch, “pull-on”
openings for neck, arms, and legs. The front of the
garment should be easy to distinguish from the back;
for example, marked with an appliqué. Extras such as
belts, sashes, and bows should be pre-tied and attached to the garment. Buttons should be flat,
smooth, and not excessively large or small but about
one-half inch in diameter. Buttonholes should be
large enough to accommodate the buttons easily.
Large zipper pulls make it easy for a child to operate
zippers. Openings should be down the front of the
garment. Hook-and-loop tape rather than traditional
fasteners should be considered.
Children’s coats and snowsuits sometimes feature
mitten ties that attach the mittens to the garment with
a cord; they prevent the loss of the mittens. Knee and
elbow patches add durability to play clothing that receives hard wear. Straps should be secured with loops
at the shoulders so they do not fall off the shoulders.
Children like pockets. Pockets, cuffs, trims, and
other details should be sewn on flat, not left dangling
to catch on things or trip the child. Colors that stand
out make children easier to see when they are
playing, increasing safety. Nonslip (but breathable for
comfort) soles on footed pajamas are another safety
feature.
Maternity Wear. Maternity clothing features details
that make garments expandable for the expectant
mother. Excess fabric is the most common approach.
Adjustable openings at the waistline accommodate
the enlarging abdomen. Stretch panels may be inserted in the abdominal area of maternity-wear bottoms; stretch panels expand as the abdomen enlarges. They should be long enough and wide enough
139
140
CHAPTER 5
to avoid uncomfortable binding. They are usually
concealed by long maternity tops.
Nursing garments have openings over the breasts
for convenient breast-feeding. The openings are concealed by fabric overlays when not in use.
Clothing for Older Adults. Clothing for older
adults, male and female, needs to be designed primarily for comfort. While people over 50 are still
fashion conscious, they put increasing value on being
comfortable in their clothing. Dissatisfaction with fit
is more common among mature women than any
other group. Safety features are very important for
mature individuals who are not 100% mobile, as are
features contributing to freedom of movement and
ease and independence of dressing. Features meeting
these needs include:
1.
2.
3.
4.
5.
6.
7.
8.
9.
10.
fabrics that stretch and give
roomy armholes
kimono and raglan sleeves
short or elbow-length sleeves
back fullness
unfitted or elasticized waistlines
large neck openings
V-necklines
long, front openings
closures that are easy to grasp, or elasticized
openings that eliminate the need for hard-tomanipulate closures, especially for those with
limited mobility brought on by strokes or
arthritis
Avoid long, loose sleeves that can catch fire on
burners or heaters, short openings, back openings,
small armholes, and very close-fitting garments.
Clothing for People with Physical Disabilities. For
the most part, individuals with physical disabilities
are just as fashion conscious as individuals without
special needs. Their physical disability usually is not
as significant or noticeable to them as it is to others.
They have either been born with their special needs
or have adapted to them. Therefore, people with disabilities do not choose clothing any differently than
other people. We all want fashion, fit, and comfort.
Unfortunately, due to the uniqueness of each special need situation, it is not possible to mass produce
appropriate apparel cost-effectively. Therefore, the selection of ready-to-wear special clothing is limited.
For this reason, individuals with special needs who
can afford to do so may have clothing custom-made.
Others may customize ready-to-wear on their own,
learning techniques to adapt mass-produced apparel
to their needs.
Clothing for people with special needs, whether
mass produced or custom adapted, is characterized
by functional details that vary according to the individual and the circumstances. Most details are kept as
inconspicuous as possible, while some become a
focal point of the item of apparel. (Clothing adapted
for wheelchair users is illustrated in Chapter 6,
Figure 6–13.) The following are just a few examples
of functional details for consideration in special need
apparel.
1. Mastectomy bras contain special pockets to hold
the prostheses or breast replacements in position
for women who have had breast-removal surgery.
2. Action-back pleats are pleats in the back shoulder
area of garments, for example, shirts, blouses, or
jackets. They provide reaching room in otherwise
fitted garments. Most action-back pleats are fairly
inconspicuous. They are comfortable for crutch
users and people in wheelchairs and for anyone
involved in active sports, because they increase
freedom of movement and reaching in the
shoulder area.
3. Underarm padding and reinforcement in clothing for
crutch users provide comfort for the wearer and
extend the life of the garment.
4. For wheelchair users, low pockets (on lower pant
legs, for instance) provide better access than traditional pocket locations.
5. For those with limited finger mobility, hook-andloop tape sewn on behind buttons makes closures
easier to manipulate.
6. Loops inside garments help with pulling them on.
7. Openings that stretch (for example, cuff buttons
sewn on with elastic) simplify dressing and undressing.
8. Zippered pant inseams and/or outseams allow easy
access to catheters.
9. For people with severe handicaps who cannot
dress without assistance, clothing should be designed for easy removal and replacement.
SUMMARY
Garments are made from flat fabrics shaped to fit the
human body. To hang straight, garments should be
cut on the straight of the fabric’s grain. They may be
cut on the bias for special effects. All garments contain darts or dart equivalents that introduce shape
into the garment. Darts are triangular folds stitched
into the fabric that shape it to fit the body. The size,
length, and angle of the dart should accommodate
the body curve it is intended to fit. Shaped seams
SHAPE, SILHOUETTE, STYLE: FOCUS ON DESIGN DEVELOPMENT
such as princess seams, gore seams in skirts, and
yoke seams may incorporate dart shapes to help the
garment fit the figure. Released darts and extra fabric
add style fullness. Style fullness may be fitted to the
body with ease, gathers, shirring, smocking, elastic,
or drawstrings. Other dart substitutes include stretch
fabrics, bias-cut pieces, pleats and tucks, godets, gussets, full-fashioned knits, and lacing.
Underlying fabrics provide additional shape, support, and smoothness to garments. Interfacing is used
in detail areas. Lining covers the inner construction
of the garment. Fully lined garments are generally
more costly but are more durable, more comfortable,
and more attractive than unlined garments.
Underlining is constructed as one with the garment
and has many of the same advantages as lining, except it does not cover inner construction details.
(However, underlining does make inner construction
details invisible from the outside of the garment.)
Interlinings are applied strictly for warmth.
Supporting devices are used to maintain shape as the
design demands.
The identifying characteristics of a garment determine its style. Variations in silhouette, length, waistline, and edge treatments and in neckline, collar,
sleeves, cuffs, pockets, and decorative details result in
different styles. Style is evaluated based on fashion
trends, personal preferences, appropriateness, function, and principles of aesthetic design.
Collars are either flat, standing, or rolled. Sleeves
are one of three types: kimono, which is cut in one
with the garment; raglan, which is attached to the
garment with a diagonal seam; and set-in, which is
attached to the armhole of the garment. Cuffs include
open-band, closed-band, and turned-back. Pockets
usually contribute to consumer satisfaction. The
main pocket types are patch, in-seam, and slashed.
Decorative details integral to the garment include
tucks, pleats, creases, ruffles, bows, and tabs.
Garments must be functionally designed with the
end use and the end user in mind. Garments for
special markets—childrenswear, maternity wear,
clothing for mature figures, clothing for people with
physical disabilities, and occupational clothing—
may require special design features.
New Terms
If you can define each of these terms and differentiate
between related terms, you have gained a good
working vocabulary for discussing the topics in this
chapter. The terms are listed in the order in which
they appear in this chapter.
tailored
grain
lengthwise grain/warp
selvages
crosswise grain/fill/filling/weft
straight-of-grain
bias
true bias
shaping methods
basic block/sloper
dart
single-pointed dart
French dart
double-pointed/contour dart
dart equivalent/dart substitute
princess seam
yoke
riser
midriff yokes
split yoke
gore
released dart
ease
gathers
shirring
smocking
applied elastic
casing
header
drawstring
gusset
godet
full-fashioned marks
lacing
body/fashion/shell fabric
interfacing
lining
underlining
interlining
balance
proportion
rhythm
emphasis
unity
silhouette
style
hip hugger
empire waistline
collar
flat collar
standing collar
rolled collar
sleeve
armscye
141
142
CHAPTER 5
set-in sleeve
kimono sleeve
raglan sleeve
dolman sleeve
cuff
open-band cuff
barrel/shirt cuff
convertible cuff
French/double-cuff
closed-band cuff
turned-back cuff
pocket
patch pocket/applied pocket
in-seam pocket
slashed pocket
single-welt pocket
double-welt/double-besom pocket
flap pocket
upturned-flap pocket
tuck
pleat
crease
ruffle/flounce
peplum
bow
tab
epaulet
shadow panel
grommets
growth tuck
Shape, Silhouette, and Style Checklist
If you can answer yes to the following questions
regarding the garment you are evaluating, it contains high-quality shape, silhouette, and style
variations.
Is the garment cut on the straight-of-grain (or on
the bias for special effects)?
Is an appropriate dart or dart equivalent used
wherever there is a body curve?
Are pleats full-depth?
Are bows full and preferably cut on the bias?
Do gussets have sharp, even, secure points?
Does interfacing provide support where needed?
Is the garment fully lined?
Does the style meet fashion, personal, aesthetic,
and end-use functional and appropriateness
expectations?
Are practical details included whenever they
would enhance the function of the garment,
particularly for special markets?
Review Questions
1. Why are most garments cut on straight-of-grain?
Which grain is typically placed parallel to the
length of the body and why? Describe the characteristics of garments cut on the bias.
2. Why are shaping methods like darts and dart
equivalents needed in all garments? List the dart
equivalents.
3. Compare and contrast
a. gussets and gores
b. gathers and ease
c. yokes and split yokes
d. smocking and shirring
4. What are the advantages and disadvantages of
a. lining a garment?
b. underlining a garment?
c. interfacing a garment?
d. interlining a garment?
5. List the various garment lengths.
6. What are the three main collar types? What determines a type of collar? Its style?
7. What are the three main sleeve types? How are
they differentiated? List the various sleeve lengths.
8. Are pockets functional or decorative features of a
garment? Support your answer.
Activities
1. Examine a low-price and a high-price example of
the following garments for use of grain and grain
trueness. Do you find any differences based on
price? On classification?
a. men’s necktie
b. jeans
c. men’s shirt
d. skirt
e. T-shirt
f. jacket
2. Fold a dart in a piece of paper. How does this affect the shape of the paper? Try to closely conform a piece of fabric to a dress form or human
body. What is required?
3. Examine a garment with darts. What body curve
is each dart intended to fit?
4. Choose 10 different garments at random from a
store, from a catalog or magazine, from a historic
costume collection, and from your wardrobe.
What shaping methods are used in each? Does
the classification of the garment influence the
type of shaping method used? Does fashion influence the popularity of certain shaping
SHAPE, SILHOUETTE, STYLE: FOCUS ON DESIGN DEVELOPMENT
methods? Do you have a personal preference for
some shaping methods over others? Explain your
answers.
5. Visit an apparel manufacturer. Ask
a. to see their basic blocks
b. how they build shape into their garments
c. what cost-cutting measure they take to eliminate costly shaping methods but ensure that
garments still fit the customer.
d. what types of supporting fabrics they use and
why.
e. what other supporting devices they use.
6. Visit a high-price and a low-price source of athletic apparel. Examine the sweatpants for quality
and quantity of shaping and supporting features.
For example, look for elastic, gussets, and drawstrings. Why are supporting fabrics and other
supporting devices not used?
7. Find examples of the following neckline styles:
a. plain/jewel
b. keyhole
c. V
d. scoop
e. sweetheart
f. bateau/boat
g. crew
h. halter
i. décolletage
j. gathered
k. cowl
l. bib
m. bow
n. Henley
o. tab
p. Queen Anne
8. Find examples of the following collar styles:
a. convertible
b. pointed shirt
c. polo/tab
d. shawl
e. stand-up
f. Edwardian
g. ascot
h. jabot
i. mandarin
j. turtleneck
k. peter pan
l. portrait
m. puritan
n. Chelsea
o. sailor
p. cowl
q. wing
r. peaked lapels
9. Find examples of the following cuff styles:
a. barrel
b. convertible
c. French
d. closed-band
e. turned-back
10. Find examples of the following sleeve styles:
a. set-in
b. kimono
c. raglan
d. puffed
e. melon/balloon
f. bell
g. petal
h. draped
i. two-piece tailored
j. bishop
k. leg o’mutton
l. angel
m. shirt
11. Cut collars from paper with the following neckline shapes:
a. straight
b. slightly curved
c. round
Try on the collars. What collar type does each
produce?
Guiding the Discussion
Try a Real-Life Scenario 5-1. Layout is not efficient
when nap must run in both directions. There is high
fallout and the marker has to be adapted. Piping, topstitching, etc., could emphasize design details but not
in the unique manner as a change of nap—these alternatives would be cheaper but do not replicate the
exact effect desired by the designers. This situation
represents the age-old “practical versus creative”
struggle between production and design—production staff thinking about ways to reduce costs and design staff working to execute an aesthetic concept. In
this case, the designers must make a decision about
whether or not they can get enough money back in
the price of the garment to justify the cost of the look
they desire.
Try a Real-Life Scenario 5-2. Some retailers might
hasten to get rid of the vendor, and if this is a brand
new vendor, that is likely to happen. But if the retailer
has a long-term relationship with the vendor, and the
rest of their record is on time and good quality at the
right price, the relationship is valuable and worth the
143
144
CHAPTER 5
time it takes to help the vendor improve the product.
The current inventory of slacks should be cleared out
through discounting. Then the retailer can help the
vendor redesign the slacks to better fit the retailer’s
customers. The feedback should benefit everyone,
and working together to solve the problem is important in preserving the relationship with the vendor.
Retailers need to bring the cost of such returns to the
attention of vendors and negotiate something to the
satisfaction of both parties.


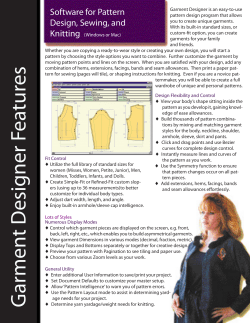
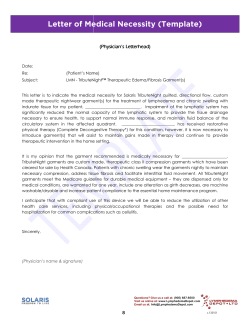


© Copyright 2026