
Picasso - Abstract Clay Face - Parenting Special Needs Magazine
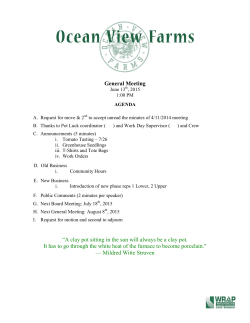
Masterpieces modified:
7.
Picasso - Abstract Clay Face
Pablo Picasso
Pablo Picasso was born on October 25, 1881 in Malaga, Spain.
Picasso helped develop a style of painting called “Cubism”. This
style took apart objects and “analyzed” them in terms of their
shapes. Many of his portraits reflect this style.
Cubism allowed the artist to show his/her model from many
different viewpoints. In the paintings of earlier times, the artist
showed his subject from one particular viewpoint. In cubist
paintings the artist may show the front and the side of a person’s
face at the same time.
©2015 www.parentingspecialneeds.org
Permission granted to print or make copies for personal and educational use.
www.artshoptherapy.com
Masterpieces modified:
Picasso Abstract
Clay Face
Materials: Clay, water in a small container,
1.
clay tools (or plastic knives etc…..)
Fine Motor Skills: Sensory and motor skills,
eye and hand coordination
Art Skills: Clay techniques, how to make clay
coils, learn how to manipulate objects and
tools to construct a 3-dimensional design
DIRECTIONS:
2.
1. Construct two balls of clay the size of
your fist.
2. H
ave the artist press each ball of clay flat
using the palm of their hands. They can
pound on the clay or use their fingertips
to stretch it out. Whatever works for them.
3. C
hoose one of your pieces of clay. Take
3.
a clay tool or plastic knife and practice
drawing triangle shapes in the clay. Have
the artist cut out two triangle shapes.
4. Use more clay and construct a “tube” of clay.
4.
©2015 www.parentingspecialneeds.org
The artist will roll the clay back and forth
using the palm of their hand. Use both
hands to roll if needed. Keep rolling the clay
until it becomes thin. Have the artist dip
their finger in water. The artist will run their
finger along the clay coil. This will create a
sticky surface. Explain to the artist that this
is like “glue” that will keep the clay pieces
stuck together.
Permission granted to print or make copies for personal and educational use.
www.artshoptherapy.com
5. L ay the piece on the round flat piece of clay
(wet side down). Help the artist shape the
piece to curve around to form a simple nose
silhouette.
5.
6. H
ave the artist dip their finger in water and
run it along the bottom of two triangle
pieces. Place the triangles together on the
clay to create a diamond shape to create an
eye on one side of the face. Artist will press
down lightly to keep it in place.
6.
7. Roll out a small sized ball of clay. Wet the
bottom and have the artist press it down
on top of the diamond shape and press it
flat. This completes the eye.
7.
8. R
oll out two small coil shape pieces
of clay. Artist will wet the pieces with
water.
More Modifications and Tips
8.
©2015 www.parentingspecialneeds.org
continued on next page.
Permission granted to print or make copies for personal and educational use.
www.artshoptherapy.com
9. Lay one piece under the nose and the next
piece under it with a curve to form a mouth.
10. F ind a tool that will create an interesting
9.
pattern on the face. Have the artist press
on the surface of one side of the face to
create a pattern. Anything that will create
holes or an interesting pattern.
11. Y
our artist can experiment with paint and
decorating the face how they would like
after it is dry.
Modifications and Tips:
10.
Have the artist practice using tools to draw
curved, straight lines on clay. Practice cutting
and pressing into a piece of clay before doing
the project.
Artist can practice rolling, pounding, flattening
clay before doing the project
Modify and simplify by having artist carve lines
in to create the face instead of rolling coils for
the face.
11.
Danelle Griner is the founder of Art Shop. She
specializes in therapeutic art instruction for
individuals with disabilities. Go to Artshop to find
easy to teach adapted art projects for children
with special needs. www.artshoptherapy.com
©2015 www.parentingspecialneeds.org
If needed an artist can start with constructing
a regular face without the coils. They can
experiment with shapes and lines by just
drawing on the clay to complete the project.
Introduce the coil concepts and repeat the
project multiple times with the artist to
practice and build skills.
The artist can do half the steps. Cover the clay
in an air tight container and come back later to
finish.
Permission granted to print or make copies for personal and educational use.
www.artshoptherapy.com


© Copyright 2026