
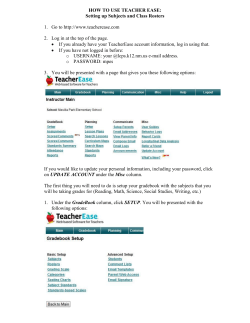
3 1 4 How to setup address
1
How to install
Step 1.
Install bracket
3
(1)After Initial starting,the OSD will display 485 baud rate,
address,protocol,as following picture shown:
OR
Step 2.
Install camera to bracket
4
How to setup address
MAIN MENU
P 27X02
20 02
INITIAL...
PROTOCOL:PELCO-D
ADDRESS:001
BAUDRATE:9600BPS
INPUT PELCO COMMAND:
(IRIS-OPEN)-----OSD MENU
(IRIS-CLOSE)--- AUTO FOCUS
(GOTO PRESET 95) – OSD MENU
DVR or PTZ controller, the 485 Option sets up the same
as the PTZ camera,so you can make it work.
FOCUS SETUP
CAMERA SETUP
FOCUS SETUP
PAN TILT SETUP
PATTERN SETUP
PROTOCOL SETUP
RESET MENU SETUP
FOCUS TYPE
AUTO
AF AFTER MOVE
ON
PRESET LOAD ZOOM
ON
AUTO CHECK FOCUS
OFF
AUTO CHECK TIME
032
DISPLAY ZOOM TIMES
OFF
EXIT MENU
RETURN
EXIT MENU
2)Enter in the submenu of PROTOCOL SETUP to setup
PROTOCOL,ADDRESS and BAUDRATE
PELCO-D
001
9600BPS
1-1 FOCUS TYPE
AUTO:
AUTO FOCUS
MANUAL: MANUAL FOCUS
1-2 AF AFTER MOVE ON/OFF
Auto Focus Setup After AF Move
1-6 DISPLAY ZOOM TIMES
ON: Display ZOOM Times
OFF:Turn off Display of ZOOM Times
RETURN
EXIT MENU
PATTERN TOUR
PATTERN TOUR
PATTERN DWELL TIME
AUTO DWELL TIME
HOME DWELL TIME
HOME POINT SETUP
STOP
000
010
STOP
128
SET
RETURN
EXIT MENU
4.PROTOCOL SETUP
RS485 PROTOCOL Setup
After turn PTZ OSD will display 485 baud rate,
address, protocol, and other information, as shown below:
N 12X07
00 07
03
INITIAL...
PROTOCOL: PELCO-D
ADDRESS:
001
BAUDRATE: 9600BPS
INPUT PELCO COMMAND:
(IRIS--OPEN) ----- OSD MENU
(IRIS--CLOSE) ----AUTO FOCUS
(GOTO PRESET 95) – OSD MENU
3-1 PATTERN TOUR
STOP:Stop PATTERN
START: Start PATTERN
3-2 PATTERN POINT NUM
The number of cruise point setting, if set 5,
then PATTERN between preset 1-5.
3-3 PATTERN DWELL TIME
PATTERN DWELL TIME Setup
3-4 AUTO RETURN HOME STOP/START
Automatically return to the HOME position after a set time .
3-5 HOME DWELL TIME
Set the time to return to the HOME point
3-6 HOME POINT SETUP SET
Turnning PTZ to the position you want to set,
Enter OSD and press IRIS-OPEN will set this position to Home
N: NTSC
12X: Lens Zoom
07: Software Version
4-4 : Address 255 (NO.06 above support this feature)
Using address255,You can control all the same protocols and baud
rate connected with the DVR 485 but the address is different
from the PTZ.
Using address 255 control,
press IRIS-OPEN Enter OSD choose PAN TILT SETU Submenu,
RETURN will become RANDOM ADDRESS
The setup status of PTZ
PROTOCOL:
ADDRESS:
BAUDRATE:
DVR:PELCO-D 001 9600
Change RS485 PROTOCOL Setup:
Press IRIS-OPEN Key to Enter MAIN MENU
MAIN MENU
PROTOCOL:
ADDRESS:
BAUDRATE:
PELCO-D
001
9600BPS
RETURN
EXIT MENU
DVR or controller 485 set the same as PTZ,
then you can PTZ control.
CAMERA SETUP
FOCUS SETUP
PAN TILT SETUP
PATTERN SETUP
PROTOCOL SETUP
RESET MENU SETUP
PTZ Upward angle limit setting:
In order to obtain a larger viewing angle range,
the machine factory set upward angle.
If you care about the camera in the ceiling spaces see the shell,
the user can set the upper limit position.
Turnning PTZ to the position you want to set,
Enter OSD and press IRIS-OPEN will set this position to Upper limit。
Choose this menu and press IRIS-OPEN key will clear Tilt limit Setup
2-4 PAN TILT LINIT SPEED
PTZ speed Settign,63 is the fastest
2-5 ZOOM LIMIT SPEED
The ZOOM pulled speed Setup, 63 is the fastest
1-8 EXIT MENU
Exit Menu
MAIN MENU
2-2 TILT LIMIT SET SET
2-3 TILT LIMIT RESET SET
1-7 RETURN
Return to the previous menu
3.PATTERN SETUP
EXIT MENU
The PTZ preset mode Setting
NORMAL: Preset back to the photoelectric switch
positions in order to get a more accurate location,
and then return to the preset point.
EXACT: Tune the preset point back to the two
photoelectric switch position to obtain
a more accurate position and then back to the preset point.
FAST: To preset point fast during Adjusting the preset
1.FOCUS SETUP
1-5 AUTO CHECK TIME
Automatic check focus interval
PAN TILT SETUP
CAMERA SETUP
FOCUS SETUP
PAN TILT SETUP
PATTERN SETUP
PROTOCOL SETUP
RESET MENU SETUP
RETURN
EXIT MENU
EXIT MENU
1-3 PRESET LOAD ZOOM ON/OFF
Loaded ZOOM position when adjusting Preset
1-4 AUTO CHECK FOCUS OFF/ON
Automatically check focus every once in a while
The time interval can be set
EXIT MENU
PROTOCOL:
ADDRESS:
BAUDRATE:
PAN TILT PRESER
NORMAL
TILT LIMIT SET
SET
TILT LIMIT RESET
SET
PAN TILT LIMIT SPEED
063
ZOOM LIMIT SPEED
063
CAMERA SETUP
FOCUS SETUP
PAN TILT SETUP
PATTERN SETUP
PROTOCOL SETUP
RESET MENU SETUP
2-1 PAN TILT PRESET
MAIN MENU
The dome camera cable include
power, RS-485, video
out.
MAIN MENU
(2)Change the PTZ camera's 485 communication settings:
CAMERA SETUP
FOCUS SETUP
PAN TILT SETUP
PATTERN SETUP
PROTOCOL SETUP
RESET MENU SETUP
Connect Interface
2.PAN TILT SETUP
MAIN MENU
1)Press ''IRIS open'',and enter into OSD menu as following
picture shown
2
Pan Tilt Zoom Dome Camera OSD Manual
PELCO-D
001
9600BPS
RETURN
EXIT MENU
EXIT MENU
When you are in RANDOM ADDRESS
press IRIS-OPEN key
Will create a random address,
such as the right address 026
PAN TILT SETUP
PROTOCOL:
ADDRESS:
BAUDRATE:
PELCO-D
001
9600BPS
RANDOM ADDRESS
EXIT MENU
DVR:PELCO-D 255 9600
PAN TILT SETUP
PROTOCOL:
ADDRESS:
BAUDRATE:
PELCO-D
026
9600BPS
RANDOM ADDRESS
EXIT MENU
5.RESET MENU SETUP
RS-485 interface is two cable
Purple color is 485 A/+
Gray color is 485 B/-
±Úʽ°²×°·½Ê½
Video out interface
The dome camera can be setup address baud rate
and protocol from PTZ Controller.
MAIN MENU
CAMERA SETUP
FOCUS SETUP
PAN TILT SETUP
PATTERN SETUP
PROTOCOL SETUP
RESET MENU SETUP
RESET MENU SETUP
FACTORY DEFAULT SET
SET
SET
RETURN
EXIT MENU
EXIT MENU
5-1 RESET MENU SETUP SET
Recovery PTZ menu settings to the factory default
5-2 FACTORY DEFAULT SET SET
Recovery PTZ preset positions, 485 set to to the factory default
4-1 PROTOL: PELCO-D/P
PROTOCOL you can choose PELCO-D or PELCO-P
4-2 ADDRESS:
Adress setuo: 1~255
4-3 BAUDRATE:
4 Baud rate choose: 1200BPS/2400BPS/4800BPS/9600BPS
Has this feature the user do not set address before install PTZ,
255 address after installation can also be used to control and select
RANDOM ADDRESS to creat random addresses,
in this way, multiple head connected with the DVR
and 485 will have a different address,
And then use the new address can be controlled separately.
1
Installation
ESC
DISP
RUN
485 B/-
S E T UP
P R S E T P A T T E R N D ELETE
HOME
C
A
- /--
CAM
SHOT
AUTO
S P EED
485 A/+
B
FOCUS+
OPEN
FOCUS-
CLOSE
ZOOM+
IRIS
S1
ZO O M -
S2
S3
F1
F2
F3
F4
P1
P2
P3
P4
P5
P6
P7
P8
S4
Connect 485 port to PTZ dome 485 cable,
Connect DC12V to power port.
After power on, controller will display A001
or P001
A means address of command, 001 is
address number.
P means preset point, 001 is preset number.
2
How to control PTZ
If you want set a preset number, you need press
PRESET button 3 seconds, and controller will display
SET- , At this time you can input a number(also at this
time, you can press HOME A B key set point home
and limited left right point),If you need input a
number more than 10,you need press button -/-at first.After input number, need press ENTER key
confirm it. When you press SETUP key at this mode,
Will send setup command to camera, Setcamera
address and protocol same as PTZ Controller at this
time. Press DISP key at this time will setup alarm host
address( only for alarm model )
When you press DELETE button for 3 second,
Screen display
, means in preset clean
mode, If you want clean a preset number, you
need press DELETE button 3 seconds, and controller
will display CLR- , At this time you can input a
number(also at this time, you can press HOME A B
key clean point home and limited left right point),
If you need input a number more than 10,
you need press button -/-- at first. After input number,
need press ENTER key confirm it.
3
When you press PATTERN button first time , Screen display
, means goto pattern
track setup mode,At this mode, Input what preset point you want go, you can input 16 point
at here,For example: If you want camera run like preset 6,preset 2, preset 3, preset 8,You
can go to preset 6, preset 2, preset 3, preset 8, camera will record this point to track.At this
time, you can set speed from one point to next point, and stay time from one point to next
point.In default number, speed from one point to next point is fast speed 63, stay time from
one point to next point is 8 second(include move time from one point to next point).Press
PATTERN secound time, screen display
,End set tour track mode.
How to start pattern tour track cruise:
(1) Press RUN button, Screen display
, Strat PATTERN curise, Press RUN again stop
it. If you not stop pattern cruise, it will continue cruise after another power on and never stop.
(2) PRESET point 247 commandcan start run PATTERN, Enable Auto Start PATTERN cruise
(3)Send Pelco RUN command one time start auto tour, Send RUN command again stop it,
If you start auto track cruise, power down and power on can not change it. you can use 4 ways
stop it.
(1) Press RUN button at cruise mode, Screen display
, Stop PATTERN curise, If you
not stop pattern cruise, it will continue cruise never stop.
(2) PRESET point 248 commandcan stop run PATTERN, Disable Auto Start PATTERN cruise.
(3) Send Pelco RUN command stop it at cruise mode.
(4)Use PRESET point 240 command can set all configuration to default,
On default data, Auto Start PATTERN curise mode is disable.
When you press CAM button, Screen display like
, First A means address,Another 3 digital
When you press DISP button, Screen display
001 means address number is 1, You can press
, means software version is version 18 .
number key input digital after A , if number big than 9,
you need press -/-- to input number more than 9.
When you press DISP button again, Screen display
Press button C can delete last input number,When
, means protocol setup at this address .
you set address 1 isPelco-D protocol, this is Pelco-D
First letter is protocol type, If display d , means
ID address, means Pelco-D ID address is 1,When you
Pelco-D, If display P, means Pelco-P, last two digital
set address 1 is Pelco-P protocol, this number plus 1
12 means 1200bps,
means baud rate,
is Pelco-P ID address, means Pelco-P ID address is 2
24 means 2400bps, 48 means 4800bps,
(Some unit use protocol address, some use ID address)
96 means 9600bps.
Like if protocol setup to Pelco-P 9600bps,
When you press SHUT button, Screen display like
screen will display
at this time.
, First P means preset point, Another 3
digital 002 means address number is 2, You can
Press DISP button third times, Screen display
input preset number like address number. After
, means alarm host addressis 128, this is only
you input preset number,Camera will got this preset
for PTZ Controller (with alarm in and alarm out model).
point you selected.
When you press SPEED button, Screen display like
, First S means speed number, Another 2
digital 63 means speed number is setup to 63,
You can input preset number like address number.
Speed number is pan tilt speed,From 1 to 63, 63 is
fast speed.
When you press HOME button, Screen display
, means home point of preset, you
can use PRESET, DELELT set or clean this point.
When you press A or B button, Screen display
or
, means
limited-A or limited-B point of preset, It will use
as left or right limited at auto mode.You can use
PRESET, DELELT set or clean this point.
When you press PRESET button for 3 second,
Screen display
, means in preset mode,
How to start pattern tour tracking cruise
4
Function list
ESC
DIS P
RUN
S E T UP
PR S ET P A T TER N DE L E TE
HOM E
A
Default protocol:
Protocol:Pelco-D
Bitrate:2400bps
B
UP DOWN LEFT RIGHT
button is controls the
movement of pan and
tilt cameras
C
ENTER button is a stop
key at movement,
And it also is a confirm
key when input a number
Numeric key 0 - 9 is
number input button
C button is a backspace
for number input
-/-- is a button for change
When you press SETUP button, Screen display
plus10
mode and normal
like
or
,PTZ Controller go to
mode,
in
normal mode only
setup protocol mode, Press left right key modify protocol,
can
input
number 0 - 9,
when you press left or right key, you can see d or P
in
plus10
mode
can input
change at screen.Press up down key can modify baud
number
0
255
rate, you can see 12 / 24 / 48 / 96 change at screen.
Press ENTER key can save this configuration and return At any mode, if you press ESC button,
system will go to address input mode.
to normal mode.
You can setup different protocol for different
address, For example you can setup address 1
is Pleco-D 2400bps, address 2 can be Pelco-P
9600bps.When you at setup mode, you press C
button, screen will black for 10 second, PTZ Controller
will clean all protocol setup and setup all address
to Pelco-D 2400bps.
-/--
S H OT
C AM
SP E E D
A U TO
FOC U S +
OPEN
F OCU S -
CL O SE
ZOO M +
I R IS
Z O OM-
S1
S2
S3
F1
F2
F3
F4
P1
P2
P3
P4
P5
P6
P7
P8
S4
Press CAM button go to address
input mode,Press SHOT button go to preset
selecting mode.It is a command of
selecting preset of your target camera,
HOME A B and P1 - P8 is shortcut key
for preset point
PRESET is set preset point
DELECT is clear preset point
This two key need press more than 3
seconds to active it.
AUTO is go to auto cruise mode,
Another auto mode is go to
preset point 99
SPEED is set speed of movement
S1 -S4 is shortcut key for speed
S1 = 8, S2 = 40, S3 = 51, S4 = 63
FOCUS + focus far , FOCUS - focus near
Iris open , CLOSE Iris close
OPEN
ZOOM + zoom wide , ZOOM - zoom tele
PATTERN start / stop learn pattern,
RUN a pattern, DISP display software
version, F1 - F4 user define shortcut key,
Press SHOT go to preset point 240,Screen
display 0--- , this time press1 - 4, if you
press 1 means setup F1. After this screen
will display 1--- to 4--- , this time press
number 0 to 255,means command data
of protocol,After finish this, you press
F1 to F4,PTZ Controller will send this
command you set.
SETUP set protocol and baud rate
Press SETUP key for 3 second,
Press UP DOWN key select protocol,
Press LEFT RIGHT key select baud rate.
F1 - F4 user define shortcut key,Press SHOT
go to preset point 240,Screen display 0--- ,
this time press1 - 4, if you press 1 means
setup F1. After this screen will display 1--- to
4--- , this time press number 0 to 255,means
command data of protocol,After finish this,
you press F1 to F4,PTZ Controller will send
this command youset. SETUP set protocol
and baud rate Press SETUP key for 3 second,
Press UP DOWN key select protocol,
Press LEFT RIGHT key select baud rate.


© Copyright 2026