
User’s Manual version 3.5.0 !
!
User’s Manual
version 3.5.0
!
TheRecipeManager™ is © TheDataManager, Inc. 2002/2011
All Rights Reserved
version 3.5.0 May 2011
Any references to any other companyʼs products, names of products or representations of any company logo, recipes
or images of food items are copyrighted by their respective owners.
TheRecipeManager
!
TheRecipeManager Overview..................................................1
What’s New in TRM v3.5.0......................................................2
Browse Recipes.....................................................................2
Main Directory Window - Multiple Views.........................................4
Recipe.................................................................................6
Recipe Tab..........................................................................................6
Ingredients Tab..................................................................................7
Staging Tab.........................................................................................8
Variations Tab.....................................................................................9
Nutrition Tab.......................................................................................9
Photo Tab..........................................................................................10
Instructions Tab...............................................................................10
Background/Related Tab..................................................................10
Serves/Time Tab...............................................................................11
Classification Tab.............................................................................12
Recipes menu....................................................................................13
Modifying Multiple Recipes.............................................................15
Advanced Search..................................................................16
Meals.................................................................................18
Meals Menu.......................................................................................19
Schedules ...........................................................................20
Schedules Menu................................................................................21
Browse Photos.....................................................................23
Cooking View......................................................................25
Cookbooks..........................................................................26
Cookbook Library.............................................................................26
Cookbook Info...................................................................................26
Creating A New Cookbook...............................................................28
Working With Multiple Cookbooks..................................................28
Synchronize Cookbooks...................................................................29
Sharing Cookbooks...........................................................................29
Shopping List......................................................................32
©TheDataManager, Inc. 2002/2010
Version 3.5.0
Page ii
TheRecipeManager
!
Recipe Items.....................................................................................32
Pantry Items......................................................................................32
Add a Store - Creating a Store Layout..............................................33
Creating a Shopping List..................................................................33
Combining Ingredients.....................................................................34
Remove A Shopping List...................................................................34
Sharing Shopping Lists.....................................................................34
Shopping List Menu..........................................................................35
Kitchen Helpers...................................................................37
Overview...........................................................................................37
Equivalents........................................................................................37
Glossary............................................................................................37
Substitutions.....................................................................................37
Temperatures....................................................................................38
Tips....................................................................................................38
Quick Conversion Calculator...........................................................38
Nutrition Lookup.................................................................39
Interactively Assigning Nutrition To A Recipe................................40
Lifestyle Tracking................................................................42
Overview...........................................................................................42
Blood Sugar.......................................................................................43
Blood Pressure..................................................................................43
Body Weight......................................................................................43
Food Intake........................................................................................43
Exercise.............................................................................................45
Modifying Graphs.............................................................................45
Administration....................................................................48
Overview...........................................................................................48
Categories..........................................................................................48
Types.................................................................................................48
Origins...............................................................................................48
Classifications...................................................................................48
©TheDataManager, Inc. 2002/2011
Version 3.5.0
Page iii
TheRecipeManager
!
Measures...........................................................................................49
Store Sections....................................................................................49
Glossary / Substitutions / Tips.........................................................50
Autofill Shortcuts..............................................................................50
Individuals........................................................................................51
Activities...........................................................................................51
(Other) Menus.....................................................................52
File Menu..........................................................................................52
Export Recipe..................................................................................52
Export Meal Recipes .......................................................................52
Export Meal Menu..........................................................................53
Export Shopping List.......................................................................53
Import..............................................................................................53
Create Import Template..................................................................54
Back Up My Data............................................................................54
Revert to Backup.............................................................................54
Print Recipe.....................................................................................55
Print Meal........................................................................................55
Print Meal Schedule........................................................................55
Print Shopping List..........................................................................55
Print Tracking Information.............................................................55
Print Cookbook Contents ................................................................56
Edit Menu..........................................................................................56
View Menu........................................................................................56
Window Menu...................................................................................57
Help Menu.........................................................................................57
TheRecipeManager Preferences..............................................58
General..............................................................................62
Where is my data?.............................................................................62
User Preferences...............................................................................62
Future version(s)...............................................................................62
Web site/contact us..............................................................63
©TheDataManager, Inc. 2002/2011
Version 3.5.0
Page iii
TheRecipeManager
!
TheRecipeManager Overview
Have you ever said something like this: “Let’s have that shrimp and chicken recipe that sounded
so good when we first saw it, do you remember which book/web-site has it?”
There are a lot of recipe/cookbooks out there - there are a lot of recipe software applications
and, literally, thousands of web sites that have recipes for everything. So, why bother? Though
there is now more recipe/food/kitchen information available than ever, most all of it is stuck in
the trappings of the old fashioned cookbook - you still have to ‘flip paper pages’, can’t combine
multiple recipes into one meal and, unless you have a very good memory, can seldom remember
which book had what you might want. One of the goals of TheRecipeManager was to create a
recipe and meal management software ‘book’ that allows you to access an unlimited number of
recipes, add your own, share recipes with others, help manage your meal planning, as well as assist with your grocery shopping needs. The most important goal? - allowing you to find what you
want quickly and effortlessly.
TheRecipeManager has been designed to give the user as much freedom as possible in recipe input, but the ability to find what you want quickly is something you will never find in a cookbook.
You can locate recipes based on almost any criteria (or combination of criteria) you can imagine.
We believe we have done some things you will not find in other recipe management type of software - we have used an industrial strength database tool to create TheRecipeManager. You have
a lot of flexibility today, much more will be added over time - there are many exciting things
planned for the future. One of our goals is to provide you an application with a solid base that
can be built on for years to come. Today TheRecipeManager runs on Mac OS X 10.4 through
10.6, and on Windows XP, Vista and Windows 7. We continue to test against new releases and
update to keep up with currently shipping operating systems.
With this documentation we will try to give an overview of all the various parts of the TheRecipeManager. The ‘Browse Recipes’ menu item in the View menu - most everything you will do is
accessible from this one window - we will also cover Cooking View, Kitchen Helpers, Shopping
List, Nutrition Lookup, Lifestyle Tracking, Administration and Preferences. There is a FAQ (Frequently Asked Questions) system that is built in, accessible from the ‘Help’ menu and available at
any time you are using TheRecipeManager.
We provide a recipe management system - we do provide recipes, but you should look at
TheRecipeManager (TRM) as a tool to manage all your own recipes, regardless of where you
find them, rather than a piece of software that provides you with a fixed set of recipes. You can,
but you will not be using TheRecipeManager power and flexibility that is available to you.
Let’s take a look at your newest kitchen tool...
©TheDataManager, Inc. 2002/2011
Version 3.5.0 Page 1 of 63
TheRecipeManager
!
What’s New in TRM v3.5.0
A lot. Nearly every window and function has been touched for this update. Some things got a
minor tweak, some things had a lot of work done and some things were completely rewritten.
There are some exciting brand new features as well. The ReadMe file that came with your installation will give you a list of the significant changes. For those of you who have been using TRM
for a while, please read that ReadMe file and, at the very least, closely review the Table of Contents in this User Guide. A quick scan of the pages wouldn’t hurt either.
At this point, let’s jump into a complete overview of the TRM app for those who are new to it...
Browse Recipes
TheRecipeManager currently opens to
the main window, the recipe browser. You
can also open the browser from the View
menu that is at the top of the screen, or
by using the keyboard equivalent, command+B. Most all you will need or want to
do can be done from this one window.
Let’s do a quick review of the various
parts.
The upper left corner of the window
shows a simple drop-down list that displays 2 sets of numbers (e.g. 287 of 287) the first number represents the number of
recipes currently being displayed, the second number represents the total number of recipes in
your open cookbooks. In our case, we are currently showing all there are in currently open cookbooks. If you click on the drop-down list you will see that the last
choice is ‘Show All Recipes’ - if this is grayed out, all recipes are
showing. If fewer than all recipes are showing, selecting that line will
force all recipes in all open cookbooks to be displayed. Choosing to
show a single category, type or origin will reduce the list to show
only matching recipes. As illustrated, choosing Dessert would show
you only those recipes whose category is Dessert. See the Cookbooks
section below to learn what Show Cookbooks will do. Most other
items or descriptions on this main window will look familiar to you. The intent was that you already know how to cook, our job is to provide the recipes (and any help you may need) as quickly
and as easily as possible.
©TheDataManager, Inc. 2002/2011
Version 3.5.0 Page 2 of 63
TheRecipeManager
!
As you click on any line in the browser list,
information about that recipe is then displayed on the right portion of the window.
You can scroll up and down the list of recipes to see all that are listed, but you can also
scroll this list left and right - you can also
increase the window size to expose more
columns without scrolling. As you scroll you
will see additional general information
about each recipe. You can click on each
column heading in the Recipe Browser to sort by that column. Columns can be sorted either top
to bottom, or bottom to top (ascending or descending) - each click on a column heading will sort
it opposite of what it was. The currently sorted column is highlighted. Default sorting is by recipe
name, A to Z. Advanced searching is covered in a later section.
In the upper right corner of the window you will see the ‘simple search’ box. This will give you a
few quick ways to find recipes based on one or another basic criteria (Name, Source, Category,
Type, Origin). Click and hold the mouse down on the
magnifying glass (with the little ‘down’ triangle), select
the type of quick search and start typing in the box to
the right. Text to the left will tell you what you are
searching by. The number of recipes displayed will
immediately start to change as you type. When you are
finished typing, the recipes displayed represent all that matched the criteria you gave. If there are
none, there were no recipes that matched your input. Each search you perform here will search
all open cookbooks, not just the displayed list.
Along the bottom of the Browse Recipes window there are a few other controls you need to be
familiar with. Just below the Recipes list, there is a button with a ‘Show Meals’ tools tip (hover
your cursor over an icon to view its tooltip). When selected, this will shorten the recipe list and
display a list of meals that are currently in TheRecipeManager. This icon displays an up arrow
when the meals list is closed and, once selected, the button tooltip will change to ‘Hide Meals’
and the icon will display a down arrow. Similarly, the ‘Show Books’ button will show and hide a
list of cookbooks. To view all of your cookbooks, click on the ‘Enter Library’ button located just
to the right of the Show Books button - this will show you all the cookbooks you currently have
installed. We’ll cover the Library, and the additional information you will find for each cookbook,
later in this Users Guide.
©TheDataManager, Inc. 2002/2011
Version 3.5.0 Page 3 of 63
TheRecipeManager
!
To the right of the Enter Library button, there is a magnifying glass over a recipe, this will give
you a Cooking View. The ‘Cooking View’ button will show you an enlarged view of the ingredients and instructions so you can see them from a distance. This button/view is covered in a later
section. To the far right you will see a grouping of 3 buttons - there is a button with a plus sign
(+) on it, one with a pencil and a red minus sign. If you want to create a New (insert/add) recipe,
click on the green plus button. This same button will also allow you to add a new meal or schedule item, but only when the ‘Meals’ button or Schedules button is selected in the group of four
buttons just to the left of the add button grouping. The button with the small pencil on it is the
Modify (or edit) control, the button with the minus (-) sign is the Remove (or delete) control.
There are menu commands and short-cut keys for each of these buttons. These last two buttons
also work for Meals and Schedules, the same as the New button.
That grouping of 4 buttons we just referenced are labeled as ‘Recipe’, ‘Advanced Search’, ‘Meals’
and ‘Schedules’. The currently highlighted button has a light gray fill around it to help it stand
out from the other three. As you select a different button, the entire right portion of the main
window changes to display your selection. We’ll cover these four sections one at a time.
Main Directory Window - Multiple Views
Several people have asked us to provide a
navigation window that could remain open at
all times - and be located ‘out of the way’
most of the time. Some requests were very
clear, others not so clear on size. So, we did
our best to accommodate everyone - one window can be any of 3 different sizes and will
stay wherever you put it. Once closed, the
Main Directory window will always reopen
where it was when you last closed it.
©TheDataManager, Inc. 2002/2011
Version 3.5.0 Page 4 of 63
TheRecipeManager
!
You can see from the larger image here that
you can choose to use either the Standard
view, Tall or Wide. Right-clicking (controlclicking) on the Main Directory window will
show you the options to select from.
If you don’t want to use this window, just close it before you quit TheRecipeManager.
At each launch, TRM remembers not only window locations, but, additionally, which
of the main windows were open when you last exited the program. Accordingly, if you
close one of the main windows, then quit, that window will not automatically open the
next time. You can always go back to the View menu and select Main Directory if you
want to open that window again.
Yes, it’s a small thing, but it was important to some - and all of us have gotten used to using it
very quickly and have found it very useful.
©TheDataManager, Inc. 2002/2011
Version 3.5.0 Page 5 of 63
TheRecipeManager
!
Recipe
As you look around this portion of the window you will see tabs that will show even more information about a recipe. If there seems to be more information than you are used to seeing - you’re
right, there is a lot more. If all you need are ingredients and instructions, they are there - but, if
you want, there is the ability to classify recipes any way you prefer, to adjust for more or fewer
servings, you can include staging information and much more. Let’s take a quick run through the
various parts.
Note: Not all recipes have all possible information included. So, if you see empty fields of information it was just
not available to us. Missing items will mostly be pictures and nutritional information. For that matter, most recipes
available on the internet or in cooking magazines don’t have that information either.
Recipe Tab
The recipe tab contains the simple information
that we all tend to forget with time. How many
great recipes have we all lost over the years - and
wouldn’t it be nice to be able to find something
even if all we could remember was that we found it
in the LA Times. The first image here shows the
recipe tab in its normal ‘browse’ mode, the second
one shows the same information in the ‘Modify’ (or
‘New’) mode. Note the selections for origin, category and type all come from drop down lists - you
don’t even have to type them in! You can use the
Administration window to add more of your own or
modify any existing ones.
Note the ‘Website’ field. If you fill in a website address for a recipe, a button appears beside it, and
clicking that button will launch your browser and
take you to that website. (The website address must begin with www. or http://) This button is
©TheDataManager, Inc. 2002/2011
Version 3.5.0 Page 6 of 63
TheRecipeManager
!
only active while browsing, not while inserting or
modifying a recipe.
Ingredients Tab
Now for some real fun. Entering ingredients (as
well as changing them) is extremely easy. Three
columns of data, a quantity, a measure, then the
ingredient itself. The measure is the smart bit - as
you begin typing the measure it will ‘auto-complete’ what you type and it will automatically save
new measurements for use in the future.
Ingredient item is even better. As you type in an
ingredient, TheRecipeManager will auto-complete
the words you type, using the recipe ingredients
already on file as its dictionary. (So if you delete all
recipes, you won’t see much auto-completion until
you accumulate more recipes in your cookbook(s).)
The Preferences window lets you choose to autofill
by word or by phrase, or to turn the feature off we will cover more on the Preferences window later,
where you will also find more tips on using this feature. And, if those weren’t enough for you, you
can also context click on any ingredient line (but only when
you are NOT doing an Insert or Modify) and select ‘Create
Ingredient Shortcut…’ - then simply follow the directions. Alternately, you can also highlight an ingredient line, open the
Recipes menu and select Create Ingredient Shortcut... to do
the same thing.
Note: You can have an unlimited number of ingredient lines. As you enter ingredients - typing in a quantity, measure, then ingredient item - you automatically add a new line if you simply press the Tab key. If the line you are
leaving has a blank Item column you will automatically be moved from the ingredient list to the next available entry
field.
©TheDataManager, Inc. 2002/2011
Version 3.5.0 Page 7 of 63
TheRecipeManager
!
While you are in the browse mode you can select
one or more ingredient lines and, by right-clicking
(control+click, also known as a “context click”) on
one of those lines you will be able to copy those
lines to the shopping list.
While in the modify/new mode, if you right-click
(control+click) on an ingredient line you have a different set of options - including inserting blank lines or moving an existing line up or down. This
is helpful if you want lines in order of ingredient usage, but you forgot to add a line in the proper
order. You can insert as many lines as you need - if you remove the description from any line
(leave it blank) that line will be removed when you
‘Save’ your changes. To add a ‘separator’ line between ingredient sections (say, crust and filling) - we
suggest that you add a word with visual marks on
either side of it, e.g. ===== Filling =====. Any
lines that contain 5 dashes, equals signs, plus signs,
etc., will not be transferred to the shopping list.
More on Shopping List functions later.
Staging Tab
Staging is extremely good for those who want to
work ahead as much as possible - or are trying to
manage a meal so everything arrives at the table at
the right time. Three pieces of information
needed: 1) a number, 2) select the amount of time
ahead from a list - if you don’t find what you want
in the list you can enter your own simply by typing,
and, 3) a description of what needs to be/can be
done. You can add as many lines as you would like and can easily modify or remove any lines at
any time. While adding a new recipe or modifying an existing one, leave the description field
blank to remove an existing line - this will happen when you ‘Save’ your changes. You can see
there is also a Staging Notes field - you can summarize why the staging steps are there or use it
for any other purpose you want. The two buttons at the bottom allow to show or hide (open/
close) that portion of the window the buttons relate to. You cannot hide both at the same time.
Note: You can have an unlimited number of staging lines. As you enter staging information - typing in a quantity,
selecting/typing in a period, then description - you automatically add a new line if you simply press the Tab key. If
©TheDataManager, Inc. 2002/2011
Version 3.5.0 Page 8 of 63
TheRecipeManager
!
the line you are leaving has a blank Description column you will automatically be moved from the staging list to the
next available entry field.
Variations Tab
Variations are used for exactly what the name implies - variations to the base recipe. As you come
across variations to your recipes that you like, include them here - you’ll still have your original recipe but with notes on those special touches that
make a difference. Also, you can see you have the
ability to show any special equipment or tools you
may need to create this recipe, and, same as the Staging tab, you have a notes field that can help
you tie together the special equipment with the variations - it is provided for you to use for whatever purpose best suits your need. The three buttons at the bottom allow you to show or hide
(open/close) the portion of the window each button relates to. You cannot hide all three at the
same time though.
Nutrition Tab
Nutritional information is not always easy to find
but can be extremely helpful to those on a diet, and
to those who must watch what they eat for medical
reasons or are just flat careful of what they eat. We
do not calculate nutritional values automatically for
recipes - there are simply too many variables to be
able to produce reliable results. We will be discussing nutritional information later.
There are usually two parts to the Nutrition tab.
USDA Information is what we are all used to seeing
on food labels - this is also where you find access to
the current USDA Nutrient database. How to use
this information is discussed in more detail in the
chapter titled ‘Nutrition Lookup’. The other part,
Food Exchanges, shows you that information. Food
Exchanges values are not created by the program
and can be supplied by you or your source for that information.
©TheDataManager, Inc. 2002/2011
Version 3.5.0 Page 9 of 63
TheRecipeManager
!
Note: See the chapter titled TheRecipeManager Preferences to learn how to hide the Food Exchanges tab if you
don’t use exchanges.
Photo Tab
You can take a digital image of your creation and
paste it here. Drag and drop from your desktop or
directly from iPhoto - be sure you are either inserting a New recipe or doing a Modify to a recipe in
order for the image to be accepted into a cookbook.
Note that your image will be scaled to fit the available area on the Photo Tab to display it. The aspect
ratio is preserved to ensure the image is not distorted. If you want to see the full size image, simply click on the magnifying glass with the plus (+) or double click on the image - a new window
will open that displays the entire image. If the image will not fit on your screen, scroll bars will
automatically be added. High quality just isn’t needed (above approx. 100k or larger), but can be
used - they just take a lot of storage space and, if you flip through recipes fast enough you may
notice a delay from time to time as large images load. When printed, images, while still retaining
proper perspective, are scaled to fit in a 4-inch square.
You can also drop a movie (.mov, .mpg, .avi or .mp4) file onto the Photo Tab. The movie will play
in a separate window, and a movie button will appear opposite the magnifying glass button. After
adding a movie, clicking that button while in the browse mode will replay the movie, and clicking
it while in the modify mode will let you remove it. The movie file is copied into the TRMovies
folder when you add it, and if you click to remove it, you’re given the choice of deleting that copy
of the movie. The original movie is unaffected by this. The TRMovies folder is located in your
~/Documents/TheRecipeManager User Data folder on OS X, or in the TRM folder inside
Program Files on Windows (see Where is my data? below).
Instructions Tab
The instructions are just what they sound like what to do and when to do it. Type in all the text
you want, you can have as many as 10,000 characters. If you need more instructions than that....
well, I don’t want to have to make that recipe!
Background/Related Tab
This is also a free-form text field - it’s for recording a little of the history, if you know it, for this
recipe. History can be as complex as describing how the recipe came across the Atlantic with Co©TheDataManager, Inc. 2002/2011
Version 3.5.0 Page 10 of 63
TheRecipeManager
!
lumbus (either direction that is), or, maybe, how
many times you tried what different ingredients
until you got ‘... just that taste ...’ you were looking
for. It is amazing how many people have been able
to add to their family tree by gleaning through
many of the old family recipe books. This would
be a great place to put some of your food history
and know it will be retained for years. The background text shown here is part of a recipe from
the UK - this is really background that someone did a lot of digging for.
Related recipes are those that you may want to use with the currently shown recipe. Think of this
as looking at a recipe for a cake, with 3 ‘related’ recipes that are each a different frosting. A
double-click on any recipe will immediately jump
you to that recipe for your review. If you want to
return to the original recipe, just double-click on
the Related recipe shown in the list that matches
the name of the recipe you were first looking at. To
Relate one recipe to another, select Modify Recipe
from the Recipe menu then simply drag a recipe
from the recipe browser list onto the Related recipe list. When you let go of the mouse button,
and select Save, those two recipes will be related (linked) to each other. You can Relate as many
recipes to each other as you would like.
Serves/Time Tab
The short description - how long does it take. Note
that total time will seldom be simply adding prep
and cooking time - some prep work will be done
after cooking has started. Serving Size and Yields
were added in v2.2.0 and will be helpful if you
want to scale recipes based on portion size.
If the Serves value is not empty in the Serves/
Time tab, a menu will appear when you modify
the recipe, allowing you to scale the ingredients for
a different number of servings. Ingredient
quantities appear in red when a recipe is
displaying scaled values. If a recipe is scaled, the
scaled quantities are used when you send
©TheDataManager, Inc. 2002/2011
Version 3.5.0 Page 11 of 63
TheRecipeManager
!
ingredients to the shopping list. We allow scaling up to 4 times and down to 1/4 the original as
well as ‘Other’, which allows you to enter any value you wish. Depending on how much you wish
to scale, some ingredient quantities will vary a bit for rounding purposes of some quantities - you
may also see some fractions.
Classification Tab
Classifications - another nice feature. This area will
allow you to decide how you would classify a given
recipe. Don’t find the classification you want? Go
to the Administration area (more on that later) and
add as many as you want. The ability to skip
through recipes to allow you to find only ‘Favorite’
recipes is a tremendous time saver as you are trying
to decide what you want to create tonight! As these two images show, when you are in the browse
mode, the only classifications displayed for a recipe are those that have been checked. During Inserting or Modifying a recipe the entire of list of classifications is available to you for additional
checking as you may require.
It is really important that you understand what is
happening with the classification function of
TheRecipeManager. Classifications can be anything you want them to be, e.g.: Favorites, Low
Salt, Holiday, Quick Meal, Peggy’s Favorites, etc.).
You can add to this list, change words or spelling,
or remove any you don’t want or don’t care for.
TheRecipeManager allows you to search on almost
any criteria, as discussed and shown in the Advanced Search area. This is one of those places
that allow the use of multiple ‘tags’ for you to really zero in on what you want. Another example
(using classifications only) would allow you to find all recipes classified as Roberta’s Favorites,
High Protein, Fish, and Barbecue. You’d be surprised how fast you can find things that way. And
it’s under your control, not ours.
Also, as you can see, this is where you can provide you own settings for Ratings (how well you like
this particular recipe on a scale of 1 to 5 chefs). The Seasonality (winter, spring, summer or fall)
that this recipe is best suited for - some recipes are better suited for different weather conditions
(or they feel like it anyway) - you can select as many or as few of these as you’d like. Finally, you
can assign the Difficulty of preparing each recipe - you can select only one of these on a scale of
Easy to Advanced. Yes, you can find recipes, in the Advanced Search view, by any or all of these
©TheDataManager, Inc. 2002/2011
Version 3.5.0 Page 12 of 63
TheRecipeManager
!
settings as well. Makes it easy to find something for this season, that’s easy to make, that I’ve had
before and really liked.
Recipes menu
The only active Recipes menu line while the Advanced Search,
Meals or Schedules displays are to the front is New Recipe. Modify Recipe and Remove Recipe are active only while the Recipe
display is foremost. Those commands do exactly what they sound
like - they let you create, modify or remove a recipe. If you want
to make a different recipe that is very close to an existing recipe,
just select the ‘Duplicate Recipe’ menu item. It will duplicate everything and add the word ‘copy’ to the end of the recipe name.
You can then modify that copy to fit your needs while still retaining your original in an unaltered state.
The Copy Recipe and Move Recipe commands will help you organize your recipes into cookbooks. The difference between these two commands is that Copy will leave the original recipe(s)
in the original cookbook, while Move will delete the originals after copying the recipes to the
other cookbook. The New Cookbook command is similar to the Copy Recipe command. It
prompts you for a cookbook title etc., creates the new cookbook, and then copies the selected
recipe(s) into the new book, without deleting the originals.
The View Read-Only Copy command opens a copy of the current recipe in a separate read-only
window. When you’re preparing a meal, it can be handy to have ready access to several recipes at
once, so you can open each of them in separate windows and arrange them for ease of use. The
commands for printing, exporting and cooking view in the File and View menus act on the recipe
in the topmost window, whether it’s the Recipe Browser or one of these Read-Only windows.
Send Selected Ingredients to Shopping List and Send All Ingredients to Shopping List - will also
do what you would expect - all currently selected ingredients for the currently selected recipe will
be copied to the shopping list or all ingredients for the currently selected recipe(s) will be copied
to your shopping list.
©TheDataManager, Inc. 2002/2011
Version 3.5.0 Page 13 of 63
TheRecipeManager
!
You can even assign your own shortcuts for
recipe ingredients autofill use. Highlight any
ingredient line you want to create a shortcut for
and select Create Ingredient Shortcut... from
the Recipes menu. You will be presented with a
small window with the ingredient item description already filled in. All you need to do is decide what you would like to use for your shortcut. In the example here, you can see that, if
saved, when you type in ‘cbg’ in a new ingredient line it will immediately be replaced with
‘chicken bouillon granules’. You can also create, modify and remove these shortcuts at the Administration window. Select the ‘Autofill Shortcuts’ icon to review all shortcuts you have added.
Another nice feature, select any recipe in the list then context click on it and select Graph Nutrition for Recipe. If the selected recipe has nutritional values assigned to it, a graph of the nutrient
values will be displayed. It is critical that you understand how this works - a recipe must have
ALL of its nutritional values assigned for this to be of any value to you - incomplete information
may allow you to make bad decisions. Very few recipes come with nutritional values pre-assigned
- and we are neither doctors, dietitians nor food scientists and we do not guarantee the nutritional
values of any recipe - please be careful where you place your trust.
The last Recipe menu item, Create Food Intake Activity for Recipe... is a great time saver as well.
If you are using the Lifestyle Tracking portion of TheRecipeManager you will want to know
about this wonderful little shortcut. Select any recipe you like, context click on it (or select the
Recipe menu item) and create a Food Intake Activity. This will take the nutritional value of one
serving and transfer those numbers and food descriptions to Food Intake - from there you can
track what you have eaten over time and what the various nutritional values are. From that window you can graph multiple days (or months) of what you have eaten.
You will find that all of your printing is controlled from the File menu.
©TheDataManager, Inc. 2002/2011
Version 3.5.0 Page 14 of 63
TheRecipeManager
!
Modifying Multiple Recipes
Just imported a lot of recipes and want to
make some changes to all of them but one at a
time seems too much of a chore? Here’s how
to do it. Select all the recipes that have things
in common that you want to change. You can
do this by clicking on each recipe one at a time
while holding the command key down (discontiguous selection) or, if you have a grouping
that is together, clicking on the first recipe in
the group then, while holding down the shift
key, clicking on the last recipe in the group
(contiguous selection.)
Note: This selection method will also work for selecting multiple meals or shopping list items.
You will now see that the Recipe Name has changed to reflect the number of recipes selected.
You can now Remove (delete) those recipes or you can Modify them all at once. Once you select
Modify, a new window appears and makes all fields that could be common to all (e.g. Source,
Origin, etc.) available to you for modification. As you make selections for changes you will see the
checkbox to the far left of each section automatically check itself - this is a visual indicator that
you will be making those changes as soon as you select Save. Any text fields or Classification
check boxes that are already filled in means that all of the selected recipes already had those
items in common.
This was a customer driven request that we had not thought of in our first release of TheRecipeManager.
©TheDataManager, Inc. 2002/2011
Version 3.5.0 Page 15 of 63
TheRecipeManager
!
Advanced Search
The fruits of your labor, finding what you want
quickly - this is accomplished by first clicking on
the ‘Advanced Search’ button on the bottom of
the main recipe browser window. This tab has
four ‘sections’ top to bottom. The easiest way to
visualize the sections is to start at the far right.
Note the four summary boxes - they summarize
the data choices you have made to the left of
each of them. Also note that each summary has
radio button choices above it, the first section
having ‘All’, ‘None’ and ‘Selected’, the other
three have ‘Any’ and ‘All’. The first box refers to
the choices for cookbooks to search, the second
refers to the classification choices, the next box
refers to the source, category, type, origin, rating, seasonality and difficulty choices to the left
of it while the final box refers to up to ten different ingredients.
Click in the various boxes, enter something in the source field and ingredient boxes. You will note
that as you make selections, the summary boxes change to reflect your choices. Each ingredient
you enter in the Ingredient(s) box, near the bottom of the window, must be separated by a space.
If you prefix an ingredient with a – (minus) sign, as in –eggs, the search looks for recipes whose
ingredients do NOT contain eggs. The summary text shows what will be included in the recipes
presented to you when you click on the ‘Search’ button. To find multiple words as one item, enclose the group of words inside double quotes, e.g. “green beans” will look for occurrences of
green and beans in the same ingredient line, as opposed to green bean (no double quotes) as all
occurrences of green and all occurrences of bean. Note the displayed quantity of recipes at the
top left of the window. What is not clear to you the first time - the four sections have an ‘and’ between them - whatever is displayed in the first summary AND whatever is displayed in the second
summary AND whatever is displayed in the third summary AND whatever is displayed in the last
summary is what you are telling TheRecipeManager to locate for you. Click the ‘Clear’ button to
clear all your choices and redisplay all recipes in all currently open cookbooks.
Please note the differences in the 3 Advanced Search windows shown here. The first one shows
the results of searching all open cookbooks for all recipes that are classified as Desserts with a
source of oreg (note you don’t need the whole word to search and it is not case sensitive) or a type
of Fruit. 34 matches. The second window shows that the only change from the first search is
©TheDataManager, Inc. 2002/2011
Version 3.5.0 Page 16 of 63
TheRecipeManager
!
changing the middle ‘Any’ radio button to ‘All’.
Now only 17 matches. Adding an ingredient of
‘graham’ (think of graham cracker crust
maybe?) for the third search shows there is only
one recipe in the open cookbooks that matches
what was searched for.
In simple words, the three searches read as:
1)
show me all recipes that are classified as
Desserts AND have a source that contains
‘oreg’ OR have a type of ‘Fruit’ AND are regardless of any particular ingredient.
2)
show me all recipes that are classified as
Desserts AND have a source that contains
‘oreg’ AND have a type of ‘Fruit’ AND are regardless of any particular ingredient.
3)
show me all recipes that are classified as Desserts AND have a source that contains ‘oreg’
AND have a type of ‘Fruit’ AND have an ingredient of ‘graham’.
Now think about the combinations of searches
you can do. Add more classifications, throw in
origin and category and more ingredients - use
them in any combination. You will find that it is
quick as well. Don’t forget that preceding an
ingredient with a ‘-’ (minus sign) will give you
the ability to use a “... does not contain...”
search. Sort of like being able to say “... give me
all the Thai dishes that are entrees that DO
NOT contain peanuts...”.
Note that closed cookbooks, if selected, will be searched
as well.
©TheDataManager, Inc. 2002/2011
Version 3.5.0 Page 17 of 63
TheRecipeManager
!
Meals
Ever select different recipes to create a meal
(you remember, the ones that were sooo good
together?) - then the next time you wanted to
make it you forgot exactly which caesars salad
you chose? While the ‘Meals’ button is highlighted, you can click on the plus (+) button on
the bottom of the window (or from the Meals
menu (New Meal)). Scroll through the various
recipes, find what you want then click down on
that recipe, drag to the ‘Recipes for this meal’
list and let go of the mouse button. The recipe
drops right into your meal.
Note: While you are inserting or modifying a meal, the
Simple Search box (in the upper right-hand corner of the window) is active and can help you condense the browser
list by only showing items that you type in.
Drag and drop as many as you want into a meal - you can even drag each line up or down to put
the meal recipes in the order you want them to always be displayed in. When you are satisfied
with that, fill in the meal title then give a description that would make a maitre d’ proud. The
Notes field is for your purposes for any notes you may want to keep about preparation, serving or
any random thoughts you may have. These notes are not printed or exported with any recipe.
If you later want to change a meal, simply select the ‘Modify Meal’ line item from the Meals
menu. To remove a meal recipe line, you can either ‘grab’ the line and drag it to the little trash
can at the bottom right of the recipes or you can highlight the line (click on it once) then click on
the little trash can, or you can highlight the line and press the ‘Backspace’ or ‘Delete’ key on your
keyboard - whichever you prefer. If it was a dessert you wanted to change, now you can simply
locate the one you want then drag and drop it into its new position in the list. If you are in the
browse mode, a single click will highlight that recipe in the browser list while a double-click on a
recipe will take you to its full display in the Recipe area.
©TheDataManager, Inc. 2002/2011
Version 3.5.0 Page 18 of 63
TheRecipeManager
!
Meals Menu
The only active Meals menu line while the Recipe, Advanced
Search or Schedules displays are to the front is New Meal. Modify
Meal and Remove Meal are active only while the Meals display is
foremost. Those commands do exactly what they sound like - they
let you create, modify or remove a meal.
The next menu items - Send Recipe Ingredients to Shopping List and Send Meal Ingredients to
Shopping List - will also do what you would expect - all ingredients for the currently selected recipe or the ingredients for all Recipes in the currently selected Meal(s) will be copied to your shopping list.
Another nice feature, select any meal in the meals list, context click on it and select Graph Nutrition for Meal. If the selected meal recipes have nutritional values assigned to them, a graph of
the nutrient values will be displayed. It is critical that you understand how this works - all recipes
in a meal must have ALL of the nutritional values assigned for this to be of any value to you incomplete information may allow you to make bad decisions. Very few recipes or meals come
with nutritional values pre-assigned - and we are neither doctors, dietitians nor food scientists
and we do not guarantee the nutritional values of any recipe - please be careful where you place
your trust.
The last Meals menu item, Create Food Intake Activity for Meal... is a great time saver as well. If
you are using the Lifestyle Tracking portion of TheRecipeManager you will want to know about
this wonderful little shortcut. Select any meal you like, context click on it (or select the Meals
menu item) and create a Food Intake Activity. This will take the nutritional value of one serving
for each recipe in the meal and transfer those numbers and food descriptions to Food Intake from there you can track what you have eaten over time and what the various nutritional values
are. From that window you can graph multiple days (or months) of what you have eaten.
You will find that all of your printing is controlled from the File menu.
©TheDataManager, Inc. 2002/2011
Version 3.5.0 Page 19 of 63
TheRecipeManager
!
Schedules
A Schedules button at the bottom of the recipe
browser reveals a calendar. You can click the
Add button and drag and drop meals or recipes
onto a day on the calendar to create a schedule
for that day.
A small icon of a page at the top left of this
view is a button that switches to a detail view
for the schedule. Here, you can add comments
and adjust the name to describe the reason for
this scheduled item. You can now also assign
the meal to be either Breakfast, Lunch or Dinner. As you can see in this calendar view, adjacent, each one of those three choices will be
displayed in a different color on the calendar. By default, the name will be set to the name of the
first meal or recipe you add to the schedule. You will notice, once you move to the schedule detail
view, that the little page icon has now changed to a small icon of a calendar. Select that button to
go back to the full calendar view.
The currently displayed month is in the top
center of the calendar navigation bar. If you
click on the single triangle to the left or right of
that month, you will be displaying the previous
or next month. If you click on the double triangle to the left of right of that month you will
be displaying the same month, but one year
previous or the next year.
If you highlight a day and start changing
months for any reason, then decide you want to
go back to where you were, simply click on the
date in the center that is displayed above the
calendar navigation bar. This will jump you
back to that date.
As you move around the calendar, changing days and/or months, you will see a small, solid red
circle appear just above the upper left of the calendar. If it’s red and you click on it, you will be
©TheDataManager, Inc. 2002/2011
Version 3.5.0 Page 20 of 63
TheRecipeManager
!
taken back to ‘today’ on the calendar. As long as you have the calendar set to today, that red circle will be gray - it’s a quick jump tool for you to use.
If you drag a meal to schedule it for a given date, then decide to remove or add a recipe, you can.
To remove a recipe from a scheduled meal, click once on the recipe to highlight it, then hit the
delete key on your keyboard. You can add another recipe by dragging it from the recipe browser
list to the scheduled recipe list. Drag recipes up or down in the list to reorder them. You also have
the ability to drag schedules to a different day while in the browse mode. Flexibility.
The small red rectangles with a left or right pointing indicator will, when you click on them, select the previous or next date on the calendar that has a meal scheduled.
Near the upper right corner you can see three letters - M W D - that represent View by Month,
View by Week and View by Day. This are new to TRM v3.5.0. Prior to this version there had
been only one view - the month view. Yes, each one changes the calendar view to reflect your selection.
Schedules Menu
Whenever a day with schedules is highlighted on the Schedules
calendar, active menu lines will be as shown to the right. The first
three commands do exactly what they sound like - they let you
create, modify or remove a Scheduled meal.
Go To Next Meal Schedule and Go To Previous Meal Schedule
will do just what they say - move you forward or backward to
another scheduled meal while skipping over all of the blank dates.
The Show Details line will take you to the details for that scheduled item - at the same time that
menu line changes to read Show Calendar, taking you to the calendar view.
The next three menu lines, View by Month, View by Week and View by Day are, as mentioned
above, new to TRM v3.5.0. Prior to this version there had been only one view - the month view.
The next menu items - Send Recipe Ingredients to Shopping List and Send Meal Schedule Ingredients to Shopping List - will also do what you would expect - all ingredients for the currently
selected recipe or the ingredients for all recipes in the currently selected Meal Schedule will be
copied to your shopping list.
©TheDataManager, Inc. 2002/2011
Version 3.5.0 Page 21 of 63
TheRecipeManager
!
Another nice feature, select any entry on the Schedule portion of the window, context click on it
and select Graph Meal Schedule Nutrition. If the selected recipes/meals have nutritional values
assigned to them, a graph of the nutrient values will be displayed. It is critical that you understand how this works - all recipes/meals that are part of a scheduled meal must have ALL of the
nutritional values assigned for this to be of any value to you - incomplete information may allow
you to make bad decisions. Very few recipes or meals come with nutritional values pre-assigned and we are neither doctors, dietitians nor food scientists and we do not guarantee the nutritional
values of any recipe - please be careful where you place your trust.
The last Schedules menu item, Create Food Intake Activity for Meal Schedule Recipes... is a
great time saver as well. If you are using the Lifestyle Tracking portion of TheRecipeManager
you will want to know about this wonderful little shortcut. Select any schedule you like, context
click on it (or select the Schedules menu item) and create a Food Intake Activity. This will take the
nutritional value of one serving of each recipe or meal on the schedule and transfer those numbers and food descriptions to Food Intake - from there you can track what you have eaten over
time and what the various nutritional values are. From that window you can graph multiple days
(or months) of what you have eaten.
In the Schedules menu, while the Recipe, Advanced Search or Meals displays are to the front, the
Modify Meal Schedule and the Remove Meal Schedule are inactive.
You will find that all of your printing is controlled from the File menu.
©TheDataManager, Inc. 2002/2011
Version 3.5.0 Page 22 of 63
TheRecipeManager
!
Browse Photos
With v3.5 of TheRecipeManager we’ve expanded your
options to browse through your recipes. We hope you find it
even more useful now. It’s already easy to find recipes with
TRM, all you need to know is just a little bit of what you
might want to fix/eat. You can quickly find recipes by name,
category, type, classification or where you got it or even based
on an ingredient that is in (or even not in) a recipe. But what if
you don’t know what you want and don’t really want to have
to think about it? Have you ever just flipped through recipes
hoping one of the pictures would help you decide? That’s what we’ve allowed for with this new
feature - you can now scroll through nothing but pictures if you’d like.
From the View menu, if you select the Browse Photos menu line, a new
window opens that allows you to scroll through the pictures. The main image
attached to each recipe in the currently selected cookbook will be displayed.
At the top of the window there is a drop down list, shown in one of the
images to the right, that will display a list of all your currently open cook
books. Select which one you want to review and all the images will be there
for you. If you double click on an image displayed, it will open a full size view of that image.
If any image gets your attention and you want to know
more about the recipe it’s attached to, click on the View
Recipe button. Depending on the radio button you select
before clicking the View Recipe button, this will bring up
the recipe browser or a read-only copy of the recipe, so
you can look at the ingredients, nutritional values or
whatever other information you may want to review. The
image to the right shows 3 windows open at once - the
main Recipe Browser, the Photo Browser and a read-only
recipe window.
One additional feature that has been added to the Browse Photos window is the ability to view
these images in one of three different ways. Similar to the way you can view the
Main Directory window in different ways, a context click on the window will expose your choices, show in both Wide and Tall views below.
©TheDataManager, Inc. 2002/2011
Version 3.5.0 Page 23 of 63
TheRecipeManager
!
Also, any of these views can be resized and repositioned anywhere on your
screen. Each view size and position is remembered when you close that view the next time any one of them is opened, it will open in that same position
again.
For a final touch on this window - any of these three views can be increased
or decreased in size. As you change the window size, the images will grow or
shrink to match the adjustments you have made. Adjust to whatever size and/
or location best fits your needs.
©TheDataManager, Inc. 2002/2011
Version 3.5.0 Page 24 of 63
TheRecipeManager
!
Cooking View
Seeing all this information on
the screen doesn’t do you much
good when you are more than
a couple of feet from the
computer screen.
TheRecipeManager has
another feature that we call
Cooking View. This view gives
you the ability to view recipes
from a distance while you are
cooking and preparing food
from across the room. When
you have a recipe highlighted,
you can launch the cooking
view by selecting the ‘Cooking
View’ button on the recipe browser window, or via the ‘View’ menu.
You can change the layout of the cooking view window using any of the four buttons at the top
of the window. Each button appears as a miniature version of what its associated view will look
like: ingredients only; ingredients and instructions stacked; ingredients and instructions side by
side; or, instructions only. As you hover your cursor over any one of the four buttons you will see
a brief description of it. There is a slider at the top left of the window that will allow you to
change the size of the displayed text. This window can be resized to fit your needs, you can even
click and drag on the vertical column dividers and drag them left or right to change the display
width. Want some fun? Try this window on a 30” monitor - you could read it from your neighbor’s house.
All of these window settings (font size, column width, view type, window location) are remembered for you, automatically, when you close the window. The next time you open the cooking
view window it will be in the same location and with the same display settings as the last time you
closed a cooking view window.
Normally the cooking view window, if left open, will update its display as you select different
recipes in the Browser. If you want to override that behavior, and keep the cooking view focused
on a single recipe, you can turn on the single cooking view override in the Preferences window.
With the override enabled, you can have several cooking view windows open at once, each showing a different recipe’s ingredients and instructions.
©TheDataManager, Inc. 2002/2011
Version 3.5.0 Page 25 of 63
TheRecipeManager
!
Cookbooks
A feature, new in version 3 of TheRecipeManager, that we
think you will like - individual Cookbooks. You can now
create your own cookbooks that contain only the recipes
you want them to - recipes you have created, family recipes
that go back for years, or recipes from the internet or
friends. You can also send these same cookbooks to family
members or friends - all they need is their own copy of
TheRecipeManager to view and use them.
If you select the ‘Show Books’ button near the lower left
corner of the main Browse Recipes window, you will reveal
a list of open cookbooks as shown in the image to the right. Please note that any recipe you select
in the recipe browser list will automatically select the cookbook that it is in. The currently selected Cookbook is always the Current Cookbook. When you add a new recipe, it’s added to the
Current Cookbook.
Cookbook Library
If you select the Enter Library button, a
window will open showing you information
about all the cookbooks in your Library,
whether they are open or not. Looking at
the image to the right, you can see that you
can Open or Close a book - if a cookbook
is open, the button for that book will
display an opened book, if it is closed the
button will display a closed book. Simply
click a book button to toggle the book
open or closed. There is a button to show
you more information about each
cookbook and the number of recipes in each cookbook is also displayed. The book with the red
minus to the far right is a button for removing/deleting that cookbook. Note the current
cookbook is displayed with an underline. You can simply double-click on a different title in this
window to make that cookbook current, or click on a different line in the Browser’s cookbook list.
Cookbook Info
Let’s click on the info button (the blue circle with the ‘i’ on it), just to the left of the cookbook
name. A new window will open giving you more information.
Most of what is there is obvious, but a couple of items do need a quick explanation. The picture
you see was put there by dragging and dropping an image from somewhere on your computer.
©TheDataManager, Inc. 2002/2011
Version 3.5.0 Page 26 of 63
TheRecipeManager
!
The little magnifying glass will open that image up to its full size in another window. You can also
add a movie file (.mov, .mpeg, .mp4 or .avi)
to the cookbook info by dropping that
movie file onto the same area that you drop
a still image onto. Once you do, and save
your changes, you will see a new icon show
up - a movie reel. Whenever you click on
that movie reel it will open the movie file
and display whatever is in it. Please note
that, unlike movies saved into a recipe
(main browse window, photo tab), which
are copied as separate files into the
TRMovies folder, cookbook info movies are
stored inside the cookbook itself. That way, anytime you copy a cookbook and send it to someone
else, all the information about that cookbook will be in one place. Again, the movies that are
attached to a recipe are not automatically exported nor are they automatically moved for you to a
new user. We made this decision based on potential movie sizes and an unknown quantity of
them you may want to use. Don’t worry though, the movies aren’t trapped on your machine, you
can still copy them manually.
Please note that if you input a proper URL into the Website field, a little globe will show up just
to the right of that field. Any time you click on that globe, it will take you directly to the listed
URL.
The Description field may be tedious if
there is a lot of text. A short text box that
you have to continually scroll as you read
gets boring very quickly. Just double-click
anywhere in the Description field and it will
get considerably taller. Double-click again
or just close the window and it will return to
normal height.
The ‘Locked’ check box means the recipes
in that cookbook cannot be deleted or
exported by anyone else using your cookbook with their own copy of TheRecipeManager.
The last item, ‘Filename’, displays the name of the cookbook file as it is stored on your computer.
The ‘Title’ is simply the name as displayed in your Cookbook Library. Both names can be the
©TheDataManager, Inc. 2002/2011
Version 3.5.0 Page 27 of 63
TheRecipeManager
!
same or they can be completely different. The ‘.ckbk’ you see to the right stands for CooKBooK
and is required. You do not have to type in the file name if you don’t want to - if you don’t/can’t
decide on a filename it will automatically be assigned for you based on what you entered into the
Title field.
Creating A New Cookbook
If you select ‘Create A New Cookbook’ in
the Cookbook Library window, you will see
a new window that looks very similar to the
Cookbook Info window. After having read
the previous couple of paragraphs, you
probably don’t need an explanation of
what you can/should do here. Of note is
the description field - you can put up to
3,000 characters in there. That should be
enough to tell whatever story you would
like to remember or that you would like
others to know about.
To see another neat little feature, select one or more recipes in the browser list, then context click
on one of those recipes and look at all the options you have with those recipes and the various
cookbooks. Take a look, it’s a neat way of creating cookbooks or moving or copying recipes
around from one cookbook to another.
Working With Multiple Cookbooks
Now, let’s forget about the Library for a few minutes (ok, sentences if not minutes) and let us explain what happens as you open and close various (or all) cookbooks. It’s important that you understand the logic we used so you can best work with multiple cookbooks.
The easiest part to understand is opening a cookbook will show all of that cookbook’s recipes in
the recipe browser list, closing a book will remove those recipes from display. Closing all cookbooks will remove all recipes from the browser list. Multiple recipes can be combined from multiple cookbooks to create a meal. If you close a cookbook that has a recipe included in a meal, then
highlight that meal, that cookbook will be automatically reopened. Searches are performed only
on the cookbooks you have open at the time. Exception - in the Advanced Search view, as discussed earlier, you can search closed cookbooks if you select them in the Cookbook(s) to search
list.
©TheDataManager, Inc. 2002/2011
Version 3.5.0 Page 28 of 63
TheRecipeManager
!
Synchronize Cookbooks
When someone sends you a cookbook that they’ve created with TheRecipeManager, you can
drop that cookbook file into your Cookbooks folder, and the next time you start the program, it
will be included in your list of available cookbooks. Usually, that’s all there is to it. However....
Since you’re able to use the Administration window to customize the set of categories, types,
origins and classifications used to tag your
recipes for easier searching, it’s more than
likely that a recipe cookbook you receive
from a friend or family member could be
using a tag that you don’t have in your
own set. If this happens, you might see a
recipe tagged with a category when you
first view it, but when you modify it, the
category choices menu will be showing a
blank. Or you might remember that the
category was “Holiday” but, when you try
to search for it, the categories menu in the
Advanced Search window does not contain Holiday. These are clues that the cookbook
containing this recipe needs to be synchronized.
Synchronizing a cookbook (started by
clicking the button that looks like two
arrows chasing each other) checks every
recipe in the book, and makes sure that
your set of lookup tags (stored in your
CommonInfo datafile) includes all the
categories, types, origins, classifications
and measures used by those recipes.
Sharing Cookbooks
And now for something completely new with TRM v3.5.0 - sharing of cookbooks and recipes. A
very important thing to be aware of - sharing is not the same as syncing. Syncing is pretty well
understood, by most everyone, to mean the matching of information on both ends of a sync.
Whatever is in one place will automatically be copied to the other - leaving you a matched set.
©TheDataManager, Inc. 2002/2011
Version 3.5.0 Page 29 of 63
TheRecipeManager
!
Sharing, with TRM, means you determine
what you wish to share with other users
that have a copy of TRM - an iPad for example. You could share recipes and cookbooks with a neighbor or family member
on a portable or desktop machine as well,
but both devices need to be on the same
network at the same time to be able to ‘see’
each other.
To get started with this part, select the
Other Cookbooks button on the main
Cookbook Library window. You will then see the view shown above, Cookbook Downloads. This
accesses our website and allows you to see the cookbooks we have made available to you from a
variety of sources, some from cookbooks authors that have allowed us to distribute a sampling of
one of their books, various national councils
as well as from individuals. You will see an
image, if provided, the cookbook title and a
bit of information about each book. The
popup list will show you various categories
of cookbooks or you can choose to see them
all at once. If you select the Downloads button, that cookbook will be downloaded directly to your copy of TRM, unzipped and
inserted into your collection immediately.
There is another tab on that window,
Sharing. If you select that tab you will be
shown all the cookbooks that are in your
copy of TRM, you can choose to make any
of those shareable by checking the box to
the left of each title. To share with others,
your cookbooks must be both currently
opened and set to share.
As well as copying over an entire cookbook
via sharing, you can, if you choose, copy
©TheDataManager, Inc. 2002/2011
Version 3.5.0 Page 30 of 63
TheRecipeManager
!
individual recipes. Select the View Recipes
button, you will then see the individual
recipes in that book. You can then
download those recipes one at a time if
you’d like.
This is a great way to share recipes between your desktop or portable computer
and your iPad. Simple, quick and you don’t
have to re-enter recipes just so you can
have them in more than one place.
It will take a bit of time to get so many brand new videos done, but our intent is to have videos to
take you step by step through all these options. It’s not as complex as it may sound, and a few
minutes of exposure will save you hours of frustration of never seeming to have what you want,
where you want it, when you want it.
Remember that little black mark you saw in the upper right corner of the main
Recipe Browser window? It looks like this image to the right (top one) - that’s a
little ‘transmitter’ and is how you enable sharing from this copy of TRM. If you
click on it, it will start to pulse little orange waves and looks like the image to the
right (bottom one). The receiving device does not have to have its sharing on only the one ‘serving’ the information needs to transmit.
Note: The server and the client (device receiving the information) must both be on the same network. Also, they must
both be using a copy of TRM made for that device.
And - if you’ve been thinking ahead on this a little, you’d probably expect us to allow you to
share shopping lists with your mobile devices as well. That would be a good thought on your
part, and Shopping Lists are next for this Users Guide.
©TheDataManager, Inc. 2002/2011
Version 3.5.0 Page 31 of 63
TheRecipeManager
!
Shopping List
The shopping list window is divided into four
tabs. The first tab displays all the ingredients
that you send to the shopping list. On the left is
a list where you can add new shopping lists. It
always shows the main Recipe Items and
Pantry Items lists at the top. The second tab
displays a list of the stores that you create, and
the sections that you assign for those stores.
Store sections are chosen from a basic set that
you can modify and extend through the Administration window.
The other buttons along the bottom - they look similar to the ones on the main browser window
for viewing Recipes, displaying Meals and Schedules - determine what is to be displayed in the
Shopping List. ‘Unpurchased Items’ will display only items you’ve not yet purchased, ‘Purchased
Items’ will display only items you have marked as purchased, and ‘All Items’ shows all items currently in the Shopping List, regardless if they’ve been purchased or not. When showing ‘All
Items’, previously purchased items will appear in gray text.
Recipe Items
Remember those items we have been transferring from various Recipes and Meals? Those items
all show up in the Recipe Items list (see photo above.) Display columns can be sorted either top to
bottom, or bottom to top (ascending or descending) - each click on a column heading will sort it
opposite of what it was. The currently sorted column is highlighted in blue (or your chosen highlight color - this is an OS level choice, not TheRecipeManager choice). Default sorting is by recipe item, A to Z.
Pantry Items
You can add pantry items by clicking the New
button when Pantry Items is selected. When
you drag a pantry item to a shopping list, it
remains with the pantry items and a new copy
is added to that shopping list.
Pantry items are similar to recipe items, except
they typically represent things you would not
buy as part of a recipe. That could include salt
(do you really want to buy 1/2 teaspoon salt?) or lunch bags, light bulbs, sour cream, butter, olive
©TheDataManager, Inc. 2002/2011
Version 3.5.0 Page 32 of 63
TheRecipeManager
!
oil, etc. It’s the things you know you always want available. These items don’t even have to be
food related.
Add a Store - Creating a Store Layout
To create a new store, select the Store Layouts
tab and click on the New button (the green ‘+’).
Fill out the store information at the bottom
then check the boxes in the far right list that
represent food aisles for that store. You can
place the aisles in the order you walk through
the store by either selecting the check boxes in
that order or by dragging the items in the
center list up or down to suit your needs. That’s
all there is to it. Many stores are similar in their
layouts - if you shop at more than one store and they have similar layouts, you can now simply
highlight a store and click on the Shopping Bag icon near the lower left of the window. This is a
Duplicate Store button. Once you have duplicated it, give it a new name, make whatever changes
you may need and you’ve just created a second store.
Creating a Shopping List
After you create a store, you can create a shopping list for that store, and it will appear in the left
hand list on the first tab. Then you can drag
shopping list items from the Recipe Items, or
Pantry Items, list to the store, or to one of the
store’s sections. Items that have been assigned
to a shopping list for a store in this way will
appear in a teal color in the main Recipe Items
list, and the store and section assignments
appear in the extra columns. Scroll off to the
right to see the extra columns or stretch the
window wider.
You can have more than one shopping list per store - in fact, as many as you would like. Why?
Well, you may want to plan out multiple shopping lists into the future - or, you may operate as a
Personal Chef. If you are buying for more than one person or group at a time, or you just want to
separate the company barbecue expenses from your personal shopping, you could set up two lists
(or more), and have them printed and rung up separately. This allows for an easy expense audit
trail to follow. Yes, this feature was customer driven as well.
©TheDataManager, Inc. 2002/2011
Version 3.5.0 Page 33 of 63
TheRecipeManager
!
Combining Ingredients
You can select two or more similar items in the
shopping list, and context-click or choose the
Combine Items command in the Shopping List
menu. You can then adjust the description,
quantity or measure and reduce the multiple
items to a single item in the shopping list.
Remove A Shopping List
What happens to the items in a shopping list if
you choose to remove that list? Depends on
how you want to use TheRecipeManager. Some
people like to track what they have purchased,
and when, for later review. If you want, you can
just remove the items that were on that list and
not retain that history. When you choose to remove the shopping list (minus ‘-’ button below the list of shopping lists) you will be asked what
your preference is. Cancel to leave everything as it was, or select the appropriate radio button
then select the Remove (default) button.
Sharing Shopping Lists
If you have read the section, above, about cookbook sharing, you will already know all you need
to know about sharing shopping lists. As a quick refresher of the important parts, we’ll touch a
few points again.
A very important thing to be aware of - sharing is not the same as syncing. Syncing is pretty well
understood, by most everyone, to mean the matching of information on both ends of a sync.
Whatever is in one place will automatically be copied to the other - leaving you a matched set.
Sharing, with TRM, means you determine what you wish to share with other users that have a
copy of TRM - an iPad for example. You could share shopping lists with a neighbor or family
member on a portable or desktop machine as well, but both devices need to be on the same network at the same time to be able to ‘see’ each other. Why would you share a shopping list with a
neighbor? Well, it could be for a block party or company event - there are many reasons.
Turn sharing on (remember the little transmitter referenced in sharing cookbooks?) to allow others with a copy of TRM on their device to ‘see’ your shared shopping list - you just have to de©TheDataManager, Inc. 2002/2011
Version 3.5.0 Page 34 of 63
TheRecipeManager
!
cide which ones to share. Those will be chosen
from the available lists you have as shown on
the Shared Lists tab. Another device, with
TRM running on it, will now be able to view
and copy your shared shopping lists.
To be able to share a shopping list from
another device, simply select the Remote Lists
tab, select the appropriate transmitting device
from the Source drop-down list. Review the list
(s) to locate what you want to copy, and select
the Import list button. Done. Once you have
what you needed, the source device can shut off
its transmitting and that’s it. This one, as you
can imagine, turned out to be a lot of work and
we understand that not everyone will want to
directly share cookbooks or shopping lists - but
we believe it was worth it for those that really
need it. And mobile devices are becoming more and more a part of our everyday life.
Shopping List Menu
New, Modify and Remove(item count) work as the name implies.
If you have more than one item selected, the total count will be
displayed in the text of the Remove line. Remove All is pretty
clear - and remember, there is no Undo. Mark All As Purchased
and Mark Selected As Purchased will do exactly that, but only if
viewing Unpurchased items. If you are viewing Purchased Items,
those two menu lines will change to Mark All As Unpurchased and
Mark Selected As Unpurchased.
You may select non-adjacent rows by command-clicking lines, or adjacent rows by clicking the
first line you want, then holding the shift key down while selecting the last line you want highlighted. Marking items as purchased automatically hides them in the shopping list (they shouldn’t
show, you’ve already purchased them!) ‘View Unpurchased Only’ is the default action when
opening the Shopping List.
The ‘Remove’ and ‘Remove All’ work the same way. Why would you want to retain items that
have already been purchased? Why did we do this? The first time or two of shopping, there is no
©TheDataManager, Inc. 2002/2011
Version 3.5.0 Page 35 of 63
TheRecipeManager
!
reason - but over time you will have a wonderful way of reviewing your buying (eating?) habits or
patterns. I’ll bet some doctor would like to look at these over time to review food purchases.
Notice that last menu line - the one that is grayed out? For those of you that have been with us
from the beginning, this is a feature we think you will really like. In the past, every time you have
added ingredients to a shopping list you have had to drop the item you want directly onto the
aisle you will find it in. Now, all you have to do is drop food in place, then tell
TheRecipeManager to ‘Remember Store Sections for ingredients’ - and it does! The next time
you drop a recipe ingredient that has been
remembered it will drop into the shopping list
aisle that you told it to remember last time. Yes,
that means you could drop milk and chicken
and apples onto a closed store shopping list
and, if that store had those aisles assigned to it,
they will find their way there again. What
happens if the store you just dropped a
‘remembered’ item onto doesn’t have that aisle?
It will just add it to the store and not try to guess where you may want it.
You will find the same ‘remember’ function in the shopping lists group. If you context click on
any of the shopping lists you will find the same ability to remember store sections for the items
that have been assigned in the currently selected list.
You will find that all of your printing is controlled from the File menu.
©TheDataManager, Inc. 2002/2011
Version 3.5.0 Page 36 of 63
TheRecipeManager
!
Kitchen Helpers
Overview
I don’t know about you, but my memory gets worse and worse all the time. Kitchen Helpers are
here so you no longer have to feel silly for not remembering how many teaspoons there are in a
half cup or what temperature a ‘hot’ oven (or grill) really is. This area is a collection of those
things you find bits of in every cookbook. At this time you cannot modify or add any of your own
items to the Equivalents or Temperatures area - we don’t believe there will ever be a need for you
to modify these, but that can be added in the future if there are enough people that find a need
for it and request that change.
Equivalents
This is where you will find the information necessary to convert almost any measure into almost any other measure.
Equivalents are provided for dry and liquid measures, butter
and other solid fats, granulated sugar and unsifted flour.
Glossary
This tab contains an alphabetical list of terms and their
definitions. The Administration window is the place where you
insert, modify or delete these glossary terms, just like tips and
substitutions. Thanks to Scott Antony and The Great British
Kitchen for this data.
Substitutions
You’re home baking and discover, at the worst time, that you
need a cup of butter - and you don’t have any. “Just my luck”
you think. “Now what do I do, there isn’t time to go to the
store.” Go to the Substitutions tab, scroll down until you find
Butter displayed in the first column - note the quantity in the
second column - now scroll through the alternatives displayed
for butter in the Substitution column to see if you have any of
the alternatives.
©TheDataManager, Inc. 2002/2011
Version 3.5.0 Page 37 of 63
TheRecipeManager
!
Temperatures
This is where you will find various cooking temperatures, in
degrees for both Fahrenheit and Celsius. Temperature conversions from Fahrenheit to Celsius to Gas Mark are also listed.
Tips
Ever wanted to know if an egg is fresh or hard boiled? This is
the type of information that you will find on the Tips tab.
Quick Conversion Calculator
Also a new addition to TRM v3.5 - a calculator at the top the
Kitchen Helpers window for you. It has a few of the standard
US and Metric measures of things we all forget all the time.
Simply enter a number into the Convert Volume field, select
what it is (e.g. Tablespoon) and then select a measure to
convert To (e.g. Cups) - the conversion answer will show up to
the right, as displayed in this image.
©TheDataManager, Inc. 2002/2011
Version 3.5.0 Page 38 of 63
TheRecipeManager
!
Nutrition Lookup
A recipe’s nutritional content depends not only
on its ingredients, but also on how you prepare
those ingredients. TheRecipeManager includes
the USDA’s nutritional database to provide you
with some of this information. You can browse
this data from the View menu. You can also use
it to interactively assign nutrition to a recipe.
Manually Assigning Nutrition To A Recipe
The View menu has a command that opens the
nutrition lookup window. You can search for an
ingredient and select from among the many
matches. Once you’ve chosen the exact kind of
egg or whatever it is, you will see the nutrient
amounts for a 100 gram serving. Some standard
serving sizes may be shown in another list, and
you can click on those serving sizes to see the
adjusted nutrient amounts appear (in red).
As you look for different items - or even look
closely at the adjacent images, you can see why
we have made the decision to not automatically
calculate the nutritional value of recipes. There
are simply too many variables, such as 127 different types of eggs or egg cooking methods.
We have never seen a recipe that lists ingredients in this way and we don’t think people
would be willing to change how they enter
foods into recipes to be as precise as would be required. We’ve now done the only other thing we
can - all of this data is provided by the USDA - we do update this periodically as the USDA does
new releases of that data. Review and use this information as you may need - it is quite fascinating, though scary sometimes, to see what we all eat.
©TheDataManager, Inc. 2002/2011
Version 3.5.0 Page 39 of 63
TheRecipeManager
!
Interactively Assigning Nutrition To A Recipe
While you are adding a new or modifying an
existing recipe, select the Nutrition tab and click
the Assign By Ingredient button (the little food
pyramid in the lower right corner.) At the top of
the window that opens, you’ll see the recipe’s
ingredients listed on the left, and a summary of
its total nutrition per serving on the right. Any
ingredients in the list that have already been
assigned will have a check-mark to the right of that ingredient. Above the summary, you’ll see the
number of servings you’ve specified for the recipe. Scaling is not a factor here, so you’ll see the
unscaled number of servings. Per-serving values will be the same, regardless of scaling. If you see
a question mark instead of a number of servings, the calculations will assume 1 serving, so if
that’s not right, you should go back and provide a number of servings, before assigning perserving nutrition here.
Below the ingredients list, you’ll see the current ingredient’s quantity and measure, converted to
grams. Conversion to grams is needed here because all the USDA data is based on 100-gram
units. Some recipe ingredient measures can’t be automatically converted to grams, for example ‘2
large onions’. When one of these ingredients is selected, an entry box is provided here, so you can
tell the program how many grams to use for this ingredient. The lower part of the window will
help you determine that number. But if the
ingredient measure can be converted to grams
automatically, there’s no entry box to deal with
(though you can click the Override button to
get one, if needed).
The first step, in either case, is to choose the
food item from the USDA data that most
closely represents the ingredient. You can
search the USDA data by typing words into the
“Search for food items containing” box and
clicking the Search button. The search results appear in the list below. Each time you select a recipe ingredient, a menu of words in that ingredient is built to save you some typing. Picking a
word from the menu works the same as typing in a word and clicking Search. When a search
finds too many food items, you can use the “Showing” menu above the results list to filter the results and make it easier to find what you’re looking for. Or you can choose a different word from
the search menu, or type one in, to get a better set of matches.
©TheDataManager, Inc. 2002/2011
Version 3.5.0 Page 40 of 63
TheRecipeManager
!
Selecting a USDA food item fills in the row of per-100 gram values in the middle part of the
window, and below that, the per-serving values are calculated. If the ingredient weight in grams
is still unknown at this point, as with 2 large onions, the row will show all zero values, and you
must fill in the gram weight before calculations can be done. If the weight is known, the calculations are done, and you only need to click the Assign to Ingredient button to complete the assignment. The per-serving values will display in red if the weight is not yet known. They will alternately display in red and blue colors when the values have been calculated but not yet been
assigned. They will display in blue, and the ingredients list will show a check-mark, once the assignment has been made.
So, for an ingredient like “1/2 Cup beef broth”, whose gram weight can be converted automatically, it’s just click and pick... Choose the word ‘broth’ from the search menu, for better results
than you get for ‘beef ’; click on the matching food item that best represents the broth you’ll be
using; and finally, click the Assign to Ingredient button. The values are added to the totals at the
top, and the next ingredient is selected for you.
For an ingredient like “2 large onions”, you will also need to identify the gram weight. Select the
food item that matches the type of onion. A Serving Size list appears on the right. Click the “1
large” serving size. Check the gram weight that was just calculated into the box below the ingredients list, change it if needed, and click Assign to Ingredient. You may choose a type of onion
that does not list a serving size like ‘1 large’. It may only list ‘1 cup chopped’ as a serving size. In
these cases, you’ll need to make a mental calculation of your own, and enter the actual gram
weight of the ingredient using your best guess.
When you’ve assigned all the ingredients that you want to assign, click the Finished button at the
bottom of the window. The total nutrition per serving values will be copied to the recipe nutrition
tab, and you can continue entering other information about the recipe.
©TheDataManager, Inc. 2002/2011
Version 3.5.0 Page 41 of 63
TheRecipeManager
!
Lifestyle Tracking
Overview
Healthy eating is part of the foundation of healthy
living. Whether you are trying to reduce blood pressure, lose weight, help manage diabetes or a variety
of other health related reasons, healthy eating is
important to you. If you want to maintain your
current health condition, healthy eating is important to you.
TheRecipeManager was created to enhance your
experience in the kitchen and to assist in the enjoyment of great food. Now, with a lot of user input, it is beginning to evolve into a lifestyle device –
something that you will come to depend on to help
you manage a healthy eating lifestyle. Being able to
manage all your recipes is the first step. Lifestyle Tracking is the second step. Look at Lifestyle
Tracking as a daily diary of what you eat, as well as a snapshot of what your body is doing at a
given point in time.
TheRecipeManager now allows you to record several different aspects of health management
that are important to both you and your doctor. All of the data points that you can now collect,
and graph, are important regardless of your current health state - this information will show you
trend lines as things start to change. Your doctor will most likely appreciate you bringing some
print outs the next time you need to visit his/her office. There is effort required on your part, you
must enter the necessary readings into the appropriate area of Lifestyle Tracking. Once you’ve
entered a month or so worth of data you will see the value of looking at information over time time usually tells you more than you think it does, and a computer usually has a better memory
than most of us.
Each of the five areas of data you can track need input, all of them require very little time but
you will want to keep up with it on a regular/timely basis to get the most out of it over time.
Each area requires, for each entry, a date and time and one or more numbers, depending on
which area you are working with. You can provide comments as well when you enter information
- you can even go back and add the comments later if you remember something that may have a
bearing on any of your readings.
©TheDataManager, Inc. 2002/2011
Version 3.5.0 Page 42 of 63
TheRecipeManager
!
You can track information for as many people as you like, just be sure to select that person’s name
from the pop-up that is available, each time you make an entry. If you don’t see a list there, don’t
worry - the list will not show until you enter at least two Individuals at the Administration window. You can add as many people as you may want to track by going to the View menu and selecting Administration. From there click on the icon labeled Individuals and then Insert, Modify
or Remove as necessary.
NOTE: Once you remove a name from this list, all tracking records stored for that individual are permanently removed from TheRecipeManager, there is no Undo.
Blood Sugar
Blood sugar readings are one of the easiest to track, needing only a reading from your glucometer in addition to the date and time of the reading. If your blood sugar was low or high, you may
want to add comments as well - this may be meaningful to you or your doctor during a review.
Blood Pressure
Blood pressure recording is almost identical to blood sugar, there are 3 data points instead of one
you need to record (in addition to date and time that is.) All you need to enter here is your systolic
(upper pressure), diastolic (lower pressure), and pulse rate. Don’t worry about taking your blood
pressure too often and taking up too much room in your application - there is more room for
storage than you will, most likely, ever need.
Body Weight
Weight is the other quick and easy one - date, time, weight and height are all you need to enter.
And if you put your height into the Administration / Individuals area it will automatically fill in
for you each time. If it auto fills why did we include it? Well, if you have any children you already
know that they grow quite rapidly.
There is one additional piece of information available to you here, the Body Mass Index (BMI).
BMI is a value that is calculated from your height and weight.
Food Intake
The types and quantity of foods you eat are obviously important. Food Intake looks to be the
most complicated. It may look that way because there are so many different fields of nutritional
information that need to be included. Don’t worry, most of those can be filled in for you automatically. You can add information to this area from a few different places including from the
Recipe browser, the Meals list and the Schedules window. But what if, while away from home,
you have a meal with friends or simply stop and get a quick lunch or snack at work, at school or
on the road? How do you input the nutritional values of all that food? TheRecipeManager uses
the USDA database for Nutrient Values as a fully functional part of the program - and you have
access to it.
©TheDataManager, Inc. 2002/2011
Version 3.5.0 Page 43 of 63
TheRecipeManager
!
Whenever you want to input foods that you have
eaten you can ‘transfer’ the nutrient values of what
you have eaten with just a few key strokes. If you
have eaten a serving from a recipe or meal that is in
TheRecipeManager, all you need to do is contextclick on that recipe (or Meal or Schedule) and select
Create Food Intake Activity for [Recipe(s) or
Meal(s) or Meal Schedule Recipe(s)]. Values that
match the supplied number of servings you’ve
eaten will be entered into the appropriate fields for
you. All you have to do is add a Short Description
(something meaningful in case you need to find it
again) and you’re done. Simple, wasn’t it.
But what if you’ve eaten something that is not part
of an existing recipe in your copy of TheRecipeManager? That’s actually easy as well. Insert a new record by clicking on the green insert (plus
sign) button. Enter the appropriate date and time and enter the Short Description. For this example, let’s pretend you stopped by KFC for a light chicken lunch...
Click on the rainbow colored USDA food pyramid icon located between the Time and Short Description fields. This will open up a USDA Nutrient lookup window titled Add Up Food Nutrition. This is the fun part. In the upper right corner, just to the left of the magnifying glass, type in
‘kentucky’ and click on the magnifying glass or simply hit the Enter key. This will automatically
load any Food Item information that contains the word ‘kentucky’. - you can see from the example that these words are not case sensitive.
Now, scroll through the list to find what you
want. In this case, we first selected KENTUCKY FRIED CHICKEN, Crispy Chicken
Strips, analyzed before January 2007. I know,
not really obvious, is it, when you just wanted
chicken strips. Next time, just type chicken - or
strips - that works too. Once selected, to the
right of the line you highlighted you now see a
variety of serving portions. We selected ‘1’, because what we ate (4 of them) wasn’t a choice.
If that is the case, we’ve allowed you to change
the serving portion by entering a number in the Serving Size multiplier field. This will allow you
©TheDataManager, Inc. 2002/2011
Version 3.5.0 Page 44 of 63
TheRecipeManager
!
to increase or decrease a portion size to fit what you did eat. Now click on the green plus to assign
the nutrient values displayed along the bottom of the window to the food item list. Add another
item - try a half cup of KFC coleslaw to go with that. When you have done that, you are done
and can now select the green check mark (save) at the bottom of the window.
You will now find yourself back at the Food Intake Tracking window with the totals of the nutrient values filled in for you. You’ll also notice that the items you picked from the USDA Nutrient
database have been spelled out in the Comments field. You can leave the descriptions there if you
like or simply delete them. Select the green check mark again to save all of the actions you just
took and you’re done. One other nice advantage of this list of previously eaten items - you can
reuse them. Let’s say you had the same lunch at KFC next week or next month. Just scroll
through the list, if you want, to find something that you know you’ve had before - context click
on it and select Duplicate. Add a new date and time and you are done. All nutritional values have
been duplicated and carried over for you - everything is the same except the date and time.
Exercise
The Exercise Tracking portion is much like the first few and is reasonably straightforward. This
portion does what it says and gives you the ability to record any exercise you do. Remember,
walking is exercise (I think watching tv is exercise too, but ...). First, go to the View menu, select
Administration, then locate the Activities icon. You can list any of the types of activities you do
here, they will all populate a list that is available to you from the Exercise Tracking window.
At the Exercise Tracking window, enter the date and time for your activity, select the Activity
from the popup list. Now enter whatever information you have available to you. You may or may
not know all the information, but do the best you can. Many types of exercise equipment you
may use today will track this information for you and list it when you are done. Write that info
down and enter it here. Over time you will be able to see the potential impact of weighing the
foods you eat against the exercise you do.
Modifying Graphs
Each of the sections of Lifestyle Tracking that we have discussed will also allow you to create a
graph that represents the numbers you have been feeding into the system. And each of those
graphs can be modified to fit your needs or colors that you prefer. On each of the windows, assuming there is any data there, you will see a small
graph icon to the right of the Remove button (red
minus sign). If you click on that button you will
immediately be shown a graph that represents the
range of data you have selected to view from the
drop down menu just to the right of the User list.
©TheDataManager, Inc. 2002/2011
Version 3.5.0 Page 45 of 63
TheRecipeManager
!
Once you are on the graph page, you will see another icon, a gear, in the lower right of that window. If you select that Graph Options icon you will be shown a whole set of choices you can use
to change the color of almost everything, where the labels are, etc. In fact, you have enough control to make the graph almost impossible to read - so have fun as you play (they will print in color
on a color printer you know), but remember that your doctor may prefer something boring and
easy for him/her to look at.
Blood Sugar, Blood Pressure and Body Weight will only create line
graphs. Exercise and Food Intake graphs can also be Pie and Bar
graphs. Think about a line graph as something that shows you
daily values; bar charts are best to compare totals side by side;
and, though pie graphs also show you totals, they do so in a way
that clearly shows you how each part fits to show 100% of the picture.
Let’s take a deeper look into the Exercise graphs - they have the
most options. To the right of the delete button (red minus ‘-’) you
will see a small graph icon - click on it to display the default line
graph for the days you wish to graph. Notice the list of activities in
the lower left corner of that window - this list displays all the information you have entered into Activities on the Administration
window. All activities performed during the days you want to
graph are automatically selected. You can uncheck any you do not
want to graph.
Each activity is displayed as a line of its own. Just above the activities list you will see that you have a choice of being able to display
all activities as a single line. On the two line graphs displayed here,
you can see the difference with that one box checked and unchecked. There is only one entry per date (the bottom of the
graph) with this box checked. All activities for a given date have
been combined - that’s why we named it ‘Display as 1 Line’. The
line graph is the only one that gives you an option to display as a
single line - there is no similar option for the other graph types.
Looking just to the right of the Activities list you’ll notice that you
can choose to graph either Calories Burned, Distance, Duration
or Pace.
©TheDataManager, Inc. 2002/2011
Version 3.5.0 Page 46 of 63
TheRecipeManager
!
Let’s take a look at the other two graph types next. If you select
the Bar Graph radio button, just below the current graph image
you will see the same information as before, but now it is showing
the totals for each different activity. Totals mean the totals for the
date range chosen to graph - there is no distinction between days.
You can choose to graph any one of the same four options as the
line graph - Calories Burned, Distance, Duration or Pace.
If you select the Pie Graph radio button you will see the same totals you just saw for the Bar Graph. But now it is showing those
totals in a fashion that allows you to very quickly see how one
thing compares to another. You can choose to graph any one of
the same four options as the line graph or bar graph.
To show Graph Options (this is a fun part), click on the little gear
just outside the lower right corner of the graph. You’ll now see a
new set of options to play with. To the right, the pie graph with
the donut hole and the slightly separated segments shows the options window open. You’ll notice you can do a lot of playing - it
doesn’t have to be explained, you just need to know it’s there. Play
with it, you won’t hurt anything. In a future release we hope to be
able to allow you to save graphs, today you
cannot - you can print to pdf if you want to
retain the image though.
Note: As of TRM v3.1.0, any graph settings you make
will not be saved for the next graph you do. All graphs,
by default, will start out using simple colors with white
backgrounds. We may change this in the future, it depends entirely on user input at this point.
Note: If you want to print a copy of a graph you just made, go to the File menu, select Print Blood Pressure [or
whichever Lifestyle Tracking name is currently listed]. From the set of choices presented to you, be sure you select
Include Graph AND Use Open Graph. If you do not select Include graph, no graph will print. If you do not select
Use Open Graph it will print a graph with default settings only. Yes, that actually means you can print a default
graph without even opening a graph window.
©TheDataManager, Inc. 2002/2011
Version 3.5.0 Page 47 of 63
TheRecipeManager
!
Administration
Overview
You should consider administration as helper maintenance. The administration window provides
you with helpers for the way you prefer to work. All of these potential choices are available to you
at the Recipe and the Advanced Search displays as lists you can pick from. You can modify (or
remove) the ones that are here - you can even add your own. As many as you want. Pretty
straightforward. Remember some of those things you chose to use while searching for recipes by
type, or source or classification, and more? These are the same lists of choices. You could consider them as a set of tagging tools to help you find almost anything quickly in the future.
Categories
You can assign one category to each recipe. You can see
from the provided list that you can put in almost anything.
Our biggest challenge has been trying to tell the difference
between Categories and Types - different web sites use the
terms differently. It is for you to decide how you want to
file your recipes, you have total flexibility.
Types
You can assign one type to each recipe. The functionality is
the same as Categories, above. Some people will believe
that these types should really be categories and the categories are really types. You decide what works best for you.
Origins
Origins are used similar to categories and types, but are
certainly less confusing. An origin can be a country (Britain, Thailand, India) or a region of a country (US Southwest, etc.) Once set up, we wouldn’t expect you to visit here
very often.
Classifications
This will be your generic - or catch all - way of marking recipes for later searching. You have already been able to assign a source, category, type and origin to a recipe. While a recipe can be
tagged with only one category, one type and one source, it can be tagged with as many classifications as you find useful. How many more ‘tags’ do you need? Well, good question. Classifications
©TheDataManager, Inc. 2002/2011
Version 3.5.0 Page 48 of 63
TheRecipeManager
!
give you the most flexibility for searching recipes to get just
the ones you want. As you find recipes you like, mark them
as ‘My Favorites’, or ‘Holiday’, or ‘Quick Fix’, or ‘Healthy
Heart’... you get the idea. You can add, modify or remove
any label you want.
Measures
The Measures list, for ingredients, gives you the ability to
personalize you recipe information even more. Some
people like to use full measures, some like to use
abbreviations. There is a constant difference of opinion on
what is proper: upper case or lower case, one letter
abbreviations or more than one letter. Guess what... you
can make these to be anything you want. Insert, modify
and remove the same as on the other administration items to create what fits your needs.
Why are these abbreviations even here? Good question. As you input recipes, you will note that
ingredients are made up of 3 different pieces of information: a quantity; a measure; and a description. As you begin to enter an ingredient measure you will note that the word/abbreviation
you are typing tries to guess what measure you want and will auto-complete the word for you.
This works by matching what you are typing against any listing in the measure preferences list. If
you type ‘t’, it will fill in (looking at the list example above) the measure ‘tablespoon’ with all letters except the t selected. If tablespoon is what you wanted, just tab to the next column - if it’s
not what you want, just type the next letter. If the next letter were an ‘e’, the list would find ‘teaspoon.’ And so forth...
As an aside - if you type in something that is not in the measure list, it will automatically be
added to the list for you. Computers make some parts of life easier, don’t they!
Store Sections
I always walk up and down aisles in grocery stores with my
scribbled shopping list that I thought I had written in order
of how the store is laid out. Ha! Never happens and I end
up going from one end of the store to the other three times
to get everything. We knew we needed something easy to
manage for truly usable shopping lists and shopping with
them. Since every grocery store is laid out differently - even
within the same chain you need to be able to customize those shopping lists. This is where you
©TheDataManager, Inc. 2002/2011
Version 3.5.0 Page 49 of 63
TheRecipeManager
!
can enter or modify (or remove) store sections (parts of
aisles). In the Shopping List area of TheRecipeManager
you will attach these sections to each store you lay out. You
won’t need to continue to try to remember the layout after
the first time - this application will do that for you.
Glossary / Substitutions / Tips
There just is not a lot to say about the administration window and these three items, Glossary, Substitutions and
Tips. Come here to insert, modify or remove entries for
these areas.
The glossary is your kitchen ‘translator’ for terms you can’t
remember or have never heard of. Substitutions will show
what to use in place of an ingredient you don’t have and
Tips gives you those little helpers to figure out what to do
when something goes wrong. Items listed here show up
only in their respective Kitchen Helpers area. As you make
changes here, the list is constantly sorted by name.
Autofill Shortcuts
In version 3 we have added the ability for you to determine you own shortcuts for ingredient autofill. Just add
any abbreviation that makes sense to you, then, as soon
as you enter those letters into the Recipe Ingredients
area, that abbreviation will be replaced with the text you
have tied to that abbreviation. We think this will be a
great time saver for you.
©TheDataManager, Inc. 2002/2011
Version 3.5.0 Page 50 of 63
TheRecipeManager
!
Individuals
Here you simply input a first and last name, along with the
height, of anyone you wish to track lifestyle information
for. Including height allows us to calculate Body Mass Index (BMI) on the weight tracking view. Height doesn’t
change much for adults, so the listed height will default into
any new weight records you input. Height will be a moving
target for children.
Activities
This is where you input any type of exercise activity that
you may do. The activities listed here are made available
for you to select from on the Lifestyle Tracking, Exercise
view.
©TheDataManager, Inc. 2002/2011
Version 3.5.0 Page 51 of 63
TheRecipeManager
!
(Other) Menus
File Menu
You will find that all of your printing is controlled from the File menu.
Note: the ‘Export’ and ‘Import’ options, which will be enabled as appropriate for the current window display.
Export Recipe
You can export your recipes, and e-mail them
to a friend who can, in turn, import them into
their copy of TheRecipeManager. If they are
kind enough to send you their favorite recipes,
you can easily import those to your system.
Your three options for Export are:
1) To Recipe File... - This is what we refer to
as the ‘TRM’ format and is the only format
we can export or import that will include the
recipe photo (if available for that recipe.) Using this menu choice will give you one export
file for each recipe you select. You will be allowed to save the file where you want, and
name it as you prefer.
2) To Plain Text File... - Plain text files do not include recipe photos. You can export a single recipe or multiple recipes at once - if you select more than one recipe then select this menu item,
they will all be included in one file. You will be allowed to save the file where you want, and name
it as you prefer.
3) To Clipboard - This is the same as ‘To Plain Text File...’ except it sends the exported recipe(s)
to the clipboard of your computer. This was done to allow you to, then, paste a recipe into an
email to send it, or if you wanted to, paste it into a word processor for creating custom printouts
of your own.
Export Meal Recipes
Meal recipes can be exported in two different ways: 1) same as exporting a recipe one at a time,
as listed above; or 2) as a single file that includes all export information for each recipe in the
meal at the same time. With this choice, if someone asks you for the recipes for that wonderful
meal you just served, simply Export Meal Recipes as you wish (recipe file, plain text file, to clipboard) then email the file you created, or paste from your clipboard (if you exported to the clip-
©TheDataManager, Inc. 2002/2011
Version 3.5.0 Page 52 of 63
TheRecipeManager
!
board) into your email and send it off. All they need to do, upon receipt of your email, is import
what you’ve sent them. It’s that easy.
Export Meal Menu
Meals can be exported to either a plain text file or to the clipboard. Exporting to a plain text file
is the easiest method to use to email that meal to a friend or family member. Export to the clipboard will enable you to then paste that meal into a word processor or page layout program so
you can format it any way you prefer.
Export Shopping List
Export to the clipboard will enable you to then paste that shopping list into a word processor or
page layout program so you can format it any way you prefer.
Import
You will find you also have three options when
importing. The first allows you to import one recipe file at a time, though that one file could contain one or many recipes. The second one will allow you to select a folder - when a folder is chosen
all recognizable recipe files in that folder are
automatically imported. The third will import any
recipe(s) currently on your clipboard.
When you import a recipe from the clipboard (e.g.
one that you just copied from a web page), if
TheRecipeManager does not recognize it as one
of the standard supported formats, a manual import window opens. This gives you a chance to
help identify the parts of the recipe, so the import can continue. You can drag dividers into the
recipe text, identifying each section; you can insert, modify, rearrange and delete lines within the
divided sections; you can adjust the interpretation of the ingredients. When you see that the recipe is being correctly interpreted, click a button and complete the import.
Note: The list of importable recipes grows at random over time. Be sure to check our web site for any new filter
availability. Currently we import MasterCook .mxp and .mx2 formats. Any application that exports recipes in either of those two formats will be readable by TheRecipeManager. There are many more as well - including importing directly from a variety of websites.
©TheDataManager, Inc. 2002/2011
Version 3.5.0 Page 53 of 63
TheRecipeManager
!
Note: What is currently on the clipboard can be a supported website’s URL - see Preferences, Import Helpers for
more information.
Create Import Template
It seems that most all recipe programs export in a
bit of a different fashion. In addition to creating
import filters for various needs, we have created a
template that will allow for easy and direct importing into TheRecipeManager. If you match your
recipe data formatting to the template you
shouldn’t have any problems. You notice you can
send this template to either a text file or to the
clipboard. A text file can be duplicated and used
to fill out multiple recipes or, from the clipboard, it
can be pasted into an email and sent to someone
else. If you can design custom export formats from
some other recipe application, you can use the
template to match your custom export format to.
Back Up My Data...
Do not back up your data if you don’t mind re-entering all of it. Bet that got your attention. If
you have had to spend a lot of time building your recipe list (or cookbooks) and getting everything just the way you want it, the last thing you want to do is.... do it again! A back-up of your
data is the best thing you can do to help minimize the chance of losing all your work. Like anything else on a computer, electronic data is capable of going away with little or no notice.
The easiest way to make a copy of your data is to simply select ‘Back Up My Data...’ from the
File menu. This will present you with a dialog box for you to determine a disk location and to
name a folder to be created in that location. All of your data is copied to that folder. Your data
consists of CommonInfo.dnd and the Cookbooks folder and all its contents.
Revert to Backup...
To replace your data from a backup, first verify that there is a problem with the current data and
make a copy of it just in case. Now, select ‘Revert to Backup...’ from the File menu. This will
open a dialog window allowing you to select an appropriate, previous, backup to restore from.
The default location will be the location you last chose to create a backup. Once you select a
backup folder, it will automatically replace your current recipe data files with that backup copy.
©TheDataManager, Inc. 2002/2011
Version 3.5.0 Page 54 of 63
TheRecipeManager
!
Print Recipe
The Print Recipe menu item will allow you to print the currently selected recipe(s). The default
amount of information included in the printout is controlled via the Preferences window, discussed below. Every once in a while you may want to print a little differently for one or two recipes only. You don’t want to have to remember to go to Preferences, change your requirements,
print, then go back to Preferences and reset them to what they were originally. When you print
recipes, a new window opens to show your current printing preferences, including a new one to
include the photo. You can change any of the preferences on a one-time basis. There is also an
option to print on 4x6 cards. This option always suppresses the printing of the date and the
photo, regardless of your preferences.
Print Meal
The Print Meal menu item will allow you to print all individual recipes that make up a meal or to
print a menu card. The menu card will include the names of each recipe in the meal as well as
any text that had been entered into any of the recipe ‘Description’ fields.
Print Meal Schedule
The Print Meal Schedule menu item will allow you to print all individual recipes that make up a
meal schedule. The printed Schedule will include the names of each recipe as well as any text
that had been entered into any of the recipe ‘Description’ fields.
Print Shopping List
When you print the shopping list, you will be able to
choose which lists to include, how to sort the items and a
choice of either ‘normal’ or ‘condensed’ printing. The section order for each store can be changed on the Store Layouts tab by dragging the sections in the middle list.
Print Tracking Information
First a small piece of confusion that needs a little clearing up - If the Food Intake view of the Lifestyle Tracking window is open, this menu line will say Print Food
Intake. If the main view of Lifestyle Tracking is Blood
Sugar or Blood pressure, the menu line will read Print
Blood Sugar or Print Blood Pressure, etc. It changes to
match the front view of Lifestyle Tracking and allows
you to print the selected data and gives you a choice to
include a graph or not. For Food Intake printing you
will also find a few choices that are not available for
©TheDataManager, Inc. 2002/2011
Version 3.5.0 Page 55 of 63
TheRecipeManager
!
non-food intake information. In this image you can see there are choices for printing templates try each one of them and see the differences - interesting what different views of the same data
can show you. Play with the different settings, you can’t hurt anything.
Print Cookbook Contents
This menu item will display all the cookbooks you currently have
in your copy of TheRecipeManager. You can see, from the image
to the right, that you can pick as many cookbooks as you would
like, and you have a variety of ways to sort them. Please note that,
even though you may select more than one cookbook, recipes will
not be lumped together with all recipes listed in one table of contents - each book will list only its table of contents. As one table of
contents completes, the next one will start. The five sort options
shown will list all recipes in a book sorted in alphabetical order listed by the choice you have selected from the radio button group.
Edit Menu
Not a lot to say about the Edit menu. Functions that are standard to most all
applications.
Note: There is no Undo. The only thing similar to Undo in a true database is the Cancel button. Whenever you are creating a New, or Modifying an existing, recipe (or anything else in
TheRecipeManager for that matter) you will have both a Save and a Cancel button available to you. Cancel means
“... never mind, put things back the way they were before I started this (new or modify) function.”
View Menu
This is the main navigation menu and allows you access to the nine most
often visited areas of TheRecipeManager. The ‘Cooking View’, when
chosen, will present you with a large-print view of the current recipe’s ingredients and instructions. This is done so you can work at the stove or
across the kitchen and still read your monitor - this feature will make you
want to move your computer to the kitchen! All of the menu line functions have already been discussed along with the other various features of
each area they refer to.
©TheDataManager, Inc. 2002/2011
Version 3.5.0 Page 56 of 63
TheRecipeManager
!
Window Menu
If you like to open several windows at once, this will be a helpful
menu for you. All currently open windows are listed in this menu.
To bring a given window to the front, just select its name from this
menu - it will immediately appear as the top-most window.
Help Menu
Short menu isn’t it. TheRecipeManager Help, when selected, will
open your selected web browser and present you with our on-line
FAQ system. You do have to be connected to the internet to use
this system. The help is very straightforward and easy to follow - it covers many of the items in
this Users Guide and has a lot of good tips on how to better use your newest kitchen helper. The
only other line, User Guide, will open a copy of the document you are now reading. The User
Guide is also an on-line document, but, once opened, you can save a copy to your local hard
drive.
The Search item in the Help menu is part of the Mac OS X operating system. You won’t see this
item in OS X before version 10.5, or in any Windows operating systems. Type in any part of a
menu command name, and matching menu items will be listed and pointed out in the standard
fashion. This helps you find commands when you don’t remember which menu they were in, and
to find all the menu commands related to a given term. Clear the search text to return to the
regular Help menu.
©TheDataManager, Inc. 2002/2011
Version 3.5.0 Page 57 of 63
TheRecipeManager
!
TheRecipeManager Preferences
Overview
To locate this window from Mac OS X,
select the ‘Preferences...’ menu line from
the ‘TheRecipeManager’ menu. On Windows, look for it at the bottom of the Edit
menu.
There really aren’t a lot of preferences for
you to worry about. The ‘Confirm Removal...” check box is asking if you want to
be notified if data is about to be removed
from TheRecipeManager, whether that is a
recipe, a meal, or an entry in one of the
lookup lists. Some people like to be asked,
some find the asking to be a bother. You
decide what works for you - a check mark
in a box means yes, no check mark means no. We can’t stress enough, if you uncheck this box,
you will not be asked to confirm removal of information and THERE IS NO UNDO (short of
reverting to a backup) to help you recover if you make a mistake and don’t mean to remove it.
Single Cooking View Override, if checked, will allow you to open more than one recipe in cooking view. Cooking View shows you ingredients and/or instructions with the ability to increase the
font size for easy reading - even across the kitchen! This is really handy if you are cooking several
recipes at the same time and want to keep up with what’s next for each of them. Worried about
having too many open at once and don’t think you can quickly find the one you need? Don’t
worry, we’ve also added a new ‘Window’ menu that lists each open window. Just select the window you want on top and it will be there.
Food Exchanges, displayed on a tab under the Nutrition tab for recipes, seem to have lost popularity over the years. Though the default value of this checkbox is set to do not use, we include
these for people who still use them. If you do not use Food Exchanges, you can uncheck the Nutritional Info Includes Food Exchanges and that information will disappear from the Nutrition
area. If you want to use them, simply check the box for them to appear again.
Ingredient Autofill is set to Phrase by default. What does all this mean? By default, as you start
typing ingredients into a recipe TheRecipeManager rapidly starts finding a previously entered
ingredient that contains what you are typing and will start guessing to help you out. If what auto
©TheDataManager, Inc. 2002/2011
Version 3.5.0 Page 58 of 63
TheRecipeManager
!
fills is acceptable, just hit your tab key and move on. One hidden *wait, if we tell you it won’t be
hidden anymore - darn* feature is once you start getting an autofill you can stop typing and use
your down arrow to start ‘scrolling’ down through a list of matches for what you have typed. If
you want to back up to a previous match, use your up arrow. If you find what you want but want
to add more to it, hold down the shift key and hit your space bar, that will place you at the end of
the autofilled text.
Ingredient Autofill by Word is similar, but doesn’t care about an entire line, just the one word you
are typing.
Font Size. Finally. The small ‘A’ represents the standard size we have used in the past - the large ‘A’
represents a font that is much larger. This change is system wide and changes are made everywhere immediately - select the two different settings available and see how it looks. Many of you
have asked for this and should be pleased that we have finally done it.
Post-Import Behavior is, basically, the same as
editing multiple recipes at the same time. If this
preference item is checked, as soon as a multiple
recipe import is completed, all those new recipes
will be selected and you will be allowed to edit/
modify them all at once. You will only be able to
make changes that are common to all recipes, as
shown to the right. It seems a safe bet that you will
not change all recipes to the same name, or image,
or ingredients, etc. - but you may wish to change
the Origin, the Type, your Rating for them. Once
you have finished you choices and select the Save
button, the changes you selected will be set to each
of the selected recipes. You can also do the same
thing with existing recipes, simply select the recipes
you wish to modify, select the modify button and you can make your changes. Cancel will stop
this operation and any changes you may have made and not saved. It is a nice convenience.
Large Image Warning is there to remind you that an image you attempting to add to a recipe is
going to be taking up space that may not be necessary. You can set this size to whatever you’d
like, but be aware that large files can, depending on how many you have, slow down the operation of TRM. Usually a file of 200 KB or below will be adequate for screen viewing or printing
needs. You can disable the warnings by deselecting the ‘Notify me..’ checkbox.
©TheDataManager, Inc. 2002/2011
Version 3.5.0 Page 59 of 63
TheRecipeManager
!
The Cookbooks preference lets you choose
between opening the same cookbooks you
were using the last time you quit the program, or opening a specific set of cookbooks each time the program starts.
Note: If any of your Meals contain recipes in
closed cookbooks, those cookbooks will automatically be opened.
The Import Helpers preference allows you
to determine how often to have your copy of
TRM check with our server to see if there
have been any changes to various websites
you can download recipes from - directly
into your copy of TRM. Your choices are
every two weeks (Auto Update), only when
you decide (by selecting the Check for
Update Now button) or Never Update.
Import Helpers, what are those? Logical
question. You know how you go to various
websites, find a recipe you like, then have to retype it for your use. Or you take a screen shot and
keep that graphic image? Or whatever way you track those recipes you want to try later?
Wouldn’t it be nice if you could just copy the URL (web address) of the recipe you like to your
clipboard, then select Import from Recipe(s) on Clipboard from the File > Import menu line in
TRM? That’s exactly what this does. These helpers know how to read the recipes on those web
pages and are then able to turn that information, properly, into a new recipe in TRM for you.
The updates are needed periodically as various changes are made to those websites - all we do,
when you connect to our server, is look at the date your list was last updated and, if there are
changes to our master list since you last visited, we transfer that updated list to your machine with
the new information that will allow you to continue to smoothly add to your recipe collection.
Sometimes we have to remove access to a web site, sometimes we are allowed to add more, sometimes it’s just changes to how they are displayed on various sites. After all, the web is very much of
©TheDataManager, Inc. 2002/2011
Version 3.5.0 Page 60 of 63
TheRecipeManager
!
an evolving mass of data - you should expect this to constantly change. We hope you enjoy this
new feature.
The Printing information items relate to
information to include or ignore during
printing. Though these are default settings,
you will have an opportunity to override
them at print time while still retaining
your default settings.
©TheDataManager, Inc. 2002/2011
Version 3.5.0 Page 61 of 63
TheRecipeManager
!
General
Where is my data?
When TheRecipeManager is first launched on OS X, a new folder is created at, ~/Documents/
TheRecipeManager User Data folder. This folder is then populated with CommonInfo.dnd,
USDA_Nutrition.dnd, and a Cookbooks folder containing TheRecipeManager.ckbk.
CommonInfo.dnd contains all of the Kitchen Helper information, lists of categories, origins,
types and measures for describing recipes and ingredients, and all of the meals, shopping lists and
meal schedules that you create. USDA_Nutrition.dnd contains version SR-23 (most current at
release 3.5 of TheRecipeManager) of the USDA nutritional database. TheRecipeManager.ckbk
contains a starter set of recipes included with the program. This is placed in your TheRecipeManager User Data folder to help facilitate backups. Also, this will allow multiple users of the
same machine to have their own data file. If you ever throw away your data by mistake, cannot
retrieve it and have no backup, the next time you launch TheRecipeManager it will once again
create a new data-file for you - the same one it created for you the first time, not the one you’ve
been working on.
On Windows, a standard installation creates a “TheRecipeManager” folder in C:\Program Files.
Within that folder there will be a “Read_Me_Info” folder containing the user guide, and a
“TRM” folder containing everything else. CommonInfo.dnd, USDA_Nutrition.dnd, and the
Cookbooks folder, all described above, will be found inside ..\TheRecipeManager\TRM\.
User Preferences
Your preferences - window locations, etc. - are stored in a preferences file. On OS X, this file is
located at ~/Library/Preferences/TheRecipeManager v3 Prefs. On Windows, you’ll find it at
..\TheRecipeManager\TRM\TheRecipeManger v3 Prefs. If you ever want to go back to square
one again (with prefs that is), just toss this file - a new one will be created the next time you
launch. If you do throw away your user prefs file, you won’t hurt a thing, but all your previous
settings will be reset to original defaults.
Future version(s)
With no guarantee of what or when, options currently being considered for future releases include expanded printing options as a never ending requirement. We are currently working closely
with multiple groups within the food/food preparation industries to help us bring you a better
product over time. Please let us know what you would like to see, what we should improve on
and, heck, you could even tell us what we are doing that you really like. Fixing bad stuff is a requirement of ours, keeping good stuff good is as well. We will evaluate all your requirements sent
to us so we can determine how, or if, we can include them.
©TheDataManager, Inc. 2002/2011
Version 3.5.0 Page 62 of 63
TheRecipeManager
!
Web site/contact us
www.TheRecipeManager.com be sure to check our web site for any announcements, new releases, new recipes, etc.
[email protected] for technical support or feature requests. Our support is Email only.
[email protected] for any special purchasing requirements including volume purchasing or school, church or non-profit usage.
[email protected] for anything else, including compliments and complaints.
Remember, though we can’t do everything for everyone - our goal is to give you what you want
and need. We’ll do our best to continue to add new features and polish old ones.
Thank you for purchasing TheRecipeManager - all of us sincerely appreciate being given the
opportunity to be at least a little bit helpful in your lives...
©TheDataManager, Inc. 2002/2011
Version 3.5.0 Page 63 of 63

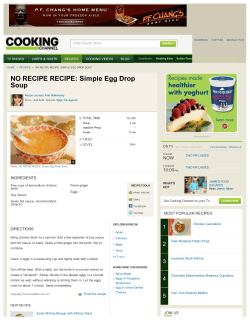
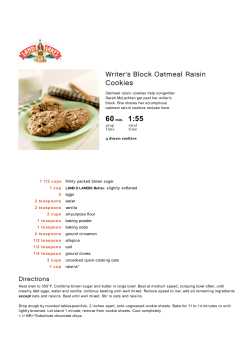


© Copyright 2026