
Creating a Private YouTube Channel C Creating Content for Constructive Coursework
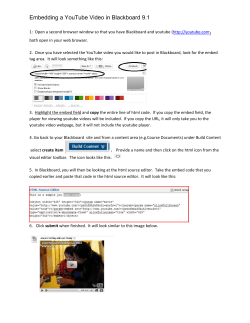
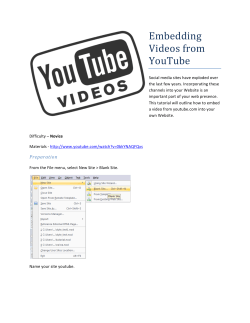
Creating a Private YouTube Channel
C 4 Creating Content for Constructive Coursework
If you have created a video for your classes, why not use YouTube to host it? YouTube allows you to:
1) Upload a video to a public/private viewing audience.
2) Share the video with any prospective clients/colleagues without complicated systems
3) Embed the video in a website or blog, to share with a wide audience.
4) Gain instant internet fame and popularity, soaring to endless riches.*
To get started with this process, you will need to create a YouTube account.
Instructions
1) Go to YouTube.com, and click on the section where it says signup in the top corner of the screen.
2) Create a username under the signup screen (this will be visible to your users). Enter your email address,
location, postal code, date of birth and gender.
3) Deselect the option, "Let others find my channel on YouTube if they have my email address." Review the terms
of use and click, "I accept" to proceed.
4) Choose a password and re-enter that password in the box below. Enable or disable web history depending on
your personal preferences. Complete the word verification at the bottom of the screen and click, "Create my
new account."
5) Check your email for an email from YouTube. The email will provide you with instructions necessary to verify
your account; follow all instructions and verify your account.
6) Sign into your YouTube account. Click on your channel located at the upper right corner of the screen. Once you
are on channel go to the, "settings" menu located above your selected videos.
7) Select, "no" under the make channel visible option. This will keep your YouTube channel from being visible to
the general public. Click, "Save Changes."
For more information, visit https://support.google.com/youtube/answer/157177?hl=en-uk
When you upload a video, the default is set as 'Public' video, which means that anybody can view it. You can easily
change the privacy settings while you’re uploading the video in the 'Privacy Settings' section. Or, if you’ve already
uploaded the video, you can change the privacy settings by following the steps below:
1) Visit your Video Manager.
2) Find the video you’d like to change, and then click the Edit button.
3) In the 'Privacy Settings' drop-down menu, select Public, Unlisted or Private.
4) Click Save changes.
Office of the Instructional Designer, October 2013


© Copyright 2026