
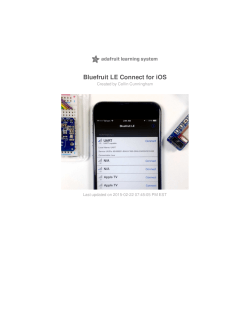
Adafruit 5" 800x480 TFT HDMI Backpack Created by lady ada
Adafruit 5" 800x480 TFT HDMI Backpack
Created by lady ada
Last updated on 2014-11-07 08:45:09 PM EST
Guide Contents
Guide Contents
2
Overview
3
Pinouts
7
EDID EEPROM Port
7
Backlight Control
7
Power Output
8
Raspberry Pi Config
9
Downloads
11
Datasheets
11
Schematics
11
© Adafruit Industries
https://learn.adafruit.com/adafruit-5-800x480-tft-hdmi-monitortouchscreen-backpack
Page 2 of 12
Overview
Its a mini HDMI monitor! So small and simple, you can use this display with any computer that
has HDMI output, and the shape makes it easy to attach to a case or rail. This backpack
features the TFP401 for decoding video, and for the touch version, an AR1100 USB resistive
touch screen driver.
The TFP401 is a beefy DVI/HDMI decoder from TI. It can take unencrypted video and pipe out
the raw 24-bit color pixel data - HDCP not supported! The 5" display is 800x480 resolution,
which is just enough to run most software, but still small enough that it can be used in
portable or embedded projects without the bulk.
© Adafruit Industries
https://learn.adafruit.com/adafruit-5-800x480-tft-hdmi-monitortouchscreen-backpack
Page 3 of 12
You can even power the entire display from a USB port. With the default 5" 800x480 display
and 50mA backlight current, the current draw is 500mA total. You can reduce that down
370mA by running the backlight at half-brightness (25mA). With the backlight off, the
decoder and display itself draws 250mA. If you want more backlight control, there's a PWM
input, connect that to your microcontroller or other PWM output and you can continuously
dim the backlight as desired.
© Adafruit Industries
https://learn.adafruit.com/adafruit-5-800x480-tft-hdmi-monitortouchscreen-backpack
Page 4 of 12
We have two versions, one is video only and one is video+touch. If you want a screen that
you can poke at, get the +touch version. The USB port then acts as both power and data,
with the touch screen appearing like a USB mouse.
In particular, we suggest it for use with single board computers (or desktop/laptops!) with
DVI/HDMI output like the Raspberry Pi or BeagleBone Black. You can power the driver over
USB and then feed it video via the HDMI port. It's a very small board so great for tucking into
an enclosure. Please no te the TFP401 deco der chip do es no t co ntain a video
scaler, it will no t resize/shrink video !
© Adafruit Industries
https://learn.adafruit.com/adafruit-5-800x480-tft-hdmi-monitortouchscreen-backpack
Page 5 of 12
© Adafruit Industries
https://learn.adafruit.com/adafruit-5-800x480-tft-hdmi-monitortouchscreen-backpack
Page 6 of 12
Pinouts
Since this is an all-in-one design, there's no soldering required, but there are a few extra
hacker-ports for those interested in tweaking!
EDID EEPROM Port
If for some reason you want to read/edit the EDID EEPROM, the top left has 4 pins: +5V, GND,
SCL and SDA. The EEPROM can be written to with some Arduino code
here (http://adafru.it/e96)
Backlight Control
The backlight driver can be dimmed with a PWM signal. Use ~1KHz or so to dim/adjust the
backlight. You can use 3V or 5V logic for the PWM signal. The monitor does not have the
ability to do its own dimming, you'll need a seperate computer/microcontroller pin to do that.
If you want to save power, you can drop the backlight current from 50mA down to 25mA by
cutting the trace in between the two pads labeled Open fo r -25mA, if you put a switch
© Adafruit Industries
https://learn.adafruit.com/adafruit-5-800x480-tft-hdmi-monitortouchscreen-backpack
Page 7 of 12
between those pads you can switch on the fly between half and full brightness
Power Output
You may want to 'recycle' the 5V or 3V power from the board, we supply two power pads for
the USB 5V power and the 3.3V regulated power. This is different than the +5V HDMI power
which is used for powering the EEPROM and isn't good for current draw.
© Adafruit Industries
https://learn.adafruit.com/adafruit-5-800x480-tft-hdmi-monitortouchscreen-backpack
Page 8 of 12
Raspberry Pi Config
This display has 800x480 pixels, and when used on Windows, at least, will autodetect and
set the resolution. On Raspberry Pi, you're better off forcing the HDMI resolution by using the
following config.txt file (in /boot/config.txt) - you can edit it by popping the SD card into your
computer, the config.txt file is in the root directory
Remember, the TFP401 driver do es no t have a video scaler! If yo u do n't feed
it exactly 800x480 pixels the image will no t stretch/shrink to fit!
# uncomment if you get no picture on HDMI for a default "safe" mode
#hdmi_safe=1
# uncomment this if your display has a black border of unused pixels visible
# and your display can output without overscan
#disable_overscan=1
# uncomment the following to adjust overscan. Use positive numbers if console
# goes off screen, and negative if there is too much border
#overscan_left=16
#overscan_right=16
#overscan_top=16
#overscan_bottom=16
# uncomment to force a console size. By default it will be display's size minus
# overscan.
#framebuffer_width=1280
#framebuffer_height=720
# uncomment if hdmi display is not detected and composite is being output
hdmi_force_hotplug=1
# uncomment to force a specific HDMI mode (here we are forcing 800x480!)
hdmi_group=2
hdmi_mode=1
hdmi_mode=87
hdmi_cvt 800 480 60 6 0 0 0
# uncomment to force a HDMI mode rather than DVI. This can make audio work in
# DMT (computer monitor) modes
#hdmi_drive=2
# uncomment to increase signal to HDMI, if you have interference, blanking, or
# no display
#config_hdmi_boost=4
© Adafruit Industries
https://learn.adafruit.com/adafruit-5-800x480-tft-hdmi-monitortouchscreen-backpack
Page 9 of 12
# uncomment for composite PAL
#sdtv_mode=2
#uncomment to overclock the arm. 700 MHz is the default.
#arm_freq=800
# for more options see http://elinux.org/RPi_config.txt
© Adafruit Industries
https://learn.adafruit.com/adafruit-5-800x480-tft-hdmi-monitortouchscreen-backpack
Page 10 of 12
Downloads
Datasheets
TFP401A (http://adafru.it/e6U) - the DVI/HDMI decoder chip
AR1100 (http://adafru.it/e6V) - the USB resistive touch chip
FAN5333B (http://adafru.it/e6W) - the backlight driver
5.0" Display Datasheet (http://adafru.it/dWZ)
Schematics
The version without touch does not have the AR1100 circuitry in the top right corner
© Adafruit Industries
https://learn.adafruit.com/adafruit-5-800x480-tft-hdmi-monitortouchscreen-backpack
Page 11 of 12
© Adafruit Industries
Last Updated: 2014-11-07 08:45:10 PM EST
Page 12 of 12


© Copyright 2026