
How to use Outlook.com
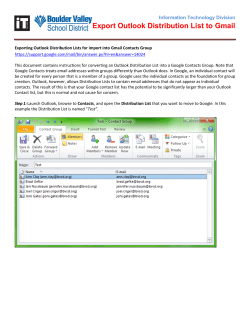
How to use Outlook.com
*Outlook.com is the new version of Hotmail.com. Any Hotmail users will
have been automatically switched over to this new Outlook.com interface.
They can still use their current hotmail.com email addresses within
Outlook.com.
Signing into/Creating an Outlook Account
1) Using your computer’s internet browser direct yourself to
www.outlook.com
2) On the Sign in page if you already have an Outlook account then type in
your existing Outlook address and password into the provided text fields
and then click Sign in. If you want to sign up for an Outlook account, then
click on the Sign up now link located near the bottom of the page.
3) If you chose to create a new account then you will be directed to the New
Account page where you will need to fill in the appropriate contact
information and create an Outlook email address. Create a secure
password, fill in the remaining required information and then click the I
Accept button at the bottom of the page.
Using your Inbox
1) Once you have signed in or created your account you will be directed to
your Outlook inbox. From here you can access your email messages,
calendar, contacts, options, messenger, SkyDrive, and the MSN website.
2) At the Inbox page you can perform a number of steps. If you want to
create folders for your emails to be organized into click on the New Folder
link located on the lower left-hand side of the page underneath the
heading “Folders”. You can also manage any folders you’ve created by
right-clicking on a folder and then choosing from the options provided in
the mini menu that appears.
You can view any of the
available folders by
clicking on their names.
By opening a folder you
will be able to view any
emails that have been
stored into them.
If you have had any
office documents or
photos sent to you
through emails you can
use the Quick Views
folders to have easy
access to them.
3) You can choose to sort any emails you have stored in your inbox or any
other email folder by clicking the Arrange by heading located on the righthand side of the page. Within the drop down menu you can arrange your
emails by clicking any of the available sorting options: Date, From, Subject,
Size, and Conversation.
4) If you want to delete or send emails to particular folders click on the small
box right beside the email you want to delete/move so it is checked off
(this will highlight the message). You will notice that once an email is
selected a few options will appear at the top of the page. Click on
whichever option you want to perform with the selected email (Reply,
Delete, Archive, Junk, Sweep, or Move to, Categories, and lastly if you
click on the three periods, more options will become available to choose
from as well).
Viewing Received Emails
1) At the Inbox page you will be provided with a list of emails that you
currently have. Any emails that you haven’t opened yet will have bold text.
To open an email click on any of the bold text of that email.
2) With the email open you can view the contents of it and then choose what
you’d like to do with it. There are a number of options available for you to
use when taking care of any received emails. Some of these options are
also available within the Inbox page or other email folders.
Reply: This will allow you to directly reply to the sender of the email by
creating a new message with the sender’s email address already entered in
the “To” text field.
Forward: This allows you to forward an email message you received onto
someone else. You can choose as many contacts as you’d like to forward the
email to. *This option is accessed by clicking the downwards arrow beside the
“Reply” option.
Delete: This will delete the email from your Inbox and send it to your Deleted
folder. If you want it permanently deleted from your Outlook account then you
will need to delete it from within the Deleted folder. (Or you can just wait and
over time the Deleted folder will automatically permanently delete any deleted
emails within that folder)
Junk: This will mark the email you received as junk and send it to your Junk
folder.
Sweep: This allows you to block the sender of the email if you no longer want
to receive emails from them. *This is a good option for any Spam you get.
Move to: With this option clicked you can choose to transfer the email to any
of your available email folders (Junk, Drafts, Sent, any folders that you’ve
created, etc.)
Categories: This option gives you a number of category folders that you can
transfer the email to.
Print: (To access the print option click on the three periods beside the
rest of the options at the top of the page) Use this print button to print just
the content of the email. This is the preferred way to print Outlook emails
because if you use your Internet browser’s print button it will print the rest of
the clutter surrounding the email as well.
Sending New Emails
1) If you want to create a brand new email message click on the New button
located near the top of the Inbox page on the left-hand side.
2) The new message page will open and from here you can create an email
message. Within the large white area of the page is where you will type in
your message. The text field underneath the heading “To” is where you
will type in the recipients email address. If you already have some
contacts saved you can click on the To button to bring up the list of
contacts to choose from so you don’t have to type them in each time. You
can have as many contacts chosen as you’d like. The text field that says
“Add a Subject:” is where you will type in the subject of your email.
Give your
email a
Subject.
Choose
your email
recipient.
Type your
message
here.
If desired you can use the Cc (carbon copy) and Bcc (Blind Carbon Copy)
options as well when sending an email. If you’d like to do this, click on the Cc
& Bcc link located to the left of the email above the “To” text field.
This will create two extra text fields: the Cc field and the Bcc field. Use the Cc
field to enter in any other contacts you want to send the email to. Any
recipients added into the Bcc field won’t be visible to other recipients of the
email.
3) If you’ve ever used Microsoft Word or Open Office you will see that similar
formatting options from those programs are available for you to use to
customize your email font. You can change the text alignment, colour,
size, etc. with these options.
4) If you’d like to attach a file to your email click on the Attach Files button
located underneath the formatting options.
5) This will bring up another window where you will choose the file you want
to send. Once you have chosen your desired file click Open.
The file attachment should now appear and load above the “Attach Files”
button. If you decide you don’t want to send that particular attachment, hover
your cursor over the file and click the X to delete it.
6) When you are ready to send your email click on the Send button located
at the top of the email. You will be presented with the Sent Email page to
confirm that your email has been sent. *Any emails you send will
automatically have a copy of them stored in your Sent folder. You can
*If you are typing a change this option if you want to but sometimes it’s nice to have your own
long, detailed
copies in case you need to refer to them again. You can delete these
email message, at
copies at any time.
some point you
may want to click
on the Save Draft
option located at
the top of the
page. This will
save a copy of
your currently
typed email into
your Drafts folder.
Creating and Managing Contacts
1) If there are people that you want to email frequently then you should save
their email address as a contact. In the top left corner of an Outlook page
click on the downwards arrow beside the title “Outlook”.
2) This will bring up some Outlook destinations. Click on the People button.
3) This will bring you to the Contacts page. You will notice that there are
options for you to import contacts from other social media sites such as
Facebook, Google, and Twitter. Click on any of those social site’s
headings to perform a transfer. If you just want to add in the email
addresses yourself then click on the New button located at the top of the
page.
4) The New Contact page will open. Fill in the contact information of the
person you want to add as a contact. You don’t have to fill all of the text
fields in but it is required for you to type in their email address and it’s a
good idea to have their name provided as well so they are easy to find and
recognize when sending emails to them. When you are finished typing in
the required contact information click Save.
5) The contact will now be saved within your Outlook account. You can view
and edit any contacts you’ve created from the Contacts page. If you wish
to edit them click on their name on the left-hand side of the page and then
click Edit located at the top of the page.
6) To return to your Outlook inbox from the Contacts page click on the small
downwards arrow beside the heading “People” located in the top left
corner of the page and then click on the Mail icon.
*Now whenever you want to send an email to a saved contact you can simply
click on the To button within the new email page to bring up the list of saved
contacts. Or you can start typing in their name or email address within the “To”
text field and allow the auto complete to fill out the rest of the address.
Changing your Outlook Settings
1) If there are certain Outlook settings that you want to change you can
access the Settings page by clicking on your name located in the top righthand corner of any Outlook page. A small box will appear with a number
of options available. You can click on Edit Profile to edit your contact
information. You can click Sign Out if you want to sign out of your account.
If you want to change more detailed settings then click on the Account
Settings option.
2) This will open the Account page where you can choose to change any
settings under the Overview, Notifications, Permissions, and Billing
headings. The key setting options found here are changing your
password, personal info, account name, and other privacy features.
3) Back at the Inbox page there is another Options button located on the top
right-hand side of the page beside your name. Click on the gear icon and
then click on More Mail Settings within the drop down menu to bring up
more personalization settings. *You can also click any of the colours
shown to change the colour theme of your Outlook.com account.
4) You will be directed to the Outlook Options page. Here you can have
access to your main email settings such as turning on email forwarding,
setting up automated vacation replies and filters, creating a signature for
the end of your email messages, altering privacy settings, and so on.
Another Useful Outlook Feature: SkyDrive
SkyDrive is an online storage cloud system where you can create Microsoft
Word, Excel, and PowerPoint documents and store them within the SkyDrive
portion of your Outlook account. You can even upload documents that you’ve
already created using your computer’s installed Microsoft Office programs into
SkyDrive. This goes with any pictures you have stored on your computer as well.
SkyDrive is very useful for keeping your files stored in a secure location and it
allows you to access them using your Outlook account from any computer with
Internet access. For those who don’t have Microsoft Office programs installed on
their computer using the versions available in SkyDrive is an excellent way to
create school, work, or personal documents for free.
To access SkyDrive click the downwards arrow beside the Outlook title located in
the left-hand corner of any Outlook page and then click on the Skydrive icon.
March 11, 2013


© Copyright 2026