
How to Use the Canadian Common CV (CCV)
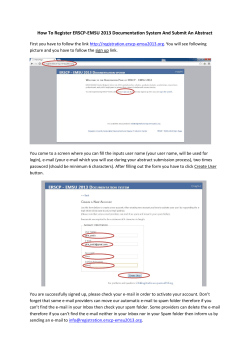
How to Use the Canadian Common CV
(CCV)
Step 1—Registering and Logging In
Step 2—Selecting the SSHRC CCV
Step 3—Completing the SSHRC CCV
Step 4—Editing and Adding Entries
Step 5—Exporting the SSHRC CCV
Step 6—Uploading the SSHRC CCV
When applying for or participating on a SSHRC grant requiring a SSHRC CCV, please follow
these instructions to complete your SSHRC CCV and upload it to your SSHRC application.
Step 1—Registering and Logging In
To create a SSHRC CCV
Go to: https://ccv-cvc.ca/.
Select English.
In the top menu bar, click Login.
To Register
If you are a new user, click Register.
Complete all mandatory fields (marked with an *) of the User Registration Personal Information
page. Then click Next.
Complete all mandatory fields (marked with an *) of the User Registration Account Information
page. Then click Submit.
A CCV account has now been created for you.
To log in
If you already have a CCV account, enter your username and password. Then click Login.
Step 2—Selecting the SSHRC CCV
Once you have logged in, the Welcome page will appear. In the top menu bar, click CV. Select
Funding.
From the Funding Source drop-down menu, select SSHRC. Then click Next.
From the CV Type drop-down menu, select SSHRC. Then click Next.
Step 3—Completing the SSHRC CCV
A list of sections will appear. If you have previously entered information into the generic version
of the CCV, this information will automatically populate any identical sections in your SSHRC
CCV. Although not all sections of the SSHRC CCV are labelled as mandatory, it is
recommended that you review all of the sections to ensure that you have completed all those that
are relevant to your application. Note: Adjudicators will only consider information regarding
your last six years of research contributions. Candidates claiming career interruptions may
include contributions drawn from their most recent periods of research activity, to an overall
total of six years.
What fields do I fill in?
Please refer to the tables below to determine which fields are mandatory for you:
Academic Applicants, Co-applicants and Collaborators
Section Name
Personal Information
Identification
Language Skills
Address
Telephone
Email
Website
Education
Degrees
Credentials
Mandatory Optional
x
x
x
x
x
x
x
x
Recognitions
User Profile
Employment
Academic Work Experience
Non-academic Work Experience
Affiliations
Leaves of Absence
Research Funding History
Activities
Teaching Activities
Supervisory Activities
Administrative Activities
Assessment and Review Activities
Participation Activities
Community and Volunteer Activities
Contributions
Interviews and Media Relations
Contributions
Publications
Note: While this section is mandatory, you are NOT required to complete
each category.
Contributions
Artistic Performances
Contributions
Intellectual Property
Non-Academic Applicants, Co-applicants and Collaborators
Section Name
Personal Information
Identification
Language Skills
Address
Telephone
Email
Website
Education
Degrees
Credentials
Mandatory Optional
x
x
x
x
x
x
x
x
x
x
x
x
x
x
x
x
x
x
x
x
x
x
x
x
x
Recognitions
x
User Profile
Employment
Academic Work Experience
Non-academic Work Experience
x
Affiliations
x
Leaves of Absence
Research Funding History
Activities
Teaching Activities
Supervisory Activities
Administrative Activities
Assessment and Review Activities
Participation Activities
Community and Volunteer Activities
Contributions
Interviews and Media Relations
Contributions
Publications
Contributions
Artistic Performances
Contributions
Intellectual Property
x
x
x
x
x
x
x
x
x
x
x
x
x
x
Note: While the majority of the sections have been designated as optional, you are encouraged
to indicate all pertinent activities and experience.
Step 4—Editing and Adding Entries
Completing or updating sections
Click the
(Edit) icon to access and complete or update a section (e.g., the Identification
section). All mandatory fields are indicated with an *. When you have completed an entry (or
“record”) within a section that allows for multiple records, a Submit? box will appear beside the
entry. Check the box if you want that specific record to appear on your SSHRC CCV.
When you have completed a section, click Done. You must click Done in each section in order
to save the information you have entered for that section and to return to the list of sections.
Creating multiple entries in a section
To create additional entries (or “records”) in a section, click Add. You must select one entry as
your “Primary Record.”
In those sections that allow for the creation of multiple records, a Submit? box will appear
beside each entry created. Please check the box if you want that specific record to appear on your
SSHRC CCV.
Some sections limit the number of records to a maximum number (e.g., up to three records for
Address).
Confirming which sections have been completed
Once all of the mandatory fields of a section have been completed, a green checkmark will
appear next to the name of that section in the list of sections. Note that a green checkmark may
also mean the section is not mandatory for the SSHRC CCV. If mandatory fields of a section
have not been completed, a red X will appear next to the name of the section.
Step 5—Exporting the SSHRC CCV
Once you have completed the SSHRC CCV, click Transfer in the top menu bar. Then click
Export.
Click Export. This will create a .xml document containing your SSHRC CCV
A download window will appear. Click Save to save the .xml file on your computer. You may
rename this file if you wish.
Step 6—Uploading the SSHRC CCV
Return to the Research Community Portal and go to your Welcome Page.
Find the intended application. Click Open. This will take you to the Application Overview page.
Within the Canadian Common CV Uploads section, click Upload. The Common CV Upload
page will appear.
Enter the title of your SSHRC CCV. Click Select. Choose your corresponding CCV file. Click
Open. Then click Upload.
A message will appear indicating that you have successfully uploaded your CCV.


© Copyright 2026