
How to create a help desk ticket in the BCIU...
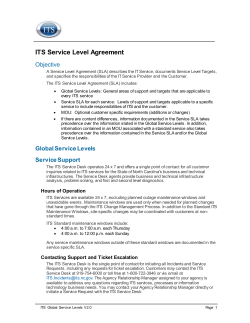
How to create a help desk ticket in the BCIU Service Center:
1. Go to the BCIU Service Center:
a. Excent Tera clients:
i. Go to the BCIU Special Education Documentation center at:
http://www.berksiu.org/pages/ProgramsServices_IT_ExcentTera.aspx
ii. Scroll down to the bottom of the screen and select the hyperlink for the helpdesk:
http://sde.berksiu.org/helpdesk/prelogin.asp
b. IEPPLus clients:
i. From the IEPPlus homepage select External Links>BCIU Documentation
ii. Scroll down to the bottom of the screen and select the hyperlink for the helpdesk:
http://sde.berksiu.org/helpdesk/prelogin.asp
c. eSchool PLUS clients:
i. From the eSchool homepage select BCIU Service Center hyperlink.
2. Sign in with Username: edsys\IEPPlus, Excent Tera, or eSchool PLUS username
Password: your IEPPlus, Excent Tera, or eSchool PLUS password
3. Click on the Quick Ticked ID that applies to the your software and support contact:
a. ESP_BARRY (eSchoolPLUS incidents assigned to Barry Bentz)
b. ESP_CANDY (eSchoolPLUS incidents assigned to Candice Schuld)
c. ESP_KIM (eSchoolPLUS incidents assigned to Kim Shimko)
d. EXCENT_TERA (Any Excent Tera client’s incidents)
e. IEPPLUS_BARRY (IEPPlus incidents assigned to Barry Bentz)
f. IEPPLUS_CANDY (IEPPlus incidents assigned to Candice Schuld)
g. IEPPLUS_KIM (IEPPlus incidents assigned to Kim Shimko)
Updated: 5/10/12
Page 1 of 2
4. Click on the “Create an incident” button.
5. Click “Yes” when prompted with “You are about to create a new Incident based on this Quick Ticket. Do
you wish to continue?”
6. Type a detailed description of the issue or question you have in the “Description” box. Please include items
like: the person(s) experiencing the issue and their contact info; what student(s) are affected; what
document(s); section and field of the document; any troubleshooting you have done; if the incident is
*urgent or needed by end of day and why; etc.
7. After description is filled out, select the “Submit button”.
8. A pop up will state the incident number that has been assigned to it. Click “OK”
9. At this point you can add file attachments to the ticket if you would like. Screen shots and examples are
very helpful to us when troubleshooting. To add attachments:
a. Click on the “Add” button to the right of “Attachments”. This button will only be available AFTER
you have created the ticket in step 8-9.
b. Browse to the file and click “Save”
10. Once finished select “Log Off”
This is the MOST EFFICIENT WAY to get assistance!! We address all issues entered into the help desk first, then
emails, then phone calls. Barry, Kim, and Candy get automatically emailed anytime a ticket is created. The help
desk system allows us to cover for each other’s clients while in meetings or out of the office. (A phone call or email
would have to wait until the support contact becomes available). If you are not sure how to describe an issue, just
do your best. If we need additional information, we will contact you! If your issue is an emergency, type *URGENT
along with a description of the problem in the description section of the ticket. Doing so will guarantee a quicker
response then calling/emailing each of us trying to find someone right away. If you are unable to access the
helpdesk, please email your support contact.
Note:
“Show My Incidents” tab: Use this tab to check the status of or add additional information to any of your
submitted tickets.
“Client Information” tab: Use this tab to verify and update your contact information. If your email address is not
correct on this tab, you will not receive an automated email with your incident resolution. Please also be sure that
automated emails are not being perceived as junk mail by your email application.
Updated: 5/10/12
Page 2 of 2


© Copyright 2026